1 2 3 5 6 7 Deflex®-Dachprofile/-Sonderprofile ... - SARGON a.s.
1 2 3 5 6 7 Deflex®-Dachprofile/-Sonderprofile ... - SARGON a.s.
1 2 3 5 6 7 Deflex®-Dachprofile/-Sonderprofile ... - SARGON a.s.

Erfolgreiche ePaper selbst erstellen
Machen Sie aus Ihren PDF Publikationen ein blätterbares Flipbook mit unserer einzigartigen Google optimierten e-Paper Software.
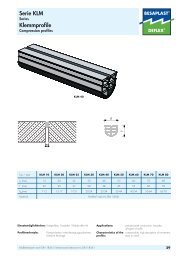
BESAPLAST ®<br />
6<br />
DEFLEX ®<br />
Montageempfehlung für<br />
DEFLEX ® Brandschutz SM 30 + AF<br />
Installation recommendation for DEFLEX ® Fire Barrier SM 30 + AF<br />
Das Einführen der Fugenfüllungen wird stark vom Zustand<br />
und der Sauberkeit der Fugenoberflächen bestimmt. Zum<br />
Schutz gegen Beschädigung und damit zur Erleichterung<br />
beim Einschieben ist DEFLEX ® -Brandschutz SM 30 + AF<br />
auf einer Seite mit einer Aluminiumfolie kaschiert. Ist der<br />
Zustand der Fugenoberflächen sehr schlecht, empfiehlt<br />
sich die Verwendung von Einführhilfen. Wir empfehlen als<br />
Montagehilfe, die Fugenfüllungen mit unserem DEFLEX ® -<br />
Brandschutzkleber zu fixieren. Die Stöße müssen verklebt<br />
werden.<br />
Vorbereitung der Fugen<br />
Entfernen vorstehender Verschalungsgrate, Betonspritzer<br />
u. ä. Bei zusätzlicher Kunststoffversiegelung: Vorbehandlung<br />
der Fugenflächen unter Beachtung der<br />
Verarbeitungshinweise des Herstellers.<br />
Montage der vorgefertigten Fugenelemente<br />
Ablängen des ungefalteten Streifens, wenn erforderlich.<br />
Geeignet sind scharfe, ungezahnte Messer. Auch lassen<br />
sich Hilfswerkzeuge verwenden.<br />
Verformung im Knickbereich durch Komprimierung mit<br />
einem Einführblech und u-förmiges Falten. Dabei ist auf<br />
gleiche Schenkellänge zu achten, da eine Korrektur in der<br />
Fuge fast nicht möglich ist. Bestreichen der Stoßseite mit<br />
DEFLEX ® -Brandschutzkleber. Einschieben mit Hilfe des Einführbleches.<br />
Zur Vereinfachung und um Beschädigungen<br />
zu vermeiden, empfiehlt sich die Verwendung von Gleitblechen.<br />
Verschieben der Gleitbleche so, daß die gerade<br />
eingebrachte DEFLEX ® -Brandschutzfüllung noch überlappt.<br />
Herausziehen des Einführbleches, wobei die Füllung gegenzuhalten<br />
ist. Einbringung des Anschlußelementes.<br />
Dabei ist darauf zu achten, daß das Einschieben mit etwa<br />
10 mm Abstand erfolgt. Der direkte Anschluß wird durch<br />
Längsverschieben erzielt. Durch diese Handhabung wird<br />
erreicht, daß sich das vorher eingebrachte Teil nicht in der<br />
Lage verändert. Außerdem ergibt sich ein formschlüssiger<br />
Stoß. Das Endstück wird mit 5 bis 8 mm Übermaß abgelängt.<br />
In diesem Bereich sollte vor der Einführung die<br />
Kaschierung entfernt werden.<br />
Versiegelung mit dauerelastischer Masse, wenn gewünscht.<br />
Montage der vorgefertigten Fugenelemente<br />
Die Montage erfolgt im wesentlichen wie bei der Füllung<br />
von Fugen mit Streifen. Abweichend ist zu beachten:<br />
Drücken (kurzzeitig) des Elementes auf etwa zwei Drittel<br />
der Elementdicke, möglichst mit einem Hilfsbrett, notfalls<br />
auch mit dem Handballen. Einschieben mit Hilfe eines<br />
Brettes, einer Leiste o. ä. Die Breite des Hilfswerkzeuges<br />
sollte etwas geringer als die Fugenbreite sein.<br />
Das Einbringen der DEFLEX ® -Brandschutzsysteme ist unproblematisch<br />
und wird in der Regel nach kurzer Zeit einwandfrei<br />
beherrscht und gern ausgeführt.<br />
The introduction of joint fillings is largely dependent on the<br />
condition and the cleanliness of the joint surfaces. To protect<br />
against damages and thereby to simplify the insertion,<br />
DEFLEX ® SM 30 + AF Fire Protection is covered on one<br />
side by an aluminium foil. If the surface condition of the<br />
joint is poor, we recommend the use of insertion tools. To<br />
aid with the installation, we recommend fixing the joint fillings<br />
with our DEFLEX ® fire-proof adhesive. The adhesive<br />
must be applied to the butt joints.<br />
Preparing the joints<br />
Remove any overhanging formwork burs, concrete splashes<br />
or similar. For additional plastic seals: pre-treat joint<br />
areas observing manufacturer’s processing instructions.<br />
Installation of prefabricated joint elements<br />
Shorten the unfolded strip, if needed. Sharp, non-toothed<br />
knife blades are appropriate. Auxiliary tools can also be<br />
used.<br />
Pre-shaping of curved areas by compressing with an insertion<br />
plate and u-shaped folding. In so doing, make sure<br />
the lengths of the sides are the same, since a subsequent<br />
within the joint is almost never possible later. Apply DE-<br />
FLEX ® fire-proof adhesive to the joint edges. Insert with the<br />
help of the insertion plate. To prevent damages and simplify<br />
the installation, we recommend the use of a gliding<br />
panel. Move the gliding panel in such a way that the precisely<br />
positioned DEFLEX ® fire-proof filling still overlaps.<br />
Pull out the insertion panel, so that the filling remains held<br />
against it. Fit the connection element. Ensure that this is<br />
done with a gap of approximately 10 mm. The direct<br />
connection is achieved by moving it diagonally. This action<br />
ensures that the previously fitted piece cannot alter its<br />
position. In addition, this forms a an even joint. The end<br />
piece which is 5 to 8 mm larger is shortened. In this area,<br />
the lining should be removed prior to insertion.<br />
Seal with permanently pliable material, if needed.<br />
Installation of prefabricated joint elements<br />
In general, the same installation steps are used as for the<br />
filling of joints where strips are used. Please observe the<br />
following differences:<br />
Press the element (briefly) to about two thirds of the element<br />
thickness, possibly with the help of a board or with<br />
the balls of the hands, if nothing else is available. Slide in<br />
with the help of a board, a profile or similar. The width of<br />
the auxiliary tool should be slightly wider than the width of<br />
the joint.<br />
The fitting of DEFLEX ® fire-proofing system is non-problematic.<br />
One can generally learn how to do it perfectly in a<br />
short time, and enjoy doing it.