Food Steamer Efs-6882 - Elba
Food Steamer Efs-6882 - Elba
Food Steamer Efs-6882 - Elba

Create successful ePaper yourself
Turn your PDF publications into a flip-book with our unique Google optimized e-Paper software.
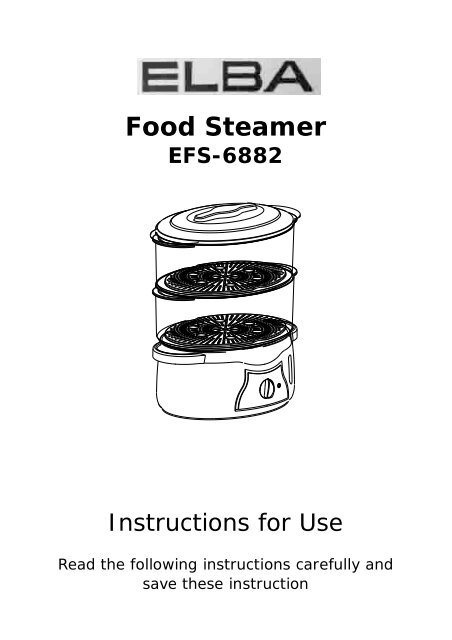
<strong>Food</strong> <strong>Steamer</strong><br />
EFS-<strong>6882</strong><br />
Instructions for Use<br />
Read the following instructions carefully and<br />
save these instruction
Important safety<br />
instructions<br />
The use of any electrical appliance<br />
requires following common sense safety<br />
rules.<br />
Primarily there is danger of personal<br />
injury and secondly danger of damage to<br />
the appliance and property. These are<br />
indicated in the instructions text by the<br />
following two conventions:<br />
WARNING: Danger of personal<br />
injury<br />
IMPORTANT: Damage to the appliance<br />
In addition we offer the following<br />
essential safety advice.<br />
Your safety<br />
• Do not touch hot surfaces. Use oven<br />
gloves or a cloth when removing lid or<br />
handling hot containers as hot steam will<br />
escape.<br />
• To protect against fire, electric shock and<br />
personal injury do not immerse cord,<br />
plugs, or appliance in water or other<br />
liquid.<br />
• Unplug from the socket when not in use,<br />
before putting on or taking off<br />
attachments, and before cleaning.<br />
• Do not operate any appliance with a<br />
damaged lead or plug, or after an<br />
appliance has malfunctioned, or has been<br />
dropped or damaged in any way. Contact<br />
the manufacturer or its service agent or a<br />
qualified electrician for advice on<br />
examination, repair, or electrical or<br />
mechanical adjustment.<br />
• Do not fill above the maximum level. If<br />
the steamer is overfilled, boiling water<br />
may be ejected which can scald.<br />
Location<br />
• Ensure that this appliance is situated out<br />
of the reach of children.<br />
• Do not place directly under kitchen wall<br />
cupboards when in use as it produces<br />
large amounts of steam. Avoid reaching<br />
over the steamer when in use.<br />
• Do not use outdoors.<br />
Mains lead<br />
• The mains lead should reach from the<br />
socket to the base unit without straining<br />
the connections.<br />
• Do not let the cord hang over the edge of<br />
the table or the counter and keep it away<br />
from any hot surfaces.<br />
• Do not let the lead run across an open<br />
space e.g. between a low socket and<br />
table.<br />
Children<br />
Never allow a child to operate this<br />
appliance. Teach children to be aware of<br />
dangers in the kitchen, warn them of the<br />
dangers of reaching up to areas where they<br />
cannot see properly or should not be<br />
reaching.<br />
Other safety considerations<br />
• The use of attachments or tools not<br />
recommended by the manufacturer may<br />
cause fire, electric shock or injury.<br />
• Extreme caution must be used when<br />
moving the cooker when containing hot<br />
food, water, or other hot liquids.<br />
• To open, lift the lid off towards yourself<br />
but tilted away from you.<br />
• Do not use any steamer parts in a<br />
microwave or on any cooking/heated<br />
surfaces.<br />
• Do not place on or near a hot gas or<br />
electric burner, or in a heated oven.<br />
• Never use the cooker to boil acid or<br />
aikaline foodstuff. Do not leave it in a<br />
damp and corrosive environment.<br />
• Do not switch the steamer on unless it<br />
contains at least 1 cup of water,<br />
otherwise the steamer may be damaged.<br />
• Aways make sure the water does not fall<br />
below the minimum level.<br />
Electrical<br />
requirements<br />
Check that the voltage on the rating plate<br />
of your appliance corresponds with your<br />
house electricity supply which must be A.C.<br />
(Alternating Current)<br />
For appliances supplied with fitted<br />
plug<br />
If the socket outlets in your home are not
suitable for the plug supplied with this<br />
appliance, the plug should be removed<br />
and the appropriate one fitted.<br />
WARNING: The plug removed<br />
from the mains lead, if severed,<br />
must be destroyed as a plug with<br />
bared flexible cord is hazardous if<br />
engaged into a live socket outlet.<br />
WARNING: This appliance must be<br />
earthed.<br />
WARNING: The protrusion on top of<br />
the lid is for decoration only, the lid<br />
handles are at the sides as indicated<br />
by 13.<br />
Features<br />
1. Lid<br />
2. Top Bowl<br />
3. Bottom Bowl<br />
4. Drip tray<br />
5. Mantle<br />
6. Heating Element<br />
7. 60 Minute Timer<br />
8. Indicator Light<br />
9. Water Level Gauge<br />
10. Add Water Hole<br />
11. Water Basin<br />
12. Rice Bowl<br />
13. Handle
Before use<br />
Before using your steamer for the first<br />
time, wash all the parts except the main<br />
unit.<br />
Using<br />
1. Fill the water basin with pure water.<br />
Do not use broth or other liquids. Do not<br />
add anything to the water in the basin.<br />
The system is designed for use with cold<br />
water only, do not use hot water.<br />
2. Put the mantle around the heating<br />
element.<br />
3. Fit the drip tray. The drip tray is used to<br />
collect juices so they can be used for<br />
gravies, sauces, soup, stock, etc.<br />
4. Place food into the steamer bowls.<br />
According to the amount and kinds of<br />
food to be cooked, you can use one or<br />
two steamer bowls as they stack up on<br />
the top of each other.<br />
5. Place the lid on the upper steamer bowl.<br />
6. Plug into the electrical socket.<br />
7. Refer to the cooking guide and set the<br />
timer for the desired cooking time, the<br />
on/off light will glow. Steaming will<br />
begin.<br />
8. After the set time the on/off light will go<br />
out, the bell will ring and the steamer<br />
will switch off automatically. Using oven<br />
gloves or a cloth promptly remove the<br />
steaming bowls.<br />
Do not remove the drip tray until it has<br />
cooled completely.<br />
Configurations<br />
Single bowl<br />
Use one steamer bowl for steaming<br />
one type of food such as peeled potatoes.<br />
Take care to arrange the food so that<br />
some of the holes in the bottom of the<br />
bowl remain clear, allowing proper<br />
steam flow.<br />
Two bowls<br />
Always place the largest pieces of food<br />
with the longest cooking time in the<br />
lower steamer bowl. Place different<br />
foods in the upper and lower steamer<br />
bowls, but as condensation will drip from<br />
the upper steamer bowl be sure the<br />
flavours compliment each other.<br />
If steaming meat, fish or poultry<br />
together with vegetables, always place<br />
the meat, fish or poultry in the lower<br />
steamer bowl so that juices from raw or<br />
partially cooked meat cannot drip onto<br />
other foods.
Refilling the basin<br />
If steaming for a long period it may be<br />
necessary to add extra water.<br />
Fill with water through the 'add water<br />
hole' by using a suitable filling jug.<br />
Cooking rice<br />
The steamer comes with a container that<br />
allows you to cook rice to perfection.<br />
1. Add rice and water to the rice bowl.<br />
2. Place rice bowl with rice and water into a<br />
bowl.<br />
3. Proceed as described previously.<br />
Useful hints and<br />
tips<br />
• Always ensure meat is placed below other<br />
food types.<br />
• Steaming times stated in the cooking<br />
guide are only a guide. Times may vary<br />
depending on the size of the food pieces,<br />
spacing of the food in the steamer bowl,<br />
quantity of food, freshness of food and<br />
personal preference. As you become<br />
familiar with the steamer, adjust the<br />
cooking times as necessary.<br />
• A single bowl of food steams faster than<br />
with 2 bowls in use. Therefore, the<br />
cooking time for a larger quantity of food<br />
will be longer.<br />
• For best results, be sure pieces of food<br />
are similar in size. If pieces vary in size<br />
and layering is required, place smaller<br />
pieces on top.<br />
• Do not crowd food in steamer bowl or rice<br />
bowl. Arrange the food with spaces<br />
between pieces to allow for maximum<br />
steam flow.<br />
• Always use the drip tray to prevent drips<br />
splashing.<br />
• Never steam meat, poultry or seafood<br />
from frozen. Always completely thaw<br />
first.<br />
Cooking guide<br />
• The cooking times shown below are only a<br />
guide and should be adjusted accordingly<br />
to suit your tastes.<br />
• Times shown are based on foods being<br />
cooked in the lower steamer bowl. <strong>Food</strong>s<br />
in the upper steamer bowl may take<br />
slightly longer.<br />
• While the majority of foods cook in much<br />
less than 60 minutes, longer cooking<br />
times may require adding additional<br />
water to the water basin. Follow refill<br />
instructions. Remember to reset the<br />
timer as the steamer will switch off when<br />
the timer runs out.<br />
<strong>Food</strong><br />
type<br />
Bottom<br />
bowl<br />
Care and<br />
cleaning<br />
WARNING: Allow steamer to cool<br />
before washing. Turn timer to off and<br />
unplug from mains socket.<br />
Bowls, lid and drip tray<br />
The bowls, lid and drip tray may be<br />
washed in a dishwasher (top rack only).<br />
Alternatively, wash in hot soapy water,<br />
rinse and dry thoroughly. Prolonged<br />
dishwasher use could discolour these parts.<br />
<strong>Steamer</strong> base<br />
Top<br />
bowl<br />
Rice 25-30 mins 30-35 mins<br />
Fish 8-10 mins 10-15 mins<br />
Poultry 25-28 mins 28-30 mins<br />
Vegetables 15-30 mins 18-30 mins<br />
Eggs 18 mins 18-20 mins<br />
The steamer base may be wiped with a<br />
clean damp cloth. Wipe dry with a soft cloth.<br />
Do not place in a dishwasher as it may get<br />
damaged.<br />
Do not use abrasive cleaners to clean any<br />
part of the steamer.<br />
WARNING: Do not immerse the<br />
steamer base, cord or plug in water or<br />
in any other liquid.
Descaling<br />
Occasionally, you may need to remove<br />
mineral deposits (known as descaling)<br />
from the steaming system. This is normal<br />
and will depend on the degree of hardness<br />
of the water in your area. If you notice a<br />
slowing in steam production or a<br />
lengthening of steaming times, you should<br />
descale the steaming system.<br />
1 Fill the water basin half full with clear,<br />
white vinegar.<br />
2 Place the drip tray, lower steamer bowl<br />
and lid onto the steamer base.<br />
3 Set the timer for 25 minutes to begin<br />
steaming. Allow the steamer to operate<br />
until the bell rings.<br />
4 Allow the steamer to cool completely.<br />
5 Empty the vinegar from the drip tray.<br />
6 Empty any remaining vinegar in the<br />
water basin.<br />
7 Rinse the water basin several times with<br />
cold water.<br />
8 Allow all parts to dry completely before<br />
storing.