

USER MANUAL GO-KART - Berg USA
USER MANUAL GO-KART - Berg USA
USER MANUAL GO-KART - Berg USA

You also want an ePaper? Increase the reach of your titles
YUMPU automatically turns print PDFs into web optimized ePapers that Google loves.
4.4.3 Different types of freewheel<br />
Different types of freewheel are available.<br />
Check which type of freewheel your go-kart has, then<br />
follow the advice accordingly.<br />
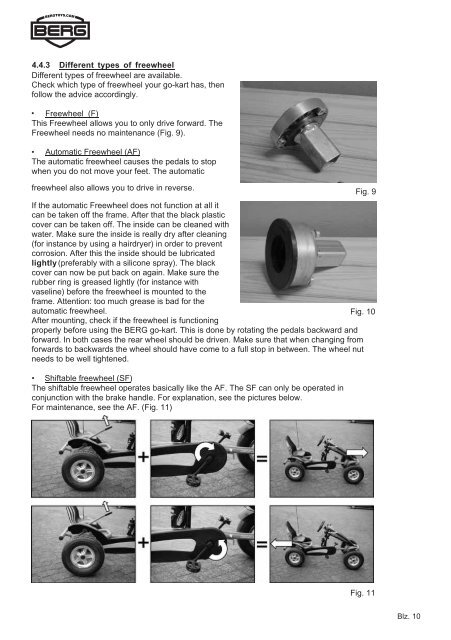
• Freewheel (F)<br />
This Freewheel allows you to only drive forward. The<br />
Freewheel needs no maintenance (Fig. 9).<br />
•<br />
Automatic Freewheel (AF)<br />
The automatic freewheel causes the pedals to stop<br />
when you do not move your feet. The automatic<br />
freewheel also allows you to drive in reverse.<br />
Fig. 9<br />
If the automatic Freewheel does not function at all it<br />
can be taken off the frame. After that the black plastic<br />
cover can be taken off. The inside can be cleaned with<br />
water. Make sure the inside is really dry after cleaning<br />
(for instance by using a hairdryer) in order to prevent<br />
corrosion. After this the inside should be lubricated<br />
lightly (preferably with a silicone spray). The black<br />
cover can now be put back on again. Make sure the<br />
rubber ring is greased lightly (for instance with<br />
vaseline) before the freewheel is mounted to the<br />
frame. Attention: too much grease is bad for the<br />
automatic freewheel.<br />
Fig. 10<br />
After mounting, check if the freewheel is functioning<br />
properly before using the BERG go-kart. This is done by rotating the pedals backward and<br />
forward. In both cases the rear wheel should be driven. Make sure that when changing from<br />
forwards to backwards the wheel should have come to a full stop in between. The wheel nut<br />
needs to be well tightened.<br />
• Shiftable freewheel (SF)<br />
The shiftable freewheel operates basically like the AF. The SF can only be operated in<br />
conjunction with the brake handle. For explanation, see the pictures below.<br />
For maintenance, see the AF. (Fig. 11)<br />
Fig. 11<br />
Blz. 10
