
You also want an ePaper? Increase the reach of your titles
YUMPU automatically turns print PDFs into web optimized ePapers that Google loves.
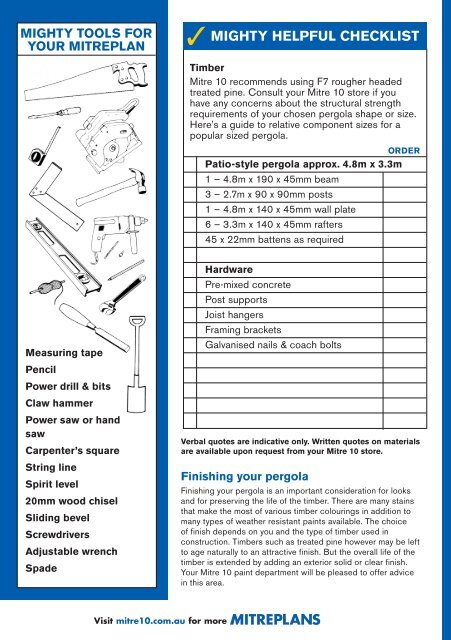
MIGhTY TOOLS fOR<br />
YOuR MITREPLAN<br />
Measuring tape<br />
Pencil<br />
Power drill & bits<br />
Claw hammer<br />
Power saw or hand<br />
saw<br />
Carpenter’s square<br />
String line<br />
Spirit level<br />
20mm wood chisel<br />
Sliding bevel<br />
Screwdrivers<br />
Adjustable wrench<br />
Spade<br />
✓<br />
MIGhTY hELPfuL ChECkLIST<br />
Timber<br />
<strong>Mitre</strong> <strong>10</strong> recommends using F7 rougher headed<br />
treated pine. Consult your <strong>Mitre</strong> <strong>10</strong> store if you<br />
have any concerns about the structural strength<br />
requirements of your chosen <strong>pergola</strong> shape or size.<br />
Here’s a guide to relative component sizes for a<br />
popular sized <strong>pergola</strong>.<br />
ORDER<br />
Patio-style <strong>pergola</strong> approx. 4.8m x 3.3m<br />
1 – 4.8m x 190 x 45mm beam<br />
3 – 2.7m x 90 x 90mm posts<br />
1 – 4.8m x 140 x 45mm wall plate<br />
6 – 3.3m x 140 x 45mm rafters<br />
45 x 22mm battens as required<br />
hardware<br />
Pre-mixed concrete<br />
Post supports<br />
Joist hangers<br />
Framing brackets<br />
Galvanised nails & coach bolts<br />
Verbal quotes are indicative only. Written quotes on materials<br />
are available upon request from your <strong>Mitre</strong> <strong>10</strong> store.<br />
finishing your <strong>pergola</strong><br />
Finishing your <strong>pergola</strong> is an important consideration for looks<br />
and for preserving the life of the timber. There are many stains<br />
that make the most of various timber colourings in addition to<br />
many types of weather resistant paints available. The choice<br />
of finish depends on you and the type of timber used in<br />
construction. Timbers such as treated pine however may be left<br />
to age naturally to an attractive finish. But the overall life of the<br />
timber is extended by adding an exterior solid or clear finish.<br />
Your <strong>Mitre</strong> <strong>10</strong> paint department will be pleased to offer advice<br />
in this area.<br />
Visit mitre<strong>10</strong>.com.au for more S<br />
build yourself a<br />
great <strong>pergola</strong> –<br />
with a little help<br />
from <strong>Mitre</strong> <strong>10</strong>.<br />
A timber <strong>pergola</strong> is one of the<br />
most attractive ways to extend<br />
your living area. You can cover<br />
it with shadecloth to provide<br />
welcome relief from a hot sun,<br />
grow ivy or creepers over it for<br />
year round greenery or add a<br />
roof for all weather protection.<br />
And because <strong>pergola</strong>s are<br />
basically only post, beam and<br />
rafter structures, all you need<br />
are average skills to build it.<br />
This <strong>Mitre</strong>Plan covers 6 different<br />
designs, so before you start<br />
building, plan what type of<br />
<strong>pergola</strong> you want and the exact<br />
extent of its construction and<br />
finish. Will it be attached to<br />
your home? Would you like a<br />
pitched roof? Perhaps a free<br />
standing <strong>pergola</strong> is best for you.<br />
Or maybe you’re building onto<br />
a deck or a sloping site. Sketch<br />
your ideas and take them to<br />
your <strong>Mitre</strong> <strong>10</strong> store. They’ll be<br />
happy to advise you. Then all<br />
you need are the right tools and<br />
materials plus this Step-by-Step<br />
<strong>Mitre</strong>Plan to guide you – and<br />
you’re on your way.<br />
fig. 1<br />
bASIC PERGOLA<br />
Step 1: Choosing your location<br />
Well designed and built, your <strong>pergola</strong> can be made to make the<br />
most of winter sun while offering protection from hot summer<br />
rays. Don’t pick a spot that is already in shade. If you build<br />
here, you’ll end up with a cold area which nobody will want to<br />
sit in. Consider places where you need privacy and protection<br />
from the weather. Ideally, your <strong>pergola</strong> should lead to a patio or<br />
courtyard garden, or barbecue area.<br />
Step 2: Marking and preparing your site<br />
Until your <strong>pergola</strong> is completed, the site will be your workshop.<br />
So make sure that you have plenty of room to move around as<br />
you work.<br />
Lay out clearly the full extent of the area with stakes and<br />
builders string line (Fig. 1). Lines 1 and 2 should be equal<br />
length, 3 and 4 equal length. Join the diagonally opposite<br />
corners with string line and check that the string used is the<br />
same in length (lines 5 and 6). This ensures that the site is both<br />
parallel and square. Mark the position of post holes. Pergolas are<br />
generally light structures so posts can be positioned up to 3m<br />
apart. Now re-check the size of the proposed area in relation to<br />
the size of your home and make sure it’s all in proportion.<br />
Step 3: Setting the posts<br />
For anchoring the posts in a concrete base, use galvanised<br />
steel post supports which elevate the post above the ground<br />
for drainage (Fig. 2). Dig holes 200 x 200mm square x 300mm<br />
deep and pour in pre-mixed concrete. Mix only enough concrete<br />
for one hole at a time and fill the hole completely. Force the<br />
support into the centre of the wet concrete using stringline<br />
to make sure it is lined up and at the<br />
right height with the other post<br />
supports. Allow about one week to<br />
set properly.<br />
An alternative method is to use the<br />
same post supports but bolt<br />
them onto an existing concrete slab<br />
using expanding masonry bolts<br />
(Dynabolts). Another alternative is<br />
to dig larger holes, e.g. 250 x 250<br />
x 600mm deep and put post into<br />
ground. This method gives extra<br />
stability to structure. (Fig.2A)<br />
When the concrete is set, posts can then be positioned, drilled<br />
through and fixed to the post supports with coach bolts. You’ll<br />
need to brace the posts temporarily with some timber for<br />
support until the top beam is erected.<br />
Step 4: fixing to the house<br />
There are two methods of doing this:<br />
1. You’ll need a board or walling plate on which to attach the<br />
rafters (Fig. 3). If your home is brick, masonry anchors can be<br />
used to fix it to the house wall. With a weatherboard home, use<br />
coach screws but take care to fix the screws right through the<br />
wall into the studs.