CERATEC PORCELAIN
CERATEC PORCELAIN
CERATEC PORCELAIN

You also want an ePaper? Increase the reach of your titles
YUMPU automatically turns print PDFs into web optimized ePapers that Google loves.
<strong>CERATEC</strong> <strong>PORCELAIN</strong><br />
INSTRUCTION MANUAL<br />
1
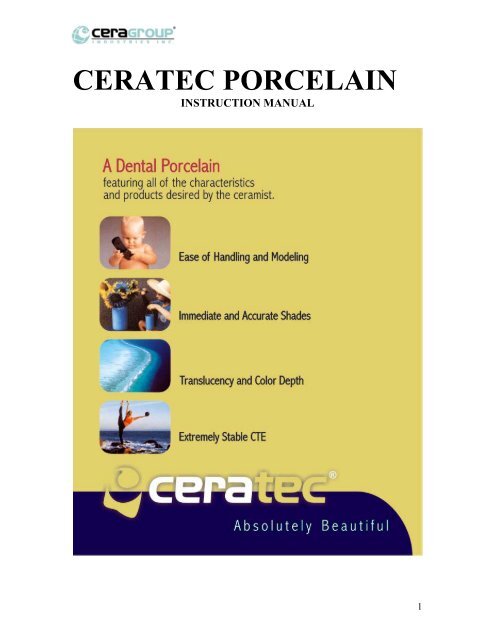
CHARACTERISTICS<br />
<strong>CERATEC</strong> DENTAL <strong>PORCELAIN</strong><br />
INSTRUCTION MANUAL<br />
1. Great modeling ease, especially suitable for laboratories in which speed and<br />
accuracy are top priority.<br />
2. Easy to use for the ceramist with little experience but with all of the properties<br />
and porcelains necessary for the expert ceramist.<br />
3. Immediate and accurate shade matching with the mere application of<br />
opaque/dentine/incisal layering; color stability even for varied thickness.<br />
4. Extremely stable linear expansion coefficients during subsequent firing processes;<br />
safely withstands up to six firing cycles.<br />
5. Minimum shrinkage.<br />
6. Great translucency and color depth.<br />
7. Opaque, Dentine and Opacious Dentine available in all shades A0 – D4.<br />
8. Wide color range 5 shoulder shades, 7 opaque modifiers, 9 dentine modifiers, 16<br />
incisals and incisal modifiers, 11 stains.<br />
9. “Live” and natural fluorescence in all light conditions.<br />
<strong>CERATEC</strong> is the product to use for:<br />
- Porcelain Fused to Metal (PFM) Crowns and Bridges<br />
- Jacket Crowns<br />
- Inlays - Onlays<br />
- Veneers<br />
2
NOTES ON ALLOYS AND FRAMEWORKS<br />
1. FABRICATION OF THE MODEL AND DIE<br />
During model and die preparation, keep in mind that porcelain fused to metal<br />
restorations require a minimum thickness of 1.5 to 1.8 mm of which 0.3 to 0.5<br />
mm is the metal portion. The model can be prepared using the desired technique.<br />
Remember that the use of shoulder porcelain requires a proper shoulder<br />
preparation.<br />
2. THE METALLIC FRAMEWORK<br />
2.1. The modeling of the metallic framework can be performed with the desired<br />
technique. The space reserved for the ceramic covering should not be less than<br />
0.8 mm. The ceramic layer should not exceed 2 mm in thickness on the incisal<br />
borders to avoid the risk of fractures.<br />
2.2 Avoid creating sharp corners, indentations, angles or curved edges on the metal<br />
surface that is to be covered. Every sharp corner is a potential point of origin for<br />
fractures, while every indentation could cause defects in the ceramic fusing<br />
process or fractures due to the contraction that occurs during firing.<br />
2.3. The ceramic must be well supported by the metal, especially in the areas of<br />
contact with the opposing dentition. In order to avoid fractures or separations, the<br />
points of contact between ceramic and metal should not coincide with the points<br />
of contact between opposing surfaces. At the same time, metal structures that are<br />
extremely open must offer great flexural stability, keeping in mind the necessary<br />
aesthetic and hygienic considerations, because any possible bending that might<br />
occur will cause fractures or separations of the ceramic.<br />
2.4. It is possible to create complete or extensive arches in a single casting, but they<br />
should be made capable of withstanding lateral or flexural movements by way of<br />
a stabilizing bar that is sufficiently wide and can be left in place until the final<br />
glazing of the ceramic has been completed.<br />
2.5. The surface of the metal structure that is to be covered must be perfectly clean,<br />
degreased and free of faults or porosity. It is recommended to use abrasives in<br />
aluminum oxide with a ceramic binder or carbides. Always grind or refinish in the<br />
same cutting direction of the instrument, without intersecting the cutting lines on<br />
the metallic structure. The finished and sanded structure must be washed with<br />
water using clean brushes. Avoid using oily substances such as soaps. Degrease<br />
with moderately acidic liquids or with a jet of steam.<br />
3
3. CHOOSING THE ALLOY<br />
3.1. In general, most of the alloys used for ceramic fused to metal restorations are<br />
compatible with <strong>CERATEC</strong> porcelains. However, since every alloy reacts<br />
differently with respect to the coefficient of expansion and can sometimes be<br />
unpredictable beyond the officially published data, we suggest that you utilize the<br />
alloys recommended for the product with a CTE in the range of 14.1 – 14.7 x 10⁻⁶<br />
/°C, measured in the range of 25 – 500°C.<br />
3.2. A practical compatibility test can be performed in the laboratory. Put a<br />
framework of at least six units through a minimum of six firing cycles. If there<br />
are no signs of cracks or fractures by the sixth firing cycle, the alloy is almost<br />
definitely compatible even with borderline operations.<br />
3.3. If you should have any doubts about the alloy to use, contact CeraGroup<br />
Industries or your <strong>CERATEC</strong> distributor for more detailed information.<br />
3.4. Be careful when re-casting alloys because in many cases this gives rise to<br />
substantial and unpredictable alterations in the expansion coefficient. Therefore,<br />
it is best not to add more than 50% of re-melted alloy to the new casting. It is<br />
also important to place the alloy in the crucible in such a way that during casting,<br />
the two alloys meld together while entering into the investment.<br />
3.5. The linear coefficient of thermal expansion of <strong>CERATEC</strong> is included in the<br />
interval 12.60-13.0 x 10⁻⁶ /°C for all porcelains (25-500 °C, opaque, dentine and<br />
incisal).<br />
3.6. The glass transition temperature is between 480-500 °C for all <strong>CERATEC</strong><br />
porcelains.<br />
4. DEGASSING / OXIDATION<br />
4.1 It is fundamental that the alloy go through a phase of heat degassing or oxidation<br />
in the oven muffle. Careful attention must be paid during the degassing of<br />
palladium-silver alloy, even though the manufacturer might state that oxidation is<br />
not necessary.<br />
4.2 Always verify that the oxidation layer is sufficient but not excessive as a layer<br />
that is too thick compromises the porcelain-metal bond and becomes a potential<br />
separation point of the interfaces.<br />
5. ALLOYS CONTAINING SILVER<br />
5.1 Alloys containing a high percentage of silver may generate discoloration<br />
4
phenomena resulting in a greenish shade to the porcelain. This is caused by the<br />
volatilization of some silver oxides that tend to attach themselves onto the<br />
porcelain and on the refractory material of the oven muffle and recirculate during<br />
successive firing cycles. In order to avoid this occurrence, be sure to<br />
decontaminate the oven periodically (at least once a week).<br />
5.2 <strong>CERATEC</strong> porcelains are manufactured with a non-greening chemistry, however,<br />
in order to increase safety levels, it is wise to adopt a specific program of muffle<br />
decontamination, closely adhering to the oven manufacturer’s instructions.<br />
5.3 Alloys should be sandblasted using Aluminum Oxide of 100-110 microns in<br />
order to clean the surface of the alloy and to better create an adequate mechanical bond<br />
WORK TECHNIQUE<br />
1. TREATMENT OF MIXTURES AND MODELLING<br />
1.0. <strong>CERATEC</strong> porcelain can be mixed and modeled using the desired techniques,<br />
including condensed onto the model, pre-vibrated onto a mixing slab, precondensed<br />
onto a mixing slab and brush or spatula modeled.<br />
1.1. During the preparation and working of the porcelain powder, remember that<br />
certain actions can lead to modifications of some of the material’s characteristics:<br />
1.1.1 The porcelain should be mixed and moistened on a flat surface and<br />
not inside of deep wells. When mixed in the well, the liquid tends to deposit itself<br />
on the bottom, pulling with it finer particles and color pigments. This can modify<br />
the condensation characteristics of the porcelain as well as the resulting color.<br />
1.1.2 The drying of the liquid in excess after mixing should never be done from above,<br />
but always from the side of the moistened powder body. The liquid emerges due<br />
to capillary action, pulling with it finer particles and color pigments. Drying from<br />
above by way of absorption draws up the finest particles, which are principally<br />
responsible for the natural glaze, and modifies the porcelain’s coefficient of<br />
thermal expansion.<br />
1.1.3 Drying of the restoration that is being modeled after condensation should always<br />
be done from the lower edge by simply dabbing it with the absorbent material. In<br />
this case, the ceramic powder itself acts as a filter, entrapping the fine particles<br />
and allowing only the liquid to flow out due to capillary action.<br />
1.1.4 The dried porcelain can always be remoistened with either distilled water or<br />
Modeling Liquid and condensed for additional modeling. Remix the dried<br />
mixtures carefully.<br />
1.2 The more pre-condensed is the porcelain on the mixing slab, the greater the<br />
5
handling qualities. There are substantial advantages in modeling drier and precondensed<br />
porcelain:<br />
- It reduces condensation on the framework, which is always dangerous<br />
for the granulometric integrity, the coefficient of thermal expansion, the<br />
auto-glazing capacity and the chromatic qualities of the porcelain.<br />
- It increases the compactness of the porcelain, which results in better<br />
translucency and greater hardness.<br />
- It reduces contraction during firing, which avoids excessive over<br />
modeling of the restoration.<br />
1.2.1 However, it is not always possible to keep to a strong pre-condensation, especially<br />
when complex aesthetic treatment is foreseen, creating the need for chromatic<br />
layers and supports that are differentiated in depth as well as in extension. In all of<br />
these cases, there are no contraindications in adapting the fluidity of the mixture<br />
to the work being done.<br />
1.2.2. Whenever possible, however, it is recommended to work in accordance with the<br />
instructions given above. At least partial pre-condensation of the powder, careful<br />
drying at the side or lower edge so as not to lose granulometric consistency and<br />
coloring pigmentation, and preparation on flat surfaces instead of bowls, will<br />
result in more consistent, higher quality restorations.<br />
1.3. If you should prefer to model with a spatula, it is recommended to proceed with<br />
porcelain that has been condensed and brought to the proper level of compactness<br />
on the mixing surface.<br />
1.3.1 The optimal state in which the porcelain should be mixed for modeling is well<br />
condensed and dried, plastic and pliable without being runny.<br />
2. METAL CONDITIONER<br />
2.1 Met-Con is a bond enhancer and color controller designed for optional use with<br />
alloys that produce excessive oxides. Met-Con is compatible with all <strong>CERATEC</strong><br />
porcelains.<br />
2.2 Either expel Met-Con Paste from the tube or mix the Met-Con Powder and Liquid<br />
to a thin slurry and apply to the surface that will receive the porcelain. A thin even<br />
coat should be applied. Dry slowly in front of the muffle until a white chalky<br />
surface appears. Fire according to the recommendations in the <strong>CERATEC</strong> firing<br />
chart.<br />
6
3. APPLICATION OF THE OPAQUES<br />
3.1 In addition to its functions of opacifying and bonding to metal, the opaque<br />
provides the fundamental color for the fixed prosthetic restoration. The proper,<br />
complete and uniform layering of the opaque is therefore a primary premise for<br />
the final chromatic result.<br />
3.2. In general, the lighter the opaque, the more light that will be reflected on the<br />
treated surface. The final color will be more luminous and will seem lighter. The<br />
darker the opaque, the more the final chroma will be heightened, at the expense,<br />
however, of an increased opacity, resulting in a color that seems more saturated.<br />
For this reason, modest but interesting variations in base color value can be<br />
obtained by substituting or flanking, within the same color dominant, a lighter<br />
shade of opaque with a darker shade and vice versa ie: substituting completely or<br />
in limited areas the opaque A3 with the opaque A2 (lighter) or A4 (darker). Only<br />
after much practical color experience, however, will it be possible to opaque<br />
dominants as the color result is difficult to predict.<br />
The opaquing system begins with MASK, a first coat ceramic material with<br />
exceptional masking abilities that is available in aerosol spray, paste or powder<br />
packaging.<br />
3.3. There are 18 opaque porcelains, one for each dentine shade A0 – D4, available in<br />
both powders and pastes Ceratec opaques are the foundation of the shade and<br />
therefore are in the same color range as the Dentines, Chroma Dentines and<br />
Opacious Dentines.<br />
3.3.0 When using the Mask spray, an extremely fine layer will produce excellent<br />
results. Spraying on this first layer is best accomplished with the restoration still<br />
on the die(s) to eliminate the need to remove opaque form the inside of any<br />
coping. Ceratec opaque powders are the finest grain opaque powders available.<br />
This allows complete coverage with a very thin layer.<br />
3.3.1 Mask is a neutral opaque material with a composition which allows it to be used<br />
as a first opaque layer under all shades other than A0 or B0, creating a thin but<br />
effectively masking wash opaque layer.<br />
3.3.2 Opaque or Mask powder can be mixed with distilled water. However, this is best<br />
done with <strong>CERATEC</strong> Opaque Liquid to provide the creamiest most homogeneous<br />
mix possible. Because ceratec opaques are very fine grain opaques they can be<br />
applied in a thicker layer and will fire to a very thin but opacifying coverage<br />
7
3.3.3 If using opaque or Mask paste, open the jar and mix the paste to a homogeneous<br />
consistency using a glass spatula. Remove the required amount from the jar and<br />
apply over the metal with a glass instrument or a brush pre-moistened with<br />
<strong>CERATEC</strong> Paste Liquid. If it is determined that the paste consistency needs to be<br />
thinned with a very small amount of Paste Liquid, remove the desired amount<br />
from the jar and mix with Paste Liquid on a glass slab.<br />
3.3.4 Layer the opaque, vibrating slightly to obtain a good contact. Place into muffle<br />
area at a muffle temperature no higher than 600 C for powders or 400 C for<br />
pastes. Dry and fire according to the firing chart indications for opaques. Allow<br />
the restoration to cool and treat it with a jet of steam.<br />
3.3.5 Mix the opaque in a creamier or denser way and apply it as a second layer with<br />
the proper brush or glass instrument. With a well-coated brush or instrument,<br />
allow the material to slide onto the framework, vibrating very gently to obtain a<br />
uniform and homogeneous flow. Be certain that the distribution is homogeneous<br />
and that all of the metal is well coated. After firing, the metal structure should not<br />
be visible. Should this not be the case, retouch and perform a third firing cycle.<br />
Any sort of correction or addition can be made on a layer of dry unfired opaque<br />
by re-moistening the dry surface. The second opaque layer, either powder or<br />
paste, should be applied in the same fashion but applied as a thicker, creamier<br />
coat.<br />
3.3.6 In the case of non-precious alloys, you may model the opaque body about 1 mm<br />
beyond the metallic margin to avoid the formation of dark oxidation borders.<br />
Reduction should be performed only after the final firing. A thickness of about<br />
0.2 mm is necessary to obtain a good opacifying and color effect.<br />
3.3.7 Do not use excess liquid for wetting the brush or to alter the consistency because<br />
this will detrimentally affect the handling of the paste. Do not be afraid of<br />
applying a thick layer of paste. Once the paste is dried and fired, the final<br />
thickness of two layers of opaque will be less than 0.2 mm.<br />
3.4. Opaque Modifiers:<br />
The following opaque modifiers are available in both powder and paste<br />
- White - Gray<br />
- Yellow - Pink<br />
- Ochre - Orange<br />
- Brown<br />
4. SUGGESTED LAYERING<br />
4.1. Due the excellent translucency of <strong>CERATEC</strong> porcelains, proper shade can be<br />
obtained even in cases of minimal reduction of the preparation. With the desired<br />
8
1.5mm of space, accurate shades can be obtained. exclusively with the opaque,<br />
dentine, and enamel or incisal porcelains.. In case of limited reduction of the<br />
preparation the use of chroma dentine or opacious dentine allow for excellent<br />
shade matching with reduced porcelain thickness.. Please see the illustrations and<br />
photos below and follow the appropriate layering techniques depending upon<br />
available space. In order to obtain a good color result, the layering should have a<br />
minimum thickness of 1.2 to 1.3 mm (in addition to the thickness of the opaque<br />
layer) and about 2 mm overall in the occlusal and incisal areas. Lesser thicknesses<br />
create the need to reinforce the color with modifiers.<br />
4.2. This layering is simple and immediate and allows for considerable savings of time<br />
and high productivity, if all work instructions are followed perfectly, particularly<br />
those regarding handling and firing procedures. Any variation in the<br />
recommended methods could bring about possible color modifications, which<br />
would result in a more complicated subsequent layering for shade attainment.<br />
4.3. If an advanced chromatic operation is planned, one can create as complex a<br />
layering scheme as desired. Even in these cases, the loss of simplicity in the work<br />
will be amply compensated by the aesthetic results obtained.<br />
4.4. <strong>CERATEC</strong> porcelain has an extremely small sintering contraction or shrinkage<br />
(up to 12% if modeled from pre-condensed mixes). Overbuild slightly to<br />
compensate for dimensional sintering contraction, but not excessively, especially<br />
if you are using the spatula technique. The brush technique, when used with<br />
porcelains that are not pre-condensed, causes a slightly higher sintering<br />
contraction.<br />
4.5. Always insulate the parts of the model that could have potential contact with the<br />
porcelain to be modeled with Shoulder SEP Liquid, preventing the stone model<br />
from absorbing the Modeling Liquid.<br />
4.6. If the entire form of the crown is built with dentine, cut back for the incisal layer,<br />
being careful that all of the edges are well blended to obtain gradual and<br />
coordinated chromatic passages.<br />
4.7. The occlusal surfaces of molars and premolars must have profiles that are not<br />
excessively pronounced or sharp. Mastication produces forces that, when applied<br />
in the direction of the cut, can lead to a premature fracturing of the ceramic. The<br />
optical plasticity should be sought instead through substitute chromatics like the<br />
use of “cold” colors on the walls of the fossa or dark colors on the inside of the<br />
profiles of the fossa.<br />
5. DENTINE AND INCISAL <strong>PORCELAIN</strong>S<br />
5.1 Dentine porcelains<br />
9
There are18 dentine porcelains, one for each shade A0 – D4<br />
5.2 Chroma Dentines<br />
There are 18 chroma dentines, one for each shadeA0 – D4. Ceratec Chroma<br />
Dentines are in the same color range as the corresponding Dentine porcelains but<br />
higher in chroma and therefore less translucent.<br />
5.3. Opacious dentines<br />
There are also 18 opacious dentines, one for each shade A0 – D4. Ceratec<br />
Opacious Dentines are in the same color range as the corresponding Chroma<br />
Dentine porcelains but higher in chroma and therefore even less translucent They<br />
possess such a good opaquing capacity that they can be used when the base<br />
opaque appears too evident or in those modeling areas that are chromatically<br />
critical.<br />
Note: Differences in color and appearance may be noted between the restoration<br />
on the model and in the mouth, particularly when the intraoral illumination of the<br />
restoration is well defined. Cervical zones of intermediate proximity to the<br />
gingival mucosa can give dark reflections to the dentine, making the other parts of<br />
the restoration appear lighter by contrast. In other areas that are closest to the<br />
cervical margin, the color of the opaque can be accentuated because of an<br />
excessively thin dentine layer.<br />
5.3.1 Major uses for opacious dentines are:<br />
10
A. Thin dentine areas, especially those close to the margin. In these areas, a layer of<br />
opacious dentine can be modeled in order to avoid chromatic variations in relation<br />
to the other areas of the tooth.<br />
B. Sub gingival areas of the restorations. In these areas, a layer of opacious dentine<br />
can be modeled in order to reproduce the exact color and reduce the shadow effect<br />
due to the presence of the gingiva and to the scarce quantity of light present.<br />
C. Central labial areas. In these areas, a good layering of opacious dentine allows for<br />
interesting chromatic effects permitting the reproduction of secondary<br />
pigmentation without affecting the overall chromatic character of the restoration.<br />
D. Inter dental spaces. The use of a layering of opacious dentine in these zones lends<br />
a more natural appearance to the restoration through better light reflection and a<br />
reduction of the shadow effect.<br />
E. Posterior zones (lingual and palatal). A layering of opacious dentine helps to<br />
camouflage the presence of visible metal collars.<br />
5.4 Incisal Porcelains<br />
The incisal porcelains are highly translucent as compared to dentine porcelains.<br />
During the layering process, remember that the chromatic effect of the incisal<br />
porcelain is that of reducing the color saturation of the dentine while increasing<br />
luminosity. It is critical to remember that a general incisal layering of the surface<br />
of the restoration leads to an overall grayish appearance. <strong>CERATEC</strong> dentine<br />
porcelains are highly translucent and when covered with the more translucent<br />
incisals, the effect is a grayish appearance. Therefore when a more saturated or<br />
intense color is desired, apply the incisal only to the incisal third of the<br />
restoration. Apply incisal porcelains in very thin layers. If a greater luminosity is<br />
desired or less dentine color saturation, apply the incisal in thicker layers.<br />
5.4.1. Six high translucent incisal porcelains are recommended to be used according to<br />
the following chart:<br />
DENTINE INCISAL<br />
A0 and B0 I-6<br />
A1, B1, C1 and D2 I -1<br />
A2, B2 and D3 I -2<br />
A3, C2 and D4 I -3<br />
A3.5, B3, B4 and C3 I-4<br />
A4 and C4 I -5<br />
11
Additional Incisals available include:<br />
Violet White Pink Blue Yellow Translucent<br />
Opal Incisals include:<br />
Opal Incisal Clear<br />
Opal Incisal Light<br />
Opal Incisal Medium<br />
Opal Incisal Dark<br />
Additional Enamels (Incisals less translucent) E1, E2,E3, E4 are available for<br />
combining with shades depending on effects desire by the technician. See relative<br />
opacity and color combination charts in the annex.<br />
5.4.2 The additional incisal shades may be used alone or may be used as incisal<br />
modifiers for the other shades.<br />
5.5 Gingival porcelains<br />
The following porcelains are available for characterizing the gingival zones:<br />
- Gingival Light<br />
- Gingival Dark<br />
5.6 Modifiers<br />
Nine porcelains for color modification of incisal and dentine porcelains are<br />
available:<br />
White Pink<br />
Yellow Violet<br />
Orange Blue<br />
Gray Ochre<br />
Brown<br />
6. SHOULDER <strong>PORCELAIN</strong><br />
6.1. In porcelain fused to metal crowns, the visibility of the metallic part on the<br />
cervical border can produce a crown margin that is dark or gray, detracting form<br />
the aesthetic appearance. To remedy this inconvenience, many experts<br />
recommend modeling the cosmetic shoulder without metal. However, dentine<br />
porcelain would not provide a perfect seal due to the sintering contraction and the<br />
12
ounding of the margins. For this reason, the modeling of these parts is done with<br />
shoulder porcelain.<br />
6.2. The shoulder must be prepared in a clean step. The internal angle may be rounded<br />
but the external angel must be between 90 and 110 degrees. The preparation must<br />
be 1 – 2 mm deep in order to guarantee a good appearance. The step must not be<br />
covered in metal (the metal must end before the floor of the step). The metal can<br />
be extended to the step only when there is sufficient space available.<br />
6.3. There are five shoulder porcelains, in varying degrees of chroma and are<br />
recommended to be used according to the following chart:<br />
SHOULDER RECOMMENDED SHADE<br />
BLEACH A0,B0<br />
LIGHT A1,B1,C1,D2<br />
MEDIUM-LIGHT B2,D3<br />
MEDIUM A2,A3, C2,D4<br />
MEDIUM-DARK A3.5, B3, B4<br />
DARK A4,C3,C4<br />
DILUENT AS NEEDED<br />
13
6.4 Apply and fire the opaque porcelain as previously recommended. Technique for<br />
the application of shoulder bodies:<br />
a. Mark the margin of the preparation with a pencil or felt tip pen.<br />
b. Insulate the shoulder of the preparation with a thin layer of the Shoulder<br />
SEP.<br />
c. Position the crown carefully on the die. Mix the shoulder powder with<br />
Shoulder SET Liquid, which will allow the powder to harden on the die<br />
allowing safe removal of the restoration without affecting the unsupported<br />
porcelain. Apply the shoulder porcelain with little or no vibrating and<br />
adapt it accurately to the margin, carefully drying the porcelain.<br />
d. Mark the margin of the shoulder with a pencil and allow the applied<br />
porcelain to dry for a few minutes. Remove the crown from the die and<br />
extract the excess porcelain from the inside of the crown.<br />
e. Fire the shoulder according to the recommended cycle.<br />
f. Check to see if a second addition of shoulder porcelain is needed due to<br />
the sintering contraction. If so, apply the necessary porcelain vibrating<br />
slightly and repeat the firing procedure.<br />
g. Continue with the restoration according to the previously recommended<br />
techniques.<br />
7. SPECIAL STAINS (SURFACE COLORS)<br />
7.1 Stains are highly pigmented powders that should always be used in limited<br />
quantities due to their strong coloring effect. They can be used mixed with the<br />
normal <strong>CERATEC</strong> porcelains as color modifiers, paying attention to accurate<br />
mixing and their strong chromatic effect, or in combination with glazes. In this<br />
case, be sure that the surface of the restoration is perfectly clean before<br />
proceeding with the application. Remember that an excessive amount of stain<br />
gives a greater opacity to the inside of the restoration due to the lesser light<br />
transmission. Therefore, always apply them in a thin and well-blended layer.<br />
7.2. The stains are available in the following colors:<br />
White Blue<br />
Yellow Black<br />
Orange Green<br />
Gray Ocher<br />
Pink Violet<br />
Brown<br />
14
7.3 Stains are to be used alone or in a combination with the glazes. They should be<br />
fired according to the tables given for the appropriate glaze. When mixed with<br />
other <strong>CERATEC</strong> porcelain powders, they are to be fired according to the<br />
instructions given for the porcelain being used.<br />
8. GLAZING AND CORRECTION<br />
8.1 Natural Glazing<br />
If the ceramic has been sintered to perfect maturation, a natural<br />
glaze can be done without the use of the specific glaze powders or pastes.<br />
8.1.1 After all necessary morphological corrections have been completed, proceed with<br />
polishing using the desired instruments or polishing paste appropriate for<br />
porcelain. Add or correct any morphological effects or characterizations. Fire the<br />
restoration according to the recommended firing cycle.<br />
8.2 Glazes<br />
If a perfect glaze effect is desired, or if the previous firing of the porcelain left a<br />
surface texture that was unsatisfactory for a natural glaze, it is recommended to<br />
use an artificial glaze. Glazing gives the tooth a greater surface shine that is moist<br />
and silky and appears similar to the surface of the shade guide.<br />
Glazes are available in both powder and paste as:<br />
- Glaze High<br />
- Glaze Low<br />
8.2.1 Glaze powder must be mixed with Stain and Glaze Medium. Mix a small quantity<br />
of the appropriate powder with Stain and Glaze Medium and apply an extremely<br />
thin layer onto the restoration.<br />
8.2.2 Glaze Pastes may be mixed on the mixing slab or applied directly to the<br />
restoration.<br />
8.2.3 Each glaze must be fired according to the appropriate cycle on the firing chart.<br />
8.3 After all the necessary morphological corrections have been made, polish using<br />
the desired instruments or polishing paste appropriate for porcelain. Add or<br />
correct any morphological effects or characterizations. Expel the selected Glaze<br />
Paste or mix the selected powder into a creamy and fluid consistency and apply a<br />
very fine layer with a brush. During this procedure, stains can be layered alone or<br />
mixed with the glaze. Slowly place the restoration into the oven and fire without<br />
engaging vacuum according to the firing chart.<br />
15
8.4 Correction with Add On porcelain<br />
Seven Add On porcelains are available:<br />
ADD ON<br />
Opaque Light<br />
Opaque Dark<br />
Dentine Light<br />
Dentine Medium<br />
Dentine Dark<br />
Incisal Clear<br />
Incisal Light<br />
8.4.1 If it is necessary to make slight corrections after the final firing procedures,<br />
<strong>CERATEC</strong> Add On correction porcelain can be used. Firing can be done at the<br />
same time as that of the Glaze Low without vacuum. <strong>CERATEC</strong> Add On must<br />
only be used in small quantities. When placed in the contact area, they tend to<br />
harmonize chromatically with the adjacent porcelain.<br />
8.4.2 Treat the concerned surfaces with an abrasive and wash carefully. Apply the<br />
correction porcelain mixed with Modeling Liquid, keeping in mind the firing<br />
shrinkage. Fire according to the chart with or without vacuum as preferred. The<br />
surface appearance will be shiny and will harmonize with any previously glazed<br />
surface. Pay attention to the previously prepared glaze while polishing the newly<br />
prepared one.<br />
9. MIXING AND MODELLING LIQUIDS<br />
The following mixing and modeling liquids are available:<br />
• Met-Con Liquid: a special liquid used in the mixing of Met-Con metal<br />
conditioner.<br />
• Opaque Liquid: a special liquid to be used in the mixing of Opaque<br />
powders. When used, this liquid will provide an opaque powder mix that<br />
is creamier and easier to apply the metal. Also used for moistening the<br />
brush for enhancing the application of paste opaques porcelains.<br />
• Modeling Liquid: a special liquid for use with dentine and incisal<br />
porcelains to enhance the building and modeling of the ceramic as well as<br />
improving the density of the fired restoration.<br />
16
• Modeling Colors: intense organic colors used alone or mixed with distilled<br />
water or Modeling Liquid for enhanced visual control during the building<br />
process. Available in Red, Blue, Yellow and Green.<br />
• Stain and Glaze Medium: a special liquid to be used only for the mixing of<br />
glaze and stain powders.<br />
• Shoulder SET: this liquid is used in the mixing of shoulder powders<br />
allowing the shoulder to harden on the die facilitating removal without<br />
affecting unsupported porcelain.<br />
• Shoulder SEP: a separating medium used over the stone model to prevent<br />
adherence of the porcelain to the stone.<br />
10. OTHER APPLICATIONS<br />
10.1 VENEERS<br />
Prepare a refractory die following the instructions of the investment manufacturer.<br />
Apply a thin layer of opacious dentine over the labial surface and fire according to<br />
recommendations in the firing chart. If necessary, apply a second coat of opacious<br />
dentine and fire using the same firing cycle. Continue the veneer build up with<br />
dentine and incisal porcelains as required and fire according to the recommended<br />
cycle. Continue with standard veneer procedures.<br />
10.2 INLAYS – ONLAYS<br />
Prepare a refractory die following the instructions of the investment manufacturer.<br />
Place opacious dentine into the mold cavity in small increments. Do not overbuild<br />
and do not bring the material to the margins. Leave a small space of refractory<br />
near the margin. Fire this layer as per the recommendations in the firing chart.<br />
Apply a second layer of opacious dentine, again using the same firing cycle. A<br />
third layer may be added as needed for additional strength or opacity. Continue<br />
building the restoration to full contour with <strong>CERATEC</strong> dentine and incisal<br />
porcelains. It is not necessary to overextend the margins. Fire according to the<br />
recommendations in the firing chart and proceed with normal inlay – onlay<br />
procedures.<br />
10.3 <strong>PORCELAIN</strong> JACKET CROWNS<br />
Prepare a refractory die following the instructions of the investment manufacturer.<br />
Apply a thin layer of opacious dentine to the predetermined area and fire<br />
according to the recommendations in the firing chart. Because two thin layers are<br />
recommended rather than one thick layer, apply a second layer and fire again<br />
using the same firing cycle. A third layer may be added as needed for additional<br />
strength or opacity. Continue the build up to full contour using <strong>CERATEC</strong><br />
dentine and incisal porcelains and fire according to the recommendations in the<br />
firing chart. Continue with standard jacket crown procedures.<br />
17
SINTERING ( FIRING PROCESS)<br />
1. NOTES ON THE FIRING PROCESS<br />
1.1 The temperature instructions given are guidelines. Porcelain is a mineral<br />
substance that does not have a clearly defined maturation point, but has a<br />
maturation interval.<br />
1.2 Each technician must decide which level of porcelain maturation is most suitable<br />
for his or her style. Properly matured porcelain has a fine eggshell surface texture<br />
and a good luster. If the surface texture is opaque, soft or granular, the sintering<br />
temperature was too low. If the surface is too smooth and too lustrous, the<br />
sintering temperature was too high and the color will lack strength or be too light.<br />
The technician must acquire familiarity with optimal temperature needed for his<br />
or her oven and working habits, following the guidelines for each specific<br />
porcelain as established in the <strong>CERATEC</strong> firing chart.<br />
1.3 <strong>CERATEC</strong> porcelains display an excellent level of sintering maturity in the<br />
interval of 910-960 °C.<br />
1.4 The recommended high temperature for dentine and incisal porcelains is 921°C.<br />
1.5 If the porcelain is fired to perfection, that is, if it displays a glossy,<br />
fine, eggshell texture, it is possible to omit the glazing procedure or simply move<br />
on to natural glazing. If the porcelain is fired at a slightly lower or slightly higher<br />
temperature, the natural glaze may not be sufficient and the appropriate glazing<br />
porcelain can be used.<br />
1.6 Opaques require a slightly higher temperature (+ 30°C). Low Glaze and<br />
correction porcelains, on the other hand, require lower temperatures.<br />
1.7 Do not fire the opaque at a temperature that is too low or the coloring pigments do<br />
not mature properly and the chromatic yield can vary greatly.<br />
1.8 Do not insert the porcelain at a temperature that is too high. The immediate<br />
vitrification of the surface layers will inhibit the emission of air, leaving porosity<br />
that will cause color variations and structural weaknesses in the restoration.<br />
1.9 Do not fire additional layers of porcelain at temperatures that are too low. Always<br />
fire at the same temperatures for the same porcelains.<br />
1.10 Do not fire the porcelain at a temperature that is too low out of caution of for<br />
safety reasons. The porcelain must arrive at perfect maturity in order to fully<br />
offer all of its chromatic characteristics.<br />
18
1.11 Do not impose rates of temperature increase that are too high or the coloring<br />
pigments will not have the time to mature and the color yield will be imperfect.<br />
1.12 Always air cool <strong>CERATEC</strong> porcelain by immediately opening the oven and<br />
directly removing the restoration upon completion of the firing cycle. Slow<br />
cooling raises the coefficient of expansion and pushes <strong>CERATEC</strong> porcelain<br />
beyond the predisposed values for the product.<br />
1.13 The maximum number of firing processes that can be performed<br />
safely is six. Beyond this limit, it is best to work <strong>CERATEC</strong> Add On porcelain.<br />
2. THE CERAMIC OVEN<br />
2.1 <strong>CERATEC</strong> porcelains can be fired in all commercial ceramic ovens with<br />
temperature levels and rates of temperature increase that are compatible with the<br />
<strong>CERATEC</strong> firing chart.<br />
2.2 Every oven possesses its own characteristics, even identical products,<br />
especially after a long period of use. Different series of the same model vary in<br />
temperature calibration, muffle characteristics and heating elements, in addition to<br />
rates of temperature increase. The maturation of the porcelain is based on time<br />
and temperature. Every oven will behave in a slightly different way regarding<br />
porcelain maturation. The firing temperatures, from 590 to 950°C, are only<br />
suggested temperatures. It is important to familiarize yourself with the optimal<br />
temperature necessary for your oven, without, however, adopting this temperature<br />
as an absolute value for other ovens.<br />
2.2.1 Horizontal ovens may require a temperature that is 10 – 20°C higher.<br />
2.3 As has already been indicated, the phenomenon of greenish<br />
discoloration caused by alloys containing silver arises from the volatilization of<br />
silver components that attach themselves to the inner coating of the oven. If alloys<br />
containing silver are used, decontaminate your oven periodically (at least once a<br />
week) following the manufacturer’s instructions.<br />
3. STANDARDS<br />
<strong>CERATEC</strong> porcelains meet the following standards:<br />
ISO 6872/95 Dental Ceramic.<br />
ISO 9693/99 Metal-ceramic restorative systems.<br />
The fundamental requirements are as follow:<br />
19
Uniformity: no segregation of the pigments shall take place when the powder<br />
is mixed with the recommended liquid.<br />
Freedom from extraneous materials: material shall be free from extraneous<br />
materials when assessed by visual inspection.<br />
Radioactivity: Ceramic shall have a radioactive emission of not more than<br />
0.2 Bq-g -1 of U238.<br />
Flexural strength: minimum 50 MPa.<br />
Chemical solubility: Loss in mass, 100 µg/cm 2 max.<br />
Adhesion to alloys: The adhesion between the ceramic and at least one<br />
specified metallic material shall be greater than 25 MPa.<br />
4. TECHNICAL DATA<br />
Radioactivity: There are no radioactive elements in <strong>CERATEC</strong> porcelains<br />
compositions. The total radioactivity is less than 0.2 Bq-g -1 of U238.<br />
Toxic or harmful elements: <strong>CERATEC</strong> porcelains are completely free of<br />
Lead, Uranium, Antimony and Cadmium.<br />
Flexural strength: 125 MPa with a standard deviation of 10 MPa.<br />
Chemical solubility: 55 µg/cm 2 .<br />
Adhesion to alloys: 36.8 MPa as tested with CERAKAST 1 non-precious<br />
alloy.<br />
Linear thermal expansion coefficient: Opaque: after two firings: 12.6 X10 -<br />
6 /ºC; after four firings: 12.8 X10 -6 /ºC (25-500ºC).<br />
Dentine: after two firings: 12.8 X10 -6 /ºC; after four firings: 12.95 X10 -6 /ºC<br />
(25-500ºC).<br />
Incisal: after two firings: 12.6 X10 -6 /ºC; after four firings: 12.9 X10 -6 /ºC (25-<br />
500ºC)<br />
Glass transition temperature: Between 480-500ºC for all <strong>CERATEC</strong><br />
porcelains.<br />
Specific gravity: 2.7 g/ml<br />
20
<strong>CERATEC</strong> COLOR COMBINATION TABLE<br />
OPAQUE A0 A1 A2 A3 A3.5 A4 B0 B1 B2<br />
SHOULDER Bleach Light Medium Medium Medium<br />
Dark<br />
Dark Bleach Light Medium<br />
Light<br />
OP. DENTINE A0 A1 A2 A3 A3.5 A4 B0 B1 B2<br />
DENTINE A0 A1 A2 A3 A3.5 A4 B0 B1 B2<br />
ENAMEL E1<br />
E4<br />
E1<br />
E4<br />
E1<br />
E3<br />
E1<br />
E3<br />
INCISAL I-6 I-1 I-2 I-3 I-4 I-5 I-6 I-1 I-2<br />
OPAQUE B3 B4 C1 C2 C3 C4 D2 D3 D4<br />
SHOULDER<br />
Medium<br />
Dark<br />
Medium<br />
Dark<br />
E1<br />
E2<br />
E1<br />
E2<br />
E1<br />
E4<br />
E1<br />
E4<br />
Light Medium Dark Dark Light Medium<br />
Light<br />
OP. DENTINE B3 B4 C1 C2 C3 C4 D2 D3 D4<br />
DENTINE B3 B4 C1 C2 C3 C4 D2 D3 D4<br />
ENAMEL E1<br />
E2<br />
E1<br />
E2<br />
E1<br />
E4<br />
E1<br />
E3<br />
E1<br />
E3<br />
Medium<br />
INCISAL I-4 I-4 I-1 I-3 I-4 I-5 I-1 I-2 I-3<br />
E1<br />
E2<br />
E1<br />
E2<br />
E1<br />
E4<br />
E1<br />
E3<br />
E1<br />
E3<br />
21
<strong>CERATEC</strong> <strong>PORCELAIN</strong><br />
RELATIVE OPACITY CHART<br />
Opacity ¤<br />
%<br />
Opaque 100<br />
Shoulder 92-95<br />
Opacious Dentine 90-95<br />
Chroma Dentine 85-90<br />
Dentines 80-85<br />
Enamel E4 75<br />
Enamel E3 70<br />
Enamel E2 65<br />
Enamel E1 55<br />
Incisal 40-50<br />
Translucent 25<br />
22
Dry out<br />
Insertion<br />
Heat rate ° / min.<br />
Vacuum start<br />
Vacuum stop<br />
Firing Temp.<br />
Palette<br />
MASK<br />
MASK<br />
Powder<br />
Palett<br />
e<br />
Paste<br />
Opaque<br />
Powder<br />
FIRING CHART<br />
Shoul<br />
der<br />
Dentines/<br />
Incisals<br />
Natural<br />
Glaze<br />
Glaze High<br />
Stains<br />
Add On Glaze Low<br />
LF Stains<br />
7 min 5 min 7 min 3-5 min 3-5 min. 3-5 min. 3-5 min. 3-5 min. 3-5 min. 3-5 min.<br />
482°C 593°C 482°C 593°C 593°C 593°C 593°C 593°C 515°C 515°C<br />
900°F 1100°F 900°F 1100°F 1100°F 1100°F 1100°F 1100°F 960°F 960°F<br />
55°C 55°C 50°C 50°C 50°C 50°C 50°C 47°C 55°C 55°C<br />
100°F 100°F 90°F 90°F 90°F 90°F 90°F 85°F 100°F 100°F<br />
482°C 593°C 482°C 593°C 593°C 593°C None None Optional None<br />
900°F 1100°F 900°F 1100°F 1100°F 1100°F<br />
971°C - 982ºC 971°C - 982ºC 954°C - 966ºC 954°C - 966ºC 941°C - 946ºC 927°C - 938ºC None None Optional None<br />
1780°F - 1800ºF 1780°F - 1800ºF 1750°F - 1770ºF 1750°F - 1770ºF 1725°F - 1735ºF 1700°F - 1720ºF<br />
977°C - 988ºC 977°C - 988ºC 960°C - 971ºC 960°C - 971ºC 946°C - 952ºC 932°C - 943ºC 932°C - 943ºC 932°C 849°C 849°C<br />
1790°F-1810ºF 1790°F - 1810ºF 1760°F - 1780ºF 1760°F - 1780ºF 1735°F - 1745ºF 1710°F - 1730ºF 1710°F - 1730ºF 1710°F 1560°F 1560°F<br />
Hold Time 0 0 0 0 0 0 0 15 sec. 15 sec 15 sec<br />
Cool Time 0 0 0 0 0 0 0 0 0 0<br />
Texture Semi-Gloss Semi-Gloss Eggshell-Shiny Eggshell-Shiny Eggshell Grainy-Shiny Shiny Glossy Glossy -<br />
Thickness (approx.) Thin/ Wash Thin/ Wash 0.1-0.3 mm 0.1-0.3 mm 0.2 mm 0.5-1.0 mm<br />
* The above temperatures are recommended and can vary with individual furnaces. The crucial factors for the firing temperatures are the<br />
appearance and the surface condition of the restoration after the firing process.<br />
Recommended alloy CTE range : 14.1-14.7 x 10 -6 /°C @ 500ºC