Create successful ePaper yourself
Turn your PDF publications into a flip-book with our unique Google optimized e-Paper software.
14<br />
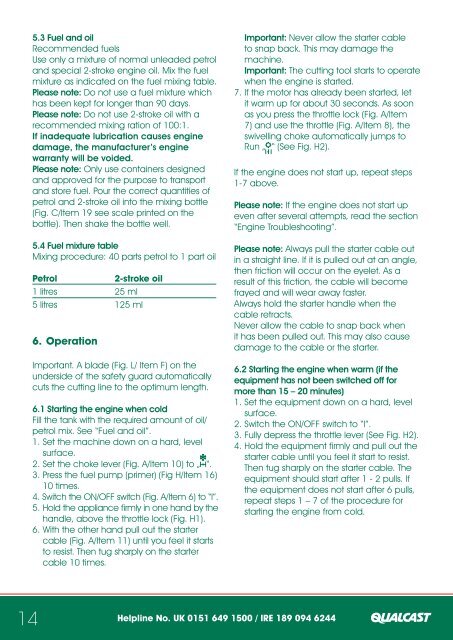
5.3 Fuel and oil<br />
Recommended fuels<br />
Use only a mixture of normal unleaded petrol<br />
and special 2-stroke engine oil. Mix the fuel<br />
mixture as indicated on the fuel mixing table.<br />
Please note: Do not use a fuel mixture which<br />
has been kept for longer than 90 days.<br />
Please note: Do not use 2-stroke oil with a<br />
recommended mixing ration of 100:1.<br />
If inadequate lubrication causes engine<br />
damage, the manufacturer’s engine<br />
warranty will be voided.<br />
Please note: Only use containers designed<br />
and approved for the purpose to transport<br />
and store fuel. Pour the correct quantities of<br />
petrol and 2-stroke oil into the mixing bottle<br />
(Fig. C/Item 19 see scale printed on the<br />
bottle). Then shake the bottle well.<br />
5.4 Fuel mixture table<br />
Mixing procedure: 40 parts petrol to 1 part oil<br />
<strong>Petrol</strong> 2-stroke oil<br />
1 litres 25 ml<br />
5 litres 125 ml<br />
6. Operation<br />
Important. A blade (Fig. L/ Item F) on the<br />
underside of the safety guard automatically<br />
cuts the cutting line to the optimum length.<br />
6.1 Starting the engine when cold<br />
Fill the tank with the required amount of oil/<br />
petrol mix. See “Fuel and oil”.<br />
1. Set the machine down on a hard, level<br />
surface.<br />
2. Set the choke lever (Fig. A/Item 10) to „ “.<br />
3. Press the fuel pump (primer) (Fig H/Item 16)<br />
10 times.<br />
4. Switch the ON/OFF switch (Fig. A/Item 6) to “I”.<br />
5. Hold the appliance firmly in one hand by the<br />
handle, above the throttle lock (Fig. H1).<br />
6. With the other hand pull out the starter<br />
cable (Fig. A/Item 11) until you feel it starts<br />
to resist. Then tug sharply on the starter<br />
cable 10 times.<br />
Important: Never allow the starter cable<br />
to snap back. This may damage the<br />
machine.<br />
Important: The cutting tool starts to operate<br />
when the engine is started.<br />
7. If the motor has already been started, let<br />
it warm up for about 30 seconds. As soon<br />
as you press the throttle lock (Fig. A/Item<br />
7) and use the throttle (Fig. A/Item 8), the<br />
swivelling choke automatically jumps to<br />
Run „ “ (See Fig. H2).<br />
If the engine does not start up, repeat steps<br />
1-7 above.<br />
Please note: If the engine does not start up<br />
even after several attempts, read the section<br />
“Engine Troubleshooting”.<br />
Please note: Always pull the starter cable out<br />
in a straight line. If it is pulled out at an angle,<br />
then friction will occur on the eyelet. As a<br />
result of this friction, the cable will become<br />
frayed and will wear away faster.<br />
Always hold the starter handle when the<br />
cable retracts.<br />
Never allow the cable to snap back when<br />
it has been pulled out. This may also cause<br />
damage to the cable or the starter.<br />
6.2 Starting the engine when warm (if the<br />
equipment has not been switched off for<br />
more than 15 – 20 minutes)<br />
1. Set the equipment down on a hard, level<br />
surface.<br />
2. Switch the ON/OFF switch to “I”.<br />
3. Fully depress the throttle lever (See Fig. H2).<br />
4. Hold the equipment firmly and pull out the<br />
starter cable until you feel it start to resist.<br />
Then tug sharply on the starter cable. The<br />
equipment should start after 1 - 2 pulls. If<br />
the equipment does not start after 6 pulls,<br />
repeat steps 1 – 7 of the procedure for<br />
starting the engine from cold.<br />
Helpline No. UK 0151 649 1500 / IRE 189 094 6244


