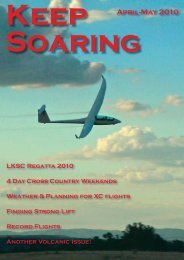
Flying the Morning Glory Dust Devil Dash Hitting the Silk New ...
Flying the Morning Glory Dust Devil Dash Hitting the Silk New ...
Flying the Morning Glory Dust Devil Dash Hitting the Silk New ...

You also want an ePaper? Increase the reach of your titles
YUMPU automatically turns print PDFs into web optimized ePapers that Google loves.
The Practical Plane Page<br />
Make Your Own<br />
Gliding Machine<br />
A gliding machine is a motor-less aeroplane, or flying-machine,<br />
propelled by gravity and designed to carry a passenger through<br />
<strong>the</strong> air from a high point to a lower point some distance away.<br />
<strong>Flying</strong> in a glider is simply coasting down hill on <strong>the</strong> air, and is <strong>the</strong><br />
most interesting and exciting sport imaginable. The style of glider<br />
described in this article is known as <strong>the</strong> "two-surface" or "doubledecked"<br />
aeroplane, and is composed of two arched cloth surfaces<br />
placed one above <strong>the</strong> o<strong>the</strong>r.<br />
In building a glider <strong>the</strong> wood material used should be straightgrained<br />
spruce, free from knots. First prepare from spruce planks<br />
<strong>the</strong> following strips of wood. Four long beams 3/4 in. thick, 1 1/4<br />
in. wide and 20 ft. long; 12 cross- pieces 3/4 in. thick, 3/4 in. wide<br />
and 3 ft. long; 12 uprights 1/2 in. thick, l in. wide and 4 ft long; 41<br />
strips for <strong>the</strong> bent ribs 3/16 in. thick, 1/2 in. wide and 4 ft. long; 2<br />
arm sticks 1 in. thick , 2 in. wide and 3 ft. long; <strong>the</strong> rudder sticks 3/4<br />
in. square and 8 ft long; several strips 1/2 in. by 3/4 in. for building<br />
<strong>the</strong> vertical and horizontal rudders.<br />
Please use <strong>the</strong> picture on <strong>the</strong> front cover of this newsletter as a<br />
plan. Cover <strong>the</strong> page with greaseproof paper to avoid dirt and glue<br />
stains. The frames for <strong>the</strong> two main surfaces should be constructed<br />
first, by bolting <strong>the</strong> crosspieces to <strong>the</strong> long beams at <strong>the</strong> places<br />
shown by <strong>the</strong> dimensions in Fig. 1.<br />
If 20-ft. lumber cannot be procured, use 10-ft. lengths and splice<br />
thorn, as shown in Fig. 3. All bolts used should be 1/8 in. in diameter<br />
and fitted with washers on both ends. Those frames formed by <strong>the</strong><br />
crosspieces should as braced by diagonal wires as shown. All wiring<br />
is done with No. 16 piano Wire.<br />
Nothing<br />
over<br />
$3!!!<br />
October November 2009<br />
The 41 ribs may be nailed to <strong>the</strong> main frames on <strong>the</strong> upper<br />
side by using he flat-headed brads 7/8 in. Iong. Those ribs are<br />
spaced 1 ft. apart and extend ft. beyond <strong>the</strong> rear edges of <strong>the</strong><br />
main frames, as shown in Fig. 1.<br />
After nailing one end of a rib to <strong>the</strong> front long beam, <strong>the</strong> rib<br />
is arched by springing down <strong>the</strong> loose end and nailing to <strong>the</strong><br />
rear beam. The ribs should have a curve as shown in Fig. 2, <strong>the</strong><br />
amount of curvature being <strong>the</strong> same in all <strong>the</strong> ribs.<br />
The frames of <strong>the</strong> main surfaces are now ready to be covered<br />
with cloth. Cambric or bleached muslin should be used for <strong>the</strong><br />
covering, which is tacked to <strong>the</strong> front edge, stretched tightly over<br />
<strong>the</strong> bent ribs and fastened securely with tacks to <strong>the</strong> rear ends of<br />
<strong>the</strong> ribs. The cloth should also be glued to <strong>the</strong> ribs for safety. In<br />
<strong>the</strong> center of <strong>the</strong> lower plane surface <strong>the</strong>re should be an opening<br />
2 ft. wide and 4 ft. long for <strong>the</strong> body of <strong>the</strong> operator.<br />
Place <strong>the</strong> two main surfaces 4 ft. apart and connect with <strong>the</strong><br />
12 uprights, placed in <strong>the</strong> corner of each crosspiece and beam.<br />
The uprights are fastened by bolting to <strong>the</strong> crosspieces, as shown<br />
in Fig. 2. The whole structure is made strong and rigid by bracing<br />
with diagonal wires, both laterally and longitudinally.<br />
The vertical rudder is to keep <strong>the</strong> machine headed into <strong>the</strong><br />
wind and is not movable. This rudder is made of cloth stretched<br />
over a light wooden frame, which is nailed to <strong>the</strong> rudder sticks<br />
connecting to <strong>the</strong> main frame.<br />
The horizontal rudder is also made of cloth stretched over a<br />
light wooden frame, and arranged to intersect <strong>the</strong> vertical rudder<br />
at its centre. This rudder is held in position and streng<strong>the</strong>ned by<br />
diagonal wires and guy wires.<br />
Keep Soaring October-November 2009 Page 22