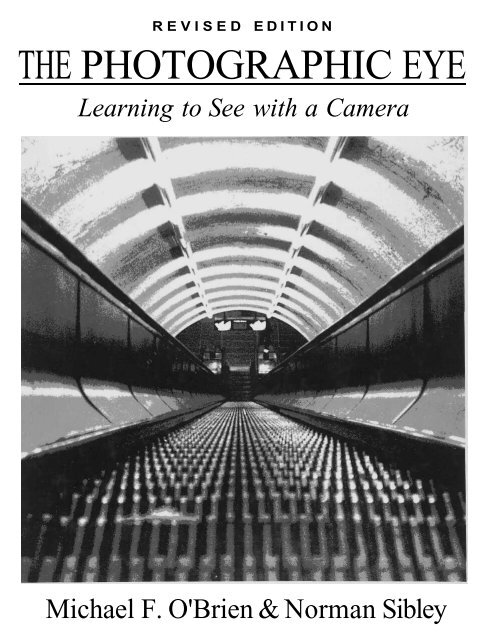
THE PHOTOGRAPHIC EYE
THE PHOTOGRAPHIC EYE
THE PHOTOGRAPHIC EYE

You also want an ePaper? Increase the reach of your titles
YUMPU automatically turns print PDFs into web optimized ePapers that Google loves.
REVISED EDITION<br />
<strong>THE</strong> <strong>PHOTOGRAPHIC</strong> <strong>EYE</strong><br />
Learning to See with a Camera<br />
Michael F. O'Brien & Norman Sibley
<strong>THE</strong> <strong>PHOTOGRAPHIC</strong> <strong>EYE</strong><br />
Learning to See with a Camera<br />
Michael E O'Brien & Norman Sibley<br />
Davis Publications, Inc., Worcester, Massachusetts
Student photograph by Gregory Conrad.<br />
4 The Photographic Eye<br />
Copyright 1995<br />
Davis Publications, Inc.<br />
Worcester, Massachusetts U.S.A.<br />
To the photography students of<br />
Seoul American High School, past,<br />
present and future.<br />
No part of this work may be reproduced<br />
or transmitted in any form or<br />
by any means, electronic or mechanical,<br />
including photocopying and recording,<br />
or by any information<br />
storage or retrieval system without<br />
the prior written permission of the<br />
copyright owner, unless such copying<br />
is expressly permitted by federal<br />
copyright law. Davis is not authorized<br />
to grant permission for further<br />
uses of copyrighted selections or images<br />
reprinted in this text without the<br />
permission of their owners. Permission<br />
must be obtained from the individual<br />
copyright owners as identified<br />
herein. Address requests for permission<br />
to make copies of Davis material<br />
to Permissions, Davis Publications,<br />
Inc., 50 Portland Street,<br />
Worcester, MA 01608.<br />
Editor: Claire Mowbray Golding<br />
Design: Greta D. Sibley<br />
Printed in the United States of<br />
America<br />
Library of Congress Catalog Card<br />
Number: 93-74644<br />
ISBN: 0-87192-283-5<br />
1098 765<br />
Cover: Student photograph by Leah<br />
Gendler.
Contents<br />
7 Introduction<br />
Part 1 Getting Started<br />
11 Chapter 1 From Blurs to Big Business<br />
History • Photographic Careers<br />
Part 2 Elements of Composition<br />
35 Chapter 2 Tools<br />
Manual or Automatic? • The Camera, Inside & Out • Exercises: Testing the Shutter & Aperture<br />
• Loading Film<br />
51 Chapter 3 What is Composition?<br />
Snapshots vs. Photographs • Structure, Balance, Dynamics • Exercises: Mat Frame • Cropping<br />
67 Chapter 4 Developing A Critical Eye<br />
Critique Session • Evaluating a Print • Exercise: Sample Crit<br />
83 Chapter 5 Point of Departure (f!6 at 1/125)<br />
Starting Simply • Doing it Right<br />
87 Chapter 6 Line<br />
Pattern, Structure, Direction • Exercise: Pattern<br />
95 Chapter 7 Texture<br />
Expressing the "Feel" • Exercise: Leaves<br />
103 Chapter 8 Shape<br />
Mass, Proportion & Relation • Using Negative Space * Exercise: Circles & Ovals<br />
113 Chapter 9 Light<br />
Controlling Exposure • Information & Mood • Using a Light Meter • Other Functions of Light<br />
• Depth of Field * Exercise: Bracketing<br />
129 Chapter 10 Motion<br />
The Science of Blurs • Stop and Co • Exercise: Blurred Movement<br />
137 Chapter 11 Perspective<br />
Lenses • Different Ways of Seeing • A Point of View • Exercise: A Point of View
Part 3 People, Places & Things: Exercises & Examples<br />
151 Chapter 12 Things<br />
Exercises: Bicycle • Hubcaps & Taillights • Eggs • Object & Its Shadow • Bottles & Classes • Water<br />
• Old Things<br />
167 Chapter 13 Places<br />
Exercises: Landscape • Architecture & Environment • Neighborhoods • Zoo/Farm • Store Windows<br />
* Construction Sites<br />
181 Chapter 14 People<br />
Exercises: Hands • Elders • Children • Soft-Light Portrait • Side-Lit Portrait • Prop Portrait • Detail<br />
Portrait • Mood Portrait<br />
197 Chapter 15 Putting It All Together<br />
Exercises: Fairs • Open Markets • Rain • Playgrounds • Sports Events<br />
209 Chapter 16 Breaking the Rules<br />
Exercises: Night • Monotone • Silhouettes • Grain and Diffusion • Double Exposure • Photo-Copy<br />
Photos • Panel Panorama • Text and Image<br />
Appendixes<br />
227 Appendix 1 Processing<br />
Processing Film • Printing • Manipulation<br />
243 Appendix 2 Color<br />
From B&W to Color • Technical Considerations<br />
253 Appendix 3 Manipulation & Presentation<br />
Presentation * Manipulation<br />
265 Appendix 4 Advanced Techniques<br />
Tools<br />
272 Mat Frame (template)<br />
273 Cropping L's (template)<br />
275 Bibliography<br />
279 Glossary<br />
281 Index<br />
287 Acknowledgments<br />
6 The Photographic Eye
P<br />
hotography is both an art<br />
and a science. As an art, it<br />
expresses a personal vision.<br />
As a science, it relies on technology.<br />
This double nature is not unique to<br />
photography. Every kind of creative<br />
expression —such as music, dance or<br />
painting —has both a purely artistic<br />
side and a more scientific or techological<br />
side as well. For example,<br />
paints are a kind of technology, and<br />
using them well involves a considrable<br />
amount of technical skill. The<br />
main difference between photogaphy<br />
and more traditional visual arts, such<br />
as painting, is the complexity of its<br />
technology.<br />
In any of the arts, the first step<br />
toward excellence is mastering techique<br />
— learning to use a specific techology<br />
skillfully and effectively. In<br />
photography, this means that you<br />
must learn to control the camera and<br />
darkroom equipment, rather than letting<br />
them control you.<br />
No artist, however creative, can<br />
produce a masterpiece without a<br />
sound basis in technique. On the<br />
other hand, no amount of technical<br />
skill can make up for a lack of artistic<br />
vision. Both are essential. The goal<br />
of any artist is to use good technique<br />
creatively.<br />
Simply speaking, a camera is a<br />
machine that produces a twodimensional<br />
(flat) copy of a three-<br />
dimensional scene. The process by<br />
which this is done may seem like<br />
magic. (In fact, when cameras were<br />
first introduced, many people all over<br />
the world thought that they were<br />
magic.) Fundamentally, however,<br />
there's no magic in the camera. It's<br />
just a box with a hole in it. You<br />
supply the magic. When you, the<br />
photographer, use a camera creatively,<br />
it changes from a simple,<br />
mechanical machine into an artist's<br />
tool. Instead of making random<br />
copies of things, it begins to say<br />
something about them.<br />
Here are some of the technical<br />
questions a photographer must<br />
answer for every photograph: How<br />
will the lighting affect the clarity and<br />
mood of the photograph? How fast<br />
should the shutter speed be? How<br />
large a lens opening should be used?<br />
What should be in focus? What<br />
belongs in the frame, and what<br />
doesn't? What lens should be used?<br />
All these factors influence each<br />
other, and they all affect the final<br />
photograph. A photograph is "successful"—in<br />
the technical sense —<br />
when these factors all work well<br />
together and are combined with correct<br />
darkroom procedures. When a<br />
creative composition is added, the<br />
photograph becomes aesthetically<br />
successfully as well.<br />
Eventually, you will learn how to<br />
Introduction<br />
control each of these factors to<br />
achieve the effect you want. But it<br />
will take time. As you may already<br />
know, it's often hard to keep all of<br />
them in mind every time you take a<br />
picture.<br />
Fortunately, it is possible to begin<br />
more simply. This book is designed<br />
to help you do that. It begins with a<br />
brief summary of photography's<br />
past, present and future, including a<br />
discussion of photography careers.<br />
This is followed by an introduction<br />
to the camera itself. Chapters 3 and<br />
4 provide a set of guidelines for composing<br />
and evaluating photographs.<br />
Chapter 5 explains a simple way to<br />
start producing correctly exposed<br />
photographs. As soon as you get that<br />
basic background behind you, you<br />
will begin your first photograph<br />
assignments. Chapters 6 through 11<br />
deal with specific "elements" of<br />
photography. At the end of these<br />
chapters are exercises that will help<br />
you learn to recognize and use each<br />
element discussed.<br />
The remainder of the book is composed<br />
of additional exercises (with<br />
examples) and an Appendix, covering<br />
most of the technical information<br />
(including a section on color photography).<br />
Finally, there's a glossary to<br />
clarify any confusing terminology<br />
and a bibliography to help you locate<br />
more detailed information.<br />
7
part 1 Getting Started<br />
Student photograph by Edward Maresh.<br />
9
Dorothea Lange, Migrant Mother, Nipomo, California, 1936. Gelatin silver print. Library of Congress,<br />
Washington, D.C.
chapter 1<br />
S<br />
urprisingly few new art<br />
forms have been invented in<br />
I the course of recorded history.<br />
Depending on how such terms<br />
as "art" and "new" are defined, the<br />
novel as a form of literature may<br />
qualify, as may rock 'n' roll and<br />
other kinds of electric and electronic<br />
music. More recent candidates include<br />
computer graphics and the<br />
current wave of digital creations<br />
known as multi-media.<br />
One form that certainly qualifies<br />
is photography. From its beginnings<br />
as a technological curiosity, it has<br />
grown into one of the most important<br />
influences in our society and<br />
culture. Every day, we encounter<br />
hundreds of images produced with<br />
cameras and film. We learn about<br />
the latest fashion trends from photographs<br />
— and about the latest war or<br />
famine. We also learn about the remarkable<br />
planet on which we live<br />
and about the people with whom we<br />
share it.<br />
HISTORY<br />
There is no single correct answer to<br />
the question of how and when photography<br />
began. No one person can<br />
be credited with inventing it. Instead,<br />
it emerged through centuries<br />
of tinkering.<br />
The first printed photographs were<br />
made between 1816 and 1840. The rhe<br />
first recorded discovery that certain ain<br />
chemicals turned black when exposed<br />
to light was made in 1725. The basic<br />
design of the cameras we use today<br />
has been in use since the 1500s. The<br />
Chinese figured it out even longer ago<br />
than that — as early as the fourth century.<br />
So, photography is between<br />
1,500 and 150 years old.<br />
Prelude<br />
The first stage of photography's<br />
evolution in Europe was the camera<br />
obscura, which is Latin for "dark<br />
chamber" (camera = chamber or<br />
room; obscura = dark). The camera<br />
obscura was a room, or a small building,<br />
with no windows. One tiny hole,<br />
fitted with a lens, projected images<br />
from outside the room onto the far<br />
wall inside it.<br />
The image was upside down and<br />
not generally very clear, but it was<br />
good enough to become a useful tool<br />
for artists. The projected image could<br />
be traced, providing an accurate<br />
sketch, which might then be developed<br />
into a painting. Portable versions<br />
of the camera obscura were<br />
developed by the 1660s. The camera<br />
existed, but photography hadn't even<br />
been imagined yet.<br />
In 1725, a German professor of<br />
anatomy, Johann Heinrich Schulze,<br />
attempted to produce a phosphores-<br />
From Blurs to<br />
Big Business<br />
cent stone (one that would glow in the<br />
dark). He mixed powdered chalk into<br />
a nitric acid solution and was surprised<br />
to discover that the mixture<br />
turned purple in sunlight. After investigating,<br />
he discovered that his experiment<br />
had been contaminated with<br />
silver salt (silver chloride) and that<br />
this was causing the reaction to light.<br />
Schulze was curious enough about<br />
this phenomenon to experiment with<br />
it. He covered bottles of his mixture<br />
with stencils so the light would<br />
"print" letters onto it, but the letters<br />
would disintegrate as soon as the mixture<br />
was disturbed. Evidently, he<br />
never thought that his discovery<br />
might have any practical application.<br />
Early Prints<br />
In 1777, a Swedish chemist, Carl<br />
Wilhelm Scheele, repeated Schulze's<br />
experiments. He also discovered that<br />
ammonia would dissolve the silver<br />
chloride and leave the image intact.<br />
With this second discovery, the basic<br />
chemistry of photography (exposing<br />
silver chloride to produce an image<br />
and "fixing" it with ammonia) was<br />
established, but —again —what it<br />
might lead to was not recognized.<br />
Forty years later, the plot began to<br />
thicken. A number of people began<br />
trying to produce a photographic<br />
image on paper. In France, Joseph<br />
Nicephore Niepce developed an<br />
11
Joseph Nicephore Niepce, world's first permanent camera image. Courtesy Gernsheim Collection, Harry Ransom<br />
Humanities Research Center, The University of Texas at Austin.<br />
emulsion (a light-sensitive varnish)<br />
out of bitumen of Judea, a kind of<br />
asphalt. Instead of turning black, this<br />
material is hardened by light. So, to<br />
produce an image, Niepce coated a<br />
glass or pewter plate with his emulsion,<br />
exposed it to light and then<br />
washed the plate with solvents. The<br />
solvents dissolved the unexposed (and<br />
still soft) emulsion, producing a<br />
print: the world's first permanent<br />
camera image. It was only some blurs<br />
of light and dark, and the exposure<br />
reportedly took eight hours, but it<br />
was a real image.<br />
Meanwhile, a painter in Paris<br />
12 The Photographic Eye<br />
named Louis Jacques Mande Daguerre<br />
was also trying to produce a<br />
camera image. He got in touch with<br />
Niepce and the two worked together<br />
on the problem. Niepce died, poor<br />
and discouraged, a few years later,<br />
but Daguerre continued (with<br />
Niepce's son Isadore as his new<br />
partner).<br />
Daguerre was convinced that silver<br />
was the key to producing a better image<br />
than Niepce's asphalt prints. In<br />
1835, his conviction paid off. He<br />
discovered that if a silver plate were<br />
iodized (treated with iodine), exposed<br />
first to light and then to mercury<br />
vapor, and finally "fixed" with a salt<br />
solution, then a visible, permanent<br />
image would result. This discovery<br />
formed the basis for the first photographic<br />
process to be used outside of<br />
a laboratory: the daguerreotype.<br />
In England, William Henry Fox<br />
Talbot was also experimenting with<br />
camera images. By 1835 he too had<br />
succeeded in producing a number of<br />
photographs. With his process, the<br />
first exposure produced a negative<br />
image on paper treated with silver<br />
compounds. The exposed paper was<br />
then placed over a second sheet of<br />
treated paper and exposed to a bright
light, producing a positive image on<br />
the second sheet.<br />
Thus, Talbot's process —called a<br />
calotype or talbotype —enabled<br />
photographers to make multiple<br />
copies of a single image. This was not<br />
possible with a daguerreotype, which<br />
produced a positive image directly on<br />
a metal plate. Because the calotype's<br />
image was transferred through a<br />
paper negative, however, it was not<br />
as clear as the daguerreotype.<br />
In 1851, another Englishman,<br />
Frederick Scott Archer, introduced<br />
the collodian wet-plate process,<br />
which offered the best of both<br />
worlds: a high-quality image and<br />
multiple copies. Talbot tried to claim<br />
credit and licensing rights for this new<br />
process as well. In 1854, the courts<br />
overruled him and followed Archer's<br />
wishes by making the process freely<br />
available to everyone.<br />
The collodian process, like the<br />
daguerreotype, was difficult to use.<br />
First, a clean glass plate had to be<br />
evenly coated with collodian (a substance<br />
similar to plastic and containing<br />
potassium iodide). While still<br />
damp, the plate had to be dipped into<br />
a silver nitrate solution, inserted into<br />
the camera and exposed. It was then<br />
developed immediately, and finally<br />
allowed to dry. If the plate dried<br />
before the process was complete, the<br />
emulsion would harden and the photograph<br />
would be ruined. It wasn't<br />
easy, but it worked.<br />
Photography Goes Public<br />
Photography, dominated by the collodian<br />
and daguerreotype processes,<br />
began to take off. Cameras were set<br />
up in studios and loaded onto carts<br />
to photograph portraits, landscapes<br />
and battles. Tourists collected inexpensive<br />
prints of local attractions,<br />
called cartes-de-visite, by the<br />
thousands. The stereoscopic camera<br />
(which produced a three-dimensional<br />
effect by combining two images) was<br />
introduced in 1849. By the 1860s, no<br />
parlor in America was considered<br />
complete without a stereo viewer and<br />
a stack of slides to entertain guests.<br />
Photography had more serious<br />
uses as well. As early as the 1850s,<br />
books of photographs were published<br />
showing the harsh conditions of life<br />
in the streets, factories, mines and<br />
slums of England and the United<br />
States. Lewis Mine, a sociologist,<br />
produced powerful photographs of<br />
children who worked long hours in<br />
Julia Margaret Cameron, Alfred<br />
Tennyson with his sons Hallam<br />
and Lionel, 1865-69. Albumen<br />
print, W/2 x 8>/4" (27 x 22 cm).<br />
Gift of David Bakalar, 1977.<br />
Courtesy Museum of Fine Arts,<br />
Boston.<br />
From Blurs to Big Business 13
Lewis Mine, Doffer Girl in New<br />
England Mill, c 1910.<br />
14 The Photographic Eye<br />
textile mills and other industries. His<br />
work helped to bring about new laws<br />
to protect children's rights.<br />
At the start of the Civil War, a successful<br />
portrait photographer named<br />
Mathew Brady asked President Lincoln<br />
for permission to carry his<br />
cameras onto the battlefields. Permission<br />
was granted, and Brady and<br />
his staff compiled a remarkable<br />
record of that tragic period of<br />
American history. Like many of photography's<br />
pioneers, he paid for the<br />
project almost entirely by himself and<br />
died penniless as a result.<br />
In the 1880s, Eadweard Muybridge<br />
invented a device called a zoopraxiscope<br />
which produced a series of images<br />
of a moving subject. It is said<br />
that he did so to settle a bet as to<br />
whether or not running horses lifted<br />
all four hooves off the ground at one<br />
time. By photographing a horse with<br />
his device, he proved that they do. He<br />
also contributed tremendously to our<br />
understanding of how animals (and<br />
humans) move.<br />
These and other similar uses of<br />
photography often achieved a high<br />
degree of aesthetic quality —a high<br />
degree of art. Their primary purposes,<br />
however, were practical: to<br />
promote social reform, record historical<br />
events and aid scientific<br />
investigations.
Mathew Brady, Magazine in<br />
Battery Rodgers, 1863. Library of<br />
Congress, Washington, D.C.<br />
From Blurs to Big Business 15
Eadweard Muybridge, Attitudes of Animals in Motion, c 1881.<br />
But Is It Art?<br />
At the same time, another group of<br />
photographers were dealing with the<br />
purely aesthetic issue of how photography<br />
relates to the traditional arts,<br />
particularly painting. Is photography<br />
an art at all? If so, how should it be<br />
used? What should "art photography"<br />
look like? These same questions<br />
continue to provoke discussion<br />
and argument even today. Photography<br />
is still defining itself.<br />
By the 1850s, two opposing factions<br />
of artist-photographers had<br />
been established. The Pictorialists,<br />
led by Oscar Rejlander and Henry<br />
Peach Robinson, believed that a<br />
photograph should look as much like<br />
a painting as possible. Their idea of<br />
16 The Photographic Eye<br />
what a painting should look like was<br />
heavily influenced by the Romanticist<br />
painters (such as Delacroix). The Pictorialist<br />
photographers, like the<br />
Romanticist painters, believed that an<br />
artist should improve upon nature by<br />
using it to express noble ideas. Both<br />
favored elaborate illustrations of<br />
scenes from ancient mythology.<br />
The other faction called themselves<br />
Naturalists. They were led by Peter<br />
Henry Emerson and George Davison.<br />
The Naturalists believed that a<br />
photograph should capture nature's<br />
own truth. They preferred the Barbizon<br />
painters, who took their easels<br />
out to the forests, fields and streams,<br />
and painted them directly. The Naturalist<br />
photographers did the same<br />
with their cameras, specializing in<br />
peaceful scenes of country life. They<br />
were also increasingly fond of using<br />
soft focus (blurred edges) in their<br />
photographs.<br />
Despite the differences between<br />
them, both the Pictorialists and the<br />
Naturalists believed that a work of<br />
art ought to express a "correct sentiment"<br />
and that it ought to be decorative—pretty.<br />
This is what most set<br />
them apart from the "practical" photographers,<br />
like Brady and Muybridge,<br />
whose work showed the hard<br />
edges of reality, with all its flaws.
Peter Henry Emerson, Gunner Working Up to Fowl, c 1886.<br />
New Tools & Processes<br />
In the late 1880s, flexible film appeared<br />
for the first time, replacing<br />
clumsy and heavy glass plates. By the<br />
1890s, George Eastman had introduced<br />
the Kodak camera, the first<br />
that was reasonably easy to use. The<br />
camera itself was simple: a box with<br />
a lens, a cord to cock the shutter, a<br />
button to release it and a crank to<br />
wind the film. What made this<br />
camera special was that it came<br />
loaded with enough film for 100<br />
photographs. When the film was<br />
used up, the entire camera was<br />
returned to the Eastman Kodak<br />
Company. The film was then developed<br />
and printed, and the camera<br />
was reloaded and returned, ready for<br />
another 100 photos. Eastman's<br />
slogan was "You press the button; we<br />
do the rest." (The name "Kodak," incidentally,<br />
doesn't mean anything.<br />
Eastman selected it because he felt it<br />
would be easy for people to<br />
remember.)<br />
In 1925, Leica introduced its "miniature"<br />
camera, the first to use 35mm<br />
film. Though not quite as simple to<br />
use as the earlier Kodak model, it was<br />
technically more sophisticated and<br />
quite a bit smaller As a result,<br />
amateur photography became an international<br />
passion.<br />
Other technical advances continued<br />
to appear all the time. The<br />
first commercial color film, Autochrome,<br />
hit the market in 1907.<br />
Autochrome produced transparencies<br />
(slides) that could not be enlarged<br />
very much without showing the grain<br />
of the starch dyes used to create the<br />
image. It also took fifty times as long<br />
to expose as black-and-white film.<br />
Then, in 1935, Kodak introduced<br />
Kodachrome, an improved slide film,<br />
followed in 1941 by Kodacolor, for<br />
making color prints. The family<br />
photograph album, which had existed<br />
for only 100 years, was now both<br />
widespread and increasingly in full<br />
color.<br />
From Blurs to Big Business 17
FOCAL POINT: Alfred Stieglitz, 1864-1946<br />
Alfred Stieglitz was in many ways the<br />
first "modern" photographer.<br />
Though his early photographs were<br />
carefully manipulated to imitate<br />
paintings, he soon recognized that<br />
photography was an art in its own<br />
right —and deserved to be treated as<br />
one. He saw the need to free photography<br />
from the conventions and limitations<br />
of painting. Consequently,<br />
Stieglitz promoted what came to be<br />
known as "straight" photography —<br />
making prints with little or no cropping,<br />
retouching or other alteration.<br />
He was a founding member and<br />
leader of the "Photo Secession," a<br />
group of photographers who were<br />
determined to break away from photography's<br />
past and to chart its<br />
future. Stieglitz was editor and<br />
publisher of the group's magazine,<br />
Camera Work, the first publication<br />
to deal seriously with photography as<br />
an independent art form. He worked<br />
with Edward Steichen to establish<br />
"Gallery 291" in New York City,<br />
which exhibited contemporary photographs<br />
along with paintings by<br />
Picasso, Matisse and Georgia<br />
O'Keefe (whom Stieglitz later<br />
married).<br />
When photography was first invented,<br />
it was a scientific novelty.<br />
Soon, it evolved into an excellent<br />
record-keeping tool. Photographers<br />
could be hired to make a lasting<br />
record of a person, place or event. By<br />
the late 1800s, photographers were<br />
striving to elevate their craft into a<br />
recognized art. They did this by imitating<br />
the content and visual effects<br />
of paintings. Stieglitz'great achievement<br />
was to bring photography full<br />
circle: he merged its artistic potential<br />
with its ability to produce a factual<br />
18 The Photographic Eye<br />
Alfred Stieglitz, The Rag Picker, New York, 1895.<br />
record. He returned to the straightforward<br />
approach of the early<br />
photographers, but he did so with the<br />
insight and confidence of a true<br />
artist.<br />
Stieglitz was among the first<br />
photographers to produce work that,<br />
even today, does not look "dated."<br />
Though clothing and architectural<br />
styles have changed considerably<br />
since his time, his best work still looks<br />
thoroughly modern. The main reason<br />
for this is that he used the camera as<br />
we use it today —as a familiar tool for<br />
exploring reality.<br />
The attitudes and interests that<br />
Stieglitz brought to photography can<br />
be traced to his upbringing. He was<br />
born in Hoboken, New Jersey, the<br />
son of German immigrants. He originally<br />
intended to become a mechanical<br />
engineer. While in Berlin studying<br />
for this purpose, he happened to<br />
see a camera in a store window. He<br />
bought it and soon decided it was<br />
more interesting than engineering.
Alfred Stieglitz, The 'Flat Iron', 1902.<br />
When he returned to the U.S. at the<br />
age of 26, he was delighted to find<br />
that photography was extremely popular.<br />
But he was also dismayed by the<br />
lack of publications and galleries promoting<br />
it as an art. For the next 56<br />
years, he devoted himself to correcting<br />
this situation. Along the way, he<br />
produced some of the finest photographs<br />
in history.<br />
Alfred Stieglitz, Sun Rays-Paula-Berlin, 1889.
FOCAL POINT: James Van Der Zee, 1886-1983<br />
James Van Der Zee, Couple in Raccoon Coats, 1932. Courtesy Donna Van Der Zee.<br />
James Van Der Zee was unique in<br />
many ways. First and foremost, he<br />
was perhaps the most accomplished<br />
black photographer in history, and is<br />
certainly the best known today. His<br />
record of Harlem in the 1920s is unsurpassed,<br />
in both quantity and<br />
quality. But he was unique in other<br />
ways as well.<br />
Stylistically, he employed both<br />
stark realism and dreamy romanticism.<br />
Technically, he produced<br />
v.<br />
20 The Photographic Eye<br />
"straight" prints in the style of the<br />
Photo Secessionists (Stieglitz,<br />
Weston, Steichen, etc.) as well as<br />
heavily manipulated images, which<br />
the Photo Secessionists had rejected.<br />
Moreover, he used both approaches<br />
interchangeably, according to his interpretation<br />
of a particular scene.<br />
One day he might do a straight outdoor<br />
portrait of someone on the<br />
street. And the next day he might<br />
pose a newly-wed couple in his<br />
studio, and produce a doubleexposed<br />
print showing their yet-to-beborn<br />
child as a ghost beside them.<br />
Van Der Zee's photographic career<br />
was far from easy. Though he<br />
became interested in photography at<br />
the age of 14 (when he purchased a<br />
mail-order camera and darkroom<br />
kit), he was 30 before he was able to<br />
earn a living at it. In between, he<br />
worked as a waiter, elevator operator<br />
and even as a violinist in a dance or-
chestra. His first photographic job,<br />
in 1914, was as a darkroom assistant<br />
in a department store in New York<br />
City. Two years later, he opened his<br />
own studio in Harlem. Though he<br />
often had to change its location, Van<br />
Der Zee kept his studio in business<br />
until 1969.<br />
In addition to skill and creativity,<br />
he was blessed with good timing.<br />
Black culture was flourishing in<br />
Harlem during the 1920s. Duke Ellington<br />
and others were redefining<br />
American music. Adam Clayton<br />
Powell, Langston Hughes, Countee<br />
Cullen and Marcus Garvey were helping<br />
to build a new black identity. And<br />
James Van Der Zee was the official<br />
and unofficial photographer for all<br />
of it. He photographed proud black<br />
couples in the streets of Harlem and<br />
in elegant clubs. Celebrities and "ordinary<br />
people" posed in his studio.<br />
He photographed weddings and<br />
funerals. All together, he compiled<br />
some 75,000 glass plates, negatives<br />
and prints. All of it revealing a world<br />
that was all but ignored by the betterknown<br />
photographers of that time.<br />
Van Der Zee received virtually no<br />
recognition outside of Harlem until<br />
1967. At that time, he was featured<br />
in an exhibit, entitled "Harlem on My<br />
Mind," at New York's Metropolitan<br />
Museum of Art. For the last 14 years<br />
of his life, his photography was<br />
widely exhibited, published and<br />
praised. He died at the age of 97,<br />
while in Washington, D.C. to receive<br />
an honorary degree from Howard<br />
University.<br />
Eugene Atget, L'Escalier de L'Hotel Charron, 7900.<br />
A New Breed<br />
Photography was coming into its<br />
own, both as an art and as a business.<br />
Alfred Steiglitz united photography<br />
and painting by opening "Gallery<br />
291," which exhibited new work in<br />
either medium. In his own photography<br />
and in his critical judgment<br />
Steiglitz promoted a lively realism<br />
that eventually became the standard<br />
for art photography. From 1902 to<br />
1917, he published Camera Work, the<br />
first magazine devoted to artistic ap-<br />
proaches to photography.<br />
In Europe, Andre Kertesz, Eugene<br />
Atget, Brassai, and Henri Carder-<br />
Bresson were among the most notable<br />
of the new wave of artist<br />
photographers. They each devoted<br />
themselves to capturing life as it<br />
really was, in the boulevards and<br />
back alleys and country lanes of<br />
Europe. Yet each did so with a<br />
distinct and original style, a unique<br />
"way of seeing." They saw that<br />
photography was a new and indepen-<br />
From Blurs to Big Business 21
Edward Steichen, Gloria Swanson,<br />
1924.<br />
dent art, not merely a cheap imitation<br />
of painting. Because of this, they —<br />
along with Steiglitz and other<br />
American peers — may be thought of<br />
as the first modern photographers.<br />
More practical applications of<br />
photography also continued. One of<br />
the most notable examples was a<br />
photographic survey, begun in 1935,<br />
of conditions during the Great<br />
Depression. Dorothea Lange, Walker<br />
Evans and other first-rate photographers<br />
were hired by this project<br />
by the U.S. government's Farm<br />
Security Administration and compiled<br />
hundreds of photographs that<br />
rank among the best ever produced.<br />
The use of photographs in publications,<br />
a novelty as recently as 1900,<br />
was expanding rapidly. Life magazine<br />
started in 1936 and began a whole<br />
new kind of publishing: photojournalism.<br />
Alfred Eisenstat,<br />
Margaret Bourke-White and other<br />
photographers on Life's staff quickly<br />
became famous as they recorded the<br />
world's events with their cameras.<br />
By the end of the 1930s, all the<br />
basic ingredients that continue to<br />
define photography were in place:<br />
Photography was increasingly ac-<br />
1937<br />
The SLR<br />
(single lens<br />
reflex)<br />
camera<br />
introduced to<br />
the U.S. by<br />
Exacta.<br />
22 The Photographic Eye<br />
1938<br />
Automatic<br />
exposure<br />
initiated by<br />
Kodak with<br />
its 6-20<br />
camera.<br />
1939<br />
Electronic<br />
flash<br />
developed by<br />
Dr. Harold<br />
Edgerton.<br />
1947<br />
First<br />
Polaroid<br />
camera<br />
developed by<br />
Edwin Land.<br />
1954<br />
First<br />
high-speed<br />
film, Tri-X,<br />
comes onto<br />
market.
1959<br />
Development<br />
of first<br />
zoom lens,<br />
the Zoomar<br />
36-82.<br />
1966<br />
Konica<br />
introduces<br />
first<br />
professional<br />
quality<br />
automatic<br />
exposure<br />
camera.<br />
1972<br />
Polaroid<br />
adds<br />
color<br />
toils<br />
instant<br />
cameras.<br />
1985<br />
Minolta<br />
introduces<br />
the first<br />
professional<br />
quality<br />
automatic<br />
focus camera,<br />
the Maxxum.<br />
Yousef Karsh, Ethiopian Bride,<br />
1963. Courtesy Woodfin Camp<br />
and Associates.<br />
cepted as an art in its own right.<br />
Photojournalists were a major source<br />
of information and insight for the<br />
general public (a role that has since<br />
been largely taken over by television<br />
reporters). Advertising had begun<br />
using photography to catch attention<br />
or communicate a message. Portable<br />
cameras had made snapshots a national<br />
hobby.<br />
Where Now?<br />
The list of technical advances in<br />
photography continues to get longer<br />
and longer (see the photographic time<br />
line), and the ranks of great<br />
photographers has expanded steadily<br />
as well. Edward Steichen, Minor<br />
White, Sebastiao Salgado, Edward<br />
Weston, Ansel Adams, Diane Arbus,<br />
Ernst Haas, Eugene Richards...the list<br />
is long and subject to fierce debate.<br />
Photography is still a young art.<br />
Painting, sculpture, writing, dance,<br />
acting and music have all been<br />
around for thousands of years. Even<br />
they continue to change at an often<br />
alarming rate. This is all the more<br />
true of photography, which has<br />
1987<br />
Canon<br />
debuts first<br />
"Commercial<br />
Still Video"<br />
system.<br />
1991<br />
Kodak<br />
launches<br />
Photo CD<br />
system and<br />
digital<br />
camera.<br />
From Blurs to Big Business 23
FOCAL POINT: Manuel Alvarez Bravo, 1902-<br />
Throughout the world, photographers<br />
have used the camera to<br />
observe, interpret and record their<br />
own cultures and environments. In<br />
the process, some have also achieved<br />
unique styles that are particularly<br />
appropriate to specific times and<br />
places. Manuel Alvarez Bravo is<br />
among a select group of photographers<br />
who have gone a step<br />
further —discovering a way of seeing<br />
that seems to express the spirit of an<br />
entire culture.<br />
Great works of art are rarely<br />
created in a vacuum. Instead, even<br />
the most gifted artist draws on a<br />
lifetime of experiences and impressions.<br />
The work of other artists is<br />
almost always an important influence.<br />
Additional influences may<br />
include one's level of wealth or<br />
poverty; the personalities and values<br />
of friends and family; the climate,<br />
colors, sounds and rituals that are<br />
part of daily life. By combining a<br />
variety of local and international influences,<br />
some artists are able to<br />
create art that breaks through<br />
cultural barriers without losing a<br />
sense of cultural roots. Bravo is one<br />
photographer who has done this.<br />
In his case, the culture is that of<br />
Mexico. He was born in Mexico City,<br />
and has continued to be based there<br />
throughout his life. His father and<br />
grandfather were both artists, one a<br />
painter and the other a photographer.<br />
Before becoming interested in photography,<br />
Bravo studied literature,<br />
music and painting, beginning in<br />
1917. In 1922, he began experimenting<br />
with photography. By 1926, he<br />
was using a camera to produce<br />
abstract images of folded paper. By<br />
the early 1930's he was among the<br />
24 The Photographic Eye<br />
Manuel Alvarez Bravo, Retrato de lo Eterno (Portrait of the Eternal),<br />
1935. Courtesy The Witkin Gallery, New York.<br />
leaders of a creative surge in Mexican<br />
art.<br />
His first solo exhibit was held in<br />
Mexico City in 1932. Soon after, he<br />
became acquainted with Paul Strand,<br />
Henri Carder-Bresson, Walker Evans<br />
and other photographers who were<br />
gaining international attention.<br />
Bravo also met Andre Breton, who<br />
is credited with creating the Surrealist<br />
style of painting. Surrealism, which<br />
employs the symbols and imagery of<br />
dreams, became a major influence on<br />
Bravo's photographic style.<br />
In his best work, Bravo combines<br />
the technical skill and confidence of<br />
photographers like Strand and<br />
Evans; the ability to capture a<br />
"decisive moment" that is characteristic<br />
of Carder-Bresson; and the<br />
often disturbing dreamlike qualities<br />
of Surrealist paintings. To this mix of<br />
artistic influences, he adds a deep and<br />
proud understanding of Mexican culture<br />
and a keen awareness of light<br />
and mood. The result is a vision that<br />
is both highly private and universally<br />
accessible.
Minor White, Moon and Wall Encrustations, 1964.<br />
barely passed its first century of widespread<br />
use.<br />
With most of the traditional arts,<br />
change has primarily been a matter<br />
of style. Michaelangelo and Picasso<br />
used essentially the same materials<br />
and techniques to produce vastly different<br />
results. Writers may use computers<br />
now, rather than quill pens, but<br />
the process of writing hasn't really<br />
changed very much since Shakespeare's<br />
day. Writing styles, however,<br />
have changed enormously.<br />
In the case of photography, almost<br />
the opposite is now true: Photography's<br />
essential nature (what it is<br />
and how it works) is in the midst of<br />
radical transformation — a technological<br />
revolution. Photography itself<br />
is mutating into something new<br />
and strange and unpredictable.<br />
Compared to that, stylistic changes<br />
hardly seem to matter.<br />
What is actually happening is that<br />
photography (along with computer<br />
graphics, electronic music and other<br />
technology-based arts) is moving<br />
away from the traditional, "manual"<br />
arts (such as painting or classical<br />
music). As a result, we are discovering<br />
entirely new ideas of how art may<br />
be created and experienced.<br />
The old distinctions between one<br />
form of art and another are breaking<br />
down. Words, images and music are<br />
all beginning to merge. The music<br />
videos on MTV are one typical example<br />
of this trend. They aren't simply<br />
songs and they aren't quite<br />
movies. They are a new hybrid: music<br />
and film merging into a new form<br />
of creative expression. Some of them<br />
tell stories. Some are more like minidocumentaries.<br />
Some resemble the<br />
song-and-dance numbers of a<br />
Broadway musical. Similarly, it is increasingly<br />
difficult to define the difference<br />
between a painting and a<br />
From Blurs to Big Business 25
photograph, or even between a photograph<br />
and a poem.<br />
In addition, all of the arts are becoming<br />
more participatory. In the<br />
very near future, it may no longer be<br />
standard procedure for an artist to<br />
create some specific "thing" - a<br />
photograph or a symphony — which<br />
others simply receive by looking or<br />
listening. Instead, each individual<br />
viewer or listener will have the power<br />
to edit, combine and transform an<br />
enormous array of images and<br />
sounds. Your photograph will be raw<br />
material which you may manipulate<br />
in any way you please, and to which<br />
others may then add their own interpretations<br />
— and it will all be done<br />
by computer. It is far too early to tell<br />
if all of this is actually an improvement,<br />
but it is certainly a change.<br />
That is what's coming. But it isn't<br />
quite here yet.<br />
We are standing on the bridge between<br />
photography's past and its future.<br />
And so we are able to move<br />
back and forth between them. We<br />
can shoot a roll of film on Uncle<br />
Frank's old Pentax, make a print in a<br />
traditional darkroom and then reinterpret<br />
it on a copy machine — or<br />
scan it into a Mac and make it all<br />
look really weird. There is still a secure<br />
place for conventional art photography,<br />
and a wide open field for<br />
experimentation.<br />
We are at the end of an era — and<br />
at the start of a new one. This is a<br />
privileged place to be. Enjoy it.<br />
<strong>PHOTOGRAPHIC</strong><br />
CAREERS<br />
The number of people who earn a<br />
"living wage" from any art is always<br />
relatively small. Photography is certainly<br />
a case in point. Most photographers<br />
are hobbyists who take<br />
26 The Photographic Eye<br />
Wedding photography requires technical accuracy, good social skills and and<br />
the ability to quickly arrange natural poses for individuals and large groups.<br />
Photograph by Donald Butler.<br />
pictures for pleasure. Even many of<br />
the best-known art photographers<br />
pay their bills by doing commercial<br />
photography or other work on<br />
the side.<br />
Unfortunately, being "good" or<br />
even "the best" won't necessarily<br />
make any difference. Many excellent<br />
photographers have died penniless.<br />
At least a few have made good livings<br />
without having much skill or<br />
creativity. That's the way of all art —<br />
timing, luck and who you know are<br />
at least as important as mastering<br />
your craft.
Fortunately, however, commercial<br />
photography can be a very rewarding<br />
career or sideline. Everything from<br />
weddings to wars seems to require a<br />
photographic record. Most commercial<br />
products rely on photography for<br />
packaging and advertising. And there<br />
is even a steadily growing market for<br />
photographs as pure art — though it's<br />
not likely to make you rich.<br />
The basic categories of professional<br />
photographic work include:<br />
weddings and other social events,<br />
portraiture, journalism, product<br />
photography and fashion. Depending<br />
on the work you choose, the time you<br />
devote to it and your luck and skill,<br />
you could earn from a few hundred<br />
to over a thousand dollars a day.<br />
In each of these categories, there<br />
are two ways of working: staff and<br />
freelance. A staff photographer is<br />
just like any employee, receiving a<br />
salary and clocking regular hours. A<br />
freelance photographer is hired for<br />
specific jobs and is generally paid by<br />
the day. Freelancers tend to earn<br />
more than staff photographers for<br />
each day they work, but staff photographers<br />
work more steadily. In other<br />
words, staff photographers are less<br />
likely either to get rich or to go broke.<br />
Freelancers take more risks and have<br />
a better chance of making it big.<br />
Weddings and Portraits<br />
Probably the largest number of professional<br />
photographers are primarily<br />
devoted to photographing social<br />
events, especially weddings. The pay<br />
can be quite good —several hundred<br />
dollars per day. Many wedding photographers<br />
are represented by an<br />
agent who sets up photo assignments<br />
for them. Many work only a couple<br />
of days each week, generally weekends<br />
(when weddings are most commonly<br />
held). Wedding photographers<br />
must be able to produce consistently<br />
good results, since there's no chance<br />
for re-shooting if things get messed<br />
up. They must be especially good at<br />
Arnold Newman, Igor Stravinsky,<br />
1946.<br />
flash photography, since much of<br />
their work is done indoors on location.<br />
In addition, they must be skilled<br />
at interacting well with all sorts of<br />
people. By and large, wedding<br />
photography does not demand much<br />
artistry —most clients don't want art.<br />
It's a good line of work for anyone<br />
who enjoys the technical side of<br />
photography and who likes to<br />
socialize.<br />
Closely related to weddings and<br />
social events is portraiturephotographing<br />
a single person or<br />
small group. Whether it's for a<br />
passport photo or a prom portrait,<br />
everyone needs a photographer sometime.<br />
Virtually every town in the<br />
country has at least one studio for<br />
just these kinds of things. Here again,<br />
the main requirements are technical<br />
consistency —particularly in terms of<br />
studio lighting —and social grace.<br />
From Blurs to Big Business 27
Photojournalism<br />
Journalistic photography ranges<br />
from covering a fire on Elm Street for<br />
the local newspaper to traveling to<br />
Tahiti for a major magazine. Photojournalists<br />
must possess good instincts<br />
above all else. Sensing when<br />
a photo opportunity is about to occur<br />
and knowing how to handle it are<br />
of vital importance. Being a first-rate<br />
photo-technician is helpful . . . but<br />
not strictly essential.<br />
A more commercial field related to<br />
photojournalism is freelance location<br />
photography. Corporate annual<br />
reports, slide presentations, promotional<br />
brochures, in-house publications,<br />
trade magazines (Plumbers'<br />
Digest or New England Beverage<br />
Retailer, for example) all require<br />
professional-quality photography.<br />
Being able to handle any lighting or<br />
composition challenge quickly and<br />
accurately is the critical factor here.<br />
An ability to blend into the corporate<br />
environment is also essential.<br />
Razzle Dazzle<br />
At the top of the career heap financially<br />
are illustration, product, food<br />
and fashion photography. This is<br />
where knowing the right people and<br />
being in the right place at the right<br />
time are of critical importance. A<br />
flair for style helps too. You also<br />
have to be very good if you expect to<br />
have more than a brief career. The<br />
competition is stiff because the<br />
rewards are high. A top-notch product,<br />
food or fashion photographer<br />
will charge $2,000 or more per day.<br />
A comparable illustration photographer<br />
might earn the same amount<br />
for a single photograph. Nice work<br />
if you can get it.<br />
28 The Photographic Eye<br />
FOCAL POINT: Margaret Bourke-White<br />
Today we take photojournalism for<br />
granted. We expect our magazine articles<br />
to be illustrated with photographs<br />
that add insights and impact<br />
of their own. But, like photography<br />
itself, photojournalism had to be invented.<br />
One of the people who played<br />
a major role in inventing it was<br />
Margaret Bourke-White.<br />
While in college, Bourke-White<br />
discovered that she excelled at photography.<br />
After graduating from<br />
Cornell, she began working as a professional<br />
photographer. She was<br />
especially intrigued by the surge of<br />
technological developments at that<br />
time and used her camera to convey<br />
the power and beauty she saw in<br />
everything from clock parts to steel<br />
mills. From 1929 to 1933, she was an<br />
industrial photographer for Fortune<br />
magazine. Her work there was not<br />
limited to machine parts and construction<br />
projects, however. In 1934,<br />
she covered the drought known as the<br />
"Dust Bowl" that swept through the<br />
Great Plains, showing how that tragedy<br />
affected the lives of farmers and<br />
their families. This article was a milestone<br />
in photojournalism. Though<br />
other photographers, such as Lewis<br />
Hine, had done similar reporting on<br />
social issues, none had done so for a<br />
major magazine.<br />
After becoming a staff photographer<br />
for Life magazine in 1936,<br />
Bourke-White continued to cover<br />
both technological progress and<br />
human suffering. The very first issue<br />
of Life featured one of her photographs<br />
on the cover: a dramatic<br />
image of a massive dam construction<br />
project. She provided extensive<br />
coverage of World War II, most<br />
notably the horrors discovered when<br />
the Allies liberated the concentration<br />
camps. She photographed the grandeur<br />
and starvation of India in the<br />
late 1940s, black South African<br />
Miners in 1950, and the Korean War<br />
in 1952.<br />
By the mid-1950s, Bourke-White<br />
was suffering from Parkinson's<br />
Disease, which progressively reduces<br />
the body's ability to control its movements.<br />
She left the staff of Life in<br />
1969 and died two years later.<br />
Though she was neither a master<br />
stylist nor an exceptional technician,<br />
Bourke-White was among the first to<br />
clearly understand the camera's<br />
power to record "history in the making."<br />
She helped establish standards<br />
for commitment, concern and sheer<br />
energy that photojournalists have<br />
struggled to live up to ever since.
1904-71<br />
Margaret Bourke-White, Airship Akron, Winner Goodyear Zeppelin Race, 1931.<br />
From Blurs to Big Business 29
A flair for the exotic and a sophisticated sense of humor are important assets in fashion photography. Photograph by<br />
Bane Kapsu.<br />
30 The Photographic Eye
Variations<br />
Mixed in with these general categories<br />
are numerous photographic specialties:<br />
scientific, sports, underwater,<br />
travel, architectural, art reproduction,<br />
etc. Matching your skills and interests<br />
to one of these niches may be<br />
the most satisfying career path of all.<br />
By specializing in one particular<br />
aspect of photography, rather than<br />
competing in a broader category, you<br />
have a good chance of establishing a<br />
clear identity and of focusing in on<br />
a steady market. Word-of-mouth recommendation<br />
is always a photographer's<br />
best advertising. You stand<br />
to benefit most from it if you earn a<br />
good reputation for a specific set of<br />
skills.<br />
If you enjoy photographing buildings,<br />
for example, you can make a<br />
career of it, hiring yourself out to architectural<br />
and construction firms or<br />
to design magazines. If you're very<br />
precise and detail oriented, you might<br />
get into photographing art for<br />
museums. If you like flying, you<br />
might consider aerial photography. If<br />
you prefer swimming, consider<br />
underwater photography.<br />
There are career opportunities in<br />
photographic processing as well.<br />
Here again, developing a specific set<br />
of skills is recommended. Some photographers<br />
specialize in a photographic<br />
style that requires certain<br />
processes, such as antique style sepiatoned<br />
or hand-tinted prints. When<br />
someone needs that particular style<br />
for a magazine illustration or corporate<br />
annual report, a specialist will<br />
generally be selected. The same rule<br />
applies to those who offer processing<br />
services to other photographers.<br />
Retouchers, for example, are paid<br />
handsomely to fix mistakes or otherwise<br />
alter a photo's appearance.<br />
Skilled darkroom techicians, specializing<br />
in black and white or color, are<br />
highly regarded and well paid.<br />
Finally, there are many other jobs<br />
that don't require regular use of a<br />
camera or darkroom but can, nonetheless,<br />
keep a photographer "in<br />
touch." These include selling and<br />
repairing cameras, maintaining<br />
photographic libraries or stockagency<br />
files, curating in photography<br />
galleries or museums, or even helping<br />
to develop new designs, formulas<br />
and processes for cameras or film.<br />
Looking Ahead<br />
In virtually any photography-related<br />
field, the key to getting started is to<br />
put together a winning portfolio —<br />
an elegant, professional collection of<br />
your best work. Your portfolio will<br />
tell a prospective employer or client<br />
what you can do, so it should be of a<br />
consistently high standard — right<br />
down to the details of excellent print<br />
quality, good mounting technique<br />
and slick presentation. If you are<br />
fortunate enough to have some of<br />
your photographs published (by a local<br />
newspaper, for example, or even<br />
in a school publication) these -<br />
called tear sheets (as in a torn-out<br />
page) — should be included as well:<br />
Cut out the full page on which your<br />
photograph appears and mount it as<br />
you would a standard print, or slip it<br />
into a plastic sheet. (Use part of a<br />
page if the whole thing is too big to<br />
fit the size mat you're using for your<br />
prints, but be sure to include the running<br />
head or foot that indicates the<br />
name and date of the publication.)<br />
Your portfolio should also be tailored<br />
to the kind of work you're<br />
seeking. If you hope to be hired as a<br />
lab technician, emphasize print<br />
quality. If you want to cover local<br />
news events, include some good<br />
action shots. If advertising interests<br />
you, try to create some still-life photographs<br />
that have the "look-andfeel"<br />
of studio composition and<br />
lighting. If you'd like to pursue fashion<br />
photography, you might team up<br />
with a friend who aspires to a career<br />
in modeling — working together to<br />
produce some fashion shots that you<br />
both can use. And, of course, if you<br />
hope to sell your work as art, then<br />
your portfolio must show that you've<br />
attained a high level of skill and creativity.<br />
As you progress through this<br />
course, it is a good idea to keep your<br />
long-range goals in mind. It's never<br />
too early to begin preparing for<br />
them. Even if you have no interest in<br />
a photographic career, your portfolio<br />
is your own record of achievement.<br />
And you never know when it<br />
may come in handy, so you may as<br />
well do it right.<br />
Effective presentation (and attention<br />
to detail) is vitally important in<br />
any line of work. Mastering photographic<br />
technique and preparing a<br />
good portfolio will teach you valuable<br />
skills which will serve you well,<br />
no matter what career you ultimately<br />
choose.<br />
From Blurs to Big Business 31
part 2 Elements of Composition<br />
Student photograph by Michael Grassia.<br />
33
Student photograph.<br />
34 The Photographic Eye
chapter 2 Tools<br />
P<br />
hotographic technology is<br />
changing so fast that it is ut-<br />
I terly impossible to define<br />
the standard tools-of-the-trade with<br />
any degree of precision. Cameras<br />
now in use range from clumsy boxes<br />
with lots of knobs and dials to the<br />
latest high-tech whiz-bang contraptions<br />
which look like props from Star<br />
Trek. Photographic images can now<br />
be stored on an astonishing array of<br />
films — plus CDs, computer disks<br />
and video tape. By the time you read<br />
this, it is likely other new technologies<br />
will have appeared, promising<br />
even greater ease, efficiency and opportunities.<br />
This is all well and good, but there<br />
is also real value in understanding<br />
the basic principles of photography<br />
— and that is much easier to do with<br />
the old fashioned, manual approach.<br />
True, it does take more time<br />
to produce a photograph in this way.<br />
And potentially great shots can be<br />
missed while you fiddle with those<br />
knobs and dials. But there is a<br />
unique satisfaction in knowing exactly<br />
what your camera is doing and<br />
why, controlling it to achieve the effect<br />
you choose rather than merely<br />
pointing and shooting.<br />
So, it is perhaps fortunate that<br />
technological advances take some<br />
time to settle in and push aside the<br />
past. Just as there are times when<br />
If you choose your camera carefully and practice with it often, you'll soon<br />
learn to use it with very little effort or conscious thought. It will become<br />
simply an extension of eyes and hands—responsive, accurate and<br />
comfortable. (Student photograph by Trevor Bredenkamp.)<br />
writing with an antique fountain pen<br />
is infinitely preferable to tapping at a<br />
computer keyboard, there are benefits<br />
to cameras that lack the latest<br />
automation.<br />
The essential point to all this is<br />
that there's no need to worry if you<br />
can't afford to buy a slick new camera<br />
with all the bells and whistles, a<br />
stash of fancy lenses and a suitcase<br />
full of clever attachments and accessories.<br />
In fact, odds are that you will<br />
become a better photographer if you<br />
begin with a second-hand, secondrate<br />
old clunker that looks like an<br />
artifact from the Stone Age.<br />
Not everyone needs the same kind<br />
of tool —whether that tool is a<br />
camera or a musical instrument. A<br />
concert violinist may require the best<br />
35
violin money can buy, but a blues<br />
singer may make fine music with an<br />
old beat-up guitar. Similarly, some of<br />
the world's best photographers use<br />
the latest "high-tech" cameras; others<br />
use antiques held together with rubber<br />
bands and tape. The right choice<br />
for most of us is somewhere between<br />
these extremes.<br />
Like any tool, each camera has a<br />
"personality" —a mixture of opportunities<br />
and limitations that you control<br />
to express your personal vision.<br />
The goal in selecting a camera is to<br />
find one that does what you need it<br />
to do, no more and no less. In other<br />
words, the right camera for you is<br />
one with a "personality" that matches<br />
your own.<br />
So, the first rule for choosing a<br />
camera is to make the best of what<br />
you already have or can easily afford.<br />
After you become more experienced,<br />
you'll be more able to decide exactly<br />
what features you need. That's the<br />
time to invest in your particular<br />
dream machine. For now, however,<br />
use what you have. If you don't yet<br />
own a camera, buy the least expensive<br />
one that meets your basic needs.<br />
The money you save can be spent on<br />
film and chemicals, which are far<br />
more important at this stage than the<br />
quality of your camera.<br />
One thing that is important, no<br />
matter which camera you buy, is<br />
durability. No matter how careful<br />
you are, your camera is likely to get<br />
knocked around a bit. Get one that is<br />
strong enough to take abuse.<br />
One of the most important differences<br />
among cameras is the lenses<br />
that can be used with them. An interchangeable<br />
lens can be removed from<br />
the camera body and replaced with<br />
another lens that produces a different<br />
effect. For example, a telephoto lens,<br />
which works like a telescope, may be<br />
36 The Photographic Eye<br />
Manual cameras provide a greater amount of creative control, especially<br />
with lighting. This photograph would have been virtually impossible with<br />
most purely automatic cameras, since the lighting effect is not "normal."<br />
(Student photograph.)<br />
used to make distant objects appear<br />
closer.<br />
The most popular and inexpensive<br />
cameras have a fixed lens. A fixed<br />
lens cannot be removed and, therefore,<br />
cannot be changed. Though not<br />
essential, interchangeable lenses can<br />
be a great asset.<br />
Some modern cameras offer a<br />
compromise between fixed and interchangeable<br />
lenses: permanently attached<br />
zooms. Others allow you to<br />
switch from a wide-angle to a telephoto<br />
lens, both of which are attached<br />
to the camera body.<br />
Generally, these kinds of lenses are<br />
too limited to be very useful, but<br />
they'll do in a pinch.<br />
There is no need to rush out and<br />
buy a telephoto or any other nonstandard<br />
lens immediately. For your<br />
first assignments, you will be using<br />
only the standard 50mm lens. Eventually,<br />
however, you will probably<br />
want to try other lenses, so it is a<br />
good idea to use a camera that will<br />
allow you to do this. Once again,<br />
however, it is not essential. If your<br />
budget restricts you to a fixed-lens<br />
camera, you will still be able to take<br />
perfectly good photographs.<br />
Manual or Automatic<br />
If you are buying a camera, you have<br />
two basic choices: manual or<br />
automatic. Manual cameras have<br />
been in use far longer than automatic<br />
cameras, and they are still preferred<br />
by many professionals. They require<br />
you to load and wind the film, select<br />
the shutter speed, set the aperture,<br />
and focus. Automatic cameras will<br />
do some or all of these things for you.<br />
The big advantage of a manual<br />
camera is that you always control<br />
what it is doing. You make the decisions,<br />
and the camera does what you
Automatic cameras are especially useful for "grab shots," when there's no<br />
time to fiddle with knobs and dials. By letting the camera make the<br />
technical decisions, the photographer is able to concentrate on getting the<br />
timing just right. (Student photograph by Lauren McDermott.)<br />
tell it to do. As a result, you will learn<br />
what works and what doesn't. You<br />
will also make mistakes (which is how<br />
you learn). The main disadvantage of<br />
a manual camera is the amount of<br />
time required to set up a shot.<br />
Most manual cameras now available<br />
in the 35mm format have a builtin<br />
light meter. The meter informs you<br />
of the lighting conditions, and you set<br />
the speed and aperture accordingly.<br />
Older cameras, and many studio<br />
models, require you to use a handheld<br />
light meter to "read" the light,<br />
before you set the camera.<br />
Cameras with automatic light<br />
metering also fall into two categories:<br />
full automatic and manual-override.<br />
A full automatic chooses the aperture<br />
or shutter speed, or both, according<br />
to a built-in computer that is programmed<br />
to make the decision you<br />
would probably make anyway. While<br />
this may sound very appealing, there<br />
is a problem — and that problem is the<br />
"probably."<br />
As you become a more experienced<br />
photographer, you will sometimes<br />
disagree with your camera's choice.<br />
You may want a picture to be a bit<br />
darker or lighter for effect, or the<br />
camera may be "confused" by a complex<br />
lighting situation. With full<br />
automatic, there's not much you can<br />
do to change the camera's decision.<br />
This is a poor choice for anyone<br />
who really wants to learn about<br />
photography.<br />
Manual-override offers a solution.<br />
When you're sure the camera will<br />
make the right decisions (i.e. when<br />
you want a normal photograph in a<br />
normal lighting situation), you let the<br />
camera decide. When you disagree,<br />
you set the camera manually. If you<br />
make an effort to pay attention to<br />
what the camera is doing, you can use<br />
the automatic light meter most of the<br />
time and still learn how to use light<br />
effectively. If you don't make that effort<br />
you won't learn much, and you'll<br />
end up taking a lot of "normal" and<br />
probably boring pictures.<br />
If you are shooting a lot of "candids"<br />
(quick, unposed photographs),<br />
like most photojournalists, the<br />
automatic option can be a big help —<br />
since you won't miss a good shot or<br />
annoy your subject while you fumble<br />
with knobs and dials. If you're doing<br />
a lot of still-life or nature photography,<br />
or if you prefer to take your<br />
time, as most art photographers do,<br />
a manual camera will do just as well,<br />
and will teach you more.<br />
All the other automatic features<br />
are far less important. Loading and<br />
winding the film manually will soon<br />
become second nature to you, so having<br />
it done automatically is not much<br />
of an advantage (unless you have<br />
reason to be in a real hurry). Autofocus<br />
is another asset for the "grabshooter,"<br />
though focusing shouldn't<br />
take more than a split second once<br />
you get the hang of it.<br />
What Format?<br />
Most modern cameras use 35mm<br />
film. This is a relatively small format<br />
that allows many frames to fit on a<br />
single roll. As a result, it costs less per<br />
shot than larger formats. In addition,<br />
the smaller format means the camera<br />
can be smaller and lighter, so it's<br />
easier to carry and use.<br />
There is one advantage to larger<br />
formats: the grain of the film. All<br />
film stores images in tiny dots. When<br />
the film is enlarged, the dots begin to<br />
show. This is grain. If you are making<br />
a large print (such as for an exhibit<br />
or a full page in a magazine),<br />
grain can be a problem. Too much<br />
Tools 37
Each kind of lens has its own characteristics and uses. The wide-angle lens used for this photograph produced a<br />
slightly surreal effect. Much of the photograph's impact would have been lost with either a normal or a telephoto<br />
lens. (Student photograph by John Berringer.)<br />
grain reduces the image quality. It<br />
begins to look "grainy."<br />
For most uses, including most exhibit<br />
formats, the ease of using<br />
35mm outweighs the drawbacks of<br />
grain. And, as films continue to improve,<br />
grain is becoming less and less<br />
of a problem. After you've developed<br />
your skill and style, you may<br />
want to move up to larger formats,<br />
but you can decide that later.<br />
38 The Photographic Eye<br />
Choosing a Lens<br />
In many ways, choosing the right lens<br />
or lenses is even more important than<br />
choosing the right camera.<br />
Once you've selected some brand<br />
names you trust and can afford, you<br />
face another choice: which lenses to<br />
buy. Most cameras come equipped<br />
with a 50mm lens. This is the standard<br />
lens for 35mm photography,<br />
because it is closest to normal vision.<br />
What you see through the camera will<br />
look the same as what you see with<br />
your own eyes. Whatever lenses you<br />
eventually buy, you will want to include<br />
the 50mm range. (By the way,<br />
if you find 50mm lenses and 35mm<br />
film confusing, don't worry. These<br />
and other terms will gradually<br />
become familiar to you as you use<br />
them.)<br />
If you have a choice (and you often<br />
won't) you might consider buying the<br />
camera body and lens separately.
This will enable you to choose a<br />
variable focal-length, or "zoom," lens<br />
instead of a "fixed focal-length" lens.<br />
As explained in Chapter 11, the<br />
focal-length of a lens determines how<br />
wide an area you can see through it.<br />
In effect, the 50mm lens draws a box<br />
within which objects are normal in<br />
size and proportion. A shorter lens,<br />
such as a 35mm, draws a larger box,<br />
and makes objects appear smaller<br />
and somewhat "bent" or distorted. A<br />
longer lens, such as a 135mm, draws<br />
a smaller box, making objects appear<br />
larger and more compressed (with<br />
less space between them). With each<br />
fixed focal-length lens you have only<br />
one choice.<br />
With a zoom (variable focallength)<br />
lens, you have many choices.<br />
A zoom lens is essentially several<br />
lenses in one. For example, if a zoom<br />
lens ranges from 35mm to 135mm,<br />
you will have the same choices as you<br />
would if you bought the three focallengths<br />
just mentioned (35mm,<br />
50mm and 135mm), plus all the<br />
focal-lengths in between.<br />
Any good modern zoom lens will<br />
match the image quality of a typical<br />
fixed focal-length lens. (Early zooms<br />
produced poor image quality at "inbetween"<br />
focal-lengths, such as<br />
42mm. This problem has been corrected<br />
on most modern models.) You<br />
will, however, almost certainly lose<br />
some of the lower (larger) apertures<br />
offered by fixed focal-length lenses.<br />
Since a large aperture lets in more<br />
light than a small one, a zoom lens<br />
may limit your ability to photograph<br />
in low-light situations or at high shutter<br />
speeds.<br />
If your budget permits, it is useful<br />
to have the three basic lens ranges:<br />
wide-angle, "normal" (50mm), and<br />
telephoto. However, the normal lens<br />
is the most important. Do not start<br />
your photo career with only a wideangle<br />
or only a telephoto. It's perfectly<br />
all right to start it with only a<br />
50mm. Once again, the best procedure<br />
is probably to start simply,<br />
with just a standard lens, and add<br />
others as you decide you need them.<br />
If you are thinking of investing in<br />
more than one lens, review Chapter<br />
11 before making any decisions.<br />
What Price?<br />
How much should you pay for a<br />
camera? Well, it really depends on<br />
what you can easily afford. Good<br />
cameras are available for as little as<br />
$50. Top professional models can<br />
cost several thousand dollars.<br />
If your budget limits you to under<br />
$100, buy the best manual camera<br />
you can find —perhaps a good<br />
second-hand model. If you can afford<br />
more, take a careful look at the<br />
$100 to $500 range, keeping in mind<br />
the features you care most about<br />
(automatic features, manual features,<br />
durability, lenses), and buy the one<br />
that best suits you. A fully professional<br />
camera system —which you absolutely<br />
do not need at this stage —is<br />
likely to cost over $1,000, depending<br />
on your choice of lenses.<br />
Before buying any camera, read<br />
reviews of several in camera<br />
magazines (see the Bibliography for<br />
names of some good ones). Ask<br />
someone you know who does a lot of<br />
photography to give you some<br />
recommendations. Then make an informed<br />
decision.<br />
Selecting a lens may be more difficult.<br />
The quality of the glass and<br />
construction varies considerably. A<br />
cheap lens may result in photographs<br />
that are always out of focus, blurry<br />
around the edges or grainy.<br />
A good rule of thumb is to stick<br />
with the brand names you know. All<br />
camera manufacturers make lenses<br />
for their cameras that you can trust<br />
to be as well-made as the cameras. In<br />
addition, cameras with automatic<br />
features may require that you stay<br />
with the same brand when buying<br />
lenses. However, many companies<br />
produce lenses designed for use with<br />
a variety of cameras. These may be<br />
as good as or better than the camera<br />
manufacturer's own lenses and often<br />
cost less. Read the reviews in camera<br />
magazines and ask for the advice of<br />
experienced photographers before<br />
you decide.<br />
One final note on lenses: Buy a UV<br />
(ultraviolet) or a "skylight" filter for<br />
each lens, attach it and leave it on at<br />
all times. Either of these filters will<br />
help a little to reduce haze under<br />
some lighting conditions, but their<br />
real use is to protect the lens itself<br />
from damage. Should you accidentally<br />
scratch the filter, it can be inexpensively<br />
replaced. Replacing the lens<br />
would of course be far more costly.<br />
Summary<br />
There are only three key points you<br />
need to understand at this point:<br />
First, start with the basics —a simple,<br />
relatively inexpensive camera with a<br />
50mm lens. Ideally, your camera will<br />
permit you to use other ("interchangeable")<br />
lenses as well. You<br />
should have at least one lens that<br />
opens up to f/2.8, and all lenses<br />
should have UV or skylight filters attached.<br />
Second, choose a camera that<br />
includes manual controls for aperture<br />
and shutter-speed. Full manual is<br />
fine; automatic features are nice extras,<br />
but they are not necessary.<br />
Third, make sure that both your<br />
camera and lens are manufactured by<br />
a reliable company. If you begin with<br />
these essentials, you'll be well<br />
equipped to learn photography.<br />
Tools 39
Additional Tools<br />
Once you've selected a camera and<br />
lens (or lenses), you have taken care<br />
of the big decisions. Later, you may<br />
want to add other tools, such as a<br />
tripod and flash, but they can wait.<br />
Refer to Appendix 4 for more information<br />
on them when the time<br />
comes. There are, however, a few<br />
other inexpensive tools you'll need in<br />
order to get started.<br />
As soon as you begin producing<br />
photographs, you'll want to store<br />
your negatives and prints, to keep<br />
them clean and organized. Plastic<br />
sheets specially designed for storing<br />
negatives are available that fit into a<br />
standard three-ring binder. Buy a box<br />
of these and a binder to file them in.<br />
Immediately after developing and<br />
drying each roll of film, you will cut<br />
the roll into shorter lengths (five<br />
frames each) and slip them into the<br />
negative file. The next step is to place<br />
the film directly onto a piece of<br />
photographic paper to make a contact<br />
print (see Appendix 1 for explanation).<br />
With a plastic negative<br />
file, this can be done directly. Paper<br />
files are also available. They require<br />
you to remove the film to make a<br />
contact print, however, so are not as<br />
easy to use as plastic sheets.<br />
Similar sheets are available for<br />
storing prints. If your photo store<br />
doesn't carry them, you can probably<br />
find them in an office supply store.<br />
Any plastic sheet that will hold<br />
8'/2" x 11" paper, with holes for a<br />
three-ring binder, will do fine.<br />
You will also want an ordinary<br />
grease pencil (yellow or white) to<br />
mark your contacts when you're<br />
deciding which frames to print.<br />
Grease pencil marks show up well<br />
in the darkroom, and they can be<br />
rubbed off if you change your mind.<br />
Finally, be sure to have the instruc-<br />
40 The Photographic Eye<br />
tions for your camera available at all<br />
times. If you are buying a new<br />
camera, this will be easy. If not, you<br />
may have to search a bit, or buy one<br />
of the many books available describing<br />
different camera models. If you<br />
can't locate instructions, have someone<br />
who knows the camera well show<br />
you how it works —and be sure to<br />
take notes.<br />
Basic Tools Checklist<br />
The following tools are all you will<br />
need to get started. Check to see that<br />
you have them, and that your camera<br />
and lens meet the key requirements<br />
listed here:<br />
Camera Requirements<br />
Durability<br />
Manual Aperture & Shutter-<br />
Speed Controls<br />
Reliable Manufacturer<br />
Interchangeable Lens<br />
Capability<br />
Lens Requirements<br />
Standard Focal-Length<br />
(50mm)<br />
172.8<br />
Reliable Manufacturer<br />
_ UV Filter<br />
Additional Tools<br />
Plastic Negative Files<br />
Plastic Print Sheets<br />
Grease Pencil<br />
Operations Manual or Other<br />
Instructions for Camera<br />
<strong>THE</strong> CAMERA, INSIDE<br />
& OUT<br />
Most 35mm cameras are fairly similar<br />
in the design and placement of key<br />
controls. For example, the film advance<br />
lever (the "winder") is generally<br />
on the top right, next to the shutter<br />
release. Advances in electronics,<br />
however, are turning cameras into<br />
mini-computers. Many are utterly<br />
unlike the traditional models. Some<br />
new ones, for example, come with a<br />
built-in auto-winder and don't have<br />
a film advance lever at all.<br />
So, the following pages are not intended<br />
as a substitute for your<br />
camera's manual. No one list can be<br />
correct and complete for all camera<br />
brands and models. You may have to<br />
hunt a bit to locate some of the components<br />
on your camera, since each<br />
model tends to have its little quirks.<br />
Check your own manual to be sure<br />
that you know where each component<br />
is located on your camera and<br />
how it works.<br />
The following pages are intended<br />
as a summary of the basic components<br />
of a typical, traditional<br />
camera. This will give you an idea of<br />
how your camera compares to most<br />
others.<br />
You may not find all of the components<br />
that are listed here, either<br />
because they are not included in your<br />
camera or because they have been<br />
replaced by an automatic feature. It<br />
is still a good idea to become familiar<br />
with all of them. Understanding each<br />
component of a traditional camera<br />
will help you understand how even<br />
the simplest or most automatic<br />
camera works. And knowing how a<br />
camera works is vital to using it well.<br />
As you read this section, compare<br />
each description with your own<br />
camera. Be sure to have your own<br />
camera's manual on hand to clarify<br />
any questions. Look for each component<br />
as it is described, and try it out.<br />
Do not put film into the camera until<br />
instructed to do so.
The Camera Body: Outside<br />
• Viewfinder<br />
The first thing to look at on your<br />
camera is the part that allows you to<br />
look through it. The viewfinder, in<br />
simplest terms, is just a rectangular<br />
window that shows you what will be<br />
in your photograph when you click<br />
the shutter. (Actually, viewfinders<br />
generally show you a bit less than<br />
you'll actually get. This is usually an<br />
advantage, as it gives you a little<br />
"slack" when you're making a print.)<br />
Your viewfinder is probably quite<br />
a bit more than just a window,<br />
however. It certainly will include<br />
some kind of focusing aid. One common<br />
focusing aid is a split circle<br />
(called a split-image focusing screen)<br />
in which out-of-focus objects do not<br />
line up correctly. Another common<br />
kind is a series of circles (called a<br />
ground-glass focusing screen) that go<br />
in and out of focus as you turn the<br />
focusing ring on the lens.<br />
The split-image screen is especially<br />
helpful if you're at all nearsighted. To<br />
use it, you simply adjust the focusing<br />
ring until both sides of the circle<br />
line up. It works best when the split<br />
is placed across a line of some kind,<br />
such as an eyelid or a branch, so you<br />
can see what you're lining up.<br />
In addition, most modern cameras<br />
use the sides of the viewfinder to<br />
show you important information.<br />
This may include the aperture of your<br />
lens, the camera's shutter-speed,<br />
Tools 41
whether the camera is in manual or<br />
automatic mode, whether your flash<br />
has recharged, etc.<br />
Take some time to explore your<br />
viewfinder. If you aren't certain what<br />
everything in it means, consult the<br />
user's manual for your camera or ask<br />
an experienced photographer.<br />
• ASA/ISO<br />
The first step of any photo assignment<br />
is to set the correct film speed.<br />
This will be listed on the film carton,<br />
or box, (and also on the canister, the<br />
metal container holding the film) as<br />
ASA or ISO. These two terms are<br />
used to describe the same thing: the<br />
film's sensitivity to light. In fact they<br />
often appear together, as ASA/ISO.<br />
ISO is becoming the more common<br />
term, however, so we'll be using it<br />
throughout this book. (Both "ASA"<br />
and "ISO" are the initials of<br />
organizations —the American Standards<br />
Association and the International<br />
Standards Organization —that<br />
establish scientific measurements.)<br />
The ISO indicator is generally built<br />
into the rewind knob, on the left side<br />
of the top of the camera. The ISO<br />
numbers are usually visible through<br />
a little window in the rewind knob.<br />
Each number is usually double the<br />
preceding number: 25, 50, 100, 200,<br />
400, 800, etc. Dots between the<br />
numbers indicate settings in between<br />
these numbers. So, for example, ISO<br />
125 is one dot above ISO 100.<br />
You must remember to change the<br />
ISO setting every time you use a different<br />
kind of film. If you are using<br />
any automatic exposure system, your<br />
camera will base its decisions on the<br />
ISO setting you've selected. If it's<br />
wrong, all your photos will be incorrectly<br />
exposed.<br />
The same holds true for the camera's<br />
internal light meter. If you're<br />
setting the shutter speed or aperture<br />
according to the meter, your exposures<br />
will only be correct if the ISO<br />
setting is correct. Even if you're doing<br />
everything manually, the ISO setting<br />
is an important reminder of what<br />
kind of film you're using.<br />
To change the ISO setting, you<br />
generally turn a knob that moves the<br />
numbers through the indicator window.<br />
You may first need to press a<br />
button, lift the knob or otherwise<br />
release a lock designed to prevent you<br />
from changing the setting accidentally.<br />
On many modern cameras,<br />
you'll change the ISO by pressing a<br />
button until the right number comes<br />
up in a display panel. Some cameras<br />
will set the ISO for you automatically,<br />
reading the proper setting from<br />
a code on the film canister. (Film that<br />
has been coded for this purpose is<br />
labeled "DX.")<br />
Locate the ISO indicator on your<br />
camera. Adjust the setting to see how<br />
low and high it goes. Professional<br />
cameras will provide ISO settings as<br />
low as 6 and as high as 6400. Many<br />
popular models have a range of 12 to<br />
3200. Don't worry if yours doesn't go<br />
as high or as low as that. Most films<br />
fall between ISO 25 and 1200.<br />
Once you've checked out the limits<br />
of your camera's ISO indicator, set<br />
it to ISO 125. This is the speed for<br />
Kodak's Plus-X film, which you will<br />
be using in your first assignment.<br />
• Shutter-Speed Control<br />
The shutter-speed control is almost<br />
always on the top right of the camera.<br />
It determines how long the shutter<br />
will remain open for each photograph.<br />
It is simply a timer. When you<br />
press the shutter release, the shutter<br />
opens, light enters through the lens,<br />
and the timer begins counting. When<br />
the shutter has been open for the<br />
amount of time you have selected, it<br />
closes again. The numbers on the<br />
shutter-speed control indicate fractions<br />
of a second (60 = 1760 of a second,<br />
and so on), so the timer has to<br />
count very quickly.<br />
The most commonly used shutter<br />
speeds are probably 60 and 125. Both<br />
are fast enough to stop most action<br />
with a 50mm lens, while allowing for<br />
a fairly small aperture in most<br />
lighting conditions.<br />
Notice that 125 (or 1/125 of a second)<br />
is almost exactly twice as fast as<br />
60 (or 1/60 of a second). The next<br />
speed above 125 is 250— twice as fast<br />
again. Depending on your camera,<br />
the highest speed may be 1000 or even<br />
higher, fast enough to "freeze" a bird<br />
in flight or a race car at the Indy 500.<br />
Moving down from 60, the next<br />
speed is 30. Again depending on your<br />
camera, the shutter speeds may go as<br />
low as 1, for 1 second. Some cameras<br />
provide even longer automatically<br />
timed exposures, even as long as a<br />
minute or more.<br />
The last indicator on the shutterspeed<br />
control should be a "B." This
stands for "bulb." In the early days<br />
of photography, the shutter was<br />
released by squeezing a rubber bulb,<br />
and it stayed open as long as the bulb<br />
was squeezed. The photographer had<br />
to decide when enough light had<br />
entered the camera, and then let go<br />
of the bulb to close the shutter. Since<br />
film was very slow in those days, that<br />
wasn't as hard as it sounds.<br />
Today, although everything about<br />
the cameras we use is far more complex,<br />
this term remains the same. The<br />
"B" simply means that the shutter will<br />
remain open as long as the release is<br />
held down. This is useful for very<br />
long exposures, primarily at night.<br />
To use the "B" setting, you will<br />
almost certainly need to use a tripod<br />
and a cable release, which (like the<br />
old-fashioned bulbs) is used to avoid<br />
shaking the camera.<br />
• Shutter Release<br />
Next to the shutter-speed control (top<br />
right of the camera) you should find<br />
the shutter release. It is simply a button<br />
which, when pressed, triggers the<br />
shutter mechanism. (Note: On some<br />
cameras, the shutter release is pressed<br />
part-way down to measure the light<br />
or "freeze" the aperture setting.)<br />
• Film Advance Lever<br />
The film-advance lever (or winder) is<br />
generally located directly behind the<br />
shutter release, making it easy to<br />
click-and-wind quickly.<br />
Try turning the winder (counterclockwise).<br />
If it doesn't move more<br />
than an inch, press the shutter<br />
release. You should hear a sharp<br />
click. Then try the winder again. It<br />
should swing easily out to the side of<br />
the camera and snap back into place<br />
when you let go of it. If you had film<br />
in the camera, you would have just<br />
taken a photograph and advanced the<br />
film to the next frame.<br />
• Rewind Release<br />
As you wind film through the<br />
camera, it travels from its canister (on<br />
the left) to the "take-up reel" below<br />
the advance lever (on the right).<br />
When you reach the end of a roll, the<br />
lever will jam. You will no longer be<br />
able to turn it easily. The next step<br />
is to rewind the film back into the<br />
canister.<br />
Before you can do that, you'll need<br />
to release the lock that keeps the film<br />
from slipping backwards by accident.<br />
Remove the camera from its<br />
case and look on the bottom of the<br />
camera body. You should find a<br />
small button directly below the film<br />
advance lever.<br />
Pressing this button will release the<br />
lock, so you can rewind the film.<br />
(Until there is film in the camera,<br />
however, it won't have any effect, so<br />
don't bother testing it yet.)<br />
• Rewinder<br />
Once you've released the film lock,<br />
you'll need to crank the film back into<br />
its canister, using the rewind knob<br />
on the left side of the camera's top.<br />
Generally, a small crank is lifted out<br />
of the rewind knob for this purpose.<br />
There should be an arrow indicating<br />
that the crank turns clockwise, in case<br />
you get confused. As you rewind the<br />
film, it is a good idea to keep your<br />
finger on the rewind release button so<br />
it doesn't lock again and tear the<br />
film's sprocket holes.<br />
• Battery Compartment<br />
Another important component is<br />
generally located on the bottom of<br />
the camera: the battery compartment.<br />
If yours is there, it will probably<br />
have a round metal cover with<br />
a slit in it. To open the compartment,<br />
you place the edge of a coin (a penny<br />
works well) into the slit and turn it<br />
counter-clockwise. When the cover is<br />
removed, a small packet with one or<br />
two coin-shaped batteries should slide<br />
out. These batteries are very sensitive<br />
and may not work if you get dust or<br />
fingerprints on them. So treat them<br />
carefully. Fortunately, your batteries<br />
rarely need changing.<br />
If you found a round metal cover<br />
with a slit in it, but did not find any<br />
batteries under it, then you've probably<br />
just discovered your camera's<br />
motor-drive connector. This is a gear<br />
that connects a separate motor-drive<br />
unit to your camera's film advance<br />
mechanism. (To learn more about<br />
Tools 43
motor-drives, see Appendix 4.) In<br />
this case, your camera's battery is<br />
located elsewhere. Most likely it's in<br />
a compartment on the front of the<br />
camera body, on the right side. If so,<br />
it's likely that your camera uses batteries<br />
to run both the light meter and<br />
a variety of automatic features. The<br />
more automatic features your camera<br />
has, the more power it requires, and<br />
the more frequently you'll need fresh<br />
batteries. Check your manual to find<br />
out how to change them.<br />
• Battery Check<br />
The placement and operation of the<br />
battery check varies considerably<br />
from one camera model to the next.<br />
It may be activated by a button on<br />
the top or on the front of the body.<br />
It may cause a needle in the viewfinder<br />
to move to an assigned spot,<br />
or light up an indicator lamp. Or it<br />
may be fully automatic, activating an<br />
indicator only when the battery is<br />
low. Take a moment to locate the<br />
battery-check function on your<br />
camera, using the manual, and be<br />
sure you know how it works. Few<br />
things are more depressing in<br />
photography than discovering too<br />
late that your camera has dead<br />
batteries.<br />
• Hot Shoe<br />
Nearly all modern cameras come<br />
equipped with a "hot shoe." This is<br />
a small clamp right above the<br />
eyepiece, onto which a flash can be<br />
44 The Photographic Eye<br />
mounted. It establishes an electronic<br />
link between the flash and the<br />
camera. This link enables the camera<br />
to "trigger" the flash while the shutter<br />
is fully open. It may also enable<br />
the flash and camera to "communicate,"<br />
so the flash can "tell" the<br />
camera what aperture to use, or the<br />
camera can "tell" the flash when it has<br />
received enough light. (See Appendix<br />
4 for more information on flashes.)<br />
• Accessories<br />
The next three components are not<br />
essential and are not included in all<br />
models. If your camera has them,<br />
however, they can be useful.<br />
Self-Timer The primary purpose<br />
of the self-timer is to permit you to<br />
take a picture of yourself. It usually<br />
consists of a lever that you turn<br />
before pressing the shutter release.<br />
The timer starts counting as soon as<br />
the shutter release is pressed, generally<br />
giving you a few seconds to<br />
position yourself in front of the<br />
camera and work on your smile.<br />
Most self-timers also include a little<br />
light that blinks to tell you it's<br />
working.<br />
Multiple-Exposure Control This<br />
feature stops the film advance<br />
mechanism from working, so you can<br />
move the lever without moving the<br />
film. This enables you to cock the<br />
shutter for a new shot, while the film<br />
stays where it is. You can then put<br />
more than a single shot onto a single<br />
frame of film. If you want to play<br />
with multiple images, "ghosts" and<br />
related special effects, this mechanism<br />
will allow you to do so.<br />
Depth of Field Preview Button<br />
Normally, your lens will stay open to<br />
the largest aperture available until<br />
you click the shutter. This gives you<br />
as much light in the viewfinder as<br />
possible to help you focus precisely.<br />
The depth of field preview button<br />
temporarily closes the lens down to<br />
the aperture you've selected, so you<br />
see exactly what the film will see. As<br />
explained in Chapter 9, the smaller<br />
the aperture, the greater the range of<br />
distance that will be in focus. This<br />
range is known as depth of field.<br />
If you have selected a small aperture<br />
(say, f/16) pressing the depth of<br />
field preview button will cause the<br />
viewfinder to become dark (due to<br />
the small aperture). If you look<br />
carefully, you'll see that nearly<br />
everything is in crisp focus. If you've<br />
selected a moderate aperture (say,<br />
f/5.6), the background will be out of<br />
focus when the foreground is in<br />
focus, and vice versa. If you've<br />
selected your largest aperture, the<br />
depth of field preview button won't<br />
have any effect at all, since the depth<br />
of field stays the same.<br />
The primary function of the depth<br />
of field preview button is to help you<br />
select the correct aperture when depth<br />
of field is of critical importance.<br />
You'll find it especially useful when<br />
shooting close-ups.<br />
• Camera Back Release<br />
Now comes the tricky part. Because<br />
you don't want your camera to open<br />
itself accidentally, the latch that<br />
keeps the back shut is often cleverly<br />
hidden. In addition, releasing it tends<br />
to require several steps. Generally,<br />
the release is connected in some way<br />
to pulling up the rewind knob (which
also frees the film canister from its<br />
sprocket). If in doubt, once again,<br />
consult your manual.<br />
The Camera Body: Inside<br />
Before we explore the internal workings<br />
of your camera, a few general<br />
words of caution are in order.<br />
Though the outside of most cameras<br />
can stand a fair amount of abuse, the<br />
inside can't. Once you've opened the<br />
camera back, you have exposed some<br />
very delicate machinery. This is one<br />
time that strict rules do apply: Don't<br />
poke around with your fingers until<br />
you know what you're poking. Don't<br />
try to "fix" things, even if they appear<br />
to be broken. If you think something's<br />
wrong, take the camera to an<br />
authorized repair shop. Open the<br />
camera back only when absolutely<br />
necessary (to change film), and close<br />
it again as quickly as possible. Protect<br />
the interior from dust and<br />
moisture. If you're shooting in dusty<br />
or wet conditions, aim your back into<br />
the wind and cover the camera as<br />
much as possible. In short, be<br />
careful!<br />
• Shutter<br />
The first thing you're likely to notice<br />
once you open the camera back is<br />
also the most fragile and important:<br />
the shutter. This is a piece of cloth<br />
or a series of small metal plates covering<br />
the rectangular space directly<br />
below the viewfinder. It is as delicate<br />
as it looks, so do not touch it.<br />
When you click the shutter, three<br />
things happen. The lens closes down<br />
to the aperture you've selected. A<br />
mirror between the lens and the shutter<br />
(which you'll see a little later) lifts<br />
up out of the way. Then the shutter<br />
slides open, stays open for the duration<br />
of the shutter speed you've<br />
selected, and slides shut.<br />
Sound simple? In a sense it is, except<br />
that all this has to happen with<br />
absolute precision in a fraction of a<br />
second.<br />
The metal plate attached to the<br />
camera back (see it?) presses the film<br />
fiat. (This is another of the camera's<br />
"don't touch" parts.) The shutter<br />
opens and closes, letting a very<br />
precise amount of light in through the<br />
lens. The light exposes one piece (or<br />
frame) of film, initiating the chemical<br />
reaction that produces a negative image.<br />
The film is advanced to a fresh<br />
(unexposed) frame and the process is<br />
repeated until the film has all been exposed.<br />
That, in very simplified form,<br />
is how a camera works.<br />
• Film Spool<br />
To the left of the shutter screen is the<br />
film spool. This is where you'll insert<br />
a film canister. Notice the prongs that<br />
protrude from the end of the spool.<br />
These must be fitted to matching<br />
openings in the film canister. Notice<br />
also that the entire spool slides up out<br />
of the way when you pull the rewind<br />
knob. This provides just enough<br />
space for you to slip in the canister.<br />
You then push the knob back down,<br />
fiddling with it, as needed, to slip the<br />
prongs into their respective openings.<br />
Tools 45
• Film-Advance Sprocket<br />
Just to the right of the shutter screen<br />
there are two sets of sprockets (gears)<br />
on a reel. This is the next step in<br />
loading film. The small rectangular<br />
holes along the upper and lower edges<br />
of the film must be positioned over<br />
these sprockets. Each knob of the<br />
sprocket should slide easily into a<br />
hole in the film as they turn together.<br />
• Take-Up Reel<br />
The final step in loading film occurs<br />
46 The Photographic Eye<br />
at the far right, just past the filmadvance<br />
sprocket. This is the take-up<br />
reel. In most cameras, this reel is<br />
simply a tube with slits in it. Your job<br />
is to insert the end of the film in one<br />
of the slits and then wind the reel until<br />
the film catches and holds tight.<br />
On some newer cameras, the takeup<br />
reel is equipped with a special<br />
mechanism to make it easier to insert<br />
the film. Some even load the film<br />
automatically. Once again, if you<br />
have any questions, consult your<br />
manual.<br />
The Lens<br />
The lens is a camera's eye. Like a<br />
human eye, its opening expands and<br />
contracts (opens and closes) as the<br />
amount of light it is "seeing"<br />
decreases and increases. Also like a<br />
human eye, it focuses on some things<br />
and not on others. Unlike the human<br />
eye, however, a camera lens requires<br />
help to do these things. With most<br />
cameras, that help must come from<br />
you, the photographer.<br />
You expand and contract the opening<br />
of the lens by adjusting the aperture<br />
ring. You use the focusing ring<br />
to select what is in and out of focus.<br />
The aperture and focusing rings are<br />
used together to determine how much<br />
is in focus. By decreasing the aperture,<br />
you increase the depth of field.<br />
In other words, a smaller lens opening<br />
means that more of your photograph<br />
will be in focus.
• Aperture Ring<br />
Let's start with the ring that is usually<br />
closest to the camera body and move<br />
outwards. On most cameras, this will<br />
be the aperture ring.<br />
The aperture ring consists of a<br />
series of numbers —4, 5.6, 8, 11,<br />
etc.-that can be turned to line up<br />
with a marker. The lowest number<br />
will probably be 1.8, 2.8, or 3.5,<br />
depending on your lens. The highest<br />
is likely to be 16 or 22.<br />
Each of these numbers stands for<br />
an aperture or f-stop, a different size<br />
lens opening. The lower numbers<br />
represent larger openings; the higher<br />
numbers represent smaller ones.<br />
On cameras with automatic metering,<br />
you're likely to see an "A" or<br />
some other symbol indicating<br />
"automatic." If so, you may need to<br />
press a button to release the ring so<br />
you can turn it. In this case, the ring<br />
locks itself on automatic, so you<br />
don't accidentally bump it into<br />
manual mode (which can result in a<br />
lot of ruined photos.)<br />
• Depth of Field Scale<br />
Generally, there is another ring with<br />
the same numbers (usually smaller<br />
and sometimes colored) right next to<br />
the aperture ring. This one does not<br />
turn. It is the depth of field scale, and<br />
is there only to give information. The<br />
scale tells you what range of distance<br />
will be in focus at each f-stop. For<br />
example, at f/16 everything from 7<br />
to 30 feet away from you will be in<br />
focus. At f/4, the depth of field is<br />
much smaller: from 7 to about 9 feet.<br />
Basically, the depth of field scale<br />
gives you the same information as the<br />
depth of field preview button. The<br />
difference is that one tells and the<br />
other shows you.<br />
• Focusing Ring<br />
If you've been checking out the depth<br />
of field scale, you've probably<br />
already figured out the focusing ring.<br />
The focusing ring is marked with<br />
distances, virtually always in both<br />
feet ("ft") and meters ("m"). You<br />
turn the ring to adjust the focus.<br />
Normally, of course, you won't see<br />
the numbers, since you'll be looking<br />
through the lens. The main use of the<br />
numbers is to give you the option of<br />
guessing at the correct focal distance.<br />
This can come in very handy if you<br />
want to sneak a shot of someone<br />
without being noticed.<br />
• Lens Release & Mount<br />
Now that you know how the lens<br />
works, let's take it off. On most<br />
cameras, you'll find a button<br />
somewhere that you must press as<br />
you turn the lens (and some turn one<br />
way, some the other). Absolutely,<br />
positively, with no exceptions, do not<br />
attempt to remove a lens from any<br />
camera until you're sure you know<br />
how. This goes double for trying to<br />
put the lens back on. (One of the best<br />
ways to ruin a camera, outside of<br />
dropping it on concrete, is to force<br />
a lens on the wrong way —and there<br />
are lots of wrong ways.) Always<br />
check the manual first.<br />
Once you have studied the manual<br />
carefully, practice removing the lens<br />
and putting it back on again until you<br />
can do it quickly and effortlessly.<br />
Before you do, make sure you have<br />
everything correctly lined up, and<br />
that you have a clean, safe place to<br />
put the lens when you take it off.<br />
Finally, never leave a lens lying<br />
around off the camera and out of its<br />
case, or a camera lying around with<br />
no lens on it. Either way, you're just<br />
asking for trouble.<br />
Tools 47
EXERCISE<br />
Testing the Shutter & Aperture<br />
By now you should be familiar with<br />
all the components that have an effect<br />
on the shutter. Let's take a look<br />
at them all in action.<br />
Set your shutter speed to "B" and<br />
your lens to its largest aperture<br />
(remember, that's the lowest<br />
number). Make sure the film advance<br />
lever has been wound, to cock the<br />
shutter. Open your camera back.<br />
Aim the lens at any convenient light<br />
source. While looking at the shutter<br />
screen, press the shutter release button<br />
and hold it down.<br />
You should find yourself looking<br />
through a hole about the size of a<br />
quarter, through which you'll be able<br />
to see whatever's in front of your<br />
lens . . . except everything will be upside<br />
down and probably out of focus.<br />
48 The Photographic Eye<br />
Let the shutter close and then cock<br />
it again. Set your lens to its smallest<br />
aperture (the highest number). Look<br />
through again and press the shutter<br />
release.<br />
This time you should see a much<br />
smaller hole, with five or more sides.<br />
The hole gets its shape from overlapping<br />
metal plates in the lens. The<br />
plates come closer together as the<br />
aperture decreases, and they spread<br />
further apart as the aperture<br />
increases.<br />
Set the lens to its largest aperture<br />
again. Cock the shutter and set the<br />
shutter speed to 60. Click and watch<br />
again. Try the same thing at 125. Try<br />
it at 30. Can you tell them apart?<br />
Move up and down the shutter speed<br />
dial to get a sense of how the speeds<br />
differ.<br />
Do the same thing with all the different<br />
apertures with the shutter set<br />
at "B," so you can see the different<br />
sized openings.<br />
Now close the back of the camera<br />
and remove the lens. Set it aside<br />
where it will be safe. Look into the<br />
camera from the front. If you have<br />
an SLR (or Single-Lens Reflex)<br />
camera, you should see a mirror set<br />
at an angle. Above the mirror you'll<br />
see the focusing screen. If you look<br />
very carefully, you may also be able<br />
to make out some of the other<br />
displays you saw in the viewfinder.<br />
The triangle on the camera's top is a<br />
prism that "bends" the image of the<br />
focusing screen around to the viewfinder<br />
so you can see it.<br />
Aim the back of the camera<br />
toward a light source and look into<br />
the mirror. You should be able to see<br />
out through the viewfinder, though<br />
most everything will be blurry.<br />
With the shutter speed still set at<br />
"B," cock the shutter. Press the shutter<br />
release and notice how the mirror<br />
swings up out of sight. The black rectangle<br />
you see at the back is the metal<br />
plate that holds the film in place. Let<br />
go of the shutter release and you'll see<br />
that the mirror drops right back into<br />
place. Now try the same thing at your<br />
camera's fastest shutter speed.<br />
That concludes the testing exercises.<br />
Now it's time to do it all for<br />
real.
Loading Film<br />
To start, open a box of film and<br />
remove the canister from its plastic<br />
case. It's a good idea to save the case<br />
to protect the film once you've finished<br />
shooting it. It's also a good idea<br />
to read over the instructions in the<br />
box if this is the first time you've used<br />
this kind of film.<br />
Set the ISO as indicated on the film<br />
box or canister. (Always do this first,<br />
so you don't forget — and before you<br />
lose the box and hide the film inside<br />
the camera.)<br />
Hold the camera securely in one<br />
hand, pin it between your knees or<br />
place it on a flat, clean surface. The<br />
lens should be pointing down and the<br />
top of the camera aimed away from<br />
you. Open the back. The film spool<br />
should be pulled all the way up and<br />
out of the way. Place the film canister<br />
into the compartment on the left side,<br />
so the film runs straight out of the<br />
canister across the shutter screen.<br />
Slide the film spool back down into<br />
place.<br />
Tuck the end of the film into a slit<br />
on the take-up reel. Click the shutter<br />
and advance the film until it begins<br />
to stretch tightly across the shutter<br />
screen area. Check to be sure the<br />
sprockets are correctly aligned with<br />
the openings along the edges of the<br />
film. Click and wind once more to<br />
tighten the film, holding it tight with<br />
one finger at the canister's opening if<br />
necessary.<br />
Close the camera back and check<br />
to be sure it is securely locked. Click<br />
and wind twice to advance to an unexposed<br />
frame.<br />
Congratulations. You're ready to<br />
shoot.
Is a plastic hose interesting? It is if it is photographed well. Notice how composition and lighting can add impact<br />
to what could have been a very dull image. The hose is positioned slightly left of center, which accentuates its<br />
looping curves. The shadow that nearly touches the upper right-hand corner promotes a sense of balance. The<br />
"negative space" between the hose and the frame of the photograph creates unusual and intriguing shapes. What<br />
else makes this photograph "work"? (Student photograph by James Schmid.J<br />
50 The Photographic Eye
chapter 3 What is Composition ?<br />
photograph is a rectangular<br />
frame with something in it.<br />
That, in essence, is all it is.<br />
Yet, within that simple definition,<br />
there are countless possibilities.<br />
Before you can begin to achieve some<br />
of those possibilities, you will need to<br />
learn how to make certain decisions<br />
with precision and creativity.<br />
First of all, you'll need to decide<br />
what to place within that rectangular<br />
frame. Then you'll need to decide<br />
how to place it. Should it fill the<br />
whole frame or just a part of it?<br />
Should it be placed toward the top or<br />
bottom of the frame, to one side, or<br />
in the center? Should the frame contain<br />
a single object or several? These<br />
questions, and others like them, are<br />
questions of composition.<br />
Composition is the arrangement of<br />
visual elements within the frame of<br />
a photograph. In photography as in<br />
chemistry, elements are basic units of<br />
composition which cannot be broken<br />
down into smaller parts. They are<br />
composition's raw materials.<br />
The most important elements in<br />
photography are line, texture, shape,<br />
light, motion and perspective. In virtually<br />
all photographs, several of<br />
these elements combine to achieve a<br />
specific effect. A photograph<br />
achieves greatness when every single<br />
element in it contributes to one<br />
overall effect, and none is wasted.<br />
You'll need a considerable amount of<br />
trial-and-error experience before you<br />
can expect to reach this goal, but it's<br />
a good idea to keep it in mind from<br />
the very beginning.<br />
A good photographer is like a<br />
master chef who mixes a certain<br />
number of ingredients (or elements)<br />
together in just the right proportions<br />
to create a memorable dish (or composition).<br />
In both cases, following<br />
recipes is a useful way to get started,<br />
but soon you'll want to be more<br />
creative and try new things. A true<br />
master breaks the rules a bit and<br />
creates something unique. Before the<br />
rules can be broken creatively,<br />
however, they must be understood.<br />
Understanding is very different<br />
from memorizing. You've memorized<br />
something when you can repeat it.<br />
You've understood it when you can<br />
apply it.<br />
You already know that composition<br />
is the arrangement of elements<br />
within the frame of a photograph.<br />
Now let's poke at the idea of composition<br />
to see if we can achieve a<br />
genuine understanding of it.<br />
SNAPSHOTS vs.<br />
PHOTOGRAPHS<br />
Perhaps the best way to do this is to<br />
consider the difference between a<br />
"snapshot" and a "photograph." You<br />
know what a snapshot is and what it<br />
generally looks like: Aunt Molly sitting<br />
by the pool, grinning at the<br />
camera. A snapshot is a casual record<br />
of some event or person or object.<br />
When you look at a snapshot, the<br />
main thing you're looking at is a<br />
memory: "Oh, so that's what Aunt<br />
Molly used to look like." It doesn't<br />
matter if part of her head got cut off<br />
or if she's slightly out of focus. All<br />
that matters is that the picture is clear<br />
enough to preserve some memories.<br />
A lot more matters in a true<br />
photograph. A photograph is, or<br />
should be, an artistic interpretation<br />
of an event or person or object. Its<br />
purpose is to tell the viewer —any<br />
viewer —something about its subject.<br />
It should show not just what the subject<br />
is, but what it is like. And it<br />
should do so with impact and style.<br />
To accomplish this, a photograph<br />
must be composed. All its elements<br />
must be selected and arranged to<br />
work together toward some unified<br />
effect.<br />
The main difference between a<br />
snapshot and a photograph is the care<br />
with which each is produced. Taking<br />
a snapshot involves little more than<br />
pointing the camera in the right direction<br />
and clicking the shutter. Taking<br />
a photograph requires paying attention<br />
to every detail within the frame,<br />
and getting all of them just right,<br />
51
Attention to detail is the primary<br />
difference between a snapshot and<br />
a photograph. In the snapshot<br />
(right) the head and feet of the<br />
taller girl are poorly cropped and<br />
the background is distracting. The<br />
girls' expressions are stiff and unnatural<br />
and the composition<br />
doesn't "do" anything. In the<br />
photograph (above) the same two<br />
girls have been posed in a more interesting<br />
way. Their expressions<br />
convey a real mood, the background<br />
is less distracting, and the<br />
composition is much stronger.<br />
Snapshot and photograph by Mike<br />
Wiley.<br />
52 The Photographic Eye<br />
before the shutter is clicked. That's<br />
what composition is basically all<br />
about: paying attention.<br />
No matter how interesting your<br />
subject may be, you have not really<br />
photographed it until you have<br />
placed it carefully within the frame,<br />
gotten rid of anything that distracts<br />
attention from it, made sure that all<br />
the various elements are working<br />
together, and set the camera to the<br />
correct aperture and shutter speed for<br />
the effect you want. In a broad sense,<br />
the subject of a photograph is far less<br />
important than its composition. Absolutely<br />
anything can be photographed<br />
well —or poorly.<br />
This in itself is a valuable lesson.<br />
Once you've begun seeing with a<br />
photographer's eye, you'll discover<br />
that there are wonderful images all<br />
around you —far more than you<br />
could ever hope to capture on film.<br />
Whether you continue to practice<br />
photography or not, the way you<br />
look at the world around you will<br />
probably be changed forever.<br />
Photography is an art of discovery.<br />
It is an exploration of the endless<br />
variety of line, texture, shape, light,<br />
motion and perspective —all the fundamental<br />
elements of composition.<br />
Not many people have an opportunity<br />
to learn to explore the world<br />
in this way. You have now become<br />
one of the lucky few who do. Enjoy<br />
the exploration.<br />
Before focusing in on each<br />
separate element, it's important to<br />
develop a sense of how they all work<br />
together. So, though each element<br />
will have its turn, we're beginning<br />
with the "big picture": composition.<br />
We've already discussed what it is,<br />
and provided some clues as to why it<br />
is important. Now let's look at how<br />
it works.
STRUCTURE, BALANCE,<br />
DYNAMICS<br />
These three things —structure,<br />
balance and dynamics —define the<br />
composition of a photograph as a<br />
whole. They provide a visual framework,<br />
a context, within which the<br />
various elements of the photograph<br />
find their proper places. Without<br />
structure, balance and dynamics, a<br />
photograph would only be a jumble<br />
of random objects. It would have little<br />
impact and might not make much<br />
sense.<br />
Structure<br />
Structure in photography works in<br />
much the same way as it works in<br />
architecture. The structural elements<br />
in a building are the posts and beams<br />
that hold it together. Non-structural<br />
elements are the walls, doors and<br />
windows that determine how the<br />
building looks and what it is for.<br />
In a photograph, the basic structural<br />
elements are line, shape and<br />
position (the placement of an object<br />
within a composition). These three<br />
elements hold the photograph<br />
together. Non-structural elements —<br />
As an example of the fact that a<br />
photograph can be "about"<br />
absolutely anything, here's one that<br />
is pure structure. Notice how the<br />
three structural elements—position,<br />
line and shape —can make even the<br />
simplest image come alive. (Student<br />
photograph by Augustine Go.)<br />
texture, light, motion and perspective—are<br />
added to complete the<br />
image, altering its appearance<br />
and effect.<br />
In a building, the design may require<br />
a generally non-structural element,<br />
such as an interior wall, to<br />
become structural. In this case, some<br />
other part of the building, such as the<br />
floor above it, depends on that wall<br />
for support. If the wall were<br />
removed, the building would probably<br />
collapse.<br />
It's the same with photography.<br />
Occasionally, texture or light (or any<br />
of the other elements that are generally<br />
"non-structural") become so important<br />
to the composition that it,<br />
too, would collapse if they were<br />
removed.<br />
In practical terms, this means that<br />
a photograph may, for example, be<br />
"about" texture, so much so that line<br />
and shape are irrelevant. This is,<br />
however, an exception. By and large,<br />
composition is determined by line,<br />
shape and position.<br />
How do they do this? Primarily by<br />
breaking the photograph up into<br />
smaller frames within the main one.<br />
Each of these smaller frames, which<br />
we'll call zones, is in effect a picture<br />
within a picture. Ideally, each zone<br />
will produce some particular effect<br />
on its own, as well as producing with<br />
all the others one overall effect.<br />
What is Composition? 53
54 The Photographic Eye<br />
Weighting this photograph over to the left side is one element that makes<br />
it interesting. What other elements contribute to its impact? (Student<br />
photograph by Renee Adsitt.)<br />
• The Nine-Zone Grid<br />
Examine the composition grid<br />
diagram. It contains nine zones.<br />
These zones are produced by dividing<br />
the frame into thirds vertically (the<br />
two gray lines) and horizontally (the<br />
two dotted lines). By thinking about<br />
composition in terms of these zones,<br />
you may find it easier to get a sense<br />
of how it works.<br />
Each zone need not produce a different<br />
effect in order to be doing its<br />
job. Most of the zones may be exactly<br />
alike, with only one or two doing<br />
something different. When that is the<br />
case, the zones that are different<br />
stand out more clearly in contrast to<br />
their surroundings: a lighted area in<br />
a photograph that is mostly dark, for<br />
example, or a figure standing in the<br />
midst of blank space.<br />
Sometimes, on the other hand,<br />
there's so much happening in a<br />
photograph that it's hard to decide<br />
what to look at first. In this case, it<br />
helps tremendously to "anchor" the<br />
most important objects by placing<br />
each one in its own zone.<br />
However you decide to use each<br />
zone, it's good to check all of them<br />
to be sure they are all doing<br />
something. If a zone is not adding to<br />
the effect you want, it should be corrected<br />
or cropped out. Usually, correcting<br />
a zone involves nothing more<br />
than shifting your angle, moving<br />
around a bit or waiting patiently for<br />
the composition to change on its<br />
own. Waiting for —and catching —<br />
just the right moment is especially important<br />
when you're photographing<br />
people. When you're photographing<br />
a small object, of course, you can<br />
always move it to improve the<br />
composition.<br />
• Position<br />
If you examine the grid, you'll see<br />
that you have three choices for positioning<br />
a subject vertically: top,<br />
center and bottom. You also have<br />
three choices horizontally: right,<br />
center and left. This gives you a total<br />
of nine choices (3x3 = 9).<br />
Most photographs have a domi-<br />
J
nant subject: an object or person that<br />
attracts the most attention. Usually,<br />
but not always, the dominant subject<br />
is the largest object in the frame.<br />
Sometimes it is a relatively small object<br />
that is carefully placed to command<br />
the most attention. It may also<br />
be a cluster of several objects or<br />
people.<br />
Positioning the dominant subject<br />
of a photograph in a zone is called<br />
weighting. A photograph may be<br />
weighted toward the top, bottom,<br />
center or to either side. It may also<br />
be weighted toward any combination<br />
of these directions —for example, the<br />
upper right-hand corner.<br />
If the subject of a photograph is<br />
strongly weighted toward the top of<br />
the frame, it will appear far away and<br />
may, as you might expect, appear<br />
top-heavy. Though this can be very<br />
effective, it produces an unusual and<br />
often disturbing effect. It should be<br />
used sparingly and only with good<br />
reason.<br />
A photograph that is strongly<br />
weighted toward the bottom tends to<br />
appear very firmly grounded. Whatever<br />
is in the upper part of the<br />
In this example of bottomweighting,<br />
notice how the buildings<br />
seem to press down on the two<br />
cars at the focal point. Also notice<br />
how line is used to draw your eye<br />
to the focal point. How many lines<br />
point at the two cars? (Student<br />
photograph by Charles Chinas.)<br />
photograph will generally seem to<br />
press down on the subject. The feeling<br />
this may convey ranges from<br />
heavy and trapped to free and<br />
liberating, depending on how the<br />
other elements are employed. For example,<br />
if the upper part of the photograph<br />
is filled with massive, dark<br />
buildings, the feeling is likely to be<br />
heavy and oppressive. If, instead, the<br />
photo is dominated by clear sky, the<br />
feeling will be quite different.<br />
A photograph that is strongly<br />
center-weighted tends to look static,<br />
as if the subject is "frozen" in place.<br />
Placing a subject in the exact center<br />
of the frame is against the "official<br />
rules" of composition. It can,<br />
however, be very effective.<br />
Finally, strongly weighting a<br />
photograph to either side tends to<br />
suggest movement. If a subject faces<br />
the same side it is weighted toward,<br />
it will seem to be moving out of the<br />
frame. This is especially true if it is<br />
weighted toward a corner as well. If<br />
the subject is facing the opposite side,<br />
it will seem to be moving into the<br />
frame. In most cases, moving into the<br />
frame is preferable.<br />
In most of your photographs,<br />
you'll probably want to place the<br />
main subject near where the lines<br />
dividing the zones cross each other.<br />
In other words, you will usually want<br />
your subject to be a little off-center,<br />
slightly weighted toward the top, bottom<br />
or one side. This produces a<br />
more subtle effect. The subject will<br />
What is Composition? 55
still seem to be interestingly distant,<br />
grounded, static or mobile, but not<br />
too much so. Later on, you will be<br />
encouraged to test the extremes. Even<br />
though you probably won't use them<br />
much, it's good to understand the effects<br />
they produce. This will allow<br />
you to use them skillfully if and when<br />
you want one of those effects.<br />
One thing you may have noticed is<br />
that the "rules" of composition sound<br />
more like suggestions. That is entirely<br />
intentional. Some photographers<br />
employ these rules very strictly. Most,<br />
however, bend and break them as<br />
they please. You should feel absolutely<br />
free to do the same —once<br />
you've understood what the "rules"<br />
are, why they exist and how they<br />
work. After you've reached that<br />
point, they are indeed only suggestions,<br />
or guidelines.<br />
• Line<br />
Weighting is generally achieved by<br />
positioning. It is often reinforced<br />
with line. For example, if you decide<br />
to weight a photograph strongly by<br />
positioning the dominant subject<br />
near the top of the frame, the impression<br />
of distance you create will be<br />
strengthened if lines starting in the<br />
foreground converge (get closer together)<br />
as they get nearer to the subject.<br />
One example is a photograph of<br />
a person walking along a sidewalk.<br />
The person will seem more distant if<br />
the receding lines of the sidewalk are<br />
emphasized. Fortunately, you don't<br />
have to do anything to the sidewalk<br />
to achieve this effect; the lines will<br />
converge naturally as a result of<br />
perspective. (Perspective will be examined<br />
in greater detail later.) All<br />
you need to do is to keep your eyes<br />
open for the effect when it may be<br />
useful.<br />
56 The Photographic Eye<br />
In this photograph, weighted toward the upper left-hand corner, the empty<br />
space of the window contributes to the dreamy quality of the image.<br />
(Student photograph by Kristin McCauley.)
How does this photograph's composition fit on the 9-zone grid? How is it<br />
weighted? How do the shapes in it work together? (Student photograph.)<br />
How does line affect this centered,<br />
top-weighted photograph? Where<br />
do the perspective lines converge?<br />
Does that tell you what the<br />
photograph is about? What is the<br />
photograph about? (Student<br />
photograph by Kenneth Griggs.)<br />
What is Composition? 57
FOCAL POINT: Composition Tips<br />
As you continue to practice photography<br />
and begin discovering your<br />
own style, you'll also begin defining<br />
your own approach to composition.<br />
The guidelines that follow will,<br />
however, help you get off to a good<br />
start. If you pay close attention to<br />
these guidelines, many of the photographs<br />
you produce now will look<br />
pretty good even after you become a<br />
master photographer.<br />
Get in close. The most common<br />
mistake made by beginning photographers<br />
is staying too far away from<br />
the subject. Admittedly, a distant<br />
shot can sometimes be very effective.<br />
As a general rule, however, the closer<br />
you are to your subject, the more interesting<br />
your photograph will be.<br />
Why? Well, first of all, the larger<br />
the subject is within the frame, the<br />
more detail it will have. Detail tends<br />
to add interest. Making your primary<br />
subject large also helps the viewer<br />
understand that it is the primary subject.<br />
(It's very frustrating to "wander<br />
around" in a photograph trying to<br />
figure out what the photographer<br />
wanted you to look at first.) Finally,<br />
getting in close reduces the size of the<br />
negative space, making it more<br />
interesting.<br />
A good way to practice this tip is<br />
to shoot a subject several times, moving<br />
in closer with each shot. See how<br />
close you can get and still produce an<br />
understandable image. You may be<br />
surprised.<br />
Pay attention to negative space.<br />
Keeping negative space relatively<br />
small is half the battle, but not all of<br />
it. In addition, it's important to experiment<br />
with the placement of your<br />
subjects until you achieve an effect<br />
that is not merely interesting, but<br />
58 The Photographic Eye<br />
Student photograph by Janice Pata.<br />
exciting.<br />
Get into the habit of scanning the<br />
edges of the frame —before you click<br />
the shutter —to see what the negative<br />
space looks like. If it doesn't excite<br />
you, change your position or camera<br />
angle until it does. This will get<br />
easier, even automatic, with practice.<br />
Edit your image. You don't score<br />
points as a photographer merely by<br />
being present for a photograph. You<br />
have to work at it. Anything within<br />
the frame that doesn't contribute to<br />
the whole image doesn't belong in it.<br />
Edit it out.<br />
Once again, this is done by mov-<br />
ing closer or to one side, or by shifting<br />
your camera angle until everything<br />
that should be in is in and<br />
everything that should be out is out.<br />
Never let yourself mutter, "That<br />
thing just got in the way." It's up to<br />
you to get it out of the way.<br />
Watch your edges. While you're<br />
shooting, printing or critiquing a<br />
photograph, look carefully at the<br />
borders, especially the corners. Lines<br />
that cut through the corners, random<br />
flecks of light or shadow and little<br />
bits of confusing detail along the<br />
edges will draw the viewer's eye away<br />
from the point of interest.
Keep verticals vertical and horizontals<br />
horizontal. Buildings that appear<br />
to lean or horizon lines that tilt are<br />
likely to make your viewers nervous<br />
or queasy. Avoid them by holding<br />
your camera level, or correct the print<br />
by cropping. Receding lines in the<br />
background are rarely a problem, but<br />
be sure the central image looks<br />
steady, unless you have a good reason<br />
to do otherwise.<br />
Place your subject in its environment.<br />
As another general rule, it is<br />
helpful to give the viewer some sense<br />
of the subject's surroundings. This<br />
does not mean, for example, that you<br />
need to pull away to show the entire<br />
neighborhood where a person is standing.<br />
A little bit of background detail<br />
may be all that's needed to provide<br />
a suitable context. Even clothing can<br />
provide an environment for a person's<br />
face.<br />
Here's an excellent example of a highly structured photograph. Notice how<br />
the lower hand forms a downward triangle with the two girls' heads. The<br />
hands of the girl on the right form a second triangle (pointing up). What<br />
lines emphasize the triangles? How does the sweater of the girl on the left<br />
relate to the background pattern of the jungle-gym bars? How does the<br />
position of the girls relate to the vertical lines of the 9-zone grid? How do<br />
the bars relate to the horizontal lines? (Student photograph by Jun Hwang.)<br />
Line can also contribute to the<br />
structure of a photograph without being<br />
directly involved in the position<br />
of its subject. The most common way<br />
it does this is by literally dividing the<br />
frame up in some kind of grid pattern.<br />
The grid produced by lines in a<br />
photo may or may not be the same<br />
as the compositional grid we have<br />
just been looking at. The lines may<br />
make a different grid of their own.<br />
In this case, the grid produced by the<br />
lines is added to the basic compositional<br />
grid. The rules concerning the<br />
compositional grid, however, remain<br />
the same.<br />
In fact, as you experiment with<br />
line, you will probably discover that<br />
the compositional grid corresponds<br />
quite accurately to the best placement<br />
of the most important lines in the<br />
frame. For example, horizon lines are<br />
generally most pleasing, and seem<br />
most natural, when they are placed<br />
very near one of the two horizontal<br />
lines in the compositional grid.<br />
Similarly, a key vertical line, such as<br />
the edge of a wall, will generally work<br />
best when it is placed near either of<br />
the two vertical lines of the grid. This<br />
observation leads to another: in most<br />
photographs that employ lines, the<br />
lines have merely weighted the photograph<br />
in one or another direction,<br />
depending on how they have been<br />
placed within the compositional grid.<br />
In other words, lines work within the<br />
grid just as any other objects do.<br />
What is Composition? 59
An unusual kind of balance is produced by composing a photograph so<br />
that it "pulls" in opposite directions. This photograph is weighted toward<br />
both the upper-right-hand and lower-left-hand corners. What effect does<br />
that have on its impact and mood? (Student photograph by Brian<br />
MacMillan.)<br />
• Shape<br />
Shape affecls structure in two ways:<br />
by where it is ... and by where it<br />
isn't. Though the idea may be hard<br />
to grasp until we explore it further (in<br />
the chapter on Shape), every object<br />
in a photograph actually has two<br />
shapes. The first shape is the obvious<br />
one: the space an object takes up<br />
within the frame, known as positive<br />
space. The second is less obvious: the<br />
space that surrounds an object. This<br />
second shape is called negative space.<br />
Because careful composition is required<br />
to make negative space interesting,<br />
it is one of the main differences<br />
between photographs and<br />
snapshots.<br />
Negative space is defined by<br />
borders —the borders of an object<br />
and the borders of the photograph's<br />
frame. The closer those borders are<br />
to each other, the more effective the<br />
negative space will be. If the subject<br />
60 The Photographic Eye<br />
of a photograph is surrounded by too<br />
much negative space, the overall effect<br />
may be weakened. In this case,<br />
the borders of the frame may be too<br />
far away from the object to interact<br />
with it in an interesting way.<br />
So, when you position a shape<br />
within the frame of a photograph,<br />
you need to pay attention to two<br />
things:<br />
First, is the shape itself interesting?<br />
If not, you can usually improve upon<br />
it by either altering the shape (asking<br />
a model to change position, for example)<br />
or by changing the angle from<br />
which you are photographing it. It is<br />
not enough simply to find an interesting<br />
subject; anyone who takes<br />
a snapshot does that. The photographer's<br />
job is to make an interesting<br />
photograph of an interesting subject,<br />
which is quite a different thing.<br />
The second point you need to think<br />
about when you position a shape is<br />
how it fits within the frame. Does it<br />
do something interesting in relation<br />
to the other objects and the frame?<br />
If not, you probably need to move<br />
the object or move your camera.<br />
Balance<br />
Balance is an equal relationship between<br />
two or more things. If you<br />
place two objects on a balancing<br />
scale, they are balanced when both<br />
sides of the scale are of the same<br />
weight. It's no different in photography.<br />
A photograph is balanced<br />
when the various elements "weigh"<br />
the same. This does not mean that<br />
they must take up the same amount<br />
of room. What it does mean is a good<br />
deal more complex.<br />
Let's say you are taking a<br />
photograph of a tree. You can<br />
balance the photograph in several<br />
ways, depending on the tree's surroundings<br />
and on the effect you<br />
want. If the tree stands alone against<br />
a blank sky, you'll probably want it<br />
to nearly fill the frame-in which<br />
case the negative space will interact<br />
well with the frame. In this case, the<br />
photograph has a single subject: the
tree.<br />
If the sky is interesting, you may<br />
choose to weight the tree toward the<br />
bottom of the frame. In this case,<br />
there are actually two subjects in the<br />
photograph: the tree and the sky. If<br />
the ground under the tree is interesting,<br />
you might weight the tree toward<br />
the top of the frame. Again, you have<br />
two main subjects: the tree and the<br />
ground.<br />
If there is a person standing off to<br />
the right side of the tree and if the sky<br />
behind is interesting, you might<br />
weight the tree to the lower left of the<br />
frame. You now have three subjects:<br />
the tree, the sky and the person.<br />
In all these examples, you achieve<br />
balance by making sure that the subject<br />
or subjects are placed in an interesting<br />
relationship to each other<br />
and to the frame of the photograph.<br />
Each should take up exactly the right<br />
amount of room it needs to achieve<br />
this relationship.<br />
To make things clearer, let's see<br />
what happens when a photograph is<br />
unbalanced. Go back to the photograph<br />
of the tree isolated against a<br />
blank sky. If you photograph it so the<br />
tree is small and weighted toward the<br />
bottom, what happens? First, the tree<br />
itself loses interest simply because it<br />
is small. Second, the sky loses interest<br />
because it is too big to create much<br />
negative space. There's so much negative<br />
space that the eye gets lost in it.<br />
This effect, which is almost always<br />
undesirable, is called dead space.<br />
Space that doesn't do anything is<br />
dead.<br />
The photograph we've just described<br />
is uninteresting because its<br />
subject is not balanced with the<br />
negative space. Make the tree larger<br />
and move it further up into the<br />
frame, and the photo begins to<br />
generate interest.<br />
Dynamics<br />
Dynamics are about movement,<br />
specifically the movement of a<br />
viewer's eye as it explores a photograph.<br />
When you look at a photograph,<br />
your eye naturally moves from<br />
one object within the frame to<br />
another. Ideally, that movement<br />
begins with the most important object,<br />
the primary subject, and then<br />
proceeds to less important ones,<br />
What is Composition? 61
Two kinds of dynamics are at<br />
work in this photograph. First, the<br />
viewer's eye naturally follows the<br />
eyes of the subject, to see what<br />
he's looking at (which, in this case,<br />
is beyond the frame). Second, the<br />
curved lines of the subject's jacket<br />
collar and hair create a sort of<br />
"funnel" that reinforces the<br />
dynamic flow. (Student photograph<br />
byJeffFrye.)<br />
secondary subjects. Finally, it comes<br />
full circle back to the primary subject<br />
again.<br />
In a poorly composed photograph,<br />
on the other hand, one of several<br />
things can happen to the dynamics.<br />
The viewer's eye may get stuck on one<br />
of the secondary subjects, which<br />
weakens the impact of the primary<br />
one. It may get distracted by something<br />
that wasn't supposed to be a<br />
subject at all (such as an annoying<br />
white space near one corner), in<br />
which case it may not really "see" the<br />
photo at all. Or it may find so many<br />
secondary subjects competing for attention<br />
that it just bounces around<br />
the frame until it gets tired and looks<br />
away.<br />
Part of your job as a photographer<br />
is to arrange the objects in a photograph<br />
so the eye naturally moves<br />
around it in a way that strengthens<br />
the photograph's impact. Generally,<br />
this means that the objects are arranged<br />
so the eye first notices the<br />
primary subject, then begins to explore<br />
how it relates to the secondary<br />
subjects, and finally comes back to<br />
the primary subject before going<br />
around one more time. The more<br />
interesting these relationships are, the<br />
more often the viewer's eye will<br />
repeaX its path around the photograph.<br />
This is what dynamics are all<br />
about —generating and holding in-<br />
62 The Photographic Eye<br />
terest by directing the eye around the<br />
photograph.<br />
Dynamics can be enhanced<br />
through the use of lines. Actual lines,<br />
as in the sidewalk mentioned above,<br />
may connect two or more subjects.<br />
This creates a sort of road map of the<br />
photograph. The eye finds its way<br />
around by following the lines.<br />
Implied lines can achieve the same<br />
effect. If, for example, a person in a<br />
photograph is looking at another subject<br />
in it, the viewer's eye will nat-
urally look to see what that other subject<br />
is. There is an implied line<br />
between the person's eye and the subject<br />
it is looking at. Similarly, many<br />
objects can, in effect, point at others.<br />
A fence, for example can point at a<br />
tree, even if the fence doesn't actually<br />
touch the tree. The viewer's eye will<br />
naturally tend to follow the line of<br />
the fence. When the fence ends, the<br />
eye will keep on going until it reaches<br />
the tree. This is another implied line,<br />
and another example of dynamics.<br />
At its best, the dynamics of a<br />
photograph bind all of the various<br />
elements together. Notice how the<br />
tuft of grass beneath the subject<br />
rises to the scarf, which then runs<br />
straight up to the face. The line<br />
continues, through the subject's<br />
hair, around the face and (back to<br />
the scarf again) spills over the<br />
subject's left shoulder. The<br />
similarity between the tuft of grass<br />
and the subject's bangs is a nice<br />
added touch. (Student photograph<br />
by Indira Suganda.)<br />
Take a few moments to test the<br />
theory of dynamics we've just outlined.<br />
Look at any photograph in this<br />
book and pay careful attention to<br />
how your eye moves about within the<br />
frame. Try this with several photographs.<br />
Which ones are most dynamic?<br />
Which hold your interest<br />
longest? Which contain distracting<br />
elements that interfere with the<br />
dynamics?<br />
While they may work alone, balance<br />
and dynamics often work<br />
together. A photograph conveys<br />
static balance when its subjects are of<br />
equal weight and appear immobile,<br />
"frozen." Static balance is essentially<br />
balance without strong dynamics. In<br />
a statically balanced photograph, the<br />
viewer's eye tends to take in everything<br />
all at once, without moving<br />
around the frame. This can be effective<br />
if the subject and composition so<br />
interesting that they hold the viewer's<br />
interest on their own. Portraits of<br />
people with especially interesting<br />
faces or expressions often employ<br />
static balance.<br />
A photograph achieves dynamic<br />
balance when its subjects are positioned<br />
to encourage the eye to move<br />
around within the frame.<br />
What is Composition? 63
EXERCISE<br />
Mat Frame<br />
Turn to the back of the book and<br />
locate the "Mat Template." Trace the<br />
template onto sturdy paper and drymount<br />
it onto a piece of dark mat<br />
board. (See Appendix for instructions<br />
on mounting.) Then carefully<br />
cut through both the mat and the<br />
template along the dotted lines. For<br />
best results, use a sharp knife<br />
(such as an X-acto) and a metal<br />
straight-edge.<br />
You have now constructed a mat<br />
frame with roughly the same proportions<br />
as your camera's viewfinder.<br />
Hold the frame an arm's length away,<br />
with the dark side toward you, and<br />
look through it. Wherever you happen<br />
to look, you'll have some kind of<br />
composition within the frame. Evaluate<br />
it. Is the composition interesting?<br />
Is it well-balanced? What<br />
kind of dynamics does it have?<br />
Next, shift the frame to either side,<br />
up or down, and observe how that<br />
changes the composition. Move it<br />
closer to you to fit more into it, or<br />
further away to crop more out of it.<br />
Rotate the frame so it goes from<br />
horizontal to vertical and back again.<br />
Try as many adjustments as you can<br />
think of until you've made the best<br />
composition you can. Then turn<br />
around and try the same process in<br />
another direction. Select an object<br />
near you and experiment with it.<br />
How many interesting compositions<br />
can you produce with a single object?<br />
Can you make an interesting composition<br />
out of absolutely anything,<br />
or do only certain kinds of things<br />
work well?<br />
64 The Photographic Eye<br />
Student photograph by Han June<br />
Bae.<br />
This exercise is, in a sense, a<br />
photographer's "warm-up" exercise.<br />
Its purpose is to loosen up your<br />
photographic "muscles" before you<br />
actually go out to shoot photographs.<br />
By exercising with just a frame, you<br />
may find that you notice things that<br />
you might miss with all the complications<br />
of a real camera. This is likely<br />
to be true whether you've already<br />
used a camera for years, or are just<br />
getting started. It's a good exercise to<br />
come back to at regular intervals, just<br />
to "freshen up" your eye— so keep the<br />
template handy and use it often.
EXERCISE<br />
Cropping<br />
This exercise begins much like the<br />
previous one. First, locate the "Cropping<br />
L's" template at the back of this<br />
book. Trace it, dry-mount it onto<br />
mat board and cut out the L's. (They<br />
are called L's because they're shaped<br />
like L's.)<br />
Place the L's on top of the photograph<br />
on this page. See if you can<br />
find a better or at least different composition<br />
within that photograph by<br />
adjusting the L's.<br />
Try cropping in on one small<br />
detail. Try trimming out any unnecessary<br />
details or background. Try<br />
shifting the balance to one side, up<br />
or down. See how many good photographs<br />
you can find in this one.<br />
Then turn to any other photograph<br />
in the book (the larger the better) and<br />
try the same thing. Continue<br />
experimenting with a variety of<br />
photographs.<br />
Try working with a partner, taking<br />
turns cropping the same photograph.<br />
Is there only one good composition<br />
within each photograph? Is there one<br />
best composition in each? Does<br />
everyone tend to agree on which is<br />
best?<br />
Keep your cropping L's handy, and<br />
use them often to evaluate compositions.<br />
Try using them during critique<br />
sessions (see the next section) to show<br />
the class how you would crop a photograph<br />
differently. Locate or obtain<br />
some magazines with a lot of large<br />
photographs (Life, National Geographic,<br />
Smithsonian, fashion<br />
magazines, etc.) and see how many<br />
of the photographs you can improve<br />
by cropping.<br />
Student photograph by Frank<br />
Hal!.<br />
What is Composition? 65
Student photograph by Jay Le Claire.<br />
66 The Photographic Eye
chapter 4 Developing a Critical Eye<br />
efore you begin doing<br />
something, it is generally<br />
helpful to establish some<br />
goals. If you have some idea of where<br />
you're headed —or where you should<br />
be headed —you're likely to arrive<br />
more quickly. You'll also be able<br />
to measure your progress more<br />
accurately.<br />
The best way to start setting your<br />
own photographic goals is to critique<br />
the work of other photographers.<br />
Once you begin begin producing your<br />
own photographs, you'll progress<br />
more rapidly if you let others critique<br />
your work as well. When a photograph<br />
is critiqued, all the various<br />
elements of it —good, bad or indifferent—are<br />
evaluated. Critiquing is<br />
no! the same as criticizing, which only<br />
involves pointing out flaws. In a true<br />
critique, positive and negative comments<br />
are balanced. This is an essential<br />
skill that every photographer<br />
must develop.<br />
CRITIQUE SESSIONS<br />
The critique session —or "crit," as it<br />
is popularly called —is one of the<br />
most valuable tools for developing<br />
skill as a photographer. In simple<br />
terms, a crit involves a group of people<br />
looking carefully at a selection of<br />
photographs, such as those you will<br />
be producing for the exercises in this<br />
book, and analyzing or judging them.<br />
Though a crit session does usually involve<br />
ranking the photographs, its<br />
primary purpose is group analysis.<br />
There are three basic questions to<br />
ask yourself about each photograph<br />
you critique: What is good about it?<br />
What is not good? How could it be<br />
better? The primary goal is to train<br />
your eye —to learn to see clearly as a<br />
photographer, when looking at<br />
others' photographs and when taking<br />
your own.<br />
You'll probably find that it's a bit<br />
less threatening to critique someone<br />
else's work, rather than your own.<br />
You won't be so close to it and,<br />
therefore, will be able to spot its<br />
strengths and weaknesses more objectively.<br />
This is one benefit of a group<br />
crit. Another benefit is that you can<br />
learn from each other's comments.<br />
EVALUATING A PRINT<br />
Take a look at the photograph to the<br />
left which we will use as an "example<br />
photograph" for the next few<br />
pages. Like most of the photographs<br />
in this book, it was taken by a student.<br />
Ask yourself the three questions<br />
mentioned above: What's good about<br />
it? What's not good? What could be<br />
better?<br />
As you ask these questions, a<br />
fourth one may come to mind: Where<br />
do you start?<br />
Most people, when asked to judge<br />
a photograph, will start by saying<br />
whether they like it or not. People<br />
tend to like a photograph when they<br />
like what's in it, and to dislike a<br />
photograph when they don't like<br />
what's in it. And many will stop<br />
there.<br />
Your first goal, as a photographer,<br />
is to move beyond your own likes and<br />
dislikes; to identify the technical, objective<br />
factors that define a photograph<br />
and to evaluate them. The<br />
essential distinction here is between<br />
style and standards.<br />
Style is largely a personal matter.<br />
In time, every photographer develops<br />
an individual style, a unique way of<br />
seeing things and expressing them —<br />
just as a singer or a writer develops<br />
an individual "voice." This does not<br />
mean that all of that photographer's<br />
work will look the same —far from<br />
it —but there will be certain stylistic<br />
themes that connect all the images in<br />
that photographer's portfolio.<br />
Similarly, each photograph has a<br />
style of its own, a mood or an interpretation<br />
of the subject. In the best<br />
photographs, that style is consistent<br />
— everything in the photograph<br />
contributes to the overall impact. The<br />
result is a single clear image, rather<br />
than a collection of random details.<br />
Liking or disliking that style is a<br />
matter of opinion — a subjective judgment.<br />
It has very little to do with<br />
whether the photograph is skillfully<br />
67
produced. Skill is the key ingredient<br />
of standards, and standards can be<br />
judged objectively. They are, by and<br />
large, matters of fact, not opinion.<br />
The place to start in your critique<br />
is to determine the facts about a<br />
photo. Once you've done this, you<br />
have a good basis for determining<br />
your opinions about it.<br />
Four basic factors determine a<br />
photograph's standards: value,<br />
clarity, composition and presentation.<br />
Ideally, a photograph will score<br />
well on each of these factors, but one<br />
or another factor may be so well represented—or<br />
the image so striking —<br />
that the photograph will be successful<br />
as a whole even if one (or more) of<br />
the other factors is lacking.<br />
Value<br />
Value, in a photograph, concerns<br />
light —not price. Specifically, it refers<br />
to the range of light in the photograph:<br />
from black through shades of<br />
gray to white.<br />
As a general rule, the more contrast<br />
a photograph has — or the wider<br />
the range between its darkest and<br />
lightest elements —the greater its<br />
visual impact will be. (As with any<br />
rules, there are exceptions; a photograph<br />
that is all grays, with no whites<br />
or blacks, can be very effective. But,<br />
in general, it's good to aim for<br />
contrast.)<br />
If, however, everything in a photograph<br />
is either black or white, with<br />
no grays, it may have a lot of impact,<br />
but will generally lack interest. Once<br />
the eye has taken in the bold image,<br />
there is not much reason to keep<br />
looking. So, in addition to a good<br />
balance of black and white, it's<br />
desirable to have a range of grays to<br />
define shapes and provide shading.<br />
When evaluating a photograph's<br />
value, it's important to distinguish<br />
68 The Photographic Eye<br />
A photograph of normal value contains black blacks, white whites and a<br />
variety of grays. (Student photograph.)<br />
between good and bad grays. The<br />
former are consistent and clear; the<br />
latter are best described as "muddy."<br />
Muddy grays may result from underexposing<br />
when shooting, underdeveloping<br />
the film, using an incorrect<br />
paper grade, over-exposing the<br />
print or removing it from the<br />
developer too soon.<br />
Take another look at the "example<br />
photograph." Evaluate its values.<br />
You'll probably notice right away<br />
that this is an exception to the rule<br />
about contrast. There is not much<br />
range between the photograph's<br />
lightest and darkest elements, yet the<br />
man's face is so expressive that the<br />
photograph works. If you look<br />
closely, you'll also notice that the one<br />
area with good contrast is the eyes —<br />
and the eyes are what grab your attention<br />
when you look at the photograph.<br />
So, while value in the overall<br />
image is limited, it is strong at the<br />
most critical point —the eyes. In fact,<br />
it is largely because the rest of the
Student photograph.<br />
A low-contrast or "monotone" photograph has a very narrow range of<br />
value. And notice how this one is dominated by mid-range grays and<br />
contains virtually no white or black. (Student photograph by Charles<br />
Stuart Kennedy HI.)<br />
A high contrast photograph<br />
contains predominantly blacks and<br />
whites, with few grays in between.<br />
(Student photograph by Jon<br />
Port is.)<br />
image is so subdued that the eyes are<br />
so penetrating.<br />
Improving Value<br />
When you have determined that the<br />
value of a photograph is weak, the<br />
next question is: How could it be<br />
better?<br />
Assuming the subject was reasonably<br />
contrasty to begin with, there are<br />
many possible causes for poor value.<br />
The most common is incorrect exposure<br />
when taking the photograph.<br />
Too little light will result in a dark,<br />
"muddy" print. Too much will cause<br />
highlights (white areas) to be<br />
"washed-out" or "burned out"—so<br />
white that no details are visible in<br />
them. (The upper corners of the "example<br />
photograph" are an example of<br />
this —though, again, the image works<br />
despite this flaw.)<br />
How the film is processed will also<br />
affect its values. The longer the film<br />
stays in the developer, the more contrasty<br />
it gets. Gray areas continue<br />
developing, getting blacker and<br />
blacker on the negative and, therefore,<br />
lighter and lighter on the print.<br />
If the film is removed from the developer<br />
too soon, its contrast will be<br />
low; the resulting prints will be weak<br />
and gray. Special chemicals are available<br />
with which you can re-develop<br />
film to increase or reduce the<br />
contrast.<br />
Additionally, the kind of paper<br />
used to make the print has considerable<br />
effect on its contrast. Paper<br />
grades, which range from low to high<br />
contrast (generally numbered 1<br />
through 5) allow considerable oppor-<br />
Developing a Critical Eye 69
Another "rule breaker"—this time<br />
without any real whiles and few<br />
blacks. Notice how the grays are<br />
crisp and varied—not muddy.<br />
(Student photograph by Michele<br />
Dearing.)<br />
tunity to adjust the contrast up or<br />
down when making a print.<br />
Other causes include paper that is<br />
accidentally exposed to the light, exhausted<br />
chemicals and improper<br />
developing of the print. Even slight<br />
amounts of light leaking into a<br />
darkroom can "fog" the paper,<br />
resulting in an overall gray tone.<br />
Chemicals that have been over-used<br />
or left out too long can become exhausted<br />
(or weak), resulting in unpredictable<br />
results. Too much or too<br />
little exposure of the paper under the<br />
enlarger and too long or too short a<br />
developing time will also distort the<br />
values of the final print. In all these<br />
cases, careful and consistent darkroom<br />
habits are the cure.<br />
Clarity<br />
The second key factor is clarity. The<br />
primary key to clarity is focus —not<br />
just whether or not the photograph<br />
is in focus, but whether it is correctly<br />
focused. There is a difference.<br />
In a correctly focused photograph,<br />
a subject may be either sharp or soft.<br />
With sharp focus, all edges are very<br />
clearly defined. With soft focus, the<br />
edges blur a bit. When something is<br />
out of focus, the edges blur more<br />
than they should. Here's another case<br />
in which personal style varies considerably.<br />
For some photographers,<br />
any blurring at all is unacceptable;<br />
others deliberately shoot with extremely<br />
soft focus to achieve a particular<br />
effect.<br />
Often, the best way to treat an image<br />
is to choose some elements that<br />
70 The Photographic Eye<br />
will be sharp, leaving others in softer<br />
focus so they are less distracting. This<br />
helps direct the viewer's eye to the<br />
focal point of the photograph, and it<br />
also makes your photograph more<br />
closely resemble normal sight. (Test<br />
this yourself: look at an object close<br />
to you and notice how the background<br />
goes out of focus.)<br />
So, the questions to ask are:<br />
What's in focus? What should be in<br />
focus? Generally it is the center of<br />
interest-what the photograph is<br />
about —that should be in focus.<br />
Then look at what is not in focus.<br />
Why is it not?<br />
Soft focus throughout a photograph<br />
may be effective, especially in<br />
portraits (to obscure blemishes or<br />
enhance the mood) or in landscapes<br />
(to achieve a dreamy effect). Special<br />
filters are available for this purpose,<br />
which work better than shooting out<br />
of focus.<br />
In addition to appropriate focus,<br />
clarity depends on an appropriate<br />
shutter speed and an appropriate<br />
degree of contrast between the sub-
"What to leave in, what to leave<br />
out ..." is the critical decision<br />
regarding focus. Notice that the<br />
helicopter in the background is just<br />
clear enough to be recognizable.<br />
This helps to keep our attention<br />
focused on the man in the<br />
foreground. (Student photograph<br />
by Trevor Bredenkamp.)<br />
ject and background. If the shutter<br />
speed is too slow, the subject will be<br />
blurred —either because it moved or<br />
because the photographer did. Blurs<br />
can be effective . . . if they are done<br />
on purpose. If the shutter speed is too<br />
fast, it may reduce the photograph's<br />
impact. For example, a race car that<br />
should look like it's zipping past may<br />
instead look like it's standing still.<br />
The relation between the subject<br />
and background in a photograph has<br />
something to do with light and value,<br />
with line and with composition.<br />
Common mistakes include photographing<br />
a dark subject against a<br />
dark background (causing the subject<br />
to vanish mysteriously), composing a<br />
photograph so trees are growing out<br />
of the subject's head, and placing a<br />
complex subject in front of a complex<br />
background (causing another vanishing<br />
act).<br />
Returning to the "example photograph,"<br />
the lines on the face, the<br />
mouth and, especially, the eyes are<br />
quite sharp. This reinforces their impact.<br />
The fur hood, zipper and button<br />
of the jacket are softer. They are<br />
clear enough to provide a context, or<br />
setting, for the face, but not so sharp<br />
as to compete with it for the viewer's<br />
attention. The nose is also a little<br />
soft, adding depth to the face. The<br />
shutter speed was fast enough to prevent<br />
any blurring, and the white<br />
background (what there is of it) sets<br />
the whole figure off nicely.<br />
Selective focus works again in this photo, in which the crowd is reduced<br />
to a suggestive blur—keeping our eyes on the quarterback. (Student<br />
photograph by Jerry Wisler.)<br />
Developing a Critical Eye 71
Placing everything in sharp focus<br />
helps to accentuate shapes and<br />
patterns, as well as giving the<br />
viewer's eye "permission" to wander<br />
about the composition. (Student<br />
photograph by Lena Aiken.)<br />
Occasionally — very occasionally — a<br />
poorly focused photograph can<br />
work just fine . . . even better than<br />
if it were focused "correctly."<br />
Notice how the soft focus on this<br />
woman affects the photograph's<br />
mood and meaning. What does the<br />
photograph seem to be about?<br />
What feelings does it convey to<br />
you? (Student photograph by<br />
Jonathan Serenius.)<br />
72 The Photographic Eye
Improving Clarity<br />
There are, again, a number of causes<br />
for poor clarity. Focus is the most<br />
common problem. It is generally<br />
caused by a failure to set the correct<br />
distance on the focusing ring. A less<br />
obvious, and slightly less common,<br />
cause is using too large an aperture.<br />
As the available light decreases, a<br />
photographer can make up for this<br />
lack of light in two ways (assuming<br />
no flash is being used). The shutter<br />
speed can be decreased, or the aperture<br />
can be increased. As the aperture<br />
is increased — as the lens opening gets<br />
larger —the depth of field, or range<br />
of distance that will be in focus at any<br />
time, decreases. Something will<br />
Wide depth of field can provide<br />
the viewer's eye with plenty of<br />
entertainment after a photograph's<br />
initial impact (in this case, the<br />
visual joke of the balloon) has<br />
worn off. How does this<br />
photograph make use of the 9-zone<br />
grid? Of weighting? Of value?<br />
(Student photograph by David<br />
Chmielewski.)<br />
always be in focus . . . but it may not<br />
be in the frame of the camera. The<br />
trick is to focus more carefully as you<br />
use larger apertures. After focusing,<br />
do not move forward or backward.<br />
When the subject is relatively close<br />
and the depth of field is very shallow,<br />
this can be crucial. (Depth of field<br />
will be covered in Chapter 9.)<br />
A third cause of poor clarity concerns<br />
the other half of the shutteraperture<br />
equation: As the shutter<br />
speed decreases, the chances of blurring<br />
a picture increase. This may be<br />
caused by a subject that moves, or by<br />
"camera shake," particularly in lowlight<br />
situations.<br />
You have little control over the<br />
movement of a subject (other than<br />
asking it to sit still), but you can control<br />
camera shake. Try pressing the<br />
camera tight against your forehead<br />
and cheekbone, holding your breath<br />
while you shoot, or bracing yourself<br />
against a wall —or all three at once.<br />
Another good technique is to prop<br />
your elbows on a solid surface or, in<br />
a pinch, on your knees.<br />
You will soon learn how slow a<br />
shutter speed you can safely use,<br />
which (as we'll discuss in Chapter 10)<br />
will vary according to the length of<br />
the lens you're using. For<br />
photographs that require a lower<br />
speed, use a tripod (see Appendix 4).<br />
In addition, a print may be fuzzy<br />
because the enlarger was incorrectly<br />
Developing a Critical Eye 73
focused. Use a focusing aid (see Appendix<br />
1) to correct this. If the problem<br />
persists, have your eyes and your<br />
lens checked. Your eyesight may be<br />
poor or your lens may be either faulty<br />
or dirty.<br />
Presentation<br />
The third factor to look for is the care<br />
and skill with which the final print<br />
has been produced. In addition to the<br />
contrast and focus already mentioned,<br />
one telltale indication of a<br />
print's quality (and, therefore, of the<br />
photographer's commitment to standards)<br />
is how clean it is. Look for<br />
white flecks, variously known as<br />
satellites, glitches, scuzz, hickies or<br />
glop —stuff on the negative that<br />
shouldn't be there. Other categories<br />
include fingerprints on the negative<br />
or print (keep your fingers out of the<br />
chemicals!), scratches, and dark<br />
circles caused by poor agitation when<br />
developing the film. In general,<br />
following instructions carefully, using<br />
anti-static brushes and other<br />
cleaning tools and keeping the<br />
darkroom as dust-free as possible will<br />
do the trick. It is possible to produce<br />
flawless prints, though at first it may<br />
not seem to be.<br />
Other aspects of presentation to<br />
look for include neatly trimmed edges<br />
(use a good sharp cutter), squared<br />
corners and proper adhesion to the<br />
mat board.<br />
Composition<br />
You already know something about<br />
composition. Of the four basic factors<br />
of "standards," it is the trickiest<br />
to define, because it is the closest to<br />
"style." There are, however, a number<br />
of aspects of composition that<br />
you can evaluate objectively. We'll<br />
review them quickly to refresh your<br />
memory.<br />
74 The Photographic Eye<br />
Where is the point of interest in this photograph? Is it cropped effectively? Is<br />
there wasted space in it? What would happen to the mood and impact of the<br />
photograph if it were cropped more tightly? Student photograph.<br />
• Point of Interest<br />
First and foremost, is there a point<br />
of interest? Does it stand out or is it<br />
lost in the surrounding confusion?<br />
With rare exceptions (and there are<br />
always exceptions), a photograph<br />
should have one clear point of<br />
interest —a single dominant element.<br />
Generally, the point of interest<br />
should be near the middle of the<br />
frame, though not usually right at the<br />
center.<br />
• Cropping<br />
Once you've identified the structure<br />
of the photograph, consider its cropping,<br />
or the way it is framed. Is it<br />
"tight" —is the frame filled with important<br />
elements, or is there wasted<br />
space? Blank areas, or negative<br />
space, can enhance a photograph's<br />
impact, but should interact with the<br />
central image in some way or the<br />
photograph will instead have less<br />
impact.<br />
As a general rule, it is good to keep<br />
the "idea" of the photograph "clean"<br />
and simple. The frame should narrow<br />
in on what's important, leaving out<br />
unnecessary details.<br />
What about the overall balance of<br />
the composition? Is it top-heavy, lopsided,<br />
boring? A composition may be<br />
balanced in two ways: static or<br />
dynamic.<br />
Static balance just sits there, but<br />
that can be quite effective. The most<br />
common way of achieving static balance<br />
is to weight the composition, or<br />
concentrate its point of interest, near<br />
the center.<br />
Dynamic balance suggests movement.<br />
Generally, this is achieved by<br />
weighting the composition away from<br />
the center, toward one side or the<br />
other, or toward the corners.<br />
• Lines<br />
Lines and curves within a composition<br />
often have a tremendous effect<br />
on its impact. Sometimes this will be<br />
obvious, as in a photograph with a<br />
crisscross pattern in the background.<br />
Often, however, you'll need to look
more closely to locate the straight and<br />
curved lines.<br />
Even a single line can "pull" or<br />
"point," drawing the viewer's eye<br />
toward or away from the point of interest,<br />
increasing or reducing the<br />
photograph's drama.<br />
Examine the lines of the "example<br />
photograph." Look for curves: the<br />
hood, the lines on the man's face, the<br />
circles under his eyes, the button, the<br />
slope of the right shoulder. All these<br />
add to the visual impact of the composition,<br />
creating a complex pattern<br />
which, in turn, creates an appealing<br />
"visual tension" in contrast to the<br />
eyes. In addition, the curves of the<br />
zipper help to anchor the composition,<br />
giving it a base and opening up<br />
into the face.<br />
Aesthetics<br />
Finally, we come to "style" —that<br />
elusive something that makes the difference<br />
between a skillful photograph<br />
and genuine art. Often, a photograph<br />
will have all the right elements but<br />
still not work. Sometimes, however,<br />
a photograph will lack many critically<br />
important elements, yet work very<br />
well. And, of course, all the right<br />
elements may combine to achieve an<br />
effect that is greater than the sum of<br />
its parts. Something special happens,<br />
a certain spark ignites, and the result<br />
is ... magic.<br />
It's difficult to pinpoint what<br />
makes this difference, but it is<br />
precisely what all photographers<br />
strive to achieve. As you progress,<br />
you'll become increasingly aware of<br />
which photographs have that something,<br />
and which don't, and why.<br />
And you'll begin to make it happen<br />
in your own photographs. A very<br />
good way to start, probably the only<br />
way, is to master the techniques of<br />
producing consistently good photo-<br />
How does the presentation of this photograph (using lith film to produce a<br />
high-contrast print) affect its impact? Do you think it probably improves the<br />
photograph? Is the presentation appropriate? Student photograph by<br />
Christopher Moiles.<br />
graphs, and to train your eye to<br />
recognize the great ones when they<br />
come along. Eventually, they will.<br />
Developing a Critical Eye 75
EXERCISE<br />
Sample Crit<br />
Describe the dynamics of this photograph. What elements contribute to them? Assess the value of the photograph.<br />
The composition (9-zone grid anyone?). How does it make you feel? What sort of person do you suppose the<br />
subject is? What sort of person do you suppose the photographer is? (Student photograph by Alison Sheehy.)<br />
Now it's your turn. Evaluate each of<br />
the photographs on the following<br />
pages, applying the criteria we've<br />
discussed in this chapter: value,<br />
clarity and composition. (Presentation<br />
is a bit hard to apply to photographs<br />
in a book.) Notice the use of<br />
negative space in each photograph.<br />
Can the cropping be improved? Is the<br />
primary subject well placed on the<br />
nine-zone grid? Is the photograph<br />
well balanced? How about its<br />
dynamics? Does it work?<br />
As you explore these and other<br />
76 The Photographic Eye<br />
questions, try to determine why each<br />
element of the photograph does or<br />
doesn't work. Ask yourself how you<br />
might improve each element. Would<br />
the photograph be equally or more<br />
effective if it were shot from a different<br />
angle? What changes in<br />
lighting might increase the photograph's<br />
impact? In some cases you're<br />
likely to see a number of possible<br />
alternatives or improvements. In<br />
others you may decide that the<br />
photograph is close to an ideal treatment<br />
of its subject.<br />
Take some notes as you evaluate<br />
each photograph. Jot down what you<br />
like about each photograph and what<br />
you think could be improved: "Good<br />
value range and mood; negative space<br />
could be enhanced by cropping in<br />
closer to face"; etc. Discuss your<br />
observations to see how others respond<br />
to the same photographs. Keep<br />
your notes on file and check them<br />
again in a few months to see if your<br />
perceptions change.
How does this photograph fit on the 9-zone grid? How would you rate its value? What about the cropping (i.e<br />
the missing head)? Is it annoying? What, if anything, does the photograph say to you? What sort of person do<br />
you suppose the subject is? (Student photograph by Jeff Frye.)<br />
Developing a Critical Eye 77
The value of this photograph is restricted to black and a very narrow range of grays. Is it appropriate and<br />
effective? How is the composition structured? Do you suppose the starfish was found where it is or placed there<br />
by the photographer? Does it matter to you? What elements do you consider most important in it? How does the<br />
photograph make you feel? What thoughts or memories does it provoke? (Student photograph by Amy Christine<br />
Zorovich.)<br />
78 The Photographic Eye
Does this photograph have any composition? (Look carefully and remember the grid.) What do you think of it?<br />
How about its values? Its focus? What, if anything, is it about? (Student photograph by Jon Portis.)<br />
Developing a Critical Eye 79
How would you evaluate this photograph? (Student photograph.)<br />
80 The Photographic Eye
How would you evaluate this one? (Student photograph by Chong Street.)<br />
Developing a Critical Eye 81
Used correctly, the "point of departure" setting will produce consistently good results in bright sunlight. (Student<br />
photograph.)<br />
82 The Photographic Eye
chapter 5 Point of Departure<br />
(f/16 at 1/125)<br />
N<br />
o\v that you are familiar with<br />
your camera, and have<br />
begun to evaluate composition,<br />
it's time to start putting your<br />
knowledge to work —by actually taking<br />
some photographs. In order to<br />
help you begin taking good photographs<br />
immediately, technical concerns<br />
will initially be kept to a<br />
minimum. At first, you will be doing<br />
little more than aiming your camera,<br />
focusing and shooting. As you proceed<br />
through the various exercises,<br />
however, you will gradually add on<br />
new techniques, learning new ways to<br />
express your own vision. By the time<br />
you reach the end of this book, you<br />
will have a solid foundation of skill<br />
and the beginnings of a personal<br />
style. Later, as you continue to progress<br />
on your own, you'll be able to<br />
push your skill and style to the limit.<br />
But for now, we'll stick to the basics.<br />
STARTING SIMPLY<br />
Your first assignments will be based<br />
on a "point of departure" that will<br />
enable you to produce technically<br />
successful photographs without getting<br />
bogged down in details. You will<br />
be using a standard aperture and<br />
shutter-speed setting: f/16 at 1/125<br />
of a second.<br />
By using one standard setting,<br />
you'll be able to concentrate on learn-<br />
ing how to "see" with a camera. In<br />
addition, starting with this setting will<br />
help you learn how the camera<br />
works. This, in turn, will provide a<br />
basis for all your future photography.<br />
Once you've had some experience<br />
with the standard setting,<br />
you'll be able to make informed decisions<br />
about how to handle a variety<br />
of other lighting situations.<br />
You will be using black-and-white<br />
film with an ISO of 125, such as<br />
Kodak's Plus-X. Your shutter will be<br />
set at 1/125 of a second, fast enough<br />
to "freeze" most action. Your aperture<br />
will be small —f/16 —so almost<br />
everything will be in focus. After<br />
loading the film, you'll adjust your<br />
camera controls to these settings —<br />
and leave them there.<br />
You may find yourself tempted to<br />
change the settings if your light meter<br />
disagrees with them. (After all, that's<br />
what the light meter is for, right?)<br />
But for now, just pretend the light<br />
meter isn't there.<br />
There are several good reasons not<br />
to rely on your light meter at the<br />
beginning. First, if you learn to shoot<br />
without it, you'll be better equipped<br />
to do so when necessary —such as<br />
when your batteries die on you, 100<br />
miles from the nearest camera shop.<br />
(Many cameras can be used manually<br />
without batteries, though some<br />
modern ones cannot.) A second good<br />
reason is that your light meter is not<br />
always accurate. Light meters assume<br />
you want the average value in your<br />
photograph to be gray. Usually you<br />
do. But when you don't, or when<br />
unusual lighting conditions "confuse"<br />
the light meter, then it's vital that you<br />
know how to work without it.<br />
When you start shooting your first<br />
assignments, you will need to pay attention<br />
to only one technical concern:<br />
make sure your subject is well lit.<br />
This means that you will need to<br />
shoot outdoors in sunny weather. A<br />
day with some clouds is okay, but a<br />
heavily overcast or rainy day is not.<br />
It also means that you will generally<br />
want the sun to be behind you —so<br />
it is shining on your subject, not in<br />
your lens.<br />
So long as your subject is well lit,<br />
and you stick to f/16 at 125, you will<br />
produce correctly exposed photographs.<br />
That's a promise. Try it.<br />
DOING IT RIGHT<br />
The need for good light brings up<br />
another important point: Don't wait<br />
till the last minute. For each of your<br />
assignments, take the time to locate<br />
interesting subjects and to shoot them<br />
well. Keep an eye on the weather, and<br />
be ready to make use of it when it's<br />
good. (Bear in mind that overcast<br />
skies, rain and snow can be "good,"<br />
83
Student photograph by Linda<br />
Raymond.<br />
once you've learned how to use<br />
them.) Do some exploring before you<br />
start shooting. Don't just step into<br />
your back yard and grab a few quick<br />
shots. Sometimes you will find a<br />
great subject there, but even so, give<br />
yourself enough time to really see it.<br />
Every time you photograph a subject,<br />
try to take several shots of it<br />
from several completely different<br />
angles. Use your camera to explore<br />
the subject, to learn about it, to<br />
discover how it interacts with other<br />
objects, with light, with space. Never<br />
allow yourself to take just one shot<br />
and call it quits. Who knows what<br />
you might have missed?<br />
Though it is important to reserve<br />
time to devote to your photography<br />
assignments, try to keep them in<br />
mind at other times as well. When<br />
you're out walking, shopping in<br />
town, travelling —anytime you're doing<br />
anything —keep your eyes open<br />
for photographic possibilities. Even<br />
if you don't have a camera with you,<br />
or never go back to make use of those<br />
possibilities, it's good practice to look<br />
for them. Photography is essentially<br />
a way of seeing, a way of sorting<br />
through all the images that rush past<br />
you every day and noticing the special<br />
ones. The more you train yourself to<br />
see in this way, the better you'll do<br />
when you set out to capture some of<br />
those special images on film.<br />
On a more practical level, you'll<br />
find that you enjoy your assignments<br />
more if you've already compiled a<br />
mental list of interesting places to explore<br />
with your camera. You may<br />
even want to write that list down, so<br />
you'll have a ready source of inspiration<br />
when you need it. If you do, you<br />
won't waste time later wandering<br />
84 The Photographic Eye<br />
around in search of something to<br />
photograph.<br />
Great shots are very rarely quick<br />
and easy. Usually, they require patience<br />
and imagination. The more<br />
time you devote to each assignment,<br />
the more you will learn — and the better<br />
your results will be. There's a<br />
special sense of accomplishment that<br />
only comes from working slowly,<br />
carefully and creatively. Making that<br />
your goal, from the very beginning,<br />
is well worth the effort.<br />
Finally, as you're shooting each<br />
assignment, keep reminding yourself<br />
of its theme. It's easy to get so caught<br />
up in a subject that you forget to look<br />
for line or texture or whatever else the<br />
assignment is supposed to be about.<br />
While such enthusiasm is commendable,<br />
it is important to stick to the<br />
themes of the assignments, and to<br />
seek out subjects that are specifically<br />
appropriate to them. Once you've<br />
done that, you can always take a little<br />
more time to just shoot whatever<br />
interests you.
Student photograph by Jon<br />
Ginsberg.<br />
Student photograph by Kenneth<br />
Griggs.<br />
Point of Departure 85
There are three basic line effects in this photograph. What are they? (Student photograph by Wendy O'Connel.)<br />
86 The Photographic Eye
chapter 6 Line<br />
T<br />
he "point of departure"<br />
camera setting (f/16 at 125<br />
of a second) provides an uncomplicated<br />
introduction to the<br />
mechanics of photography. We'll<br />
now do the same thing with composition.<br />
The first subject in photographic<br />
theory is, quite simply,<br />
line.<br />
PATTERN, STRUCTURE,<br />
DIRECTION<br />
You may recall that in geometry a<br />
line is a one-dimensional series of<br />
points. Several lines are required to<br />
define a three-dimensional shape.<br />
You could say that a line is an<br />
edge, a border between one thing and<br />
another. It can also be the connection<br />
between two things, like a clothesline<br />
tied between two trees. Straight,<br />
curved, bent or zig-zagged, it goes<br />
from one place to another.<br />
Understanding lines is one of the<br />
primary requirements of photography.<br />
Virtually every photograph,<br />
of course, has lines in it. Some of<br />
these lines do more than merely<br />
divide or connect objects. They may<br />
also suggest moods and rhythm,<br />
create patterns, indicate directions<br />
and structure. The various qualities<br />
of the lines in a photograph combine<br />
to produce an overall impression,<br />
called line.<br />
How do your eyes react to this highly linear shot? Does it hold their<br />
interest? If so, why? (Student photograph by Jean Ann Hall.)<br />
Line is not passive. Instead, it is a<br />
strong visual force that pulls the<br />
viewer's eye around in a picture. Used<br />
well, it suggests movement, conveys<br />
impact and helps to focus attention<br />
on the key points of the composition.<br />
Used poorly, it distracts attention and<br />
weakens the composition's effect. It<br />
may be simple, but is also powerful.<br />
It is a bit like electricity. And like<br />
electricity, it must be controlled to be<br />
useful.<br />
Line may be a subject in itself (as<br />
it will be in your first assignment), or<br />
it can play a supporting role for<br />
another subject. Lines may be connected<br />
in a larger pattern or isolated<br />
from each other, evenly distributed<br />
across the frame in an orderly manner,<br />
or scattered at random. A photograph<br />
may be dominated by just one<br />
line or packed with many. A line need<br />
not be "real" to have its effect. Objects<br />
of the same height (such as a<br />
Line 87
How many basic line effects are in<br />
this photograph? (Student<br />
photograph by Robert Muller.)<br />
How many basic line effects are<br />
there in this photograph? Notice<br />
how the lampshades and the<br />
several open windows add<br />
"punctuation" to the overall<br />
pattern. (Student photograph by<br />
John Pang.)<br />
88 The Photographic Eye<br />
lull I ill 11J 111 ll II Hill 111 Illll 111
What "instructions" do these lines give to your eye? How does your eye<br />
move around the photograph? Where, if anywhere, does your eye come to<br />
rest? (Student photograph by William Roche.)<br />
row of fence posts) and the border<br />
between a building and the sky both<br />
produce an implied line that works<br />
just as well.<br />
All of these possibilities boil down<br />
to three basic functions: pattern,<br />
direction and structure.<br />
As pattern, line is often a photograph's<br />
primary element. The lines<br />
themselves interact in some interesting<br />
way that is more important<br />
than any other elements within the<br />
frame. A photograph of buildings or<br />
cornfields or blades of grass is likely<br />
to emphasize pattern.<br />
As direction, line helps the viewer's<br />
eye travel around the picture. Visually,<br />
the lines say, "Go here. Look<br />
at that. Stop. Move on." A photograph<br />
with many different kinds of<br />
objects especially needs strong directions<br />
to help the viewer understand<br />
it. Without directing lines, the overall<br />
image can simply seem like chaos<br />
(which, of course, may be the photographer's<br />
intention).<br />
As structure, line divides a<br />
photograph into smaller areas, providing<br />
a skeleton to support the other<br />
elements and link them together. A<br />
strongly structured photograph will<br />
often seem to be several photographs<br />
in one. A photograph of several faces<br />
peeking out of windows is one example<br />
of this.<br />
Line also conveys movement, or<br />
the lack of it. A rigid grid of straight<br />
lines tends to make an image appear<br />
static, flat, immobile. Lines that converge<br />
(that are closer together at one<br />
end than at the other) or that shoot<br />
off toward the corners of the frame<br />
tend to suggest motion. Straight lines<br />
suggest the full-speed-ahead motion<br />
of a train, or the up-and-down of a<br />
piston. Curves tend to suggest movement<br />
that is more like dance.<br />
Similarly, lines can increase or<br />
Line 89
Notice the soft-focus lines behind<br />
the tennis player. What instructions<br />
do they give to your eye? What<br />
effect do they have on the<br />
photograph's composition? On its<br />
impact? (Student photograph by<br />
Jon Portis.)<br />
90 The Photographic Eye<br />
decrease the apparent depth of an image.<br />
If you shoot a flat surface from<br />
an angle, the lines in it will be closest<br />
together at the point where the subject<br />
is furthest away from you.<br />
This creates the illusion of threedimensional<br />
space, or depth. If you<br />
shoot it straight on, so the lines remain<br />
parallel, you reinforce the impression<br />
of flatness. You decide<br />
which effect you want.<br />
You can even make a round object<br />
appear flat by shooting it straight on,<br />
right at its exact center, and using a<br />
small aperture. Any lines that would<br />
normally indicate its roundness will<br />
appear straight and flat. This appearance<br />
will be strengthened by the<br />
extreme depth of field (almost everything<br />
in focus) provided by the small<br />
aperture.<br />
Finally, different kinds of lines express<br />
different moods or emotions.<br />
Straight lines tend to seem rigid,
What's the "tune" of this woodpile? (Student photograph by Frank Hall.)<br />
harsh, intense. Curved lines and<br />
circles are more inviting, calm and<br />
soothing. Zig-zags seem busy, conveying<br />
excitement or confusion.<br />
Thick lines seem imposing. Thin ones<br />
seem delicate.<br />
To get a sense of how these effects<br />
work, look at different kinds of lines<br />
and see what sounds and rhythms<br />
they suggest to you. What sort of<br />
musical instrument or tune reminds<br />
you of wavy lines? Zig-zags? Circles?<br />
Straight lines in a row? It may seem<br />
odd to think of listening to lines, but<br />
with a little experimentation you'll<br />
probably discover that it comes very<br />
naturally. Different kinds of lines do<br />
have different characters.<br />
The key point is that lines are expressive<br />
tools. As a photographer,<br />
you'll need to learn to use them<br />
effectively.<br />
Before you can use them, however,<br />
you have to find them. Where should<br />
you look? Well, just about anywhere.<br />
Here's a short list: sidewalks, streets,<br />
telephone poles, buildings, bowls,<br />
wheels, trees, grass, rivers, forks and<br />
spoons, cracks, mountains, pencils,<br />
curtains, clothing, hands, arms,<br />
chairs, fields, tennis courts, bleachers<br />
and jungle-gyms.<br />
Once you start noticing lines, you'll<br />
find them everywhere. And that is exactly<br />
the point. It is because they are<br />
everywhere that lines are so fundamental<br />
to photography. They are<br />
the basic vocabulary of the photographic<br />
language.<br />
It may seem odd to think of photography<br />
as a language. But that's exactly<br />
what it is. Both a sentence and<br />
a photograph ought to have a subject.<br />
And just as a sentence may have<br />
verbs, adverbs, objectives and prepositions,<br />
a photograph may have<br />
movement, mood, perspective and<br />
relation. Understanding line is the<br />
first step toward learning to express<br />
yourself in the photographic<br />
language.<br />
What sort of musical sounds do<br />
the bent lines in each of the glasses<br />
suggest? What about the<br />
background lines? What instrument<br />
might play them? (Student<br />
photograph by Tyler Smith.)<br />
Line 91
EXERCISE<br />
Pattern<br />
Your assignment is to find and shoot<br />
patterns. Any series of lines creates<br />
a pattern.<br />
Look above your head, down at<br />
the ground, as well as straight ahead.<br />
Try to find subjects that are primarily<br />
patterns, not just ones that have some<br />
pattern in them. So far as possible,<br />
have the pattern fill the frame of the<br />
photograph. Try to have nothing in<br />
the photograph except pattern.<br />
Though your assignment is to<br />
shoot pattern, you may want to consider<br />
some of the other qualities of<br />
line as well, such as direction or structure.<br />
See if you can add them into a<br />
photograph without losing sight of<br />
your primary goal. Use these other<br />
qualities to strengthen the pattern,<br />
not to detract from it. For example,<br />
you may want to use perspective so<br />
your pattern recedes into the distance,<br />
suggesting direction. Or you<br />
may find a series of small patterns<br />
contained in a large one, creating<br />
structure.<br />
Remember to keep your camera on<br />
the point of departure setting (f!6 at<br />
1/125 of a second), and to shoot in<br />
open sunlight. The rest is up to you.<br />
92 The Photographic Eye<br />
Student photograph by Allison Page.
Experience the illusion of motion in this vivid image, created by the vertical lines of fences and their horizontal<br />
shadows. Do you get a sense of overlapping fences pumping up and down ? Can you feel how the shadows and stairs<br />
produce a nearly circular sweep, up to our left and back down on the right? (Student photograph.)<br />
...<br />
Line 93
Can you distinguish line from texture in this shot? (Student photograph by Han June Bae.)<br />
94 The Photographic Eye
chapter 7 Texture<br />
ow that you've begun to<br />
develop an eye for line, it's<br />
time to complicate things a<br />
bit by adding texture. Actually,<br />
you've probably already done this on<br />
your own. The photographs you shot<br />
for the pattern exercise almost certainly<br />
included texture as well. Like<br />
line, texture is hard to avoid. Almost<br />
everything has some texture: rough or<br />
smooth, patterned or irregular, dramatic<br />
or subtle.<br />
One thing you'll begin to notice is<br />
that the various elements of photography<br />
tend to overlap. Though you<br />
will be exploring them separately, it<br />
is often difficult, even impossible, to<br />
separate one element from another.<br />
You may not always be able to say,<br />
for example, "This is line; that is texture."<br />
Don't worry about this lack of<br />
precise categories. The important<br />
point is to recognize and understand<br />
all the different elements. It is far less<br />
important to always be able to tell<br />
them apart. Learning to notice them<br />
separately, however, will help you<br />
learn to combine them effectively.<br />
EXPRESSING <strong>THE</strong> "FEEL"<br />
Texture mainly concerns the surfaces<br />
of things. In the previous section, we<br />
saw how line can convey the impression<br />
of three-dimensional realism by<br />
Many photographs have more than one "level" of texture. The undulating<br />
surface of the cloth is one level of texture. The smaller variations in the<br />
weave of the cloth is another. (Student photograph by Evelyn Wight.)<br />
suggesting depth or height. Texture<br />
strengthens that impression by providing<br />
visual clues to the "feel" of a<br />
subject. In a sense, texture enables<br />
the eye to "touch" the subject.<br />
A photograph, like a painting, is<br />
two-dimensional. It reproduces a<br />
three-dimensional image on a flat<br />
surface. To break through the limitations<br />
of that flat surface, a photog-<br />
rapher, like a painter, has to employ<br />
visual "tricks." These tricks create the<br />
illusion of three-dimensional space.<br />
Depending on the angle from<br />
which you take a photograph, you<br />
can use line to represent an object<br />
three-dimensionally, or to flatten it.<br />
With texture, however, you are<br />
always working in three dimensions.<br />
Flattened texture is simply pattern,<br />
95
Student photograph by Man-<br />
McCoy.<br />
96 The Photographic Eye<br />
and pattern is simply a combination<br />
of lines.<br />
Look at the photographs of a brick<br />
wall on this page. The first thing<br />
you're likely to observe is the pattern<br />
produced by the lines between the<br />
bricks. If you look more closely,<br />
however, you'll see that the bricks<br />
stick out beyond the lines. This<br />
creates one kind of texture. If you<br />
look even more closely, you'll notice<br />
variations in the surface of the bricks.<br />
That's another texture.<br />
If the wall is evenly lit from the<br />
front, the strongest element will be<br />
line. The wall will look like a flat surface,<br />
divided into a grid pattern.<br />
Variations in the surface of the wall<br />
will not show as much.<br />
If, however, the wall is lit from one<br />
side, the element of texture will be<br />
strongest. The most noticeable thing<br />
about the wall will be the variations<br />
in its surface. The line grid will still<br />
be there, of course, but it won't stand<br />
out as much.<br />
Once again, you'll notice that line<br />
and texture are similar. The difference<br />
between them depends<br />
primarily on the angle of light.<br />
Texture is far more sensitive than<br />
line to shifts in lighting. If you continued<br />
to look at that brick wall<br />
throughout the day, you would see<br />
the texture constantly changing as the<br />
sun passed over it. It would be most<br />
dramatic early and late in the day,<br />
when the sunlight strikes it at a low<br />
angle. This has the effect of stretching<br />
out all the small shadows created<br />
by variations in the surface of the<br />
wall. As the shadows get longer and<br />
more exaggerated, they appear more<br />
dramatic.<br />
One of the most important tasks<br />
for a photographer is to observe and<br />
make use of changing light. This is<br />
especially vital when shooting for
texture, which depends on light.<br />
In addition to enhancing the impression<br />
of reality in a photograph,<br />
texture adds visual interest. Pure line<br />
or pattern can be very impressive, but<br />
may fail to hold the viewer's interest.<br />
Texture, particularly if it is irregular<br />
or complex, gives the viewer's eye<br />
more to play with. It creates little<br />
nooks and crannies for the eye to explore.<br />
It invites the viewer to linger<br />
a while and look around. It also provides<br />
information about the subject —<br />
its age, condition and other qualities.<br />
The photograph of a building on<br />
this page is a good example of the different<br />
effects produced by line and<br />
texture, and of how they can be combined<br />
to increase impact. The first<br />
thing you're likely to notice about this<br />
photograph is the strong lines of the<br />
building. As you look more closely,<br />
however, your eye will probably be<br />
caught by the complex texture of the<br />
foreground. Finally, you might<br />
notice how the glass distorts the<br />
reflection of another building, in the<br />
center of the frame.<br />
The first impression, then, is line.<br />
The second is texture. The third is<br />
shape, which we'll cover in greater<br />
depth in the next section. Each provokes<br />
a different kind of interest.<br />
As you continue to examine the<br />
Contrasting patterns of white snow<br />
against dark steps creates a sort of<br />
zigzag motion aimed at the upper<br />
left corner of the image. Notice how<br />
your eyes move as they look at this<br />
picture. Do they settle at any one<br />
point? How does this feel? (Student<br />
photograph by Amy Ferrais.)<br />
Texture 97
photograph, your attention may also<br />
focus on the small wedge in the lower<br />
lefthand corner: line again. By combining<br />
several elements, and contrasting<br />
two linear effects, the<br />
photograph gains interest that would<br />
be lost if it had concentrated only on<br />
line.<br />
You can test this idea yourself, by<br />
covering up the foreground so only<br />
the lines are visible. How does that<br />
affect your interest in the image?<br />
How does it change your impression<br />
of the building?<br />
This does not mean that texture<br />
necessarily improves a photograph.<br />
How you use it, and whether you use<br />
it at all, is strictly a personal choice.<br />
It is, however, one of your basic tools<br />
as a photographer. Learning to notice<br />
it is one step toward mastering<br />
technique.<br />
98 The Photographic Eye<br />
Used creatively, texture can provide enough information so that even a<br />
very abstract photograph makes perfect sense. Do you have any trouble<br />
recognizing the subject of this one? (Student photograph by Lynne<br />
Mattielli.)
Texture itself can be an effective<br />
subject for a photograph. (Student<br />
photograph by Bjorn Goldis.)<br />
Texture can be very effective as a<br />
context for another subject. Notice<br />
how the highly textured vegetation<br />
sets off the shape and the soft fur<br />
of the rabbit. (Student photograph<br />
by Craig Hurst.)<br />
Texture 99
EXERCISE<br />
Leaves<br />
Your next assignment is to shoot<br />
leaves. Not just any leaves, but leaves<br />
with texture. As noted previously, it<br />
is important to keep the theme of the<br />
assignment in mind, as well as the<br />
subject.<br />
Look for as many kinds of leaves<br />
as you can find. Leaves on trees, or<br />
on the ground. Even pine needles are<br />
officially acceptable, though they are<br />
not strictly leaves.<br />
In order to fulfill the texture<br />
requirement, you'll want a good<br />
amount of contrast. This means that<br />
the leaves should be in open sunlight.<br />
Try to do your shooting in the morning<br />
or afternoon, not in the middle<br />
of the day. That will ensure that the<br />
light is striking your leaves at an<br />
angle, enhancing their texture. Once<br />
again, use the point of departure setting<br />
f/16 at 125.<br />
Keep an eye out for interesting effects<br />
of light and shadow: one leaf<br />
casting a shadow on another, or on<br />
the ground or branch beneath it.<br />
Finally, unless you're lucky enough<br />
to find a single leaf of extraordinary<br />
interest, you'll probably do better<br />
shooting several together. Notice how<br />
they interact with each other and with<br />
the frame of the picture. Crop in<br />
close enough so there's no wasted<br />
space, but don't forget that space can<br />
be a useful compositional tool.<br />
100 The Photographic Eye<br />
Student photograph by David Kleinfelt.
Student photograph by William Roche.<br />
Student photograph by Alexandra<br />
Berg.<br />
Texture 101
A series of similar curves, an interesting juxtaposition of two objects (the sunglasses and the BMW hood<br />
ornament) and effective use of negative space all lend impact to this simple still life. (Student photograph by<br />
Trevor Bredenkamp.)<br />
102 The Photographic Eye
chapter 8 Shape<br />
n the two previous exercises,<br />
you've begun training your<br />
eye to see line and texture.<br />
Both are vital, but relatively simple,<br />
compositional elements. The next<br />
one, shape, is more complex. To<br />
apply it well, you will have to pay<br />
particular attention to the relationships<br />
between objects within the<br />
frame of each photograph.<br />
You've already done a "test run" on<br />
this in the framing exercise. The next<br />
step is to take the lessons learned in<br />
that exercise and translate them effectively<br />
and consistently into actual<br />
photographs.<br />
As we've mentioned earlier, the<br />
photos you produce in the exercise on<br />
shape will probably contain line and<br />
texture as well. That's precisely what<br />
should be happening. While each element<br />
can be effective by itself, it's<br />
likely to be most effective in combination<br />
with others. The goal of this<br />
entire section is to provide compositional<br />
"building blocks" that you will<br />
assemble in new and interesting ways.<br />
MASS, PROPORTION<br />
& RELATION<br />
When we look at something, its shape<br />
tells us what it is. There are, of<br />
course, other ways of figuring this<br />
out —by smell or touch or sound —<br />
but shape is the way that is most<br />
familiar. If someone asks you to<br />
describe something, you would probably<br />
start with its shape.<br />
For a photographer, however,<br />
shape is something more than a<br />
means of recognition. Shape helps<br />
convey the nature of a subject; not<br />
just what it is, but what it is like. Is<br />
it heavy, light, big, small, beautiful,<br />
ugly, interesting, plain? Shape<br />
answers questions like these. It also<br />
answers questions about the way an<br />
object interacts with its surroundings:<br />
Which object is biggest, closest, most<br />
important?<br />
So, the functions of space in a<br />
photograph can be grouped into three<br />
categories: mass, proportion and<br />
relation. Mass has to do with the<br />
amount of space an object fills up,<br />
how big and heavy it is. Proportion<br />
has to do with how the mass of one<br />
object compares to that of another,<br />
and how the various parts of a single<br />
object "hang together."<br />
Relation is probably the most complicated<br />
aspect of space, and the most<br />
important. Relation is primarily concerned<br />
with how objects interact.<br />
This can mean physical factors, such<br />
as whether they are close, touching,<br />
far apart, similar, different, etc. Interaction<br />
between objects can also be<br />
extended to include interpretive factors,<br />
such as which object is more attractive,<br />
which is more important,<br />
which is dominant, whether they<br />
seem to belong together, and so on.<br />
Relation tends to require some<br />
degree of judgment. For a relation to<br />
be clear, somebody usually has to<br />
decide what that relation is. You, as<br />
the photographer, for example, may<br />
make value judgments. You may decide<br />
that object "A" is more attractive<br />
or interesting or important than<br />
object "B," and you may compose a<br />
photograph to indicate that relation.<br />
Or someone in your photograph may<br />
be making the decision, by looking at<br />
an object in a certain way, or touching<br />
it, or using it. Even the physical<br />
relationships of objects in a photograph<br />
often depend on how one is<br />
looking at them. Two objects<br />
photographed from a distance may<br />
appear close together. The same objects<br />
shot close up may appear far<br />
apart.<br />
Like the relation between two people,<br />
the relation between two shapes<br />
(called a spatial relation) tells us more<br />
than just that they happen to be<br />
together. It asks us to consider why<br />
they're together.<br />
Imagine two people you've never<br />
seen before, walking into a room.<br />
What do you notice about them?<br />
What do you want to know? You're<br />
likely to observe them first as individuals,<br />
noticing each of their<br />
faces, clothes, mannerisms, etc. Then<br />
103
In this high-contrast print, shape is all there is . . . but it's enough. The chair shape is clearly a chair and the<br />
person shape is clearly a person's shadow. The spatial relation between the two is a/so clear. The shapes in the<br />
photograph don't just convey information, however, they also convey a mood. This photograph is "about" more<br />
than its graphic impact. (Student photograph by Amy Thomas.}<br />
you'll probably start wondering why<br />
they're together. If they seem to be<br />
an obvious pair, like two businessmen<br />
or two athletes, you may not<br />
wonder very long. If, on the other<br />
hand, you notice something odd<br />
about them, you might keep wondering.<br />
What if the businessmen were<br />
both dressed like circus clowns, or the<br />
athletes were singing an opera?<br />
Wouldn't your next question be:<br />
"What's going on here?"<br />
These are examples of how people<br />
tend to respond to seeing odd personal<br />
relationships. The same thing<br />
104 The Photographic Eye<br />
holds true for spatial relationships. If<br />
two objects are seen together that<br />
don't normally belong together, they<br />
are likely to catch our attention and<br />
interest. In addition, they may tell us<br />
something —about themselves, about<br />
space, about relation —that we didn't<br />
know before.<br />
In the best photographs, spatial<br />
relations are used to tap us on the<br />
shoulder and say "Look, isn't that interesting!"<br />
We may be entertained,<br />
amused or saddened, but we will have<br />
learned something new about the<br />
world.<br />
Perhaps the best way to summarize<br />
this is to say that spatial relationships<br />
(and, therefore, shapes) are rarely<br />
without meaning. What that meaning<br />
is —and who decides— is an open<br />
question. It is perhaps the question<br />
that photographers are most concerned<br />
with answering. You can use<br />
your camera to express your own interpretation<br />
of objects and events.<br />
You can use it simply to explore relationships,<br />
without imposing any specific<br />
interpretation. You cannot,<br />
however, avoid interpretation altogether.<br />
As soon as you make the
Notice how the large expanse of negative space in this photograph of a<br />
stadium establishes the visual "theme" of semi-circles (semi-ellipses to be<br />
precise). How many times is that theme re-stated in the photograph?<br />
(Student photograph by Michael Rodgers.)<br />
At its simplest and deepest level, a<br />
circle is a symbol of fullness. That<br />
works perfectly in this shot of<br />
plump sacks of beans and grain.<br />
Would the photograph have the<br />
same effect if the beans and grain<br />
were stored in square boxes?<br />
(Student photograph by Michael<br />
Rodgers.)<br />
decision to include one thing and not<br />
another, you are interpreting. That's<br />
what photography is all about.<br />
USING NEGATIVE SPACE<br />
As mentioned in the chapter on composition,<br />
a photograph is simply an<br />
image of something within a frame.<br />
That thing actually has two shapes.<br />
The first is the contours (the outer<br />
shape) of the thing itself. The second<br />
shape is the effect that those contours<br />
have on the surrounding space, including<br />
the rectangular box of the<br />
frame. This kind of shape is called<br />
negative space. For a photographer,<br />
it is every bit as important as the first<br />
kind of shape.<br />
Think of an apple. In your mind's<br />
eye, draw a box around it. Then draw<br />
a line around the apple, tracing its<br />
contours. Finally, erase the apple,<br />
leaving the line. Negative space is<br />
what you have left. It is everything<br />
except the apple.<br />
In this case, because there's<br />
nothing but the apple in the picture,<br />
the negative space is everything between<br />
the apple and the frame. If<br />
there were other objects in the picture,<br />
like a banana, the negative<br />
space would be everything between<br />
the apple and the banana and<br />
everything between them and the<br />
frame.<br />
To make things a little clearer, let's<br />
look at an actual picture, the photo-<br />
Shape 105
106 The Photographic Eye
Student photograph by Michael<br />
Grassia.<br />
graph of a teakettle. Where's the<br />
negative space? If you're not sure,<br />
draw an imaginary line around the<br />
teakettle and imagine that the teakettle<br />
has been erased. Everything<br />
else is negative space.<br />
Now, look more closely and pick<br />
out areas where the negative space is<br />
interesting. You might notice the area<br />
between the handle and the top of the<br />
kettle. It creates a circular shape that<br />
resembles the opening in the teakettle,<br />
just below it. This kind of<br />
recurring (repeating) shape is often<br />
used to create visual harmony in a<br />
photograph. It makes the photograph<br />
interesting because the human eye<br />
automatically looks for such<br />
similarities.<br />
As you continue to look for shapes<br />
and to point them out in critique sessions,<br />
you will become increasingly<br />
aware of these visual harmonies.<br />
Your brain will decide that they are<br />
worthy of notice and, as a result,<br />
you'll begin to see them directly.<br />
Most people only sense visual harmonies<br />
vaguely, because they don't<br />
need to do more than that. As a<br />
photographer, however, your job is<br />
to use these and other composition<br />
tools, so you must learn to recognize<br />
them.<br />
At first you may need to make an<br />
effort to train your brain to take note<br />
of visual harmonies. The way to do<br />
this is to ask yourself questions. For<br />
example, how many circular shapes<br />
do you see in the photograph? There<br />
are at least five. Can you pick out all<br />
of them?<br />
What other areas of negative space<br />
are interesting in the teakettle photograph?<br />
Look at the tip of the spout.<br />
Notice how it almost touches the<br />
Negative space can be black (or gray) as well as white. This photograph of<br />
a construction site would be very bland without the dramatic angular<br />
frame of black space. (Student photograph by Mina Murphy.)<br />
frame of the photograph. Like visual<br />
harmonies, this also generates visual<br />
interest. Anytime an object comes<br />
near another or comes near the frame<br />
of a photograph, it creates visual tension.<br />
It's almost as if the object is<br />
pressing against the space between.<br />
Oddly enough, the tension is<br />
strongest when objects almost, but<br />
don't quite, touch. Michelangelo's<br />
painting of the hand of God reaching<br />
out to the hand of Adam is a famous<br />
example of this effect. The effect<br />
would be weakened if their fingertips<br />
actually met.<br />
Where else in the teakettle photograph<br />
is a similar effect achieved?<br />
Now, what about the rest of the<br />
negative space? You may notice that<br />
the sides and bottom of the teakettle<br />
(not counting the spout) are all just<br />
about the same distance from the<br />
edge of the frame. What effect does<br />
this produce?<br />
If you're not sure, take a moment<br />
to study it. Compare it to the effect<br />
of the protruding spout. The spout<br />
creates tension. The placement of the<br />
teakettle within the frame has the opposite<br />
effect. It centers the teakettle.<br />
This conveys a static sensation. The<br />
teakettle "feels" like it is sitting very<br />
solidly on the ground. It appears to<br />
be firmly placed, or grounded, within<br />
the frame.<br />
If you've been looking closely, you<br />
might have observed that the top of<br />
the handle is also about the same<br />
distance from the frame as the bottom<br />
and sides are. This increases the<br />
sense of stability.<br />
The main part of the teakettle is<br />
closer to the bottom of the photograph<br />
than it is to the top. It is<br />
weighted toward the bottom. Once<br />
again, this reinforces the sense of<br />
stability. If it were weighted toward<br />
the top, it would appear "top heavy,"<br />
and would tend to convey the impression<br />
that it might roll right out of the<br />
Shape 107
As with line and texture, a photograph can simply be "about" shape. Here, a nicely balanced series of irregular<br />
shapes creates a satisfying landscape. (Student photograph by Mark Pry.)<br />
frame. In this case, weighting toward<br />
the bottom helps to promote the impression<br />
of realism. The teakettle<br />
looks like it "should" look, and the<br />
tension produced by the spout adds<br />
vitality and, therefore, interest.<br />
Welcome to the world of negative<br />
space. Learn to use it effectively and<br />
you'll be well on your way to mastering<br />
photography.<br />
One more thing should be said at<br />
this point. In order to explain compositional<br />
elements like shape and<br />
negative space, we are discussing<br />
them as if a photographer must be<br />
objectively (consciously) aware of<br />
them before taking a photograph.<br />
Photography may seem like some<br />
kind of visual mathematics. You may<br />
108 The Photographic Eye<br />
suspect that a photographer goes<br />
around measuring everything and<br />
making all sorts of mental diagrams<br />
before taking any pictures. In practice,<br />
most photographers work far<br />
more subjectively (relying on intuition).<br />
Once they understand the<br />
various elements of composition,<br />
they stop thinking about them. They<br />
see a subject and intuitively arrange<br />
the elements into an effective image.<br />
In essence, the purpose of discussing<br />
these elements objectively is to<br />
train your intuition. Once that is accomplished,<br />
you will be free to shoot<br />
what you see without a lot of calculation.<br />
The math will become automatic.<br />
You won't have to think too<br />
much about it, because you'll feel it.<br />
Developing that inner sense of proportion<br />
and relation is one of the keys<br />
to learning to see as a photographer.<br />
Don't worry if it takes awhile. It will<br />
come to you if you just keep at it.<br />
Before we leave the teakettle photograph<br />
behind, take a minute to<br />
notice how line and texture work in<br />
it. As indicated above, elements can<br />
be combined to produce an effect<br />
that is greater than the sum of its<br />
parts. For line, look at the step<br />
behind the teakettle. Notice the corner<br />
of the doorway above it and the<br />
subtle lines of the bricks below. For<br />
texture, look at the surface of the<br />
teakettle, the step, the ground, the<br />
wall, the grip of the handle. What effects<br />
do these elements have on the
whole image? What do they tell you<br />
about the objects? How do they work<br />
together?<br />
Now let's get back to the usual<br />
meaning of shape —the contours of<br />
objects. In the discussion of the<br />
teakettle photograph you may have<br />
noticed that circles kept showing up.<br />
As you probably know, a circle is one<br />
of several basic shapes. Others include<br />
squares and triangles, plus a<br />
variety of polygons (which literally<br />
means "many sided shapes"). Then<br />
there are the less regular shapes,<br />
from oblongs to "blobs." Creative<br />
use of any of these can enhance your<br />
photographs — if you remember to<br />
look for them.<br />
In certain cases, the negative space<br />
can be larger than the subject of a<br />
photo without losing its impact.<br />
While the wall behind this woman<br />
has some texture to it, it functions<br />
essentially as negative space,<br />
surrounding her and providing a<br />
dramatic setting that seems fully<br />
appropriate. (Student photograph.)<br />
Shape 109
EXERCISE<br />
Circles & Ovals<br />
Use at least one roll of film to shoot<br />
only circles and ovals. You may have<br />
other shapes in the photographs as<br />
well, but be sure that each frame is<br />
dominated by one or more circular<br />
shapes. You may want to set up some<br />
of the shots (try experimenting with<br />
a cup and saucer, with spoons, plates<br />
or bowls), but at least half of your<br />
shots should be of "found" circles or<br />
ellipses (i.e. ones that you just happen<br />
to see in your yard, neighborhood<br />
or town).<br />
Try to find a variety of compositions<br />
using circles or ovals. Try some<br />
with just one circular shape, some<br />
with lots and some with a few. Try<br />
some shots in which one or more circular<br />
shapes interact with squares or<br />
other shapes. Shoot in bright sunlight<br />
at the point of departure setting.<br />
Keep in mind the various functions<br />
of shape and spatial relation as you<br />
do this assignment. Without losing<br />
sight of your primary theme (circles<br />
and ovals), see if you can use shape<br />
to indicate mass, such as the "bigness"<br />
of a pumpkin or a boulder. Try<br />
to produce interesting examples of<br />
proportion and compelling spatial<br />
relations. In addition, try to come up<br />
with a few shots that express what<br />
you think or feel about a subject.<br />
All these shapes are available to<br />
you as a photographer, just as they<br />
are available to any artist. You just<br />
have to find them.<br />
This is not as hard as it may sound.<br />
Once you begin keeping an eye out<br />
for interesting shapes, you'll probably<br />
be amazed at how many are out<br />
there, just waiting for you to capture<br />
them on film.<br />
Start by looking for individual<br />
shapes. Then pay attention to how<br />
110 The Photographic Eye<br />
Student photograph by Scott Olson.<br />
those shapes may repeat themselves<br />
and establish visual harmonies.<br />
Finally, allow interpretations to<br />
emerge as you experiment with different<br />
compositions, different combinations<br />
of objects, different viewing<br />
angles. Allow space and spatial<br />
relation to tell you something about<br />
your subjects . . . and then try to<br />
pass that "something" on to others<br />
through your photographs.<br />
Don't be at all surprised if the<br />
"something" that you learn and want<br />
to pass on can't be expressed in<br />
words. If it could be, you could just<br />
say it or write about it, and you<br />
wouldn't need to photograph it. The<br />
best photographs present an image or<br />
idea or feeling in a way that only a<br />
photograph can. Strive to notice<br />
those things that need to be<br />
photographed, rather than spending<br />
time on those that simply can be.
(Student photograph by John Pang.)<br />
Student photograph by Charles<br />
Gibbs.<br />
Shape 111
Student photograph by Bruce Cakebread.<br />
112 The Photographic Eye
chapter 9 Light<br />
ou don't really have much<br />
control over the compositional<br />
elements we've discussed<br />
so far: line, texture and shape.<br />
For the most part, they're just "out<br />
there" in the world, waiting for you<br />
to notice them. You can change their<br />
positions within the frame of your<br />
viewfinder, by moving forward or<br />
back, or to one side or the other. You<br />
can make one element more dominant<br />
than the others, and you can edit<br />
out distractions. Outside of that,<br />
however, you don't generally have<br />
any real control over them.<br />
The next three elements (light, motion<br />
and perspective) are more "interactive"—they<br />
allow (and may require)<br />
more choice on your part.<br />
They are, of course, also "out there"<br />
waiting for you, just like line, texture<br />
and shape. But there's an important<br />
difference.<br />
You can choose whether to accept<br />
the light that's "given" to you —or you<br />
can change it. You can, if you<br />
choose, make daylight look like midnight,<br />
and vice versa. More subtly,<br />
you can choose whether an object<br />
that's in shadow will simply be darker<br />
than its surroundings or utterly invisible.<br />
In fact, you have to choose.<br />
Following the recommendation of<br />
your light meter is a choice, especially<br />
since you must decide what source of<br />
light the meter is reading.<br />
The soft, indirect light of open shade is more subtle and moody than<br />
straight sunlight. It tends to convey a pleasant, rather dreamy, thoughtful<br />
or wistful quality. This is the sort of neutral gray tone a light meter<br />
assumes you want. (Student photograph.)<br />
CONTROLLING<br />
EXPOSURE<br />
You have now used the "point of<br />
departure" setting for several photo<br />
assignments. If you've followed instructions<br />
carefully, you should<br />
already be producing consistently<br />
good results. It has probably occurred<br />
to you, however, that you<br />
can't count on the sun to provide<br />
enough light for this setting to be correct<br />
all the time. You may already<br />
have missed some good shots because<br />
the light wasn't bright enough. It's<br />
time to start putting your camera's<br />
aperture ring to work.<br />
Before we do that, we'll need to<br />
review shutter speed as well, to gain<br />
an understanding of how aperture<br />
and shutter speed work together.<br />
Set your camera at the point of<br />
departure setting. Your aperture ring<br />
will be on f/16, and your shutter<br />
speed dial will be set at 125.<br />
Change the aperture setting to<br />
113
Bright sunlight is best suited to<br />
cheerful "ordinary life"<br />
photographs . . . though it can be<br />
used to suggest that ordinary life is<br />
pretty strange. (Student photograph<br />
by Dick Waghorne.)<br />
114 The Photographic Eye<br />
f/11. You have just doubled the<br />
amount of light that would enter the<br />
camera if you clicked the shutter.<br />
Remember that increasing the aperture<br />
by one "stop" always doubles the<br />
size of the lens opening. (Also<br />
remember that a lower number indicates<br />
a larger opening.)<br />
Now change the shutter speed to<br />
250. Since 1/250 of a second is half<br />
as much time as 1/125, the amount<br />
of light reaching the film has just<br />
been cut in half. So you're back at the<br />
point of departure exposure again. In<br />
other words, so far as the amount of<br />
light is concerned, f/11 at 250 will<br />
produce the same exposure as f/16 at<br />
125.<br />
These two settings will not produce<br />
exactly the same photograph. Both
the depth of field and the visible motion<br />
in the photograph will be slightly<br />
different, as will be explained later<br />
on. The amount of light in each photograph,<br />
however, will be the same.<br />
Set your camera on the point of<br />
departure setting again: f/16 at 125.<br />
Now change your shutter speed to<br />
500. What aperture will give you an<br />
exposure that matches f/16 at 125?<br />
Adjust the aperture ring to this<br />
f-stop.<br />
What aperture will give you twice<br />
as much light as f/16 at 125? Again,<br />
adjust the aperture ring to this f-stop.<br />
What aperture will give you half as<br />
much light as f/16 at 125? If you've<br />
ended up with your aperture ring at<br />
f/11 (with your shutter speed still at<br />
500), then you're getting the idea. An<br />
aperture of f/8 and a shutter speed<br />
of 1/500 of a second will match f/16<br />
at 125. An aperture of f/5.6 at 500<br />
will give twice as much light, and f/11<br />
will give half as much.<br />
As you've been going through this<br />
exercise, you may have noticed that<br />
the aperture ring clicked twice every<br />
Indirect light also tends to be the<br />
most flattering for portraits. It<br />
minimizes blemishes and<br />
encourages a relaxed, open<br />
expression. (Student photograph<br />
by Marciano Pitargue, Jr.)<br />
time you moved from one aperture to<br />
another. If so, the first click indicates<br />
a half-stop, a lens opening halfway<br />
between two standard apertures.<br />
If, for example, you started at f/16<br />
at 125 and opened the lens half a<br />
stop, you would be letting 50 percent<br />
more light into the camera. The<br />
resulting photograph would be<br />
lighter, but not twice as light. Halfstops<br />
are very useful for fine tuning<br />
an exposure.<br />
Light 115
An unlighted subject against a light background produces a very graphic silhouette. With luck and skill, the shape<br />
of the figure will convey all the basic information needed to make sense of the image. (Student photograph by<br />
Mark Bissel.)<br />
116 The Photographic Eye
A well-lit subject conveys additional information —in this case, primarily<br />
facial expression and three-dimensional shape. (Student photograph by<br />
Melanie Fernandez.)<br />
INFORMATION & MOOD<br />
By now you know that light is what<br />
makes a photograph possible. Without<br />
light bouncing off of objects and<br />
into your lens, you wouldn't be able<br />
to photograph anything — or see anything.<br />
Beyond this, though, light has<br />
two primary photographic functions:<br />
It provides information and it influences<br />
mood.<br />
Information is facts. Your eyes<br />
convey facts to your brain, which the<br />
brain then translates into understanding.<br />
"That is a building." "That is a<br />
person." "The person looks larger<br />
than the building." "Aha!" says the<br />
brain. "The person is standing in<br />
front of the building." That, more or<br />
less, is how visual information works.<br />
But it gets more complicated than<br />
that. Variations in brightness and<br />
shadow, the intensity of textures, the<br />
way in which shading may exaggerate<br />
shape, and other factors all contribute<br />
to our visual perceptions of<br />
things. And they are all influenced by<br />
light.<br />
For example, compare the two<br />
photographs of a person kicking at<br />
the camera. The first is a silhouette.<br />
Because there is far less light on the<br />
subject than on the background, the<br />
subject appears black. How much information<br />
does the photograph provide<br />
about the person in it?<br />
Now look at the second "kick"<br />
photograph. How much information<br />
does this photograph provide? As<br />
you can see, the two photographs are<br />
similar in content and composition —<br />
but very different in lighting.<br />
In extreme cases, light may determine<br />
whether a photograph is confusing<br />
or clear. More commonly, the<br />
way you handle light may make the<br />
difference between immediate and<br />
delayed recognition of what some-<br />
Light 117
Low-light tends to be very somber,<br />
even sinister. It is difficult to use,<br />
since the subject must be placed in<br />
exactly the right spot in order to<br />
be visible. Used well, however, it<br />
can be highly dramatic. (Student<br />
photograph by Chris Jacobs.)<br />
thing is or what it means. This, in<br />
turn, may make the difference between<br />
a strong emotional response or<br />
none, between sustained interest or<br />
boredom.<br />
Mood is another vital ingredient<br />
provided by light. We tend to respond<br />
to lighting in much the same<br />
way as we respond to weather. Bright<br />
light, like a sunny day, tends to make<br />
us feel cheerful, relaxed. If the light<br />
is harsh, however, as it is on a bright<br />
hazy day, the mood will tend to be<br />
stark and unfriendly. Soft light, like<br />
mist, tends to make us nostalgic,<br />
wistful, dreamy. Darkness, like night<br />
or an approaching storm, makes us<br />
feel worried, frightened, serious.<br />
You can use these natural reactions<br />
to heighten the effect of a photograph.<br />
By filling a photograph with<br />
a lot of darkness and shadows, you'll<br />
increase the impact of such "dark"<br />
emotions as fear and foreboding. By<br />
filling it with bright light, you'll increase<br />
the sense of well-being.<br />
Sometimes, however, you'll want<br />
contradictions in your photographs:<br />
a sad face or scene in bright light, or<br />
a cheerful one in shadows. This is<br />
another way that light can be useful,<br />
by "playing against" the prevailing<br />
tone of a subject. Though such contradictory<br />
impressions may create<br />
confusion, if they are handled well<br />
that confusion itself will be interesting.<br />
The viewer will want to<br />
figure out what's going on.<br />
To apply light effectively you must<br />
keep information and mood in bal-<br />
118 The Photographic Eye<br />
ance with each other. If you concentrate<br />
too much on information and<br />
choose lighting that is bright<br />
throughout the frame, your photograph<br />
may lack emotional impact.<br />
On the other hand, it is equally<br />
possible to emphasize mood so much<br />
that the photograph loses its ability<br />
to convey information. You've probably<br />
seen photographs in which, for<br />
example, people's faces are lost in<br />
shadow. It may be moody, but it also<br />
tends to be annoying.<br />
Fortunately, you have two chances<br />
to modify the light in a photograph:<br />
when you shoot it and when you print<br />
it. While you're shooting, you may<br />
choose an exposure that is based on<br />
either the highlights (brightest areas)<br />
or shadows (darkest areas), or for a<br />
mid-range of grays ("average" areas).<br />
Imagine that you are photographing<br />
someone who's wearing a white<br />
shirt and a dark jacket. If you expose
By intentionally reducing the light entering the camera, dramatic climatic effects can be enhanced, adding mood<br />
and impact. (Student photograph.)<br />
for the highlights, then all the details<br />
in the white shirt will be clear, but<br />
some shadow detail —such as the texture<br />
of the jacket —may be lost. If,<br />
on the other hand, you expose for the<br />
shadows, the jacket will look great,<br />
but the white shirt may disappear.<br />
The reason for this is film latitude.<br />
Every kind of film is sensitive to a<br />
specific range of light. Very few films<br />
can handle all the variations in<br />
lighting that our eyes can see. In<br />
black-and-white photography, this<br />
limitation is most evident when<br />
you're trying to capture a wide range<br />
of grays. If the lightest and darkest<br />
grays are so different in value that<br />
they exceed the film's range, or<br />
latitude, then you have to compromise.<br />
(Review value, if necessary,<br />
in Chapter 4.)<br />
This is where the second chance to<br />
modify light comes in. When you<br />
shoot, the photograph, you can<br />
choose to stress one part of the value<br />
range. Then, when you print it, you<br />
can re-adjust the balance —but only<br />
to a certain extent. If certain information<br />
(such as the texture of the<br />
shirt or jacket) did not get recorded<br />
by the film, there's nothing you can<br />
do to bring it back.<br />
The safest approach to exposure,<br />
therefore, is to aim for the middle:<br />
average gray. This is exactly what a<br />
light meter does. Any light meter,<br />
whether built into a camera or handheld,<br />
assumes that the average light<br />
in any scene is predominantly gray.<br />
(Note: If you're using a hand-held<br />
light meter, refer to the Appendix.<br />
The rest of this section deals with incamera<br />
meters.)<br />
Light 119
FOCAL POINT: Light Meters<br />
If your camera is less than 15 years<br />
old, then you will almost certainly be<br />
using a light meter that is built into<br />
your camera (internal). If your camera<br />
is not equipped with a built-in<br />
meter, then you will need to use a<br />
hand-held model.<br />
Depending on the brand and<br />
model, you may be informed of the<br />
light reading by a needle that moves<br />
up and down, a series of lights, or a<br />
numerical display showing the current<br />
recommended aperture. With<br />
only a little practice, you should be<br />
able to respond to your camera's light<br />
meter and achieve the effect you want<br />
quickly and accurately.<br />
Before you can do this, however,<br />
you'll need to know what the light<br />
meter is actually trying to tell you. A<br />
light meter may "read" either incident<br />
or reflected light. Incident light is the<br />
light that is generally available in a<br />
given lighting situation. Imagine, for<br />
example, a black cat sitting in a white<br />
chair in an evenly lit room. The incident<br />
light reading will be the same for<br />
both. That means the amount of light<br />
on the cat is the same as the amount<br />
on the chair. Reflected light is the<br />
light that actually enters the camera.<br />
This is the light that is reflected by a<br />
given subject. If your meter is<br />
measuring reflected light, it will give<br />
a much higher reading for the white<br />
chair than for the black cat. This is<br />
because the chair, being brighter, will<br />
reflect far more light.<br />
Light meters that are built into<br />
cameras measure only reflected<br />
light —the light that enters the<br />
camera's lens. There are two kinds of<br />
reflectance meters: averaging meters<br />
and spot meters. An averaging meter<br />
gives you the average light reading<br />
120 The Photographic Eye<br />
for a large area. A spot meter focuses<br />
in on a small area. Some cameras are<br />
equipped with a switch that lets you<br />
choose either kind of meter. Most,<br />
however, compromise by giving you<br />
a "center-weighted average" reading.<br />
This means that the light meter<br />
averages the light throughout the<br />
image area, but pays special attention<br />
to the center of the frame. (The<br />
center is often indicated by a circle of<br />
some kind.) If the image area is<br />
generally bright, but dark at the<br />
center of the frame, a centerweighted<br />
averaging meter will indicate<br />
a larger aperture than an ordinary<br />
averaging meter would. If you<br />
aimed a spot meter at the dark area<br />
at the center of the frame, the reading<br />
would be lower still.<br />
Most of the time, an averaging<br />
meter works adequately, since high-
lights and shadows tend to balance<br />
each other out. A center-weighted<br />
meter usually works better, because<br />
the main subject tends to be near the<br />
center of the frame. A spot meter can<br />
be very useful, however, when you<br />
are photographing a scene in which<br />
the light is quite different in different<br />
parts of the picture. It can be especially<br />
useful when large areas of the<br />
picture are either very bright or very<br />
dark. When the sun is behind your<br />
subject, for example, making the sky<br />
very bright and leaving your subject<br />
in shadow, you will need to make a<br />
spot reading of the subject to be sure<br />
that it is correctly exposed.<br />
Fortunately, there's an easy way to<br />
do this, even without a spot-meter.<br />
Simply move close enough so your<br />
subject fills most of the frame. Then<br />
step back and compose your shot,<br />
setting the exposure as indicated by<br />
your close-up reading. Some cameras<br />
permit you to "lock" the exposure<br />
where you want it by pressing a<br />
special button. When you use this<br />
technique, be sure that you don't<br />
create any shadows on your subject<br />
when you move in for the close-up<br />
reading.<br />
Hand-held meters read both reflected<br />
and incident light. For the<br />
reflected light reading, you aim the<br />
meter's lens at your subject, just as<br />
you would with a built-in meter. For<br />
the incident reading, you place a<br />
translucent cover over the meter's<br />
lens, stand near your subject and aim<br />
the meter toward your camera or<br />
toward the light source. If you're<br />
shooting outdoors in even light<br />
(either all sunny or all cloudy, for example),<br />
you can obtain an allpurpose<br />
average reading by taking an<br />
incident reading from the sun.<br />
Hand-held meters have one additional<br />
advantage. If you attempt to<br />
take any photographs in very low<br />
light (at night, for example), you may<br />
discover that your camera's light<br />
meter doesn't work at all shutter<br />
speeds. It may shut off when you get<br />
down to 1 /8 of a second, perhaps, or<br />
2 seconds. A decent hand-held meter,<br />
by contrast, will give you a reading<br />
for shutter speeds of 4 minutes or<br />
more (depending on the ISO of your<br />
film).<br />
One final point: as noted in this<br />
chapter, reflectance light meters<br />
assume that your subject is neutral<br />
gray in tone. If you want to photograph<br />
a subject that is brighter overall<br />
(such as a snowy field) or darker<br />
overall (such as a black cat), you'll<br />
need to change the aperture accordingly.<br />
If you don't, both the snowy<br />
field and the black cat will turn out<br />
gray . . . which is probably not what<br />
you want. For the snow scene, you'll<br />
need to use a larger aperture than indicated,<br />
and for the cat you'll need<br />
to use a smaller one.<br />
USING A LIGHT METER<br />
The specific gray that a light meter<br />
assumes you want is one that reflects<br />
only about 18% of the light it<br />
receives from the sun. (Pure white<br />
reflects close to 100%; pure black<br />
close to 0%.) This figure-"18%<br />
gray" —has been scientifically calculated<br />
to represent average lighting<br />
for most scenes.<br />
So, if the average light reaching<br />
the light meter is darker than an<br />
18% gray, the light meter will recommend<br />
a larger aperture or a slower<br />
shutter speed, to let more light in.<br />
If the average light reaching the<br />
meter is brighter than an 18% gray,<br />
the meter will call for a smaller<br />
aperture or faster speed, to let less<br />
light in.<br />
Nine times out of ten, this is<br />
precisely the kind of advice you want.<br />
The light meter will recommend the<br />
camera setting you'd choose yourself,<br />
if you took the time to figure<br />
it out.<br />
Ah, but what about that one time<br />
out of ten when the light meter's advice<br />
is not what you want? Suppose<br />
you're photographing someone who<br />
is standing between you and the sun.<br />
Because the sunlight is coming right<br />
at you, it is very bright. Unless the<br />
person is filling up most of the frame,<br />
your light meter will react to the<br />
bright sunlight and tirge you to select<br />
a very small aperture or a very<br />
fast speed. What will it do to your<br />
photograph?<br />
By letting only a little light into the<br />
camera (just enough so the sunlight<br />
shows up as a nice gray), the person<br />
you intended to photograph will look<br />
like a black blob. This is probably not<br />
the effect you hoped for.<br />
Here's another example: You're<br />
photographing a black cat on a black<br />
Light 121
couch. The average light in the scene<br />
is quite a bit darker than an 18%<br />
gray. Your light meter will tell you to<br />
use a very large aperture, or a slow<br />
shutter speed, or both. The result? A<br />
washed-out looking gray cat on a<br />
gray couch.<br />
None of this means that a light<br />
meter is a bad thing. A light meter is<br />
a great tool. Its primary drawback is<br />
that it wants to make everything gray.<br />
Knowing this can help you use it<br />
more effectively. If you're shooting<br />
under tricky lighting conditions (any<br />
conditions in which precision is important),<br />
take a meter reading off<br />
something that is close to an 18%<br />
gray, and set your camera accordingly.<br />
Your blacks will be black, and<br />
your whites will be white. If you want<br />
to make the photograph darker or<br />
lighter than "normal," you can then<br />
adjust your aperture or shutter speed<br />
accordingly. If, for example, you<br />
decide that you'd like the whole scene<br />
to appear darker than it actually is,<br />
you can take a reading for an 18%<br />
gray and then decrease the aperture<br />
by one or two stops.<br />
Fine, but how are you supposed<br />
to find a sample of 18% gray when<br />
you need it? You can buy a 18%<br />
gray card that is scientifically produced<br />
to be exactly 18% gray.<br />
Or you can use the gray card you<br />
already have: the palm of your<br />
hand. Whether you're black, white,<br />
hispanic or oriental, you can obtain<br />
an acceptably accurate midrange<br />
reading simply by holding<br />
the palm of your hand in the light<br />
and aiming a meter at it.<br />
When you do this, be sure that the<br />
lighting on your palm is the same as<br />
the lighting on the subject of your<br />
photograph. Your hand should be<br />
held so that the light strikes your<br />
palm at the same angle as it strikes<br />
122 122 The Photographic Eye<br />
By metering off the subject's face, rather than averaging the entire scene, a<br />
rich black context was produced for this striking portrait. (Student<br />
photograph.)<br />
your subject. Don't let the camera<br />
cast a shadow on your palm. Also be<br />
sure to hold your camera close<br />
enough to ensure that other light is<br />
not confusing the reading. Most<br />
modern cameras have centerweighted<br />
averaging meters. This<br />
means that they read light from<br />
several points around the image area,<br />
but give more importance to the<br />
reading at the center. Therefore, your<br />
palm should fill most of the image<br />
area, and should especially cover the<br />
center.<br />
(Note: To increase the precision of<br />
your "palm readings," compare<br />
them to readings from a gray card.<br />
Place it in open shade and take a light<br />
meter reading from it. Be sure that<br />
the card fills your view-finder. Then
Shadows, produced by angled light, help to "anchor" objects so/idly as<br />
well as adding visual interest. (Student photograph by Joshua Noble.)<br />
If you don't want a silhouette<br />
when shooting a subject against a<br />
bright sky, it is essential to meter<br />
the subject . . . not the sky. This is<br />
the sort of shot that automatic<br />
cameras tend to mess up. (Student<br />
photograph by Steve Gates.)<br />
take a reading from your palm in the<br />
same light. The difference between<br />
the two readings indicates how far<br />
your palm varies from an 18% gray.<br />
You should add or subtract this<br />
amount whenever you take a reading<br />
off your palm. For example, if the<br />
gray card reading was f/5.6 and the<br />
reading for your palm was f/4, then<br />
you should always open your lens up<br />
one stop more than indicated by a<br />
"palm reading.")<br />
There are more sophisticated<br />
theories and techniques for obtaining<br />
ideal lighting, but this one is certainly<br />
the easiest. Most of the time, it'll do<br />
just fine.<br />
Another common way to avoid the<br />
pitfalls of a faulty light reading is<br />
called bracketing. When you bracket<br />
a shot, you shoot several frames at<br />
different exposures. By doing this,<br />
you are simply improving the chances<br />
of getting a correctly exposed image.<br />
If, for example, your light meter<br />
called for f/8 at 125, you might<br />
bracket by shooting one frame at that<br />
setting, plus one at f/5.6 and one at<br />
f/11. Or you might shoot five frames<br />
within that three-stop range, using<br />
the half-stop settings on your aperture<br />
ring. You can also bracket by adjusting<br />
the shutter speed. For example,<br />
f/8 at 60, 125 and 250.<br />
O<strong>THE</strong>R FUNCTIONS OF<br />
LIGHT<br />
Light has some additional functions<br />
that it shares with other compositional<br />
elements. Like line, light can<br />
Light 123
promote rhythm. Alternating bands<br />
of light and shadow, for example, or<br />
isolated spots of light surrounded by<br />
darkness may create very strong and<br />
interesting visual rhythms.<br />
Similarly, light and shadow can<br />
reproduce or enhance many of the effects<br />
of shape. Even a small object<br />
can appear quite massive if it produces<br />
a large shadow.<br />
In addition, the shadow of an object<br />
often indicates how that object<br />
relates to its environment. Test this<br />
yourself. Close one eye and look<br />
down at your foot. (By closing one<br />
eye, you're losing depth perception,<br />
and seeing things the way the camera<br />
sees them.) Now lift your foot off the<br />
floor. Can you convince yourself that<br />
it is still touching the floor? If you<br />
can't, it's probably because the<br />
shadow cast by your foot is providing<br />
clear relational information: it is<br />
showing you the relative positions of<br />
your foot and the floor.<br />
Try this in several lighting situations,<br />
viewing your lifted foot from<br />
several angles. (You can alter the<br />
lighting without moving by using a<br />
notebook to shade your whole foot.)<br />
Experiment until your foot looks like<br />
it is still touching the floor. Then continue<br />
experimenting until no amount<br />
of imagination can fool you —until<br />
the relation between your foot and<br />
the floor is unmistakable.<br />
DEPTH OF FIELD<br />
There's one other way that light affects<br />
relation: depth of field. As we<br />
discussed in Chapter 2, depth of field<br />
is the range of distance that is in acceptable<br />
focus at one time. If you<br />
have small, or "narrow," depth of<br />
field, whatever you have focused on<br />
(the focal point) may be the only<br />
thing in focus. If, instead, you have<br />
124 The Photographic Eye<br />
The depth of field in this photograph is sufficient to provide a clear visual<br />
context for the elderly farmer. Notice how the old tin cans in the<br />
foreground and the woodstove in the background contribute to the<br />
photograph's effectiveness. (Student photograph by Robert Lewis.)
FOCAL POINT: Depth of Field<br />
To understand how depth of field<br />
works, it is important to understand<br />
how focusing works. What determines<br />
whether or not a subject is<br />
clearly focused?<br />
Let's say you're photographing an<br />
apple. Rays of light from the sun are<br />
constantly bouncing off that apple in<br />
all directions. When you click the<br />
shutter of your camera, you allow<br />
some of those rays to travel through<br />
the lens to the film inside the camera.<br />
The rays of light react with the film<br />
to produce an image of the apple<br />
composed of a series of "points" —<br />
or dots of light. Ideally, a point of<br />
light striking the apple would reproduce<br />
as an identical point of light on<br />
the film. In reality, it is more of a circle.<br />
If this circle is 1/200 of an inch<br />
in diameter, it will appear to be a<br />
sharply focused point to the human<br />
eye. If most of the circles that make<br />
up the image of an apple are larger<br />
than that, the image will appear<br />
fuzzy.<br />
When you focus the lens, you are<br />
increasing and decreasing the size of<br />
these circles on the film plane. Light<br />
from one point of the apple spreads<br />
out to fill the lens and then tapers<br />
back to a point (see diagram), making<br />
the shape of a cone. When the<br />
subject is in focus, the tip of that<br />
cone is right at the film plane. When<br />
the subject is out of focus, the cone<br />
comes to a point in front of or behind<br />
the film plane.<br />
Now, how does depth of field fit<br />
in with all this? Since the light spreads<br />
to the edges of the lens opening, the<br />
base of the cone of light is as wide as<br />
the aperture. The width of the base<br />
of the cone determines the angle at<br />
which the light will travel toward the<br />
film plane. If the aperture is large, the<br />
light will come to a point more gradually<br />
than it will if the aperture is<br />
small. The same degree of error in<br />
focus will produce a more out-offocus<br />
image with the large aperture<br />
because the circle produced by each<br />
point of unfocused light will be<br />
larger. With the smallest apertures,<br />
a considerable range of focal error<br />
will still convey a crisp image. If you<br />
examine the diagram carefully, you'll<br />
see how narrowing the cone of light<br />
produces this result.<br />
So, if you have focused accurately<br />
on the apple and are using a small<br />
aperture, the cone of light will probably<br />
be narrow enough for the banana<br />
behind the apple and the orange<br />
in front of it to also appear to be in<br />
focus. If you are using a large aperture,<br />
both the banana and the orange<br />
are likely to be represented by oversized<br />
circles and, therefore, to appear<br />
fuzzy.<br />
That, in essence, is how depth of<br />
field works. (Aren't you glad you<br />
asked?)<br />
Light 125
long, or "wide," depth of field, then<br />
objects behind and in front of the<br />
focal point will also be in focus.<br />
Depth of field is primarily determined<br />
by two factors: the aperture<br />
and the focal length of the lens. Since<br />
aperture concerns light, we'll deal<br />
with its effect on depth of field in this<br />
section. Focal length is discussed in<br />
more detail in Chapter 11.<br />
For now, just bear in mind that<br />
depth of field decreases as focal<br />
length increases. In other words, if<br />
you set a 50mm and a 100mm lens at<br />
the same aperture and focus them on<br />
a subject at the same distance, the<br />
depth of field will be greater with the<br />
50mm lens. Objects in the foreground<br />
and background will be in focus for<br />
the 50mm lens that are out of focus<br />
for the 100mm lens.<br />
Aperture, as you'll recall, is the size<br />
of the opening through which light<br />
enters the camera. A smaller aperture,<br />
like a shorter lens, increases<br />
depth of field. For a partial explanation<br />
of why this is so, consult "Focal<br />
Point: Depth of Field." Fortunately,<br />
you don't really need to understand<br />
the reasons for this fact in order to<br />
make use of it.<br />
With a small aperture, therefore,<br />
the range of acceptable focus will extend<br />
beyond whatever is in precise<br />
focus. Only one exact distance will be<br />
100% focused. (This distance is<br />
called the focal point.) However, objects<br />
in the foreground and<br />
background will seem to be in focus<br />
as well. As the aperture of the lens<br />
increases, this range of acceptable<br />
focus (depth of field) decreases.<br />
The distance between the focal<br />
point and the camera also affects<br />
depth of field. The greater this<br />
distance is, the greater the depth of<br />
field will be. For example, a standard<br />
50mm lens set at f/8 and focused at<br />
126 The Photographic Eye<br />
6 feet will have a depth of field from<br />
5 to 7 feet. The same lens at the same<br />
aperture, focused at 20 feet, will also<br />
have a depth of field from 10 to 30<br />
feet. In the first case, relatively close<br />
to the camera, the depth of field extends<br />
only 2 feet. In the second case,<br />
at a greater distance, it extends 20<br />
feet. If you focus on something 2 feet<br />
away, the depth of field will only be<br />
about 1 inch.<br />
You may, of course, want less<br />
depth of field. This brings us to<br />
how depth of field "works" in a<br />
photograph.<br />
Two objects in a photograph that<br />
are both in focus will seem close<br />
together, because that's the way<br />
you're used to seeing things. Your<br />
eyes provide you with very selective<br />
focusing, so two objects that aren't<br />
close together are not both in focus<br />
at the same time. Your brain expects<br />
a photograph to work the same way.<br />
Depth of field; therefore, can do<br />
two useful things in a photograph.<br />
First, it can convey the impression of<br />
depth. As you may recall, a photograph<br />
is a two-dimensional image of<br />
three-dimensional objects. It needs all<br />
the help it can get to seem threedimensional.<br />
By reproducing some<br />
objects in focus and some out of<br />
focus (imitating normal vision),<br />
depth of field helps to create the illusion<br />
of a three-dimensional image.<br />
Depth of field can also tell the eye<br />
where to look, and help it tell dif-<br />
ferent objects apart. You've probably<br />
seen photographs in which a tree<br />
seems to be growing out of someone's<br />
head. That's one common result of<br />
too much depth of field.<br />
Used creatively, limited depth of<br />
field helps to single out one object or<br />
one part of an object. The viewer's<br />
eye automatically aims for what is in<br />
focus. If that also happens to be the<br />
primary subject of the photograph —<br />
the thing the photographer wanted us<br />
all to notice — then the photograph is<br />
likely to attract interest and attention.<br />
Too much depth of field can have<br />
another undesirable effect. By bringing<br />
too many images to the viewer's<br />
attention, the emotional or aesthetic<br />
impact of the primary subject may be<br />
watered down or destroyed. Instead<br />
of concentrating on one subject, the<br />
eye will get busy checking out all the<br />
others.<br />
Sometimes, of course, that's<br />
precisely the response you want. A<br />
photograph of a bustling city, for example,<br />
may best capture the bustle by<br />
having many details in focus. With a<br />
photograph of a single rosebud, on<br />
the other hand, you'll probably want<br />
to be more selective.
EXERCISE<br />
Bracketing<br />
Select a subject with a wide range of<br />
values —from black through various<br />
grays to white —and shoot it several<br />
times, at one shutter speed, but several<br />
apertures.<br />
Before shooting, take a light<br />
reading of some part of the subject<br />
that is in the mid-range of grays (or<br />
meter off your palm).<br />
Shoot one frame at the setting<br />
recommended by your meter, then<br />
shoot another at each f-stop above it,<br />
while keeping the same shutter speed.<br />
Student photographs by Marc<br />
McCoy.<br />
Then shoot one frame at each f-stop<br />
below the one selected by the light<br />
meter.<br />
For the most interesting range of<br />
lighting effects, try to shoot in<br />
lighting that is just a bit less than<br />
broad daylight. Your meter reading<br />
should be around f/8 at a shutter<br />
speed between 250 and 60.<br />
You should produce at least two<br />
different exposures of a single subject<br />
to be critiqued. However, you may<br />
want to try the same procedure on<br />
several subjects to find one that produces<br />
the most interesting variations.<br />
If you use only one subject, try to<br />
find several angles to shoot it from,<br />
so you can compare effects. Different<br />
angles will produce the most variety<br />
when the subject is dramatically lit.<br />
This means that your subject needs<br />
to receive some direct light, and that<br />
you'll want to shoot early or late in<br />
the day.<br />
Light 127
A skillfully handled blurred motion shot can convey a sense of being caught up in the action. (Student photograph<br />
by Sheri Allen.)<br />
128 The Photographic Eye
chapter 10 Motion<br />
ust as variations in depth of<br />
field can make a photograph<br />
look more or less threedimensional,<br />
motion can be used to<br />
assert or disguise the fact that a<br />
photograph captures only a tiny slice<br />
of time. Allowing a moving subject<br />
to blur during an exposure "stretches"<br />
time a bit, emphasizing the subject's<br />
movement. "Freezing" the subject<br />
emphasizes the camera's ability to<br />
"grab" an instant of time and hold it<br />
still. Each approach can be very effective.<br />
Neither is exactly lifelike,<br />
however, because your eyes record<br />
movement as a series of instants (the<br />
way a motion picture does).<br />
<strong>THE</strong> SCIENCE OF BLURS<br />
An object in a photograph will<br />
appear blurred if it moves while<br />
the shutter is open. If the object<br />
moves across only a very small portion<br />
of the image area, it will seem<br />
only slightly blurred. If it moves<br />
over a large portion, it will blur<br />
considerably.<br />
How far an object moves through<br />
the image area depends on three<br />
things: its speed, the speed of the<br />
shutter, and the angle of view.<br />
The angle of view can be imagined<br />
as a triangular or funnel-shaped<br />
wedge extending from inside the<br />
camera out into space. The edges of<br />
A limited amount of blur can add sparkle to a simple gesture, making a<br />
photograph more lively and expressive. (Student photograph by Sonja<br />
Gray.)<br />
129
A fast shutter speed (or flash) will "freeze" a subject. Some flash set-ups can even freeze a bullet in mid-flight.<br />
In this photograph of a dove, the wings are allowed to blur just enough to suggest movement. (Student<br />
photograph by Darrel Miers.)<br />
130 The Photographic Eye<br />
this wedge are the boundaries of the<br />
camera's "sight." Whatever is inside<br />
the boundaries will show up on the<br />
film. Whatever is outside won't.<br />
The longer a lens is, the smaller its<br />
angle of view will be. (This will be explained<br />
in more detail in the next<br />
chapter, when we discuss perspective<br />
and interchangeable lenses.) If a lens<br />
has a narrow angle of view, an object<br />
won't have to move very far to<br />
create a blur.<br />
The reason for this is that a lens<br />
with a narrow angle of view —a<br />
200mm telephoto, for instanceselects<br />
only a small part of the total<br />
image in front of it. It effectively<br />
crops in on a small fraction of the<br />
total scene, just as you might do<br />
when editing a print. The narrow<br />
angle of view enlarges that fraction<br />
to fill the image area.<br />
Let's say you're photographing a<br />
car driving along a road that crosses<br />
your field of view. A 200mm lens<br />
might cover only a few feet of the
Js this bird photograph less "correct" than the previous one? It all depends on what you want to convey. Allowing<br />
a subject to blur almost to the point of becoming unrecognizable can be a very effective way of conveying<br />
movement. It generally takes several trial-and-error shots to get it just right. (Student photograph by Cheryl<br />
Plumb.)<br />
road. In 1/60 of second, the car<br />
might move 10% of the distance<br />
from one side of the frame to the<br />
other. This would be enough to produce<br />
a very obvious blur when the<br />
photograph was enlarged.<br />
If a lens has a large angle of view —<br />
such as a 28mm wide angle —much<br />
more of the road will fit into the<br />
image area. That same car, shot at<br />
the same shutter speed, at the same<br />
distance, moving at the same speed,<br />
would cross only a tiny fraction of<br />
the field of view, perhaps 1%. It will<br />
therefore produce virtually no blur at<br />
all.<br />
The same principles apply to the<br />
distance between the camera and the<br />
object being photographed. If the<br />
camera is very close to the object, any<br />
movement of the object will cover a<br />
fairly large area of the image area at<br />
a moderate shutter speed. A visible<br />
blur will result. If, instead, the object<br />
is relatively far from the camera, and<br />
the same lens and shutter speed are<br />
used, the movement will cover a<br />
smaller area and be less visible.<br />
You can also control the amount<br />
of image area affected by a moving<br />
object by increasing the shutter<br />
speed. Quite simply, the faster your<br />
shutter speed, the less time an object<br />
has to move. If the shutter is fast<br />
enough, even an object that is moving<br />
very quickly will seem to be stand-<br />
Motion 131
Panning will at least slow down a moving subject. Used with a slow shutter speed it will blur the background,<br />
producing an effective impression of motion while retaining the subject's clarity. (Student photograph.)<br />
ing still. This is often referred to as<br />
"freezing."<br />
There are other ways to avoid<br />
blurred movement. You can choose<br />
subjects that aren't moving, of<br />
course, or wait for a moving one to<br />
stop. You can also make a subject<br />
slow down by moving with it. The<br />
most common way to do this is called<br />
panning. To pan, you stand in one<br />
place and swing your camera to<br />
follow the movement of your subject<br />
while you click the shutter. If you're<br />
132 The Photographic Eye<br />
using a fairly fast shutter speed, you<br />
may be able to freeze even a quickly<br />
moving subject by panning.<br />
If you're using a relatively slow<br />
shutter speed, however, the subject<br />
may blur less or not at all, but the<br />
background may blur considerably.<br />
This will result in a fairly crisp image<br />
of the subject, but it will seem to<br />
be moving very quickly, due to the<br />
streaks of the background.<br />
STOP AND GO<br />
Once again, there is no "right way"<br />
to shoot everything. Sometimes you'll<br />
want a subject to be very blurred.<br />
Sometimes a slight blur is best.<br />
Sometimes you'll want no blur at all.<br />
The important thing to recognize is<br />
that this is an aesthetic decision, and<br />
that you have several ways of putting<br />
your decision into effect.<br />
In most cases, you don't want any<br />
blur when you're photographing im-
Blurred motion can even be used effectively with immobile objects, as in<br />
this impressionistic image of St. Patrick's cathedral, created by handholding<br />
the camera for a long exposure. (Student photograph by Mike<br />
Brace o.)<br />
mobile objects —buildings, rocks or<br />
furniture, for example. If you try to<br />
photograph a building with a 200mm<br />
lens at 1/8 of a second, you'll produce<br />
the disturbing impression of a<br />
major earthquake.<br />
You may or may not want some<br />
blurring when photographing objects<br />
that move occasionally or slowly: tree<br />
leaves, people walking, or flowing<br />
water. In this case, you'll want to<br />
choose the distance, lens and shutter<br />
speed that best produce the motion<br />
effect you want.<br />
Finally, you're most likely to want<br />
blurring when photographing objects<br />
that tend to move quickly and often:<br />
racing cars, galloping horses, a<br />
basketball team in action. In this<br />
case, a long lens and/or a slow shutter<br />
speed may be in order.<br />
As you notice moving subjects during<br />
future assignments, take a moment<br />
to consider your options. Howmany<br />
ways of creating blurred motion<br />
can you recall? How many can<br />
you recall to prevent blurring? The<br />
sooner all your options come to mind<br />
automatically, the sooner you'll be<br />
able to control motion effectively and<br />
creatively.<br />
Motion 133
EXERCISE -<br />
Blurred<br />
Movement<br />
Assignment: Experiment with various<br />
ways of illustrating motion by using<br />
slow shutter speeds.<br />
Goal: Use blurred motion with a clear<br />
purpose and with a clear result. In<br />
other words, try to get a shot in which<br />
the blur really expresses motion.<br />
Tips: Set your camera at f/16 and<br />
1 /15 to start .Once you get going, experiment<br />
with shutter speeds as lowas<br />
1/8. You'll find the assignment<br />
easiest on a gray, overcast day, since<br />
you don't want too much light. Alternatively,<br />
you might use a neutral<br />
density filter, which cuts down the<br />
amount of light entering the camera.<br />
You may shoot in one of three<br />
ways:<br />
1 > Aim your camera so your subject<br />
is moving into the frame. Begin<br />
following your subject's movement<br />
and then release the shutter. Keep<br />
moving with the subject as the shutter<br />
opens and closes. This will produce<br />
a blurred background with your<br />
subject more or less "frozen."<br />
2> Mount your camera on a<br />
tripod or find some other way to hold<br />
it very steady. Aim so your subject<br />
is moving into the frame and release<br />
the shutter. This will produce a<br />
steady background with your subject<br />
moving across the frame as a blur.<br />
3> Attach a zoom lens to your<br />
camera, then mount it on a tripod or<br />
find some other way to hold it steady.<br />
Focus on the subject with the zoom<br />
at its maximum focal-length (i.e. 200<br />
on a 75-200 zoom). Pull back on the<br />
zoom lens and immediately release<br />
the shutter. This produces a pattern<br />
134 The Photographic Eye<br />
Student photograph by Jeffrey Parker.<br />
of lines radiating out from your<br />
subject.<br />
Note that you'll have to find<br />
something to focus on, or guess the<br />
distance, before your subject moves<br />
through the frame.<br />
Possible subjects include runners;<br />
almost any sports activity; motorcycles,<br />
bicycles and other vehicles; a<br />
person or a group of people jumping,<br />
twirling, swinging, dancing, etc.<br />
Your subject should contrast with<br />
the background (light on dark, dark<br />
on light). If it already blends in, the<br />
blur will make it blend even more.<br />
(Note: If you are doing your own<br />
processing at this stage, you can increase<br />
contrast by overdeveloping<br />
your film for 2 minutes and/or using<br />
a high-contrast paper —grade 4 or<br />
5 — for printing.)
Student photograph by Marciano Pitargue, Jr.<br />
Student photograph by Charles Stuart<br />
Kennedy III.<br />
Motion 135
Converging lines and an appropriate point of view are the two key ingredients of perspective. (Student photograph<br />
by Kenneth Griggs.)<br />
136 The Photographic Eye
chapter 11 Perspective<br />
erspective is the one compositional<br />
element that is<br />
almost entirely in your control.<br />
The word "perspective" means<br />
"point of view," both literally and<br />
figuratively. In its literal sense, it<br />
means where you stand in relation to<br />
your subject and how that influences<br />
the appearance of your subject. In<br />
the figurative sense, it means how<br />
you feel about your subject.<br />
The literal aspect of perspective is<br />
essentially practical. If from your<br />
point of view the sides of your subject<br />
are visible as they recede into the<br />
background, then your perspective<br />
will enhance the perspective of the<br />
subject. You can tell where it starts<br />
and how far back it goes.<br />
If, on the other hand, the sides of<br />
the subject are invisible from your<br />
point of view (as, for example, when<br />
you photograph a low building<br />
straight-on from the front), you<br />
diminish its perspective. The building<br />
will appear flat as a pancake.<br />
When we talk about perspective<br />
figuratively, it means how you<br />
perceive a subject, not just spatially,<br />
but aesthetically, emotionally, even<br />
morally. This kind of perspective requires<br />
that you understand your subject<br />
enough to have an opinion or<br />
idea about it ... and that you have<br />
the technical skill and creativity to<br />
convey that opinion or idea to others.<br />
This photograph is an example of what is called "two-point" perspective.<br />
The dominant perspective lines run along the vertical axis to the right of<br />
center. A second, less evident, perspective runs out of the left side of the<br />
photograph. Try using your cropping L's to determine if the photograph is<br />
stronger with both perspective points, or with just one. In addition, notice<br />
how the shadows play off of the other structural elements of the<br />
photograph. (Student photograph by Kimberly DeMarco.)<br />
137
For now, let's stick with the literal<br />
kind of perspective. No matter where<br />
you stand and where you look<br />
(straight ahead, to one side, up or<br />
down) objects are receding away<br />
from you. That's how space works.<br />
Much of the time you aren't particularly<br />
aware of this fact.<br />
Everything just looks normal. But<br />
when you start drawing rectangles<br />
around things with the frame of a<br />
photograph, all lines become much<br />
more obvious. The lines and angles<br />
of the frame provide a point of<br />
reference with which to compare<br />
other lines within the frame. So, a<br />
building receding into the sky above<br />
you, or into the distance in front of<br />
you, may seem distorted, strange or<br />
dramatic depending on the lens<br />
you're using.<br />
LENSES<br />
First let's take a look at the various<br />
kinds of lenses available, all of which<br />
fit into three basic categories: wideangle,<br />
normal and telephoto.<br />
Wide-angle lenses have a wide<br />
angle of view. They allow a large<br />
amount of any scene to be included<br />
within the frame of a photograph.<br />
They have the shortest focal lengths,<br />
ranging from 15mm or less to 45mm.<br />
Extreme wide-angle lenses (18mm<br />
and below) are called "fish-eyes,"<br />
because they produce a very distorted,<br />
circular image. The most<br />
common wide-angle focal lengths are<br />
28mm and 35mm.<br />
The next category of lenses is "normal."<br />
These are the lenses that most<br />
closely match the normal vision of the<br />
human eye. They range from 45mm<br />
to 55mm. The most common normal<br />
lens is 50mm.<br />
The third category is telephoto<br />
lenses. These produce a telescopic ef-<br />
138 The Photographic Eye<br />
FOCAL POINT: Lenses<br />
Long & Short<br />
The primary factor that makes one<br />
lens different from another is its focal<br />
length. When a photographer speaks<br />
of "a 50-millimeter lens," he or she<br />
means that the focal length of the lens<br />
measures 50 millimeters (50mm). One<br />
millimeter is a bit smaller than 1/32<br />
of an inch. A 50mm lens, therefore,<br />
has a focal length of about 2 inches.<br />
The focal length of a 200mm lens is<br />
about 7 7/8 inches.<br />
So, what is "focal length" and why<br />
is it so important? Technically, focal<br />
length is the distance from the optical<br />
center of a lens to the film plane. This<br />
distance is four times as long within<br />
a 200mm lens as it is within a 50mm.<br />
Until recently, this would have been<br />
fairly obvious, because the 200mm<br />
lens would have been just about four<br />
times as long. Modern techniques of<br />
"bouncing" (or, more precisely, reflecting)<br />
light back and forth within<br />
a lens, however, permit one that actually<br />
measures less than 100mm (or<br />
about 3 7/8 inches) to have a focal<br />
length of 200mm.<br />
A 50mm lens is generally considered<br />
to be "normal" for a 35mm<br />
camera. However, any lens with a<br />
focal length between 45mm and<br />
55mm falls within the normal range.<br />
A normal lens comes nearest to the<br />
vision of a human eye. Though you<br />
can't see as much through the lens as<br />
you can with your eyes, the size,<br />
distance and proportion of what you<br />
do see appears to be the same.<br />
Any lens with a focal length over<br />
55mm is in the telephoto range. Any<br />
lens with a focal length under 45mm<br />
is in the wide-angle range. Telephoto<br />
lenses, then, are casually referred to<br />
as "long" and wide-angles as "short."<br />
Imagine that you are photographing<br />
a house from a distance of about<br />
50 feet. The focal length of your lens<br />
determines how much of the house<br />
will be recorded on the film in the<br />
camera. With a wide-angle lens (such<br />
as a 28mm), you would probably be<br />
able to fit the whole house into one<br />
frame of film. With a normal lens<br />
(50mm) you might be able to fit in<br />
only the front door and two windows.<br />
With a telephoto (such as a<br />
200mm) you might be limited to a<br />
single window or less.<br />
Making the lens longer reduces the<br />
angle at which light can enter the<br />
lens. In other words, as focal length<br />
increases, the angle of view decreases.<br />
(The angle of view is measured<br />
diagonally across the image area,<br />
from corner to corner.)<br />
Decreasing the angle of view also<br />
decreases the field of view. The field<br />
.of view is what you see in the viewfinder<br />
(and what you capture on<br />
film). It is the image area.<br />
With a 28mm lens, the angle of<br />
view is 75°. The borders of the field<br />
of view create a 75° angle (like a thick<br />
slice of pie) that starts at your camera<br />
and stretches out to infinity.<br />
Anything that can be seen within that<br />
angle will show up in your photograph.<br />
The angle of view for a<br />
200mm lens is only 12° (like a very<br />
thin slice of pie). In simple terms: the<br />
longer your lens, the less you will see<br />
through it, and the less will appear in<br />
your photograph. Because fewer objects<br />
will fit into a single frame, looking<br />
through a long lens is a little like<br />
looking through a telescope: distant<br />
objects appear closer, small objects<br />
appear larger.
Fast & Slow<br />
Besides being available in different<br />
lengths, lenses also differ in terms of<br />
the apertures they can accommodate.<br />
You might hear a lens referred to as,<br />
for example, a 50mm f/2.8 ("fifty<br />
millimeter, f two eight"). The first<br />
number refers to the focal length of<br />
the lens and the second number refers<br />
to its largest aperture.<br />
As you know, larger apertures let<br />
in more light. If an image is correctly<br />
exposed in 1/60 of a second with an<br />
aperture of f/4, it will take only<br />
1/125 of a second to be correctly<br />
exposed at f/2.8. With a larger<br />
aperture, the film is exposed more<br />
quickly.<br />
So, a lens with a very large maximum<br />
aperture (f/2 or f/1.4, for example)<br />
is called a fast lens. One with<br />
a relatively small maximum aperture<br />
(say, f/4) is called slow. Fast lenses<br />
allow you to shoot at faster speeds or<br />
in lower light than slow lenses do.<br />
Unfortunately, increasing the speed<br />
of a lens also increases its price. This<br />
is particularly true for telephoto<br />
lenses.<br />
The aperture number is calculated<br />
by dividing the focal length of the<br />
lens by the diameter of the lens opening.<br />
The actual lens opening of a<br />
200mm lens would therefore have to<br />
be four times as wide as that of a<br />
50mm lens to achieve the same maximum<br />
aperture:<br />
200mm focal length<br />
4- 71.4mm diameter = f/2.8<br />
50mm focal length<br />
^ 17.8mm diameter = f/2.8<br />
17.8mm x 4.01 = 71.4mm<br />
As you might guess, increasing the<br />
amount of optical-quality glass and<br />
other materials also increases the cost<br />
of producing a lens. However, a telephoto<br />
lens —even a fast one —is rarely<br />
useful in low light. To get the best<br />
results, a telephoto needs a fairly fast<br />
shutter speed. It also needs as wide<br />
a depth of field as possible, since it<br />
is difficult to hold telephotos steady<br />
and focus them accurately. Therefore,<br />
you can get by just fine with a<br />
fairly small maximum aperture (f/4<br />
and f/3.5 are common and affordable).<br />
With normal and wide angle<br />
lenses, large apertures become far<br />
more useful and, fortunately, less expensive.<br />
It's a good idea (though by<br />
no means necessary) to have at least<br />
one short lens with a maximum aperture<br />
of f/2 or f/1.4.<br />
Perspective 139
feet, making distant objects appear<br />
larger and, therefore, closer. They<br />
range from 55mm to 500mm and<br />
beyond. Moderate telephotos (ranging<br />
from about 70mm to 150mm) are<br />
often referred to as "portrait" lenses,<br />
since they are most flattering for<br />
faces. The most common portrait<br />
lens length is probably 135mm. Other<br />
popular telephotos include 150mm,<br />
175mm and 200mm. Longer telephotos<br />
are generally used only for<br />
such specialized work as sports<br />
photography.<br />
(Note: Many photographers use a<br />
"doubler" —or, more properly, an<br />
"extender" —to increase the focal<br />
length of a telephoto lens when necessary.<br />
A doubler is a short tube or<br />
lens which, as its name suggests,<br />
doubles the focal length of any lens.<br />
A 150mm lens with a doubler, for example,<br />
can produce the same results<br />
as a 300mm lens, at far less expense.)<br />
True telephotos (anything over<br />
150mm) present some challenges that<br />
you should know about at this point.<br />
We discussed one of these challenges<br />
earlier: decreased depth of field. If<br />
you like the effect it produces, some<br />
reduction in depth of field can be<br />
perfectly all right. You must focus<br />
more carefully with a long lens than<br />
with a short one, however. If you<br />
don't, you may not have anything in<br />
focus at all.<br />
Another consequence of a long<br />
lens that we've already discussed is<br />
reduced angle of view. Because a long<br />
lens has a narrow angle of view, any<br />
motion will be more conspicuous<br />
with a long lens than with a short<br />
one. Once again this can be good or<br />
bad, depending upon what you want.<br />
If you want some blurred motion, a<br />
telephoto lens can achieve it.<br />
One of the great drawbacks of long<br />
lenses is that they magnify camera<br />
140 The Photographic Eye<br />
A wide-angle lens has a wide field of view, producing an apparent<br />
distortion of objects close to it. This can be very effective, if that's the<br />
effect you want. Used to photograph distant objects, however, most wideangle<br />
lenses produce an entirely "normal-looking" image. (Student<br />
photograph by Daniel Watson.)
A telephoto lens allows you to "get close" to a subject without actually<br />
moving, which is particularly helpful when the subject is inaccessible. In<br />
addition, it will tend to "compress" distances, adding emphasis to the<br />
patterns created by layers of lines or shapes. (Student photograph by<br />
Michael Grassia.)<br />
shake. Unless your camera is on a<br />
tripod, it will shake somewhat as you<br />
click the shutter. With a normal or<br />
wide-angle lens at a normal shutter<br />
speed (1/60 of a second or faster),<br />
this presents no problem. With a long<br />
lens, especially one over 200mm, the<br />
problem gets quite serious.<br />
Because the lens is longer and<br />
heavier than normal, it is more difficult<br />
to hold steady. Because its<br />
angle of view is narrower, even slight<br />
movement is more likely to show up<br />
when you print an enlargement. You<br />
can offset some of the camera-shake<br />
problem by increasing the shutter<br />
speed. If you use a shutter speed that<br />
is roughly double the focal length of<br />
the lens you should have no camerashake<br />
problem. In other words, you<br />
should be able to hand-hold a 135mm<br />
lens at a shutter speed of 250, or a<br />
200mm lens at 500. With practice,<br />
however, you'll be able to do considerably<br />
better than that.<br />
Increasing the shutter speed further<br />
reduces the depth of field, because<br />
you'll need a larger aperture to compensate<br />
for the faster speed. Furthermore,<br />
most telephotos don't open up<br />
to very large apertures. This means<br />
that in less than ideal light, you may<br />
have to choose between risking a blur<br />
or missing the shot altogether. An example<br />
would be a shot that requires<br />
you to set the aperture on f/2.8 at 125<br />
with a 200mm lens. If your lens only<br />
opens up to f/3.5, then you'll just<br />
have to shoot at that aperture, with<br />
a shuttter speed of 60, and hold your<br />
breath.<br />
As mentioned earlier, a zoom lens<br />
is essentially several lenses in one,<br />
since a single zoom will provide a<br />
wide range of focal lengths. Like any<br />
other lens, however, a zoom also has<br />
limitations. If you're using a wide-totele<br />
zoom (say, 28mm to 80mm),<br />
Perspective 141
you'll have many focal lengths to<br />
choose from. But you will probably<br />
have at least one less f-stop than a<br />
plain 28mm or 80mm lens would give<br />
you. That's not a huge sacrifice under<br />
most conditions, but it is something<br />
to be aware of. (This is the reason we<br />
previously suggested that you should<br />
have at least one fixed-focal-length<br />
lens. You never know when you'll<br />
need to shoot something at f/2.8.)<br />
Every lens involves a similar tradeoff.<br />
They are all good for some kinds<br />
of shots and not good for others. A<br />
wide-angle, for example, would be a<br />
poor choice for shooting a football<br />
game. You might get some nice images<br />
of the stadium, but the action of<br />
the game would be utterly lost.<br />
DIFFERENT WAYS OF<br />
SEEING<br />
With a 50mm lens, as we've mentioned,<br />
things appear much as they<br />
do through a human eye. Receding<br />
objects will generally appear quite<br />
normal.<br />
With a wide angle lens, the lines of<br />
perspective will be exaggerated, so a<br />
building will seem taller or longer as<br />
it recedes from you. The lens does not<br />
actually change those lines. It only<br />
seems to because of the wide angle of<br />
view.<br />
What effect do you get if you shoot<br />
the same building, from the same<br />
position, with both a wide angle and<br />
a telephoto lens? The wide angle shot<br />
will seem to distort the image to emphasize<br />
depth, so objects will seem<br />
farther away. The telephoto will seem<br />
to distort it in the other direction, so<br />
objects seem flatter and closer than<br />
they actually are. The important<br />
word here is seem. If you crop out of<br />
the wide-angle photograph the portion<br />
of the entire scene that fit into<br />
142 The Photographic Eye<br />
A zoom lens not only offers the benefits of several lenses in one, it \vill<br />
also make some interesting special effects possible. This shot was made by<br />
zooming the lens during a long exposure. (Student photograph by Charles<br />
Cibbs.)<br />
the telephoto shot, you would have<br />
two virtually identical photographs.<br />
But what about the way a wideangle<br />
lens bends people's faces at the<br />
edges of the frame? This is also just<br />
an apparent distortion. The lens is accurately<br />
recording an image from a<br />
certain perspective. The best way to<br />
test this is to look at a large wide<br />
angle print with your face as close as<br />
possible to it. The nearer you come<br />
to matching the original viewing position<br />
for the scene, the more normal<br />
the photograph will look. When you<br />
stand back from a wide-angle print,<br />
you are simply compressing a broad<br />
viewing angle into a smaller space, so<br />
things look weird.
The combination of height and distance enhance the perspective of this photograph. Notice how other lines in the<br />
photograph reinforce it. (Student photograph by Lynne Mattielli.)<br />
Perspective 143
Student photograph by Russell Wells.<br />
144 The Photographic Eye
So, if you actually get the same<br />
image with each lens, why not just<br />
stick to one and move closer to or<br />
further from your subject? There are<br />
two reasons. First, you can't always<br />
do that. If your subject happens to<br />
be a pro football lineman in the middle<br />
of a game, you're much better off<br />
sticking to the sidelines. If your subject<br />
is a bird flying over a lake, you<br />
really don't have much choice. You<br />
need to take the shot from where you<br />
are.<br />
But there's another reason too.<br />
While the subject itself may look the<br />
same, its relation to other objects in<br />
the frame will change. Imagine that<br />
you want to photograph a person<br />
standing 50 feet in front of a building.<br />
With a wide-angle lens, the person<br />
may seem to be standing 100 feet<br />
away from the building. With a<br />
Student photograph by Laurie<br />
McMillen.<br />
50mm lens, the relation between the<br />
person and the building will seem to<br />
be "normal." With a 200mm lens, the<br />
person may seem to be right next to<br />
the building.<br />
So, different lenses make different<br />
points of view available to you. In a<br />
sense, the only "honest" lens is a<br />
50mm. It's the only one that reproduces<br />
your actual point of view.<br />
Longer and shorter lenses create the<br />
impression of other points of view,<br />
by allowing you to expand or crop into<br />
an image. As a result, you appear<br />
to be closer to or farther from it than<br />
you actually are.<br />
A POINT OF VIEW<br />
How do you apply perspective?<br />
There are two ways, both of which<br />
involve establishing a point of view.<br />
One point of view (the literal kind)<br />
is physical — where you place yourself<br />
in relation to your subject.<br />
The second kind of point of view<br />
is harder to describe. It too depends<br />
on where you stand in relation to<br />
your subject . . . but not just<br />
physically. It also depends on where<br />
you stand aesthetically (is the subject<br />
beautiful, plain, ugly?), emotionally<br />
(does it make you happy, amused,<br />
worried, sad?) and ethically or<br />
spiritually (do you believe the subject<br />
itself is good, indifferent or bad?).<br />
Sooner or later, you'll want to do<br />
more with your camera than just<br />
make copies of things. You'll want to<br />
explore them, find out what makes<br />
them "tick." You'll want to reach an<br />
understanding of them and express<br />
that to others. That's when you'll<br />
begin to be an artist with a camera.<br />
Perspective 145
EXERCISE<br />
Point of View<br />
Assignment: Photograph a single<br />
subject from several different angles.<br />
At least two final prints should be<br />
produced.<br />
Goal: See how many good compositions<br />
you can produce by looking at<br />
your subject from all sides: front,<br />
back, right side, left side, top, bottom,<br />
even up close and far away.<br />
Tips: Use lighting as well as position<br />
to add variety and interest to this<br />
assignment. Try shooting early or late<br />
in the day to make use of dramatic<br />
light and long shadows. Alternatively,<br />
you might want to set up some<br />
kind of light source (such as a<br />
spotlight) to produce ypur own<br />
lighting effects. Most importantly,<br />
shoot a lot of film, at least one entire<br />
roll.<br />
146 The Photographic Eye<br />
Student photographs for this exercise by Jeff Frye.
Perspective 147
part 3 People, Places & Things:<br />
Exercises & Examples<br />
Student photograph by Jim Piazza.<br />
149
Student photograph.
chapter 12 Things<br />
y now, you should have a<br />
good grasp of the basic elements<br />
of photography.<br />
You may even have the beginnings of<br />
a personal style. The most important<br />
thing at this stage is practice. So, with<br />
the exception of the Appendix, the remainder<br />
of this book is devoted solely<br />
to exercises.<br />
Each exercise assignment promotes<br />
specific skills and insights. The<br />
assignments can be as challenging (or<br />
as easy) as you choose to make them.<br />
Almost all of them can be accomplished<br />
with the knowledge you have<br />
already acquired. (If and when you<br />
feel the need for more information,<br />
the Bibliography will give some ideas<br />
of where to start looking.)<br />
For the first category of exercises,<br />
you will be photographing "things" -<br />
isolated objects. Things are generally<br />
easier to photograph than places or<br />
people (the next two categories).<br />
However, it's not necessarily easy to<br />
do it well. Before you set out to capture<br />
your bicycle (or any other subject)<br />
on film, it's a good idea to set<br />
some objectives for yourself, beyond<br />
those required just to complete the<br />
assignment. In fact, this a good habit<br />
for photographing anything.<br />
Clearly it is not enough merely to<br />
produce an accurate image of your<br />
subject. A photocopying machine accomplishes<br />
that objective quite well.<br />
Student photograph.<br />
151
But what is "enough"? While the<br />
ultimate answer to that question is up<br />
to you (and to those who critique<br />
your photos), here are a few hints.<br />
A good first objective for any<br />
photo is to generate visual interest.<br />
Obviously, a photograph must provoke<br />
interest to hold a viewer's attention.<br />
Before you can make the rest of<br />
us understand your intentions, you<br />
must make us want to understand<br />
them.<br />
There are many ways of achieving<br />
visual interest. First is composition.<br />
A skillful composition can generate<br />
interest all by itself. Light is another<br />
important factor. Others include<br />
depth of field, shutter speed effects<br />
and printing technique.<br />
A second objective is mood.<br />
Though it is often hard to define, virtually<br />
every effective photograph has<br />
a mood of some kind. It needn't be<br />
a familiar one like "happy" or "sad."<br />
If a photograph emphasizes shape<br />
and texture, the mood may be "sensuous."<br />
If it suggests a scientific<br />
examination, the mood may be "clinical"<br />
or "detached." If it's not clear<br />
what the photographer is intending,<br />
the mood may be "confused" or<br />
"playful." A photograph that is apparently<br />
concerned only with line, or<br />
light and shadow, may have a mood<br />
that is simply "aesthetic."<br />
A third objective is expression.<br />
This one is optional, though recommended.<br />
A photograph is expressive<br />
when it "says" something. You can<br />
use almost any subject to express<br />
your own feelings about the world.<br />
Or you can try to stand back and let<br />
each subject (whether it be a bicycle<br />
or a person) speak for itself. You can<br />
even do both: combining your own<br />
moods and perceptions with the inherent<br />
qualities of your subject.<br />
Decide for yourself.<br />
152 The Photographic Eye<br />
FOCAL POINT: Edward Weston<br />
By the 1920s, photography had become<br />
an accepted part of American<br />
culture. Photographers were busily<br />
producing images of people, places<br />
and events that they or their clients<br />
considered significant. Presidents,<br />
boulevards, buildings, newlywed<br />
couples, battles and factory workers<br />
were all being faithfully recorded and<br />
preserved for posterity. Edward<br />
Weston helped promote a whole new<br />
way of seeing. He photographed both<br />
soaring mountains and a handful of<br />
pebbles, the "great themes" and<br />
relative trivia. He was interested in<br />
pure aesthetics, in anything that had<br />
compelling line, texture, shape or<br />
lighting.<br />
Other photographers, as far back<br />
as Daguerre and Talbot, had photographed<br />
small objects or details of<br />
large ones. However, Weston was<br />
among the first to consistently elevate<br />
the ordinary into fine art. He photographed<br />
weathered doorways, eggs,<br />
fruit, rocks, eyeglasses and cabbages,<br />
striving to capture the essence of<br />
each. Weston's subjects became important<br />
because they had been photographed.<br />
Absolutely anything was<br />
appropriate, if it could be compellingly<br />
presented.<br />
Curiously, Weston began his<br />
career heavily influenced by the Pictorialists,<br />
one of the most conservative<br />
of the various "schools" of<br />
photography. The Pictorialists believed<br />
that photography should imitate<br />
painting, and they strove to<br />
reproduce painterly effects with their<br />
cameras. Weston's early photographs,<br />
true to Pictorialist style, tended<br />
to use soft-focus and dreamy<br />
lighting.<br />
After encountering the work of<br />
Steiglitz, Paul Strand and other<br />
Realists, Weston changed his mind<br />
and his style. He began using large<br />
format cameras to produce "straight"<br />
photographs of exceptional precision<br />
and clarity. Along with Ansel<br />
Adams, he was a founding member<br />
of "Group f.64," an association of<br />
photographers who all believed in using<br />
small apertures to achieve extreme<br />
depth of field.<br />
Weston was born in 1886 in Highland<br />
Park, Illinois, but spent most of<br />
his life in California and other<br />
western states. He opened his own<br />
photographic studio at the age of 18,<br />
specializing in portraits. Nearly 20<br />
years later, in 1923, he suspended his<br />
commercial work and spent three<br />
years in Mexico. Upon his return to<br />
the U.S., Weston began concentrating<br />
on the nature studies for<br />
which he became famous. From<br />
the mid-1930s until his death in<br />
1958, Weston was widely regarded<br />
as one of America's foremost<br />
photographers.
1886-1958<br />
Edward Weston, Pepper, 1930. c Sotheby's Inc. 1987.<br />
Things 153
EXERCISE<br />
Bicycle<br />
Assignment: Photograph a bicycle<br />
from various angles.<br />
Goal: Explore the idea that there is<br />
more than one way to look at any object.<br />
Once you start really looking, the<br />
possibilities are endless.<br />
Tips: Get in close and shoot parts of<br />
the bicycle: pedals, spokes, handlebars,<br />
seat, light, kickstand, gears, etc.<br />
Get even closer and shoot details of the<br />
parts: a portion of the gears, the handgrip<br />
of the handlebars, the joint of the<br />
kickstand.<br />
Then pull back a bit and look for<br />
patterns: the various lines and circles<br />
and curves and angles of the frame,<br />
wheels and mechanism of the bicycle.<br />
Pull further back and shoot the entire<br />
bicycle in an interesting environment.<br />
Alternatively, shoot it in a very plain<br />
environment, so the shapes of the bicycle<br />
stand out clearly.<br />
Approach the bicycle from the<br />
front, back, top and either side. Get<br />
down under it and shoot upwards. Lay<br />
it down and shoot it on the ground.<br />
Get in close again. Step back. Move<br />
around. Try to find as many ways as<br />
you can to look at this one object.<br />
(Note: You don't have to restrict<br />
yourself to one bicycle. Look for variations<br />
in different ones. Find or place<br />
several bikes together and shoot them<br />
as a group. Do, however, get at least<br />
a half-dozen shots of one bicycle, to<br />
see how many variations you can find<br />
in a single object.)<br />
154 The Photographic Eye<br />
Student photograph by Charles Bell.
Student photograph by Charles Stuart<br />
Kennedy III.<br />
Student photograph by Bruce Wiles.<br />
Things 155
EXERCISE<br />
Hubcaps &<br />
Taillights<br />
Assignment: Photograph automobile<br />
hubcaps and taillights (headlights<br />
are acceptable as well).<br />
Goal: Concentrate on cropping in<br />
on your subject. Explore various<br />
ways of composing circular and other<br />
shapes within the rectangular frame<br />
of a photograph.<br />
Tips: Choose your subjects<br />
carefully; the more intricate the better.<br />
For example, a very plain hubcap<br />
will generally be less interesting<br />
than one with spokes or other<br />
decoration.<br />
Shoot pieces, details. It's a good<br />
idea, for instance, not to get the<br />
whole hubcap into the frame. Crop<br />
in on an interesting part of it. Look<br />
for patterns. In this exercise, patterns<br />
are more important than the object<br />
being photographed.<br />
Notice how light interacts with<br />
chrome and glass. Pay particular attention<br />
to precise focusing. Experiment<br />
with different angles for interesting<br />
effects. Move around.<br />
156 The Photographic Eye<br />
Student photograph by Stephen Griggs.<br />
Student photograph by Marciano Pitargue, Jr.
Student photograph by Han June Bae.<br />
Student photograph by David<br />
Kleinfelt.<br />
Things 157
EXERCISE<br />
Eggs<br />
Assignment: Arrange several eggs on<br />
a white background and photograph<br />
them.<br />
Goal: Explore the possibilities of a<br />
repeated simple shape, of light and<br />
shadow, of a white subject on a white<br />
background, and of a "set-up"<br />
shot —all at once. Try to produce a<br />
photograph in which the eggs are arranged<br />
in a pleasing composition<br />
which is enhanced by their shadows.<br />
Tips: Try using a large (i.e.<br />
32" x 40") piece of white mat<br />
board, so you can experiment freely<br />
with composition and viewing angle.<br />
Shoot in bright sunlight and rely on<br />
the point of departure camera setting<br />
(f/16 at 1/125 of a second). This is<br />
another case in which your light<br />
meter will only be confusing.<br />
Don't settle for the first shot that<br />
comes to mind —explore! Try various<br />
arrangements and various angles<br />
until you get something that's<br />
exciting.<br />
158 The Photographic Eye<br />
Student photograph by Jun Hwang.
Student photograph by William Roche.<br />
Student photograph by Cliff<br />
Blaskowsky.<br />
Things 159
EXERCISE<br />
Object &<br />
Its Shadow<br />
Assignment: Photograph an object<br />
(or part of it) along with its shadow.<br />
Goal: Explore how an object's<br />
shadow can add visual interest to a<br />
photograph.<br />
In addition, learn to place both an<br />
object (or part of an object) and its<br />
shadow effectively into a rectangular<br />
frame.<br />
Tips: You'll get the best results<br />
early or late in the day (from dawn<br />
to mid-morning or mid-afternoon till<br />
sunset), when shadows will be nice<br />
and long. Be sure your subject is wellplaced<br />
to cast an interesting shadow.<br />
It's best if the shadow is cast on a<br />
fairly simple surface —a complicated<br />
surface tends to reduce a shadow's<br />
impact.<br />
Pay particular attention to negative<br />
space. Try to achieve visual tension<br />
between the object and the shadow.<br />
This can be done by placing the object<br />
over to one side of the frame and<br />
letting the shadow stretch to the far<br />
side (a corner to corner stretch can be<br />
especially effective).<br />
160 The Photographic Eye<br />
Student photograph by Charles Stuart Kennedy HI.
Student photograph by Lynne<br />
Mattielli.<br />
Student photograph by Evelyn Wight.<br />
Things 161
EXERCISE<br />
Bottles &<br />
Glasses<br />
Assignment: Photograph an arrangement<br />
of bottles and/or glasses<br />
on a white background. (32 x 40"<br />
white mat board is recommended).<br />
Photograph the arrangement from<br />
various angles to explore the compositional<br />
possibilities in it.<br />
Goal: Achieve the best possible<br />
white, gray and black tones, using the<br />
correct aperture and shutter speed<br />
combination (f/16 at 125 in bright<br />
sunlight).<br />
Produce an interesting composition<br />
that makes good use of these<br />
tones.<br />
Tips: Don't rely on your light<br />
meter. Stick to the "point of departure"<br />
setting and you will get the correct<br />
effect. The background should<br />
be a true white, but with texture visible.<br />
Black lines (where glass is thick<br />
or is touching something) should be<br />
clear and dark enough to contrast<br />
strongly with the white. Gray tones<br />
should be varied and delicate, not<br />
muddy.<br />
Notice how the shapes of the bottles<br />
or glasses interact with each<br />
other, and how their shadows interact<br />
as well.<br />
Do not let the edge of the white surface<br />
show in the frame! A telephoto<br />
or, better still, a zoom lens is helpful<br />
for an assignment like this. If you<br />
have one, use it. If you don't, just get<br />
in close.<br />
162 The Photographic Eye<br />
Student photograph by Jeff Frye.<br />
Student photograph by Bill Backus.
,-<br />
Student photograph by Lynne<br />
Mattielli,<br />
Student photograph by Cliff<br />
Blaskowsky.<br />
Things 163
EXERCISE<br />
Water<br />
Assignment: Photograph waterany<br />
kind of water, from a puddle to<br />
an ocean.<br />
Goal: Capture some of water's different<br />
qualities: calm and still, rippling,<br />
splashing, falling, cascading,<br />
moody, etc.<br />
Tips: Watch for interesting reflections<br />
on calm water; for water interacting<br />
with other objects (people,<br />
animals, rocks); for how water affects<br />
and is affected by its environment;<br />
for water as an environment;<br />
for drops of water on leaves, glass,<br />
metal, etc. Try looking into the water<br />
for fish, pebbles, discarded bottles or<br />
whatever else you might find.<br />
Photograph a landscape or a city<br />
street through a wet window in a<br />
home, apartment or car. Keep an eye<br />
out for floating leaves, sticks or<br />
boats, anything half in and half out<br />
of the water. Look for things growing<br />
in water: lilies, grass, algae.<br />
You may want to photograph an<br />
object and its reflection, or just the<br />
reflection. Try shooting a calm reflection<br />
first, and then tossing in a pebble<br />
to see what effect that has.<br />
Finally, you might catch people<br />
playing in water —at a fire hydrant,<br />
in a swimming pool, along a river or<br />
at the ocean.<br />
Student photograph by Greg Garre.<br />
164 The Photographic Eye<br />
Student photograph by A! Webb.
EXERCISE<br />
Old Things<br />
Assignment: Photograph a variety<br />
of old objects, things that are worn<br />
from age or use —houses, tools, toys,<br />
furniture, etc.<br />
Goal: Show how the age of an object<br />
influences its character.<br />
Tips: People in our society tend to<br />
think that a thing has to be new and<br />
glossy to be good. Few people appreciate<br />
things that have earned their<br />
character through age and lots of use.<br />
That's what this exercise is about.<br />
Look for peeled paint, rust,<br />
broken glass, things that have been<br />
abandoned, used up, worn out. They<br />
have a statement of their own, a<br />
special mood. That mood may be sad<br />
("This thing is all worn out"), or<br />
happy ("This thing has been useful<br />
for years").<br />
Try to capture the object's<br />
character. Notice how light and texture<br />
may help to portray that<br />
character.<br />
Possible subjects include old<br />
houses, cars, tools, bridges, train<br />
tracks, machinery, abandoned buildings,<br />
an old can, discarded toys, a<br />
chipped plate, teacup, fork.<br />
(Note: If you find something indoors<br />
that you want to photograph<br />
outdoors, be very careful that it<br />
doesn't look set up. Adjust the arrangement<br />
until it looks natural.)<br />
Student photograph by Mark Mealey.<br />
Student photograph by Thomas A. Perez.<br />
Things 165
Student photograph by Richard Greenstone.<br />
166 The Photographic Eye
chapter 13 Places<br />
s you progress from<br />
"things" to "places," the<br />
number of variables you<br />
must control will increase. Now, in<br />
addition to placing your subject<br />
carefully within the frame and worrying<br />
about the effect of light and<br />
shadow on it, you have to pay attention<br />
to all kinds of potential complications<br />
and distractions. People,<br />
animals, cars, trucks and weather can<br />
get in your way just as you're about<br />
to click the shutter. Buildings, trees<br />
and telephone poles can make it impossible<br />
for you get the composition<br />
you want.<br />
In addition, you'll have to be very<br />
concerned with perspective: should<br />
you be close to a building or far<br />
away? How big should a tree look<br />
next to the building? How much sky<br />
should be included? Should you crop<br />
in on a small part of the scene or try<br />
to fit it all into the frame? Meanwhile,<br />
your subject is likely to be<br />
changing all the time. If you think<br />
too long, it may no longer be worth<br />
the bother. If you get impatient, you<br />
may miss out on a new and unexpected<br />
opportunity.<br />
There are other challenges as well.<br />
For example, if your subject has any<br />
moving parts (people, animals,<br />
machines, running water, trees in the<br />
wind, etc.), long exposures will produce<br />
blurs. This means that you will<br />
Student photograph by Debbie Taggart.<br />
either have to stick to fast shutter<br />
speeds or learn to like the blurs.<br />
Lighting will become more complicated<br />
as you enlarge your field of<br />
view from particular objects to<br />
general scenes. While you will still<br />
need to pay particular attention to<br />
how the light affects your primary<br />
subject, its affect on the surrounding<br />
environment will be important as<br />
well.<br />
You will also begin to face the<br />
challenge of dealing with people. If<br />
you're photographing a crowd, you<br />
may not be aware of all the individual<br />
people in it. They, however, may be<br />
very aware of you. Some of them<br />
may prefer not to be in your photograph.<br />
For the assignments in this<br />
section, you should be able to avoid<br />
this problem either by leaving people<br />
out of your photographs or by asking<br />
permission in advance (e.g. for<br />
the "Construction Site" exercise).<br />
However, if you feel that some advice<br />
on photographing people is appropriate<br />
at this stage, you might<br />
want to read the introduction to the<br />
"people" category of exercises.<br />
Overall, controlling composition is<br />
the greatest challenge you'll face as<br />
you begin photographing places. It's<br />
Places 167
you photograph. Try to crop in on<br />
them, cutting out anything that just<br />
adds confusion (unless of course confusion<br />
is what you want to express).<br />
Don't forget to move around —from<br />
side to side and up and down. You've<br />
probably seen other photographers<br />
crawling on the ground, climbing up<br />
trees and generally looking foolish.<br />
Here's your chance to do it too. When<br />
you're photographing a place, creative<br />
solutions may be required to resolve<br />
compositional problems.<br />
168 The Photographic Eye<br />
FOCAL POINT: Ansel Adams<br />
Widely admired both for his eloquent<br />
landscapes and his technical<br />
skill, Ansel Adams was among the<br />
most influential photographers in<br />
history. Through his exhibitions,<br />
books and classes, he inspired thousands<br />
of aspiring photographers to<br />
adopt his philosophy and techniques.<br />
Adams specialized in photographing<br />
the natural environment of the<br />
American West. His photographs are<br />
typically vast panoramas of mountains<br />
and sky, with highly dramatic<br />
composition and lighting. Extreme<br />
clarity was a key element of his style.<br />
To achieve that goal, he used largeformat<br />
cameras, very small apertures<br />
(such as f/64) and long exposures<br />
(sometimes over an hour).<br />
His technique is based on the<br />
"Zone System," a set of procedures<br />
that provide very precise control over<br />
the range of values in a photograph.<br />
By adjusting both exposure and development<br />
times (with the appropriate<br />
burning and dodging), a photographer<br />
using the Zone System can<br />
lighten the shadow areas and/or<br />
darken the highlights to achieve finely<br />
balanced tones. The final image is<br />
often utterly unlike the original scene.<br />
The photographer is then in suitable<br />
control of the photographic process<br />
according to the Zone System's advocates.<br />
Critics say that the resulting<br />
photos may seem to be about little<br />
more than technique itself. In any<br />
case, Adams and his use of the<br />
Zone System must be given credit for<br />
producing some extraordinary<br />
photographs.<br />
Adams was born in San Francisco<br />
on February 20, 1902. His early interest<br />
in music led him to become a<br />
professional (self-taught) pianist by<br />
his early 20s. Photography, however,<br />
would soon demand his full attention.<br />
He obtained his first camera at<br />
14 and promptly traveled to Yosemite<br />
to experiment with it. For the next<br />
decade, he photographed there every<br />
year. In 1927 his first collection of<br />
photographs was published —and<br />
very favorably received. By 1930,<br />
friends and admirers had convinced<br />
him to shift his career from music to<br />
photography. From then until his<br />
death in 1984, Adams remained one<br />
of the most respected and widely exhibited<br />
photographers in the world.<br />
Ansel Adams, Moon and Halfdome,<br />
Yosemite Valley, c 1955.
1902-1984<br />
Places 169
EXERCISE<br />
Landscape<br />
Assignment: Photograph a large<br />
expanse of any "natural" environment.<br />
Depending on where you live,<br />
"natural" may mean virgin<br />
wilderness, agricultural land, a<br />
seashore or an inner city park. Do<br />
your best, however, to avoid buildings,<br />
roads or other indications of<br />
human influence.<br />
Goal: Capture something of the<br />
character of the landscape you photograph.<br />
Is it lush, wild, domesticated,<br />
barren, pleasant, forbidding,<br />
calm, awesome? Take time to find<br />
out, and then express your conclusions<br />
in your photographs.<br />
Tips: Don't just go out and point<br />
your camera at the view and call it a<br />
landscape because it has land and<br />
trees and sky in it. Make the composition<br />
work. Look for visual harmonies:<br />
recurring patterns in trees,<br />
rocks, the contours of the land,<br />
water, clouds.<br />
Shoot in snow, rain, mist, bright<br />
sunlight, any weather. Notice how atmospheric<br />
conditions change the environment:<br />
How does rain affect an<br />
open field, a pond or river, a forest?<br />
How does bright sunlight affect<br />
them? Notice how clouds relate to the<br />
shape of the land.<br />
Patience is important. For example,<br />
once you decide what to photograph,<br />
you may have to wait until the<br />
clouds do just the right thing.<br />
Pay particular attention to technique.<br />
Landscapes are very demanding<br />
subjects. For example, you may<br />
want to use a filter to make clouds<br />
more distinct, to darken the sky or<br />
otherwise achieve the effect you want<br />
170 The Photographic Eye<br />
(see Appendix). If it's raining, or the<br />
sky is heavily overcast, you may want<br />
to use a larger aperture (or slower<br />
shutter speed) to brighten the photograph.<br />
If the whole scene seems too<br />
bright, you may want to darken it by<br />
using a smaller aperture (or faster<br />
speed). Be aware of your position in<br />
relation to the sun, and the effect that<br />
has on your results. Experiment, and<br />
take notes on what you're doing, so<br />
you'll know what worked and what<br />
didn't.<br />
Student photograph by Clark<br />
Peterson.
Student photograph by Al Webb.<br />
Student photograph by Patrick Stout.<br />
Places 171
EXERCISE<br />
Architecture<br />
& Environment<br />
Assignment: Photograph a building<br />
(or buildings), showing how it relates<br />
to its environment.<br />
Goal: Before you start shooting,<br />
ask yourself some questions about<br />
the relation between the building (or<br />
buildings) and environment. Are they<br />
in harmony with each other? Do they<br />
clash? Does one have a negative effect<br />
on the other? Do you like one<br />
and dislike the other? Do you like or<br />
dislike them both? Use your camera<br />
to help you answer these questions.<br />
Decide what you'd like to say about<br />
what you see, and say it with your<br />
photographs.<br />
Tips: Pay attention to the surrounding<br />
natural environment, landscaping,<br />
streets, other buildings, etc.<br />
Any kind of buildings are acceptable:<br />
suburban homes, row houses, apartments,<br />
high-rise offices, barns and<br />
silos, trailer homes, buildings shaped<br />
to fit an odd piece of land, etc.<br />
Don't restrict yourself to an eyelevel<br />
perspective. Get up high and<br />
look down. Lie flat on the ground<br />
and look up. Go off to one side or<br />
another. Step back into an alley or<br />
side street. Get in close. Move far<br />
away. If you have more than one<br />
lens, use them. Try a wide angle lens<br />
up close, a telephoto from a distance.<br />
172 The Photographic Eye<br />
Student photograph by Jeffrey Richter.<br />
\
Student photograph by Mark Crew.<br />
Student photograph by Derek Leath.<br />
Places 173
EXERCISE<br />
Neighborhoods<br />
Assignment: Photograph a neighborhood—any<br />
place where people<br />
live.<br />
Goal: Try to express a "sense of<br />
place": What is it about this neighborhood<br />
that makes it special? Don't<br />
just shoot a collection of buildings.<br />
Tips: You may or may not want to<br />
include people in your photographs.<br />
Make that decision on the basis of<br />
what you want to express about the<br />
neighborhood. If it seems like a<br />
friendly community, a place where<br />
people are important, then you'll<br />
probably want them included. If it<br />
seems cold and empty, a bunch of<br />
buildings where people just happen<br />
to live, then you may want to express<br />
that feeling by not showing any people<br />
in your photographs.<br />
Notice how light affects the mood<br />
of a neighborhood. Use the light to<br />
help express your feelings: dark and<br />
solemn, bright and cheerful, pale and<br />
sad, etc.<br />
Also notice that neighborhoods,<br />
like people, tend to show their age.<br />
Is the neighborhood itself young,<br />
middle-aged, old? What about the<br />
people in it? Are many of them<br />
similar in age and character to their<br />
neighborhood?<br />
Look for clues about how people<br />
live: tree-lined avenues, people watering<br />
lawns, trash cans in the morning,<br />
similarities and differences among the<br />
various houses or apartments. What<br />
kind of cars are in the driveways or<br />
parking lots? What kind of decorations<br />
do you see? Do people hang out<br />
their wash on clotheslines? Do they<br />
174 The Photographic Eye<br />
spend time outside, or stay indoors?<br />
Learn as much as you can by just<br />
looking around. Then see how much<br />
of what you've learned can be expressed<br />
in a single photograph.<br />
Most of the rules that apply to architectural<br />
photography also apply to<br />
this assignment. You may want to get<br />
down low and look up, get up above<br />
and look down for patterns, shoot<br />
from a third story window, through<br />
trees or gates, or from down an alley.<br />
Student photograph by Bruce Wiles.
Student photograph by Gerald Allen Conway.<br />
Places 175
EXERCISE<br />
Zoo/Farm<br />
Assignment: Go to a zoo or a farm<br />
and photograph animals.<br />
If you can't get to a zoo or farm,<br />
find some pets to photograph.<br />
Photograph only animals, not people<br />
on horseback, for instance, or an<br />
animal with a trainer.<br />
Goal: Try to get more than just a<br />
photograph of an elephant or cow or<br />
dog. See if you can capture<br />
something special about one particular<br />
animal.<br />
Tips: Animals, like people, are<br />
highly expressive and mobile. To<br />
photograph them well, you'll have to<br />
catch them in action or wait till one<br />
stops in an interesting pose.<br />
Experiment with perspective. Get<br />
in close enough to crop out the<br />
background completely. Step back<br />
and show the animal in its environment.<br />
Show the whole animal, just a<br />
part of it —an ear, eye, tail, footer<br />
several animals together. Look for<br />
texture (such as an elephant's hide)<br />
and pattern (a zebra's stripes).<br />
In addition to zoos and farms, you<br />
might find good subjects at a country<br />
fair, a cattle auction, a dog show,<br />
or in a park. Even in the middle of<br />
a city, you should be able to find dogs<br />
and cats; you might find horses; and<br />
you will certainly find pigeons.<br />
If there is a cage between you and<br />
your subject, get as close to the bars<br />
or wire as possible (assuming you<br />
can't shoot between them). The cage<br />
will then just be a blur, especially if<br />
176 The Photographic Eye<br />
you use a large aperture. Try to open<br />
up to about f/2.8, but remember that<br />
you'll need to focus very carefully. If<br />
your subject is also fairly far away,<br />
the cage may disappear entirely.<br />
Alternatively, if you're at a zoo, an<br />
outdoor show may give you an opportunity<br />
to photograph animals outside<br />
of their cages.<br />
Student photograph by Sam Tipton.
The placement of the cat, combined<br />
with light spilling in through the<br />
window, makes this photograph<br />
more than a portrait of a particular<br />
cat. It evokes a mood, conveys a<br />
sense of place and time, artel si irs our<br />
memories — even though we have<br />
never experienced this particular<br />
scene. (Student photograph by Lynn<br />
Miller.)<br />
Student photograph by David<br />
Krumlauf.<br />
Places 111
EXERCISE<br />
Store Windows<br />
Assignment: As you photograph<br />
store windows, look for two things:<br />
merchandise on display and reflections<br />
in the glass.<br />
Be careful to keep yourself out of<br />
the photograph as much as possible.<br />
It is not acceptable for you to be<br />
clcarlv visible.<br />
Goal: Try to catch something<br />
unusual, especially something humorous.<br />
Don't just show a window<br />
with things in it. Make sure your<br />
photographs say something about<br />
those things.<br />
Tips: Look for patterns and interesting<br />
juxtapositions (or combinations)<br />
of objects. Notice how the<br />
reflection interacts with what's inside<br />
the window. Watch for signs (inside<br />
the window or reflected in it). Keep<br />
an eye out for interesting mannequins,<br />
or displays being rearranged.<br />
Consider getting two windows together<br />
in one photograph.<br />
Be conscious of your cropping. As<br />
a general rule, only the window<br />
should in the photograph, not the rest<br />
of the building. But if the building<br />
relates to what's in the window, then<br />
include both. Pay particular attention<br />
to converging lines caused by perspective.<br />
Make sure they work with<br />
the composition, not against it.<br />
Several tricks will help keep you<br />
out of the photograph. Stand at an<br />
angle to the window so it isn't reflecting<br />
things from your direction. Or get<br />
down low, so the reflection passes<br />
over you. Position yourself so that<br />
you line up with the frame of the window.<br />
Or stand so your reflection is<br />
in a dark part of the window. This<br />
can be achieved by standing so some-<br />
178 The Photographic Eye<br />
thing dark (a shadow, for example,<br />
or a building) is behind you, or by<br />
lining yourself up with some dark object<br />
inside the window. Experiment<br />
with these techniques and they'll soon<br />
become automatic. (Note: It is<br />
acceptable, and often unavoidable,<br />
for part of you to be visible. Just try<br />
not to produce a photograph that<br />
looks like a self-portrait in a window.)<br />
It is perfectly acceptable for<br />
other people to be visible, either inside<br />
the window or reflected in it.<br />
Student photograph by John<br />
Pretty man.
EXERCISE<br />
Construction<br />
Sites<br />
Assignment: Find any kind of<br />
building under construction (from a<br />
glass and steel skyscraper to a<br />
wooden shed) and photograph it.<br />
Goal: Look for more than posts<br />
and beams-people; bulldozers;<br />
machinery; tools; heaps of dirt, stone<br />
and metal, etc. Make sure, however,<br />
that you stick to the construction<br />
theme (no portraits of people who<br />
just happen to be near a building site,<br />
for example).<br />
Tips: Don't just stand back and<br />
shoot a distant building project. If<br />
you do shoot from a distance, make<br />
the foreground and background<br />
work together. Try to find visual harmonies<br />
between them. Make sure<br />
that something ties them together.<br />
For example, locate lines leading to<br />
the point of interest, and emphasize<br />
them.<br />
Try a combination of overview and<br />
detail shots: the silhouette of a<br />
building's frame against the sky, a<br />
bulldozer pushing a mound of earth,<br />
a hand holding a hammer, a nail or<br />
screw in a piece of wood or metal.<br />
How do the construction workers (or<br />
carpenters, etc.) relate to the building?<br />
How does the building relate to<br />
them and to its environment?<br />
Student photograph by Lynne Mattielli.<br />
Student photograph.<br />
Places 179
Several distinctive features make this image unusually compelling: juxtaposition of the leaf over the face (which is both<br />
unexpected and slightly disturbing), interplay of the textures of leaf and skin, and the penetrating eye peering at us<br />
through the shadows. (Student photograph by Mia Lobel.)<br />
180 The Photographic Eye
chapter 14 People<br />
oving from photographing<br />
objects and places to photographing<br />
people is likely to<br />
be a bit unsettling. Not only must you<br />
think about composition and exposure,<br />
but you must also interact with<br />
your subject. A true portrait is far<br />
more than just a photograph of a person<br />
staring into a camera —it should<br />
reveal something about that person's<br />
character, experiences, feelings.<br />
How do you achieve that? Basically,<br />
you find ways to make the camera less<br />
obvious, and ways to help the subject<br />
feel and look as natural as possible.<br />
Since you can't actually make your<br />
camera invisible, it will always have<br />
some effect on the subject. That effect<br />
can, however, be good. Once they are<br />
relaxed, people tend to "show off" for<br />
the camera, becoming more expressive<br />
and energetic. But people who aren't<br />
relaxed just tend to get more and more<br />
nervous. So, your first task is to make<br />
your subject as comfortable as<br />
possible.<br />
There are two ways of doing this.<br />
The first, which is especially useful<br />
when you're photographing people<br />
you don't know, is to set the proper<br />
exposure and then keep the camera<br />
out of the way until you see the shot<br />
you want. Then you swing the camera<br />
up, focus it and "grab" the shot.<br />
You may even be able to focus beforehand<br />
as well.<br />
Student photograph by Robert Bielk.<br />
181
Student photograph by Susan Hodge.<br />
182 The Photographic Eye<br />
You'll get [he best results in bright<br />
light, when an aperture of f/8 or<br />
higher will give you enough depth of<br />
field so you won't have to focus too<br />
carefully. In this case, you can rely<br />
on zone focusing, focusing your lens<br />
in advance on the general area in<br />
which your subject is located. With<br />
a wide-angle lens at f/8, for example,<br />
everything between 5 and 10 feet (or<br />
between 10 feet and infinity) will be<br />
in focus.<br />
If you use this technique with<br />
strangers, be as sure as you can that<br />
you won't regret it. The best way to<br />
do that is either to ask permission or<br />
be sure you aren't noticed. For example,<br />
it is not a good idea to grab a<br />
shot of a motorcycle gang without<br />
asking permission first. (It may not<br />
even be a good idea to ask permission!)<br />
You should always be aware<br />
of the other person's right to privacy.<br />
A beggar on the street is not likely to<br />
consider himself a good subject for<br />
a photograph. If you can't get the<br />
shot without disturbing his selfrespect,<br />
then leave him alone. Photographers<br />
have earned a bad name<br />
all around the world by insulting their<br />
subjects; don't add to it.<br />
Until you develop your own instincts<br />
for when it is and isn't appropriate<br />
to grab a shot or to request<br />
permission, photograph people with<br />
whom you are comfortable, people<br />
you know, or who at least recognize<br />
you. Then you may want to try photographing<br />
people you don't know,<br />
but who are from the same social<br />
background as you. Continue to<br />
move further from your cultural<br />
"home base" as your confidence and<br />
instincts improve. A camera is a<br />
wonderful tool for making contact<br />
with people you wouldn't ordinarily<br />
meet . . . but take it slowly.<br />
Although the grab shot approach
is especially useful on location, it can<br />
also work very well in a portrait session.<br />
The main difference is that the<br />
subject of a portrait session (in which<br />
you take many photographs of a<br />
single person) knows that you intend<br />
to use your camera. Nonetheless, by<br />
bringing the camera between you<br />
only when necessary, you can keep<br />
the mood relaxed and casual. Chat<br />
awhile, grab a few shots, chat some<br />
more, grab a few more shots, etc.<br />
The second approach, which is<br />
especially useful in a photograph session<br />
setting, is to place the camera on<br />
a tripod. Set the exposure and focal<br />
range and then peek out from behind<br />
it to talk with your subject. Stay close<br />
to the camera if you want your subject's<br />
eyes to be looking straight<br />
ahead. You may want to use a cable<br />
release so you won't have to try to<br />
find the shutter while you're talking.<br />
A variation on this technique,<br />
which is probably the most commonly<br />
used of all, is to hold the<br />
camera in your hands the whole time.<br />
You compose, set aperture and focus<br />
and then look through the viewfinder<br />
and click your photos (conversing as<br />
normally as possible) until your subject<br />
begins to look nervous. Then you<br />
poke your head up, make eye contact,<br />
tell a few jokes or whatever else<br />
it takes to get your subject to relax.<br />
The main thing to strive for in a<br />
portrait session is a comfortable pace<br />
for both you and your subject. If the<br />
camera keeps clicking at regular intervals,<br />
and conversation proceeds in<br />
a steady flow, most subjects will<br />
relax. Your instructions ("Move over<br />
there. Look into the camera. Mowabout<br />
a smile?") will gradually fade<br />
into the background. The other person's<br />
character will begin to surface.<br />
You should expect to "waste" 10 or<br />
more exposures before this occurs.<br />
Don't hold back, waiting for the one<br />
perfect shot, or you'll both become<br />
nervous wrecks. Just start talking and<br />
shooting, like it's the most natural<br />
thing in the world.<br />
The most effective pace will vary<br />
depending on your subject and the<br />
mood you want to capture. If you<br />
want a solemn, soulful expression,<br />
try to speak slowly, softly and allow<br />
for some long pauses. Remember<br />
that you may be asking your subject<br />
to be very emotionally revealing . . .<br />
and it's only fair that you reveal<br />
something about yourself as well. A<br />
genuine exchange should be expected<br />
from both of you.<br />
If, on the other hand, you want a<br />
cheerful expression, then talk fast<br />
and furiously until your subject gets<br />
so caught up in your great sense of<br />
humor (or bumbling mistakes) that<br />
he or she forgets about your camera.<br />
(By the way, don't be afraid to make<br />
mistakes and admit them. This can be<br />
a very effective way to loosen up a<br />
subject. You may even want to make<br />
a few on purpose. Just be sure you<br />
stop making them after the first few<br />
shots, so your subject doesn't begin<br />
to think the whole session will be a<br />
waste of time.)<br />
One other trick: If you can't get<br />
your subject to relax and just talk, try<br />
asking him or her to recite the alphabet.<br />
This has two useful results. First,<br />
it gets the lips moving and produces<br />
a variety of expressions. Second,<br />
everyone asked to do this starts<br />
laughing sooner or later.<br />
As you practice shooting portraits,<br />
you will begin to learn when your<br />
subject's expressions will change.<br />
This is necessary if you intend to<br />
catch them on film. Once you've seen<br />
the expression you want, it's too late<br />
to click the shutter. You have to do<br />
that just a fraction of a second before<br />
the "right" expression occurs.<br />
Shooting several frames in quick succession<br />
can help, but that's no substitute<br />
for the true photographer's instinct<br />
for what Carder-Bresson<br />
named the "decisive moment." Like<br />
fishermen, photographers are continually<br />
lamenting the "one that got<br />
away." With consistent practice and<br />
a bit of luck, however, they will<br />
become few and far between.<br />
Lighting is of critical importance<br />
in portraits. For most purposes, the<br />
best light is open shade. This may be<br />
obtained outdoors on the shady side<br />
of a tree or building, or inside near<br />
a window.<br />
For more dramatic effects, you<br />
may want your subject to be lit more<br />
directly. If so, pay particular attention<br />
to the eyes. Many otherwise<br />
good photographs are ruined because<br />
a subject's eyes were lost in harsh,<br />
black shadows. Careful positioning<br />
will usually correct the problem. If<br />
not, you may want to use a reflector<br />
(any white or metallic surface will do<br />
the trick) to throw some light back<br />
into the shadows.<br />
People 183
FOCAL POINT: Edward Steichen, 1879-1973<br />
Photography was initially used<br />
simply to record visual facts. A<br />
photograph of a tree was successful<br />
if the tree was immediately recognizable.<br />
A landscape was successful if all<br />
the important features were visible.<br />
A portrait was successful if it was in<br />
focus and the subject's expression<br />
was reasonably pleasant. Gradually,<br />
photographers and the public began<br />
to demand more from this new and<br />
still mysterious medium.<br />
One of the first to demonstrate<br />
photography's full potential for expressive<br />
portraiture was Edward<br />
Steichen. The key to his achievement<br />
was light. Before Steichen, portraits<br />
were straightforward. Photographers<br />
generally employed soft, even light<br />
and a plain gray background. The<br />
main goal was produce a clear, welllit<br />
likeness of the subject. Steichen<br />
changed all that. He posed his subjects<br />
against black walls and used<br />
dramatic lighting, often allowing part<br />
of the face to be in shadow or otherwise<br />
obscured. His portraits were not<br />
mere records of a person's appearance,<br />
they were strong statements<br />
about who that person was.<br />
In part, Steichen's success in portraiture<br />
was due to his training in<br />
painting. Much of his earlier work<br />
suggests paintings by Rembrandt,<br />
184 The Photographic Eye<br />
with clearly etched faces surrounded<br />
by darkness. However, very little of<br />
Steichen's work displays the nostalgic<br />
sentiments of the Pictorialists, who<br />
also strove for a painterly quality in<br />
their photographs. He was in fact<br />
among the first to recognize that<br />
photography was a new art form,<br />
with rules, possibilities and limitations<br />
all its own.<br />
Steichen's best photographs —such<br />
as his portrait of Greta Garbo —are<br />
images that would be unimaginable<br />
in any other medium. He complemented<br />
the starkness of black and<br />
white photography with equally stark<br />
poses. He encouraged his subjects to<br />
interact directly with the camera.<br />
And he watched for just the right moment<br />
to capture something of his subject's<br />
essential character. His portraits<br />
still seem very "modern." They<br />
are dramatic, confident, even confrontational.<br />
Each one is distinct and<br />
memorable.<br />
Steichen was born in 1879 in Luxembourg,<br />
one of the smallest countries<br />
in Europe. One year later, he<br />
emigrated to the United States with<br />
his family, living first in Michigan<br />
and later in Wisconsin. In 1900, at<br />
the age of 21, he travelled to Paris<br />
to study photography and modern<br />
painting for two years. Upon his<br />
return to the U.S, he set up a photo<br />
studio in New York City, earning a<br />
reputation for his skillful portraits of<br />
the rich and famous. In 1905, he and<br />
Alfred Stieglitz established "Gallery<br />
291" in an effort to promote photography<br />
as an art.<br />
With the outbreak of World War<br />
I, Steichen directed the photographic<br />
team of the Army Air Service, coordinating<br />
an ambitious photographic<br />
record of the war. In 1923 he returned<br />
to commercial photography,<br />
doing a wide range of work for many<br />
leading magazines. He again applied<br />
his photographic and management<br />
skills to help record World War II,<br />
this time serving with the Navy. From<br />
1947 to 1962, Steichen was the director<br />
of photography for the Museum<br />
of Modern Art in New York City. In<br />
that role, he organized "The Family<br />
of Man," a traveling exhibit designed<br />
to promote understanding and tolerance<br />
among the many cultures of<br />
the world. Steichen died in 1973, in<br />
Connecticut.<br />
Edward Steichen, Greta Garbo,<br />
1928. c Sotheby's Inc., 1987.
People 185
EXERCISE<br />
Hands<br />
Assignment: Photograph hands in<br />
expressive postures or engaged in interesting<br />
activities.<br />
You may photograph one hand by<br />
itself, both hands of one person, or the<br />
hands of several people together. Do<br />
not include a full face with the hands,<br />
though part of a face is acceptable.<br />
Goal: Hands have attitudes, moods,<br />
habits. Look for hands that say something<br />
about a person or what that person<br />
is doing, thinking or feeling.<br />
Tips: Look for people you know<br />
who have a particular gesture that is<br />
their "signature." Alternatively, look<br />
for the various attitudes of hands<br />
(resigned, strong, casual, engaged in<br />
some task, at rest, tense) or for their<br />
position in relation to the body<br />
(behind the back, part way in a<br />
pocket, scratching the head, holding<br />
up the chin). Look also for how<br />
hands relate to their surroundings:<br />
hands reaching for something; interacting<br />
with someone else's hands;<br />
placed on somebody's shoulder;<br />
holding a baseball bat, a steering<br />
wheel, a chess piece; opening a car<br />
door.<br />
In general, unless the context is important,<br />
the hands should be large<br />
within the frame.<br />
186 The Photographic Eye<br />
Student photograph.<br />
Student photograph by Esther Suarez.
EXERCISE<br />
Elders<br />
Assignment: Do a series of portraits<br />
of old people: grandmothers, uncles,<br />
aunts, neighbors, etc.<br />
Goal: Notice that faces get very expressive<br />
as they grow older. You can<br />
often tell what kind of life a person<br />
has led just by looking at his or her<br />
face. Try to capture something of<br />
your subject's whole life in your<br />
photographs.<br />
Tips: With the elderly, it is even<br />
more important than usual to get<br />
clear permission. Depending on how<br />
old and how healthy your subject is,<br />
the idea of being photographed may<br />
seem fine, strange or unpleasant.<br />
Help your subject feel comfortable<br />
about being photographed, before<br />
you take a single shot. If this doesn't<br />
seem possible, go find another subject.<br />
Don't just walk up to strangers<br />
and start photographing them. It is<br />
your job to make the experience pleasant<br />
and relaxing. Work at it.<br />
Student photograph by Kimberly S. Kosiba.<br />
Student photograph by Neill Bevill.<br />
People 187
EXERCISE -<br />
Children<br />
Assignment: Photograph children<br />
doing things that come naturally to<br />
them: playing, talking, sleeping,<br />
perhaps reading or daydreaming.<br />
Any child between infancy and<br />
about 8 years old qualifies.<br />
Goal: Capture particularly childlike<br />
qualities, not just a person who happens<br />
to be young.<br />
Tips: Be aware of how children respond<br />
to their surroundings. Where<br />
they are, what they're doing, who<br />
they're with may be important . . .<br />
or may not. You decide.<br />
You'll probably get the best results<br />
with children you already know, so<br />
they can go about their business<br />
without being aware of the camera.<br />
Try your younger brothers and sisters,<br />
cousins, family friends, neighbors.<br />
If none of them is available or<br />
willing, look for children out on the<br />
street, at school, in parks, etc.<br />
Never photograph children without<br />
getting permission from a parent.<br />
This is especially true if you don't<br />
know the child, but it's a good idea<br />
even if you do.<br />
The main challenge is to keep the<br />
child interested and interesting. If the<br />
child is playing a game, encourage<br />
him or her to tell you about it. Try<br />
to talk to the child while you're<br />
shooting, even while you're behind<br />
camera. You may want a parent or<br />
another child to keep conversation<br />
going if it's hard to talk and shoot at<br />
same time.<br />
188 The Photographic Eye<br />
Student photograph by Charles Stuart Kennedy III.
Student photograph.<br />
Student photograph bv Chris Lombardo<br />
People 189
EXERCISE<br />
Soft-Light<br />
Portrait<br />
Assignment: Do a series of headand-shoulders<br />
photographs in which<br />
the light source is behind the subject.<br />
Goal: Produce an expressive portrait,<br />
with soft light and no shadows<br />
on the face.<br />
Tips: In bright sunlight, have your<br />
subject face away from the sun. The<br />
face will thus be in open shadow,<br />
with little variation in the lighting.<br />
Keep the background out of focus by<br />
using a fairly large aperture. (Try<br />
f/5.6 at 1/125 of a second as a point<br />
of departure for this exercise.)<br />
Be careful of "burn out": white<br />
areas that are so bright they lose all<br />
detail. Though you'll probably do<br />
best if your subject does not wear<br />
white, with proper exposure this<br />
should not be a problem.<br />
Get in close. Frame the subject<br />
carefully. Stick to the head and<br />
shoulders for the most part, though<br />
an expressive hand is a perfectly acceptable<br />
addition.<br />
Student photograph by Vinny<br />
Rodziewicz.<br />
190 The Photographic Eye<br />
Student photograph.
EXERCISE<br />
Side-Lit<br />
Portrait<br />
Assignment: Do a series of portraits<br />
in which the subject is strongly lit<br />
from one side.<br />
Goal: Side-lighting tends to be<br />
dramatic, and is often harsh, especially<br />
in very "contrasty" lighting.<br />
However, it can produce a particular<br />
mood and can be subtle when either<br />
the contrast or the overall light value<br />
is low. Control the lighting and exposure<br />
to get the effect you want.<br />
Tips: For best results, use early<br />
morning or late afternoon light. You<br />
may want to shoot indoors near a<br />
window, so the light comes in a single<br />
shaft. You can then place your subject<br />
so the light strikes precisely where<br />
you want it to. Bracket your exposures<br />
to get the effect you want.<br />
You may want the sidelit area to<br />
be the highlight of otherwise balanced<br />
lighting, or to have the<br />
sidelighting be the only source. In addition,<br />
experiment with placing the<br />
subject so the lighted side faces the<br />
camera, and so the shaded side does.<br />
Be careful of losing texture in highlighted<br />
areas. In the final print, you<br />
should be able to see pores on the<br />
brightest part of the face. Expose for<br />
the highlights.<br />
In rare cases it can be very effective<br />
to have the whole face in shadow,<br />
;/the background is adequately lit so<br />
features are clear.<br />
Student photograph by Don Ho Fuller.<br />
Student photograph by Kristen McCauley.<br />
People 191
EXERCISE<br />
Prop Portrait<br />
Assignment: Photograph people<br />
with "props" —tools, sports equipment,<br />
musical instruments or any<br />
other object with which they can<br />
interact.<br />
Goal: Props have two uses for the<br />
photographer. First, they can help a<br />
subject relax. Second, they can tell<br />
the viewer something about the subject.<br />
Try to select props that are<br />
useful in both of these ways.<br />
Tips: People who are uncomfortable<br />
just standing and looking at a<br />
camera, even if you get them talking,<br />
tend to relax quite a bit if you give<br />
them something to hold or look at.<br />
Similarly, you can often produce a<br />
very revealing portrait by placing<br />
your subject in a familiar environment:<br />
in his or her own room, with<br />
personal possessions around, at a<br />
desk or workplace, in the locker<br />
room or gym, etc.<br />
While it is often helpful if the subject<br />
can actually be using the prop in<br />
some way, be aware of how that affects<br />
the face. If it's obscured, you<br />
may have to get the subject to look<br />
up when you actually click the shutter.<br />
You may, of course, be able to<br />
position the subject (or yourself) so<br />
this isn't necessary.<br />
Anything familiar to the subject is<br />
acceptable: a scarf, telephone, guitar,<br />
book or baseball bat. Something as<br />
simple as a chair may do the trick.<br />
Use your imagination, and don't<br />
forget to ask your subject for ideas.<br />
(Note: Try to think of more<br />
creative props than cameras. One or<br />
two shots of someone holding a<br />
camera are fine, but no more.)<br />
\ 92 The Photographic Eye<br />
Simple elements, potent image - a fine example of "less is more." What does<br />
this photograph say to you? What is it about? (Student photograph by<br />
Christina Faiella.)
Student photograph by Michael Cothran<br />
Student photograph by Scott Hughes.<br />
People 193
EXERCISE<br />
Detail Portrait<br />
Assignment: Do a series of "portraits"<br />
in which the subject's face is<br />
not shown. Instead, crop in on expressive<br />
details of objects that relate<br />
in some way to the subject. (Part of<br />
the face may be shown, but not all<br />
of it.)<br />
Goal: As in the prop portrait<br />
assignments, you will be using objects<br />
to help convey a person's character.<br />
The only rule is that you must not include<br />
the full face.<br />
You'll probably want to photograph<br />
an object the subject is either<br />
wearing or holding. This is not required,<br />
however.<br />
Tips: Crop in on something that<br />
typifies the person you're photographing:<br />
patches on a favorite pair<br />
of jeans, a piece of jewelry, glasses,<br />
track shoes slung over a shoulder, a<br />
purse or handbag, a baseball, a book.<br />
Keep in mind that an empty pair<br />
of shoes, for example, or a notebook<br />
by itself, or a wallet, or a coffee mug<br />
are all perfectly acceptable. The subject<br />
does not have to be in the<br />
photograph at all.<br />
194 The Photographic Eye<br />
Student photograph.
EXERCISE<br />
Mood Portrait<br />
Assignment: Produce a series of<br />
portraits that clearly express moods.<br />
Goal: Get more than just a picture<br />
of somebody. Capture a particular<br />
facial expression or posture to convey<br />
something of what your subject<br />
is feeling. Try to make the viewer feel<br />
the same way.<br />
Tips: There are a lot of moods to<br />
choose from. Here are a few: happiness,<br />
sadness, curiosity, contemplation,<br />
boredom, excitement, friendliness,<br />
hostility, arrogance, delight,<br />
fear, satisfaction, anticipation,<br />
anger, patience, concentration,<br />
uncertainty, frustration.<br />
Most of us have certain expressions<br />
or gestures that are unique, some particular<br />
way of saying who we are. If<br />
you think of someone as being jolly,<br />
how do you express that? What<br />
about solemn? Frazzled? Calm?<br />
Excited?<br />
You might try getting several people<br />
to interact together. Or go<br />
someplace where they're likely to do<br />
that on their own, such as a football<br />
game. People in groups often don't<br />
react the same way at the same time,<br />
so you may get several moods in one<br />
shot. Alternatively, you might crop<br />
in on one person in the group and let<br />
the viewer imagine the rest of the<br />
scene.<br />
Be selective. Surroundings may be<br />
helpful or distracting. Often, just a<br />
subject's face will be enough.<br />
However, part of the subject's body<br />
may also be expressing the mood. If<br />
that helps make a better photograph,<br />
put it in. If it doesn't, leave it out.<br />
Student photograph by John Shearer.<br />
Student photograph.<br />
People 195
Student photograph by Monte Paulsen.<br />
196 The Photographic Eye
chapter 15 Putting It All Together<br />
P<br />
hotographers may be divided<br />
into two or more sides on<br />
any number of issues:<br />
manual vs. automatic cameras;<br />
35mm vs. large format film; B&W vs.<br />
color; darkroom manipulation vs.<br />
"straight" prints. One of the most<br />
divisive issues concerns the "ultimate<br />
test" of a photographer's skill. Ansel<br />
Adams, not surprisingly, believed<br />
that landscapes deserved that title.<br />
Others have argued that the ultimate<br />
test is portraiture, photojournalism<br />
or advertising. Still others have suggested<br />
that plain old "street<br />
photography" —any photography of<br />
strangers in public spaces-tests a<br />
photographer like nothing else.<br />
After all, landscape photographers<br />
can spend days taking a shot. Portrait<br />
photographers are helped along by<br />
their subjects. Photojournalists can<br />
count on automatic viewer interest.<br />
And advertising photographers have<br />
crowds of assistants and a small fortune<br />
in lighting equipment at their<br />
disposal.<br />
The street photographer must<br />
make do with an instantaneous<br />
response to an unpredictable opportunity,<br />
must depend on subjects who<br />
may be violently opposed to being<br />
photographed, cannot assume any<br />
viewer interest, and must work solo,<br />
generally with inadequate equipment.<br />
The exercises in this section are<br />
essentially variations on "street<br />
photography." They will require you<br />
to apply aspects of all three previous<br />
sets of exercises —things, places and<br />
people —all at once. As you attempt<br />
to do so, you may be dismayed at<br />
your lack of control. People moving<br />
this way and that, backgrounds that<br />
only distract from your intended subject,<br />
self-consciousness about<br />
photographing strangers may all interfere<br />
with your artistic vision. If so,<br />
relax. Part of the fun of this kind of<br />
photography is being out of control.<br />
The trick is to remain alert and<br />
watch for the "magic." Two people<br />
interacting. Someone interacting with<br />
Student photograph by Sheri<br />
McHenry.<br />
the environment or an object in it.<br />
Some random grouping of people<br />
and things that is aesthetically pleasing,<br />
emotionally powerful or intellectually<br />
interesting. The second trick is<br />
to be ready to catch that magic on<br />
film. There are two essential rules for<br />
achieving that objective.<br />
Rule #1: Adjust as many camera<br />
settings in advance as possible. First,<br />
decide on a shutter speed that will<br />
produce the effect you want: stop action<br />
or blur. Second, check out the<br />
light with your meter before you<br />
197
egin photographing. If the light is<br />
fairly consistent, then set your aperture<br />
for an average reading. Adjust<br />
it for a particular shot only if you<br />
have time. (More often than not,<br />
you'll be able to produce an acceptable<br />
print, even if the negative is<br />
darker or lighter than it should be.)<br />
If your subject is likely to be difficult<br />
for any reason (such as being shy or<br />
nervous), then try to focus your lens<br />
in advance as well. Simply guess at<br />
the distance and use the distance scale<br />
on the focusing ring or aim at<br />
something near the subject and focus<br />
on that. Using a small aperture will<br />
help ensure accuracy. Finally be sure<br />
to advance your film before you try<br />
to grab the shot. (You'd be amazed<br />
at how often photographers forget to<br />
do this.)<br />
Rule #2: Scan the entire frame for<br />
"interference." The most common<br />
flaw in "street" photographs is a tree<br />
growing out of someone's head . . .<br />
or some variation on that theme. A<br />
face that disappears into a matching<br />
background, legs and arms poking in<br />
from the borders of the frame and extra<br />
heads in odd places are additional<br />
examples of common interference<br />
problems. These problems can almost<br />
always be avoided with one quick<br />
glance around the frame and, if<br />
necessary, a slight shift in viewing<br />
angle before clicking the shutter. This<br />
procedure should become just as<br />
automatic as checking the light meter<br />
or focusing the lens. In fact, it is the<br />
one thing you should be doing all the<br />
time you're looking through the<br />
viewfinder. Once you have your shot<br />
all lined up, you'll almost always have<br />
time (it only takes a fraction of a second)<br />
to check out the edges of your<br />
subject and the borders of your frame<br />
just before you click the shutter.<br />
198 The Photographic Eye<br />
FOCAL POINT: Henri Cartier-Bresson<br />
Henri Cartier-Bresson (pronounced<br />
kar-tiay brays-son) devoted<br />
himself to the challenge of preserving<br />
"life in the act of living" — and he<br />
succeeded. In the process, he virtually<br />
invented what has since come to be<br />
the defining characteristic of<br />
photography: its ability to capture a<br />
fleeting instant.<br />
From its beginnings, photography<br />
was limited by its technical requirements.<br />
Equipment was large and<br />
bulky. Film reacted slowly to light,<br />
requiring subjects to remain stationary<br />
for exposures of 15 minutes<br />
or more. Unless they confined themselves<br />
to panoramic street scenes and<br />
were content with blurs in place of<br />
people, early photographers were<br />
simply unable to pursue their craft<br />
without attracting (or requiring) attention.<br />
As a result, photographing<br />
people, from portraiture to news<br />
coverage, tended to be a rather<br />
solemn affair. Subjects would be<br />
strapped into their chairs, braced<br />
upright from behind or asked to<br />
stand very still.<br />
The technology of photography<br />
gradually began to change. Cameras<br />
became smaller and films became<br />
faster. Despite these developments,<br />
the approach of photographers to<br />
their craft remained slow and solemn.<br />
Portraits still involved sitting up<br />
straight and staring into the unfriendly<br />
eye of the camera. Group<br />
photographs tended to convey the<br />
impression of actors posing patiently<br />
on stage. Street scenes seemed<br />
more concerned with buildings,<br />
weather and vehicles than with people.<br />
A technical requirement had<br />
evolved into a style.<br />
Though not the first to break<br />
through this stylistic barrier, Cartier-<br />
Bresson unquestionably did so with<br />
the most flair and passion. Recognizing<br />
that a small camera permitted him<br />
to be unnoticed, he learned to "grab"<br />
events as they happened. What he<br />
lost in image quality and composition,<br />
he gained in the startling emotional<br />
impact of the image. Rather<br />
than viewing the world as a detached<br />
observer, Cartier-Bresson seemed to<br />
throw himself into the midst of<br />
things. And, through his photographs<br />
that experience could be<br />
shared by anyone.<br />
Cartier-Bresson coined the term<br />
"decisive moment" to describe what<br />
he looked for as he explored the<br />
world with his camera. Rather than<br />
projecting his ideas or interpretations<br />
onto his subjects —as Ansel Adams,<br />
Edward Weston and others would<br />
advocate —Cartier-Bresson and<br />
others in his "school" of photography<br />
watched for that split second when all<br />
the elements of a scene fell into place<br />
on their own and "clicked." It was a<br />
radical departure, and one that is still<br />
hotly debated. Without question,<br />
however, the "decisive moment" approach<br />
has resulted in many remarkable<br />
images and profoundly affected<br />
our understanding both of photography<br />
and of the world that it<br />
records.<br />
Cartier-Bresson was born in<br />
France in 1908. He studied in Paris<br />
and Cambridge, England. He concentrated<br />
on painting until 1931,<br />
when he began working as a freelance<br />
photographer in Europe, Africa and<br />
Mexico. He later worked with Jean<br />
Renoir, making motion pictures.
1908-<br />
During World War II he served in the<br />
French army, was captured by the<br />
Germans, escaped and joined the<br />
Resistance. In 1946, Carder-Bresson<br />
travelled to New York City for an exhibit<br />
of his photographs at the<br />
Museum of Modern Art. While<br />
there, he helped establish Magnum,<br />
which has long been one of the most<br />
prestigious photo agencies.<br />
Henri Cartier-Bresson, Brussels, 1937.<br />
Putting It AII Together 199
EXERCISE<br />
Fairs<br />
Assignment: Photograph a public<br />
gathering that fits the general idea of<br />
a "fair" — any event where people get<br />
together for festivities, entertainment,<br />
games and/or food.<br />
Goal: People tend to go to interesting<br />
extremes at fairs: dressing<br />
up as clowns; wearing costumes from<br />
different countries or periods in<br />
history; dancing, eating, playing<br />
games and generally having a good<br />
time with exceptional enthusiasm.<br />
Try to capture this spirit in your<br />
photographs.<br />
Tips: You may interpret "fair" to<br />
include festivals, amusement parks,<br />
carnivals, parades, cattle auctions,<br />
folk dances, craft shows, circuses,<br />
horse shows and any other similar<br />
events.<br />
Try to take your photographs outdoors,<br />
rather than indoors. (Shooting<br />
an indoor crowd scene with even<br />
sophisticated flash equipment is no<br />
easy job.)<br />
Think of ways to get right in the<br />
midst of the action. For example, you<br />
might get out on a ride, such as a<br />
roller coaster, and photograph people<br />
on it. Try shooting at slow shutter<br />
speeds, for blurs. Get up in a ferris<br />
wheel and shoot down.<br />
200 The Photographic Eye<br />
Student photograph by Bruce Senior.
Student photograph by Amy Walsh.<br />
Putting It All Together 201
EXERCISE<br />
Open Markets<br />
Assignment Photograph any kind<br />
of outdoor market, from a large<br />
"flea market" to a single vendor with<br />
a cart.<br />
Goal: Look for photo opportunities<br />
among the merchandise itself,<br />
and among the people selling it.<br />
Try to catch people in relation to<br />
merchandise, rather than just a<br />
straight portrait of someone who<br />
happens to be selling (or buying)<br />
something. Look for monev or merchandise<br />
passing between people.<br />
Tips: Notice the sizes and shapes<br />
of various vegetables, fruits or other<br />
merchandise, the way they are arranged,<br />
the patterns they create.<br />
Watch how the vendors interact with<br />
their customers. Are they bored?<br />
Energetic? Friendly?<br />
This is another broad category, so<br />
use your imagination. The corner<br />
grocer is okay, so is a street vendor, a<br />
yard or garage sale, a fish market, a<br />
flea market, anywhere someone is<br />
offering a service for sale (a shoeshine<br />
stall, for example), a sidewalk art<br />
show, a newspaper stand or someone<br />
selling souvenir T-shirts from a cart.<br />
Once again, remember to ask<br />
permission.<br />
202 The Photographic Eye<br />
Student photograph by Dennis Martin.
EXERCISE<br />
Rain<br />
Assignment: Do a series<br />
photographs of a rainy day.<br />
of<br />
Goal: Explore how objects, people<br />
and the earth interact with rain. What<br />
moods does rain provoke? How does<br />
it change the way people and things<br />
look and act?<br />
Tips: A light drizzle is generally better<br />
than a heavy downpour. Look for<br />
how the light is striking the rain itself.<br />
Especially if it's raining and sunny at<br />
same time, the results can be stunning.<br />
(You might try using a flash to<br />
highlight the rain. Just be sure to<br />
keep it dry!)<br />
You can shoot from under cover:<br />
standing under an awning or in a<br />
doorway, sitting in your house or in<br />
a car and shooting out a window<br />
(open or shut, wiped clean or<br />
streaked).<br />
If you do choose to go right into<br />
the rain, be sure to protect your<br />
camera. You can use a laundry bag,<br />
for example, with holes cut for the<br />
lens and viewfinder, taped to the<br />
camera. Or, if it's not too windy, you<br />
can just keep your camera under an<br />
umbrella. It's a good idea to use a<br />
lens hood, to keep the lens dry.<br />
Moisture on the lens can be a good<br />
effect, but use it thoughtfully.<br />
Keep shooting after it stops raining.<br />
Look for puddles, objects and<br />
people dripping droplets clinging to<br />
leaves, etc.<br />
Student photograph by Steve Whiteside.<br />
Breaking the Rules 203
EXERCISE<br />
Playgrounds<br />
Assignment: Photograph children<br />
in action at a playground.<br />
Goal: Try to get children actually<br />
playing —hitting a ball, upside down<br />
on a jungle-gym, using the swings or<br />
slide, etc. Avoid straight portraits of<br />
children who just happen to be at a<br />
playground.<br />
Tips: Stay around long enough so<br />
the children get used to you. It is<br />
perfectly acceptable to ask a child (or<br />
several) to pose for you —just try to<br />
make sure the photograph doesn't<br />
look posed. Encourage the child to<br />
move around in the general area<br />
you've selected. Offer suggestions,<br />
but let the child come up with some<br />
ideas too.<br />
204 The Photographic Eye<br />
Student photograph by Matthew Scerbak.
Student photograph by Vinnie<br />
Rodziewicz.<br />
Putting It A/1 Together 205
EXERCISE<br />
Sports Events<br />
Assignment: Photograph any<br />
sports event, outdoors if at all possible<br />
(so you won't need to use a flash).<br />
Goal: Photographs of sports<br />
events are very common. Unfortunately,<br />
most of them are pretty<br />
bad. Your job is to get some good<br />
ones.<br />
Tips: Be sure the center of interest<br />
is clearly isolated, either by cropping<br />
or by using shallow depth-of-field, or<br />
both. You'll generally get the best<br />
results by moving in close and/or<br />
shooting from a low or high point of<br />
view. Be very aware of what's going<br />
on in the background.<br />
In group sports, such as football,<br />
try to get a mixture of individual and<br />
group shots. Alternate among one<br />
player, the team, one fan, the sideline<br />
crowd, etc.<br />
Look at faces. Look at what bodies<br />
are doing: the strain of a weightlifter's<br />
arms, for example. The most<br />
important information and expression<br />
is not necessarily in the face.<br />
Try to give particular attention to<br />
a specific quality of each sport. With<br />
football, it might be the impact of<br />
collision. With running, the solitude<br />
or tension of the final yards. With<br />
tennis, concentration or stretching<br />
for a difficult return. Try to get a feel<br />
for what is special about the sport<br />
even before you start shooting. It<br />
may help if you've had experience in<br />
the sport. If you haven't, try talking<br />
to someone who has.<br />
Also look for the endless waiting<br />
around on the bench, the building<br />
206 The Photographic Eye<br />
Student photograph by Janes Sernovitz.<br />
tension before a player goes in, the<br />
elation or disappointment afterwards.<br />
Play with stop-action and<br />
blurs. This is a good opportunity to<br />
use a telephoto or zoom lens, if you<br />
have one. You might also get some<br />
interesting effects with a wide-angle<br />
lens. (Just be careful not to get run<br />
over!)<br />
Notice atmospheric conditions. If<br />
the weather is interesting, you may<br />
want to do a distant shot of the game<br />
and spectators. Remember to turn<br />
around and photograph people.<br />
Catch the game in their expressions.<br />
Finally, look for objects of the<br />
sport lying around (helmets, rackets,<br />
shoes, etc.).<br />
(Note: If you do photograph an indoor<br />
event, refer to the Appendix for<br />
information on "pushing" film and<br />
using a flash.)
Student photograph by Karen Demuth.<br />
Student photograph by Anne<br />
Thorstvedt.<br />
Putting It All Together 207
A wonderful hodgepodge like this is one of the effects that can be produced by photomontage. (Student photograph<br />
by Kira Deyss.)<br />
208 The Photographic Eye
chapter 16 Breaking the Rules<br />
hroughout this book, you<br />
have been urged, at every<br />
possible opportunity, to<br />
bend and break the "rules." There is<br />
a very simple reason for that.<br />
Photography, like any art, must<br />
evolve to remain healthy. And all<br />
evolution requires mutations —<br />
experiments that break away from<br />
"business as usual."<br />
For your own photographic style<br />
and insights to evolve, you must be<br />
free to record the world as you see it.<br />
If you see some aspect of the world<br />
differently than the rest of us, then<br />
our rules won't be of much use to<br />
you. If some aspect of the world has<br />
changed, then the rules of the past<br />
won't be of much use to any of us.<br />
As each of us breaks the rules to<br />
suit our own inclinations and needs,<br />
most of those same rules are likely to<br />
remain at the center. They will continue<br />
to guide future generations of<br />
photographers, with slight shifts over<br />
long periods of time. You are now<br />
part of that process, so it's time for<br />
you to take your turn at breaking a<br />
few rules. The exercises in this section<br />
will get you started. After that, the<br />
only limit is your imagination.<br />
Naturally there are rules for breaking<br />
rules, too. (You may feel free to<br />
break these as well, of course.)<br />
Rule #1: Break a rule for a good<br />
reason. While it can feel liberating to<br />
Student photograph by Helario Reyna.<br />
break rules just to break them, the<br />
thrill isn't likely to last very long.<br />
Sooner or later, it all begins to seem<br />
like random shots in the dark. Stick<br />
to the rules until you have a good<br />
reason not to, and your results will<br />
probably be more interesting. For example,<br />
one common mistake made<br />
by both photographers and other artists<br />
is to confuse novelty for insight.<br />
Fortunately, time tends to sort<br />
things out quite nicely. The pure<br />
novelties get tossed aside, and the<br />
true insights become lasting treasures.<br />
You can simplify the sorting process<br />
if you make a point of challenging<br />
yourself as you go along. Be especially<br />
careful to challenge any habits<br />
you develop. Are they productive?<br />
Are they causing you to miss opportunities?<br />
Do other people respond<br />
well to them? While you can't always<br />
judge your work by the response of<br />
others (many great artists were rejected<br />
at first), it can be helpful to<br />
compare notes with them from time<br />
to time. If you can't make any sense<br />
of their response, you may have a<br />
problem.<br />
209
Rule #2: Break as few rules as<br />
possible. For any photograph, try to<br />
stick to as many of the established<br />
rules as you can. If you decide to<br />
break a compositional rule, try to<br />
follow the rules for correct exposure.<br />
If you want to break an exposure<br />
rule, use conventional composition.<br />
If you can't get the results you want,<br />
then — and only then — break another<br />
rule. If that doesn't work, try breaking<br />
one more. If, instead, you break<br />
all the rules at once, you're likely to<br />
end up with chaos that no one else<br />
will understand, or want to understand.<br />
Don't forget that photography<br />
is a language. If you want to be<br />
understood, you can't make up all<br />
your own words and grammar.<br />
Variations: Another way of breaking<br />
the rules is to combine several<br />
photographs into a single image, or<br />
merge photos and text. You could<br />
manipulate a photographic image by<br />
distorting it or by adding color with<br />
paints or markers. (See Appendix 3<br />
for additional ideas along this line.)<br />
In recent years, traditional notions<br />
of what constitutes a "correct"<br />
photograph have been largely abandoned.<br />
Though there is real value in<br />
the purity and integrity of a<br />
"straight" print, photographers (like<br />
all artists) must be free to experiment<br />
and expand their horizons. Without<br />
this freedom, any art will become<br />
stagnant and lifeless. In the following<br />
exercise, you will be invited to<br />
expand your horizons a bit, to break<br />
a few rules and see what happens. It<br />
is up to you to decide if this process<br />
offers fresh insights and new possibilities.<br />
210 The Photographic Eye<br />
FOCAL POINT: Diane Arbus, 1923-71<br />
Though not the most experimental<br />
of photographers, Diane Arbus was<br />
most noted, and often criticized, for<br />
breaking the rules of what is and<br />
is not an appropriate subject. For<br />
Arbus, the camera was a tool for exploring<br />
"the forbidden" —especially<br />
people who, for various reasons,<br />
were not "normal." She sought out<br />
twins, giants, midgets, outcasts and<br />
eccentrics, and photographed them<br />
just as they were. Her photographs<br />
tend to be profoundly disturbing, to<br />
raise questions and doubts, perhaps<br />
even to provoke fear.<br />
Arbus also broke many rules of<br />
composition and technique. Her photographs<br />
tend to be very stark, with<br />
few of the comforting distractions of<br />
conventional composition. Her subjects<br />
often stand right at the center<br />
of an otherwise empty frame and<br />
simply stare at the viewer. Legs and<br />
arms are often "cut off by the<br />
borders, so they look unnatural or<br />
awkward. If the available light was<br />
lacking, she would often use a simple<br />
camera-mounted flash, making<br />
no effort to disguise the light from it.<br />
Though her work may at first seem<br />
sloppy, her admirers argue that it is<br />
perfectly suited to the unusual subjects<br />
she chose to photograph.<br />
Because her style and subject matter<br />
were such a radical departure<br />
from established photographic traditions,<br />
Arbus was extremely controversial.<br />
Her critics considered her a<br />
"voyeur" —a peeping-tom using her<br />
camera to pry into other people's sad<br />
lives. She, however, believed that<br />
"there are things which nobody<br />
would see unless I photographed<br />
them." To her credit, she worked<br />
long and hard to earn the trust and<br />
cooperation of her subjects before<br />
she aimed her camera at them.<br />
Arbus was born in New York City<br />
in 1923. After studying painting and<br />
fashion illustration, Arbus became<br />
interested in photography. Beginning<br />
in the early 1940s, she and her husband<br />
ran a fashion photography<br />
studio, which began by doing promotional<br />
photographs for her father's<br />
fur and women's clothing store. In<br />
1957, after years of increasing<br />
frustration with the world of commercial<br />
photography, she quit. Over<br />
the next decade, she devoted herself<br />
to photographing people on the<br />
fringes of American society. After an<br />
exhibit at the Museum of Modern Art<br />
in 1967, she became something of a<br />
celebrity and inspired many imitators.<br />
She continued to photograph<br />
people who didn't "fit" into mainstream<br />
society. However, the temperament<br />
that enabled her to communicate<br />
so well with them eventually<br />
took its toll. Arbus committed suicide<br />
in 1971, at the age of 48. Her last<br />
project was a series of portraits of<br />
the mentally retarded whom she described<br />
as "enveloped in innocence."
Diane Arbus, Identical Twins, 1966. c Sotheby's Inc., 1987.<br />
Breaking the Rules 211
EXERCISE<br />
Night<br />
Assignment: Do a series of photographs<br />
outdoors at night.<br />
Goal: By now you should have a<br />
good idea of how the camera responds<br />
to variations in daylight. How<br />
does it respond to the night? Your<br />
task is to find this out.<br />
Tips: For best results, select a location<br />
with some artificial source of<br />
light. Streetlights, car headlights,<br />
lighted windows of a house or other<br />
building will ail work well. The moon<br />
can work, but it requires good timing,<br />
luck and patience.<br />
Take some time to find a subject<br />
that is interesting enough to deserve<br />
a lot of your time. Unless you're very<br />
lucky, you'll need to do a considerable<br />
amount of experimenting to get<br />
a single photograph that is "just<br />
right." Be patient and creative.<br />
This is one situation in which a<br />
hand-held meter can be very helpful.<br />
If you don't own one (or can't borrow<br />
one), try shooting at f/5.6 for<br />
about 1 minute to start. (Use a stop<br />
watch to keep track of your time.)<br />
Then bracket in both directions: 2<br />
minutes, 30 seconds, 15 seconds, etc.<br />
Remember that doubling the time<br />
(from 1 minute to 2 minutes) will<br />
have basically the same effect as<br />
opening the lens one stop (from f/5.6<br />
to f/4). However, at very slow shutter<br />
speeds, the ratio is not accurate,<br />
due to what is called "reciprocity<br />
failure." Basically, this means that<br />
you'll have to guess a lot. So be sure<br />
to experiment with a wide range of<br />
exposures.<br />
You might also try using a small<br />
("penlight") flashlight to "draw" your<br />
subject. Here's how to do it: Set your<br />
212 The Photographic Eye<br />
camera up on a tripod. Place your<br />
subject carefully within the frame.<br />
Open the shutter, using the "B" setting<br />
and a fairly small aperture (try<br />
178). Stand behind the subject and<br />
turn on the flashlight. Move the<br />
flashlight quickly along the edges of<br />
the subject, aiming it so the light is<br />
visible to the camera. After a few<br />
seconds (try 15 to start), turn off the<br />
flashlight and close the shutter.<br />
Repeat the same procedure at different<br />
shutter speeds.<br />
Student photograph by Trevor<br />
Bredenkamp.
Student photograph by John Dean.<br />
Student photograph by Trevor<br />
Bredenkamp.<br />
Breaking the Rules 213
EXERCISE<br />
Monotone<br />
Assignment: Do a series of<br />
photographs with a very limited<br />
range of values: black on black, white<br />
on white, or gray on gray.<br />
This assignment is similar to the<br />
"eggs" assignment, with two important<br />
differences: 1) variations in value<br />
caused by shadows, highlights, etc.<br />
should be avoided as much as possible,<br />
and 2) any tone is acceptable (not<br />
just white). In addition, you are not<br />
required to photograph your subject<br />
against a background. You may<br />
prefer to crop in so the subject fills<br />
the frame. The only rule is that the<br />
overall tone of the photograph<br />
should be white, black or one shade<br />
of gray.<br />
Goal: A contrasty print, with a full<br />
value range (from black, through<br />
various grays, to white) is generally<br />
desirable. However, limiting value to<br />
only one tone (black, gray or white)<br />
can sometimes be very effective. Find<br />
a subject that lends itself to this treatment<br />
and make it work.<br />
Tips: Proper exposure is vital,<br />
especially if the main tone is black or<br />
white. Meter off your hand or a gray<br />
card. Remember to bracket your<br />
shots, just to be on the safe side.<br />
Possible subjects include a black<br />
cat on a black chair, an arrangement<br />
of plain white paper, a white chair on<br />
a white porch, a black car on a blacktop<br />
road, a pear on a wooden table<br />
top (both of which would show up as<br />
gray), a straw hat on a beach, etc.<br />
For white on white, you may want<br />
to overexpose a bit, which will lighten<br />
any gray or black areas. For black on<br />
black, you may want to underexpose<br />
(to darken gray areas), but be sure<br />
214 The Photographic Eye<br />
Student photograph by Helario Reyna.<br />
Student photograph by Jack Backus.<br />
your subject doesn't just disappear.<br />
With gray on gray, you may want a<br />
normal exposure, or one that is<br />
slightly light or dark, depending on<br />
what kind of gray is dominant and<br />
what else is in the photograph.<br />
Experiment.
Student photograph by Dave Hornback.<br />
Breaking the Rules 215
EXERCISE<br />
Silhouettes<br />
Assignment: Photograph an object or<br />
person as a silhouette.<br />
Goal: Make sure that the silhouetted<br />
figure makes sense as a silhouette,<br />
that it's clear and distinct. In addition,<br />
be very aware of negative space,<br />
especially if the figure is entirely<br />
within the frame of your photograph.<br />
Tips: This assignment is difficult<br />
because you'll be shooting an object<br />
against the sky. As a result, your light<br />
meter will get very confused. The<br />
"point of departure" setting is no help<br />
because you don't want a normally<br />
exposed image: the figure should be<br />
black against a white sky.<br />
So, take a meter reading off the<br />
sky and then open your lens up two<br />
stops wider than indicated by the<br />
meter. For example, if the meter indicates<br />
f/16, shoot at f/8 instead.<br />
(Remember, the meter will want the<br />
sky to be gray, which is not what you<br />
want.) Bracket a few stops in both<br />
directions to see what effect that has.<br />
Try to clearly isolate your subject,<br />
unless other details work well with it.<br />
Good subjects include trees, people,<br />
playground equipment, machinery,<br />
objects with holes in them that allow<br />
some light to show through. Avoid<br />
plain rectangular shapes like a<br />
building or door, since they don't<br />
tend to produce interesting<br />
silhouettes.<br />
216 The Photographic Eye<br />
Student photograph by Darrell Converse.
Student photograph by Lynne<br />
Mattielli.<br />
Student photograph by Jay David<br />
Blumenfeld.<br />
Breaking the Rules 217
EXERCISE<br />
Grain &<br />
Diffusion<br />
Assignment: Use ISO 3200 film<br />
(for enhanced grain) with some form<br />
of diffuser over your lens to produce<br />
a very "soft" image.<br />
Goal: To experiment with the effects<br />
produced by deliberately avoiding<br />
crisp focus and lighting.<br />
Tips: There are a number of ways<br />
to diffuse the light (and with it the<br />
image) coming through your lens.<br />
You can use a conventional fog filter,<br />
available at modest cost at many<br />
camera stores. Or you can shoot<br />
through textured glass — such as a<br />
shower door, an antique window, or<br />
a crystal serving dish (ask your mom<br />
for permission). If there's a store in<br />
town that sells glass, you might have<br />
an interesting piece cut to a usable<br />
size. (Tape the edges and handle with<br />
care!) Another option is to stretch a<br />
piece of plastic wrap over your lens,<br />
possibly smearing it with petroleum<br />
jelly or spraying it with water. Try<br />
using a nylon stocking or a piece of<br />
lace in the same way (without the<br />
petroleum jelly). Or you might squirt<br />
some dishwashing liquid on a normal<br />
window and shoot through that.<br />
Focus on your subject, measuring<br />
the distance to it if necessary. Bear in<br />
mind that larger apertures will increase<br />
the diffusion effect and are<br />
therefore preferable. Also, be sure no<br />
direct light is striking your diffuser,<br />
as that will bring out the screen texture<br />
and obscure your subject.<br />
218 The Photographic Eye<br />
This photograph combines grain and blurred motion to produce a very<br />
moody effect. Student photograph.<br />
Variations: You might try using a<br />
very slow shutter speed (between 15<br />
and 4) and either enticing your subject<br />
to move or hand-holding the<br />
camera to blur the image a bit and<br />
further soften it.
As this photograph demonstrates, grain can be a highly effective tool for conveying certain kinds of emotions or<br />
moods. How would you describe the mood in this image? (Student photograph by Amy Shafer.)<br />
Breaking the Rules 219
EXERCISE<br />
Double<br />
Exposure<br />
Assignment: Combine two images<br />
into a single photograph either by<br />
double-exposing a single frame of<br />
film or by using two separate negatives<br />
to produce one print.<br />
Goal: Strive for a unified effect.<br />
The trick to a double-exposed photograph<br />
is to achieve visual coherence<br />
— an image that makes sense to the<br />
viewer. This does not mean that the<br />
image needs to be entirely clear, but<br />
it should be more than a chaotic<br />
jumble of lines, light and shadow<br />
(unless, of course, that's the effect<br />
you want).<br />
Tips: If you are creating your image<br />
in the camera, the simplest way<br />
to proceed is to shoot one frame as<br />
usual, making a mental note or, preferably,<br />
a rough sketch of the image,<br />
noting light and dark areas. If your<br />
camera has a double-exposure feature,<br />
use it. Otherwise, hold in the<br />
film-release button while you cock<br />
the shutter (i.e., wind the film as<br />
usual, though it shouldn't actually<br />
move). Experiment with various exposure<br />
combinations. If your second<br />
image is in a very dark area of your<br />
first image, you may get a good<br />
result by using a normal exposure for<br />
both. Otherwise, try under-exposing<br />
both by one stop (or doubling the<br />
ISO number). As always, bracketing<br />
is the safest way to ensure a successful<br />
result. After completing one double-exposure,<br />
wind the film forward<br />
as usual and try another.<br />
To produce a double exposure in<br />
the darkroom, you may either sandwich<br />
two negatives together in the<br />
220 The Photographic Eye<br />
The ghostly figure in this photograph is one of the intriguing effects possible<br />
with double-exposure. (Student photograph by Anne Nowak.)<br />
negative holder or print them separately.<br />
Again, you will have to experiment<br />
to get the right exposure<br />
combination. With the second approach,<br />
you must remember that any<br />
white areas of the first negative will<br />
print black and nothing from the<br />
second negative can be printed in<br />
those areas.<br />
Variations: It is also possible to use<br />
a piece of black mat to cover half of<br />
the lens while making your first ex-<br />
posure, and then cover the other half<br />
for your second shot — but skill and<br />
practice are required to blend the two<br />
images successfully. (This works better<br />
on larger format cameras.)<br />
A "ghost" effect can be produced<br />
by setting the camera on a tripod,<br />
shooting one shot of a model (or<br />
other subject) at half the normal exposure,<br />
and then removing the<br />
model and shooting a second image<br />
(at the same exposure).
EXERCISE<br />
Photo-Copy<br />
Photos<br />
Assignment: Select a print you<br />
have already made and "interpret" it<br />
with a photo-copy machine.<br />
Goal: This is an experiment in<br />
print manipulation — breaking down<br />
the clarity of an image to create a<br />
more impressionistic effect.<br />
Tips: The basic procedure is very<br />
simple: place the print face-down in<br />
a photo-copy machine and run off<br />
one copy. Then copy the copy. Then<br />
copy the copy of the copy, and so on,<br />
until you get an effect you like. However,<br />
not all prints will work well for<br />
this process. Generally, a fairly "contrasty"<br />
original will yield better<br />
results than one that is either very<br />
dark or predominantly gray. You<br />
may also have to tinker with the<br />
darkness control on the copier to<br />
produce the effect you want. In addition,<br />
higher quality paper will give<br />
you a cleaner image.<br />
If you have access to a high-tech<br />
copier, you can experiment with the<br />
exposure settings (try "photo," if<br />
available) to see how they affect the<br />
final result. One other experimental<br />
procedure, which works on any copier,<br />
is to slip your hand in under the<br />
cover and move your "original"<br />
(which may be a copy of a copy)<br />
around on the glass — just slightly!<br />
- while it is being copied. (Do not<br />
open the cover for this procedure, as<br />
the bright light is hard on the eyes.)<br />
Student photographs.<br />
Breaking The Rules 221
EXERCISE<br />
Panel<br />
Panorama<br />
Assignment Produce a series of<br />
prints, shot sequentially, in a line or<br />
circle from the same spot, and<br />
mount them together to form a single<br />
composite image.<br />
Goal: Select a location that will ensure<br />
each frame will be visually interesting.<br />
None should simply fill<br />
space. Each image should contribute<br />
some impression or visual information<br />
to the whole sequence.<br />
222 The Photographic Eye<br />
Tips: Unless otherwise instructed<br />
by your teacher, you will have to decide<br />
how many images to combine in<br />
your panorama (between three and<br />
five are recommended). Before you<br />
begin shooting, check each area of<br />
your location to be sure that a single<br />
aperture (preferably small, for good<br />
depth of field) can be used throughout<br />
the sequence. The basic procedure<br />
is to shoot, turn slightly, shoot<br />
again, and so on — ideally without<br />
moving from your starting point.<br />
Line up your shots carefully so they<br />
all connect at the edges. Your final<br />
prints should be fairly small (i.e.,<br />
3'/2" x 5"), so the final result won't<br />
be utterly enormous. Take care that<br />
the density of all your final prints is<br />
consistent.
Variations: Shoot a sequence at<br />
different times of day, making a note<br />
of where each image ends, so you<br />
can later begin your next image at<br />
that point. (A street scene offers interesting<br />
possibilities for this approach.)<br />
Break the pattern by<br />
moving forward and back, shifting<br />
your point of view as you proceed<br />
through the sequence. Combine vertical<br />
and horizontal formats. Overlap<br />
the edges of your panels and<br />
mount them as a sort of patchwork<br />
quilt. Follow David Hockncy's example<br />
(see Appendix 2) and shoot<br />
lots of separate images. Have someone<br />
model for you in a different pose<br />
in each image. Include a word in<br />
each frame so the whole sequence<br />
contains a phrase or sentence. Stand<br />
in one place and shoot forward, back<br />
and to each side. (The possibilities<br />
are endless.)<br />
There's a person in this mom, though no one is in sight. Every object, from<br />
the rumpled bed to the ragged posters, not only tells us whose room this is<br />
but also allows us to feel that person's presence. Is this somebody you know?<br />
(Student photograph by Aindrea Brennan.)<br />
Breaking The Rules 223
EXERCISE<br />
Text& Image<br />
Assignment: Combine one or<br />
more photographs with words — a<br />
poem, song, quotation, excerpt from<br />
a book, handwritten note, etc.<br />
Goal: Photography and the written<br />
word have enjoyed a long partnership,<br />
especially in magazines and advertising.<br />
Photographs may illustrate<br />
a text, or text may be employed to<br />
clarify or comment on a photographic<br />
image. The goal of this exercise<br />
is to explore the various ways in<br />
which these two forms of expression<br />
can be used together to produce a<br />
meaningful combined effect.<br />
Tips: Try to avoid an overly literal<br />
result, with the photograph and text<br />
merely saying the same thing in different<br />
ways. Ideally, each will enhance<br />
and expand the impression<br />
conveyed by the other.<br />
Just as some song writers begin<br />
with a lyric and others first compose<br />
a melody, you may choose to select<br />
(or write) your text first and then create<br />
an image to go with it — or the<br />
other way around. Keeping the text<br />
short will usually (but not always)<br />
enhance the overall effect. (Haiku, a<br />
style of short poems developed in Japan,<br />
are an excellent choice.) Whatever<br />
form of text you choose, be sure<br />
it will actually work well with a photographic<br />
image. (Your favorite song<br />
will not necessarily give you much to<br />
work with.)<br />
Unless otherwise instructed by<br />
your teacher, you will have to decide<br />
if the text is to be typed or handwritten<br />
— and whether to place it in the<br />
image area of the photograph, to<br />
leave white space for it below the<br />
224 The Photographic Eye<br />
print, or to place it on the mat or a<br />
separate sheet of paper.<br />
Variations: You may wish to try<br />
various forms of collaboration. For<br />
example, the entire class might select<br />
a topic of shared interest and produce<br />
a series of text/image combinations<br />
to explore together. (This could<br />
Student photograph by Amy Toensiiig.<br />
make a very effective exhibit.) Or<br />
you might want to work together to<br />
illustrate a long poem, a song, a<br />
short-story, or a portion of a book<br />
you all admire. Alternatively, you<br />
might collaborate individually with<br />
students in a writing course —<br />
matching your photographs with<br />
their poetry, for example.
In this example, an excerpt from a poem by Rumi (a medieval Sufi) is written directly on the print. Notice<br />
how the two play off each other, suggesting deeper meanings and hidden connections. (Student photo by<br />
Laura Mitchell.) . . .<br />
Breaking The Rules 225
Student photograph by Marc McCoy.<br />
226 The Photographic Eye
appendix 1 Processing<br />
PROCESSING FILM<br />
Tools<br />
• Canister Opener<br />
The first step in processing film is to<br />
pry open the canister to remove the<br />
film. There are special tools designed<br />
for this, but a common can opener<br />
will do just fine.<br />
• Developing Tank<br />
The developing tank is a container<br />
that is light-light (i.e., that no light<br />
can enter). It is equipped with a reel<br />
that prevents the film from sticking<br />
to itself during processing. Developing<br />
tanks come in a variety of sizes,<br />
materials, and styles. The most common<br />
version is the traditional metal<br />
tank with a metal reel. With this version,<br />
you must slide the film into the<br />
reel prior to processing it. More<br />
modern versions are made of plastic<br />
and offer innovative design features,<br />
such as a mechanism for cranking the<br />
film in, a wider mouth for pouring<br />
chemicals in and out, etc. Any tank<br />
will work well, once you learn how<br />
to use it properly.<br />
• Chemicals<br />
There are four stages to processing<br />
B&W film: developing, stopping, fixing<br />
and washing. First, the developer<br />
activates light-sensitive silver crystals<br />
in the emulsion (a gelatin coating).<br />
SAFETY NOTE: Many chemicals used in photographic processing can cause skin irritation and<br />
possible lung problems. Gloves and longs should be used (o protect the skin from direct contact<br />
with chemicals during mixing and working with photographic chemicals. Proper darkroom<br />
ventilation (from 10-20 room-air changes per hour) is essential to safeguard the lungs against<br />
chemical dusts and vapors.<br />
Second, the stop bath "freezes"' the<br />
developing action. Then the fixer<br />
changes the chemical compounds, so<br />
they will no longer be sensitive to<br />
light. Finally, water washes away all<br />
traces of the active chemicals, so they<br />
can no longer react with each other.<br />
Film Developer: There are many<br />
different kinds of film developers,<br />
though the basic chemistry remains<br />
the same. Developing agents (with<br />
names like metol, phenidone and hydroquinone)<br />
intensify the reaction<br />
caused by light, producing black<br />
metallic silver within exposed silver<br />
crystals. The main difference between<br />
two developers is usually the quality<br />
of the grain each produces —the<br />
degree to which the silver compounds<br />
cluster together to form black lumps.<br />
Other factors, such as developing<br />
time and contrast may also be<br />
affected.<br />
Any crystals that received light<br />
during an exposure begin turning<br />
black when immersed in the developing<br />
solution. This produces a negative<br />
image of the photographed subject.<br />
The longer the crystals are immersed,<br />
the blacker they become.<br />
Thus, lengthening the developing<br />
time will increase a negative's contrast,<br />
since the crystals that received<br />
a lot of light will get very black. The<br />
227
crystals that received no light will not<br />
be affected. Those that received a little<br />
light will become increasingly dark<br />
as the developing continues, producing<br />
a lighter print. If the developing<br />
goes on too long, the result will be a<br />
print in which the contrast will be extremely<br />
high and everything will look<br />
overexposed.<br />
Shortening the developing time will<br />
reduce contrast, since even the<br />
crystals that received the most light<br />
will only have time to become gray.<br />
Stop Bath: Since virtually all<br />
developers only work well in an<br />
alkaline (non-acidic) solution, the<br />
developing process will be halted if<br />
the solution becomes acidic. That's<br />
precisely what stop bath does.<br />
Stop bath is simply diluted acetic<br />
acid. When the film, with developer<br />
on its surface, is immersed in the stop<br />
bath, this acid halts the development<br />
process. If you were to rinse off the<br />
stop bath and place the film back in<br />
the developer, the development process<br />
would continue.<br />
Indicator stop bath also contains<br />
a dye that turns purple when the acid<br />
is no longer active enough to be useful.<br />
If you are using an indicator stop<br />
bath, you can safely recycle it until<br />
the dye begins to change color (to a<br />
brownish gray). Most photographers,<br />
however, simply discard it after each<br />
use when processing film. (The indicator<br />
dye is more helpful when<br />
you're processing prints.)<br />
Fixer: "Fixing" film does two<br />
things: It dissolves all the silver<br />
crystals that have not been activated<br />
by the developer, and it hardens the<br />
emulsion. In essence, -it "locks" the<br />
image.<br />
There are two basic kinds of fixer:<br />
the regular variety (sodium thiosulphate)<br />
and "rapid fixer" (aluminum<br />
thiosulphate), which simply reacts<br />
228 The Photographic Eye<br />
more quickly. The key differences<br />
between the two is speed and, of<br />
course, price.<br />
Wash: Film must be thoroughly<br />
washed. Chemical traces left on the<br />
film by improper washing will interfere<br />
with the quality of your prints<br />
and may damage the negative as well.<br />
The quality of the water you use is<br />
also important. Most water that is<br />
safe to drink should be fine for<br />
washing films (as well as for diluting<br />
chemicals and washing prints).<br />
If, however, you repeatedly<br />
discover streaks, smears, speckles or<br />
other curiosities on the film's surface,<br />
try washing a few rolls in bottled or<br />
distilled water. If the curiosities go<br />
away, then your tap water is probably<br />
the problem. It's likely to be fine for<br />
diluting chemicals and may be okay<br />
for washing prints, but keep a bottle<br />
of "good" water on hand for washing<br />
film.<br />
Wetting Agent: A final step that<br />
is highly recommended, but not<br />
strictly essential, is coating the film<br />
with a wetting agent. The wetting<br />
agent covers the film with a slippery<br />
surface, so any impurities in the<br />
water will tend to slide off rather than<br />
stick. If you don't use a wetting<br />
agent, there's always a risk that<br />
something (mineral deposits, dust in<br />
the air, or even just bubbles in the<br />
water) will leave a permanent mark<br />
on the emulsion.<br />
• Interval Timer<br />
An interval timer is a device that<br />
measures the time between the beginning<br />
of a process and its end. Any<br />
timer (such as a clock, wristwatch or<br />
stopwatch) with a second-hand will<br />
do fine. There are of course a variety<br />
of very nice timers specifically designed<br />
for darkroom use ... but you<br />
don't need one.<br />
• Negative Clips<br />
When you've finished processing<br />
your film, you'll need to hang it up<br />
to dry. Once again, there are special<br />
metal clips made for this purpose . . .<br />
and, once again, you don't need<br />
them. Plain old wooden clothespins<br />
work just as well. Whichever you use,<br />
place one clip on each end of the film,<br />
using one to hang the top up, and the<br />
other to weight the bottom down so<br />
the film doesn't curl.<br />
Processing Tips<br />
The golden rule of processing is BE<br />
CONSISTENT. Once you have<br />
established the chemicals, procedures<br />
and times that work for you, stick<br />
with them. Change nothing without<br />
a good reason. You will then always<br />
be able to identify and correct any<br />
problems quickly. If, on the other<br />
hand, you never do the same thing in<br />
the same way twice, you're far more<br />
likely to encounter some unpleasant<br />
surprises . . . and far less likely to<br />
know what caused them or how to<br />
correct them.<br />
The trickiest part of film processing<br />
is getting the film loaded into the<br />
developing tank. After that, all you<br />
need to worry about is correctly timing<br />
each step.<br />
Before you risk ruining a roll of actual<br />
photographs, practice loading<br />
the tank with a blank roll until you're<br />
sure you have it down pat. There's<br />
nothing quite like the panic caused by<br />
discovering that a roll of precious<br />
film is not loading correctly. With<br />
practice, you can avoid that ex-
perience. Start by loading your practice<br />
roll in normal light, so you can<br />
see how it works. Then practice in<br />
the dark.<br />
Always be sure that your hands,<br />
opener, scissors, and developing tank<br />
are clean and dry — before you begin.<br />
Hands and tools that are wet or have<br />
traces of chemicals on them are a<br />
common cause of ruined film. A little<br />
planning can help you avoid a lot<br />
of regret.<br />
Finally, darkroom chemicals<br />
deteriorate over time. Some become<br />
useless quite rapidly (once they've<br />
been mixed with water) if they are exposed<br />
to air. Therefore, they should<br />
all be stored in airtight containers,<br />
and the containers should be reasonably<br />
full. If you have only a small<br />
amount of a chemical left, pour it into<br />
into a smaller container. Flexible<br />
plastic containers are available with<br />
an accordion grid design which<br />
allows all excess air to be squeezed<br />
out. These are a useful option if you<br />
tend to store irregular amounts of<br />
chemicals for fairly long periods of<br />
time (a month is a long time for some<br />
chemicals).<br />
Procedures<br />
• Preparation<br />
/. Have all your chemicals mixed<br />
and ready to use before you<br />
begin.<br />
The developer is frequently<br />
diluted with water to produce a<br />
working solution appropriate to<br />
a specific film or effect. The stop<br />
bath is generally prepared by mixing<br />
a very concentrated liquid<br />
with water. The fixer may be<br />
prepared in the same way. In all<br />
these cases, be sure you have the<br />
right mixtures set aside and ready<br />
to use. It is even a good idea to<br />
have the exact amount of devel-<br />
oper you'll need already poured<br />
into a measuring cup. You can<br />
measure the other chemicals during<br />
processing.<br />
Always be sure your chemicals<br />
are at the correct temperature<br />
before you begin processing.<br />
There are two ways to accomplish<br />
this.<br />
If a chemical is to be diluted<br />
with water, check the temperature<br />
before you add the water. You<br />
can then adjust the temperature<br />
by using warmer or colder water<br />
to produce the working solution.<br />
This approach is most useful if<br />
your chemicals are still warm<br />
from mixing (some powdered<br />
chemicals require hot water to<br />
dissolve properly) or if they're<br />
cold from sitting in a storage<br />
room. In other words, this approach<br />
can be used to quickly<br />
produce a major change in<br />
temperature.<br />
The second and more common<br />
way to adjust the temperature is<br />
to prepare a "temperature bath."<br />
Fill a sink or basin with warm or<br />
cool water. Place the containers<br />
of chemicals in the bath and let<br />
them soak until they are at the<br />
correct temperature. Add warmer<br />
or cooler water to the bath as<br />
needed.<br />
Bear in mind that the temperature<br />
will change more quickly for<br />
a small amount of a solution than<br />
for a large one. Therefore, you<br />
may want to put only the<br />
amounts you actually need into<br />
the temperature bath.<br />
2. In total darkness, open the<br />
film canister and slide the film out<br />
of it.<br />
Pry the cap off of the flat end of<br />
the canister. Gently slide the film<br />
out, making sure the film is rolled<br />
fairly lightly, so it won't catch on<br />
the edges of the canister. Discard<br />
the canister and cap.<br />
Keep the film rolled up after it<br />
has been removed. Never set the<br />
film down between removing it<br />
from the canister and loading it<br />
into the tank. (If you do, you<br />
may forget where it is or accidentally<br />
contaminate it by setting it<br />
down in some moist chemical<br />
residue.)<br />
It's perfectly all right to touch<br />
the first 6 inches or so of the film<br />
(including the leader), since there<br />
aren't any photographs on it.<br />
Once you start loading the film,<br />
however, you will have to be<br />
more careful.<br />
3. Trim the leader off the film.<br />
Always use scissors for this; don't<br />
tear the film. (If you try tearing<br />
the film, you're likely to bend or<br />
stretch it, which will interfere<br />
with loading.)<br />
Cut straight across the film,<br />
not at an angle. Try to cut between<br />
sprocket holes, so the end<br />
of the film is completely straight<br />
(which will make loading easier).<br />
With practice, you should be able<br />
to do this in the dark: With your<br />
fingertips, feel for the sprocket<br />
holes on one side, and hold on to<br />
one. Begin cutting just beyond<br />
your fingertips. As you cut, feel<br />
for the corresponding sprocket<br />
hole on the other side and aim the<br />
scissors just past it.<br />
4. Insert the end of the film into the<br />
developing reel.<br />
The exact procedure for loading<br />
film varies according to the type<br />
of reel and tank you're using. For<br />
most plastic reels you 'II need on-<br />
Processing 229
ly to feel along the outer edge of<br />
the reel for the opening and insert<br />
the film into it. For a metal<br />
spiral reel, feel on the inside for<br />
the center clip or spike. Holding<br />
the film loosely in one hand and<br />
the reel in the other, engage the<br />
film end into the clip.<br />
5. Load the film into the reel.<br />
Once the film is inserted, you will<br />
continue to slide it in, or you'll<br />
crank the reel or loader, which<br />
will slide the film in for you.<br />
As you load the film, loosen<br />
the film on the spool so it moves<br />
smoothly. Hold the film by its<br />
edges— try not to touch the image<br />
area. The emulsion is on the inner<br />
surface of the film, so it is less<br />
risky to touch the outer surface<br />
. . . but it's still not a good<br />
idea.<br />
As you load the film, continually<br />
check to be certain that it is<br />
not bending or catching. You<br />
may need to touch the outer surface<br />
to do this. If so, do it as<br />
lightly and briefly as possible.<br />
With a metal reels, you'll need<br />
to squeeze the edges of the film<br />
slightly so they slide into the<br />
grooves of the reel. Try to<br />
develop a smooth and gentle<br />
movement with your hand, wrist<br />
230 The Photographic Eye<br />
and arm as you slide the film into<br />
the reel, draw back to unwind<br />
it from the spool, and slide it in<br />
again.<br />
With the crank-equipped reels,<br />
you'll have to experiment to find<br />
the technique that works best for<br />
you. You can unwind and load<br />
the film in sections, or you might<br />
prefer to let the whole roll drop<br />
and hang free from between your<br />
thumb and index finger as you<br />
crank it up into the reel.<br />
6. Place the reel into the tank and<br />
securely attach the top.<br />
Once the film is in the tank and<br />
securely covered, the hard part is<br />
over. You may now turn on the<br />
lights. Processing should begin<br />
immediately (to reduce the<br />
chances of the film being harmed<br />
by left-over chemicals).<br />
• Processing<br />
/. Pour the developer (already<br />
diluted to the proper strength, if<br />
necessary) into the mouth of the<br />
developing tank and cap it.<br />
2. Immediately after pouring,<br />
shake the tank to ensure that the<br />
film is evenly covered. Then<br />
bang the tank down a few<br />
times—hard!—to dislodge any<br />
air bubbles clinging to the film.<br />
3. Agitate the tank for specified<br />
periods of time, at specified<br />
intervals.<br />
Read the instructions packaged<br />
with the developer and/or film<br />
and follow them exactly. Both<br />
too much and too little agitation<br />
can ruin your photographs. Use<br />
a stopwatch or a clock with a<br />
second-hand to ensure precise<br />
timing.<br />
Generally, you will be instructed<br />
to agitate the tank for 5<br />
seconds at 30-second intervals. If<br />
so, then do exactly that. Do not,<br />
for example, agitate it for 10<br />
seconds at 20-second intervals, or<br />
for 3 seconds whenever you feel<br />
like it. The most common cause<br />
of ruined film is incorrect or<br />
careless processing. Follow the<br />
instructions.<br />
Once you have established a<br />
method of agitation that seems to<br />
work, stick with it. Unless specifically<br />
instructed to do otherwise<br />
(i.e. for a special kind of film or<br />
processing) use the exact same<br />
method every time you process<br />
film. If you alter your method<br />
significantly, you may cause<br />
problems in the processing that<br />
will seem to be caused by other
influences, such as incorrect exposure<br />
or exhausted chemicals.<br />
Try this method, counting<br />
slowly from 1 to 5: On 1, twist<br />
the tank clockwise. On 2, twist it<br />
counter-clockwise. On 3, turn it<br />
upside down. On 4, turn it right<br />
side up. On 5, bang it down on<br />
a hard surface.<br />
4. Begin pouring the developer out<br />
of the tank 15 seconds before the<br />
end of the processing time.<br />
Unless instructed to do otherwise,<br />
pour the developer down the<br />
drain. You generally will not<br />
want to use it again.<br />
5. Immediately after pouring all the<br />
developer out, fill the tank with<br />
the pre-mixed stop bath, cap the<br />
tank and agitate it once.<br />
6. Leave the film in the stop bath<br />
for about 30 seconds, with some<br />
agitation. Then pour it down the<br />
drain.<br />
7. Fill the tank with fixer and<br />
follow the timing and agitation<br />
instructions.<br />
The same rules apply to fixing as<br />
to developing: Follow the instructions<br />
exactly. Though precise timing<br />
is less important with the<br />
fixer, you should not a/low yourself<br />
to get careless. Poorly fixed<br />
film will be just as ruined as<br />
poorly developed film.<br />
Generally, you will fix the film<br />
for about 5 minutes, agitating for<br />
10 seconds at I-minute intervals.<br />
You may open the film canister<br />
in dim light during fixing. However,<br />
try to resist the urge to<br />
"peek." If you've messed up the<br />
processing, there's nothing you<br />
can do about it now.<br />
8. Pour out the fixer.<br />
You may want to re-use your<br />
fixer. Do not, however, mix used<br />
and fresh fixer unless specifically<br />
instructed to do so. (It's a/I right<br />
to do this if all the fixer will be<br />
used and disposed of within a relatively<br />
short period of time. It's<br />
not all right if it will be stored for<br />
a while.)<br />
9. Wash the film for the specified<br />
time.<br />
The simplest way to do this is to<br />
remove the lop and place the tank<br />
under running water, draining it<br />
at regular intervals to ensure a<br />
complete wash.<br />
10. Soak the film in the wetting<br />
agent.<br />
Do not remove the film from the<br />
reel yet. Just pour the wetting<br />
agent into the developing tank<br />
after pouring out the water.<br />
Plunge the reel up and down a<br />
few times to ensure that the film<br />
is evenly coated. Lift the reel out<br />
of the tank and shake it gently.<br />
Pour the wetting agent back into<br />
its container if you plan to use it<br />
again soon; otherwise discard it.<br />
11. Remove the film from the reel<br />
and hang it up to dry in a dustfree<br />
space.<br />
Hang the film so the last frame<br />
is at the top (which will make it<br />
easier to file once it's dry). Let the<br />
film dry overnight, and do not<br />
touch it again until it is dry.<br />
The "dust wars" begin as soon<br />
as you hang your film up to dry.<br />
If the drying area is kept absolutely<br />
clean, you'll have a good<br />
head start. If, on the other hand,<br />
it's even slightly dusty, you'll<br />
probably never win. If your film<br />
has dust on it after drying, try to<br />
think of ways to correct the problem,<br />
or locate a better drying<br />
space.<br />
12. Cut the film into strips and insert<br />
them into a negative file.<br />
You have not finished processing<br />
your film until this vital step is<br />
complete. Never leave processed<br />
film hanging or rolled up or lying<br />
around any longer than absolutely<br />
necessary. (The dust wars<br />
require constant vigilance.)<br />
Using the Negative File<br />
Negative files generally hold either 5<br />
or 6 frames per row and have 7 rows<br />
per sheet. The 5-frame-per-row<br />
variety with holes to fit a standard<br />
3-ring binder is very handy. Unfortunately,<br />
it holds only 35 exposures,<br />
so you'll probably want to limit<br />
yourself to 35 shots per roll of film,<br />
so you don't have one too many<br />
frames for the file. The easiest way<br />
to do this is to advance the film until<br />
the frame-counter reads "2" before<br />
you take your first shot. You can<br />
then trim off the excess leader after<br />
processing, and you won't have to<br />
remember to stop at your 35th shot.<br />
To use the file, fill in the label area<br />
with the date, assignment and file<br />
number, using a ball-point pen.<br />
While the film is still hanging, cut<br />
off the leader (which should be at the<br />
bottom). Then count the number of<br />
frames that your file holds per row<br />
(5 or 6) and cut them off. Take care<br />
to cut precisely along the narrow<br />
band between frames, so you don't<br />
trim off part of the image area.<br />
With the label of the file facing<br />
you, slip the film into the first row<br />
with the "hump" up (i.e., with the<br />
emulsion side down). Repeat until the<br />
whole roll has been placed in the file.<br />
Processing 231
To avoid confusion, do not add<br />
pieces of other rolls to the file even<br />
if you have plenty of extra space<br />
in it. Don't mark the file to indicate<br />
which frames to print or how to<br />
crop them. That's what the contact<br />
sheet is for.<br />
PRINTING<br />
Tools<br />
• Photographic Paper<br />
Photographic paper is functionally<br />
the same as film, except it has opaque<br />
paper instead of clear film for its<br />
backing. Like film, it is coated with<br />
silver crystals which turn black when<br />
they are exposed to light and processed.<br />
However, the coating on<br />
photo paper reacts far more slowly<br />
than that on film.<br />
Photo paper is graded according to<br />
its contrast. Contrast grades are<br />
generally numbered from 0 to 5 —the<br />
higher the number, the higher the<br />
contrast. In some cases, descriptive<br />
words, such as soft (low contrast) and<br />
hard (high contrast) may be used to<br />
indicate contrast grades. Or you can<br />
use a variable contrast paper with<br />
filters to yield a range of contrasts.<br />
In addition, the surface texture,<br />
image tone, base tints and weight<br />
may be indicated either with a code<br />
or a few descriptive words. Surface<br />
texture descriptions include glossy<br />
(smooth and shiny), matte (textured<br />
and dull) and lustre (in between<br />
glossy and matte). Image tone<br />
depends on the chemistry of the<br />
emulsion, and ranges from "cold"<br />
blue-black to "warm" brown. Base<br />
tints, produced by dyes that affect the<br />
color of the paper, are described<br />
as white, warm-white, cream, etc.<br />
Finally, the weight of a paper indicates<br />
its thickness. For photo<br />
paper, this is generally expressed as<br />
232 The Photographic Eye<br />
"single-weight" (S) or "doubleweight"<br />
(D). (Resin coated paper,<br />
described later, comes only in<br />
"medium weight.")<br />
Most of this information may be<br />
compressed into a single code, such<br />
as F3 (in the Kodak code). In this<br />
case, the "F" stands for glossy and<br />
the "3" stands for moderate contrast.<br />
Whatever brand of paper you use,<br />
familiarize yourself with its code. As<br />
time and money permit, experiment<br />
with a variety of contrast grades and<br />
surfaces. To begin with, however, a<br />
glossy and moderate-to-high contrast<br />
(#3 or #4) paper should suit your purposes<br />
well. (#2 is considered "normal"<br />
contrast.)<br />
• Enlarger<br />
The enlarger is essentially a camera<br />
in reverse. It projects light back<br />
through the negative and focuses it<br />
onto a sheet of light-sensitive paper<br />
which, when processed, produces a<br />
positive image.
The enlarge: can be raised or<br />
lowered to alter the size of the printed<br />
image. It may have one or two focusing<br />
controls. If there are two, one will<br />
be for coarse focus (getting in the<br />
right general range) and the other will<br />
be for fine-tuning. The lens is calibrated<br />
like the lens on a camera, in<br />
f-stops. Under the lens there should<br />
be a red filter which, when it covers<br />
the lens, blocks any light that might<br />
expose the paper (most photo paper<br />
is not sensitive to red light). In addition,<br />
a set of filters may be attached<br />
to the enlarger for controlling contrast,<br />
when using variable contrast<br />
paper. (Variable contrast paper used<br />
with no filter will print as #2 grade.)<br />
• Safelight<br />
Because photo paper is coated with<br />
a light-sensitive emulsion, just like<br />
film, it will turn black if fully exposed<br />
to light and processed. Unlike film,<br />
however, photo paper has limited<br />
sensitivity. It will generally react only<br />
to the blue end of the spectrum.<br />
Therefore, most photo papers can<br />
safely be exposed to a quite bright red<br />
or orange light. This is the reason<br />
that a safelight is safe. Nevertheless,<br />
it's a good idea not to leave uncovered<br />
photo paper near a safelight<br />
for extended periods of time, as some<br />
safelights will eventually cause the<br />
paper to fog (turn gray) when<br />
processed.<br />
(Most films can also be exposed to<br />
very dim light in certain ranges of the<br />
spectrum — Plus-X, for example can<br />
tolerate some green light —but it is<br />
generally not worth the bother and<br />
risk.)<br />
• Film Cleaners, Etc.<br />
The simplest dust-fighting tool is a<br />
blower-brush. The blower is simply<br />
a rubber bulb that you squeeze to<br />
force air down the tube of the brush.<br />
The brush itself should have very soft<br />
bristles, so it can be used to "sweep"<br />
dust off film without scratching.<br />
A more sophisticated variety of<br />
brush is the anti-static brush (such as<br />
the Staticmaster). It contains a<br />
tiny amount of radioactive material<br />
that neutralizes the electrical charge<br />
of static, which helps to actually get<br />
rid of dust, rather than just move it<br />
around. An anti-static brush is a very<br />
effective and useful tool. It is slightly<br />
radioactive, however, so use it<br />
cautiously.<br />
A somewhat tamer tool for<br />
fighting static is an anti-static cloth,<br />
such as Ilford's Antistaticum IM .<br />
Provided that the cloth is sufficiently<br />
soft, smooth and lint-free, you can<br />
use it to very gently wipe dust off<br />
of film.<br />
You can also use canned compressed<br />
air (such as Dust-Off IM ) to<br />
clean film. However, some of the<br />
gases used in the compression process<br />
can do more harm than good. Holding<br />
the can perfectly upright will<br />
minimize the escape of these gases.<br />
Test the product (and your technique)<br />
on film you don't care about first. If<br />
you see smudges or other signs of<br />
damage, use something else instead.<br />
Another option is Edwal's Anti-<br />
Static Film, Glass and Chrome<br />
Cleaner. Though not especially<br />
recommended for everyday use, this<br />
is a useful tool for cleaning up film<br />
that has gotten out of control. Use it<br />
very carefully to avoid scratching the<br />
film.<br />
Finally, if you do scratch some<br />
film (and, sooner or later, you will),<br />
Edwal also makes a product called<br />
No-Scratch IM . It covers the film<br />
with a coating that fills in scratches,<br />
making them less evident (and even<br />
invisible) in the print. While No-<br />
Scratch is a great help when you<br />
really need it, use it only as a last<br />
resort. It is very messy to work with<br />
and hard to clean off the film.<br />
• Timer<br />
You will need a fairly sophisticated<br />
timer to obtain the best possible<br />
results with an enlarger. Because<br />
you'll be measuring time in seconds<br />
(and maybe even fractions of a second),<br />
rather than minutes, it is not<br />
practical to turn the enlarger on and<br />
off by hand.<br />
With a proper timer, you simply<br />
set the amount of time you want the<br />
light to be on and click a switch. The<br />
timer turns the light on, keeps it on<br />
for precisely the amount of time you<br />
selected, then turns it off.<br />
• Developing Trays<br />
Since photo paper can be safely exposed<br />
to some light, it is processed in<br />
trays instead of tanks. The trays,<br />
made of plastic, come in a variety of<br />
sizes, designs and colors. White is<br />
recommended, since it clearly shows<br />
chemical discoloration (which could<br />
be a sign of trouble). However, you<br />
may prefer to use different colors for<br />
each chemical, so you can easily tell<br />
them apart. Be sure your trays are<br />
large enough to easily accommodate<br />
your paper. A tray that is too large<br />
is better than one that is too small.<br />
On the other hand, a tray that is<br />
much too large will only waste<br />
chemicals.<br />
• Tongs<br />
Tongs, made of plastic or bamboo<br />
with rubber tips, are used to move the<br />
paper from one tray to the next. They<br />
also come in a variety of colors. Use<br />
one color for each chemical (blue for<br />
developer, red for stop bath, etc.).<br />
This will help you avoid accidentally<br />
Processing 233
contaminating your chemicals. Always<br />
use your tongs . . -. do not use<br />
your fingers.<br />
• Chemicals<br />
The chemicals used for processing<br />
prints are essentially the same as<br />
those used for processing film. Some<br />
of them, in fact, can be used for<br />
either purpose. In both cases, you<br />
develop the image, "stop" it, fix it<br />
and, finally, wash and dry it.<br />
Contact Prints<br />
• Additional Tools<br />
Glass: To make a contact print,<br />
the negative must be pressed flat<br />
against —or in contact with —the<br />
photo paper. The simplest way to<br />
achieve this is to place a piece of glass<br />
on top of the negative. (Though<br />
special contact printing frames are<br />
sold for this purpose, they are not<br />
necessary.) The glass should be heavy<br />
enough to hold the negatives flat and<br />
slightly larger than the photo paper<br />
(generally 8x10").<br />
It is essential that the glass be clean<br />
and unscratched, since any flaws in<br />
the glass will show up on your contacts.<br />
You should have a dry and protected<br />
place in which to store the<br />
glass, and always put it away immediately<br />
after using it. Wipe the<br />
glass clean with a dry, lint-free cloth<br />
(using a glass-cleaning spray if<br />
necessary) prior to each use.<br />
Lupe: The primary function of<br />
a contact sheet is to enable you to inspect<br />
your photographs before you<br />
enlarge them. To avoid disappointing<br />
results, you need to know more than<br />
just what's in each photograph. Is it<br />
in focus? Is the lighting exactly right?<br />
Are the subject's eyes open? Is the<br />
facial expression good? These are<br />
some of the questions you can only<br />
answer with a lupe or magnifying lens.<br />
234 The Photographic Eye<br />
To use a lupe, place it directly on<br />
the contact sheet over the frame you<br />
want to inspect. Bring your eye down<br />
to the lupe (don't lift the lupe) and<br />
look through it. It's important that<br />
your head does not block the light.<br />
Do not place the contact on a light<br />
box or hold it up to the window, as<br />
this will only make all the<br />
photographs look over-exposed and<br />
out of focus.<br />
Grease Pencil: As you inspect<br />
each contact sheet, you'll want to<br />
make notes regarding which photographs<br />
to enlarge and how to enlarge<br />
them. The best tool for this is a white<br />
grease pencil. A grease pencil writes<br />
easily on photo paper, and can also<br />
be erased with a fingertip or tissue.<br />
A while grease pencil will show up<br />
fairly well even under a safelight . . .<br />
so your notes will be legible in the<br />
darkroom, where you need them<br />
most.<br />
What sort of notes should you put<br />
on your contacts? First, mark each<br />
frame that you want to enlarge. The<br />
usual way of doing this is simply to<br />
draw a box around it. You may also<br />
want to cross out any frames that are<br />
out of focus. If you see a good way<br />
to crop a photograph, mark that as<br />
well. Finally, you may want to jot<br />
down suggestions on how to print a<br />
photograph, so you'll remember your<br />
intentions when the time comes.<br />
• Procedures<br />
1. Turn the enlarger on and open<br />
the lens to its largest aperture.<br />
2. Adjust the enlarger's height as<br />
needed until the light is covering<br />
an area slightly larger than the<br />
negative file.<br />
It's a good idea to focus the<br />
enlarger when you do this, so<br />
you'll always be setting it at<br />
roughly the same height. The reason<br />
for this is that the amount of<br />
light reaching the paper decreases<br />
as the distance to the light source<br />
(the enlarger bulb) increases. You<br />
can focus the enlarger without<br />
putting a negative in it: simply<br />
adjust the focusing knob until the<br />
edges of the lighted area are crisp<br />
and clear.<br />
3. Set the enlarger lens two stops<br />
down.<br />
4. Cover the lens with the safelight<br />
filter.<br />
At this point, check to be sure<br />
that all lights except safelights<br />
are turned off, and that there<br />
are no light leaks around doors,<br />
window, etc. Leave the enlarger<br />
light on.<br />
5. Center a sheet of photo paper in<br />
the lighted area.<br />
Remove one sheet of photo paper<br />
from its container. Always close<br />
the container immediately. Do<br />
not leave photo paper uncovered,<br />
no matter how light-tight you<br />
think your darkroom is. There's<br />
always the chance that you or<br />
someone else will turn the lights<br />
on before you've put the paper<br />
away. Learn good habits from<br />
the outset and stick with them.
6. Place the negative file over the<br />
photo paper.<br />
Be sure that all the negatives and<br />
the label area are within the<br />
paper's borders.<br />
7. Place the glass over the negative<br />
file.<br />
Hold the glass by the edges to<br />
avoid finger-printing the image<br />
area. Gently press the glass down<br />
against the paper to ensure full<br />
contact. You may want to use a<br />
cloth for this, to keep your<br />
fingers off the glass.<br />
8. Turn off the enlarger.<br />
9. Swing the safelight filter out of<br />
the way of the enlarger lens.<br />
10. Expose the contact sheet.<br />
For your first contact, follow the<br />
procedures for making test strips<br />
(see below). Later, once you<br />
know the exposure that works for<br />
you, you probably won't need a<br />
test strip except for film shot in<br />
tricky lighting situations.<br />
Test Strip<br />
/. With the enlarger light on and<br />
covered by the safelight filter,<br />
place a piece of photo paper in<br />
the image area.<br />
When you make your very first<br />
test strip (of a contact), you may<br />
want to use an entire sheet of<br />
photo paper. Later, you'll be able<br />
to save paper (and money) by using<br />
a smaller piece (such as 1/3<br />
of a sheet). Always be sure that<br />
the test strip area covers a representative<br />
sampling of the photograph's<br />
contrast. In addition,<br />
be sure that the most important<br />
elements of the photograph are<br />
represented (for example, the face<br />
in a portrait). Generally, this can<br />
be accomplished by placing the<br />
test strip diagonally across the<br />
center of the image area.<br />
2. Cover all but one narrow band<br />
of the test strip with an opaque<br />
card.<br />
3. Make a 2-second exposure.<br />
4. Move the card to uncover<br />
another narrow band of the test<br />
strip.<br />
5. Make another 2-second<br />
exposure.<br />
6. Repeat until you have made a<br />
total of at least 8 exposures and<br />
the entire test strip has been<br />
exposed.<br />
Processing 235
Enlargements<br />
• Additional Tools<br />
Easel: The easel is simply an adjustable<br />
tool for holding photo paper<br />
in place and keeping it flat. Most<br />
easels have two blades which slide<br />
along a slot marked in inches. To<br />
move the blades, you press a lever<br />
which unlocks them. When you have<br />
set the blades at the correct<br />
measurements, you release the lever,<br />
locking the blades in place. Other<br />
easel designs provide standardized<br />
openings (4x5", 5x7", 8x 10") or<br />
have 4 adjustable (often magnetic)<br />
blades. Here again, which tools you<br />
use is of far less importance than how<br />
you use them.<br />
Grain Focuser: An enlargement<br />
is correctly focused only when the<br />
grain (the pattern of silver dots that<br />
compose the image) is in focus. With<br />
most films, you need a grain focuscr<br />
to see the grain well enough to<br />
achieve this degree of precision. It<br />
enlarges a very small portion of the<br />
image area and reflects it up through<br />
a lens so you can see the grain clearly<br />
enough to focus it.<br />
Before using a grain focuser, adjust<br />
the enlarger until the photograph<br />
is fairly well focused. Then place the<br />
focuser on your easel within the<br />
image area. Look through the lens,<br />
making sure your head jsn't blocking<br />
the light from the enlarger. .Move the<br />
focuser around within the image area<br />
until you can see clusters of black<br />
dots. That's grain. You'll be able to<br />
see more grain, and therefore to<br />
236 The Photographic Eye<br />
focus more accurately, in the darker<br />
areas of the image. Looking through<br />
the focuser, adjust the focusing controls<br />
of your enlarger until the grain<br />
is nice and crisp.<br />
(Note: If your grain focuser is<br />
equipped with a "target" like the sight<br />
of a gun, the grain will appear to<br />
move up and down, rather than in<br />
and out of focus. To use this type of<br />
focuser, keep your eye on the target<br />
and then adjust the enlarger until the<br />
grain lines up with it.)<br />
• Procedures<br />
/. Insert the negative into the<br />
negative holder, emulsion-side<br />
down.
The easiest way to identify the<br />
emulsion side of a negative is to<br />
set it on a flat surface, with its<br />
edges touching the surface. The<br />
film should look like a tunnel.<br />
The underside (or ceiling) of the<br />
tunnel is the emulsion.<br />
The reason this works is that<br />
the emulsion tends to contract (or<br />
shrink) as it dries. This is because<br />
it absorbs (and later evaporates)<br />
more liquid than the plastic<br />
backing.<br />
You can also tell the emulsion<br />
side of film by looking at it in<br />
fairly bright light. The emulsion<br />
side is the dull side (the plastic<br />
backing is shiny). In addition, if<br />
you carefully examine it, you<br />
should be able to see layers in the<br />
emulsion side (the backing is<br />
smooth).<br />
2. Be sure the negative is free of<br />
dust.<br />
This is the hard part, but it is<br />
essential. For best results, use an<br />
anti-static brush before and after<br />
placing the negative in the holder.<br />
Hold the negative up against a<br />
light and check for any remaining<br />
dust spots. Use the brush or<br />
compressed air until the negative<br />
is perfectly dust-free. Bear in<br />
mind that the darkroom safelight<br />
is not bright enough to reveal<br />
dust. Turn the enlarger or room<br />
light on for this purpose.<br />
3. Place the negative holder into the<br />
enlarger and turn the enlarger<br />
light on.<br />
Generally, you will turn a lever to<br />
lift the lighting unit out of the<br />
way, slide the holder into place<br />
and lower the lighting unit back<br />
into place.<br />
Be careful not to dislodge more<br />
dust when you do this. In other<br />
words, be gentle. If you suspect<br />
that dust is hiding in your enlarger,<br />
then clean it.<br />
4. Place the easel under the lens.<br />
5. Adjust the height of the enlarger<br />
and the position of the easel until<br />
the image is cropped the way<br />
you want it to be.<br />
6. Turn off all room lights at this<br />
point, leaving only one or two<br />
safelights on.<br />
7. Open the enlarger lens to its<br />
largest aperture and focus it.<br />
A/ways focus at the largest aperture.<br />
This will ensure that you<br />
have enough light to focus accurately.<br />
Remember to open the<br />
lens and re-focus every time you<br />
raise or lower the enlarger head.<br />
For best results, use a grain<br />
focuser.<br />
8. Close the lens down two stops.<br />
This is a point-oj'-departure setting.<br />
Once you have acquired<br />
some darkroom experience, you'll<br />
learn to use other f-stops to<br />
achieve the effects you want.<br />
9. Cover the lens with the safelight<br />
filter.<br />
10. Place a piece of photo paper on<br />
the easel.<br />
11. Expose the paper for the correct<br />
amount of time.<br />
Follow the instructions for making<br />
a test strip if you don't know<br />
what the "correct" time is.<br />
12. Slide the paper into the developer,<br />
face-up.<br />
13. Immediately turn the paper facedown<br />
and let it sit for 30 seconds.<br />
Processing 237
14. While continuously agitating the<br />
tray, turn the paper over at<br />
30-second intervals until it has<br />
been in the developer for the<br />
specified amount of time.<br />
Two minutes of developing, for<br />
example, would be face-down for<br />
30 seconds, face-up for 30 seconds,<br />
face-down for 30 seconds<br />
and face-up for 30 seconds. This<br />
procedure will ensure that the<br />
print is evenly developed and may<br />
help to reduce curling.<br />
Follow the timing instructions<br />
packaged with the developer or<br />
paper. Do not attempt to correct<br />
a poor exposure by changing the<br />
developing time!<br />
15. Lift the paper out of the<br />
developer with tongs and gently<br />
shake excess liquid from it.<br />
16. Place the paper in the stop bath<br />
for IS to 30 seconds with occasional<br />
agitation.<br />
17. Lift the paper from the stop bath<br />
with tongs and gently shake excess<br />
liquid from it.<br />
18. Place the paper in the fixer for<br />
the specified time, with occasional<br />
agitation.<br />
Once again, read the instructions<br />
packaged with your fixer or film<br />
to determine the fixing time.<br />
19. Place the paper in the washing<br />
tank and wash for the specified<br />
time.<br />
238 The Photographic Eye<br />
20. Dry the paper.<br />
RC (or resin coated) papers have<br />
a layer of plastic between the<br />
emulsion and the paper, and a<br />
second coat on the back of the<br />
paper, to prevent the paper from<br />
absorbing water during processing.<br />
As a result, they dry very<br />
quickly. Special drying racks are<br />
available to ensure that they dry<br />
flat, but you can achieve the same<br />
result by laying your prints faceup<br />
on towels until they dry and<br />
then pressing them under some<br />
heavy books.<br />
More traditional fiber-base<br />
papers absorb much more water.<br />
They should be dried in a glazer<br />
(a specially designed heater that<br />
effectively "irons"photographs).<br />
Fiber-base papers may also be<br />
dried with blotters (rolls or sheets)<br />
or electric dryers.<br />
Dodging and Burning<br />
Occasionally, you will discover that<br />
there is no "correct" exposure for the<br />
entire image area of a single photograph.<br />
If you expose for the dark<br />
areas, the light areas will look washed<br />
out. If you expose for the light areas,<br />
the dark areas will look dense and<br />
"lumpy." Fortunately, you can alter<br />
the exposure of selected areas by<br />
dodging and burning.<br />
Dodging (or dodging out) a photograph<br />
involves covering up part of<br />
the image so it will receive less light<br />
during an exposure. Burning (or<br />
burning in) involves using an opaque<br />
card with a hole in it to expose part<br />
of the image to more light.<br />
• Dodging<br />
Dodgers: These are simply small<br />
pieces of opaque material on sticks.<br />
You can make your own quite easily<br />
(with cardboard, wire and tape) or<br />
purchase a set at any camera store.<br />
The edges of a dodger are generally<br />
irregular to help the dodged area<br />
blend with the rest of the print.<br />
Raise or lower the dodger to make<br />
its shadow the right size for the area<br />
you want to dodge (generally a bit<br />
smaller).<br />
It is very important to wiggle the<br />
dodger during the exposure so the<br />
edges of the area being dodged will<br />
fade into their surroundings.<br />
If one part of the image is too dark<br />
when the rest is correctly exposed,<br />
then you'll want to dodge it. There<br />
are two approaches to this. The first<br />
is to dodge out the dark area (or<br />
areas) while making a normal exposure<br />
for the print. The second approach,<br />
which will produce more<br />
accurate results, is to make a series<br />
of short exposures rather than one<br />
long one.<br />
For example, let's say the normal<br />
exposure is 20 seconds and the dark<br />
area should receive only about half<br />
as much light as the rest of the photograph.<br />
Set the timer for 10 seconds<br />
and expose the entire image once for
that amount of time. Then cover the<br />
lens with the safelight filter and turn<br />
on the enlarger so you can get your<br />
dodger in position. With your free<br />
hand, turn the enlarger off and swing<br />
the filter away. Begin wiggling the<br />
dodger and activate the timer. Continue<br />
wiggling throughout the second<br />
10-second exposure.<br />
If, instead, you needed to dodge<br />
two areas for 5 seconds each, then<br />
you might make three separate exposures:<br />
10 seconds for the entire<br />
print, 5 seconds to dodge one area,<br />
and 5 seconds to dodge the other<br />
area. Most of the print would still<br />
receive a total of 20 seconds of<br />
exposure.<br />
• Burning<br />
Burner: The burner is simply a<br />
piece of cardboard or other material<br />
that is thick and dark enough to prevent<br />
light from going through it. A<br />
hole (ideally with irregular or rough<br />
edges) cut in the center allows a narrow<br />
beam of light to reach the print,<br />
so only that area is exposed while the<br />
burner is in use.<br />
A face in deep shadow can often be<br />
"rescued" with careful dodging. Student<br />
photograph by Mike Wiley.<br />
If one area (or several) of a photograph<br />
is too light when the rest is<br />
correctly exposed, then burning is the<br />
answer. As with dodging, you may<br />
either slide the burner into place and<br />
wiggle it over the area while making<br />
a single exposure, or you may make<br />
a series of exposures for greater<br />
control.<br />
Though you may want to keep a<br />
few commercially available burners<br />
on hand, you'll probably discover<br />
that it's often useful to make your<br />
own, with the hole just the right size<br />
and in just the right place for your<br />
specific needs. The black cardboard<br />
of photo paper boxes works perfectly,<br />
and its a good idea to save<br />
them for this purpose.<br />
As with dodging, raise or lower the<br />
burner to get the size right, and be<br />
sure to wiggle it so the edges blend.<br />
Processing 239
FOCAL POINT: Common Disasters<br />
Your camera, as we've noted, is a<br />
machine. Like any machine, it won't<br />
always produce the results you<br />
expect.<br />
Blank Film<br />
One of the most upsetting unexpected<br />
results is an entire roll of film that<br />
comes out blank. Unless something<br />
went very wrong during processing<br />
(such as using the wrong chemicals),<br />
this means that the film did not advance<br />
correctly. (The old problem of<br />
leaving the lens cap on while shooting<br />
has been eliminated with throughthe-lens<br />
cameras.) Film does not advance<br />
for one of two reasons: either<br />
it was incorrectly threaded into the<br />
take-up reel, or the sprocket holes<br />
were torn.<br />
Both problems are fairly easy to<br />
discover and avoid. Each time you<br />
advance the film, the rewind knob<br />
should turn slightly. If it doesn't,<br />
crank it counter-clockwise until the<br />
film in the canister is tightly wound.<br />
Release the shutter and advance the<br />
film again. If the rewind knob still<br />
doesn't turn, you have a problem.<br />
Take the camera into a darkroom or<br />
use a light-tight changing bag to<br />
remove the film in total darkness. (If<br />
you don't, you'll probably lose any<br />
photographs you've taken so far.)<br />
If the film is partially advanced<br />
(and therefore has been exposed), cut<br />
the exposed part away from the canister.<br />
Store it in a light-tight container,<br />
such as the black plastic containers<br />
that come with Kodak film.<br />
Develop it as usual when you can.<br />
If no more than the first "lip" of<br />
the film (called the "leader) is extended,<br />
check the sprocket holes. If<br />
they are not damaged, reload the film<br />
240 The Photographic Eye<br />
carefully. If the sprocket holes are<br />
torn, cut off the damaged part of the<br />
film. Trim the new end of the film to<br />
create a new leader, and reload.<br />
So much for finding and correcting<br />
the problem. How do you avoid it?<br />
The key is being careful to load film<br />
properly. Always advance the film at<br />
least one frame with the camera back<br />
open, so you can check to be sure it<br />
is "catching" correctly on the take-up<br />
reel. Then close the back and advance<br />
it two more frames, checking<br />
to be sure the rewind knob is turning<br />
as well.<br />
To avoid tearing the sprocket<br />
holes, be certain as you load the film<br />
that they fit the sprocket reel properly.<br />
In addition, avoid advancing the<br />
film with abrupt, jerky movements.<br />
Instead, move the film advance lever<br />
in one gentle, steady sweep.<br />
Double Exposures<br />
If some frames of a roll of film are<br />
double exposed (and you don't know<br />
why), torn sprocket holes may again<br />
be the problem —especially if the two<br />
exposures don't line up exactly. Often<br />
the problem will correct itself after<br />
ruining a few frames, but only if you<br />
stop jerking the film forward and extending<br />
the tear. If the problem happens<br />
again and again even though<br />
you are being careful, take the<br />
camera to a camera shop for possible<br />
repairs.<br />
Blurs<br />
If your photos display blurs or poor<br />
focus, always in the same area of the<br />
frame, your lens may be flawed. The<br />
most common "flaw" that produces<br />
this result is a dirty lens. You may not<br />
notice fingerprints, water (especially<br />
if it has chlorine or salt in it), dust,<br />
and other environmental hazards until<br />
you try to make enlargements. If<br />
you make a habit of inspecting your<br />
lens before you shoot, you'll avoid a<br />
lot of frustration. Always carry lens<br />
tissue or a soft, lint-free cloth<br />
(or wear a thoroughly "broken-in"<br />
cotton shirt) to wipe the lens as<br />
necessary.<br />
It is a good idea to use a UV or<br />
skylight filter at all times. The main<br />
reason for this is that it is far less<br />
painful to replace a scratched filter<br />
than a scratched lens. In addition,<br />
a filter can be removed for more<br />
thorough inspection than is possible<br />
with a lens. You'll be surprised by the<br />
amount of dirt that can hide on a<br />
filter and be invisible until you hold<br />
it up to the light.<br />
If your photographs are consistently<br />
blurred, especially around<br />
the edges, the lens itself may be causing<br />
the problem. Some inexpensive<br />
zoom lenses, for example, produce<br />
distortion at large apertures or at certain<br />
focal lengths. The only solutions<br />
are to avoid using the lens under conditions<br />
that cause the undesirable<br />
results ... or to replace it with a better<br />
(and probably more expensive)<br />
model. Before you do that, however,<br />
take the lens back to where you<br />
bought it. It's possible that the lens<br />
was improperly assembled by the<br />
manufacturer and can be repaired.<br />
(For this reason, you should always<br />
test any new camera equipment exhaustively<br />
while it is still under<br />
warranty.)<br />
Scratches<br />
If your film shows long horizontal<br />
scratches, you either have dust in the
camera or are being careless during<br />
processing. It's a good idea to blow<br />
and brush the camera's interior from<br />
time to time. Be especially careful not<br />
to load or unload film in a strong<br />
dusty wind.<br />
IN PROCESSING<br />
If you're at all prone to anxiety, then<br />
processing film is likely to be a<br />
nightmare for you. All those precious<br />
images sit soaking inside a little metal<br />
or plastic tank. You can't see what's<br />
going on and any mistake may result<br />
in utter disaster. Rest assured that,<br />
sooner or later, you will ruin a roll.<br />
Try to accept it as a learning experience,<br />
as your photographic dues.<br />
It happens to all of us.<br />
Streaks<br />
The most common cause of streaking<br />
in a negative is incorrect agitation.<br />
If you agitate the film too little<br />
during processing, you're likely to get<br />
vertical streaks (running across each<br />
frame) that line up with the sprocket<br />
holes. If you agitate too much, you're<br />
likely to get horizontal streaks (running<br />
along the edge of the film<br />
lengthwise). Both are caused by inconsistencies<br />
in the rate at which<br />
bromide in the developer is refreshed.<br />
The solution is simple: once you<br />
establish an agitation pattern that<br />
works for you, stick to it.<br />
If you are quite certain that you are<br />
agitating the film correctly, you have<br />
been using old or contaminated<br />
chemicals. Replace them.<br />
Polka Dots<br />
If your film comes out of processing<br />
looking like it has a bad case of<br />
chicken pox, you probably are having<br />
trouble with air bubbles. When an<br />
air bubble attaches itself to the film,<br />
it blocks out the developer. As a<br />
result, the film under the bubble<br />
doesn't develop. To avoid this,<br />
remember to bang the developing<br />
tank good and hard after each<br />
agitation.<br />
Fogging<br />
If large patches of your negative, including<br />
the narrow band between<br />
frames, are cloudy (i.e. dark gray<br />
even in the lightest areas), you almost<br />
certainly have a light leak. Check out<br />
your darkroom by closing the door<br />
and turning off all the lights. After<br />
three minutes, stretch your hand out.<br />
You should not be able to see it. If<br />
you can see it, try to find out where<br />
the light is coming from. Look along<br />
the edges of any doors and windows.<br />
Check to see if any darkroom equipment<br />
is glowing too brightly (indicator<br />
lights on your enlarger timer?<br />
a glowing radio dial?). Also examine<br />
your processing tank to be sure it<br />
hasn't developed any light leaks.<br />
Have any portions of the light trap<br />
inside the tank broken off? Is the<br />
cover not sealing properly?<br />
White Blotches<br />
If your negative comes out looking<br />
like irrefutable proof of UFOs, you<br />
probably failed to load the film properly<br />
onto the developing reel. If the<br />
film is stuck together during loading,<br />
it can produce an airtight seal which,<br />
like air bubbles, prevents development.<br />
Little crescent moons are<br />
caused by bending the film. The only<br />
solution is to be as careful as possible<br />
when loading, and to practice<br />
with blank rolls until you can load<br />
correctly every time.<br />
Scratches<br />
You have many opportunities to<br />
scratch your film. The first is when<br />
you remove it from the canister. Be<br />
sure the film is wound tightly enough<br />
to slide out all together. The outside<br />
of the roll (the leader) is not being<br />
developed, so be sure it is protecting<br />
the rest of the roll. Your second<br />
scratch opportunity is when you<br />
transfer the roll onto the developing<br />
spool. Good ways to scratch the film<br />
at this stage include bumping or<br />
sliding it against a table or other surface,<br />
letting one part of the film edge<br />
scrape along another portion of the<br />
emulsion, or running your fingers<br />
along the emulsion (inner) surface.<br />
Once the film is in the developing<br />
tank, it is relatively impossible to<br />
scratch. Your next big chance comes<br />
when you hang it up to dry. Squeegees<br />
are the best tool for scratching.<br />
Just squeeze good and hard and<br />
you're certain to destroy the entire<br />
roll. Finally, any time the film is out<br />
of its negative file it stands an excellent<br />
chance of being scratched.<br />
Particularly effective techniques include<br />
dropping it on the floor (stepping<br />
on it just about guarantees complete<br />
destruction), sliding it through<br />
a closed negative holder, leaving it<br />
unprotected while you go out for a<br />
snack, and trying to rub dust off with<br />
a cloth that could pass for sandpaper.<br />
Processing 241
Ernst Haas, City Lights. Courtesy Magnum Photos, Inc., New York.<br />
242 The Photographic Eye
appendix 2 Color<br />
t's a good idea to spend at<br />
least a year concentrating<br />
on black-and-white photography,<br />
before adding any other<br />
complications. As you become fluent<br />
in black and white, however, you will<br />
probably want to explore color<br />
photography as well. It is an equal,<br />
though not necessarily greater, source<br />
of discovery and expression. It is no<br />
more difficult and no easier; no more<br />
or less important, "artistic," or expressive<br />
than black-and-white. It's<br />
simply different.<br />
Certainly every photographer<br />
should learn to work in both blackand-white<br />
and color. You may<br />
choose to use one more than the<br />
other, but you should get to know<br />
both.<br />
This chapter is intended solely as<br />
an introduction. Full coverage of all<br />
the various aspects of color photography<br />
would require a book in itself.<br />
Color imposes a new layer of possibilities<br />
and decisions. The skills and<br />
insights you've already developed in<br />
black-and-white, however, will give<br />
you a head start.<br />
FROM B&W TO COLOR<br />
What changes when you move into<br />
color? What stays the same? Let's<br />
deal with the second question—and<br />
shorter answer —first.<br />
David Hockney, Studio, L.A., Sept. 1982. Photographic collage, ©<br />
David Hockney. If Hackney's intention here is to simulate human sight,<br />
in what ways would you say he has succeeded?<br />
243
One key to effective color<br />
photography is including an appropriate<br />
number of colors in any<br />
single photograph. Though lots of<br />
splashy colors may be perfect for<br />
some subjects, others—such as this<br />
winter detail— achieve greater impact<br />
with a limitedpallette. Notice how the<br />
green leaves stand out clearly from the<br />
more neutral brown and white background.<br />
Student photograph by Mark<br />
Harrington.<br />
244 The Photographic Eye<br />
The basic photographic process<br />
stays the same. Light enters the<br />
camera and exposes silver crystals on<br />
film. The main difference is that the<br />
film has four layers, each of which<br />
captures one color of light. When<br />
these layers are dyed the right colors,<br />
they produce overlapping dots which<br />
produce a wide range of tints and<br />
shades. The result is a color image.<br />
The equipment also stays the same,<br />
for the most part. You use the same<br />
camera and same lenses. If you do<br />
your own processing, temperature<br />
control becomes more important due<br />
to more sensitive chemicals. The<br />
enlarger must be equipped with filters<br />
for color printing. Outside of that,<br />
and a number of additional steps, the<br />
procedures remain similar.<br />
What changes? The most obvious<br />
change is that colors will be recorded<br />
as colors, instead of black, white or<br />
gray. As a result, you'll need to be<br />
aware of whether those colors complement<br />
each other or clash. You'll<br />
have to pay attention to the ability of<br />
some colors to "steal" attention away<br />
from what you've chosen as the subject.<br />
You'll also have to learn to control<br />
the range of colors in a photograph:<br />
how many colors are in it, and<br />
how bright or dark they are.<br />
Finally, you'll have to choose between<br />
negative (print) or reversal<br />
(slide) film. Each has its benefits and<br />
drawbacks and is suited to a specific<br />
kind of work. You'll also have to<br />
spend more money.<br />
The following sections will provide<br />
a brief discussion of each of these<br />
issues.
Complicated Imagery<br />
The first thing you're likely to notice<br />
when you first start working in color<br />
is that there's suddenly a lot more to<br />
think about. Color tends to make individual<br />
objects more noticeable.<br />
What was pattern in a black and<br />
white may be a chaotic mess of separate<br />
things in color, each one trying<br />
to be the dominant subject. If the<br />
background colors are too strong,<br />
they'll overpower your subject. If<br />
they're too weak, they'll decrease its<br />
impact.<br />
The best way to begin with color,<br />
therefore, is probably to stick to a<br />
strict "diet." At first, try to have one<br />
color theme throughout each<br />
photograph.<br />
Look for images in which a single<br />
color, or a group of similar colors,<br />
appears in various places. A blue car<br />
in front of a blue house, for example,<br />
or someone in a purple coat with<br />
a pink umbrella, standing next to a<br />
stop sign. This is equivalent to a<br />
painter's selection of a palette, a set<br />
of related colors to use throughout a<br />
picture. You might also look for<br />
lighting situations that give a color<br />
cast to an entire scene, such as the<br />
orange light of late afternoon, or the<br />
pale blues of a morning mist.<br />
Once you get a feel for color<br />
themes like these, try introducing one<br />
"discordant note," a color that contrasts<br />
or even conflicts with the<br />
prevailing color theme. For example,<br />
you might photograph someone in a<br />
bright red shirt sitting in the blue car<br />
in front of the blue house.<br />
A second way to keep color under<br />
control is to use the relative sizes of<br />
objects to structure a photo. For example,<br />
if that blue car is the subject<br />
of your photo, but the house behind<br />
it is brown and the person sitting in<br />
it is wearing a light green shirt, you<br />
All of the basic compositional elements of black and white photography also<br />
apply to color. Notice how the repeating shapes of the bowls and peppers produce<br />
interesting visual harmonies in this photograph. The bright colors add<br />
impact, but do not alter the essential composition. Would this photograph work<br />
equally well in black and white? Why or why not? Student photograph by Josh<br />
Noble.<br />
Color 245
Joel Meyerowitz, Red Interior,<br />
Provincetown, 1977. Crisp focus<br />
and intensity of color give this<br />
scene a surreal air. Does there<br />
seem to be an unfinished story<br />
here?<br />
246 The Photographic Eye<br />
can't get a color theme. You can,<br />
however, move in close on that car,<br />
possibly shooting it from the front<br />
rather than the side, so it fills the<br />
frame as much as possible. The car<br />
should almost certainly cover the<br />
four key points of the composition<br />
grid. By doing this, you will ensure<br />
that the blue car is clearly dominant,<br />
and that the less important features<br />
(the person and the house) are less<br />
conspicuous.<br />
What can you do to emphasize the<br />
person in the car? How would you<br />
compose the photo to emphasize the<br />
house?<br />
Similarly, if you want to single out<br />
one subject from among a clutter of<br />
shapes and patterns, move in close to<br />
it. Make it as large as your composition<br />
will allow, and position it<br />
over one or more of the key points<br />
of the grid.<br />
Another good way to single out a<br />
subject is to "spotlight" it. If the light<br />
is brighter on your subject than on its<br />
surroundings, then the subject will<br />
naturally "pop." It will stand out<br />
clearly. If the natural light doesn't<br />
provide an opportunity for this effect,<br />
you can "fake" it by using a<br />
reflector (such as a mirror or a piece
of white mat board) or flash fill (see<br />
Appendix) to throw some additional<br />
light onto your subject.<br />
How do you achieve this? One way<br />
is to be patient and hope that either<br />
your subject moves or the light does.<br />
Another way is to make sure that the<br />
sun is behind you, so it is likely to be<br />
shining on your subject. If you do<br />
that and get up close, your subject<br />
will generally appear brighter than<br />
the background.<br />
Sometimes you'll want to do just<br />
the opposite of "spotlighting." A<br />
shadowed or silhouetted subject can<br />
occasionally stand out beautifully<br />
from a brightly colored background.<br />
The main thing you need to keep<br />
in mind is that a color photograph is<br />
almost always "about" color before<br />
it is about anything else. The color<br />
makes its impact first, and other<br />
elements emerge more gradually. If<br />
you don't control the color by deciding<br />
how much of it gets into the<br />
photo, then it will probably compete<br />
with your subject, rather than enhancing<br />
it.<br />
Pow! or Subtle?<br />
As you begin playing with color<br />
themes and different palettes, you'll<br />
also want to begin making decisions<br />
about value. Value, as you may<br />
recall, is the darkness or lightness of<br />
color tones. In black-and-white<br />
photography, value concerns the<br />
range of grays. In color photography,<br />
it essentially concerns the density of<br />
color. If you underexpose a color<br />
photo, you will intensify and darken<br />
the values in it. You will increase their<br />
density. If you overexpose it, you will<br />
lighten and possibly weaken them,<br />
reducing their density.<br />
Most color photographers settle on<br />
a value level that expresses the way<br />
they see things, and then tend to stick<br />
Eliot Porter. Frostbitten Apples, Tesuque, New Mexico, November 21,<br />
1966. Dye-transfer photograph. The Metropolitan Museum of Art, New<br />
York (Gift of Eliot Porter in honor of David H. McAlpin, 1979).<br />
Color 241
One way to produce a color photograph<br />
is to add the color yourself,<br />
using paints, markers or other media<br />
on a black-and-white print. This creates<br />
a somewhat surreal image,<br />
which can be very effective. (Student<br />
photograph by Eric Babbitt.)<br />
248 The Photographic Eye<br />
close to this level in most of their<br />
work. Before you decide on a consistent<br />
value level, however, be sure<br />
to experiment. The best way to do<br />
that is to bracket your shots. Make<br />
it a habit to shoot one normal exposure<br />
first, and then to try several<br />
darker and lighter variations.<br />
After a while, you'll probably find<br />
that you generally want to set your<br />
camera a half or full stop above or<br />
below what your light meter indicates.<br />
If so, you might want to adjust<br />
the ISO accordingly. For example,<br />
let's say you want to underexpose<br />
Kodachrome 64 by about half a stop.<br />
To do that, set the ISO at 80. If you<br />
want to go even darker most of the<br />
time, set it at 100. Bear in mind,<br />
however, that you will be darkening<br />
everything. This means that you'll<br />
have to be especially careful to avoid<br />
shadows on people's faces and other<br />
potential lighting problems.<br />
If you want to get a lighter effect,<br />
you can try lowering the ISO to 50.<br />
Most color films are rated fairly low<br />
already, so it's unlikely that you'll<br />
want to set them lower, but don't be<br />
afraid to try it. Sometimes even a<br />
very pale, washed-out look is just<br />
right.<br />
The main point here is that you<br />
should be aware of the effect that exposure<br />
has on color. Some photographers<br />
prefer a dark, or color<br />
saturated, style. Others prefer a very<br />
light, delicate one. Most probably<br />
prefer to stay right in the middle,<br />
with "normal" exposures most of the<br />
time. Take some time to sort out your<br />
own preferences.
TECHNICAL<br />
CONSIDERATIONS<br />
In addition to all the various aesthetic<br />
decisions that color photography requires,<br />
there are some technical ones<br />
as well. As is usually the case, these<br />
technical decisions have aesthetic<br />
implications.<br />
Prints or Slides?<br />
The first decision you'll need to make<br />
is whether to use film that produces<br />
color prints or transparencies (slides).<br />
Both kinds can produce prints of<br />
roughly equal quality, but you cannot<br />
easily produce good transparencies<br />
from negative film.<br />
Transparency film (technically<br />
called color reversal, since the<br />
negative is chemically "reversed" to<br />
produce a transparent positive image)<br />
offers one distinct advantage: After<br />
it is developed, you can look at what<br />
you've got before making prints.<br />
With color negatives, you pretty well<br />
have to have prints made of an entire<br />
roll before you can choose the<br />
ones you like. Transparencies are also<br />
virtually required if you hope to have<br />
your color photographs published.<br />
On the other hand, if you know<br />
that you will always want just prints,<br />
then print film is what you should<br />
use. This is especially true if you plan<br />
to do your own developing and printing.<br />
To get a print from a transparency,<br />
you'll probably need to<br />
make an interneg (by copying it onto<br />
another film) to use in the enlarger.<br />
If you have no use for the original<br />
transparency, then this merely adds<br />
an unnecessary step.<br />
Finally, transparencies impose one<br />
Don't forget to look for photographs<br />
in unlikely places. This reflection of<br />
a neon sign is almost certainly more<br />
interesting than a straight shot of the<br />
sign would have been. Also notice<br />
how the deep "saturated" colors add<br />
impact. With color slide film, this effect<br />
is achieved by slightly underexposing.<br />
With print film, color saturation<br />
can be controlled during exposure<br />
or printing. Student photograph by<br />
Jeff Frye.<br />
Color 249
250 The Photographic Eye<br />
High-speed films (some rated as high as ISO 3200), can be used in very low<br />
light. Though they are grainer than slower films, most produce quite good<br />
results. Many photographers even find the grain of high-speed films to be an<br />
asset, since it conveys a soft, moody quality. Photograph by Michael F. O'Brien.
more important consideration: cropping.<br />
Unless you plan to make your<br />
own prints from your transparencies,<br />
or are willing to pay for custom printing<br />
at a lab, you must do all your<br />
cropping when you take a photograph.<br />
Is your eye good enough so<br />
you never need to make corrections<br />
after, a shot is taken? Shooting<br />
transparencies is a good way to find<br />
out. It's also a good way to work<br />
toward that goal.<br />
Films<br />
Deciding between negative and reversal<br />
film narrows your choices<br />
down . . . but not by much. Both<br />
kinds of film offer a wide range of<br />
choices in speed and other factors.<br />
The following examples of transparency<br />
films will give you an idea of<br />
your choices.<br />
Kodachrome has been the reigning<br />
professional standard for several<br />
decades. It has a good grain structure,<br />
which means that the dots that<br />
produce the colored image are small<br />
and densely packed. It also has good<br />
contrast, so objects look razor sharp.<br />
These two factors are especially important<br />
if you hope to have your<br />
photographs published.<br />
Kodachrome reacts particularly<br />
strongly to red, so anything red is<br />
likely to seem dominant. It's important<br />
to be aware of this, especially if<br />
your primary subject is not red. All<br />
color films have a similar bias or cast.<br />
Kodachrome is not especially good at<br />
rendering bright greens, so if you're<br />
photographing springtime in the<br />
park, for example, you might do better<br />
with some other film.<br />
The grain structure of Ektachrome<br />
is not as good as Kodachrome's, giving<br />
it a "soft" quality. It also has<br />
relatively low contrast and a green<br />
bias. All these factors make it a good<br />
choice for nature photography. It is<br />
less good for some skin tones.<br />
Fujichrome is a very bright film<br />
with a yellow bias. The brightness is<br />
the result of an unusually thin emulsion.<br />
Its grain structure is comparable<br />
to Kodachrome's, though it has<br />
somewhat less contrast. Fujichrome<br />
tends to make things look rather<br />
cheerful because of its brightness and<br />
yellow bias.<br />
You also need to choose a film<br />
speed that is appropriate to specific<br />
subjects and lighting conditions. In<br />
most cases, you want the slowest film<br />
that will work in the light you have<br />
at the shutter speed you need. For example,<br />
on a bright, sunny day on<br />
which you plan to photograph people<br />
walking in a park, you might<br />
choose a fairly slow film, such as ISO<br />
50 or 64. For darker lighting or faster<br />
subjects, you'll probably want a<br />
faster film, such as ISO 200 or<br />
higher.<br />
You can get higher ISO ratings by<br />
pushing the film, achieving faster<br />
speed by altering the development<br />
time. The film that works best for<br />
this is Ektachrome 400. Many labs<br />
will push it to ISO 1600 or 3200. Be<br />
sure to point out that you want it<br />
pushed, and how high, when you<br />
drop off the film.<br />
Money<br />
One last technical issue is money.<br />
Color film costs more than black<br />
and white. It also costs more to develop<br />
and print. While shooting<br />
many photographs of a single subject<br />
is just as good an idea in color as<br />
in black and white, it is expensive.<br />
So, experiment to your heart's content<br />
at the start. Later, once your experience<br />
grows (and your wallet<br />
shrinks), you'll probably want to be<br />
more conservative. Try to make every<br />
shot count. Don't stop bracketing,<br />
but be careful not to waste color film<br />
on subjects that are only moderately<br />
interesting. Hold out for the really<br />
good stuff.<br />
Color 251
Student photograph by John Strange, Jr.<br />
252 The Photographic Eye
appendix 3 Manipulation &<br />
Presentation<br />
PRESENTATION<br />
Mounting Prints<br />
Any photograph that is to be<br />
displayed, even just for a class crit,<br />
should be mounted. This will prevent<br />
the photograph from curling and help<br />
to protect it from accidental damage.<br />
There are several ways to mount a<br />
phonograph. The most common is to<br />
use Jr; mount (issue in a heated<br />
mounting press. This procedure is<br />
explained below. Another, more<br />
sophisticated technique is to use a<br />
vacuum press, in which a special<br />
spray is used instead of the dry mount<br />
tissue. The simplest technique is to<br />
use spray mount, a rubber cement<br />
spray that produces an even gluing<br />
surface. This is an acceptable (and inexpensive)<br />
alternative if you don't<br />
have access to a press.<br />
When you are ready to hang a<br />
show (and probably not before then),<br />
you will want to put your prints in<br />
some kind of frame. This is called<br />
matting. We'll get to that after we<br />
discuss mounting.<br />
• Dry-Mounting: Tools<br />
Mounting Board: You can<br />
mount a photograph on virtually any<br />
stiff fiber-board. One of the best<br />
materials is Bainbridge Board IM , a<br />
thin mat board with a smooth surface.<br />
Any other non-corrugated, stiff<br />
cardboard, however, will work<br />
almost as well.<br />
Dry Mount Tissue: This is a kind<br />
of tissue paper that contains a special<br />
glue. The glue is activated by heat<br />
and tends to be very permanent. You<br />
will place a sheet of dry mount tissue<br />
between a print and a mounting<br />
board, like a sandwich, then heat it<br />
and press it to stick the whole thing<br />
together.<br />
Paper Cutter: The first step in<br />
mounting a print is to trim off the<br />
white borders around the edges. You<br />
will probably also need to trim your<br />
mounting board, so a fairly heavyduty<br />
paper cutter is recommended.<br />
Always be mindful that a paper<br />
cutter is a very dangerous tool. Use<br />
it carelessly and you could lose a<br />
finger. Never leave the blade up after<br />
use. Always look before you cut, to<br />
be sure no part of you, your clothing<br />
or anything else you don't want to cut<br />
is in the path of the blade.<br />
Tacking Iron: Before going into<br />
the press, a photograph must be anchored<br />
in place with a tacking iron.<br />
This is exactly like the sort of iron<br />
used to press your clothes, except it's<br />
smaller and has a long handle.<br />
Mounting Press: A mounting<br />
press provides two things: heat and<br />
weight. The heat activates the dry<br />
mount tissue's glue. The weight<br />
presses everything flat. The press is<br />
equipped with a thermostat and a<br />
light to indicate when it is at the correct<br />
temperature for mounting.<br />
• Dry Mounting: Procedures<br />
/. Place the photograph face-down<br />
on a clean surface.<br />
2. Place a sheet of dry mount tissue<br />
on top of the photograph.<br />
Be sure the tissue is large enough<br />
to cover the entire image area.<br />
3. With the tacking iron, attach the<br />
tissue to the photograph, at the<br />
center.<br />
Lightly "iron" the tissue so it<br />
sticks to the center of the photograph.<br />
Confine the tacking iron<br />
to the smallest area possible, just<br />
enough to hold the tissue in place.<br />
4. Trim all borders off the photograph<br />
(and, of course, off the<br />
tissue as well).<br />
253
5. Place the photograph face-up on<br />
a piece of mounting board.<br />
6. Lift one corner of the photograph<br />
(keeping the tissue flat<br />
against the mounting board) and<br />
tack the tissue to the board.<br />
7. Cover the print with a clean<br />
cover sheet (ordinary tracing<br />
paper will do fine) and slide it,<br />
with the attached mounting<br />
board, into the press.<br />
8. Close the press and let it "cook"<br />
for 5-10 seconds.<br />
9. Check to be sure the print is<br />
firmly mounted.<br />
The best way to do this is to<br />
gently curve the mounting board.<br />
A well mounted print will curve<br />
with it. A poorly mounted one<br />
will begin to peel away. If this<br />
happens, press it again.<br />
10. Trim the edges of the mounting<br />
board flush with edges of the<br />
photograph.<br />
The easiest way to do this is to<br />
trim a fraction of an inch (say<br />
1/8") off all 4 sides of the print.<br />
Use a mat knife if you have one<br />
and know how to use it safely, or<br />
just chop the sides off with the<br />
paper cutter.<br />
254 The Photographic Eye<br />
• Spray Mounting: Tools<br />
Spray Mount<br />
Mounting Board<br />
Paper Cutter and/or Mat Knife<br />
Newspaper<br />
• Spray Mounting: Procedures<br />
/. Select a work area that has<br />
plenty of ventilation.<br />
2. Spread an ample supply of newspapers<br />
on the floor (or other<br />
working surface) to protect it<br />
from the spray mount glue.<br />
3. Trim all borders off the<br />
photograph.<br />
4. Place piece of scrap paper<br />
slightly larger than the photograph<br />
in the center of the<br />
newspaper.<br />
5. Place the photograph face-down<br />
on top of the scrap paper.<br />
6. Hold the spray mount can about<br />
12" away from the print and<br />
spray an even coat of glue.<br />
7. Let the glue "set" for at least 1<br />
minute.<br />
8. Dispose of the scrap paper.<br />
The purpose of the scrap paper<br />
is to protect one print while you<br />
spray it. Don't re-use it. Don't<br />
leave it lying around. You'll soon<br />
discover that spray mount tends<br />
to get all over everything if you<br />
aren't careful. If you do get spray<br />
mount on your print, hands or<br />
clothing, wipe it off with cotton<br />
or soft cloth dipped in rubber<br />
cement solvent or thinner.<br />
9. Carefully set the photograph in<br />
place on the mounting board.<br />
10. Cover the photograph with tracing<br />
paper (or any clean paper or<br />
cloth).<br />
11. Gently but firmly rub (or burnish)<br />
the photograph to ensure<br />
that it is firmly stuck to the<br />
mounting board.<br />
12. Trim the mounting board and<br />
photograph with a mat knife or<br />
paper cutter.<br />
Matting<br />
• Procedures<br />
/. Select or prepare a mat with an<br />
opening slightly smaller than the<br />
print. There should be at least 2<br />
inches of border on all sides.<br />
Again, cutting mats is risky<br />
work. Do it carefully and, if<br />
necessary, with assistance.<br />
2. Mount the print in the exact<br />
center of a mounting board that<br />
has been cut to the same size as<br />
(or slightly smaller than) the mat.<br />
Do not trim the mounting board.<br />
Follow the steps listed above to<br />
mount the print. If you're using<br />
spray mount, center the print on<br />
the mounting board before spraying<br />
it, and mark the correct position<br />
for each corner. This will<br />
enable you to position it correctly<br />
without smearing spray mount all<br />
over the mounting board.<br />
3. Place the mounted print face-up<br />
on a clean surface.<br />
4. Set the mat face-down along the<br />
top of the mounting board. The<br />
edges should be touching.
5. Use an 8" strip of masking tape<br />
to attach the mat to the mounting<br />
board.<br />
This step is not strictly necessary.<br />
If you are placing your prints in<br />
frames, there's really no need to<br />
tape the mat to the mounting<br />
board. It's up to you.<br />
6. Fold the mat over the top of the<br />
mounting board.<br />
Don't worry if the tape shows a<br />
bit, it will be covered by the<br />
frame.<br />
7. Sign your name on the mat just<br />
under the lower right-hand corner<br />
of the print.<br />
8. Write the title of the photograph<br />
(if it has one) on the mat to the<br />
left of your signature (slightly to<br />
the right of the print's center).<br />
9. If you are producing a numbered<br />
series (such as limited edition),<br />
write the print number on the<br />
mat under the lower left corner<br />
of the print.<br />
10. Insert the matted print in a frame<br />
(generally under glass) and show<br />
it off.<br />
Hanging a Show<br />
There are basically three approaches<br />
to selecting and arranging prints for<br />
a show. The first is to group the<br />
prints by theme (subject matter, style,<br />
tone, mood, etc.). The second is to<br />
group them by photographer (assuming<br />
there's more than one). The third<br />
approach is not to group the prints<br />
at all; just put them up in the order<br />
they come. Each approach can be<br />
quite effective. Base your decision on<br />
what feels right for all or most of the<br />
participants.<br />
However you choose to arrange<br />
them, it is a good idea to mix verticals<br />
and horizontals as evenly as possible.<br />
You will probably want to separate<br />
black-and-white and color prints, but<br />
not necessarily.<br />
Before you make your selection,<br />
decide where the show will be hung<br />
and calculate how many prints will fit<br />
well in the space available. They<br />
should be at least a foot apart,<br />
preferably further. Generally, it's a<br />
good idea to hang the photographs in<br />
a single row at average eye level. If<br />
you do hang all the prints at one<br />
level, be sure it is exactly the same<br />
level. This may require considerable<br />
adjustment, so leave yourself plenty<br />
of time for it.<br />
Be sure you have a good method<br />
of hanging the prints . . . and one<br />
that won't destroy the walls. One<br />
method that is often successful is to<br />
suspend the prints from wires<br />
attached to the moulding along the<br />
edges of the ceiling.<br />
Each photograph should be accompanied<br />
by a small placard with<br />
the name of the photographer, the<br />
title of the photograph, the date it<br />
was taken (month and year are sufficient)<br />
and where it was taken.<br />
In addition, there should be some<br />
kind of sign at the entrance, to attract<br />
attention and suggest the show's<br />
theme. The theme may be nothing<br />
more than "recent work by the<br />
photography class." It may be as<br />
vague and suggestive as "light and<br />
shadow." Or it may be as specific as<br />
"views of main street." Be certain,<br />
however, that the theme is representative<br />
of the show as a whole.<br />
In general, a show is an excellent<br />
opportunity to work as a team. By<br />
cooperating and working together,<br />
you can produce something that is<br />
"greater than the sum of its parts."<br />
Slide Presentations<br />
Once you've begun to experiment<br />
with color photography, you may<br />
want to produce a slide presentation.<br />
This can be done as a solo project or<br />
as a group venture.<br />
To be effective, a slide show virtually<br />
has to have an identifiable sequence.<br />
That sequence may be chronological<br />
(the "how I spent my summer<br />
vacation" sort of thing); it may<br />
be thematic (shifting moods, lighting,<br />
a linked series of subjects, etc.);<br />
or it may follow some narrative<br />
structure.<br />
You might want to make your own<br />
equivalent of a rock video by illustrating<br />
a favorite song. This is especially<br />
effective if the song is about<br />
some issue you care about (love songs<br />
can be tricky). You might illustrate<br />
a piece of jazz, folk, classical or contemporary<br />
instrumental music. You<br />
might combine music and narration,<br />
perhaps using poetry to suggest the<br />
themes of your photographs. You<br />
might even team up with a musician<br />
Manipulation and Presentation 255
friend and compose something entirely<br />
original.<br />
With any of these approaches,<br />
don't feel tied to a literal expression.<br />
Instead, try to combine sounds and<br />
images that evoke the same mood.<br />
You might select a piece of music that<br />
suggests a certain environment to you<br />
(a forest, mountains, a river, city<br />
streets, etc.) and shoot a series of<br />
photographs of that environment.<br />
However you structure your slide<br />
show, a few basic rules will apply.<br />
First, remember that your primary<br />
purpose must be to entertain ... or<br />
at least to hold your viewers' interest.<br />
Even if you're sure everyone would<br />
love to watch your show till doomsday,<br />
don't let it run for more than 20<br />
minutes. Five minutes is a perfectly<br />
good length. Three minutes is not<br />
necessarily too short.<br />
Avoid abrupt shifts of light value<br />
from one image to the next. Don't go<br />
from a very dark slide to a bright<br />
white one if you can possibly avoid<br />
it. Certainly don't do this often. The<br />
strain on viewers' eyes will seriously<br />
reduce your show's impact.<br />
Look for color harmonies in your<br />
slides and try to arrange them so the<br />
harmonies are evident. For example,<br />
you might have one slide of someone<br />
holding a red flower. The next slide<br />
could have someone in a red shirt<br />
standing in the same general area of<br />
the frame as the flower. If that person<br />
is also wearing black pants, your<br />
next slide might show a blacktop road<br />
in the same general area as the pants.<br />
Establishing these kinds of patterns<br />
can help provide a sense of flow.<br />
Finally, be a critical editor. There<br />
are few things as dull as a slide show<br />
full of photographs that "got<br />
away" —overexposed, underexposed,<br />
poorly focused, poorly composed<br />
shots. If a slide isn't technically good,<br />
256 The Photographic Eye<br />
it is not worth showing. Test your<br />
show on some trusted friends before<br />
you inflict it on an unsuspecting<br />
public. Do whatever you must to<br />
make it interesting, even if that<br />
means cutting out all your prized<br />
slides of your parakeet.<br />
MANIPULATION<br />
Sometimes you can increase a photograph's<br />
impact and effectiveness by<br />
producing a non-standard print of it.<br />
There are many ways of altering a<br />
print's appearance, some of which are<br />
explained in this section. One word<br />
of warning: It is very easy to get carried<br />
away with these special effects<br />
processes. If you're not careful, you<br />
may fool yourself into believing that<br />
you're producing great art when<br />
you're only playing visual games. Try<br />
to discipline yourself to not indulge<br />
in a special effect without a good<br />
reason.<br />
Kaleidoscope Composite Print<br />
By combining 4 2x3" prints of a<br />
single photograph into one composite<br />
print you can produce startling and<br />
intriguing images with a kaleidoscope<br />
effect. It's important to be as precise<br />
and neat as possible in assembling the<br />
composite print, so it will appear to<br />
be a single image, rather than 4 pieces<br />
glued together.<br />
You'll generally get better results<br />
with a photograph that has diagonal<br />
lines, rather then just vertical and<br />
horizontal lines. Curves, especially if<br />
they run out of the frame, also work<br />
well. The subject mater is virtually irrelevant.<br />
Any subject can produce an<br />
interesting effect . . . if the composition<br />
makes an interesting pattern.<br />
• Procedures<br />
/. Place the photograph you have<br />
selected in the enlarger and<br />
turn the enlarger light on.<br />
2. Set your easel up for a<br />
2x3 "print and posit ion it so the<br />
photograph is cropped the way<br />
you want it.<br />
3. Place a sheet of tracing paper in<br />
the easel.<br />
4. Draw an outline of objects in the<br />
photograph, carefully marking<br />
the exact location of key<br />
elements. Outline the frame of<br />
the photograph as well by running<br />
your pencil around the<br />
edges of the easel's blades.<br />
5. After you have determined the<br />
proper exposure, expose 22x3"<br />
sheets of photo paper in the<br />
usual way.<br />
6. Reverse the negative.<br />
This is where the outline drawing<br />
comes in handy. Place it back in<br />
the easel (upside down) and line<br />
up the projected image with it.<br />
Bear in mind that you may need<br />
to re-adjust your focus. If so, do<br />
this before you line up the image<br />
with the drawing.<br />
For best results, simply turn<br />
the negative holder upside down,<br />
without removing the negative.<br />
With some enlargers, however,<br />
this is not possible. In this case,<br />
you'll have to remove the<br />
negative, turn it upside down,<br />
and re-position it in the negative<br />
holder. Some adjustment may be<br />
required to get everything lined<br />
up just right.
7. Expose 2 more 2x3" sheets.<br />
8. Develop all 4 prints at one time,<br />
to ensure that they all come out<br />
exactly the same.<br />
It's a good idea to hold on to the<br />
black plastic bags in which photo<br />
paper is usually packaged. Keep<br />
them on hand for temporary storage<br />
of exposed photo paper anytime<br />
you want to do this sort of<br />
batch processing.<br />
As you expose each sheet of<br />
photo paper, simply slide it into<br />
the bag. When your whole batch<br />
is ready for processing, you can<br />
then load it into the developer as<br />
a group. You will, of course,<br />
place each sheet of paper into the<br />
developing tray separately, but<br />
you should be able to immerse<br />
the whole batch within a few<br />
seconds.<br />
9. When your prints are processed<br />
and dried, experiment to see<br />
which arrangement of them is<br />
most effective.<br />
Notice that you have 4 possible<br />
arrangements. Try them all and<br />
decide which produces the most<br />
interesting composition.<br />
If you happen to notice that<br />
your prints don't match in exposure<br />
or cropping, then do them<br />
over until you get them exactly<br />
right.<br />
10. Mount the prints together onto<br />
a mat board.<br />
This is the tricky part. There are<br />
two ways of doing it. The first is<br />
to arrange all 4 prints on one<br />
large sheet of dry mount tissue<br />
and anchor them in place with the<br />
tacking iron. Then tack the composite<br />
print onto a piece of<br />
mounting board and press it.<br />
Student photograph by William Roche.<br />
The second approach, which<br />
will probably be easier and<br />
neater, is to cut the dry mount<br />
tissue to fit each print. Then tack<br />
each print to its own piece of dry<br />
mount, tack them onto the<br />
mounting board, and press them.<br />
Whichever approach you follow,<br />
neatness counts. Be sure that<br />
all lines at the edges of the prints<br />
that are supposed to connect, do<br />
connect.<br />
Strip Composition<br />
Another technique for producing surprising<br />
images is to combine 2 prints<br />
of a single photograph into a single<br />
strip print by cutting the prints into<br />
narrow strips and re-assembling them<br />
as a single image.<br />
Select a photograph that will gain<br />
impact or expressiveness from the<br />
"choppy" look of a strip print. Any<br />
action photograph is likely to be a<br />
good choice. Faces tend to produce<br />
humorous results. Experiment.<br />
It is important to use a photograph<br />
with relatively high contrast. At the<br />
very least, be sure that the subject<br />
stands out clearly from the background,<br />
or the final strip print will<br />
just look like mush.<br />
• Procedure<br />
/. Make 2 prints using exactly the<br />
same exposure and development<br />
time.<br />
2. Attach dry mount tissue to the<br />
back of each photograph with<br />
the tacking iron.<br />
3. Trim 1/16" off of one end of one<br />
of the prints.<br />
Whether your photograph is vertical<br />
or horizontal, you'll generally<br />
get the best results by cutting<br />
it the long way (i.e. cut a vertical<br />
print vertically, and a horizontal<br />
print horizontally). So,<br />
for vertical prints, trim 1/16" off<br />
the bottom or top of one of<br />
them. This is to ensure that the<br />
2 prints are not quite identical,<br />
Manipulation and Presentation 257
which improves the effect.<br />
Leave the rest of the trim edge<br />
intact for now. Do not cut it off.<br />
You'll need some space to number<br />
the strips, and it's handy to<br />
have some blank area to work<br />
with when you assemble the<br />
composite.<br />
4. Cut each print into narrow<br />
strips.<br />
All the strips (for both prints)<br />
should be the same width, about<br />
3/8". Narrower strips work well<br />
too (down to about 1/4"). Wider<br />
strips are generally less effective.<br />
It is very important to keep<br />
track of the sequence of the strips<br />
as you cut them. You can either<br />
number them in the borders as<br />
you go, or measure where your<br />
cuts will be and number the strips<br />
before you cut them.<br />
It is also important to keep the<br />
strips from each print separate.<br />
You may want to use different<br />
colored pens; or use "A "for one<br />
print and "B" for the other (i.e.<br />
Al, A2, A3, etc. and Bl, B2, B3,<br />
etc.); or use numbers for one and<br />
letters for the other; or number<br />
one along the top and the other<br />
along the bottom . . . whatever<br />
works for you.<br />
5. Re-assemble the strips on a mat<br />
board, alternating one strip from<br />
one print with one from the<br />
other.<br />
The easiest way to do this is to use<br />
the tacking iron on the borders of<br />
the strips to stick them to the<br />
mounting board. Get a bunch of<br />
strips (about 1/4 of the total)<br />
tacked in place, press them, tack<br />
another bunch, press them, and<br />
so on until the whole composite<br />
print is assembled and pressed.<br />
258 The Photographic Eye<br />
(Note: Do not place uncovered<br />
dry mounting tissue in the press.)<br />
High Contrast<br />
A high contrast print (often referred<br />
to as a line print) is simply a photograph<br />
that is all black or white, with<br />
no gray tones at all. A photograph of<br />
this kind has a very dramatic, graphic<br />
quality. Special "lith" film and<br />
developer are used that are not at all<br />
responsive to gray.<br />
For best results, select a negative<br />
that will still make sense when all the<br />
grays turn either white or black.<br />
(Light grays will turn white, dark<br />
ones will turn black.) It should be<br />
fairly contrasty to begin with, so the<br />
lith film won't get "confused."<br />
Generally, a simple image (one subject<br />
against a plain background)<br />
works better than a complicated one.<br />
Elaborate patterns can, however,<br />
make very effective high contrast<br />
prints.<br />
(Note: You can save a few steps if<br />
you have a suitable color slide to<br />
work from. In this case, your first lith<br />
film will be a negative. If the contrast<br />
looks right, you can then go directly<br />
to your final print.)<br />
• Tools<br />
Lith Film: Normally used to<br />
prepare photographs for printing, lith<br />
film has a very narrow contrast range<br />
(essentially black-and-white, with no<br />
gray tones) and fine grain structure.<br />
Lith Developer: Though a high<br />
contrast print can be produced without<br />
using any special chemicals, lith<br />
developer is specially formulated to<br />
accentuate the high-contrast tendencies<br />
of lith film. It will convert a normal<br />
negative to a high contrast positive<br />
in one step or "generation." With<br />
ordinary film developer, you will<br />
have to make several "generations"<br />
(positive and negative copies) of a<br />
photograph to achieve the same<br />
effect.<br />
Most lith developers come in two<br />
parts (A and B). Once they are mixed<br />
together, the resulting solution tends<br />
to deteriorate quickly. So, be sure<br />
that you have set aside enough time<br />
(and negatives) to make good use of<br />
the entire batch before you mix it up.<br />
Opaquing Compound: Once you<br />
make copies of the original negative<br />
on lith film, you can paint out<br />
undesirable effects. The "paint" you'll<br />
use is opaquing compound (generally
just called opaque), a sticky red goo<br />
that effectively blocks all light and<br />
dries quite rapidly.<br />
Brushes: You'll of course need<br />
some brushes to paint on the opaque.<br />
Any ordinary watercolor brushes will<br />
work, but a relatively fine tip is<br />
desirable.<br />
• Procedures<br />
/. Place the negative in the enlarger<br />
and prepare to make an enlargement<br />
measuring 2 '/>" X P/," (the<br />
size of a 120 roll-film negative).<br />
Be sure that your enlarger can accommodate<br />
a negative of this<br />
size. If not, then use whatever size<br />
you can. If 35mm is your only<br />
option, then simply contact print<br />
the negative onto the lith film.<br />
You may then contact print one<br />
lith film onto another . . . producing<br />
a final negative that is still<br />
35mm.<br />
If, on the other hand, your enlarger<br />
can accommodate a negative<br />
larger than the 120 size, then<br />
use the largest size you can. Using<br />
So what's this about? ft hardly matters.<br />
The point is that it makes you<br />
wonder, which gets your brain going.<br />
The high contrast helps by stripping<br />
the image down to pure<br />
essentials. Would this image work as<br />
well with a full range of gray tones?<br />
(Student photograph by David<br />
RiotteJ<br />
the entire 4x5" of standard lith<br />
film is ideal, since that will give<br />
you more room to work in and<br />
produce a more detailed print.<br />
2. Stop the enlarger lens down to<br />
f/16.<br />
3. Instead of photo paper, place a<br />
piece of lith film on the easel.<br />
To save on film, which is quite<br />
expensive, cut each sheet into<br />
about three pieces. Use these for<br />
your test strips.<br />
Manipulation and Presentation 259
4. Make a test strip of at least 10,<br />
1-second exposures.<br />
5. Develop the test strip in lith<br />
developer and ordinary stop bath<br />
and fixer.<br />
6. Select the shortest exposure that<br />
produces a deep black in the<br />
darkest shadow areas.<br />
7. Expose and process a full sheet<br />
of lith film.<br />
8. Use the opaquing compound to<br />
block out areas that you want to<br />
appear as solid blacks on the<br />
final print.<br />
9. Remove the negative from the<br />
enlarger.<br />
10. Raise the enlarger and make a<br />
contact test strip of at least 8,<br />
2-second exposures onto a third<br />
piece of lith film (with the aperture<br />
still set at f/16).<br />
11. Make a full contact print at the<br />
shortest exposure that produces<br />
a deep black.<br />
12. Use the opaquing compound to<br />
block out any areas that you<br />
want to appear as clear white in<br />
the final print.<br />
13. Cut the the final negative out of<br />
the lith film, place it in the<br />
enlarger, and focus it as usual.<br />
14. Make a test strip on apiece of ordinary<br />
photo paper (#4 or US for<br />
best results).<br />
15. Make your final print at the<br />
shortest exposure that produces<br />
a deep black.<br />
260 The Photographic Eye<br />
Solarization<br />
A solarized print is produced by making<br />
a normal print on film or paper<br />
and fogging it (exposing it to light)<br />
during development. The effect this<br />
produces is a result of the chemistry<br />
of the photographic process.<br />
As you know, the developer causes<br />
a chemical reaction converting silver<br />
crystals to silver metal. The waste<br />
material (bromide) of this reaction<br />
collects around the edges of the<br />
image, forming a wall. In addition,<br />
once the normally exposed image has<br />
been developing for awhile, the<br />
chemical reactions in its area will be<br />
slowing down. Therefore, fogging the<br />
image causes a greater reaction in the<br />
unexposcd areas. This part turns<br />
black very quickly. Only the wall of<br />
bromide remains white. That is what<br />
causes solarization, or (as it is officially<br />
known) the Sabbatier effect.<br />
• Solarizing a Print: Procedures<br />
This is a very simple process. In fact,<br />
if you happen to dig through your<br />
darkroom trash, you'll probably find<br />
that some prints have solarized<br />
themselves without any help from<br />
you. Any print that is exposed to light<br />
before being fixed will solarize . . .<br />
including any that you throw away<br />
without fixing. You can achieve more<br />
aesthetically pleasing results, however,<br />
by playing a more active role.<br />
Solarization is a very fluid process:<br />
one that produces highly varied<br />
results with slight variations in timing.<br />
So, once again, experiment by<br />
changing the timing of each stepbut<br />
change them one at a time, so<br />
you'll know what caused the resulting<br />
effect.<br />
/. Start as you normally would to<br />
make a normal 8x10" print:<br />
Place the negative in the<br />
enlarger, crop, focus, determine<br />
timing and expose.<br />
2. Place the print in the developer<br />
and agitate normally for 1<br />
minute.<br />
3. Let the print sit with no agitation<br />
for 1 minute.<br />
4. Expose the print to light until it<br />
begins to produce an interesting<br />
result.<br />
The print will begin turning gray<br />
and black at a rapid rate. Let it<br />
go for a few seconds, then turn<br />
off the light. Watch how the print<br />
develops and move it into the<br />
stop bath as soon as you like<br />
what you've got.<br />
5. Fix, wash and dry the print<br />
normally.<br />
• Solarizing a Negative:<br />
Procedure<br />
This process is a bit more complicated.<br />
However, it produces superior—and<br />
more controllableresults.<br />
Since it employs lith film,<br />
you'll need the same tools as for high<br />
contrast printing.<br />
1. Set up the enlarger to make a<br />
2 } /4 " x I 'A" negative.<br />
2. Make a test strip on a piece of<br />
lith film.<br />
3. Select the shortest exposure that<br />
produces a deep black and expose<br />
the image onto a full sheet<br />
of lith film.
Student photograph by Ray Shaw.<br />
4. Process the resulting positive image<br />
normally.<br />
Ideally, you should let the film<br />
dry overnight. If you're in a<br />
hurry, however, you can use a<br />
blow dryer to speed things up.<br />
5. Raise the enlarger as you would<br />
to make an 8x10" print and<br />
remove the negative from it.<br />
6. Make a contact test strip on a<br />
piece of lith film, again selecting<br />
the shortest exposure that produces<br />
deep black.<br />
7. Contact print the image onto a<br />
full sheet of lith film.<br />
8. Place the lith film in lith<br />
developer and agitate normally<br />
for 40 seconds.<br />
9. Place the developer tray (with the<br />
film in it) under the enlarger.<br />
10. Stop agitating immediately.<br />
11. Let the film settle for about 15<br />
seconds (for a total of I minute<br />
of development).<br />
12. Turn the enlarger on and expose<br />
the film for the same amount of<br />
time as you used for your initial<br />
print (at the same f-stop).<br />
The film will turn black. Don'!<br />
panic. This is what it's supposed<br />
to do.<br />
13. Agitate the film normally to the<br />
end of the development time.<br />
14. Stop and fix the film normally.<br />
After a minute affixing, you may<br />
turn on the room light and examine<br />
the film. It should be<br />
Manipulation and Presentation 261
predominantly black, with a<br />
white outline of the image. If the<br />
negative has a lot of gray in it,<br />
double the second exposure.<br />
15. Cut out the image area and place<br />
it in the enlarger.<br />
16. Set the lens to its largest aperture<br />
and make a test strip with at least<br />
10 30-second exposures.<br />
Depending on how fully solarized<br />
your negative is, you may need a<br />
very long exposure to make your<br />
final print.<br />
17. Make your final print at the exposure<br />
that produces crisp and<br />
solid black lines (not gray from<br />
under-exposure or blurred from<br />
over-exposure).<br />
Note: You can make a negative<br />
image (white lines on a black ground)<br />
by making a third lith film copy. This<br />
version will be far easier to print,<br />
since most of the negative will be<br />
clear. If you have trouble getting a<br />
good positive print, you're almost<br />
certain to succeed with a negative<br />
one.<br />
Toning and Tinting<br />
B&W photographs don't necessarily<br />
have to remain black and white. You<br />
may want to give the whole image a<br />
color tone, such as the warm, brown,<br />
"old-fashioned" look of sepia. Alternatively,<br />
you may want to add real<br />
or imagined colors to a print by<br />
painting it with photographic tints.<br />
• Toning: Tools and Procedures<br />
Chemicals: Toning is a two-step<br />
process. First you bleach the print.<br />
Then you re-develop it in a toning<br />
solution. The easiest method of obtaining<br />
the right kind of bleach and<br />
262 The Photographic Eye<br />
toner is to buy a kit that contains<br />
them both. If you can't find the right<br />
kind of kit, buy the toner and read<br />
its label to find out what kind of<br />
bleach to use. Toners are available in<br />
sepia, blue, red and other colors.<br />
/. Expose and process a print as<br />
normal.<br />
The print should be fully fixed<br />
and washed, but need not be<br />
dried. If, however, you want to<br />
tone an already dry print, that's<br />
fine too.<br />
Once your original print is<br />
ready, you may work entirely in<br />
normal room light.<br />
2. Soak the print in the bleach solution<br />
for the specified period of<br />
time or until the blacks are reduced<br />
to pale browns (usually 2<br />
to 3 minutes).<br />
3. Place the print in the toner<br />
solution.<br />
The image should become clear<br />
again within a few seconds.<br />
4. Soak the print in the toner, with<br />
some agitation, for the specified<br />
period of time or until the image<br />
returns to full strength (about 5<br />
minutes).<br />
5. Wash and dry the print<br />
normally.<br />
• Tinting: Tools and Procedure<br />
Photographic Dyes: Several<br />
manufacturers produce dyes specially<br />
formulated for tinting photographs.<br />
Ask at your local camera store.<br />
Cotton Balls: These will be used<br />
to dampen and paint large areas of<br />
the print.<br />
Brushes: Any good watercolor<br />
brushes will do fine. Try to have a<br />
variety of sizes on hand, including at<br />
least one small brush for details.<br />
/. For best results, begin with a<br />
sepia-toned and mounted print.<br />
A normally exposed black-andwhite<br />
print is likely to be too dark<br />
in the shadow areas to be suitable<br />
for tinting. If you aren't able to<br />
use a sepia-toned print, make a<br />
lighter-than-normal black-andwhite<br />
print and use that.<br />
Do mount the print before you<br />
begin, as the dyes may be sensitive<br />
to heat.<br />
2. Wipe the print with a damp cotton<br />
ball or lint-free cloth or<br />
sponge.<br />
This will enable the surface of the<br />
print to absorb the tints more<br />
evenly.<br />
3. Dip a cotton ball into water and<br />
then add some dye to it. Use this<br />
to fill in any large areas, such as<br />
the sky, a building, foliage, etc.<br />
4. Dip a brush into water and add<br />
dye to it. Paint in the smaller<br />
areas.<br />
5. Use several layers of thin dye,<br />
rather than a single heavy layer,<br />
to achieve dark colors.<br />
6. When the print is colored to your<br />
satisfaction, simply set it aside to<br />
dry for awhile.
Retouching<br />
Even if you are extraordinarily<br />
careful, sooner or later you're likely<br />
to need to hide a few blemishes on a<br />
print. That bit of dust that just<br />
wouldn't go away, a development<br />
flaw or scratch on the negative, a<br />
highlight that won't quite burn in ...<br />
these are example of situations that<br />
require retouching.<br />
• Tools and Procedures<br />
The simplest, least expensive and (in<br />
most cases) least effective retouching<br />
tool is a set of paints (usually black,<br />
white and sepia) sold at most photo<br />
stores. While these can be very useful<br />
for fixing minor, small flaws, their<br />
utility is very limited. To use the<br />
paints (generally known as spotting<br />
colors), simply rub the tip of a<br />
moistened brush in the color you<br />
need, adding water until you have the<br />
appropriate shade or tint. Then paint<br />
the color on the print as needed.<br />
A more sophisticated alternative is<br />
spotting dyes. These actually change<br />
the pigment of the photographic<br />
image, rather then merely covering it<br />
up. Use a very finely tipped paintbrush<br />
to apply the dye in dots. Never<br />
paint in lines or strokes, just tap out<br />
a series of small dots until you have<br />
achieved the result you want.<br />
Always practice on a print you<br />
don't care about, to warm up and<br />
select just the right tone of dye. Some<br />
prints will need a warm gray; some<br />
will need a cold gray. Once you feel<br />
ready, start working on the actual<br />
print, beginning with the lightest<br />
grays and proceeding to any darker<br />
tones you need. Dilute the dye with<br />
water so it is a bit lighter than the<br />
area on which you plan to use it.<br />
Then blot it almost dry on a lint-free<br />
cloth before starting to work on the<br />
print. Let it build up slowly to the<br />
shade you need.<br />
Some dyes (such as Spotone)<br />
actually get darker as they soak into<br />
the print surface. Be especially sure<br />
to start out light with these, as you<br />
can't remove the dye once it has set-<br />
tled in.<br />
With all dyes, you may need to<br />
dampen the surface of the print so it<br />
will absorb the color well. This is<br />
especially true for RC prints.<br />
Major corrective surgery for a<br />
badly damaged negative or print can<br />
be done with airbrushing. If you need<br />
this kind of retouching, get help from<br />
someone who already knows how to<br />
do it.<br />
Manipulation and Presentation 263
Photograph by Ron Schloerb. Courtesy The Cape Cod Times.<br />
264 The Photographic Eye
appendix 4 Advanced Techniques<br />
TOOLS<br />
Tripod<br />
Any time you need to hold your<br />
camera very still, either during or between<br />
exposures, you need a tripod.<br />
For example, you can probably handhold<br />
your camera (with a 50mm lens)<br />
at 1730 of a second without blurring<br />
the shot. With a tripod, the shutter<br />
can stay open for as long as needed<br />
without blurring. You can also use a<br />
tripod to support a long telephoto<br />
lens (if the lens needs support, it<br />
should come with a tripod mount on<br />
the barrel), to pan for action shots,<br />
to make accurate multiple-exposures<br />
or to make a series of exposures of<br />
exactly the same area.<br />
There's no such thing as a good<br />
cheap tripod. There's also no such<br />
thing as a good small tripod. If a<br />
tripod is cheap enough to be bought<br />
without a second thought, it's almost<br />
certainly too flimsy to be useful. If<br />
it's small enough to be carried<br />
without a second thought, then it's<br />
certainly too flimsy.<br />
Plan to spend close to $100 for a<br />
good tripod. Also plan to complain<br />
a lot about how heavy your tripod is.<br />
Don't carry it around unless you expect<br />
to need it.<br />
A good tripod is, above all, sturdy.<br />
When extended to its full height, it<br />
should not wobble, wiggle or shake<br />
265
in the wind. Its full height, for most<br />
purposes, should bring the camera at<br />
least up to your eye level, preferably<br />
higher. The tripod's head (the<br />
platform on which the camera is<br />
mounted) should move through all<br />
conceivable angles (up, down,<br />
around, and side to side). It .iliould<br />
lock tight and loosen quickly and<br />
easily.<br />
As for options, one hotly debated<br />
choice concerns the leg releases,<br />
which either clip or screw opsn and<br />
shut to unlock and lock the leg extensions.<br />
Clip releases tend to be faster<br />
to operate and are less likely to<br />
"freeze up."<br />
One option that is unquestionably<br />
desirable is a removable or releasable<br />
camera mount. On the simplest tripods,<br />
the camera screws directly onto<br />
the tripod head. Unfortunately it<br />
can often be exceedingly difficult to<br />
unscrew it. The solution is to have a<br />
mount that can be removed or<br />
released by flipping a lever.<br />
Additional options that come in<br />
handy but are not necessary include<br />
metal prongs that screw out of the<br />
rubber tips on the ends of the legs (to<br />
anchor the tripod in soil); a level (to<br />
help in aligning the tripod on uneven<br />
ground); and a circular scale (for<br />
measuring off camera positions for<br />
a panoramic series of shots).<br />
When you use a tripod, first adjust<br />
the legs so the head is just below the<br />
height you need. Be sure the legs are<br />
spread out fully. Plant the feet firmly<br />
in the ground if you're outside. Check<br />
to be sure that the tripod is sturdy.<br />
If it isn't, adjust it. Attach the camera<br />
body (or lens) and crank the head up<br />
to the desired position. Aim the<br />
camera at your subject. Adjust the<br />
head (or the legs if necessary) until<br />
the camera is level —line it up with the<br />
horizon if possible. Shoot away.<br />
266 The Photographic Eye<br />
For very long exposures (i.e., over<br />
1 /8 of a second), use a cable release<br />
to avoid camera shake. Unfortunately,<br />
some shutters will still produce<br />
a considerable amount of camera<br />
shake, especially if the camera is<br />
fairly light and the tripod is unsteady.<br />
If your tripod does wobble despite<br />
your best efforts to make it stand<br />
still, you may do better by pressing<br />
down hard on top of the camera and<br />
pressing the camera's own shutter<br />
release. Just be sure you don't wiggle<br />
during the exposure. (This only<br />
works for exposures down to about<br />
2 seconds.)<br />
A short, inexpensive tripod can be<br />
very useful in emergencies. It will<br />
cover your needs for steadiness under<br />
most conditions ... so long as you<br />
can set the tripod on a table or can<br />
get the shot you want from a very low<br />
angle. Do not extend the legs if they<br />
are at all wobbly.<br />
For sports photography requiring<br />
long telephoto lenses and other situations<br />
in which a moderate degree of<br />
steadiness will suffice, you might try<br />
using a monopod, which has one leg<br />
instead of three. Since you have to<br />
provide the other two legs to hold the<br />
thing up, it won't be much help for<br />
very long exposures.<br />
Filters<br />
There are essentially three kinds of<br />
filters: atmospheric, colored and<br />
special effects. Each kind has very<br />
specific uses.<br />
The basic atmospheric filters are<br />
UV, skylight and polarizing. The first<br />
two have very mild effects on the<br />
quality of the sunlight. Their greatest<br />
utility is in protecting the lenses from<br />
accidental damage.<br />
The polarizing filter is more interesting.<br />
Under certain lighting conditions,<br />
it can reduce or eliminate<br />
glare on glass, water or other partially<br />
reflective surfaces. It can darken colors<br />
dramatically. And it can make<br />
clouds far more vivid in contrast to<br />
the sky. Though most useful for color<br />
photography, a polarizer can help for<br />
black-and-white as well. To use one,<br />
focus on the subject and then turn the<br />
outer rim of the filter. This shifts the<br />
polarization, often substantially<br />
altering the image quality.<br />
Color filters have very different effects<br />
in black-and-white and in color.<br />
When used with black-and-white<br />
film, they can compensate for the<br />
film's limited responsiveness to certain<br />
ranges of the spectrum. A color<br />
filter lightens the black-and-white<br />
rendition of its own color and<br />
darkens its complementary color.<br />
Red, for example, lightens red and<br />
darkens blue.<br />
When used with color film, colored<br />
filters can produce subtle or dramatic<br />
shifts in a subject's appearance. A<br />
subtle shift might be produced by<br />
using a light orange filter to enhance<br />
a sunset, for example, or by using a<br />
light magenta filter to "warm up" the<br />
bluish tones of twilight. A dramatic<br />
shift might be to use a green filter to<br />
make your friends look like Martians.<br />
Used carefully and for specific<br />
purposes, color filters can be very<br />
useful expressive tools.<br />
Finally, special effects filters do all<br />
sorts of things. Some play tricks with<br />
light, some play tricks with color,<br />
some play tricks with your vision. A<br />
defraction filter may make every<br />
point of light into a starburst or a<br />
mini-rainbow or a repeating pattern.<br />
A multi-color or split-field filter combines<br />
two or more colors, such as<br />
purple and yellow, to produce a surreal<br />
lighting effect. A multiple image<br />
or prism filter scatters a series of<br />
"ghosts" of a subject all around the
image area. Special effects filters (like<br />
print manipulation) should be used<br />
very sparingly and only for good<br />
reasons. Used too frequently, they<br />
quickly become boring cliches.<br />
Motor Drive<br />
If you need to make several exposures<br />
fairly quickly-as in sports photography—then<br />
a motor drive or auto<br />
winder may be a good investment.<br />
An auto winder, the less expensive<br />
choice, automatically advances the<br />
film after each exposure. This is all<br />
the winding assistance that most photographers<br />
actually need.<br />
A motor drive does the same thing,<br />
but does more as well. Generally, a<br />
motor drive will trigger 5 exposures,<br />
for example, every time you release<br />
the shutter ... or 2, or 10, or<br />
whatever number you select. It may<br />
also have a delay and/or interval<br />
timer, which will release the shutter<br />
after a specified time or at specified<br />
intervals. Unless you have a clear<br />
need for these features, a motor drive<br />
is primarily an excellent way to waste<br />
film. Stick with the auto winder<br />
unless you have a good reason not to.<br />
Flash<br />
A modern electronic flash emits a<br />
very short (often 1/500 of a second<br />
or less) burst of light that is essentially<br />
the same color as midday sunlight.<br />
To work properly, the shutter<br />
must be in sync with the flash, which<br />
means that it must be wide open at<br />
the exact instant that the flash fires.<br />
If it isn't, only part of the frame will<br />
be correctly exposed. The traditional<br />
standard setting for electronic flash<br />
sync is 1/60 of a second. Recently,<br />
however, there's been a trend toward<br />
faster flash sync speeds (from 1/125<br />
of a second all the way to 1/1000),<br />
which can more effectively freeze<br />
Advanced Techniques 267
motion.<br />
The flash sync speed should be indicated<br />
on your shutter speed dial. It<br />
may appear in a different color than<br />
the other shutter-speed numbers, or<br />
it may be marked with a lightning<br />
bolt. Any shutter speed lower than<br />
the sync speed will work fine with the<br />
flash. You may get a flash-and-blur<br />
effect at a slower speed, with the<br />
flash producing a crisp, bright image<br />
and the rest of exposure producing a<br />
darker blur. This can be very effective<br />
or disastrous, depending on your<br />
intentions.<br />
Most camera-mounted flashes (i.e.<br />
non-studio models) offer one or a few<br />
f-stop options. If you have a choice,<br />
you select the f-stop that will work<br />
best for the range you need to cover<br />
(the approximate distance between<br />
the flash and the subject). The flash<br />
then sends out an appropriate<br />
amount of light.<br />
More recently designed flashes<br />
allow you to shoot at any aperture<br />
(with some distance limitations) and<br />
will pass your instructions along to<br />
the camera for you (automatically<br />
setting the aperture and even the<br />
shutter speed). Though these models<br />
cost over $100, they are very useful<br />
if you need a flash often.<br />
A camera-mounted flash is triggered<br />
through a hot shoe, the little<br />
clamp above the viewfinder. This<br />
sends an electrical impulse to the<br />
flash when the shutter opens, so the<br />
flash knows when to fire. Some<br />
flashes can also be connected to the<br />
camera by a cord attached to the Xsync<br />
outlet on the camera body. This<br />
permits you to place the flash<br />
somewhere other than on top of the<br />
camera, which often produces a more<br />
natural lighting effect.<br />
268 The Photographic Eye<br />
Flash fill can be used to add light to undesirable shadows.<br />
• Using a Flash<br />
The basic rule for using a flash is this:<br />
A flash has been used well when it<br />
doesn't appear to have been used at<br />
all. There should be no black ghosts<br />
around your subject, no bleached out<br />
faces, no red dots in the eyes. Unfortunately,<br />
this is a lot easier said than<br />
done.<br />
There are two basic applications<br />
for a flash. One is flash fill, in which<br />
the flash simply adds to the existing<br />
light. The other application is controlled<br />
lighting, in which the flash is<br />
the dominant, or only, light source.<br />
Flash Fill: Often, even when<br />
you're shooting outside in bright<br />
sunlight, you won't have the right<br />
amount of light in some critical area<br />
of your composition. A subject's face<br />
may be in shadow, for example, or<br />
the background may be too bright.<br />
Situations like these call for flash fill.<br />
In the first case (a subject's face in<br />
shadow) you can use the flash to<br />
balance the lighting. Let's say the<br />
overall light of your image area calls<br />
for an exposure of f/8 at 60 (remember<br />
to use the flash sync speed!). If<br />
you set your flash for f/5.6 (assuming<br />
you can) and expose the film at<br />
f/8, the subject's face will still be<br />
slightly darker than the surrounding<br />
area, but all the features should be<br />
clearly visible. With luck and practice,<br />
no one will know that you used<br />
a flash.<br />
If you set the flash for f/8, the subject's<br />
face would be just as well lit as<br />
anything else in the photograph. This<br />
tends to produce "flat" effect and is<br />
generally not desirable.<br />
What happens if you continue to<br />
raise the flash's power? It begins to<br />
"take over" and control the lighting.<br />
Let's say you set both the flash and<br />
the camera lens at f/16. The background<br />
will still be receiving only an<br />
f/8 amount of light (assuming the<br />
flash doesn't reach far enough to light<br />
everything up). So, the subject will<br />
now be brighter than the surrounding<br />
area. The effect will be a bit odd, but<br />
may be very dramatic and interesting<br />
as well.<br />
Depending on the flexibility of<br />
your flash, and how well you learn<br />
to use it, you can gain a tremendous
amount of control over everyday<br />
lighting situations.<br />
Controlled Lighting: But what<br />
about the non-everyday situations?<br />
Perhaps you need to shoot indoors or<br />
at night. You will then have to rely<br />
on your flash as the primary or sole<br />
light source. This is a good deal more<br />
difficult than flash fill.<br />
While you can get good fill results<br />
with virtually any flash, controlled<br />
lighting pretty well requires a flash<br />
with an adjustable head. At the very<br />
least, it should swivel sideways.<br />
Ideally it will swivel up and down as<br />
well. In addition, a flash equipped<br />
with its own light meter (which tells<br />
it when to stop firing) will produce<br />
far more consistent results with far<br />
less hassle than one that you must<br />
control manually. But, here again,<br />
make do with what you have.<br />
The first rule for controlled<br />
lighting with a flash is never point the<br />
flash directly at your subject. There<br />
are, of course, exceptions to this<br />
rule ... but not many. Direct flash<br />
tends to produce stark and unpleasantly<br />
artificial lighting. Instead,<br />
try to bounce the flash's light off<br />
something, which will soften it and<br />
spread it around more naturally.<br />
Indoors, the ceiling often works<br />
perfectly for this purpose, if it is<br />
fairly low and light in color. Angle<br />
your flash head (assuming it is adjustable)<br />
so its light will shoot up to<br />
the ceiling and bounce down right on<br />
the primary subject of your photograph.<br />
If your angle is too low, the<br />
light will end up behind the subject.<br />
If it's too high, it will light a little pool<br />
at your subject's feet.<br />
If you don't have access to a nice<br />
white ceiling (or even if you do), you<br />
can steal a trick from photojournalists:<br />
the white card. Any card<br />
will do; a standard 3x5 note card is<br />
Attaching a white card enhances the effectiveness of "bouncing" the flash off<br />
a ceiling indoors.<br />
very commonly used.<br />
Wrap a rubber band around the<br />
flash head and slip the card in under<br />
it, with most of the card sticking out<br />
beyond the head. Angle the flash so<br />
it is aimed above the subject (bouncing<br />
off the ceiling if possible). As<br />
most of the light from the flash<br />
shoots upwards, part of it will be<br />
reflected from the white card directly<br />
into the subject. The light that hits<br />
the ceiling will help to illuminate the<br />
surrounding space. With luck and<br />
skill, you can produce very adequate<br />
and natural lighting with this technique,<br />
indoors or out. (Look closely<br />
at the next press conference you see<br />
on TV and you're certain to spot a<br />
few photographers using this trick.)<br />
You can often find or concoct<br />
other reflecting surfaces as well: a<br />
white wall, a window (which can<br />
reflect light from the inside as well as<br />
let it in from the outside), a large<br />
sheet of white paper or mat board,<br />
etc. Keep your eyes open and you'll<br />
generally find what you need.<br />
Shooting for Publication<br />
If you hope to have some of your<br />
photographs published (don't we<br />
all?), you'll have a head start if you're<br />
familiar with some basic guidelines.<br />
First of all, it is a very good idea<br />
to obtain releases from everyone you<br />
photograph. It is required for virtually<br />
all journalistic photography. A<br />
release is a signed contract giving you<br />
permission to use a person's photograph<br />
in certain ways. If you have a<br />
photograph published without a<br />
release, there's always a chance you'll<br />
be sued for invasion of privacy,<br />
misusing a person's image or causing<br />
them some kind of damage (financial,<br />
emotional, etc.). Here's a sample<br />
release:<br />
Advanced Techniques 269
Use only the release portion (the first<br />
part) for anyone over 18 years of age.<br />
Have a parent or adult sign the consent<br />
form for anyone younger.<br />
Don't panic every time you<br />
photograph someone without getting<br />
a release. First of all, as an artist you<br />
have considerable protection. It is<br />
only when you begin pursuing photography<br />
as a business that releases<br />
really become necessary. The laws<br />
vary from state to state, so it would<br />
be a good idea to check things out<br />
with a knowledgeable editor or<br />
lawyer if you plan to sell your photographs<br />
for publication.<br />
270 The Photographic Eye<br />
On a more technical note, it's important<br />
to know how publication will<br />
affect the quality of your photographs.<br />
An offset printing press can't<br />
generally print gray. Instead, it<br />
reduces the gray tones in a photograph<br />
to varying densities of black<br />
dots. The dots are close together in<br />
the dark areas and far apart in the<br />
light areas. This creates the impression<br />
of a continuous tone photograph<br />
(which is what your original is called).<br />
A photograph prepared for publication<br />
is called a halftone. It has been<br />
screened —copied onto high-contrast<br />
(lith) film through a screen, which<br />
produces the dots. This process has<br />
two effects.<br />
First, it increases the photograph's<br />
mid-range contrast. All the subtle<br />
grays get separated out into a few<br />
basic values. The lightest grays<br />
become white (or almost white) and<br />
the darkest ones become black (or<br />
almost black). Second, the screening<br />
process decreases the photograph's<br />
overall latitude —the total range of<br />
tones from black, through gray, to<br />
white. This is because a halftone normally<br />
cannot produce either pure<br />
black or pure white. There are always<br />
some white spaces in the black areas
and some black dots in the white<br />
areas.<br />
Both these effects are most extreme<br />
when the photograph is printed on<br />
newsprint, which requires very large<br />
dots. Good quality magazine paper<br />
is more responsive, but still a far cry<br />
from photo paper. Some art books<br />
come quite close to matching the<br />
quality of the original print . . . but<br />
you're probably a few years from<br />
that yet.<br />
In essence, this means that in most<br />
cases your photograph won't look<br />
nearly as good in a magazine as it<br />
does on your wall. A contrasty<br />
print —with clear blacks and whites —<br />
will look fairly similar, though the<br />
contrast will increase. A low-contrast<br />
print may turn into a smudge, especially<br />
when printed on newsprint.<br />
You can minimize the damage by<br />
shooting with publishing's constraints<br />
in mind. Always try to have your central<br />
subject fill the frame (so it gets<br />
as many dots as possible). Try to<br />
photograph your subject against a<br />
contrasting background. A white wall<br />
will set off someone's face and hair<br />
better than a gray or black one.<br />
The standard format for blackand-white<br />
is an 8x 10" glossy print<br />
(5x7" for newspapers). The print<br />
should have a label taped or glued to<br />
the back with your name, copyright<br />
(i.e. © 1988), when and where the<br />
photograph was taken, the name(s)<br />
of any identifiable person(s) in it and<br />
a note indicating that you have a<br />
release if you do (i.e., Release on<br />
File).<br />
With color, the rules change a bit.<br />
The photograph is still reduced to<br />
dots, but this time the dots are in the<br />
4 primary colors (yellow, magenta,<br />
blue and black) and they overlap in<br />
a sort of daisy-shaped pattern. Color<br />
photographs actually tend to repro-<br />
Photographs that are reproduced by standard publishing techniques, such as<br />
all of the photographs in this book, are first "screened." This reduces all toneswhite,<br />
gray and black—to dots of varying sizes. This is an enlargement of a<br />
photograph used elsewhere in this book.<br />
duce much more accurately in a publication<br />
than black-and-white. In<br />
general, bright and saturated (strong)<br />
colors will work best. Good contrast<br />
will help make the focus seem nice<br />
and crisp. The problem area generally<br />
is shadows, which tend to become<br />
murky and blotchy. For this reason,<br />
it is especially important that faces<br />
and other key features be well lit.<br />
For color work, most publishers<br />
prefer to receive 35mm transparencies.<br />
The films that produce the best<br />
results are Kodachrome (ISO 25 or<br />
64) and Fujichrome (especially ISO<br />
50), both of which have very fine<br />
grain and good contrast. Ektachrome<br />
is weak on both counts (grain and<br />
contrast) and is not recommended for<br />
general publication work.<br />
On the slide mount you should<br />
write your name, copyright, when<br />
and where the photograph was taken,<br />
the name(s) of any identifiable person^)<br />
and a note about a release if<br />
you have one.<br />
Finally, before you abandon your<br />
most prized transparency into the<br />
hands of a stranger (or a friend, for<br />
that matter) it's a very good idea to<br />
get a signed contract stating what<br />
rights you have if the original is damaged.<br />
Generally, you should expect to<br />
receive some extra payment if the<br />
transparency cannot be printed<br />
again. Anything from $50 to $200 is<br />
a reasonable starting point. A publisher<br />
who values your photograph<br />
enough to use it should be prepared<br />
to guarantee its safekeeping.<br />
Advanced Techniques 271
Cropping L's. Trace these templates onto paper, then mount on cardboard<br />
to make your own cropping "tools." (See page 65.)
Mat frame. Trace this frame, cut it out, mount it on cardboard, and use<br />
it to select strong photographic compositions. (See page 64.)<br />
273
Bibliography<br />
Books<br />
Books on photography move in and<br />
out of bookstores at a rapid rate.<br />
Many of this year's books will be<br />
replaced by new ones next year, if not<br />
sooner. Any list of specific titles,<br />
therefore, is likely to be only briefly<br />
valid and unlikely to be very helpful.<br />
Fortunately, several excellent writers<br />
and important topics find their way<br />
into print year after year. As points<br />
of reference, they're likely to be more<br />
useful than specific titles.<br />
The following list, then, is intended<br />
as a general guide. Though some<br />
titles are mentioned, the authors and<br />
topics are more important. Check<br />
your local bookstore or library for<br />
new or old books by these authors or<br />
about these topics:<br />
Davis, Phil Author of several excellent<br />
instruction manuals. His<br />
college-level textbook, Photography<br />
(published by Wm. C. Brown Publishers),<br />
is a detailed introduction to<br />
photographic theory and practice. It<br />
is highly recommended for anyone<br />
with an interest in the technical side<br />
of photography.<br />
Eastman Kodak The "editorial<br />
team" of this renowned film and<br />
camera manufacturer produces<br />
books on a wide range of photo-<br />
graphic topics. Some (notably The<br />
Joy of Photography, published by<br />
Addison-Wesley, and The Complete<br />
Kodak Book of Photography,<br />
published by Crown) are essentially<br />
"idea" books, containing a mix of information<br />
and photographs. They<br />
won't answer all your questions, but<br />
they will make you want to get out<br />
and try new things. Others (such as<br />
the DATAGUIDE series and a<br />
variety of how-to manuals) provide<br />
more detailed information than<br />
you're ever likely to need. Kodak<br />
books are sold in many camera<br />
stores, as well as in bookstores.<br />
Equipment Manuals These are<br />
published by the manufacturers of<br />
cameras and accessories, as well as by<br />
independent publishers. They include<br />
specialized guides to the use of brandname<br />
cameras (such as Canon SLR<br />
Cameras and Nikon SLR Cameras,<br />
both published by HP Books) and<br />
more general summaries of important<br />
accessories (such as Flash<br />
Photography, also by HP Books).<br />
For publications of this kind, check<br />
in camera stores as well as bookstores<br />
and libraries.<br />
Hedgecoe, John One of the most<br />
prolific and competent authors of allpurpose<br />
"how-to" guides. At least one<br />
of Hedgecoe's books (including The<br />
Photographer's Handbook, The Book<br />
of Photography, The Art of Color<br />
Photography and John Hedgecoe's<br />
Pocket Guide to Practical Photography)<br />
should be included in every<br />
photographic library. All of them<br />
provide brief and precise answers to<br />
a host of "How do I . . . ?"<br />
questions.<br />
ICP The International Center of<br />
Photography, based in New York,<br />
produces one of the most impressive<br />
photographic reference books, the<br />
Encyclopedia of Photography (published<br />
by Pound Press). Everything<br />
from biographies of major<br />
photographers to explanations of<br />
photographic theory and practice is<br />
covered in this enormous (and expensive)<br />
book. In addition, ICP is<br />
responsible for numerous collections<br />
of photographs published in conjunction<br />
with museum exhibits.<br />
Inspiration The list of books that<br />
contain collections of photographs is<br />
virtually endless. Every photographer<br />
should regularly spend time admiring,<br />
critiquing and learning from<br />
books like these. Fortunately, almost<br />
any bookstore or library will provide<br />
ample opportunity to do so. Some<br />
noteworthy publishers of photographic<br />
collections include The New<br />
York Graphic Society, Aperture, and<br />
275
The Museum of Modern Art (of New<br />
York).<br />
Processing If you spend much time<br />
working in the darkroom, especially<br />
if you want to explore advanced techniques,<br />
you'll probably want more<br />
guidance than we've offered in the<br />
Appendix. There are essentially three<br />
kinds of books for this purpose:<br />
general manuals, special technique<br />
manuals and standard reference<br />
books.<br />
A good general manual will help<br />
you select and use equipment, explain<br />
both basic and advanced procedures<br />
and offer helpful tips. Examples include<br />
The Basic Darkroom Book by<br />
Tom Grimm (Plum Books), Basic<br />
Guide to B& W Darkroom Techniques<br />
(part of the "Learn Photography<br />
Series" published by HP Books) and<br />
Beginner's Guide to Color Darkroom<br />
Techniques by Ralph Hattersley<br />
(Doubleday/Dolphin). A special<br />
technique manual may cover anything<br />
from high-contrast processing<br />
to the production of museum-quality<br />
prints. Examples include Darkroom<br />
Magic by Otto Litzel (Amphoto) and,<br />
for advanced Zone System work,<br />
Ansel Adams' The Negative and The<br />
Print (New York Graphic Society).<br />
Darkroom reference books provide<br />
very detailed information on films,<br />
papers, chemicals and procedures.<br />
Examples include The Photographic<br />
Lab Handbook by John Carrol<br />
(published by Amphoto) and such<br />
Kodak publications as How to Process<br />
Ektachrome Slides Using Process<br />
E-6 and Kodak Black-and-White<br />
Photographic Papers.<br />
Special Techniques If you're interested<br />
in some particular aspect of<br />
photography, odds are that someone<br />
has written a book about it. Few of<br />
276 The Photographic Eye<br />
the more specific titles, however, will<br />
ever show up in your local bookstore,<br />
or even in the library. If you want<br />
more information than you can find<br />
in the usual general interest books,<br />
try looking in Books in Print, a standard<br />
reference available for use in<br />
both bookstores and libraries. Most<br />
bookstores will be happy to place an<br />
order for you, and may even be able<br />
to convince a library to do so as well.<br />
Examples of the kinds of books you<br />
might find include John Shaw's<br />
Closeups in Nature (Amphoto) and<br />
Frame It: A Complete Do-It- Yourself<br />
Guide to Picture Framing by Lista<br />
Duren (Houghton Mifflin).<br />
Time-Life Another editorial team.<br />
The Time-Life Library of Photography<br />
is an extensive (and expensive)<br />
series of books whose titles include<br />
Color, Photojournalism and The<br />
Great Themes. They are all good<br />
reference books, though you'll probably<br />
want to check them out of your<br />
local library, rather than buy them.<br />
Vestal, David The author of<br />
numerous instruction books stressing<br />
black-and-white photography and<br />
processing. His books (especially The<br />
Craft of Photography) are excellent<br />
resources for anyone wishing to<br />
achieve a high level of technical skill.<br />
Zone System The exposure control<br />
technique of Ansel Adams and his<br />
disciples. If you're interested in producing<br />
exquisite prints of subjects<br />
that will sit still for a long time (like<br />
buildings and rocks), then the Zone<br />
System is an essential tool. It has<br />
been explained in numerous books by<br />
numerous authors, including Adams<br />
himself. Probably the best known<br />
book on this subject is The New Zone<br />
System Manual, by Minor White,<br />
Richard Zakia and Peter Lorenz<br />
(published by Morgan and Morgan).<br />
Magazines<br />
There are many magazines and other<br />
periodicals devoted to photography,<br />
from glossy, mass-market monthlies<br />
to simple camera club newsletters.<br />
The following list covers those that<br />
are most commonly available. The<br />
best way to make your selection is to<br />
find a bookstore or drugstore with an<br />
extensive magazine rack and browse.<br />
American Photographer If you<br />
consider advertising photography to<br />
be as important as traditional landscapes<br />
(as many contemporary photographers<br />
do) then you'll probably<br />
like American Photographer. If you<br />
enjoy a slick and occasionally flippant<br />
style, then you'll probably love<br />
it. At the very least, American<br />
Photographer is more enthusiastic<br />
than most photography magazines.<br />
In terms of content, it is primarily<br />
devoted to discussing photographers<br />
and showing their work, rather than<br />
to explaining how their results were<br />
achieved or what tools they used.<br />
Aperture This is the classic<br />
photography magazine: a very serious<br />
publication, almost solely devoted to<br />
presenting the work of art photographers.<br />
It is elegantly designed and<br />
beautifully printed. Every photographer<br />
should own at least one issue.<br />
Darkroom Photography For<br />
anyone wishing to master the darkroom,<br />
Darkroom Photography is an<br />
important resource. It contains a<br />
good mix of detailed "how-to"<br />
guides, equipment reviews and collections<br />
of inspirational photographs.
Modern Photography Both Modern<br />
Photography and its near-twin,<br />
Popular Photography, are utterly<br />
practical. Both are primarily about<br />
photographic tools. Most articles<br />
either evaluate a new product<br />
(camera, film, lens, etc.) or compare<br />
several that are similar. Collections<br />
of photographs illustrating a specific<br />
technique are another common feature.<br />
At least half of the reason to<br />
read either magazine is the ads, both<br />
the manufacturers' own and the mailorder<br />
listings in the back.<br />
Peterson's Photographic This one is<br />
something of an oddball. Despite a<br />
style of writing and photography that<br />
are notably outdated, Peterson's<br />
Photographic is one of the most<br />
useful photography magazines available.<br />
It is filled with very practical<br />
step-by-step instructions on everything<br />
from studio lighting to building<br />
a homemade synchronizing flash trigger.<br />
The photographs are rarely<br />
better than mediocre, but the information<br />
is great.<br />
Popular Photography See Modern<br />
Photography.<br />
Zoom Rather aggressively off-beat,<br />
Zoom is the main forum for what<br />
might be described as new-wave photography.<br />
Stylistically, it favors bold,<br />
gritty imagery with a strong urban<br />
flavor. It is primarily devoted to collections<br />
of work by contemporary<br />
photographers. (Parental discretion is<br />
advised.)<br />
Manufacturers' Magazines Several<br />
leading camera manufacturers publish<br />
magazines to show off the<br />
photographs produced with their<br />
cameras. These magazines are equally<br />
useful for inspiration and critiquing,<br />
even if you happen to own a competitors'<br />
camera. Minolta's is particularly<br />
good.<br />
Bibliography 277
Glossary<br />
Aperture Ring The ring on the lens<br />
of a manual camera which controls<br />
the size of the aperture.<br />
Aperture The size of the lens opening.<br />
Apertures are measured by<br />
dividing the focal length of the lens<br />
by the diameter of the opening. For<br />
example a lens with a focal length of<br />
50mm opened to a diameter of 6mm<br />
would produce an aperture (or f-stop)<br />
of f/8, or 1/8 the focal length.<br />
ASA/ISO Standard numbers indicating<br />
film speed.<br />
Cable Release A flexible cable<br />
which takes the place of a camera's<br />
shutter release button, allowing a<br />
photographer to "click" the shutter<br />
without shaking the camera. Used<br />
primarily for photography in low<br />
light, when long exposures are<br />
required.<br />
Composition The arrangement of<br />
objects within the frame of a<br />
photograph.<br />
Contact Print A photograph produced<br />
by placing the negative in contact<br />
with the photo paper under a<br />
light. For 35mm film, a contact print<br />
is almost exclusively used to test the<br />
negative's quality and provide a<br />
record of the photographs on it.<br />
Contrast The range of values in a<br />
photograph or subject. Low contrast<br />
compresses all colors into a narrow<br />
range of grays. High contrast<br />
separates the colors so the darkest<br />
tones are very black and the lightest<br />
tones are very white, often with little<br />
or no gray in between. Normal contrast<br />
provides black blacks, white<br />
whites and a wide range of grays as<br />
well.<br />
Critique The process, usually conducted<br />
in groups, of evaluating the<br />
strengths and weaknesses of one or<br />
more photographs.<br />
Cropping Trimming the borders of<br />
a photograph, generally to improve<br />
composition. Though the term<br />
usually refers to trimming done on a<br />
finished print, cropping may be done<br />
by moving the camera before taking<br />
a photo, or by raising the enlarger so<br />
that less than the full photograph appears<br />
in the print. It is generally<br />
preferable to crop before the print is<br />
completed.<br />
Dynamic Balance A composition in<br />
which the visual elements are<br />
arranged to produce a sense of harmony<br />
and to suggest motion of some<br />
kind.<br />
F-Stop Number indicating a<br />
specific aperture (or lens opening),<br />
such as f/16. Higher numbers indicate<br />
smaller apertures (f/16 is<br />
smaller then f/11). See Aperture.<br />
Film Speed The rate at which film<br />
reacts to light. A fast film reacts more<br />
quickly than a slow one. Film speed<br />
is measured as ISO and/or ASA<br />
numbers. ISO 400 is twice as fast as<br />
ISO 200.<br />
Fixed Focal-Length Lens Any lens<br />
for which the angle-of-view is not adjustable<br />
(since extending the length of<br />
the lens narrows the angle at which<br />
light can enter it). For example, a<br />
50mm fixed focal-length lens will<br />
always have a 55-degree angle-ofview.<br />
Any lens that does not have a<br />
fixed focal-length is a zoom. (See<br />
focal length and zoom.)<br />
Fixed Lens A lens that is permanently<br />
attached to a camera body.<br />
Focal Length In a general sense,<br />
focal length refers to the distance that<br />
light travels between entering the lens<br />
and arriving at the film. Longer focal<br />
lengths produce a telescope effect,<br />
shorter focal lengths produce a wideangle<br />
effect.<br />
Focal Point The point at which all<br />
the rays of light from a single object<br />
converge, causing the object to be in<br />
focus. By extension, the focal point<br />
of a photograph is the object on<br />
which the lens is focused. Other objects<br />
may of course be in focus as<br />
well.<br />
279
Focusing Ring The ring on a lens<br />
which moves the lens forward and<br />
back, causing objects to go in and out<br />
of focus at the film plane.<br />
Ground-Glass Focusing Screen A<br />
piece of glass with a matte finish onto<br />
which the camera projects the<br />
same image as it is projecting at the<br />
film plane, permitting the photographer<br />
to compose and focus.<br />
Highlights Bright areas of a<br />
photograph or subject.<br />
Interchangeable Lens Any lens that<br />
may be removed from the camera<br />
body and, therefore, exchanged for<br />
another.<br />
Mass The apparent weight of an object<br />
in a photograph, as indicated by<br />
its size, tone (dark objects generally<br />
appear more massive), position and<br />
shadow.<br />
Negative Space The space between<br />
one object and the frame of a photograph,<br />
or between two or more objects<br />
within the frame.<br />
Objective (adjective) Factual; not<br />
influenced by a person's feelings or<br />
opinions.<br />
Point of Interest The object in a<br />
photograph that attracts the most attention.<br />
Ideally the point of interest<br />
is also the primary subject (what the<br />
photograph is "about"), but this is<br />
not always the case.<br />
Positioning Placing an object<br />
within the frame of a photograph.<br />
Generally this is done by moving the<br />
camera rather than by moving the<br />
object.<br />
Positive Space The space filled by<br />
an object.<br />
280 The Photographic Eye<br />
Proportion The relative sizes of two<br />
or more objects within the frame of<br />
a photograph. (Proportion may also<br />
refer to the contours of a single subject<br />
which, if distorted, may appear<br />
to be "out of proportion.")<br />
Relation Anything that links two or<br />
more objects together, such as a<br />
similarity, contrast or contact between<br />
them.<br />
Shutter A mechanical device which<br />
uncovers a single frame of film for<br />
a specified period of time so light<br />
traveling through a lens can produce<br />
an image.<br />
Shutter Release A mechanical or<br />
electrical button which causes the<br />
shutter to open.<br />
Shutter Speed The time that a shutter<br />
remains open, expressed in fractions<br />
of a second (i.e. 1/125 of a second,<br />
commonly referred to simply as<br />
125).<br />
Split-Image Focusing Screen A<br />
piece of glass (generally a small circle<br />
in the viewfinder) onto which two<br />
fragments of an image are projected<br />
by the camera's lens (or lenses). When<br />
the two fragments are aligned, the<br />
image is in focus.<br />
Static Balance A composition in<br />
which the visual elements are<br />
arranged to produce a sense of harmony<br />
with no suggestion of motion.<br />
Subjective (adjective) Dependent<br />
on a person's values, tastes or<br />
opinions.<br />
Telephoto Lens Any lens that<br />
reproduces a smaller than normal<br />
portion of a given scene, so objects<br />
seem closer and larger than they actually<br />
are.<br />
Value The range of dark and light<br />
tones in a photograph.<br />
Viewfinder The camera's "window,"<br />
which shows the photographer<br />
the image that will appear on the<br />
film. Many viewfinders also indicate<br />
the amount of light entering the lens,<br />
the shutter speed and other technical<br />
data.<br />
Visual Elements All the basic components<br />
of an image. An element is<br />
a fundamental unit, such as line,<br />
which cannot be broken down into<br />
smaller parts.<br />
Visual Harmony Any repeating<br />
visual element, such as a line or circle<br />
or a larger pattern of shapes and<br />
values. Visual harmonies are used to<br />
add interest and structure to<br />
photographs.<br />
Weighting Positioning key subjects<br />
toward one side or the top or bottom<br />
of a photograph.<br />
Zoom Lens Any lens of variable<br />
focal length, i.e. with an adjustable<br />
angle-of-view. A 35-150mm zoom<br />
lens, for example, provides the same<br />
focal-lengths as a 35mm, a 50mm and<br />
a 150mm lens, plus all the focal<br />
lengths in between.
Index<br />
Adams, Ansel, 23, 152, 168, 197<br />
advanced techniques, tools, 265-269<br />
aesthetics, 75<br />
agitation, during processing, 230-231,<br />
238, 241, 261<br />
angle of view. 129- 131, 138<br />
anti-static brush, 233, 237<br />
aperture, 44, 113-115, 125, 126, 139,<br />
198, 212<br />
and clarity, 73<br />
and portraits, 182<br />
standard, 83-84<br />
testing, 48<br />
aperture ring, 46-47, 113, 115, 139<br />
Arbus, Diane, 23, 210<br />
Archer, Frederick Scott, 13<br />
architecture and environment<br />
(exercise), 172<br />
art, photography as, 16, 18-19,21,<br />
23, 184, 209<br />
ASA/ISO, 42. See also ISO<br />
Atget, Eugene, 21<br />
atmospheric filters, 266<br />
automatic cameras, 36-37<br />
autowindcr, 267<br />
average gray, 119, 121<br />
balance, 74, 76<br />
and composition, 60-63<br />
dynamic, 63, 74<br />
of information and mood, 118<br />
of light, 268<br />
static, 63<br />
base tints, 232<br />
battery, 43-44<br />
bicycle (exercise), 154<br />
black-and-white film:<br />
chemicals for, 227-228<br />
and filters, 266<br />
printing, 232-239<br />
processing, 227-232<br />
values and, 247<br />
black-and-white photos, 119, 270-271<br />
black-and-white prints, toning and<br />
tinting, 262<br />
Blacks, and photography. See Van<br />
Dcr Zee, James<br />
bleach, 262<br />
blower-brush, 233<br />
blurs, 71, 73-74, 129-134, 167, 206,<br />
240<br />
avoiding,132<br />
exercise on, 134<br />
unwanted, 240<br />
bottles (exercise), 162<br />
bounce (Hash's light), 269<br />
Bourke-White, Margaret, 22, 28-29<br />
bracketing, 123, 127, 191,214,248<br />
and color, 248<br />
exercise on, 127<br />
portraits, 191<br />
Brady, Mat hew, 14-16<br />
brassai, 21<br />
Bravo, Manuel Alvare, 24<br />
brushes, 23, 259, 262<br />
burners, 238-239<br />
burning (in), 238-239<br />
cable release, 43, 183,266<br />
calotype, 13<br />
camera back release, 44-45<br />
camera obscnra, 11<br />
cameras:<br />
accessories for, 44<br />
body of, inside, 45-47<br />
choosing, 35-36<br />
early, 17, 22<br />
types of, 12, 17, 22-23, 36-37<br />
camera shake, 73, 140-141<br />
Cameron, Julia Margaret, 13<br />
cartes-de-visite, 13<br />
Cartier-Bresson, Henri, 21, 24,<br />
198-199<br />
center of interest, 206<br />
center-weighted averaging meters, 122<br />
changing bag, 240<br />
chemicals:<br />
for black-and-white film, 227-229,<br />
234<br />
for toning, 262<br />
children:<br />
exercise, 190<br />
as subjects, 204<br />
circles, 107, 109<br />
exercise, 110<br />
Civil War, photography of, 14<br />
clarity, 70-71, 73-74, 168<br />
collodian process, 13<br />
color cast, 245<br />
color film, 17, 243-244<br />
bracketing, 248<br />
complexity of, 245-247<br />
contrast in, 257<br />
cropping, 251<br />
expense and, 251<br />
technical considerations, 249 251<br />
value and,247-248<br />
Index 281
color harmonies, 256<br />
color photos, 22, 23<br />
and publication, 271<br />
color reversal film, 249<br />
color saturated style, 248<br />
color theme, 245-247<br />
composition, 158<br />
aspects of, 74-75<br />
and balance, 60-62<br />
controlling, 167-168, 170<br />
and dynamics, 62-63<br />
elements of, 51<br />
and portraits, 181<br />
and structure, 53-56, 59-60<br />
tips on, 58-59<br />
and visual interest, 152<br />
compressed air, 233<br />
computers:<br />
camera and, 25<br />
in cameras, 35<br />
consent (permission), 270<br />
construction sites (exercise), 179<br />
contact print, 40<br />
procedures, 234-235<br />
tools for, 234-235<br />
contact printing frames, 234<br />
contact sheet, 235<br />
containers, airtight, 229<br />
context, 71<br />
continuous tone, 270<br />
contours, 105, 109<br />
contract, 271<br />
contrast, 68-71, 98, 100, 134, 214<br />
251,271<br />
in color film, 257<br />
controlled lighting, 268-269<br />
critique, sample (exercise), 76<br />
critique sessions, 67-68, 76<br />
cropping, 65, 74, 75, 156, 176, 178,<br />
256<br />
and color film, 251<br />
exercise, 65<br />
and portraits, 194<br />
Daguerre, Louis Jacques Mande,<br />
12-13<br />
daguerreotype, 12-13<br />
Davison, George, 16<br />
282 The Photographic Eye<br />
dead space, 61<br />
"decisive moment," 198<br />
detraction filter, 266<br />
depth, line and, 90<br />
depth of field, 44, 73, 115, 124-126,<br />
140, 206<br />
decreased, 140<br />
depth of field preview button, 44<br />
depth of field scale, 47<br />
density (of color), 247<br />
detail portrait (exercise), 194<br />
developer, 227,229-231<br />
developer tray, 261<br />
developing reel, 229-230<br />
developing tank, 227-231<br />
developing trays, 233, 261<br />
direction, and line, 87-89<br />
disasters, with film, processing,<br />
240-241<br />
distance, and blurring, 131, 133<br />
dodgers, 238-239<br />
dodging (out), 239-239<br />
double exposures, 240<br />
"doubler," 140<br />
dry mounting:<br />
procedures, 253-254<br />
tools, 253<br />
dry mount tissue, 253-254, 257<br />
dust, 240<br />
and film, 231-233<br />
on negative, 237<br />
dynamic balance, 63, 74<br />
dynamics, 62-64, 76<br />
easel, 237,256, 259<br />
Eastman, George, 17<br />
Edgerton, Harold, 22<br />
edges, of photo, 58, 60<br />
eggs (exercise), 158<br />
eighteen percent gray, 119, 121<br />
Eisenstat, Alfred, 22<br />
ektachrome (color film), 251<br />
elders (exercise), 187<br />
electronic flash, 267<br />
Emerson, Peter Henry, 16<br />
emulsion, 12,227-228,230<br />
on color film, 251<br />
on negative, 236-237<br />
on paper, 233<br />
enlargements:<br />
procedures, 236-238<br />
tools for, 236<br />
enlarger, 232-237, 256, 259, 261-262<br />
environment, 59, 154, 164, 179<br />
architecture and (exercise), 172<br />
familiar 192<br />
natural, 168, 170, 172<br />
evaluation, of prints, 67-75<br />
Evans, Walker, 22, 24<br />
expenses, photography, 36, 39, 235,<br />
244,251,265<br />
exposures, 113-115, 119<br />
double, 240<br />
and portraits, 181<br />
expression, as objective, 152<br />
"extender," 140<br />
faces, 187, 190, 206, See also Portraits<br />
fairs (exercise), 200<br />
farm (exercise), 176<br />
fiber-based paper, 238<br />
field of view, 138<br />
50 mm lens, 38-39<br />
film:<br />
black-and-white. See black-andwhite<br />
film<br />
color. See color film<br />
disasters with, 240-241<br />
early, 17<br />
grain of, 37-38<br />
loading, 49<br />
printing, 232-239<br />
processing, 227-232<br />
sensitivity of to light, 119<br />
speed of, 22, 42, 251<br />
film advance lever, 43<br />
film-advance sprocket, 46<br />
film canister, 228-229<br />
film carton, 42<br />
film cleaners, 233<br />
film developer, 227, 229-231<br />
film latitude, 119<br />
film plane, 138<br />
film spool, 45<br />
filters, 240, 266-267<br />
fixed-focal length lens, 39, 142
fixed lens, 36<br />
fixer, 228-229, 231,238<br />
flash, 22, 203,267-269<br />
using, 268-269<br />
flash-and-blur effect, 268<br />
flash fill, 247, 268<br />
flashlight, as light source, 212<br />
focal length, of lens, 126, 138, 140<br />
increasing, 140<br />
focal point, 124, 126<br />
focus, 23,70, 73<br />
focusing, 125-126, 176<br />
in advance, 198<br />
and portraits, 181<br />
focusing ring, 46-47, 73<br />
fog:<br />
on negative, 241<br />
on paper, 283<br />
foreground, elongated (exercise), 224<br />
frame, mat, 64<br />
freezing, 129, 132<br />
f/stop, 44, 47. See also aperture<br />
fujichrome (color film), 251, 271<br />
glasses, bottles and (exercise), 162<br />
glazer, 238<br />
grab shots, 181-182, 198<br />
gray card ,122<br />
grain (of film), 37-38, 227, 236, 271<br />
grain focuser, 236-237<br />
grain structure (color film), 251<br />
grease pencil, 40, 234<br />
great depression, photographic survey<br />
of, 22<br />
group f.64, 152<br />
Haas, Ernst, 23<br />
half-stop, 115<br />
halftone, 270<br />
hand-held light meter, 121, 220<br />
hands (exercise), 186<br />
harmony, visual, 107<br />
head (of tripod), 266<br />
high contrast print:<br />
procedures, 259-260<br />
tools, 258-259<br />
Hine, Lewis, 13-14,28<br />
Hockney, David, 25<br />
hot shoe, 43<br />
hubcaps (exercise), 156<br />
imagery, and color film, 245-247<br />
image tone, 232<br />
implied lines, 62-63<br />
incident light, 120-121<br />
indicator stop bath, 228<br />
interchangeable lens, 36<br />
interneg, 249<br />
interval timer, 228<br />
ISO, 83-84<br />
and color, 248<br />
journalistic photography, 269. See also<br />
photojournalism<br />
kaleidoscope composite print,<br />
procedures, 256-257<br />
Karsh, Yousef, 23<br />
Kertesz, Andre, 21<br />
kodachrome (color film), 251, 271<br />
kodak camera, 17<br />
Land, Edwin, 22<br />
landscape, 197<br />
exercise, 170<br />
Lange, Dorothea, 22<br />
latitude (of photo), 270-271<br />
leader, film, 229<br />
leaves (exercise), 100<br />
leg releases (tripod), 266<br />
leica camera, 17<br />
lens, lenses (camera), 46, 73<br />
and angle of view, 130 131<br />
choosing, 38-39<br />
fast, 139<br />
fixed focal length, 36, 142<br />
focal length of, 126<br />
function of, 46<br />
interchangeable, 36<br />
normal, 138<br />
and perspective, 138-140<br />
and point of view, 145-146<br />
portrait, 140<br />
ranges of, 39<br />
slow, 139<br />
telcphoto, 138-142<br />
zoom, 23, 39, 141-142<br />
lens (enlarger), 262<br />
lens release and mount, 47<br />
Life magazine, 22, 28<br />
light, 113-127, 165, 167-168,203<br />
artificial, 212<br />
controlled, 268-269<br />
and film, 119<br />
and information, 117<br />
low, 139<br />
metering, 120-121<br />
modifying, 118-119<br />
and mood,d 118, 174<br />
and portraits, 182 184, 190, 191<br />
range of, 68, 127<br />
reflected, 120-121<br />
texture and, 96, 100<br />
value and, 68<br />
and visual interest, 152<br />
light meter, 119. 120-123, 197-198<br />
hand-held, 212<br />
internal, 42<br />
not relying on, 83<br />
using, 121-123<br />
light-tight, 227<br />
line, 56, 62-63, 74-75, 97, 108<br />
as subject in photogrphic theory,<br />
87-91<br />
curved,91<br />
horizontal, 59<br />
implied, 62-63<br />
straight, 90-91<br />
vertical, 59<br />
line print, 258-260<br />
lith developer, 258, 260-261<br />
lith film, 258-261<br />
lupe, 234<br />
lustre, 232<br />
manipulation, procedures, 256-257<br />
manual cameras, 36-37. 39<br />
manual-override, 37<br />
mass, 103<br />
mat board, 257-258<br />
mat frame (exercise), 64<br />
matte texture, 232<br />
matting, procedures, 253-255<br />
Meyerowitz, Joel, 244<br />
monopod, 266<br />
Index 283
monotone (exercise), 214<br />
mood, 117-118, 165<br />
light and, 174<br />
line and, 90-91<br />
as objective, 152<br />
and portraits, 183, 186, 191, 195<br />
mood portrait (exercise), 195<br />
motion, 129-133<br />
blurred (exercise), 134<br />
visible, 115<br />
motor drive, 43-44, 267<br />
mounting board, 253-255, 257<br />
mounting press, 253<br />
movement, line and, 87-89<br />
multi-color filter, 266<br />
multiple-exposure control, 44<br />
multiple image filter, 266-267<br />
Muybridge, Eadweard, 14, 16<br />
naturalists, 16<br />
negative, 228, 238<br />
reversing, 256<br />
solarizing, 260-261<br />
negative clips, 228<br />
negative file, 231-232,235<br />
negative image, 262<br />
negative space, 58, 60, 74, 76, 160,<br />
216<br />
using, 105-109<br />
neighborhoods (exercise), 174<br />
Newman, Arnold, 27<br />
Niepce, Isadore, 12<br />
Niepce, Joseph Nicephore, 11-12<br />
night (exercise), 212<br />
nine-zone grid, 54, 59, 75<br />
normal lens, 39, 138. See also 50 mm<br />
lens<br />
object and shadow (exercise), 160<br />
old things (exercise), 160<br />
opaquing compound, 258-259<br />
open markets (exercise), 202<br />
optical center, 138<br />
ovals (exercise), 110<br />
overdeveloping, for contrast, 134<br />
palette, 245,247<br />
palm reading (of light), 122-123,222<br />
284 The Photographic Eye<br />
panning, 132<br />
paper, photographic, 40, 69-70, 232,<br />
235, 238<br />
surface texture of, 232<br />
weight of, 232<br />
paper cutter, 263<br />
patterns, 95-96, 154, 156, 174, 178,<br />
202, 256<br />
exercise, 92<br />
and line, 87-89<br />
recurring, 170<br />
people, photographing, 181-195. See<br />
also portraits<br />
permission (for subjects), 182, 187<br />
188,202,269-271<br />
perspective, 56, 137-145, 167, 172,<br />
176, 178<br />
lenses and, 138-140<br />
photographers, famous, 11-16, 18-24,<br />
28, 152, 168, 184, 197-199,214<br />
photographic dyes, 262<br />
photography:<br />
as art, 16, 18-19,21,23, 184,209<br />
careers in, 26-28<br />
and computer, 25<br />
defined, 51-52, 84<br />
freelance, 26-28, 31<br />
history of, 11-31, 152, 168, 184,210<br />
issues in, 197<br />
for publication, 269-271<br />
as seeing, 84<br />
staff, 27<br />
photography show, hanging, 255<br />
photojournalism, 22-23, 27, 28, 197<br />
"photo secession," 18, 20<br />
pictorialists, 16, 152, 184<br />
places, photographing, 167-179<br />
plastic sheets (for storage), 40<br />
playgrounds (exercise), 204<br />
point of departure setting, 83-84, 87,<br />
113-115, 158, 162<br />
point of interest, 74<br />
point of view, 145<br />
exercise, 146<br />
polarizing filter, 266<br />
polka dots, on film, 241<br />
Porter, Eliot, 23, 245<br />
portrait lens, 140<br />
portraits, 26-28,63, 181-195, 197<br />
exercises, 188-195<br />
portrait session, 183<br />
positive session, 183<br />
positive space, 60<br />
presentation, 74, 253-256<br />
primary subject, 62<br />
printing, tools of, 232-235<br />
prints:<br />
color, 244, 249<br />
evaluation of, 67-75<br />
mounting, 256-257<br />
non-standard, 256-262<br />
screened, 270-271<br />
sepia-toned, 262<br />
solarizing, 260<br />
strip, 237<br />
prism filter, 266-267<br />
privacy, and portraits, 182<br />
procedures:<br />
contact prints, 234-235<br />
dry mounting,m 253-254<br />
enlargements, 236-238<br />
high contrast print, 259-260<br />
kaleidoscope composite print,<br />
256-257<br />
manipulation, 256-257<br />
matting, 254-255<br />
processing film, 229-231<br />
retouching, 263<br />
solarizing, 260-262<br />
sirip composition, 257-258<br />
tinting, 262<br />
toning, 262<br />
processing, film, 227-241<br />
disasters in, 240-241<br />
history, 17<br />
negative file, using, 231-232<br />
printing, 232-239<br />
procedures, 229-231<br />
tips for, 228-229<br />
tools of, 227-228<br />
proportion, 103, 108<br />
prop portrait (exercise), 192<br />
props, 192<br />
publication, shooting for, 269-271<br />
pushing (the film), 251
ain (exercise), 203<br />
range of light, 68<br />
"rapid fixer," 228<br />
realists, 152<br />
reflected light, 120-121<br />
Rejlander, Oscar, 16<br />
relation, 103-105, 124<br />
release (permission), 269-270<br />
retouching, 31<br />
tools and procedures, 263<br />
rewinder, 43<br />
rewind release, 43<br />
rhythm:<br />
and light, 123-124<br />
line and, 91<br />
Robinson, Henry Peach, 16<br />
rules:<br />
for achieving objectives, 197-198<br />
breaking, 209-214<br />
sabbatier effect, 260<br />
safelight, 233-235, 237<br />
saturated colors, 271<br />
Scheele, Carl Wilhelm, 11<br />
Schloerb, Ron, 262<br />
Schulze, Johann Heinrich, 11-12<br />
scratches, 240-241<br />
screened print, 270-271<br />
secondary subject, 62<br />
self-timer, camera, 44<br />
sepia-toned print, 161<br />
shadow, 158<br />
object and (exercise), 160<br />
shape, 97, 103-110, 117<br />
and composition, 60<br />
exercise, 110<br />
and light, 124<br />
repeated, 158<br />
shutter, 45<br />
and flasK7267-268<br />
testing, 48<br />
shutter speed, 113-115, 197, 198,212<br />
and clarity, 70-71, 73<br />
and motion, 131, 133, 134<br />
standard, 83-84<br />
shutter-speed control, 42-43<br />
side-lit portrait (exercise), 191<br />
silhouette, 117, 179<br />
exercise, 216<br />
slide presentation, 255-256<br />
slides, color, 244, 249<br />
SLR (single lens reflex), 22<br />
snapshots, vs. photographs, 51<br />
soft focus, 70<br />
soft-light portrait, (exercise), 190<br />
solarization:<br />
of negative, 260-262<br />
of print, 260<br />
spatial relation, 103-105, 110<br />
special effects, and prints, 256-262<br />
split-field filter, 266<br />
sports, photographing, 206, 266-267<br />
exercise, 206<br />
spotlight, on subject, 246-247<br />
spot meter, 120-121<br />
spotting colors, 263<br />
spotting dyes, 263<br />
spray mount, 253<br />
spray mounting, 254<br />
stability, 107<br />
standards, 67-75<br />
static balance, 63, 74<br />
Steichen, Edward, 18, 23, 184<br />
stereoscopic camera, 13<br />
Stieglitz, Alfred, 18-19,21-22, 184<br />
stop-action, 206<br />
stop bath, 228-229, 231,238<br />
stop watch, 220, 230<br />
store windows (exercise), 178<br />
Strand, Paul, 23<br />
streaks, 241<br />
street photography, 197<br />
rules for, 197-198<br />
strip composition, procedure, 257-258<br />
strip print, 257<br />
structure:<br />
and composition, 53-56, 59-60<br />
and line, 87-89<br />
style, 67,74-75<br />
subject:<br />
and color film, 246<br />
and contrast, 134<br />
exploring, 84<br />
interacting with, 181-183, 196<br />
positioning, 54, 58<br />
primary, 62<br />
secondary, 62<br />
lacking iron, 253, 257, 258<br />
taillights (exercise), 156<br />
take-up reel, 46<br />
Talbot, William Henry Fox, 12<br />
telephoto lens, 39, 138-142, 162, 206<br />
temperature bath, 229<br />
temperature control, and color film,<br />
244<br />
tension, 206<br />
visual, 107<br />
test strip, 235,259-261<br />
texture, 95-98, 108, 117, 165, 232<br />
things, photographing, 151-165<br />
objectives of, 151-152<br />
35 mm lens, 38-39<br />
timer, 253<br />
liming:<br />
of processing, 230, 237-238<br />
of solarization, 261<br />
tinting, tools and procedures, 262<br />
tones, 162<br />
tongs, 233-234, 238<br />
toning, tools and procedures, 262<br />
toning solution, 262<br />
tools:<br />
for advanced techniques, 165-169<br />
of contact prints, 234-235<br />
dry-mounting, 253<br />
high contrast print, 258-259<br />
history, 17<br />
of manipulation, 256-263<br />
photography, 35-40<br />
of printing, 232-235<br />
for processing film, 227-228<br />
retouching, 263<br />
spray mounting, 254<br />
tinting, 262<br />
toning, 262<br />
transparency film, 249<br />
tripod, 43, 73, 212, 265-266<br />
for portraits, 183<br />
vacuum press, 253<br />
value, 68-70, 232, 247<br />
and black-and-white film, 247<br />
Index 285
and color film, 247<br />
improving, 69-70<br />
Van Der Zee, James, 20 21<br />
variable focal-length lens, 39<br />
variables, 167<br />
vertical lines, 59<br />
viewfinder, 41-42<br />
viewing angle, 165-168<br />
visual harmony, 107, 170, 179<br />
visual interest, 160<br />
as objective, 152<br />
visual tension, 107, 160<br />
wash, 231,238<br />
water (exercise), 164<br />
weddings, photographing, 26-27<br />
weighting, 55-56, 74<br />
Weston, Edward, 23, 152<br />
wetting agent, 229, 231<br />
White, Minor, 23, 24, 25<br />
wide-angle lens, 39, 138, 206<br />
and distortion, 142<br />
winder. See film advance lever<br />
zone focusing, and portraits, 182<br />
zones, 53-54<br />
zone system, 168<br />
zoo (exercise), 176<br />
zoom lens, 23,39, 141-142, 162,206<br />
zoopraxiscope, 14<br />
286 The Photographic Eye
Acknowledgments<br />
The authors wish to thank Scholastic,<br />
Inc., especially Eudora Groh and<br />
Mimi Sanchez, for generous assistance<br />
in providing student photographs.<br />
We also wish to thank the<br />
individual teachers and students at<br />
Seoul American High School who<br />
responded to our request for samples<br />
of their work, especially Jeff Frye,<br />
Trevor Bredenkamp and other students<br />
who undertook special assignments<br />
for us. Exercises on pages<br />
218-219 and 222-223 provided by Jolecn<br />
Mahoney Roe (Bethlehem Central<br />
High School, Dehnar, New-<br />
York). We are grateful, too, to<br />
Tommy Clark (Lamar High School,<br />
Houston, Texas), William Jerdon<br />
(Cleveland Heights High School,<br />
Cleveland Heights, Ohio) and Shirley<br />
Rosicke (John Jay High School,<br />
Hopewell Junction, New York) for<br />
carefully reviewing the manuscript<br />
before publication.<br />
Scholastic Inc. provided photographs<br />
that appear on the following pages:<br />
4, 9, 36-38, 50, 53, 57, 60, 63, 68,<br />
71-73, 75, 76, 80, 84, 85, 88, 91, 99,<br />
109, 112-114, 118, 119, 122-124,<br />
129-131, 133, 134, 140, 145, 164-167,<br />
170-173, 177, 181, 182, 187, 189,<br />
190, 192, 195-198, 202, 209, 210,<br />
219, 220, 221-223.<br />
Sotheby's Inc. provided photographs<br />
that appear on pages 14, 16-19, 21,<br />
22, 25, 27, 29, 153, 169, 185, 201,<br />
213.<br />
The following high schools also provided<br />
student photographs (page<br />
numbers in parentheses): Dowling<br />
H.S., West Des Moines, Iowa (56,<br />
149, 175, 193, 203); James W. Riley<br />
H.S., South Bend, Indiana (195);<br />
Wagner American H.S., Phillipines<br />
(70); Largo H.S., Florida (137); Colo<br />
Community H.S., Iowa (164, 171,<br />
209); Central Visual and Performing<br />
Arts H.S., St. Louis, Missouri (165);<br />
East H.S., Waterloo, Iowa (192);<br />
Bethlehem Central H.S., Delmar,<br />
New York (97, 177, 180, 192, 208,<br />
219,222-223,248).<br />
Acknowledgments 287
REVISED EDITION<br />
<strong>THE</strong> <strong>PHOTOGRAPHIC</strong> <strong>EYE</strong><br />
Learning to See with a Camera<br />
A GUIDE FOR TEACHERS
ESSENTIAL ELEMENTS<br />
The following is a listing of the Essential Elements for Art Education prescribed by the Texas Education Agency.<br />
1. Awareness and sensitivity to natural and human-made environments.<br />
A. examining a variety of objects<br />
B. exploring art elements (line, value, texture, color, form and space)<br />
C. applying art principles (unity, emphasis, balance, variety, movement and proportion)<br />
2. Inventive and imaginative expression through art materials and tools.<br />
A. designing, developing and creating original artworks<br />
B. working in art areas (ceramics, design, drawing, painting, photography, printmaking and sculpture)<br />
3. Understanding and appreciation of self and others through art, culture and heritage.<br />
A. appreciating art (contemporary and past artworks)<br />
B. exploring art and artists through visuals and visitations<br />
4. Aesthetic growth through visual discrimination and judgment.<br />
A. evaluating artwork (students and major artists)<br />
B. applying aesthetic judgments<br />
TEXAS ASSESSMENT OF ACADEMIC SKILLS<br />
DOMAIN: READING COMPREHENSION Instructional Targets, English Language Arts (Exit Level)<br />
R1 Objective 1: The student will<br />
determine the meaning of words in a<br />
variety of written texts.<br />
• Use of context clues to choose the<br />
appropriate meaning of multiplemeaning<br />
words<br />
• Use knowledge of the meanings of<br />
prefixes and suffixes to determine<br />
word meanings<br />
• Use context clues (e.g., synonym,<br />
antonym, definition and explanation,<br />
description or example) to determine<br />
the meaning of an unfamiliar work<br />
• Use context clues to determine the<br />
meanings of specialized/technical<br />
terms<br />
R2 Objective 2: The student will<br />
identify supporting ideas in a variety<br />
of written texts.<br />
• Recognize supporting facts and details<br />
• Arrange events in sequential order<br />
• Follow complex written directions<br />
R3 Objectives: The student will<br />
summarize a variety of written texts.<br />
• Identify the stated main idea<br />
of a selection<br />
• Identify the implied main idea<br />
of a selection<br />
• Identify the best summary<br />
of a selection<br />
R4 Objective 4: The student will<br />
perceive relationships and recognize<br />
outcomes in a variety of written texts.<br />
• Perceive cause and effect relationships<br />
• Predict probable future actions and<br />
outcomes<br />
R5 Objective 5: The student will<br />
analyze information in a variety of<br />
written texts in order to make<br />
inferences and generalizations.<br />
• Interpret graphs, charts, diagrams<br />
and tables<br />
• Make inferences and draw conclusions<br />
• Make generalizations<br />
• Evaluate and make judgments<br />
• Describe plot, setting and mood<br />
in literary selections<br />
R6 Objectives: The student will<br />
recognize points of view, propaganda<br />
and/or statements of fact and nonfact<br />
in a variety of written texts.<br />
• Recognize the author's point of view<br />
and purpose<br />
• Recognize forms of propaganda<br />
• Distinguish between fact and nonfact<br />
Note: The wording of the instructional<br />
targets was taken for the most part<br />
directly from the Essential Elements as<br />
delineated in the State Board of Education<br />
Rules for Curriculum. Each target is<br />
defined in behavioral terms appropriate<br />
for pencil-and-paper testing in the section<br />
entitled Description of Test Questions.<br />
Continued on Inside Back Cover
<strong>THE</strong> <strong>PHOTOGRAPHIC</strong> <strong>EYE</strong><br />
A Guide for Teachers<br />
Michael F. O'Brien and Norman Sibley<br />
Davis Publications, Inc., Worcester, Massachusetts
Copyright 1445<br />
Da\ is Publications. Inc.<br />
Worcesicr. Massachusetts. U.S.A.<br />
Coordinating Editor:<br />
Claire Moubray Guiding<br />
Production Editor: Nancy Wood Bedau<br />
Design: Janis Owens<br />
Production Artist: Tricia Def'orge<br />
Manufacturing Coordinator:<br />
Steven Vogelsang<br />
No part of this work may be reproduced<br />
or transmitted in any form or by any<br />
means, electronic or mechanical, including<br />
photocopying and recording, or by any<br />
information storage or retrieval sy stem<br />
without the prior written permission of the<br />
copyright owner, unless such copying is<br />
expressly permitted by federal copyright<br />
law. Davis is not aulhori/ed to grant<br />
permission for lurther uses of copyrighted<br />
selections or images reprinted in this text<br />
without the permission of their owners.<br />
Permission must be obtained from the<br />
individual copyright owners as identified<br />
herein. Address requests for permission<br />
to make copies of Davis material to<br />
Permissions, Davis Publications Inc..<br />
50 Portland Street. Worcester. MA 01608.<br />
Printed in the United States of America<br />
ISBN: S7192-2S4-3<br />
109876543
Contents<br />
Introduction 5<br />
Technique vs. Creative Expression 5<br />
Part 1 Teaching with The Photographic Eye 7<br />
Editorial Philosophy and Structure<br />
Special Features<br />
Application<br />
Community Resources 9<br />
Preparing the Classroom 15<br />
Basic Set-Up 15<br />
The Darkroom 18<br />
Defraying Expenses 22<br />
Part 2 Planning the Course 24<br />
Student Role 24<br />
Critiquing 24<br />
Teacher Evaluation 26<br />
Student Portfolio 27<br />
Class Variations 28<br />
Research Projects 28<br />
Exercise Variations 34<br />
Reteaching Options and Productive Play 35<br />
Part 3 Useful Information 39<br />
Health and Safety Guidelines 39<br />
Tools and Equipment 39<br />
Chemicals 40<br />
18-Week Curriculum 43<br />
36-Week Curriculum 45<br />
Additional Sources 50<br />
Evaluation and Study Aids 53<br />
Critique Form (for use by students) 55<br />
Photograph Evaluation Form 56<br />
Reading Worksheet for Chapter 1 57<br />
Quiz for Chapter 2 63<br />
Quiz on Film Developing (Appendix 1) 67<br />
Final Examination Study Sheet 69<br />
Correlations to Essential Elements and TAAS 70<br />
3
Introduction<br />
TECHNIQUE vs. CREATIVE EXPRESSION<br />
Like any form of art or craft, photography employs technical skills to facilitate<br />
creative expression. Because it requires the use of a sophisticated<br />
machine (rather than brushes and paint or other simple tools), the technical<br />
aspect of photography is especially important. However, once the basic<br />
mechanics have been mastered, photographers are exceptionally free to<br />
explore the creative potential of their craft, because the camera does much<br />
of the work that painters, for example, must continually strive to refine.<br />
Ultimately, these two concerns — technique and creative expression —<br />
are complementary. Each enhances the other. In practice, however, anyone<br />
who teaches photography must make some choices about which approach<br />
will be given primary attention, take precedence as a criterion for grading<br />
purposes and promote the most productive learning experience.<br />
Successful development of technical skills will enable students to produce<br />
photographs that are well composed, exposed and printed. For students<br />
who already possess a clear sense of visual acuity, this approach may also<br />
result in creative discovery and the depth of expression which genuine art<br />
requires. In addition, acquiring precise and systematic work habits are potentially<br />
beneficial in other kinds of endeavors. On the other hand, technique<br />
can readily become too dominant, producing results that are precise but sterile,<br />
"correct" but uninspired and flawlessly dull.<br />
An emphasis on creative expression may result in photographs that<br />
are technically less than perfect, but it has one distinct advantage: a<br />
capacity to foster deep and lasting enthusiasm for the joy of looking, seeing<br />
and creating.
The Photographic Eye is devoted, first and foremost, to the goal of teaching<br />
photography as a medium for creative expression. The technical aspects<br />
are of course covered in considerable detail, but they are not the primary<br />
theme. Instead, seeing — specifically "learning to see with a camera" — is<br />
the core concern. In our experience, students who first learn to do this will<br />
quickly move on to the next step — effectively expressing what they see —<br />
and this, in turn, will give them the incentive to improve on technique. We<br />
believe that proceeding in the opposite direction, from technique to creativity,<br />
is both more difficult and less likely to be of lasting benefit.<br />
The lessons learned through the "creative" approach extend to every facet<br />
of life, regardless of whether or not a student continues to apply them in the<br />
field of photography. Those who pursue other visual arts will do so with<br />
enhanced perception and acuity. Even if the visual arts are abandoned, students<br />
who have learned to look and see (and express what they have seen)<br />
will be enriched throughout life, trained to experience the world as a constant<br />
source of stimulating and instructive images and insights.<br />
In addition, many of the skills and experiences gained through a course<br />
of this kind are of direct practical benefit in virtually any pursuit. Specific<br />
examples include the ability to notice and utilize detail, pattern and relation;<br />
the conceptual skills required to compose a photograph; experience in<br />
problem-solving; and exposure to the creative application of complex<br />
technology.<br />
Photography — like any art — is both technically and creatively boundless.<br />
No one, not even a teacher, can be expected to master it all. We believe<br />
the text contains all the basic information required to get students off to a<br />
good start in photography, even if the teacher is just starting in it as well. If<br />
you already have some experience in photography, so much the better, but<br />
little or none is strictly necessary. We've attempted to make the learning<br />
process as painless — for everyone — as possible. And we urge teachers to<br />
learn with their students. The key to doing so is to provide clear, consistent<br />
structure, leaving ample room for individual tangents and discoveries.
port 1 Teaching with The Photographic Eye<br />
EDITORIAL PHILOSOPHY AND STRUCTURE<br />
The Photographic Eye is essentially intended to serve as a catalyst. Solemn<br />
pronouncements about "right" and "wrong" ways of doing things have been<br />
studiously avoided, in the hope of stimulating discussion, exploration and<br />
discovery. Both the content and style of the text are designed to support the<br />
teacher's and students' insights and experience, so each class can define its<br />
own orientation, priorities, preferences and goals.<br />
In keeping with this approach, the bulk of the technical data (including a<br />
chapter on color photography) has been placed in the appendices — not<br />
because it is unimportant, but so each teacher may decide when to introduce<br />
specific skills. A historical survey and the basic workings of the camera are<br />
at the front, to provide a foundation. Both are deliberately brief, so students<br />
may begin producing photographs as quickly as possible.<br />
This is very much a hands-on course, for the simple reason that information<br />
is far more likely to "stick" when learned through practical application,<br />
rather than through abstract theorizing. Depending on class structure<br />
and available resources, teachers may wish to augment the assignments provided<br />
in the text with research projects and other activities which do not<br />
require the use of a camera or darkroom. However, we believe the knowledge<br />
gained in these ways will be more meaningful (and therefore be more<br />
effectively retained) if integrated with a regular routine in which students<br />
are challenged to fulfill specific photographic tasks.
Special Features<br />
Application<br />
As a glance through the table of contents will indicate, one key component<br />
of The Photographic Eye is the sequence of exercises, each of which<br />
is designed to achieve three essential goals:<br />
1. reinforce concepts discussed in the text;<br />
2. provide a gradual progression into more advanced use of the camera;<br />
3. introduce students to the perspectives of other photographers (generally<br />
other students undertaking the same exercise).<br />
Another essential ingredient is the series of focal points — special sections<br />
providing in-depth coverage of a concept or photographer mentioned<br />
in (or relevant to) the main text. Focal points offer an opportunity for enrichment<br />
or advanced study of some very specific topics, such as depth of field<br />
or light meters. They may also contain biographies of outstanding photographers:<br />
Alfred Steiglitz, Margaret Bourke-White and many others. Often<br />
these featured photographers are especially illustrative of the concept(s) discussed<br />
in the chapter with which they appear. For example, Margaret Bourke-<br />
White is profiled next to the text discussing photojournalism. Diane Arbus<br />
appears in the chapter entitled ''Breaking the Rules."<br />
It is important to note — and point out to students — that the vast majority<br />
of photographs in this book were taken by high school students. While<br />
many are of exceptional quality, they are largely the work of peers — not<br />
daunting masterpieces by famous artists. Some masterpieces have been<br />
included, to establish standards and provide a challenge, but the overall message<br />
of the photographic illustrations is "you too can do this."<br />
Though it is highly recommended to proceed through chapters sequentially<br />
in "Part 2 — The Elements of Photography," teachers are encouraged to vary<br />
the sequence of exercises in "Part 3 — People, Places and Things" to capitalize<br />
on local and seasonal opportunities and on the students' developing<br />
interests and needs. For example, a town fair in October should not be missed<br />
simply because it is "ahead of schedule" (see the exercise on "Fairs," pages<br />
200 and 201). Conversely, if a number of students are having difficulty grasping<br />
a particular concept, you may wish to devote more time to it than indicated<br />
by the text (or return to it later).<br />
Any number of variations on the exercises may, of course, be added as<br />
well. The basic framework — succinct assignment description, explanation,<br />
examples and tips — is infinitely expandable. (Some ideas along this line<br />
are included in Part II of this manual.)
Similarly, a teacher who has darkroom or other technical experience may<br />
well wish to expand coverage of these topics, possibly adding exercises<br />
specifically tailored to this purpose. Also, a number of excellent books and<br />
periodicals are available which explore topics that are beyond the scope of<br />
this textbook (see the Sources section on page 50 of this manual).<br />
Finally, The Photographic E\e (as a catalyst) will ideally be integrated<br />
with whatever community resources may be locally available, in addition to<br />
a growing "library" of student work from previous years, other sources of<br />
photographs, field trips, research projects and additional activities.<br />
Community Resources One distinct advantage of photography as a course of study is that it has<br />
many applications in the daily life of virtually any community. As a result,<br />
there are certain to be a number of local resources that can significantly<br />
enhance your students' educational experience.<br />
Local Newspapers<br />
Any local newspaper (or other periodical publication) is a potential gold<br />
mine of opportunities for photography students. To begin with, you might<br />
arrange for a tour of a newspaper's production facilities, enabling students<br />
to observe firsthand how photographs are converted to the printed page. A<br />
tour might also include an introduction to the wire-service computer, showing<br />
how photographs from around the world are received and edited for local<br />
use. In addition, a photo-editor or staff photographer might be invited to<br />
explain the process of illustrating local stories and discuss how newspapers<br />
approach lighting, contrast, composition, etc. One extension of this idea<br />
would be for students to accompany a staff photographer to the scene of an<br />
actual news event. (Even something as tame as a town council meeting could<br />
be highly educational and quite exciting.)<br />
It may also be possible to interact with a local paper on a continuing basis,<br />
providing students with an opportunity to get their photographs published<br />
and obtain invaluable on-the-job training. For example, the feature editor<br />
might be willing to assign a story to your class, explaining what kind of photographs<br />
would be appropriate, selecting the best entries and using them to<br />
illustrate the story. If successful, this kind of collaboration could evolve into<br />
a mutually beneficial, ongoing relationship, with student work illustrating<br />
perhaps one story each month. In this case, you might wish to divide the<br />
class into teams, with several students working together on a single story.<br />
One alternative would be for the newspaper to reserve a full page (again,<br />
perhaps once a month) for student photographs of the local community or<br />
to run a single student photograph as an occasional highlight.<br />
9
10<br />
Studio Photographers<br />
Virtually any town (and all cities) have professional studio photographers<br />
whose services may include portraiture, advertising, print restoration or corporate<br />
promotions. The first step to taking advantage of this resource would<br />
be to arrange a presentation or field trip, inviting one or more photographers<br />
to visit the class and discuss their work or to host the class in the studio or<br />
on location.<br />
Additional variations might include arranging for small groups of students<br />
to spend an extended period of time observing a professional photographer<br />
at work. It may also be possible to set up workshops in which<br />
students can refine their darkroom skills, learn about studio lighting<br />
or receive specialized instruction in some other aspect of professional<br />
photography.<br />
Local photographers may also be willing to serve as judges for photographic<br />
competitions or as a panel to critique student work on a regular basis.<br />
Depending on the size of your class and the number of professional photographers<br />
in your area, you may be able to organize "mentor sessions," in<br />
which several students meet with a local photographer for specialized instruction,<br />
critiques and advice. One advantage of this kind of activity is that it<br />
would expose students to a variety of perspectives, promoting a broad awareness<br />
of photographic opinion and stimulating discussion.<br />
Finally, don't forget the wedding photographers, nature photographers,<br />
technical photographers, print retouchers, lab technicians, camera repair<br />
shops, antique dealers and others who may have specialized skills or information<br />
to offer your class. A close inspection of the Yellow Pages may be<br />
the best place to start a busy year of informative presentations and field trips.<br />
Galleries and Exhibits<br />
Though the number of art galleries and exhibits featuring photography will<br />
vary according to your region and the size of your community, there is an<br />
excellent chance that you will have access to some resources along this line.<br />
If not, you may be able to create them.<br />
One emerging trend is for restaurants to use the work of local artists and<br />
photographers to decorate their walls. If this is common in your community,<br />
it is yet another way of locating photographers who might be willing to assist<br />
you in some of the ways outlined above. A nature photographer, for example,<br />
would be another good choice for a class presentation and may also be<br />
open to escorting your class on a field trip to a local scenic area.<br />
If none of the restaurants in your community currently include photographs<br />
in their decor, perhaps you can persuade them to start — using the
work of your students in a rotating display. One recommendation that applies<br />
to any proposal of this kind is that you should first prepare an impressive<br />
portfolio of your students' best work, so you are clearly offering a service<br />
and not merely asking a favor. In addition, be sure that the work you present<br />
is appropriate: landscapes or appealing portraits (possibly in color) are likely<br />
to be of greater interest to a restaurant than shots of the latest football game,<br />
though again this will vary according to local taste.<br />
Any gallery or other exhibit that includes a substantial number of photographs<br />
is a fabulous opportunity for students to be exposed to the work of<br />
other photographers. Plan a field trip and follow it up with a critique session,<br />
encouraging students to voice their responses to the work they have<br />
seen. Better still, you might be able to arrange for a private viewing (at a<br />
time when the gallery or exhibit is officially closed or expecting low attendance)<br />
and do the critique right then and there. (This is of course preferable<br />
to having to remember what the photographs looked like.) Perhaps the<br />
photographer!s) featured in the exhibit would be willing to meet with your<br />
students and explain the work on display, both in terms of artistic intent and<br />
technical considerations.<br />
When visiting a gallery or exhibit with your class, don't forget to raise<br />
practical questions as well as exploring aesthetics. For example, how are<br />
the photographs mounted and arranged? How might certain effects have been<br />
produced? What ideas, techniques or locations might students try to emulate?<br />
Advertising Agencies<br />
Any local advertising agency is yet another potential resource, regardless of<br />
its size or prestige. A large, "flashy" agency (the sort that produces full-color<br />
advertising spreads or sales literature for major corporations) should be willing<br />
and able to provide an exciting and highly instructive classroom presentation<br />
or tour. A smaller and more modest operation can demonstrate how<br />
photography is employed in newspaper ads or simple brochures.<br />
There is a better chance that smaller-scale agencies will be open to more<br />
substantial (and ultimately more rewarding) collaboration as well. For example,<br />
you might be able to arrange for your class (again, possibly in teams)<br />
to assist with the photography for some advertising projects. (It may also be<br />
possible to arrange this directly with your local newspaper.) Alternatively,<br />
perhaps your class could attend some of the planning and design sessions in<br />
which agency staff decide how to approach an ad and which photographs to<br />
include in it.<br />
If there are no advertising agencies in your community, you have an excellent<br />
opportunity to make an offer to local merchants. Ask them if they'd like<br />
11
12<br />
to assign an ad to your class, either for publication in the local paper or as<br />
a hypothetical experiment. This is one area in which you may wish to work<br />
together with a writing and/or art class as well — arranging for one class to<br />
produce the copy (or text) and another to handle the design and layout to<br />
accompany photographs produced by your students.<br />
Camera Stores<br />
Any place where cameras are sold or film is processed is a resource you<br />
should not neglect. The educational opportunities range from demonstrations<br />
of equipment to in-depth training in specialized skills.<br />
For example, one great way to augment the "Tools" chapter of the text<br />
(page 35) is to plan a field trip to a local camera store and ask the proprietor<br />
to explain the workings of a selection of the cameras and other equipment<br />
sold there. If the store also has a darkroom (or a computerized processor)<br />
then this would be an excellent destination for a second field trip when your<br />
course progresses to that point. The camera store staff is also likely to include<br />
some accomplished photographers and to be a great source of tips regarding<br />
other photographers in your area (they are likely to know who is really<br />
good and most likely to give you a cordial reception).<br />
Local Clubs and Organizations<br />
There are two categories to be considered here: clubs and organizations<br />
specifically concerned with photography and others that may employ photography<br />
as an adjunct to their main activities or interests.<br />
The first category is fairly straightforward. Many towns and cities have<br />
camera clubs whose members would be more than willing to offer advice,<br />
tutoring, slide presentations, photographs for critiques or display, or to host<br />
field trips, serve as judges or provide other valuable services. At the very<br />
least, they should be an excellent source of back issues of photography magazines.<br />
If you're unable to locate a local camera club, contact the Photographic<br />
Society of America, 3000 United Founders Boulevard, Suite 103.<br />
Oklahoma City, OK 73112, tel: 405-843-1437.<br />
One word of caution: some camera clubs are highly conservative in their<br />
photographic tastes and quite dogmatic in their views regarding composition.<br />
They may still be very useful resources, but — as always — we recommend<br />
that you encourage your students to question and challenge any<br />
aesthetic opinions that may be presented as absolute "rules."<br />
The second category of clubs and organizations — those for which photography<br />
is not a primary concern — invites more creativity and imagination.<br />
If your community is blessed with a local historical society, it may have
a wealth of old photographs of interest to your students — which they might<br />
help restore by doing copy-photography and making new prints. (Once again,<br />
an exhibit is certainly possible for this, and the local newspaper might want<br />
to run some of them.) There may be a performing arts school that would be<br />
grateful for the assistance of student photographers. A bird-watchers' club<br />
might be a good source of ideas and information on nature photography. A<br />
gardening club could ensure that your students have some splendid subjects<br />
for still-lifes. (By the way, vegetable gardens are excellent locations for<br />
exploring light, line, shape and texture.)<br />
If you're looking for a good place for students to practice candids, consider<br />
the local Bingo hall, the annual Shriners' parade, the Elk's weekly<br />
barbecue or whatever local events draw a diverse mix of people. (Be aware<br />
of the possible need for flashes in these settings.) Pay attention to local events<br />
calendars, bulletin boards and other sources of news on upcoming events<br />
and be sure everyone knows of your interest. With any luck, people will soon<br />
be seeking you out with ideas on new projects and events that may benefit<br />
your class and enable them to become active participants in your community's<br />
life. That is one way in which a course in photography can be expanded<br />
into a rich and multidimensional educational experience.<br />
13
14<br />
Etceteras<br />
No list of this kind can cover all the educational opportunities that may be<br />
available in your own community. Some novel ideas will certainly present<br />
themselves once you begin exploring.<br />
For example, if a college, technical school or university is within reach,<br />
you might be able to establish an ongoing relationship with its photography<br />
department, making arrangements for your students to sit in on classes, join<br />
in critique sessions and tour (or use) the darkroom facilities. Some recreational<br />
facilities are equipped with darkrooms and may be willing to make<br />
special arrangements for students to take advantage of them. There may be<br />
a local crafts cooperative or other similarly equipped organization that would<br />
rent darkroom space to your class at a modest rate.<br />
If you're located near the offices of camera, film or accessory manufacturers<br />
— or custom labs, publishing companies and related businesses —<br />
then additional field trips and classroom presentations should not be difficult<br />
to arrange. Perhaps a printing company would provide a tour of its colorseparation<br />
facilities (if it's big enough to have one), showing students how<br />
a photograph is prepared for printing. A television studio might offer a similar<br />
tour, showing how images are broadcast on TV.<br />
If no such resources are close at hand, you might write to some manufacturers<br />
and request stock slide presentations or promotional literature.<br />
Tiffcn, for example, offers an excellent presentation — free of charge — on<br />
their line of filters. The presentation (which runs about 30 minutes) comes<br />
with a loaned dissolve unit and tape player and even a filter "door prize."<br />
All you would need to provide is a Kodak or compatible slide projector and<br />
a screen. Call 800-645-2522 or write to Tiffen, 90 Oser Ave., Hauppauge,<br />
NY 11788 to make arrangements.<br />
Kodak also offers an extensive range of promotional literature on their<br />
films, cameras, CD and computer imaging systems, etc. Use a touch-tone<br />
phone to call Kodak's product information line, 800-242-2424 and hit the<br />
appropriate buttons to find what you need.<br />
You may also be able to join forces with other classes or groups in your<br />
own school. One obvious example is for your class to be actively engaged<br />
in producing the school yearbook. Another is to help produce promotional<br />
materials for a school play by photographing the actors in appropriate poses<br />
for a poster or hallway display. Don't forget the local newspaper as an outlet<br />
for this kind of work!<br />
Some of the exercises in The Photographic Eye may suggest additional<br />
avenues for this kind of collaboration. (One specific example is the "Text &<br />
Image" exercise on pages 224 and 225 of the text.) A writing or English<br />
class might work with your photography students to develop an exhibit or
PREPARING <strong>THE</strong> CLASSROOM<br />
slide show on some topic of shared concern or interest. You might produce<br />
a similar presentation about your town with a history class, photographing<br />
buildings that are historically significant or doing copy photography of<br />
antique prints. A social studies class might be a good partner for a presentation<br />
on your community as it is today, possibly illustrating the various government<br />
offices and civic groups that are active in its daily affairs.<br />
In short, once you start looking and asking, odds are you'll find more<br />
potential resources than you can possibly use.<br />
The ideal classroom for teaching photography is one that is reasonably spacious,<br />
well-lit and abundantly stocked with photographs. With a modest<br />
investment of time, money and imagination, virtually any room can be converted<br />
into a space that will facilitate the learning process and promote efficient<br />
working habits.<br />
Basic Set-Up Arranging the Furniture<br />
A well-designed photography classroom will of course contain the usual<br />
desks and chairs, though you may wish to cluster them together (especially<br />
if their tops are flat and of uniform height) to create additional surfaces for<br />
spreading out photographs or supplies and to encourage students to interact<br />
in smaller groups. Off to one side, it is a good idea to clear a space for cutting<br />
mats and mounting prints. This area will ideally include a good paper<br />
cutter, a mat cutter and dry-mount press (if available), plus a large table to<br />
work on. Some surrounding floor-space will also come in handy, since many<br />
tasks can be done on that level.<br />
The next major concern is preparing a suitable arrangement for critique<br />
sessions. The goal here is to devise an effective way of displaying photographs<br />
in full view of the entire class. This is often done by simply tacking<br />
photographs directly into the wall (assuming its surface is receptive and<br />
no one minds having it poked full of holes). Another method is to attach narrow<br />
strips of wood along one wall, on which mounted prints can be placed.<br />
An advantage to this approach is that the photographs can be easily<br />
rearranged. This permits exploration of the ways various individual images<br />
relate to others and produces interesting and instructive combined effects.<br />
Whatever system you employ, it is very important that the crit area be<br />
free of additional clutter— an otherwise blank wall will help focus students'<br />
attention on the photographs and promote visual clarity. You will also want<br />
15
Ample space, effective light traps and<br />
fastidious cleanliness are essential<br />
ingredients of any shared darkroom<br />
space. (Photograph hy Doric I'ar.miix.)<br />
16<br />
to arrange the classroom furniture so there is a clear passage along the whole<br />
length of the crit area, so everyone can get up close and observe details. One<br />
final consideration: the crit area should be set up out of reach of direct sun-<br />
light, as this will hamper visibility.<br />
Light<br />
Lighting is a matter of critical importance in any classroom devoted to the<br />
visual arts, especially for work done in color. If at all possible, avoid standard<br />
fluorescent lights (or low-wattage incandescent bulbs) as these will<br />
impede clear vision and impose an unfortunate "color-cast." (Fluorescent<br />
light produces a flickering greenish-blue effect that is especially hard on the<br />
eyes. Incandescent light tends to be orange, which is not much better.) Excellent<br />
full-spectrum bulbs are available for either kind of lighting. They are<br />
fairly expensive and may be difficult to locate, but are certainly worth the<br />
trouble. (Check at your nearest health food store if all else fails.) No other<br />
single expenditure is likely to have as much impact on the educational quality<br />
of your classroom as obtaining good lighting. It is very hard to learn to<br />
see well when one must struggle to see at all.<br />
Decor<br />
With the sole exception of the crit area, it is entirely appropriate to cover all<br />
available walls with photographs. One key to developing critical judgment<br />
in photography is to look at a large number of examples of other photographers'<br />
work.<br />
Constant exposure to photographic excellence provides students with a<br />
standard for which they might strive. It heightens their expectations. Even<br />
less-than-excellent photographs are useful aids in developing visual acuity,<br />
though it is not productive to be surrounded by outright mediocrity. Changing<br />
the collection of photographs on your walls at regular intervals is one<br />
simple way of ensuring that your classroom is a dynamic environment, one<br />
that promotes interest, creativity and high aspirations.<br />
Whatever other resources may be lacking, a collection of photographs is<br />
one resource that is absolutely vital and well within anyone's reach. Since<br />
budget limitations usually prohibit the purchase of exhibition prints, the primary<br />
source will be magazines and books. While it is highly recommended<br />
that teachers subscribe to one or more of the better photography magazines<br />
for class use, that is just the beginning. National Geographic, Sports llluximied,<br />
Islands. People, Time and Newsweek, fashion magazines and a host<br />
of other periodicals contain numerous photographs that are well worth critiquing.<br />
Similarly, coffee table books on foreign countries, cooking, archi-
A well-equipped (and carefully designed)<br />
darkroom will enable a sizeable number<br />
of students to work together, without<br />
generating chaos or tedium. (Photograph<br />
by Doric. Famous.)<br />
lecture and many other subjects are packed with striking photographs, as are<br />
travel brochures, annual reports, calendars (less expensive after January 1),<br />
posters and catalogs.<br />
One good early assignment is to ask each student to scour the basement<br />
or attic at home tor magazines and books with photographs that can be cut<br />
out and displayed. This exercise in itself is certain to prove highly educational<br />
and may provide a basis for fruitful discussion of the various branches<br />
of photography (scientific, sports, cultural, fashion, product, portraiture, photojournalism)<br />
and of photography's role in our culture.<br />
In the unlikely event that this assignment fails to produce an adequate<br />
stock file, local civic groups, libraries, doctors' offices and other sources in<br />
the community might also be approached for their discarded books and magazines.<br />
This same approach could be a good way to obtain additional, if<br />
somewhat outdated, camera equipment. Virtually every photographer has an<br />
old lens, light meter or tripods gathering dust somewhere.<br />
If some budget is available, inexpensive books may be found in the<br />
remainders bins at bookstores and even at yard sales. Barnes & Noble and<br />
other discount book distribution companies have mail-order catalogs offering<br />
suitable books at discount prices.<br />
17
The Darkroom<br />
Light Baffles, top view<br />
18<br />
Every photographer dreams of the perfect darkroom, and most of us manage<br />
to make do with a merely adequate substitute. The main reason for this<br />
is that a first-rate darkroom is very expensive to build, equip and maintain.<br />
Ultimately, however, there's only one thing that really matters: dust. If<br />
you can't keep dust under control, it will consistently sabotage your ability<br />
to teach good darkroom skills and undermine your students' efforts to produce<br />
high-quality prints. Nothing is more frustrating (and more damaging<br />
to a student's desire to learn) than spending hours in the darkroom laboring<br />
with painstaking care over a single print, only to discover a motley collection<br />
of white specks all over it once it's brought into the full light of day.<br />
Knowing the importance of effective dust-control is one thing; achieving<br />
it is another. Here again (unless you are very lucky or endowed with a luxurious<br />
budget) you will probably have to accept some compromises. But you<br />
will have a distinct advantage if you recognize dust as your sworn enemy<br />
and vigilantly pursue it.<br />
Begin by limiting the surfaces and nooks and crannies where dust can<br />
collect. Install no more shelving than you actually need (or remove whatever<br />
excess may already be in place). A good basic darkroom requires only<br />
a single counter top to support the enlarger(s), a large sink and enough space<br />
for processing trays (in the sink if it's big enough). Reduce clutter to a strict<br />
minimum. Store papers and all non-essential equipment (extra enlarger<br />
lenses, etc.) in file cabinets or any other available containers. Keep nothing<br />
in the actual darkroom space that doesn't absolutely belong there; cram the<br />
overflow into a closet somewhere else. It is perilously easy to let odds and<br />
ends begin to collect in a darkroom, so a periodic "spring cleaning" is highly<br />
recommended.<br />
All surfaces should be non-porous, to ensure that chemicals — and dust<br />
— can be wiped away. (Uncovered concrete and wood are especially undesirable.)<br />
All cracks should be carefully caulked. This will also assist in controlling<br />
culprit number two: light leaks.<br />
Light and dust traps should be installed along the edges of all doors (insulation<br />
kits available in any hardware store work fine). Any windows should<br />
of course be thoroughly blacked out and sealed shut. Linoleum is probably<br />
the best surface for the floor (again, avoid exposed concrete). Ideally, walls<br />
will be painted white (enamel or other easily cleaned paint is best), as this<br />
will make any residue more visible.<br />
BLACK<br />
VINYL-COATED If the size and layout of your darkroom space permit, it is a good idea to<br />
construct a light baffle, so students can come and go without letting light<br />
slip in (disastrous for prints in progress and opened boxes of photo-paper).<br />
One reasonably simple procedure is to hang three or more floor-to-ceiling<br />
strips of black, opaque fabric (coated with plastic if possible) in overlapping
Film drying closet<br />
rows, creating a passageway through which people can pass without bringing<br />
in light. If you must resort to a generic doorway, hang at least one lighttrap<br />
strip about three feet into the darkroom, parallel to the door, attached<br />
to the wall on the side where the door opens (opposite the hinge). This will<br />
at least ensure that no blasts of full daylight spill in unannounced.<br />
One common misconception is that a darkroom must be. . .well, dark.<br />
While it is true that prolonged exposure to even red or yellow "safe" lights<br />
can fog papers (and will certainly ruin film), a well-designed darkroom will<br />
have enough of these (carefully placed to provide illumination where it's<br />
actually needed) to ensure that it is not difficult to see once the eyes adjust.<br />
The desired effect is suggestive of twilight. There's no need to fumble about<br />
in true darkness, increasing the risk of mistakes and accidents.<br />
At a minimum, each enlarger should be equipped with its own safe-light,<br />
and there should be two or three at intervals above the developing trays and<br />
sink, plus a general source of illumination for the rest of the room if it's large<br />
enough to need it. Be sure all switches are readily accessible, so lights can<br />
be turned on and off as appropriate.<br />
You will also need to devise an entirely "light-tight" space for handling<br />
film. A closet can work fine for this. Just be sure the door, when shut, is fully<br />
sealed against light-leaks and you're in business. As an alternative, you can<br />
use part of your main darkroom when it is not otherwise in use.<br />
An enclosure for drying film is another virtual necessity — and it must<br />
be both ventilated and impregnable to dust. Once dust lodges into the emulsion<br />
of wet film, it is maddeningly difficult to get rid of it. Prevention is the<br />
only real cure. One simple technique for constructing an effective film-dryer<br />
is to build a "box" out of plywood into which an array of holes has been<br />
drilled. It should be tall enough to accommodate the full length of a 36exposure<br />
roll of film and sufficiently spacious to hold a day's output for the<br />
entire class without crowding. (Rolls of wet film will stick to each other if<br />
they touch, often with tragic results.)<br />
The front can be a simple latched door. Cover the inside with some kind<br />
of fine-mesh cloth to keep dust from entering.<br />
One option is to drill a larger hole (also mesh-covered) near the bottom<br />
into which the nozzle of a standard hairdryer can be inserted to speed things<br />
up. Finally, install a few rows of wire or string near the top onto which film<br />
clips (or clothes pins) can be clamped to attach the film.<br />
19
Efficient use of affordable technology<br />
(such as this print-drying rack) can<br />
make the critical difference between<br />
frustration and enthusiasm.<br />
(Photograph by Done Parsons.)<br />
20<br />
One other piece of standard equipment (which may not be immediately<br />
apparent in a school environment) is a radio. There's certainly nothing wrong<br />
with providing some entertainment to promote the idea of the darkroom as<br />
a fun place to work, but there is an additional benefit to musical accompaniment.<br />
Much of the time spent in a darkroom is devoted to waiting (for the<br />
chemicals to do their stuff, for a turn at the enlarger, for instruction or assistance,<br />
etc.) and boredom is always a factor that must be considered. The time<br />
passes very slowly in dead silence and this can lead to hasty work, which in<br />
turn produces sloppy results. If you prefer not to promote rock-and-roll, tune<br />
in to a good classical station and introduce your students to some serious<br />
culture. Or perhaps you have an all-news station in your area which can keep<br />
your students abreast of world events. (This is one small way in which photography<br />
can be linked to other areas of education.)<br />
As for equipment, a reasonable wish-list will include the following:<br />
1. As many serviceable enlargers as you can afford or otherwise obtain,<br />
within reason. Two or three should be adequate for most class sizes. More<br />
than that may simply invite pandemonium. One may be enough if you<br />
structure your class accordingly, but this will reduce opportunities for<br />
convivial co-learning. (However, with a bit of patience, two students<br />
should be able to share a single enlarger without undue difficulty.) Plan<br />
to allow about four square feet of surface space for each enlarger, which<br />
leaves room for contact sheets, negatives and other paraphernalia.
2. One full array of developing trays for every two enlargers. Anything less<br />
is likely to result in bottle-necks and/or confusion. Bear in mind that<br />
exposed prints can be stored (save the black plastic liners from photopaper<br />
packaging for this purpose) and batch-processed to assist in controlling<br />
the flow of darkroom activities.<br />
3. Two timers for each enlarger — one for exposure and one for keeping<br />
track of processing times. Inexpensive stop-watches are perfectly acceptable<br />
for the latter.<br />
Additional equipment and supplies are outlined in Appendix 1 ("Processing")<br />
in the text. These include developing tanks for film processing,<br />
tongs, film cleaners, tools for dodging and burning (which can be handmade),<br />
spotting inks and an ample stock of chemicals and paper. In addition, be sure<br />
to have extra enlarger bulbs on hand to replace any that burn out.<br />
If you're on a tight budget, keep your eyes open for bargains in newspaper<br />
classifieds, bulletin boards and yard sales. Enlargers, especially, tend to<br />
last a long time and there's an excellent chance that you'll find a trusty old<br />
model just waiting for a new home. (One note: avoid glass negative carriers<br />
— they're very hard to keep clean and tend to scratch film if not used properly.)<br />
You might want to run an ad yourself or post billboard notices to alert<br />
local photographers to your needs. And, as always, check out any stores dealing<br />
in second-hand photography equipment — let the proprietors know what<br />
you're looking for so they can help you find it.<br />
You might also be able to work out a favorable deal with a photo lab for<br />
slightly out-dated paper. With luck, it will still be fully usable and could save<br />
a substantial sum of scarce money.<br />
Ventilation<br />
Professional photographers recommend general ventilation with ten air<br />
changes per hour for the darkroom. In other word, to dilute the contamination<br />
from chemicals normally in use, fresh air must be brought into the room<br />
to replace the old air ten times during every hour. Some ventilation experts<br />
feel this "rule of thumb" is inappropriate in many uses and is a difficult concept<br />
for a teacher to use. Three steps should be taken to determine what constitutes<br />
effective ventilation. First, gather all possible information about the<br />
chemicals used in the darkroom, including the amount to be used at any one<br />
time. Second, collect information on appropriate ventilation systems and<br />
recommended standards. Third, take that information to the school's personnel<br />
responsible for maintaining school ventilation systems. Get that person<br />
to apply the information to your specific room. This is not a job for the<br />
teacher alone.<br />
21
Defraying Expenses<br />
Defraying Expenses No matter how one approaches it, photography is a relatively expensive art<br />
medium. If students can all afford or otherwise obtain cameras, one major<br />
hurdle will be cleared. If not, it may be necessary to provide one or more<br />
"class cameras." The same might apply to a tripod and a few other accessories.<br />
In addition, there are the costs of darkroom equipment, film, paper<br />
and chemicals. Depending on circumstances, the school may underwrite all<br />
of these expenses, the students may be expected to cover the full amount<br />
themselves or something in between.<br />
Fortunately, if funds are limited, photography offers a number of fundraising<br />
possibilities.<br />
22<br />
• A local camera club or civic group might be approached for contributions<br />
of money or equipment.<br />
• Exhibits might be held — perhaps in a private gallery, civic center, town<br />
hall, store, museum, church, Y or library — with a modest fee.<br />
• Prints, especially those in an exhibit, can be offered for sale. A standard<br />
minimum for pricing prints is to triple the total cost of supplies.<br />
• The class might produce an annual calendar to sell in the community, perhaps<br />
featuring local highlights. (The Chamber of Commerce might be<br />
persuaded to buy copies in bulk.)<br />
• Greeting or note cards, postcards or posters might be produced and sold,<br />
perhaps with the assistance of a local printer willing to print them at cost.<br />
(This is especially feasible if the printer uses excess paper from other<br />
printing jobs.) Perhaps the school has a print shop that can handle the job,<br />
or an art class that can produce silk screen prints.<br />
• Perhaps a black-and-white book of student work can be published and<br />
marketed in conjunction with an art class.<br />
• A camera might be raffled at some community function.<br />
• A portrait booth might be set up at a school carnival or town fair or on<br />
the street at any time. (Lights could be set up if needed, portraits photographed,<br />
prints delivered later.)<br />
• Advanced students might even hire out on behalf of the class to cover<br />
weddings or parties for a fee. (Legalities and local sentiment should be<br />
checked first.)
part 2 Planning the Course<br />
Naturally, how you structure your course will vary according to resources,<br />
class schedule and other factors. The course on which this text is based meets<br />
once a week. Each class begins with an explanation and discussion of the<br />
next assignment, followed by a critique session. Students are expected to<br />
complete the assignment, including darkroom work, on their own.<br />
Early in the fall, give each student a list of all assignments for the year.<br />
This offers students a sense of the structure of the course and enables them<br />
to keep an eye out for future assignment subjects. Naturally, some flexibility<br />
is maintained to accommodate unforeseen opportunities or obstacles,<br />
such as an exceptionally photogenic snowfall or a long stretch of rainy<br />
weather that forces students to work indoors.<br />
Prior to each class session, relevant samples are displayed to stimulate<br />
ideas. (As mentioned earlier, a simple rack consisting of wooden strips<br />
attached to the walls would facilitate this and the critique sessions.) Once<br />
the class is in session, the teacher summarizes the exercise, covers any logistical<br />
details (field trip schedule, for example, if one is planned for the assignment),<br />
discusses the displayed samples, and notes any "idiosyncrasies"<br />
(lighting considerations, possible locations, potential problem areas, special<br />
equipment, etc.).<br />
23
STUDENT ROLE<br />
CRITIQUING<br />
24<br />
Students are required to shoot one roll of 36 exposures — entirely devoted<br />
to the assignment — per week. A general rule for assignments is: the more<br />
specific, the better. Most students will want very clear guidelines, at least at<br />
first. The more creative students won't need that — they'll be creative anyway.<br />
The primary goal of the assignments is to focus students' attention on<br />
subjects they might otherwise overlook. This trains their photographic vision<br />
and gets the process of "learning to see with a camera" going much more<br />
quickly than with a more laissezfaire approach. In addition, having students<br />
work on the same assignment at the same time makes critique, or "crit," sessions<br />
easier and more beneficial. It's very important, therefore, that students<br />
do shoot what is assigned. (You might point out that if an assignment were<br />
from a client, they'd have to get the right shot or lose the job.)<br />
Once the next assignment has been clearly presented, the students turn in<br />
their finished prints from the previous assignment. All prints are required to<br />
conform to a standard format. First and foremost, they must be a full 8" x<br />
10" (20.3 cmx 25.4cm), no elongated shapes, which imposes a healthy compositional<br />
discipline. They must be mounted on some appropriate cardboard<br />
stock, so they won't curl or fall over during crits, and trimmed flush with the<br />
edges of the print (no borders). You may settle on a different standard, such<br />
as white, 1-inch (2.5 cm) borders on all sides, but it is important that a clear<br />
standard be established. This is both good training and an important means<br />
of equalizing factors that might influence judging (such as the presence or<br />
absence of borders).<br />
The prints are arranged — anonymously — at random along the wall, in full<br />
view of the entire class. Students are then called on to discuss value, focus,<br />
presentation and other technical issues (one photo for each student).<br />
Once each has been discussed, students take turns arranging the photographs<br />
from most successful to least successful, as follows:<br />
• The first student called on selects what he or she considers the most successful<br />
print and places it at the head of the line.<br />
• The second student selects the second-most successful print and places<br />
it next in line. Each student may overrule any previous selection as well.<br />
• This continues until all the prints have been ranked.
Crit sessions offer an opportunity for<br />
students to express their perceptions<br />
of each others' work — promoting<br />
clarity, objectivity and camaraderie.<br />
(Photograph by Doric Parsons.)<br />
An alternate approach is to approach both ends of the line at once, with<br />
the first student selecting the most successful, the second student selecting<br />
the least successful and so on. Either way, discussion is encouraged at all<br />
times, so the final sequence reflects the class consensus.<br />
One good rule is that each opinion must be substantiated (citing composition,<br />
presentation and so forth, not merely "1 like it"). It is very important<br />
that students understand early that liking or disliking the subject matter is<br />
not an acceptable basis for a critique — each photograph must be judged on<br />
its photographic merits. It is equally important, though more difficult, that<br />
students understand that the purpose of the crit is to learn — the criticism is<br />
not a personal attack. All students should be learning from total crit: getting<br />
ideas on what to do and not do in the future, rather than merely waiting for<br />
judgment on their own efforts.<br />
Anonymity is essential. At first, students generally have a hard time criticizing<br />
their own work or that of their friends. Most will find it much easier<br />
to do this if they don't know whose work they are discussing.<br />
Once the students have determined a sequence, the teacher goes through<br />
the same procedure. (The same rules should apply: substantiate on photographic<br />
grounds.) This may result in a very similar arrangement or in a substantial<br />
re-ordering. The grades are then determined and written on the back<br />
of each. Though grades are not generally announced, students will have some<br />
idea of how they've fared by their position in the final sequence.<br />
25
TEACHER EVALUATION<br />
26<br />
The authors feel that grading is very important. Done wisely, it promotes a<br />
healthy degree of competitiveness and competition fuels effort. In order for<br />
grading to be fair and productive, it is vital that the teacher be clear about<br />
what the criteria will be for each assignment, as well as what criteria apply<br />
to all assignments. Grading should, we feel, be reasonably strict. Be direct<br />
and honest.<br />
Photography, like any art, easily degenerates into self-indulgence, if<br />
allowed to do so. If high standards are not set, they won't be achieved. No<br />
student benefits from the false comfort of being graded higher than his or<br />
work deserves. This is especially true for any student who hopes to pursue<br />
photography professionally. The people who pay for photography are not<br />
noted for their gentleness.<br />
Though some intuition will of course come into play in making your final<br />
judgment, each grade should be largely based on objective criteria: quality<br />
of the print, accuracy of focus and exposure, care in composition, inclusion<br />
of important elements and exclusion of distractions, appropriateness to<br />
assignment and so on. Teachers are urged to be on guard against the inherent<br />
dangers of imposing one's own tastes on the class. It's a difficult trap to<br />
avoid. One key is to remain mindful of the distinction between style (what<br />
one likes) and standards (what is well executed). Standards are the proper<br />
domain of teaching and judging, a personal style cannot be taught and ought<br />
not be penalized.
STUDENT PORTFOLIO<br />
Our recommended guidelines for grading are as follows: any photograph<br />
that meets all the basic requirements should rate a "B'.' A few shortcomings<br />
might drop it to a "C"' A disaster, especially a sloppy print, might deserve<br />
a "D" A photograph showing no serious effort should be stuck with an "F."<br />
A grade of "A" should be reserved for that extra margin of inventiveness,<br />
insight or impact. An "A+" should be reserved for a really special achievement.<br />
In practice, not every crit will yield an "A'.' Sometimes there will be<br />
two or three. Use them sparingly so they mean something.<br />
Students who do poorly on a given assignment are entitled to redo it<br />
at any time during the term, to improve the grade. This provides valuable<br />
incentive and helps to correct for the risk of teacher misjudgment. Periodic<br />
"make-up" crit sessions are scheduled, in which all the redone assignments<br />
are critiqued together. When transferred from the photos to the grade record,<br />
grades are recorded in pencil to they can easily be changed. In addition, students<br />
are encouraged, though not required, to submit more than one print<br />
for each assignment. Only the highest grade received for that assignment is<br />
recorded.<br />
Prior to each crit session, the teacher reviews each student's contact<br />
sheet(s) to help select frames to enlarge. When a print is turned for a crit, it<br />
must be accompanied by contacts and test strips, so the teacher can talk about<br />
what has been done well, what might have been done differently and go<br />
through all possibilities of what went wrong (assuming something did).<br />
At the end of the term, the teacher selects a set of, say, six photographs<br />
by each student for the class "library." This builds stock files for future use.<br />
At the end of the year, each student is required to produce a portfolio of his<br />
or her best work as a final project, which may or may not be graded. Thus,<br />
each student retains a permanent record of his or her photographic accomplishments,<br />
which in some cases will lead to the start of professional work.<br />
(An impressive portfolio is an absolute requirement for anyone wishing to<br />
launch a photographic career.)<br />
As the class progresses, students may be given a looser rein on assignments.<br />
We recommend against settling into a "do what you want" mode,<br />
however. One essential for competent photography is the ability to go out<br />
and find what one is looking for. Without some structure, it is all too easy<br />
to fall back on one's lazier predilections, doing what comes easily, rather<br />
27
CLASS VARIATIONS<br />
28<br />
than continually striving to break new ground. One alternative to assignments<br />
from the teacher is to let each student commit in advance to a topic<br />
or theme and then go out to photograph it. This leaves considerable room<br />
for individual interests, while preserving a coherent structure and clear<br />
expectations.<br />
There are a number of ways to adjust this core class structure according to<br />
your particular circumstances. If your class meets five days a week, you<br />
might "double up" with two assignments and two crits per week — though<br />
this may be too demanding. Alternatively, you might schedule, say, crit sessions<br />
for Monday, an assignment shooting session (many can be conducted<br />
in or around the school building) for Tuesday, research projects for Wednesday,<br />
darkroom work for Thursday and critiques of other photographers' work<br />
for Friday.<br />
If your darkroom facilities are limited, you might organize the class into<br />
several groups, having one group use the darkroom while another is doing<br />
research or crits. If so, we recommend re-organizing the groups at intervals,<br />
so more advanced students can help others. If you also teach other art classes,<br />
you might arrange for groups of two or three students to use the darkroom,<br />
during other periods. If you don't have access to a darkroom at all, you can<br />
make do without one, thought this will add to the expense and diminish the<br />
learning experience. Perhaps raising money to purchase darkroom equipment<br />
— through exhibits and sales of class photographs — could become a<br />
collective project.<br />
Other possible variations include:<br />
• using class time to mount prints, making extensive use of the "cropping<br />
exercise" (in Chapter 3 , page 65), either privately or in front of the class.<br />
• arranging for a drama class to provide models (perhaps in stage dress).<br />
• concentrating on playground activities if the photography class coincides<br />
with an elementary recess.<br />
• having photography students take an active role in producing the yearbook<br />
(as already noted), perhaps doing senior portraits as well as candids<br />
and sports photography.<br />
• mounting periodic exhibits, possibly on an exchange basis with other<br />
schools.<br />
• taking field trips on foot in the school vicinity during class periods.
RESEARCH PROJECTS<br />
You may want to make extensive use of exercises which can be undertaken<br />
in the classroom without requiring additional photography, such as<br />
"Photo-Copy Photos" (page 221 of the text) or "Text & Image" (pages 224<br />
and 225). You can develop your own exercises for print manipulation, using<br />
markers, photo-tints or other media to embellish existing photos. Or, try<br />
photo-collage, mounting fragments of several prints together to produce a<br />
composite image.<br />
The amount of information students learn independently and from each other<br />
can be vastly increased through creative use of research projects. Rather than<br />
merely assigning topics for papers that serve no function other than to effect<br />
a student's grade, use this work to benefit the entire class.<br />
For example, students might be asked to research various topics (perhaps<br />
selected from a list of options) and then to take turns sharing what they've<br />
learned by presenting their findings to the class as a whole. They might then<br />
move on to another topic, report on it, and so on throughout the year.<br />
Here is a brief list of possible topics:<br />
• profiles of important past and present photographers or periods in photographic<br />
history (refer to chapter 1 for ideas)<br />
• styles: the "decisive moment!' pictorialism, landscape, photo-montage.<br />
• specialties: photojournalism, portraiture, sports, advertising, fine arts, science<br />
(again, refer to chapter 1).<br />
• technology: stages in the evolution of cameras; film and other tools; film<br />
processing; the future of photography; the mechanics of the camera or<br />
lens; flash; how light reacts with film; reciprocity failure; auto-focus.<br />
• technique: the Zone System; studio lighting; flash fill; action photography;<br />
night photography; infra-red: special effects.<br />
• interviews with local photographers<br />
• product research on different brands of cameras, lenses, flashes, filters,<br />
tripods.<br />
• reviews of books and magazine articles on photographic techniques, compilations<br />
of work by individual photographers or thematic collections<br />
such as the A Day in the Life of. . . (Hawaii, Spain, Canada, Japan, etc.)<br />
series by David Cohen and Rick Smolan, published by Collins SF.<br />
29
30<br />
• ''rainy-day" activities, such as constructing a pin-hole camera, producing<br />
photograms or manipulating Polaroid prints (which produce interesting<br />
effects if scored with a stylus during the development process).<br />
• the specific chemical processes that produce an image on photographic<br />
(ilm and paper. What is the developer actually doing? The stop-bath? The<br />
fixer? What happens, on a molecular level, when light strikes the film?<br />
What are the components of color film and how do they work? This can<br />
also lead to such basic questions as how our eyes enable us to see and<br />
how our brains translate a two-dimensional image into a perception of a<br />
three-dimensional scene. (There are actually some cultures in which a<br />
photograph is incomprehensible, because their brains have not been<br />
trained to process images in this way.)<br />
Some topics will lend themselves to a traditional essay or book report<br />
format, which may be read aloud or photocopied to serve as the basis for<br />
discussion. Others, such as specialized or advanced photographic techniques,<br />
will open opportunities for more interactive demonstrations.<br />
For example, one or more students might be given an assignment to<br />
research infrared photography, compiling basic information on films and filters,<br />
locating some samples and, ideally, producing some examples of their<br />
own. They might then provide basic instruction to the rest of the class in<br />
preparation for an infrared exercise in which everyone participates.<br />
Something similar might be undertaken for studio lighting. Arrange for<br />
a group of students to spend some time in the studios of local photographers,<br />
learning the basics. They might then present a demonstration that could lead<br />
directly into a new exercise (again with full class participation), possibly<br />
using equipment borrowed from (and supervised by) their sources.<br />
An exciting further development of this concept is for one or more students<br />
to prepare a "briefing" on a controversial topic, which would then be<br />
discussed by the entire class.<br />
Suggested topics for this purpose include the following:<br />
• environmental concerns regarding the production and disposal of photographic<br />
chemicals<br />
• social issues such as the invasion of the privacy of celebrities (i.e., the<br />
notorious paparazzi)<br />
• the use of photography in generating public awareness or shaping perceptions<br />
of wars and other world events<br />
• the evolution of presidential "photo-ops" and their effect on the quality<br />
of news reporting
• the moral and ethical implications of using photography to investigate<br />
indigenous cultures (some of whom have objected strenuously, regarding<br />
the camera as a "soul stealer")<br />
• other moral and ethical dilemmas that photographers may confront, such<br />
us: "You are a photojournalist covering a war (or a presidential campaign,<br />
a celebrity wedding or a crime scene); is there any situation in which you<br />
would not do your job, even if it meant missing a major scoop? How far<br />
would you go (in terms of invading privacy, for example) to get the shot<br />
you want?"<br />
• the conflicting aesthetic views and methods of, say, Ansel Adams and<br />
Diane Arbus or any other pair of photographic "schools of thought." (Photographers<br />
are a wonderfully opinionated lot!) You might even assign<br />
each student to research the views of a single noteworthy photographer<br />
and then have them assume this persona (like characters in a play) for a<br />
debate or panel discussion. ("Mr. Adams, how would you evaluate the<br />
work of Cartier-Bresson?" "Ms. Arbus, would you care to comment on<br />
last week's cover of Time magazine?")<br />
A similar approach (minus the specific characters) could be applied to<br />
the "moral and ethical dilemma" questions as well.<br />
• What is the "right" kind of camera? automatic vs. manual?<br />
• Is there a future for photography? If so, what will it be like?<br />
• Is photography an art?<br />
• Is a photograph a true record of a scene or event? Can photographs lie?<br />
Can they distort the truth?<br />
• Is it true (as the singer Paul Simon once observed) that "everything looks<br />
worse in black-and-white," and (if so) why? Does everything look better<br />
in color? Again, what might cause this impression? Does this have an<br />
effect on the truthfulness of photographs? Does it matter?<br />
Once you begin exploring these dimensions of photography, you will no<br />
doubt discover that the list of possible topics meriting discussion is virtually<br />
endless. By challenging students to actively consider the implications<br />
of photography (and its potential for misuse) you may vastly expand the<br />
horizons of their awareness — transforming a course in photography into a<br />
wide-ranging exploration of the nature of life and the hard choices we all<br />
encounter. More practically, you can also use photography as a framework<br />
for a host of related activities bearing on subjects as diverse as writing, public<br />
speaking, science, social studies, history and even drama.<br />
31
EXERCISE VARIATIONS<br />
As already noted, virtually all of the exercises in The Photographic Eye can<br />
be expanded and revised with any number of variations. This may serve<br />
at least three useful functions. First, it will enable you to pace the course<br />
according to your own design and your students' aptitudes and interests. If<br />
one area of activity proves to be especially engaging or troublesome, you<br />
can increase the amount of time devoted to it by employing some of these<br />
potential variations. Second, you may wish to broaden the scope of any particular<br />
exercise by offering variations as additional options. This will allow<br />
more experienced or gifted students to forge ahead to new levels of challenge<br />
and fulfillment, while allowing novices (or those to whom photography<br />
poses special difficulties) time to catch up. Finally, in some instances<br />
variations can be employed to narrow the focus of an exercise, either to provide<br />
more detailed instructions or to demonstrate the range of possibilities<br />
contained within any single theme.<br />
It is vitally important in any course of this nature to provide plateaus at<br />
which students can experience a sense of competence and savor the rewards<br />
of mastering a set of skills before proceeding into the dark waters of renewed<br />
uncertainty. A constant barrage of daunting assignments will only result in<br />
emotional fatigue and discouragement — and too long a respite may induce<br />
boredom. Naturally, students will experience these two extremes at different<br />
times. Incorporating a degree of flexibility within your course structure<br />
will help them establish a productive rhythm of challenge and accomplishment,<br />
ensuring that each student's individual "learning curve" is neither too<br />
abrupt to be manageable nor too gradual to be consistently engaging.<br />
The chart on the following pages suggests a number of possible variations<br />
on exercises contained in The Photographic Eye. You will no doubt<br />
discover others that are specific to your situation, skills, experience and<br />
priorities.<br />
These examples convey the general idea of the "variations" concept. Some<br />
exercises in the textbook also include additional variations or present a number<br />
of options. You may wish to adjust these when you discuss actual assignments<br />
with your class, adding or subtracting as appropriate.
TEXT PAGE<br />
p. 100, 101<br />
p.l 10, 111<br />
p. 127<br />
p. 134, 135<br />
p. 146, 147<br />
p. 154, 155<br />
p. 156. 157<br />
p. 158, 159<br />
p. 160, 161<br />
p. 162, 163<br />
p. 164<br />
p. 165<br />
EXERCISE<br />
Leaves<br />
Circles & Ovals<br />
Bracketing<br />
Blurred Motion<br />
Point of View<br />
Bicycle<br />
Hubcaps &<br />
Taillights<br />
Eggs<br />
Object &<br />
Shadow<br />
Bottles &<br />
Glasses<br />
Water<br />
Old Things<br />
<strong>THE</strong>ME<br />
texture<br />
shape<br />
lighting<br />
shutter speed<br />
perspective<br />
multiple views<br />
of a single<br />
object<br />
details<br />
light and form<br />
compositional<br />
use of shadows<br />
translucence<br />
moods in<br />
nature<br />
character<br />
in objects<br />
"Topics in "quotes" indicate either specific techniques or exercise lilies lhat are intended to provoke interpretation.<br />
VARIATIONS<br />
rocks, building materials,<br />
tree trunks, vegetables<br />
rectangles, tools,<br />
branches, fences, windows<br />
deliberate over- or underexposure<br />
(shoot a roll of<br />
film at half or double the<br />
recommended ISO and see if<br />
any desirable effects<br />
are produced as a result.)<br />
"slow-speed/low-light"*:<br />
shoot at 1/15 of a second<br />
or slower in low-light<br />
situations with a handheld<br />
camera, deliberately<br />
using "camera-shake" as<br />
an asset.<br />
"random shots": shoot a<br />
roll without looking<br />
through the viewfinder<br />
chair, house, tree, TV,<br />
door, cardboard box,<br />
fire hydrant<br />
architectural close-ups,<br />
houseplant (w/macro lens),<br />
sidewalk, train tracks<br />
a handful of pebbles,<br />
marbles, apples and oranges,<br />
chessboard<br />
shadows only<br />
glass of water, prism<br />
clouds, sunlight, weather,<br />
wind, fog, dawn<br />
high-tech, toys,<br />
"favorite things"<br />
33
TEXT PAGE<br />
p. 170, 171<br />
p. 172, 173<br />
p. 174, 175<br />
p. 176, 177<br />
p. 178<br />
p. 179<br />
p. 186<br />
p. 187<br />
p. 190<br />
p. 191<br />
p. 192<br />
p. 194<br />
p. 195<br />
EXERCISE<br />
Landscape<br />
Architecture &<br />
Environment<br />
Neighborhoods<br />
Zoo/Farm<br />
Store Windows<br />
Construction<br />
Sites<br />
Hands<br />
Elders<br />
Soft-Light and<br />
Side-Lit<br />
Portrait<br />
Prop Portrait<br />
Detail Portrait<br />
Mood Portrait<br />
<strong>THE</strong>ME<br />
natural<br />
environs<br />
publicspaces<br />
sense of place<br />
non-human<br />
subjects<br />
insights into<br />
common sights<br />
random sources<br />
of line and<br />
pattern<br />
"body parts"<br />
qualities<br />
of specific<br />
groups of<br />
people<br />
effect of<br />
lighting in<br />
portraiture<br />
use of objects<br />
to evoke<br />
personality<br />
portraits<br />
without faces<br />
varieties of<br />
expression<br />
*Topics in "quotes" indicate either specific techniques or exercise titles that are intended to provoke interpretation.<br />
34<br />
VARIATIONS<br />
mountains, stream,<br />
"wasteland," "oasis"<br />
"ruins," miracle mile,<br />
"commons" (as in parks and<br />
town greens)<br />
backyard, main street,<br />
"room with a view,"<br />
home, bus depot<br />
birds (w/zoom lens),<br />
"comparative dogs and cats"<br />
cars, stairs, doors<br />
"curves," "square and<br />
circle," etc. — all in<br />
public spaces<br />
feet, noses, lips, eyes<br />
farmers, pedestrians,<br />
families, parents,<br />
brothers and sisters<br />
low-light portrait,<br />
over-exposure portrait,<br />
light and shadow portrait<br />
"object portrait": use<br />
objects only (no person)<br />
to convey subject, shoes,<br />
hats, car and driver<br />
(see "Hands" above),<br />
legs in motion,<br />
gestures, backs<br />
"1 subject. 1 roll":<br />
shoot an entire roll<br />
of 1 person in a single<br />
session, curiosity, joy,<br />
waiting, "oops"
RETEACHING OPTIONS AND PRODUCTIVE PLAY<br />
For those students who encounter difficulties with any aspect of photography,<br />
you may find it helpful to consider alternate approaches to teaching the<br />
requisite skills. One way to start is to look beneath the surface and strive to<br />
locate any underlying causes which may not be immediately apparent.<br />
For example, one potential problem area that all photographers must confront<br />
to some degree is a high level of interaction with others (often total<br />
strangers) which can be extremely uncomfortable and — until identified —<br />
may be the source of an otherwise inexplicable inability to capture effective<br />
"people pictures." Creating a safe environment, such as encouraging the use<br />
of friends and family members for "set-up" shots, may be all that is necessary<br />
to solve this dilemma. Extensive use of self-portraiture may be another<br />
useful approach to try, especially for highly introspective students who may<br />
lack effective social skills.<br />
Others may have a hard time grasping the core concepts of composition.<br />
In this case, you might try some special exercises in which you work with<br />
the student (or class if this is a generalized obstacle), experimenting with a<br />
collection of visually interesting objects (an assortment of fruit, blocks of<br />
wood or odds and ends gathered in the classroom). Using a combination of<br />
addition, subtraction and rearrangement, discuss the way each change affects<br />
the "image" (which may be viewed through the mat frame explained in chapter<br />
3), as you seek to draw out the student's responses. With creativity and<br />
patience, this process can often stimulate an exciting "click" of recognition,<br />
when a student suddenly sees how composition works. If the use of threedimensional<br />
objects proves unproductive, try the same approach using cutout<br />
shapes of black paper (with a bit of Spray Mount on the back of each)<br />
to produce various compositional effects on a white mat board. (For best<br />
results, enclose the image area in some kind of frame.)<br />
For a more dynamic approach, consider creating a "virtual camera," consisting<br />
of a cardboard box set on its side on a table, with the top and bottom<br />
removed to produce a limited field of vision (approximating the frame of a<br />
viewfinder or print). One or more students may be asked to arrange objects<br />
within this frame, then step behind it and observe the results. Alternatively,<br />
students could take turns being the "photographer" with the "camera" aimed<br />
at three or more other students who act as models by moving, standing and<br />
sitting as instructed. Or you might begin with a random grouping and then<br />
ask a student to change the position of only one of the subjects. The next<br />
student in turn might then be called upon to make one more change, and so<br />
on until an effective composition has been achieved. Yet another alternative<br />
35
36<br />
is to have students take turns shifting the position of the camera. In all cases,<br />
the effect of every change should be explained and discussed.<br />
The goal of this sort of creative play is to promote an appreciation of the<br />
inherent fun of looking at the world through a camera, while freeing students<br />
of the burden of producing an actual photograph.<br />
If you feel that some students consistently "freeze" when confronted with<br />
this daunting prospect, you may be able to loosen them up with a number<br />
of exercises designed to prevent "over-thinking" their photographs. These<br />
are similar in purpose to the timed sketching drills (or gesture drawings)<br />
often used in conventional art classes.<br />
For example, have each student load a roll of film into a camera, assign<br />
each of them a subject (either another student or an object that is large enough<br />
to allow for a wide-range of angles). Then tell them they must shoot the<br />
entire roll in, say, two minutes — and begin counting. In their haste to meet<br />
this imposed deadline they are likely to forget their inhibitions and they may<br />
very well produce their first exceptional photographs as a result. At the very<br />
least, they will have a roll of film to process and will probably be curious to<br />
see the results, which is an excellent first step.<br />
A variation on this theme (included in the "variations" chart) is to have<br />
students shoot randomly, without looking through the viewfinder. A time<br />
limit may again be useful. Or you can play a version of "Red Light, Green<br />
Light," instructing students to run around some visually interesting location<br />
(the classroom, if there is sufficient light or a nearby park or some area of<br />
town where there is no risk of encountering traffic). At your command, they<br />
must stop and take a photograph before you count to three.<br />
A more elaborate extension of this theme is for you to set up a sort of<br />
photographic obstacle course: a series of casually arranged objects at some<br />
distance from each other, which students must race against the clock to photograph<br />
(possibly being required to rearrange each set of objects prior to<br />
shooting). The student who completes the circuit in the shortest time wins.<br />
With any of these drills, by distracting attention away from the formal<br />
concerns of composing an impressive photograph, you will facilitate an<br />
uncontrived immediate response that can break up the mental logjams that<br />
inhibit free expression. In addition, this kind of kinesthetic activity involves<br />
a student's whole body in the photographic experience and introduces a vital<br />
spirit of play, both of which may help to overcome inhibitions and performance<br />
anxieties.<br />
An altogether different and complementary approach is to slow the<br />
process down and simplify it so extremely that the tendency to see only the<br />
obvious cannot be sustained, which can also serve to open the doors of creativity.<br />
For example, select an open space outdoors and place your students
far enough away from each other to avoid distractions. Tell them they must<br />
stay where they are for 36 minutes, shooting one entire roll of film during<br />
that time at one-minute intervals (which you signal for them). They may<br />
stand, sit and turn around, but must not otherwise move. They may not photograph<br />
the same view twice. The goal is to produce as many different kinds<br />
of photographs as possible and they will be graded only on this basis: three<br />
points for each frame on a contact sheet (there's no need to make prints of<br />
them all) which does not repeat any other frame on the roll. The same<br />
approach can be applied to a single object, in which case students may move<br />
about freely but must shoot every frame of that one object from a different<br />
perspective.<br />
Yet another playful option is a variation on "treasure hunts." Draw up a<br />
list of common objects or sketch various shapes and instruct students to<br />
locate and photograph each one within a specified time. This may be refined<br />
in any number of ways specific to any stage of the course. For example, you<br />
might simply instruct students to photograph as many different shapes (or<br />
textures or lines) as possible within a specified time on a single roll of film.<br />
Or you might assign a list of photographic categories: black-on-white, grayon-gray,<br />
motion, detail, shadow, texture, etc. This last exercise is an especially<br />
efficient means of conducting a capsule review, which can serve as a<br />
useful reminder of photographic elements which students may have begun<br />
to neglect.<br />
By using any of these methods to "circle back" to previously covered<br />
ground, you can accomplish the goals of reteaching students in need of special<br />
assistance without separating them from the rest of the class, as all students<br />
should find these exercises entertaining (at least) and possibly highly<br />
instructive. Returning to basics in this manner can provide a reassuring sense<br />
of progress, provide the sort of plateau experience mentioned above and promote<br />
awareness of the ways in which the various elements of photography<br />
are integrated and interwoven. At the same time, students who have lagged<br />
behind in certain areas can painlessly reprise them and may, in the process,<br />
come to understand concepts or develop skills that were previously missed.<br />
37
parts Useful Information<br />
HEALTH AND SAFETY GUIDELINES<br />
Tools and Equipment<br />
Always be mindful that a paper<br />
cutter is a very dangerous tool.<br />
Use it carelessly and you could<br />
lose a finger. Never leave the<br />
blade up after use. Always look<br />
before you cut, to be sure no part<br />
of you, your clothing or anything<br />
else you don't want to cut is in<br />
the path of the blade.<br />
Fortunately, photographic hardware is generally quite benign, posing few<br />
safety hazards. The only truly dangerous piece of equipment likely to be<br />
used with some frequency is the paper cutter. The note at left, which appears<br />
in the textbook in regard to paper-cutter use, should be strongly emphasized.<br />
Outside of that, the most likely risk to health and safety is carelessness<br />
while photographing. Any photographer with one eye glued to the viewfinder<br />
and the other shut tight is at best half-blind. It is not uncommon for one to<br />
be so intent on getting the composition just right that a ditch or step or cliff<br />
or passing truck is blithely ignored until too late. (Those jokes about "one<br />
more step, one more step, splash!" have a serious side.) Students should be<br />
encouraged to learn good habits in this as in other aspects of photography.<br />
An advisable basic rule is: look around with both eyes before you peek<br />
through the shutter. This is as helpful for good composition as it is for avoiding<br />
bruised and broken limbs: scanning the environment without the camera<br />
gives a photographer a sense of bearings that will produce better<br />
photographs as well as prevent accidents. Under no circumstances should<br />
one walk in any direction without first checking to ensure that the coast is<br />
clear.<br />
39
Chemicals<br />
A student examines a newly processed<br />
roll of film, f Photograph by<br />
Doric Parsons.)<br />
40<br />
The necessary use of chemicals in photographic processing does present<br />
some potential health and safety concerns. However, by taking proper precautions<br />
and promoting careful work habits, these concerns can be effec-<br />
tively minimized.<br />
The fumes of many photographic chemicals may irritate the eyes, nose<br />
or lungs, cause headaches and other symptoms, and ultimately pose serious<br />
health risks. The most important preventative step is to ensure that the darkroom<br />
space is adequately ventilated (see "Ventilation" on page 21). In addition,<br />
all spilled chemicals should be cleaned up immediately and students<br />
should be prohibited from spending more than one hour in the darkroom<br />
without a "fresh-air-break." Splashing chemicals into the eyes is the most<br />
common potentially hazardous darkroom accident. Encouraging students to<br />
move slowly and deliberately when processing will aid in prevention. Should<br />
such an accident occur, the eyes should be immediately and thoroughly<br />
flushed with clean water and/or a sterile eye wash solution. It's a good idea<br />
to have a well-stocked first aid kit, just in case.<br />
Prolonged contact with some chemicals (especially those used in sepia<br />
toning and other advanced procedures) may irritate the skin and/or result in<br />
rashes or discoloration. Though the most circumspect solution to this potential<br />
problem would be to insist that students wear gloves at all times in the<br />
darkroom, many teachers deem this unnecessarily cautious. At the very least,<br />
students should be strictly required to wash their hands thoroughly (with<br />
industrial-strength soap) after every darkroom session—and to use tongs<br />
(not fingers!) to transfer prints in and out of developing trays. (You should,<br />
however, have at least one back-up pair of gloves for students with allergies<br />
or sensitive skin.)<br />
Other general precautions that should be strictly adhered to include the<br />
following:<br />
1. Do not heat chemicals. Re-mix with hot water (or place container in a<br />
hot-water bath) if you need to raise the temperature.<br />
2. Store chemicals in tightly sealed containers. In addition to reducing the<br />
risk of accidental spills and unnecessary fumes, this will significantly prolong<br />
the life of your chemicals. The use of specially designed, flexible<br />
plastic containers that can be compressed to expel excess air is highly<br />
recommended. Glass jars are not recommended: They can become very<br />
slippery in the darkroom, increasing the ever-present risk of breakage.<br />
3. Do not use old chemicals. Unlike other supplies, such as paper and film,<br />
chemicals should not be used beyond their listed expiration dates. Doing<br />
so merely invites increased health and safety risks.
Toxic Chemicals to be<br />
Avoided in the School<br />
Photo Program 12<br />
4. Carefully read and follow all safety guidelines provided by a chemical's<br />
manufacturer. Some photographic chemicals pose particular health risks<br />
that will be fully explained on the packaging. Make a habit of reading all<br />
the fine print before using any new chemical—and discuss all relevant<br />
information with your class.<br />
Chemical<br />
Developers<br />
Catechin<br />
catechol<br />
pyrocatechol<br />
o-dihydroxybenzene<br />
Pyrogallic acid<br />
pyrogallol<br />
Diaminophenol hydrochloride<br />
Intensifiers<br />
Mercuric chloride<br />
Mercuric iodide<br />
Potassium cyanide<br />
Uranium nitrate<br />
Toner<br />
Thiourea<br />
Miscellaneous<br />
Formaldehyde<br />
Freons<br />
(fluorocarbons)<br />
Hazard<br />
Difficulty in breathing:<br />
cyanosis, liver-kidney<br />
damage; ingestion may be fatal<br />
Cyanosis, anemia, liver-kidney<br />
damage; ingestion can be fatal<br />
Severe skin irritation,<br />
bronchial asthma, gastritis,<br />
convulsions, coma.<br />
Chronic mercury poisoning.<br />
Chronic mercury poisoning.<br />
Rashes, chemical asphyxia;<br />
ingestion can be fatal.<br />
Skin corrosion, liver-kidney<br />
damage, radioactive.<br />
Causes cancer in rats;<br />
suspected carcinogen.<br />
Scnsiti/.er causing respiratory<br />
and skin allergies;<br />
suspected carcinogen.<br />
1 Secger, A Photographer's Guide to the Safe Use of Materials, pp. 29-40.<br />
: McCann, Artist Beware, pp. 310-324.<br />
Respiratory irritations;<br />
heating may produce poison gases.<br />
41
Photo Processes to be<br />
Avoided in the Schools 12<br />
Teachers must individually<br />
make decisions concerning these<br />
processes, but their use is not<br />
recommended because the potential<br />
hazards are so serious that<br />
controlling them is expensive. If a<br />
teacher has a special interest in one<br />
of the processes, it is suggested<br />
that after becoming fully aware of<br />
the potential hazards, the use of the<br />
process be kept the teacher's own<br />
personal creative work and not<br />
attempted with students.<br />
Material Safety Data Sheets<br />
Some manufacturers provide<br />
Material Safety Data Sheets<br />
(MSDS) for some or all of their<br />
products. The MSDS provides<br />
important safety information, such<br />
as a listing of all standardized<br />
ingredients and warnings regarding<br />
potential fire, chemical and<br />
personal injury hazards.<br />
You should request a MSDS for<br />
any art material whose uses or<br />
characteristics are unfamiliar to<br />
you, any unlabeled material whose<br />
label does not provide warning<br />
information.<br />
42<br />
Process<br />
Color processing<br />
Cibachrome<br />
Gum printing<br />
Cyanotype<br />
Daguerreotype<br />
1 Sceger, A Photographer 'v Guide lo ihe Safe Use of Maierittls.<br />
'• McCann, Artist Beware.<br />
Rationale for Avoidance<br />
Many of the chemicals used in<br />
color processing are highly toxic<br />
and require local exhaust and very<br />
careful control methods. It is a<br />
complex, difficult process and<br />
should only be undertaken in the<br />
most advanced classes under the<br />
direction of extremely well<br />
qualified instructors.<br />
Highly toxic chemicals used in this<br />
process are suspected especially of<br />
affecting the female reproductive<br />
system, possibly resulting in birth<br />
defects and miscarriages.<br />
Requires local ventilation; dust<br />
masks must be worn when using<br />
powders. Results probably do not<br />
warrant the precautions necessary.<br />
Exposure by carbon arc light on<br />
potassium ferricyanide can release<br />
hydrogen cyanide gas. Eyes and<br />
skin are especially sensitive to UV<br />
radiation. Can be done safely if<br />
exposure is by sunlight and water<br />
is used for developing.<br />
Exposure to highly toxic mercury<br />
vapor is possible; educational<br />
results do not seem to warrant<br />
the risk.
IB-WEEK CURRICULUM<br />
WEEK1<br />
Topic: Introduction<br />
Goal: Orientation<br />
Objective(s): Outline schedule<br />
and procedures<br />
Review basic camera functions<br />
(Survey history and applications<br />
of photography)<br />
Chapter(s): (I). 2<br />
Class: Camera Demonstration<br />
WEEK 4<br />
Topic: Line<br />
Goal: Explore use of line in<br />
photography<br />
Objective(s): Shoot/process<br />
1 roll of "line" subjects<br />
Chapter(s): 6<br />
Class: Crit, shooting session,<br />
lab work<br />
Note: Items in parentheses are options that may be added to (or substituted<br />
for) basic objectives and schedule, or covered incrementally throughout the<br />
course (i.e., chapter 1 might be assigned for reading over a week or two pos-<br />
sibly followed by independent research by each student on a selected topic).<br />
WEEK 2<br />
Topic: Composilion<br />
Goal: Establish fundamentals of<br />
good composition<br />
Objective(s): Introduce standards<br />
and vocabulary of composition<br />
Practice crit procedures<br />
Chapter(s): 3, 4<br />
Class: Mat & Cropping<br />
Exercises, Sample Crit<br />
Topic: Shooting & Processing<br />
WEEKS<br />
Topic: Texture<br />
Goal: Explore use of texture<br />
Objective(s): Shoot/process<br />
1 roll of "texture" subjects<br />
Chapter(s): 7<br />
Class: Crit, shooting session,<br />
lab work<br />
WEEK 3<br />
Goal: Begin taking and<br />
processing photos<br />
Objective(s): Apply "point of<br />
departure" settings<br />
Expose and process a roll of Him<br />
Chapter(s): 5, Appendix 1:<br />
Processing Film & Prints (B&W)<br />
Class: Demonstration of<br />
processing (Field trip to shoot<br />
1st roll)<br />
WEEK 6<br />
Topic: Shape<br />
Goal: Explore use of shape<br />
Objective(s): Shoot/process<br />
1 roll of "shape" subjects<br />
Chapter(s): 8<br />
Class: Crit. shooting session,<br />
lab work<br />
43
WEEK? WEEKS WEEK 9<br />
44<br />
Topic: Light<br />
Goal: Explore use of light<br />
Objective(s): Shoot/process 1<br />
roll of "light" subjects<br />
Chapter(s): 9<br />
Class: Crit, shooting session,<br />
lab work<br />
WEEK 10<br />
Topic: Things<br />
Goal: Practice photographing<br />
objects<br />
Objective(s): Shoot 1 roll of<br />
still life subjects<br />
Chapter(s): 12<br />
Class: Crit. shooting session,<br />
lab work<br />
WEEK 13<br />
Topic: Putting It All Together<br />
Goal: Practice photographing<br />
events<br />
Objective(s): Shoot/process<br />
1 roll of events<br />
Chapter(s): 15<br />
Class: Crit, shooting session,<br />
lab work<br />
Topic: Motion<br />
Goal: Explore use of motion<br />
Object!ve(s): Shoot/process 1<br />
roll of "motion" subjects<br />
Chapter(s): 10<br />
Class: Crit. shooting session,<br />
lab work<br />
WEEK 11<br />
Topic: Places<br />
Goal: Practice photographing<br />
places<br />
Objective(s): Shoot 1 roll of<br />
location subjects<br />
Chaptcr(s): 13<br />
Class: Crit, shooting session,<br />
lab work<br />
WEEK 14<br />
Topic: Breaking the Rules<br />
Goal: Explore non-standard<br />
subjects and composition<br />
Objective(s): Shoot/process<br />
1 roll of experimental subjects<br />
Chapter(s): 16<br />
Class: crit, shooting session,<br />
lab work<br />
Topic: Perspective<br />
Goal: Explore use of perspective<br />
Objective(s): Shoot/process 1<br />
roll of "perspective" subjects<br />
Chapter(s): 1 I<br />
Class: Crit, shooting session,<br />
lab work<br />
WEEK 12<br />
Topic: People<br />
Goal: Practice photographing<br />
people<br />
Objective(s): Shoot/process<br />
1 roll of portraits<br />
Chapter(s): 14<br />
Class: Crit, shooting session,<br />
lab work<br />
WEEK 15<br />
Topic: Color<br />
Goal: Explore color photography<br />
Objcctive(s): Experiment with<br />
"color themes"<br />
Chapter(s): Appendix 2<br />
Class: crit, shooting session,<br />
lab work
WEEK 16 WEEK 17 WEEK 18<br />
Topic: Presentation<br />
Goal: Develop matting and/or<br />
exhibition skills<br />
Objective(s): Mat sample prints<br />
for portfolio<br />
Produce an exhibit<br />
Chapter(s): Appendix 3<br />
Class: Lab work<br />
(Exhibit/portfolio preparation)<br />
36-WEEK CURRICULUM<br />
Topic: Final Project Presentation<br />
The final project might be a<br />
report on independent research, a<br />
finished portfolio by each student,<br />
a class exhibit or other group<br />
project, etc.<br />
Goal: Consolidate progress<br />
Objective(s): Submit final project<br />
Class: Final project presentations<br />
(Exhibit/portfolio preparation)<br />
Topic: Final Project Presentation<br />
& Portfolio Review<br />
Goal: Evaluate progress<br />
Objective(s): Assess each<br />
student's progress<br />
Class: Final project<br />
presentations, portfolio review<br />
Note: Items in parentheses are options that may be added to (or substituted<br />
for) basic objectives and schedule or covered incrementally throughout the<br />
course (i.e., chapter 1 might be assigned for reading over a week or two pos-<br />
sibly followed by independent research by each student on a selected topic).<br />
WEEK1<br />
Topic: Introduction<br />
Goal: Orientation<br />
Objective(s): Outline schedule<br />
and procedures<br />
Review basic camera functions<br />
Survey history and applications of<br />
photography<br />
Chapter(s): (I ). 2<br />
Class: Camera Demonstration<br />
WEEK 2<br />
Topic: Composition<br />
Goal: Establish fundamentals of<br />
good composition<br />
Objective(s): Introduce standards<br />
and vocabulary of composition<br />
Practice crit procedures<br />
Chapter(s): 3, 4<br />
Class: Mat & Cropping<br />
Exercises, Sample Cril<br />
Topic: Shooting & Processing<br />
45
WEEK 3<br />
46<br />
Goal: Begin taking and<br />
processing photos<br />
Objective(s): Apply "point of<br />
departure" settings<br />
Expose and process a roll of film<br />
Chapter(s): 5, Appendix 1:<br />
Processing Film & Prints (B&W)<br />
Class: Demonstration of<br />
processing (Field trip to shoot<br />
1st roll)<br />
WEEK 6<br />
Topic: Shape<br />
Goal: Explore use of shape<br />
Objective(s): Shoot/process<br />
1 roll of "shape" subjects<br />
Chapter(s): 8<br />
Class: Crit. shooting session,<br />
lab work<br />
WEEK 9<br />
Topic: Perspective<br />
Goal: Explore use of perspective<br />
Objective(s): Shoot/process 1<br />
roll of "perspective" subjects<br />
Chapter(s): I 1<br />
Class: Crit. shooting session,<br />
lab work<br />
WEEK 4<br />
Topic: Line<br />
Goal: Explore use of line in<br />
photography<br />
Objective(s): Shoot/process<br />
1 roll of "line" subjects<br />
Chapter(s): 6<br />
Class: Crit. shooting session,<br />
lab work<br />
WEEK?<br />
Topic: Light<br />
Goal: Explore use of light<br />
Objective(s): Shoot/process 1<br />
roll of "light" subjects<br />
Chapter(s): 9<br />
Class: Crit. shooting session,<br />
lab work<br />
WEEK 10<br />
Topic: Things<br />
Goal: Practice photographing<br />
objects<br />
Objectivc(s): Shoot I roll of still<br />
life subjects<br />
Chapter(s): 12<br />
Class: Crit. shooting session,<br />
lab work<br />
WEEKS<br />
Topic: Texture<br />
Goal: Explore use of texture<br />
Objcctive(s): Shoot/proeess<br />
I roll of "texture" subjects<br />
Chapter(s): 7<br />
Class: Crit, shooting session,<br />
lab work<br />
WEEKS<br />
Topic: Motion<br />
Goal: Explore use of motion<br />
Objective(s): Shoot/process 1<br />
roll of "motion" subjects<br />
Chapter(s): 10<br />
Class: Crit. shooting session,<br />
lab work<br />
WEEK 11<br />
Topic: Things<br />
Goal: Practice photographing<br />
objects<br />
Objective(s): Shoot 1 roll of st<br />
life subjects<br />
Chapter(s): 12<br />
Class: Crit. shooting session,<br />
lab work
WEEK 12<br />
Topic: Things<br />
Goal: Practice photographing<br />
objects<br />
Objective(s): Shoot 1 roll of still<br />
life subjects<br />
Chapter(s): 12<br />
Class: Crit, shooting session,<br />
lab work<br />
WEEK 15<br />
Topic: Places<br />
Goal: Practice photographing<br />
places<br />
Objective(s): Shoot 1 roll of<br />
location subjects<br />
Chapter(s): 13<br />
Class: Crit, shooting session,<br />
lab work<br />
WEEK 18<br />
Topic: People<br />
Goal: Practice photographing<br />
people<br />
Objective(s): Shoot 1 roll of<br />
location portraits<br />
Chapter(s): 14<br />
Class: Crit, shooting session,<br />
lab work<br />
WEEK 13<br />
Topic: Places<br />
Goal: Practice photographing<br />
places<br />
Objective(s): Shoot 1 roll of<br />
location subjects<br />
Chapter(s): 13<br />
Class: Crit. shooting session,<br />
lab work<br />
WEEK 16<br />
Topic: People<br />
Goal: Practice photographing<br />
people<br />
Objective(s): Shoot 1 roll of<br />
location portraits<br />
Chapter(s): 14<br />
Class: Crit, shooting session.<br />
lab work<br />
WEEK 19<br />
Topic: People<br />
Goal: Practice photographing<br />
people<br />
Ob.jective(s): Shoot I roll of<br />
location portraits<br />
Chapter (s): 14<br />
Class: Crit. shooting session.<br />
lab work<br />
WEEK 14<br />
Topic: Places<br />
Goal: Practice photographing<br />
places<br />
Objective(s): Shoot 1 roll of<br />
location subjects<br />
Chapter(s): 13<br />
Class: Crit, shooting session,<br />
lab work<br />
WEEK 17<br />
Topic: People<br />
Goal: Practice photographing<br />
people<br />
Objective(s): Shoot 1 roll of<br />
location portraits<br />
Chapter(s): 14<br />
Class: Crit, shooting session.<br />
lab work<br />
WEEK 20<br />
Topic: Putting It All Together<br />
Goal: Practice photographing<br />
events<br />
Objective(s): Shoot/process<br />
1 roll of events<br />
Chapter(s): 15<br />
Class: Crit, shooting session,<br />
lab work<br />
47
WEEK 21 WEEK 22 WEEK 23<br />
48<br />
Topic: Putting It All Together<br />
Goal: Practice photographing<br />
events<br />
Objective(s): Shoot/process<br />
1 roll of events<br />
Chapter(s): 15<br />
Class: Crit. shooting session,<br />
lah work<br />
WEEK 24<br />
Topic: Breaking the Rules<br />
Goal: Explore non-standard<br />
subjects and composition<br />
Objective(s): Shoot/process 1<br />
roll ot experimental subjects<br />
Chapter(s): 16<br />
Class: Crit, shooting session,<br />
lab work<br />
WEEK 27<br />
Topic: Color<br />
Goal: Explore color photography<br />
Objective(s): Experiment with<br />
color density<br />
Class: Crit, shooting session,<br />
lab work<br />
Topic: Putting It All Together<br />
Goal: Practice photographing<br />
events<br />
Objcctive(s): Shoot/process<br />
1 roll of events<br />
Chapter(s): 15<br />
Class: Crit, shooting session,<br />
lab work<br />
WEEK 25<br />
Topic: Breaking the Rules<br />
Goal: Explore non-standard<br />
subjects and composition<br />
Objective(s): Shoot/process 1<br />
roll of experimental subjects<br />
Chapter(s): 16<br />
Class: Crit, shooting session,<br />
lab work<br />
WEEK 28<br />
Topic: Color<br />
Goal: Explore color photography<br />
Objective(s): Select any exercise<br />
and apply to color<br />
Class: Cril, shooting session,<br />
lab work<br />
Topic: Breaking the Rules<br />
Goal: Explore non-standard<br />
subjects and composition<br />
Objective(s): Shoot/process 1<br />
roll of experimental subjects<br />
Chapter(s): 16<br />
Class: Crit, shooting session,<br />
lab work<br />
WEEK 26<br />
Topic: Color<br />
Goal: Explore color photography<br />
Objective(s): Experiment with<br />
"color themes"<br />
Chapter(s): Appendix 2<br />
Class: Crit, shooting session,<br />
lah work<br />
WEEK 29<br />
Topic: Color<br />
Goal: Explore color photography<br />
Objcctive(s): Select any exercise<br />
and apply to color<br />
Experiment with different<br />
films — high speed; various<br />
brands; prints & transparencies<br />
Class: Crit, shooting session,<br />
lab work
In the remaining weeks, one possibility is to generate an independent or<br />
class project. Tin's might be collective work on the yearbook, an exhibit,<br />
a publication; independent or group research on various topics; or each<br />
student developing an individual portfolio (either employing exercises in<br />
the textbook or committing to a specific topic/technique). Alternativeh',<br />
the four weeks set aside for "projects " could cover special effects printing<br />
(Appendix 3: "Manipulation "), flash photography, etc. Goals and<br />
objectives will vary according to how projects are defined, but the<br />
underlying purpose of this portion of the curriculum is to encourage<br />
students to refine their own special interests and aptitudes, either<br />
independently or as a group, and to consolidate the progress thev have<br />
made in the course.<br />
WEEK 31<br />
Topic: Independent/Class Project<br />
Class: Lab work, projects<br />
WEEK 34<br />
Topic: Completion/Presentation<br />
of Projects<br />
Class: Mounting an exhibit<br />
Reporting on research<br />
Reviewing portfolios<br />
WEEK 32<br />
Topic: IndependentyClass Project<br />
Class: Lab work, projects<br />
WEEK 35<br />
Topic: Review & Revision<br />
Class: Reporting on Research<br />
Exercises on weak points<br />
Addition to portfolios<br />
WEEK 30<br />
Topic: Independent/Class Project<br />
Class: Lab work, projects<br />
WEEK 33<br />
Topic: Independent/Class Project<br />
Class: Lab work, projects<br />
WEEK 36<br />
Topic: Review & Revision<br />
Class: Reporting on Research<br />
Exercises on weak points<br />
Addition to portfolios<br />
49
ADDITIONAL SOURCES<br />
Films<br />
50<br />
Write to the following sources for catalogs of films on area artists. For a<br />
complete listing of available films, see Films on An, compiled by the American<br />
Federation of Arts, published by Watson-Guptill Publications, New<br />
York, 1977. Look for revised and updated editions.<br />
Not all of the companies listed here produce materials specifically on<br />
photography. In some cases, films, filmstrips, etc. would be used for enrichment/motivation<br />
ideas. Check with the suppliers as to specific listings or to<br />
obtain catalogs.<br />
American Institute of Architects<br />
1735 New York Ave, NW<br />
Washington, DC 20006<br />
Association Films, Inc.<br />
866 Third Ave.<br />
New York, NY 10022<br />
BBC-TV Enterprises<br />
Manulife Center<br />
55BloorSt. W., Suite 510<br />
Toronto. Ontario M4W1A5<br />
BFA Educational Media<br />
2211 Michigan Ave.<br />
Santa Monica. CA 90404<br />
Carousel Films, Inc.<br />
1501 Broadway. Suite 1503<br />
New York, NY 10036<br />
Castelli-Sonnabend Tapes<br />
and Films<br />
420 W. Broadway<br />
New York, NY 10012<br />
Canadian Film Institute<br />
303 Richmond Rd.<br />
Ottawa, Ontario K1Z6X3<br />
Embassy of Japan<br />
2520 Massachusetts Ave, NW<br />
Washington, DC 20008<br />
FACSEA<br />
972 Fifth Ave.<br />
New York, NY 10021<br />
Film Images<br />
1034 Lake St.<br />
Oak Park, IL 60301<br />
Films Incorporated<br />
1144 Wilmette Ave.<br />
Wilmette, IL 60091<br />
Indiana University<br />
Audiovisual Center<br />
Bloomington, IN 47401<br />
International Film Bureau<br />
332 S. Michigan Ave.<br />
Chicago, IL 60640<br />
Learning Corp of America<br />
1350 Ave. of the Americas<br />
New York, NY 10019<br />
Leland Auslander Films<br />
6036 Comey Ave.<br />
Los Angeles. CA 90034<br />
Macmillan Films, Inc.<br />
34 MacQueston Pkwy S.<br />
Mount Vernon, NY 10550<br />
Modern Talking Picture Service<br />
2323 Hyde Park Rd.<br />
New Hyde Park, NY 11040
Slides, Filmstrips,<br />
Videotapes<br />
Museum at Large<br />
157 West 54th St.<br />
New York, NY 10019<br />
Museum of Modern Art<br />
11 West 53rd St.<br />
New York, NY 10019<br />
National Gallery of Art<br />
Extension Service<br />
Washington, DC 20565<br />
New York University<br />
Film Library<br />
26 Washington PI.<br />
New York, NY 10003<br />
Ohio State University<br />
Dept. of Photography<br />
and Cinema<br />
156 West 19th Ave.<br />
Columbus, OH 43210<br />
Phoenix/BFA Films and Video<br />
468 Park Ave. S.<br />
New York, NY 10016<br />
Pyramid Films<br />
P.O.Box 1048<br />
Santa Monica, CA 90406<br />
RJM Productions<br />
7012 LaPresa Dr.<br />
Hollywood, CA 90028<br />
Time-Life Films<br />
100 Eisenhower Dr.<br />
Paramus, NJ 07652<br />
University of California<br />
Extension Media Center<br />
Berkeley, CA 94720<br />
Many of the companies listed below produce films. Their catalogs will be of<br />
help to you in many areas.<br />
Centre Productions<br />
1800 30th St., Suite 207<br />
Boulder, CO 80301<br />
Crystal Productions<br />
Box 12317<br />
Aspen, CO 81612<br />
Educational Audiovisual Inc.<br />
17 Marie Ave.<br />
Pleasantville, NY 10570<br />
Educational Dimensions Group<br />
P.O.Box 126<br />
Stamford, CT 06904<br />
Helvey Productions<br />
P.O.Box 1691<br />
Columbia, MO 65205<br />
International Film Bureau<br />
332 S. Michigan Ave.<br />
Chicago, 1L 60640<br />
Son-A-Vision<br />
110 Washington Ave.<br />
Pleasantville. NY 10570<br />
Video-Ed Productions<br />
4301 East-West Hwy.<br />
Hyattsville, MD 20782<br />
Warner Educational Productions<br />
Box 8791<br />
Fountain Valley, CA 97208<br />
51
Books Davis, Phil. Photography. Dubuque, IA: William C. Brown Co., 1986. A<br />
college-level text with detailed technical information on photographic<br />
theory and practice. Highly recommended for anyone interested in this<br />
52<br />
aspect of photography.<br />
Eastman Kodak. Complete Kodak Book of Photography. Rochester, N.Y.<br />
Distributed by Crown Publishers, New York. 1982.<br />
Joy of Photography, The. Rochester, N.Y. Distributed by<br />
Addison-Wesley Publishing Co., Reading, MA 1983. Both these books<br />
are "idea" sources. Excellent photographs, limited information. May<br />
inspire students to "try" new things.<br />
Hedgecoe, John. Pocket Guide to Practical Photography. New York, Simon<br />
& Schuster, 1979. A "must" for all photographic libraries. Contains brief<br />
and precise answers to "How do I. . . ?" questions.<br />
Vestal. David. The Craft of Photography. New York: Harper & Row. 1978.<br />
Recommended for those who wish to achieve a high level of technical<br />
skill. Emphasizes black-and-white photography and processing.<br />
There are numerous titles on specialized photographic subjects. For those<br />
wishing to pursue this topic, one should consult a library with an extensive<br />
photography section. Several titles one might explore are:<br />
The Negative and the Print by Ansel Adams (Amphoto).<br />
The New Zone System Manual by Minor White et al. (Morgan & Morgan)<br />
Close-ups in Nature by John Shaw (Amphoto).<br />
The Photographic Lab Handbook by John Carrol (Amphoto).
EVALUATION AND STUDY AIDS<br />
A simple "till-in-the-blanks" quiz can<br />
be a useful study aid, challenging<br />
students to read assigned textbook<br />
passages with care and precison.<br />
(Photograph b\ Doric Parsons.)<br />
The following pages contain a selection of sample evaluation forms that you<br />
may apply as models or templates, altering them as you wish to suit your<br />
own needs and preferences.<br />
The Critique Form is designed to serve as a written alternative or addition<br />
to verbal crit sessions. Before proceeding to the verbal crit, students<br />
might be instructed to fill out a form like this one for each photograph under<br />
review. In addition to providing substantial documentation of responses to<br />
a given photograph (which may be easier to absorb and assimilate than a<br />
barrage of spoken opinions), this procedure will also help train students to<br />
organize their perceptions and articulate them clearly and carefully.<br />
The Photograph Evaluation Form is intended for use by the teacher,<br />
providing a clear and consistent framework for noting key aspects of photographic<br />
quality and assignment fulfillment. Once again, students are far<br />
more likely to "process" information and criticisms which are presented in<br />
this kind of formalized structure, as opposed to casual conversation or handwritten<br />
notes. Over time, students will also be able to track their progress<br />
by looking back at the evaluations they have received.<br />
The Reading Worksheet for chapter 1 is an example of a type of study<br />
aid which may significantly enhance students' comprehension of textbook<br />
reading assignments. Students fill in the missing words as they read — either<br />
on the first "run-through" or as a review exercise (which may be done in the<br />
classroom). By turning the reading exercise into a kind of game (find the<br />
missing word), a worksheet like this provides motivation and momentum<br />
which may otherwise be lacking, especially for students who have not developed<br />
good reading skills.<br />
The procedure for producing "fill-in-the-blank" quizzes of this kind is<br />
relatively straightforward: Simply select sentences at regular intervals from<br />
the text and type them out, replacing one key word in each sentence with a<br />
blank space (large enough to be filled in by hand!). In the provided sample,<br />
the missing word is generally (though not always) the "key" word of the sentence.<br />
Emphasizing new vocabulary terms specific to photography (such as<br />
"Daguerreotype") will make the quiz more challenging and help students<br />
become familiar with these terms by prompting them to notice the correct<br />
spelling and definition.<br />
The Quiz for Chapter 2 is an example of a more "conceptual" exercise,<br />
which requires students to demonstrate comprehension of core ideas in the<br />
text. Again, students may be encouraged to refer to the text for answers (or<br />
the quiz may be used as a test of acquired knowledge, without reference to<br />
the text). The provided answers are (in most cases) intended as general guide-<br />
53
54<br />
lines. A reasonable amount of leeway is necessary in a quiz of this kind, as<br />
the exact wording of most answers is likely to vary considerably.<br />
Additional quizzes like this one may be derived from the text by noting<br />
bold-faced terms or selecting key concepts and devising questions pertaining<br />
to them. Note that some questions (such as 13: "Define 'depth of field'")<br />
are not easily answered in a few words. Though these have the benefit<br />
of being especially challenging — provoking substantial thought — it is<br />
important to ensure that the majority of the answers to a quiz of this kind be<br />
reasonably simple (lists, single-word answers, etc.), so students do not feel<br />
overwhelmed. If students will be permitted to refer to the text, you may wish<br />
to provide page number citations (included in parentheses in this sample) to<br />
assist with this.<br />
The Quiz on Film Developing suggests a useful format for focusing<br />
attention on specific procedures. The answers to any of the sample questions<br />
may vary, depending the film, chemicals, etc., used in your class. You may<br />
also wish to alter the questions (and add others) depending on your own preferences<br />
and procedures. (For example, if you include a hypo clearing agent<br />
in film processing, then one or more questions pertaining to that should be<br />
added.)<br />
Toward the end of the course, you may wish to provide the class with a<br />
Final Examination Study Sheet, indicating topics with which they should<br />
be familiar. The sample provided summarizes key points raised in the text<br />
(with parenthetical page references to assist in locating each topic). Once<br />
again, you are encouraged to add, subtract and revise to suit your own preferences<br />
and needs.<br />
We wish to thank Dorie Parsons (Kubasaki High School; Okinawa) and<br />
Joleen Roe (Bethlehem Central High School; Delmar, New York) for contributing<br />
evaluation forms on which these samples are based.
Critique Form<br />
What technical aspects of this photograph (such as lighting, focus, print quality, etc.) do you feel are good or excellent?<br />
What technical aspects do you feel detract from the quality or effectiveness of the photograph?<br />
What artistic qualities (such as composition, impact, mood, etc.) do you see in this photograph?<br />
In what ways do you feel this photograph is artistically flawed?<br />
What might the photographer have done to make this photograph better?
Photograph Evaluation<br />
Name<br />
Assignment<br />
Assignment Requirements<br />
Print Size<br />
correct<br />
incorrect<br />
Printing Technique<br />
Contrast<br />
good<br />
I highlights/whites not light enough<br />
1 J highlights/whites too light<br />
. i shadows/blacks not dark enough<br />
shadows/blacks too dark<br />
Print Exposure<br />
D good<br />
D over-exposed (too dark)<br />
LJ under-exposed (too light)<br />
D needs dodging:<br />
LJ needs burning:<br />
Composition<br />
Center of Interest<br />
D adequate<br />
strong<br />
missing<br />
Cropping<br />
LJ effective<br />
LJ reposition to correct tilted<br />
horizon line<br />
iZ crop tighter:<br />
: I cropped too tight:<br />
L3 change to vertical format<br />
D change to horizontal format<br />
Originality<br />
Choice of Subject<br />
compelling<br />
D interesting<br />
L~J adequate<br />
:'.". dllll<br />
Grade D<br />
Depth of Field<br />
effective<br />
i~l acceptable<br />
D too shallow:<br />
D too deep:<br />
Choice of Subject<br />
meets assignment<br />
does not meet assignment<br />
Print Quality<br />
good, clean print<br />
D dust on negative<br />
G scratches on negative<br />
D air bubbles in processing<br />
. i water spots on negative<br />
[ . dented emulsion<br />
D negative reversed<br />
D paper is fogged<br />
chemical stains<br />
. should be in focus<br />
should not be in focus<br />
Period<br />
C fingerprints<br />
D tong marks<br />
D uneven developing<br />
D incomplete fixing<br />
D etc:<br />
Reprint and submit again<br />
Point of View Comments:<br />
LJ common<br />
D unusual Work on:<br />
Focus<br />
i ] sharp<br />
' almost sharp<br />
[ poorly focused<br />
D effective use of selective or soft focus<br />
D camera shake<br />
, moving subject<br />
IH effective use of blurred motion<br />
Please mount this print Extra Credit
Early Photography — Reading Worksheet for Chapter 1<br />
Period<br />
Please read pages 10-15 in The Photographic Eye: Learning to See with a Camera. Fill in this worksheet as you read.<br />
You are responsible for the material to be read. Be sure to spend some time looking at the pictures.<br />
1. Photography began as a curiosity and has grown into a . influence on our society.<br />
2. We encounter hundreds of photographs every day, some with tremendous impact, some with<br />
3. How long has photography been around? Any guess over<br />
4. There isn't any one answer.<br />
5. No one person can be credited with<br />
6. The first printed photographs were made between 1816 and<br />
. photography.<br />
years would be reasonably correct.<br />
7. The first recorded discovery that a certain chemical turned black when exposed to light was made in<br />
8. The basic design of the camera has been in use since the .<br />
9. The. figured it out even longer ago than that—as early as the fourth century.<br />
10. Photography is between .<br />
1 1. The first stage of photography's .<br />
12. Camera is Latin for chamber; obscura means.<br />
and 150 years old.<br />
13. The camera obscura was a room with one tiny hole fitted with a .<br />
14. The image was upside down and not very _<br />
15. Portable versions of the camera obscura were developed by the .<br />
in Europe was the camera obscura.<br />
. but it could be traced.<br />
16. In 1725 Johann Heinrich Schulze discovered a mixture that turned . . in sunlight.<br />
17. Silver salt was causing the reaction to .
Early Photography — Reading Worksheet for Chapter 1<br />
Name Period<br />
18. Schulze never thought that his discovery might have any .<br />
application.<br />
19. In 1777 Carl Wilhelm Scheele discovered that ammonia would dissolve the silver chloride and<br />
leave the imaae<br />
20. The basic chemistry of photography (exposing silver chloride to produce an image and.<br />
it with ammonia) was established.<br />
21. In France, Joseph Niepce developed an emulsion or<br />
22. Instead of turnina black, this material is<br />
. by light.<br />
23. To produce an image, emulsion on glass or pewter was exposed to light and then<br />
with solvents.<br />
24. The solvents dissolved the unexposed emulsion, producing the world's first.<br />
camera image.<br />
-sensitive varnish.<br />
25. It was only some blurs of light and dark and the exposure took. hours.<br />
26. In Paris. Louis Jacques Mande Daguerre discovered that if a silver plate were iodized, exposed first to light and<br />
then to mercury vapor, and finally fixed with a salt solution, then a , permanent image<br />
would result.<br />
27. This was the first photographic process to be used outside of a laboratory: the .<br />
28. In England, William Henry Fox Talbot succeeded in producing photographs. The first exposure produced a negative<br />
image on .<br />
29. The exposed paper was placed over a second sheet of treated paper and exposed to a bright light, producina a<br />
image.<br />
30. Talbot's process—called a calotype—enabled photographers to make<br />
of a single image.<br />
31. Because the calotype's image was transferred through a paper negative it was not as<br />
as the daguerreotype.<br />
. copies
Early Photography — Reading Worksheet for Chapter 1<br />
Name Period<br />
32. In 1851, Frederick Scott Archer introduced the collodian wet-plate process which produced a high<br />
_ image and multiple copies.<br />
33. The collodian process was .to use.<br />
34. A clean glass plate had to be coated with collodian and while still damp, the plate had to be dipped into silver nitrate,<br />
inserted into the camera and exposed, then developed .<br />
35. Photography, dominated by the collodian and daguerreotype processes, began to.<br />
36. Cameras were used to photograph portraits, landscapes and<br />
37. collected inexpensive prints of local attractions.<br />
38. The stereoscopic camera that produced a. . image was introduced in 1849.<br />
39. As early as 1850 . of photographs were published showing the harsh conditions<br />
of life in England and the U.S.<br />
40. Lewis Hine produced powerful photographs that helped to bring about new .<br />
children's rights.<br />
41. At the start of the Civil War, Mathew .<br />
onto the battlefields.<br />
. asked for permission to carry his cameras<br />
42. In the 1880s. Eadweard Muybridge invented the zoopraxiscope that produced a series of images of a<br />
subject.<br />
43. Though early photographers often achieved a high degree of aesthetic quality, their primary purposes were<br />
44. They were to promote social reform, record events and aid . . investigations.<br />
off.<br />
.to protect
Early Photography — Reading Worksheet for Chapter 1 — Answers<br />
Name Period<br />
Please read pages 10-15 in The Photographic Eye: Learning to See with a Camera. Fill in this worksheet as you read.<br />
You are responsible for the material to be read. Be sure to spend some time looking at the pictures.<br />
1. Photography began as a curiosity and has grown into a major influence on our society.<br />
2. We encounter hundreds of photographs every day, some with tremendous impact, some with<br />
none .<br />
3. How long has photography been around? Any guess over 150 years would be reasonably correct.<br />
4. There isn't any one correct answer.<br />
5. No one person can be credited with inventing photography.<br />
6. The first printed photographs were made between 1816 and 1840<br />
7. The first recorded discovery that a certain chemical turned black when exposed to light was made in 1725<br />
8. The basic design of the camera has been in use since the 1500s<br />
9. The Chinese figured it out even longer ago than that—as early as the fourth century.<br />
10. Photography is between 1.500 and 150 years old.<br />
11. The first stage of photography's evolution in Europe was the camera obscura.<br />
12. Camera is Latin for chamber; obscura mean dark .<br />
13. The camera obscura was a room with one tiny hole fitted with a lens<br />
14. The image was upside down and not very clear but it could be traced.<br />
15. Portable versions of the camera obscura were developed by the 1660s .<br />
16. In 1725 Johann Heinrich Schulze discovered a mixture that turned purple in sunlight.<br />
17. Silver salt was causing the reaction to light
Early Photography — Reading Worksheet for Chapter 1 — Answers<br />
Name Period<br />
18. Schulze never thought that his discovery might have any practical application.<br />
19. In 1777 Carl Wilhelm Scheele discovered that ammonia would dissolve the silver chloride and<br />
leave the image intact<br />
20. The basic chemistry of photography (exposing silver chloride to produce an image and fixing<br />
it with ammonia) was established.<br />
21. In France, Joseph Niepce developed an emulsion or light -sensitive varnish.<br />
22. Instead of turning black, this material is hardened by light.<br />
23. To produce an image, emulsion on glass or pewter was exposed to light and then washed<br />
with solvents.<br />
24. The solvents dissolved the unexposed emulsion, producing the world's first permanent<br />
camera image.<br />
25. It was only some blurs of light and dark and the exposure took 8 hours.<br />
26. In Paris, Louis Jacques Mande Daguerre discovered that if a silver plate were iodized, exposed first to light and<br />
then to mercury vapor, and finally fixed with a salt solution, then a visible permanent image would result.<br />
27. This was the first photographic process to be used outside of a laboratory: the daguerreotype<br />
28. In England, William Henry Fox Talbot succeeded in producing photographs. The first exposure produced a negative<br />
image on paper .<br />
29. The exposed paper was placed over a second sheet of treated paper and exposed to a bright light, producing a<br />
positive image.<br />
30. Talbot's process—called a calotype—enabled photographers to make multiple copies<br />
of a single image.<br />
31. Because the calotype's image was transferred through a paper negative it was not as clear<br />
as the daguerreotype.
Early Photography — Photography Reading Worksheet for Chapter 1 — Answers<br />
Name<br />
Period<br />
32. In 1851, Frederick Scott Archer introduced the collodian wet-plate process which produced a high-<br />
quality image and multiple copies.<br />
33. The collodian process was difficult to use.<br />
34. A clean glass plate had to be coated with collodian and while still damp, the plate had to be dipped into silver nitrate,<br />
inserted into the camera and exposed, then developed immediately<br />
35. Photography, dominated by the collodian and daguerreotype processes, began to take— oil.<br />
36. Cameras were used to photograph portraits, landscapes and battles .<br />
37. Tourists collected inexpensive prints of local attractions.<br />
38. The stereoscopic camera that produced a three-dimensional image was introduced in 1849.<br />
39. As early as 1850 books of photographs were published showing the harsh conditions<br />
of life in England and the U.S.<br />
40. Lewis Hine produced powerful photographs that helped to bring about new laws to protect<br />
children's rights.<br />
41. At the start of the Civil War, Mathew Brady asked for permission to carry his cameras<br />
onto the battlefields.<br />
42. In the 1880s, Eadweard Muybridge invented the zoopraxiscope that produced a series of images of a<br />
moving subject.<br />
43. Though early photographers often achieved a high degree of aesthetic quality, their primary purposes were<br />
practical .<br />
44. They were to promote social reform, record events and aid scientific invpsfiontinng<br />
*
Quiz for Chapter 2 — Tools<br />
1. List two important choices you should consider before buying a new camera.<br />
2. What is an interchangeable lens?<br />
3. What is a fixed lens?<br />
4. What is a "fixed focal-length" lens?<br />
5. What is a "zoom" lens?<br />
6. What does "manual override" allow you to do?<br />
7. What does "grain" mean in photography?<br />
8. What is the most important benefit of using a "UV" or "skylight" filter?
Quiz for Chapter 2 — Tools<br />
9. What is a contact sheet'.'<br />
10. Describe a situation in which you micht choose ISO 400 film instead of ISO 64 film?<br />
1 1. What does "aperture" mean?<br />
12. Which aperture is larger: ['4.5 or I'S?<br />
13. Define "depth of field."<br />
14. What aperture might you choose for shallow (or narrow) depth of field and what effect might you achieve with it?<br />
15. List three conditions in which a fast shutter speed is useful.<br />
16. Which lens most closely matches human vision:<br />
_200mm 75mm 50mm 28mm<br />
17. What happens if you change lenses while there is film in your camera?
Quiz for Chapter 2 — Tools — Answers<br />
1. List two important choices you should consider before buying a new camera, (page 36)<br />
A. fixed or interchangeable lens(es)<br />
B. manual or automatic exposure<br />
2. What is an interchangeable lens? (page 36)<br />
One that can be removed from the camera body<br />
3. What is a fixed lens? (page 36)<br />
One that cannot be removed<br />
4. What is a "fixed focal-length" lens? (page 39)<br />
One in which the angle of view or "length" (the distance between the optical center and the<br />
film plane) cannot be adjusted.<br />
5. What is a "zoom" lens? (page 39)<br />
One in which the length can be adjusted<br />
6. What does "manual override" allow you to do? (page 37)<br />
Select a different exposure than recommended by the light meter<br />
7. What does "grain" mean in photography? (page 37)<br />
The size of the "dots" which create a photographic image<br />
8. What is the most important benefit of using a "UV" or "skylight" filter? (page 39)<br />
It protects the lens from being scratched
Quiz for Chapter 2 — Tools — Answers<br />
9. What is a contact sheet? (page 40)<br />
A same-size print of all the frames on a single roll of film, used for evaluating the images<br />
and decidine which to enlarge<br />
10. Describe a situation in which you might choose ISO 400 film instead of ISO 64 film?<br />
Any situation in which the light is low, the subject or photographer is in motion, or a "soft" or grainy effect is desired<br />
11. What does "aperture" mean? (page 47)<br />
The size of the lens opening<br />
12. Which aperture is larger: f'4.5 or f8? (page 47)<br />
(4.5<br />
13. Define "depth of field." (page 47)<br />
The range of distances from the camera which will be in sharp focus at any one time<br />
14. What aperture might you choose for shallow (or narrow) depth of field and what effect might you achieve with it?<br />
(page 47)<br />
Example: t'4.5 — To achieve the effect of a subject in focus with a blurred background.<br />
15. List three conditions in which a fast shutter speed is useful, (page 36)<br />
A. subject is in motion<br />
B. shooting in low light<br />
C. using a long lens<br />
16. Which lens most closely matches human vision: (page 39)<br />
200mm 75mm 50mm 28mm<br />
50mm<br />
17. What happens if you change lenses while there is film in your camera? (page .<br />
You must figure out this one on your own — it depends on your camera.
Film Developing — Photography<br />
Choose the most correct answer.<br />
1. The type of developer we use is<br />
A. Dektol<br />
B. Microdol-X<br />
C.Microdol-X(l:3)<br />
D. Photo-flo<br />
2. The best temperature for the developer is<br />
A. 55"<br />
B. 68"<br />
C. 75"<br />
D. 100"<br />
3. At this temperature, film should remain in the developer for<br />
A. 1 minute.<br />
B. 5 minutes.<br />
C. 15 minutes<br />
D. 30 minutes.<br />
4. After pouring developer into the processing tank, you should<br />
A. agitate the tank continuously for the entire developing time.<br />
B. set the tank on a flat surface without shaking it and leave it there for the entire developing time.<br />
C. agitate the tank for 5 seconds at 30-second intervals.<br />
D. agitate the tank occasionally for what feels like the "right" amount of time.<br />
5. At the end of the developing time, you should<br />
A. open the developing tank and check to be sure the film has been developed correctly.<br />
B. pour the developer back into its container.<br />
C. leave the developer in the tank and pour in a small amount of stop bath.<br />
D. pour the developer down the drain.<br />
6. Film should remain in the stop bath for<br />
A. 5 minutes.<br />
B. 30 seconds.<br />
C. I minute.<br />
D. between 1 and 5 minutes, depending on the type of film.<br />
7. After completing the stop bath, film should be<br />
A. washed for 30 minutes, then fixed.<br />
B. fixed for 30 minutes, then washed.<br />
C. fixed for 5 minutes, then washed.<br />
D. washed for 5 minutes (fixing is optional, but not necessary).
Film Developing — Photography<br />
8. To focus the negative in an enlarger, you should<br />
A. use the largest aperture.<br />
B. use the smallest aperature.<br />
C. use whatever aperture looks best.<br />
9. The correct exposure for printing a negative is<br />
A. 5 seconds at f8.<br />
B. 10 seconds at f4.5.<br />
C. determined by making a test strip.<br />
D. determined by trail and error.<br />
10. To develop the print normally, you should<br />
A. allow the paper to sit in the tray with no agitation for the entire developing time.<br />
B. agitate the paper occasionally while it is developing.<br />
C. turn the paper over at 30-second intervals while continually agitating the tray.<br />
D. agitate continually and remove the print as soon as it looks right.<br />
E. agitate continually and remove the print when it looks slightly underexposed.<br />
11. The best way to increase the contrast of a print is to<br />
A. use a large aperture and then remove the print from the developer as soon as it looks right.<br />
B. use a small aperture and develop the print for at least 15 minutes.<br />
C. use higher-contrast paper.<br />
D. agitate the paper continually while it is developing.<br />
E. rub the paper with your hands while it is developing.<br />
12. After the print has been properly developed, you should:<br />
A. place it in the stop bath for 15-30 seconds.<br />
B. place it in the stop bath for 5 minutes.<br />
C. rinse it off in the stop bath and place it in the fixer.<br />
D. rinse it with running water.<br />
13. The print should remain in the fixer for<br />
A. I minute with continual agitation.<br />
B. 5 minutes with agitation for 5 seconds at 1 -minute intervals.<br />
C. 10 minutes with agitation for 5 seconds at 30-second intervals.<br />
D. 10 minutes with no agitation.<br />
14. After fixing, the print should be<br />
A. washed for 1 minute<br />
B. washed for 10 minutes<br />
C. washed for 20 minutes<br />
D. returned to the stop bath for 1 minute, then washed for 5 minutes.<br />
Answers:<br />
1, 2, 3, 13, 14: Answers to these questions will depend on your own procedures.<br />
4:C, 5:D. 6: B. 7: C, 8: B, 9: C, 10: C, 11:C, 12: A
Final Exam Study Sheet<br />
As part of your preparation for the photography final exam, you may want to review the topics<br />
included in this list. You should be familiar with all of them — understanding not merely what the<br />
words mean, but how they apply to photography in practice. The numbers (in parentheses) indicate<br />
pages of The Photographic Eye where you will find information on each topic.<br />
Cameras<br />
camera obscura (11)<br />
daguerreotype (12)<br />
interchangeable lens (36, 280)<br />
manual override (37)<br />
ASA/ISO (42, 279)<br />
shutter speed (42-43, 48, 280)<br />
aperture (47, 48, 279)<br />
single-lens reflex (48)<br />
fast and slow lenses (139)<br />
focal length (39, 138,279)<br />
depth-of-field(124-126)<br />
angle-of-view (129-131, 138)<br />
Composition & Technique<br />
line (56-59)<br />
shape (60)<br />
balance (60-61)<br />
dynamics (61-63)<br />
weighting (55, 280)<br />
cropping (65, 74)<br />
value (68-70)<br />
negative space (60, 280)<br />
bracketting(123, 127)<br />
panning (132)<br />
flash fill (268)<br />
zone focusing (182)<br />
Darkroom<br />
working solution (229)<br />
grain focuser (236)<br />
contrast grades (232)<br />
surface texture (232)<br />
emulsion (12, 227)<br />
test strip (235)<br />
dodging and burning (238-<br />
239)<br />
fogging (233, 241)
70<br />
Contents<br />
Chapter 1:<br />
From Blurs to<br />
Big Business<br />
Chapter 2:<br />
Elements of<br />
Composition<br />
Chapter 3:<br />
What is<br />
Composition?<br />
Chapter 4:<br />
Developing a<br />
Critical Eye<br />
Chapters:<br />
Point of Departure<br />
(f/16@1/25)<br />
Page<br />
11-31<br />
21-23,29<br />
9-31<br />
9-27,29,30<br />
31<br />
The Photographic Eye<br />
Correlations to Essential<br />
Elements and TAAS<br />
11-14,16,21-23,<br />
26, 27, 31<br />
Focal Point: 1Q-21. 24. 2B, 29<br />
35-49<br />
33, 36, 38, 39<br />
37,38<br />
40, 48, 49<br />
34-38<br />
41-47<br />
Exercise: 48, 49<br />
50-65<br />
50-63<br />
54-63<br />
50-60, 62-65<br />
Exercise: 64, 65<br />
67-81<br />
68-70, 74<br />
66, 68-81<br />
Exercise: 76-81<br />
82-85<br />
84,85<br />
82, 84, 85<br />
82-84<br />
Essential<br />
Elements<br />
1A.2B<br />
1B<br />
3A.3B<br />
4A, 4B<br />
2A<br />
3A.3B<br />
1A.2B<br />
1B<br />
1C<br />
2A<br />
3A, 4A, 4B<br />
2A<br />
1A.2B<br />
1B.1C<br />
2A<br />
4A, 4B<br />
2A<br />
1A, 2B, 4A, 4B<br />
1B<br />
3A.3B<br />
1B, 1C,4A,4B<br />
1A.2A<br />
1B, 1C<br />
3B, 4A, 4B<br />
TAAS<br />
R1.R2.R3.HB<br />
mmmmm<br />
•HHHHHH<br />
B4, R5<br />
R1,R3,R5,R6<br />
R2, B4, B5<br />
R2, R4, R5<br />
R1.R3<br />
R2, R4, R5<br />
R2, R4, R5<br />
R1.R2, R3, R4.R5, R6<br />
R2, R3, R5, W5, W6, W7<br />
R3, R4, R5, R6<br />
•••^^••i<br />
R1.R2
Contents<br />
ChapterG:<br />
Line<br />
Chapter 7.<br />
Texture<br />
ChapterS:<br />
Shape<br />
Chapter 9:<br />
Light<br />
Chapter 10:<br />
Motion<br />
Chapter 11:<br />
Perspective<br />
Page<br />
86-93<br />
87,89<br />
90,91<br />
86,88-91<br />
Exercise: 92, 93<br />
94-101<br />
95, 96, 98<br />
Exercise: 100-1 01<br />
102-111<br />
103,108<br />
102,104-111<br />
105-108<br />
Exercise. 110-111<br />
112-127<br />
116, 117, 124<br />
116,117<br />
112-119,122-124,<br />
126,127<br />
Focal Point: 120-1 21, 125<br />
Exercise: 1 27<br />
128-135<br />
129-133<br />
133<br />
Exercise: 134-1 35<br />
136-147<br />
140,142<br />
136,137,140-147<br />
136-146<br />
137-142,145,146<br />
Focal Point: 138-1 39<br />
Fxerc/se: 146-1 47<br />
Essential<br />
Elements<br />
1A,1B,3B,4A,4B<br />
1C<br />
2A<br />
1A, 1B.2B.3B,<br />
4A, 4B<br />
MMH^HH<br />
2A<br />
1A, 1B.2B<br />
1C<br />
3B, 4A, 4B<br />
2B<br />
1A.2B<br />
1B<br />
1C<br />
4A, 4B<br />
2A<br />
1A, 1C, 2B.3B,<br />
4A, 4B<br />
2A<br />
1A.1B.2B<br />
1C<br />
3B, 4A, 4B<br />
1C<br />
2B<br />
TAAS<br />
R1.R3. R5.R6<br />
R2<br />
W5, W6, W7<br />
R2, R4<br />
R1.R5, R6<br />
R4<br />
R2, R4<br />
R1.R3, R6<br />
R5<br />
R2, R4<br />
R1.R3, R6<br />
R2, R4,<br />
R2, R4,<br />
R1.R5. R6<br />
R3, R4<br />
R5<br />
R5<br />
W5, W6, W7<br />
R2<br />
R3, R6<br />
R1<br />
R2<br />
R1.R2, R4, R5<br />
71
72<br />
Contents<br />
Chapter 12:<br />
Things<br />
Chapter 13:<br />
Places<br />
Chapter 14:<br />
People<br />
Chapter 15:<br />
Putting it all<br />
Together<br />
Chapter 16:<br />
Breaking the Rules<br />
Page<br />
150-165<br />
150,152-165<br />
150,151,154-165<br />
Focal Point: 152, 153<br />
Exercise: 154-1 65<br />
166-179<br />
Focal Point: ~\BS, 169<br />
Exercise: 170-1 79<br />
180-195<br />
181-183<br />
Focal Point: 184, 185<br />
Everc/se: 186-1 95<br />
Exercise: m. 190, 191,194<br />
197,198,200,202-204,206<br />
Focal Point: 198, 199<br />
Exercise: 202-207<br />
208-225<br />
209<br />
210<br />
Focal Point: 21 0-211<br />
Exercise: 2W. 222, 224, 225<br />
Exercise: 21 8-225<br />
Essential<br />
Elements<br />
1A.2B<br />
1B.1C<br />
3B, 4A, 4B<br />
3A, 3B, 4A, 4B<br />
2A<br />
1A.2B<br />
1B, 1C, 3A, 3B,<br />
4A, 4B<br />
1B, 1C, 3B, 4A.4B<br />
1A,2B,3B,4A,4B<br />
1B, 1C.3A<br />
2A, 4A, 4B<br />
1B, 1C<br />
1A, 1B, 1C.2B<br />
1A, 3A<br />
2A, 3B, 4A, 4B<br />
1A.2B.4B<br />
4B<br />
18, 1C<br />
1B, 1C, 3A, 3B<br />
1B, 1C, 2A, 4B<br />
TAAS<br />
R1.R3<br />
R2, R4, R5, R6<br />
R1.R3.R6<br />
R1.R3<br />
R1<br />
R2, R4, R5<br />
R3, R6<br />
R1.R2, R4, R5<br />
R2, R1.R4, R5<br />
R1.R3, R4, R5, R6<br />
R2<br />
R1.R3<br />
R1.R3<br />
W5, W6, W7<br />
R2, R4, R5, R6
TEXAS ASSESSMENT OF ACADEMIC SKILLS<br />
DOMAIN: WRITTEN COMMUNICATION Instructional Targets, English Language Arts (Exit Level)<br />
W1 Objective 1: The student will<br />
respond appropriately in a written<br />
composition to the purpose/audience<br />
specified in a given topic.<br />
• Vary word and sentence choice for<br />
purpose and audience<br />
• Write compositions incorporating<br />
information from sources other than<br />
personal experience<br />
• Write informative discourse of a<br />
variety of types<br />
• Write persuasive discourse of a<br />
variety of types<br />
• Use various composition models<br />
as aids in developing writing skills<br />
• Use formal and informal language<br />
appropriately<br />
• Use aural and visual stimuli for writing<br />
• Evaluate content<br />
W2 Objective 2: The student<br />
will organize ideas in a written<br />
composition on a given topic.<br />
• Use the composing process to plan<br />
and generate writing<br />
• Evaluate organization of writing<br />
• Write descriptive, narrative and<br />
expository paragraphs<br />
W3 Objectives: The student will<br />
demonstrate control of the English<br />
language in a written composition on<br />
a given topic.<br />
• Evaluate appropriate transition,<br />
clarity of language and appropriate<br />
word and sentence choice<br />
• Use the forms and conventions of<br />
written language appropriately<br />
• Use parts of speech effectively<br />
in sentences<br />
• Use the fundamentals of grammar<br />
W4 Objective 4: The student will<br />
generate a written composition that<br />
develops/supports/elaborates the<br />
central idea stated in a given topic.<br />
• Demonstrate clear and logical thinking<br />
in support and development of a<br />
central idea<br />
• Evaluate topic development<br />
W5 Objectives: The student will<br />
recognize appropriate sentence<br />
construction within the context<br />
of a written passage.<br />
• Recognize complete sentences and<br />
avoid fragments and run-ons<br />
• Combine sentence parts and sentences<br />
to produce a variety of sentence<br />
structures including simple,<br />
compound and complex<br />
W6 Objective 6: The student will<br />
recognize appropriate English usage<br />
within the context of a written<br />
passage.<br />
• Use common affixes to change words<br />
from one part of speech to another<br />
• Use correct subject-verb agreement<br />
with nouns, personal pronouns,<br />
indefinite pronouns and compound<br />
subjects, and use correct pronounantecedent<br />
agreement<br />
• Recognize correct verb tense and<br />
avoid faulty shifts intense<br />
• Use the appropriate forms of adjectives<br />
and adverbs and the correct case of<br />
pronouns, and avoid the use of double<br />
negatives.<br />
W7 Objective?: The student will<br />
recognize appropriate spelling,<br />
capitalization and punctuation within<br />
the context of a written passage.<br />
• Use the fundamentals of spelling<br />
• Use appropriate capitalization<br />
• Use the fundamentals of punctuation<br />
Note: The wording of the instructional<br />
targets was taken for the most part<br />
directly from the Essential Elements as<br />
delineated in the State Board of Education<br />
Rules for Curriculum. Each target is<br />
defined in behavioral terms appropriate<br />
for pencil-and-paper testing in the section<br />
entitled Description of Test Questions.