

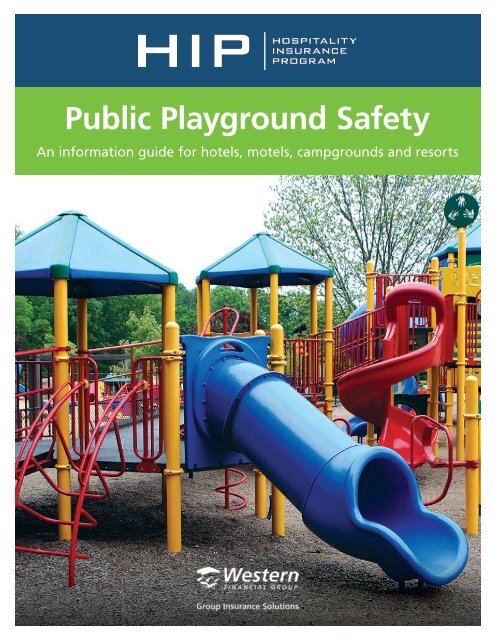
Public Playground Safety - Western Financial Group Insurance ...
Public Playground Safety - Western Financial Group Insurance ...
Public Playground Safety - Western Financial Group Insurance ...

You also want an ePaper? Increase the reach of your titles
YUMPU automatically turns print PDFs into web optimized ePapers that Google loves.
<strong>Public</strong> <strong>Playground</strong> <strong>Safety</strong><br />
An information guide for hotels, motels, campgrounds and resorts
Forward<br />
This <strong>Playground</strong> <strong>Safety</strong> Guide was created for the use of hotel, motel, campground and resort maintenance<br />
personnel and managers entrusted with designing and maintaining playgrounds.<br />
The CSA publication CAN/CSA-Z614-07 is the technical standard that shall be referred to in the discussion of<br />
playground safety and any new equipment or additions and replacement parts should meet the technical<br />
requirements of this standard.<br />
The detailed requirements in the CSA manual certainly have their place but many individuals and agencies have<br />
requested simple, workable guidelines and practices to help identify problem areas and provide and maintain safer<br />
playgrounds. It is with this in mind, that this publication has been issued so that maximum safety benefits can be<br />
realized.<br />
Introduction<br />
This information guide provides guidelines for public playground equipment and looks at the safety of each piece of<br />
play equipment and the layout as a whole. It is important to see this information as a guideline and there may be<br />
other methods that can be used to contribute to playground safety. We do believe that following the<br />
recommendations in this publication will help minimize playground injuries.<br />
Each year in North America, it is estimated that over 200,000 children require medical attention because of injuries<br />
that occurred on a playground. The majority of playground injuries result from falls off playground equipment to the<br />
ground. Approximately three quarters of playground injuries are in the falls category and by maintaining good ground<br />
cover, we can go a long way in reducing injuries.<br />
1
Designing <strong>Playground</strong>s<br />
When planning a new playground, it is important to check the proposed site for potential hazards. Pick a location<br />
away from roads, driveways and parking lots. If this is not possible, then an appropriate fence should be constructed<br />
to keep children from running into dangerous areas. Visibility is very important so the fence should not in any way<br />
restrict supervision but allow clear sight lines.<br />
The following points should be considered when planning a playground:<br />
Pick a site away from obstacles that could cause injuries such as low hanging tree branches, overhead wires,<br />
tree stumps and concrete.<br />
Check the location regarding drainage as heavy rains or melting snow can turn a play area into a swamp. Regrading<br />
may help improve drainage.<br />
Place metal equipment, where feasible, out of direct sunlight to reduce the possibility of serious burns.<br />
Play equipment should be located over 1,800 mm (6 feet) from other play equipment, buildings, fences, trees,<br />
etc. Provide additional space in front of and behind swings.<br />
Don’t crowd equipment together but instead organize different areas where active, physical activities are<br />
separate from passive activities. Sandboxes should not be located too close to a swing or slide. Ensure traffic<br />
patterns allow children to move safely from one piece of equipment to another.<br />
<strong>Playground</strong>s should have separate areas for younger children with suitable sized equipment and adequate space<br />
for greater supervision.<br />
Size<br />
Determine if the site is big enough to have a playground that meets your needs.<br />
The following items need to fit on that site:<br />
Play equipment.<br />
Protective surfacing that will extend up to 1,800 mm (6 feet) in all directions from the equipment.<br />
Non-encroachment zones beyond the protective surfacing area.<br />
Landscaping, seating, refuse containers, etc.<br />
Installation and Assembly<br />
Follow the instructions carefully as provided by the manufacturer and ensure the equipment is securely anchored.<br />
Because of the forces generated by active use, proper anchoring is required to prevent overturning, sliding or tipping.<br />
Anchors must be buried and covered with appropriate amount of protective surfacing.<br />
Equipment cannot be installed once the ground is frozen. From May to September are the ideal months for<br />
playground construction.<br />
Assembly of equipment should take place under the guidance of the manufacturer’s representative or installed<br />
completely by a trained crew. No deviation is permitted from the manufacturer’s instructions. There shall be clear<br />
and concise instructions and procedures for the installation of each play structure. Protective surfacing shall be<br />
installed as soon as possible following equipment assembly and the equipment shall not be used until this is done.<br />
The site shall be secure during construction when unattended to prevent children from playing on the site.<br />
Temporary barricades are required at unprotected openings of incomplete structures. All equipment must be<br />
thoroughly inspected before public use by the owner or representative.<br />
2
The equipment must be kept in excellent condition as this is essential to reducing injuries. Keep a copy of the<br />
manufacturer’s instructions and parts list so that worn or damaged components can be replaced.<br />
Develop an all inclusive maintenance program for the entire playground. This shall include regularly scheduled<br />
inspections for corrosion and breakage to more frequent inspections for broken glass and vandalism.<br />
The type of inspection will depend on the piece of equipment, amount of use and climatic conditions. Checklists<br />
should be developed for each playground item.<br />
Inspections shall include:<br />
Checking the entire playground area for hazardous debris or litter.<br />
Checking for any damage such as broken or missing components whether due to wear or vandalism.<br />
Checking for broken or missing protective barriers, steps, guardrails, etc. and damage to benches, signs and<br />
fences.<br />
Checking for strings and ropes that have been tied onto the equipment and removing them.<br />
Inspection Schedule<br />
The following three types of inspections are recommended:<br />
Daily/Weekly Visual Inspection<br />
A visual inspection shall be carried out by the owner, maintenance inspector, care giver, or custodian on a daily<br />
basis, if possible, and at least once a week, to identify defects or emerging problems.<br />
Detailed Monthly Inspection<br />
A detailed inspection shall be carried out every month, and the results and actions taken entered in a permanent<br />
record that can be examined if necessary.<br />
Annual Comprehensive Written Report<br />
Every year, comprehensive written reports shall be completed by the owner or a representative, and the results and<br />
action taken (e.g. checking equipment below grade, physically testing equipment, conducting surveys of overhead<br />
hardware on ladders) shall be entered in a permanent record that can be examined if necessary.<br />
Repairs in Play Spaces<br />
All repairs shall comply with the CSA Standard. When a defect is observed, it shall be immediately reported and<br />
repaired. Details of the defect or problem and remedial action shall be recorded. Should the repair take time, all<br />
reasonable steps shall be taken to bar access. Warning or danger signs alone shall not be acceptable. Damaged or<br />
worn components shall be repaired or replaced to the CSA Standard.<br />
Maintenance and repairs to equipment and the replacement of components shall be carried out in strict compliance<br />
with the manufacturer’s recommendations.<br />
Hazards<br />
Head and Neck Entrapment<br />
A component or a group of components should not form openings that could trap a child’s head. In general, an<br />
opening may present an entrapment hazard if the distance between any interior opposing surfaces is greater than<br />
90mm and less than 225 mm. (3.5 inches and 9 inches)<br />
3
Weekly <strong>Playground</strong> Inspection Checklist<br />
Town/Municipality: ______________________________________________________________________________<br />
Name of Location/Facility: _______________________________________________________________________<br />
<strong>Playground</strong> Location/Name: ______________________________________________________________________<br />
Address: ________________________________________________________________________________________<br />
Date Inspected: Time: ______________________<br />
Check for and remove loose garbage, debris, broken glass, and animal droppings on play area<br />
ground surface.<br />
Check play structure for obvious signs of damage, vandalism, or broken parts.<br />
(Advise Management immediately if service is needed).<br />
Check for and remove skipping ropes or any other ropes or climbing devices which have been<br />
attached to but are _________________________________________________________________ not a<br />
permanent part of the playground structure.<br />
Rake sand/gravel to replenish areas beneath swing bays, slide exits, and fire poles.<br />
Empty garbage can(s) located in playground area.<br />
Action Items or General Comments: ______________________________________________________________<br />
Completed by (print name): ______________________________________________________________________<br />
Signature Date<br />
Risk Management at a Glance – Hospitality <strong>Insurance</strong> Program
Monthly <strong>Playground</strong> Maintenance<br />
Inspection Report<br />
INSPECTED BY: NOTES:<br />
DATE:<br />
TIME:<br />
Attention Required<br />
Satisfactory<br />
LOCATION:<br />
CONDITION LEGEND<br />
General Site<br />
Conditions<br />
Campsite<br />
Playstructure 2<br />
Campsite<br />
Playstructure<br />
Merry – Go –<br />
Rounds/Whirls<br />
Climbers<br />
See Saws<br />
Spring Toys<br />
Slides<br />
Risk Management at a Glance – Hospitality <strong>Insurance</strong> Program<br />
Swing, Tire<br />
Swing, Belt<br />
Swing, Tot<br />
Equipment<br />
Chains<br />
S-Hooks/C-Hooks<br />
Seats/Tires<br />
Hanger Bearings<br />
Grease Fittings<br />
Stability in Ground/Tilting<br />
Exposed Concrete<br />
Entanglement Points<br />
Universal Joint<br />
Chain Covers<br />
Hand Railings<br />
Support Bars/Legs<br />
Fastening Point Areas<br />
Sidewalks & Bedways<br />
Entrapment Point Areas<br />
Sharp Edges/Points<br />
Stairs/Steps<br />
Plastic Component – Damage<br />
Spring & Bar<br />
Handles<br />
Pivot Points<br />
Nuts & Bolts<br />
Ground Clearance<br />
Locking Devices (int./ext.)<br />
Wood Checking (max. 3/4”)<br />
Protrusions<br />
Caps/Plugs<br />
Protective Surfacing<br />
Equipment Spacing/No Encroach<br />
Benches<br />
Debris/Broken Glass<br />
Asphalt Paths, Etc.<br />
Lighting<br />
Signs<br />
Fencing<br />
Condition – Satisfactory<br />
Condition – Attention Required<br />
Action Required<br />
Date<br />
Completed
Angles<br />
The angle of any vertex formed by adjacent components should not be less than 55 degrees, unless the lower leg is<br />
horizontal or projects downwards. An exception can be made if a rigid shield is attached to the vertex between<br />
adjacent components and the shield is of sufficient size to prevent a 225 mm (9 inches) diameter circular template<br />
from simultaneously touching components on either side of the vertex.<br />
Protrusions<br />
Protrusions on playground equipment should not be capable of entangling children’s clothing because such<br />
entanglement can cause serious injuries or death by strangulation. All protrusions shall not extend beyond the face of<br />
any of the three test gauges shown in Figure 5.<br />
Protrusions and Projections<br />
Protrusions or projections on playground equipment should not be capable of entangling children’s clothing, because<br />
such entanglement can cause death by strangulation. Particular attention should be given to avoid protrusions or<br />
projections on slides to minimize the risk of entanglement with clothing, jackets and sweatshirts with hoods and/or<br />
drawstrings have been involved in such entanglement/strangulation incidents. Jewellery, such as necklaces and<br />
rings, has also resulted in injuries from entanglement. The diameter of a protrusion should not increase in the<br />
direction away from the surrounding surface towards the exposed end (see Figure 4).<br />
Figure 4<br />
Figure 5<br />
Figure 6<br />
4<br />
Figure 5
No protrusion should extend beyond the face of any of the three gauges having dimensions show in Figure 5. These<br />
gauges may be purchased from the National Recreation and Park Association (NRPA).<br />
Protrusion Test Procedure<br />
Successively place each gauge (see Figure 5) over any protrusion or projection and determine if it projects beyond<br />
the face of the gauge (see Figure 6).<br />
Protrusions on Suspended Members of Swing<br />
Assemblies<br />
Because protrusions on swings can be extremely hazardous, given the<br />
potential for impact incidents, a special test gauge (see Figure 7) and<br />
procedure are recommended. No bolts or components in the potential<br />
impact region on suspended members should protrude through the hole<br />
beyond the face of the specified gauge, when tested in accordance with<br />
the following method.<br />
Conduct the test with the suspended member in its rest position. Place<br />
the gauge over any protrusion on the front or rear surface of the<br />
suspended member such that the axis of the hole in the gauge is<br />
parallel to both the intended path of the suspended member and a<br />
horizontal plane. Visually determine if the protrusion penetrates through<br />
the hole and beyond the face of the gauge.<br />
Protrusions that Project Upwards<br />
and Protrusions on Slides<br />
To minimize the likelihood of clothing entanglement, protrusions that fit<br />
within any one of the three gauges shown in Figure 5 and also have a<br />
major axis that projects upwards from a horizontal plane should not<br />
have projections perpendicular to the plane of the surrounding surface that are greater than 1/8 inch<br />
(see Figure 8).<br />
Sharp Points, Corners and Edges<br />
There should be no sharp points, corners or edges on any components of playground equipment which could cut or<br />
puncture children’s skin. Wood parts should be smooth and free from splinters. All metal edges should be rolled or<br />
have rounded capping.<br />
Suspended Hazards<br />
Cables, wires, ropes, or similar flexible components suspended between play units or from the ground to a play unit<br />
within 45 degrees of horizontal should not be located in areas of high traffic because they may cause injuries to a<br />
running child. This applies to suspended members at a height of 2100 mm (7 feet) or less.<br />
5<br />
Figure 7
Tripping Hazards<br />
All anchoring devices for playground equipment, such as concrete footings or horizontal bars at the bottom of flexible<br />
climbers, should be installed below the playing surface to eliminate the hazard of tripping. Attention should be given<br />
to environmental obstacles in the play area, including rocks, roots, and other protrusions from the ground that may<br />
cause children to trip.<br />
Figure 8<br />
Materials<br />
General Requirements<br />
<strong>Playground</strong> equipment shall be manufactured and constructed only of materials that have a demonstrated record of<br />
durability in the playground or similar outdoor setting.<br />
Metals<br />
Metals shall be painted, galvanized or otherwise treated to prevent rust.<br />
Coatings<br />
All paints or other similar finishes shall be non-toxic with documentation from the manufacturer stating that this<br />
treatment will not present a hazard to the user.<br />
Wood<br />
Wood shall be naturally rot and insect resistant or treated to avoid such deterioration. Creosote, pentachlorophenol<br />
and tributyl tin oxide are too toxic and shall not be used as preservatives for playground equipment. Technology<br />
exists that will minimize the amount of leachable chemicals on the surface of the wood after treatment. Consumers<br />
should request the information sheet available from the manufacturer of the preservative.<br />
Plastics<br />
Plastics shall be strong and durable and able to maintain structural integrity under a wide range of temperature<br />
variation.<br />
Ropes<br />
Ropes shall be strong and durable and resistant to U.V. deterioration.<br />
6
Hazardous Substances<br />
The manufacturer shall ensure that users of the playground equipment cannot ingest, inhale, or absorb any<br />
potentially hazardous amounts of substances as a result of contact with the equipment.<br />
Fastening Devices<br />
All fasteners shall be corrosion resistant. Bearings shall be easy to lubricate or be self lubricating. All hooks, including<br />
S-hooks, shall be closed as tightly as possible. (See 12.3.5.1 and 12.3.5.2 in CAN/CSA-Z614-07)<br />
Fasteners<br />
Corrosion Resistance<br />
All fasteners and connecting and covering devices shall be inherently corrosion-resistant or be provided with a<br />
corrosion-resistant coating.<br />
Security<br />
When installed in accordance with the manufacturer’s instructions, fasteners and connecting and covering devices<br />
shall not loosen or be removable without the use of tools. Lock washers, self-locking nuts, or other locking means<br />
shall be provided for all nuts and bolts to protect them from detachment. Hardware in moving joints shall also be<br />
secured against unintentional loosening.<br />
Moving Suspended Elements<br />
General<br />
Moving suspended elements shall be connected to a fixed support using bearings that will reduce friction.<br />
Steel Cable<br />
Cables shall be protected to lessen the possibility of loosening or unravelling.<br />
Chains<br />
Chains shall comply with the requirements of Clause 12.4.1 in CAN/CSA-Z614-07<br />
Tires<br />
If steel belted radials are used, they shall be closely examined to ensure there are no exposed steel belts that could<br />
be a protrusion or laceration hazard. Water should not be allowed to accumulate in the tires and drainage holes<br />
should be considered.<br />
Pinch, Crush and Shearing Points<br />
There shall be no accessible pinch, crush or shearing points on playground equipment that could injure children or<br />
catch their clothing. Such points can be caused by components moving relative to each other or to a fixed component<br />
when the equipment moves through its anticipated use cycle. When inspecting playground equipment, consider the<br />
likelihood of a body part being entrapped and the configuration and closing force of the components.<br />
Requirements for Access/Egress<br />
Access to playground equipment is varied and may be by means of ramps, steps, ladders, climbing nets, arch<br />
climbers and tire climbers. Stairways, ramps and ladders have a range of slopes permitted for these types of access.<br />
Table 2 in CAN/CSA-Z614-07 contains recommended dimensions for access slope, tread or rung width, tread depth,<br />
rung diameter and vertical rise. Openings between adjacent steps or rungs shall prevent the possibility of entrapment.<br />
7
Handrails<br />
Continuous handrails shall extend over the full length of the access and be provided on both sides of all stairways<br />
and stepladders. The appropriate measurements are provided in Clause 13.1 in CAN/CSA-Z614-07<br />
Other Means of Access<br />
Spiral stairways shall meet the requirements of Clause 13.1 and Table 2 in CAN/CSA-Z614-07 and Clause 13.2<br />
provides additional information on this type of access Arch climbers and flexible components shall be used as a<br />
means of access only if another type of access is also provided. Flexible components shall be securely fastened at<br />
both ends and when one end is anchored to the ground, the anchors shall be below the protective surfacing.<br />
Transition from Access to Platform<br />
On stairways and stepladders, there shall be a continuation of handrails from the access to the platform.<br />
On accesses that do not have side handrails, such as rung ladders, arch climbers, or flexible components, there shall<br />
be alternative hand-gripping support to facilitate the transition to the platform.<br />
For rung ladders, flexible components, and arch climbers, the stepping surface used for final access shall not be<br />
above the designated play surface it serves.<br />
Guardrails shall completely surround the elevated surface, except for entrance and exit openings necessary for each<br />
event. Means of ascent and descent, except at access points for stairs and ramps, that are accessible by openings in<br />
guardrails with horizontal dimensions greater than 375 mm (15 in) shall have a minimum of one top rail, i.e. maximum<br />
opening(s) without a top horizontal rail shall be 375 mm (15 in) in the horizontal dimension.<br />
The top surface of guardrails shall have a height of 725 mm (29 in) or greater when the elevated surface is for use by<br />
children aged 18 months to 5 years old, and 950 mm (38 in) or greater when for use by children aged 5 to 12 years<br />
old.<br />
The lower edge of guardrails on elevated surfaces intended for children aged 18 months to 5 years old shall be no<br />
greater than 575 mm (23 in) above the underlying equipment surface. For elevated surfaces intended for children<br />
aged 5 to 12 years old, the lower edge of the guardrails shall be no greater than 700 mm (28 in) above the underlying<br />
equipment surface.<br />
Platforms<br />
Guardrails or protective barriers shall be used to prevent falls off elevated platforms and shall be provided on<br />
platforms, walkways, landings and transitional surfaces. There shall be no designated play areas on guardrails and<br />
protective barriers and the design should minimize the possibility of climbing.<br />
Children less than five years of age require guardrails or protective barriers at lower levels and any elevated surface<br />
that is over 500 mm ( 20 in.) above the protective surfacing shall have this provided. A full protective barrier may be<br />
preferable for this age group as it affords a greater protection from falls. Children older than five require guardrails or<br />
protective barriers on platforms higher than 750 mm (30 in.)<br />
Protective barriers will always be provided when elevations exceed 750 mm (30 in.) for children less than five years<br />
of age and 1200 mm (47 in.) for children over five. The protective barrier shall be complete around the elevated<br />
surface except for entrance and exit openings.<br />
On some composite structures, there are layered or tiered platforms between the higher platform and the ground<br />
surface. The height difference between platforms shall be a maximum of 300 mm (12 in.) for children under five years<br />
of age and 450 mm (18 in.) for children older than five. Infill shall be used to reduce the space between platforms to<br />
prevent the possibility of entrapment.<br />
8
Guardrails and Protective Barriers<br />
Either guardrails or protective barriers may be used to prevent unintentional falls off elevated platforms. Protective<br />
barriers provide a greater degree of protection as they should prevent children climbing over or through the barrier.<br />
Minimum Elevation Requiring Guardrails and Protective Barriers<br />
Pre-School Age Children (Under 5 years)<br />
An elevated surface that is more than 508 mm (20 inches) above the underlying surface should have a guardrail or<br />
protective barrier to prevent falls. Guardrails are acceptable for platforms greater than 508 mm (20 inches) and less<br />
than or equal to 762 mm (30 inches) high. A full protective barrier may be preferable here but a protective barrier is<br />
definitely required for platforms that exceed 762 mm (30 inches) in height.<br />
School Age Children (over 5 years)<br />
An elevated surface that is more than 762 mm (30 inches) above the underlying surface should have a guardrail or<br />
protective barrier to prevent falls. For platforms greater than 762 mm (30 inches) and less than or equal to 1,219 mm<br />
(48 inches) high, guardrails are acceptable although a full protective barrier always provides greater protection.<br />
Platforms that exceed 1,219 mm (48 inches) in height shall always have a protective barrier.<br />
Guardrails and Elevated Surfaces<br />
Pre-School Age Children<br />
The top surface of guardrails should be at least 736 mm (29 inches) high and the lower edge should be no more than<br />
584 mm (23 inches) above the platform.<br />
School Age Children<br />
The top surface of guardrails should be at least 965 mm (38 inches) high and the lower edge should be no more than<br />
660 mm (26 inches) above the platform.<br />
Protective Barriers<br />
Pre-School Age Children<br />
The top surface of protective barriers should be at least 736 mm (29 inches) high.<br />
School Age Children<br />
The top surface or protective barriers should be at least 965 mm (38 inches) high.<br />
Both guardrails and protective barriers should be designed to prevent unintentional falls off the platform, prevent the<br />
possibility of entrapment and facilitate supervision. Horizontal cross-pieces shall not be used as infill for the space<br />
below the top rail because they provide footholds for climbing.<br />
Stepped Platforms<br />
Some composite structures have layered or tiered platforms. Falls from a higher platform can be terminated by a<br />
lower platform rather than by the ground surface. Unless there is an alternate means of access/egress, the maximum<br />
difference in height between stepped platforms should be:<br />
Pre-School Age Children: 305 mm (12 inches)<br />
School Age Children: 457 mm (18 inches)<br />
9
Play Space Layout<br />
Each playstructure requires an area of protective surfacing that corresponds to the fall zone. The fall zone is the area<br />
under and adjacent to a playstructure where it is reasonable to expect that a child may land after a fall. The depth and<br />
other dimensions of the protective surfacing are dependent on the fall height. The fall height can be considered as an<br />
approximation of the maximum fall height from which a life threatening head injury would not be expected to occur.<br />
The surfacing material should have a depth that is relative to the height of the highest accessible part of the<br />
equipment.<br />
No-Encroachment Zone<br />
There shall be a no-encroachment zone surrounding the protective surfacing zone of moving equipment and in front<br />
of the protective surfacing zone of slides.<br />
The no-encroachment zone shall extend at least 1800 mm (72 in) past the protective surfacing zone.<br />
Each piece of playground equipment must have its own protective surfacing area and they shall not overlap. It is<br />
acceptable for adjacent pieces of playground equipment to share a single no-encroachment zone.<br />
Visualization<br />
Let’s take a piece of equipment and decide how we can make it dangerous and even more dangerous. We will use<br />
slides for this purpose.<br />
Starting Platform<br />
Height<br />
slide sitting section/entrance<br />
Sliding Section Entrance<br />
hand support<br />
guardrail/hood forces sitting<br />
protective side enclosures<br />
Sliding Section<br />
Height/length ratio shall not exceed 0.577<br />
No slide span shall have a slope exceeding 50° from the horizontal<br />
Sidewalks shall have a height of 100 mm (4 inches) or greater along both sides of the chute<br />
Exit Section<br />
Slope of the exit section shall be between 0 and 4° from horizontal<br />
Length of the exit section shall be a minimum of 275 mm (11 inches)<br />
End of the slide shall be rounded to a minimum radius of 10 mm (0.375 inches) with no sharp edges<br />
10
Figure 17<br />
Figure 18<br />
Slides<br />
Slide Access<br />
With the exception of embankment slides, access to a slide may be by means of a ladder with rungs or steps, a<br />
stairway with steps, or the slide may be a component of a composite play structure to which access is provided by<br />
other means.<br />
Slide Platform<br />
All slides should be provided with a platform with sufficient length to facilitate the transition from standing to sitting at<br />
the top of the inclined sliding surface. The length of the platform will usually not be an issue when the slide is<br />
attached to the deck of a composite structure, because decks are generally at least 3 feet square. However, in the<br />
case of a free-standing slide, it is recommended that the platform have a minimum length of at least 22 inches.<br />
The platform should be horizontal and have a width at least equal to the width of the slide. Guardrails or protective<br />
barriers should surround a slide platform. Slides should not have any spaces or gaps between the platform and the<br />
11
start of the slide chute. With the exception of tube slides, handholds should be provided at the entrance to all slides to<br />
facilitate the transition from standing to sitting and decrease the risk of falls.<br />
At the entrance to the chute there should be a means to channel a user into a sitting position. This may be a<br />
guardrail, a hood, or other device. Whatever means is provided, it should be of a design that does not encourage<br />
climbing.<br />
Sliding Section of Straight Slides<br />
It is recommended that the average incline of a slide chute be no more than 30 degrees. This can be measured by<br />
determining that the height to length ratio (as shown in Figure 18) does not exceed 0.577. No span on the slide chute<br />
should have a slope greater than 50 degrees.<br />
Straight slides with flat open chutes should have sides with a 4 inch minimum height extending along both sides of<br />
the chute for the entire length of the inclined sliding surface.<br />
The sides should be an integral part of the chute, without any gaps between the sides and the sliding surface.<br />
Metal slides should be placed in shaded areas to prevent burns caused by direct sun on the slide chute.<br />
Exit region<br />
All slides should have an exit region to help children maintain their balance and facilitate a smooth transition from<br />
sitting to standing when exiting.<br />
The exit region should be essentially horizontal and parallel to the ground and have a minimum length of 11 inches.<br />
Check CSA current standards for additional information on slides.<br />
Hazard Actions Leading to Potential Accidents<br />
Steep angle<br />
Dangerous speed of descent<br />
No exit ramp<br />
Hard ground<br />
Open stairs<br />
Rough surfaces<br />
No starting platform<br />
Nearby equipment<br />
Other hazards:<br />
Fast speed to exit and possible falls<br />
Hard landings<br />
Entrapment, slippage<br />
Scraped skin<br />
No opportunity to begin a safe descent<br />
Unsafe fall zone, potential collisions<br />
12
What is an Accident?<br />
A happening that is not expected, foreseen or intended,<br />
An unpleasant and unintended happening sometimes resulting from negligence that results in injury, loss and/or<br />
damage.<br />
What is the most common form of accident on playgrounds?<br />
Falls<br />
What part of the body is injured?<br />
Scrapes<br />
Broken bones & skull fractures<br />
Serious Injuries & Deaths<br />
Hazard versus Danger<br />
Danger<br />
Situation that potentially exposes individual to harm, but is visible. E.g. Jump from a height.<br />
Hazard<br />
Situation where a danger is not readily apparent, such as entrapment hazards on a piece of playground equipment.<br />
Where do Injuries Occur on <strong>Playground</strong>s?<br />
In 1998, the Ontario School Boards issued a ten year study of incurred claims on playgrounds. These claims resulted<br />
from injuries sustained mainly from climbers, swings and slides with climbers alone involved in about 2/3 of all<br />
injuries.<br />
The actual breakdown is as follows:<br />
Climbers 63.6%<br />
Slides 18.2%<br />
Swings 14.2%<br />
Teeter-totters 3.5%<br />
Merry-go-rounds 0.5%<br />
18%<br />
14%<br />
4% 1%<br />
Further analysis of the climber injuries provided information that over 40% of the injuries could have been prevented<br />
or reduced if proper inspections and maintenance procedures were carried out.<br />
Canadian Hospital Injury Reporting and Prevention Program (CHIRP) surveyed the results of hospital injuries<br />
involving children and found climbers, swings and slides were the pieces of playground equipment on which children<br />
are most frequently injured.<br />
13<br />
63%<br />
Climbers<br />
Slides<br />
Swings<br />
Teeter-totters<br />
Merry-go-rounds
The results were:<br />
38% injured on climbers<br />
25% injured on swings<br />
25% injured on slides<br />
The actual injuries were:<br />
78% as a result of a fall<br />
15% by collision with another child or object<br />
1.8% entrapment/entanglement<br />
The 1.8% is a low value, but it must be kept in mind that this is the main cause of death.<br />
Risk Management Strategies<br />
Risk is a measurement of the likelihood of consequences and playgrounds certainly present some elements of risk. It<br />
is the purpose of risk management to moderate risk while leaving opportunities for play and growth.<br />
Risk Avoidance<br />
If the activity that may cause an injury does not take place, there is absolutely no chance of a loss resulting from that<br />
activity. This can be restated by saying “if there are no climbers on the playground, then it is impossible to have an<br />
injury or claim resulting from the use of a climber.” Avoidance works best with high-risk activities, but this procedure is<br />
often not practical or acceptable for moderate risk playground equipment.<br />
Risk Minimization<br />
This strategy usually requires a great deal of effort which is on-going. Risk minimization often takes the form of loss<br />
prevention in that rules and procedures are established to minimize the risk of loss or to limit the severity of a loss.<br />
An organization (school board, municipality, day care, etc.) accepts the benefits of the activity taking place exceeding<br />
the consequences of any injury that may result from the activity. An organization has accepted the risk of having a<br />
playground and uses risk management to take positive steps to reduce the chance of a loss occurring.<br />
Occupier’s Liability<br />
Occupier’s Duty<br />
An occupier of premises owes a duty to persons entering on the premises and to any person, whether on or off the<br />
premises, whose property is on the premises, to take such care as, in all circumstances of the case, is reasonable to<br />
see that the person or property, as the case may be, will be reasonably safe while on the premises.<br />
An occupier is a person or organization who has responsibility for and control over the condition of the premises or<br />
the activities that take place there. Premises shall be kept in proper repair and inspections conducted and kept on file.<br />
Courts will apply a standard to determine whether reasonable care has been taken by the occupier. In Canada, the<br />
Canadian Standards Association (CSA) manual on Children’s Play Spaces and Equipment will be applied as a test to<br />
determine whether reasonable care has been taken to provide for the safety of those using the playground<br />
equipment.<br />
14
<strong>Public</strong> <strong>Playground</strong> <strong>Safety</strong> Checklist - Top Ten List<br />
Is your public playground a safe place to play?<br />
Each year, more than 200,000 children go to U.S. hospital emergency rooms with injuries associated with playground<br />
equipment. Most injuries occur when a child falls from the equipment onto the ground.<br />
Use this simple checklist to help make sure your playground is a safe place to play.<br />
<strong>Public</strong> <strong>Playground</strong> <strong>Safety</strong> Checklist<br />
1. Make sure surfaces around playground equipment have at least 10 to 12 inches of wood chips, mulch, sand or<br />
pea gravel or have mats made of safety-tested rubber or rubber-like materials.<br />
2. Check that protective surfacing extends at least 6 feet in all directions from play equipment. For swings, be sure<br />
surfacing extends, in back and front, twice the height of the suspending bar.<br />
3. Make sure play structures more than 30 inches high are spaces at least 9 feet apart.<br />
4. Check for dangerous hardware, like open “S” hooks or protruding bolt ends.<br />
5. Make sure spaces that could trap children, such as openings in guardrails or between ladder rungs, measure<br />
less than 3.5 inches or more than 9 inches.<br />
6. Check for sharp points or edges in equipment.<br />
7. Look out for tripping hazards, like exposed concrete footings, tree stumps and rocks.<br />
8. Make sure elevated surfaces, like platforms and ramps, have guardrails or protective barriers to prevent falls.<br />
9. Check playgrounds regularly to see that equipment and surfacing are in good condition.<br />
10. Where possible, adult supervision is highly recommended<br />
15
Sliding Poles<br />
1. What is the distance from a platform to the top surface of a sliding pole? minimum of 1500 mm (60 in)<br />
2. What is the greatest diameter of the pole? no greater than 50 mm (2 in)<br />
3. What is the maximum opening in a horizontal direction at a guardrail? 375 mm (15 in)<br />
4. The clearance distance from structures to the pole is _______________<br />
between 450 mm (18 in) and 500 mm (20 in).<br />
15.4<br />
Sliding Poles (See Figure 31)<br />
15.4.1<br />
Clearance distances from structures to the pole shall be between 450 mm (18 in) and 500 mm (20 in).<br />
15.4.2<br />
Upper access to the sliding pole shall be from one height only.<br />
15.4.3<br />
The distance from the platform’s surface to the top surface of the sliding pole shall be a minimum of 1500 mm (60 in).<br />
15.4.4<br />
The pole shall be no greater than 50 mm (2 in) in diameter.<br />
15.4.5<br />
The sliding pole shall be continuous, with no protruding welds or joints along the sliding area, and shall have no<br />
abrupt changes in direction.<br />
15.4.6<br />
The guardrail or protective barrier at a platform entrance/exit opening shall have an opening with a maximum<br />
horizontal dimension of 375 mm (15 in).<br />
15.4.7<br />
Sliding poles are not recommended for children under 5 years of age.<br />
15.4.8<br />
The fall height is the height of the access platform, except where guardrails are present where the fall height is the<br />
top of the guardrail.<br />
16
Surfacing<br />
The surface under and around playground equipment can be a major factor in determining the injury-causing<br />
potential of a fall. A fall onto a shock absorbing surface is less likely to cause a serious injury than a fall onto a hard<br />
surface. The more shock absorbing a surface can be made, the more the likelihood that the severity of the injury will<br />
be reduced. It must be recognized that all injuries due to falls cannot be prevented no matter what playground<br />
surfacing material is used.<br />
Critical Height<br />
This term is used to describe the shock absorbing performance of a surfacing material. As it is used in this<br />
publication, the Critical Height for a surfacing material is defined as the maximum height from which the<br />
instrumented metal headform, upon impact, yields both a peak deceleration of no more than 200 G’s and a<br />
HIC of no more than 1,000 when tested in accordance with the procedure described in ASTM F1292.<br />
The most widely used test method for evaluating the shock absorbing properties of a playground surfacing material is<br />
to drop an instrumented metal headform onto a sample of the material and record the acceleration/time pulse during<br />
the impact. Such a method is described in an ASTM Standard Specification for Impact Attenuation of Surface<br />
Systems Under and Around <strong>Playground</strong> Equipment, ASTM F1292.<br />
The Critical Height of a surfacing material can be considered as an approximation of the fall height below which a lifethreatening<br />
head injury would not be expected to occur. The surfacing material used under and around a particular<br />
piece of playground equipment should have a Critical Height value of at least the height of the highest designated<br />
play surface on the equipment. This height is the fall height for the equipment.<br />
17
Highest Accessible Part of Equipment<br />
Equipment Highest Accessible Part<br />
Swings<br />
Elevated Platforms Including<br />
Slide Platforms<br />
Climbers and Horizontal<br />
Ladders<br />
Merry-Go-Rounds<br />
See-Saws (Teeter totters)<br />
Spring Rockers<br />
Height of the pivot point where the swing’s suspending elements connect to the<br />
supporting structure<br />
The fall height is the height of the platform. If the platform is surrounded by<br />
guardrails and children can climb onto or over guardrails, the height of the guardrail<br />
is included in the height above the playing surface.<br />
Maximum height of the structure<br />
Height above the ground of any part of the perimeter on which a child may sit or<br />
stand.<br />
Maximum height attainable by any part of the see-saw (teeter totter)<br />
Maximum height above the ground of the seat or designated play surface<br />
Most common approved surface material is medium gravel (pea gravel – ¼” diameter)<br />
Course sand can also be used as long as it does not have much clay in the mix so that it does not pack down. Sand<br />
requires more frequent maintenance to loosen the sand.<br />
18
Climbers<br />
Climbers refer to a wide variety of equipment including arch climbers, sliding poles, chain or net climbers, overhead<br />
horizontal ladders, overhead rings, dome climbers, parallel bars, balance beams, cable walks, suspension bridges<br />
and spiral climbers. Composite structures with linked platforms are also included. Climbing equipment is designed to<br />
present a greater degree of physical challenge than other equipment on public playgrounds.<br />
Figure 1 - Typical Climbing Equipment<br />
Climbers with Non-Rigid Components<br />
Net and chain climbers use a flexible grid of ropes or chains for climbing. Tire climbers are also described as flexible<br />
climbers. These may have the tires secured tread-to-tread in the form of a sloping grid or the tires may be suspended<br />
individually by chains or other means to provide access to an elevated platform.<br />
Flexible grid climbing devices which provide access to platforms should be securely anchored at both ends. When<br />
one end is connected to the ground, the anchoring devices shall be below the level of the playing surface.<br />
Connections between ropes, cables, or chains within the climbing grid or between tires should be securely fixed.<br />
Spacing between the horizontal and vertical components of a climbing grid should satisfy all entrapment criteria<br />
Arch Climbers<br />
Arch climbers consist of metal or wood rungs attached to convex side supports. They may be free standing or be<br />
provided as a more challenging means of access to other equipment.<br />
19
Horizontal Ladders and Overhead Rings<br />
Four year-olds are generally the youngest children capable of using upper body devices such as these. The<br />
recommendations below are, therefore, designed to accommodate children 4 through 12 years of age.<br />
The space between adjacent rungs of overhead ladders should be greater than 9 inches to satisfy the entrapment<br />
requirements. The center-to-center spacing of horizontal ladder rungs should not exceed 15 inches. This does not<br />
apply to the spacing of overhead rings because, during use, the gripped ring swings through an arc and reduces the<br />
distance to the gripping surface of the next ring.<br />
The first handhold on either end of upper body equipment should not be placed directly above the platform or<br />
climbing rung used for mount or dismount. This minimizes the risk of children impacting rigid access structures if they<br />
fall from the first handhold during mount or dismount.<br />
Sliding Poles<br />
Vertical sliding poles are designed to be more challenging than some other types of climbing equipment. They are not<br />
recommended for preschool-age children who may lack the requisite upper body strength and coordination to<br />
successfully slide down the pole. Furthermore, once younger children have grasped the pole, they would be forced to<br />
slide down it since there is no alternative option.<br />
Sliding poles should be continuous with no protruding welds or seams along the sliding surface and the pole should<br />
not change direction along the sliding portion.<br />
The horizontal distance between a sliding pole and the edge of the platform or other structure used for access to the<br />
sliding pole should be at least 18 inches. This minimum distance applies to all points down the sliding pole.<br />
All points on the sliding pole at or above the level of the access structure, where a child is likely to reach for the pole,<br />
should not be more than 20 inches away from the edge of the access structure.<br />
The pole should extend at least 38 inches above the level of the platform or other structure used for access to the<br />
sliding pole.<br />
The diameter of sliding poles should be no greater than 1.9 inches<br />
The design of the access structure should minimize the possibility of interference from surrounding traffic that may be<br />
out of the line of sight of a user during descent.<br />
Climbing Ropes<br />
Individual vertically suspended climbing ropes are recommended only if they are securely fastened to a footing at the<br />
lower end to prevent the rope from being looped back on itself and forming a noose.<br />
Balance Beams<br />
To avoid groin injuries during falls, balance beams should be no higher than 12 inches.<br />
Layout of Climbing Components<br />
When climbing components are part of a composite structure, their level of challenge and mode of use should be<br />
compatible with the traffic flow from adjacent components.<br />
The swinging movements generated on upper body devices warrant special precautions to reduce the risk of impact<br />
with children on adjacent structures. Upper body devices should be placed so that swinging children cannot interfere<br />
with the movement of children on adjacent structures, particularly with their descent on slides.<br />
The design of adjacent play structures should not facilitate climbing to the top support bars of upper body equipment.<br />
20
Figure 2 - Examples of More Challenging Modes of Access<br />
Swings<br />
Swings may be divided into two distinct types, single axis of motion and multiple axes of motion. A single axis swing<br />
is intended to swing back-and-forth in a single plane and generally consists of a seat supported by at least two<br />
suspending members each of which is connected to a separate pivot on an overhead structure. A multiple-axis swing<br />
consists of a seat (generally a tire) suspended from a single pivot that permits it to swing in any direction.<br />
Hardware used to secure the suspending elements to the swing seat and to the supporting structure should not be<br />
removable without the use of tools. S-hooks are frequently used to attach the suspending elements to the overhead<br />
support bar or to the swing seat. Open S-hooks are hazardous because they can catch a child’s clothing and result in<br />
strangulation. S-hooks should be pinched closed as tightly as possible.<br />
Swing support structures should discourage climbing and A-frame support structures shall not have horizontal crossbars.<br />
Swing seats shall be designed to accommodate one user at any time and wood or metal seats are NOT<br />
recommended.<br />
To help prevent young children from running into the path of moving swings, swing structures shall be located away<br />
from other equipment or activities. To minimize the likelihood of children being struck by a moving swing, it is<br />
recommended that no more than two single axis swings be hung in each bay of the supporting structure.<br />
To minimize collisions between swings or between a swing and the supporting structure, the clearances shown in<br />
Figure 1 are recommended. In order to reduce side-to-side motion, swing hangers should be spaced wider than the<br />
width of the swing seat.<br />
21
Clearances<br />
The horizontal distance between adjacent single axis swing seats at rest, when occupied by the maximum user, shall<br />
be no less than 600 mm when measured 1.5m above the protective surfacing.<br />
The horizontal distance between the supporting structure and the adjacent single axis swing seat, when occupied by<br />
the maximum user, shall not be less than 750 mm when measured at 1.5 m above the protective surfacing.<br />
The horizontal distance between the hangers supporting a single axis swing seat shall be greater than the width of<br />
the seat when occupied by the maximum user, and shall not be less than 500 mm.<br />
The vertical distance between the underside of the occupied seat and the protective surfacing shall not be less than<br />
300 mm.<br />
15.6.2.5.1<br />
The horizontal distance between adjacent to-fro swing seats at rest, when occupied by the maximum user, shall be<br />
no less than 600 mm when measured 1.5 m above the protective surfacing.<br />
15.6.2.5.2<br />
The horizontal distance between the supporting structure and the adjacent to-fro swing seat, when occupied by the<br />
maximum user, shall be not less than 750 mm when measured at 1.5 m above the protective surfacing.<br />
15.6.2.5.3<br />
The horizontal distance between the hangers supporting a to-fro swing seat shall be greater than the width of the seat<br />
when occupied by the maximum user, and shall not be less than 500 mm.<br />
15.6.2.5.4<br />
Figure 1<br />
The vertical distance between the underside of the occupied seat and the protective surfacing shall not be less than<br />
300 mm.<br />
22
(Clauses 15.6.2.51. to 15.6.2.5.4 CAN/CSA-Z614-07)<br />
Conversions<br />
500 mm = 19.66 inches<br />
600 mm = 23.52 inches<br />
750 mm-= 29.40 inches<br />
Multi-axis swings shall be located away from other play structures or activity areas.<br />
The minimum clearance between the seating surface of a tire swing and the uprights of the supporting structure<br />
should be 750 mm (30 inches) when the tire is in a position closest to the support structure. The vertical distance<br />
between the underside of the rotating seat, when occupied by the design capacity of maximum users, and the<br />
protective surfacing shall not be less than 300 mm (12 inches).<br />
Tot Swings<br />
Figure 2<br />
These are single axis swings intended for very young children to use with adult assistance. The seats and<br />
suspension systems of these swings, including the related hardware, should follow all of the other criteria for<br />
conventional single axis swings. Tot swing seats shall provide support on all sides of a child and these supports must<br />
not present a strangulation hazard.<br />
Multi-Axis Tire Swings<br />
Tire swings are typically suspended in a horizontal orientation using three suspension chains or cables connected to<br />
a single swivel mechanism that permits both rotation and a swinging motion in any axis. Only one multi-axis swing<br />
shall be located in the same bay.<br />
The likelihood of hanger mechanism failure is increased for tire swings, due to the added stress of rotational<br />
movement and multiple occupancy. Special attention to maintenance is warranted and the hanger mechanism should<br />
not have any accessible pinch points.<br />
23