June 2010

Create successful ePaper yourself
Turn your PDF publications into a flip-book with our unique Google optimized e-Paper software.
makes access difficult, particularly if you have large hands. The only reference to the switch in the ‟49 shop manual is a<br />
picture of it on page 196, so I hope the following is an improvement.<br />
1. Disconnect one or both cables from the battery and put the transmission in R (or in gear if a stick shift). Release the hand<br />
brake and unfasten the two bolts holding the bracket supporting the hand brake shaft from the bottom of the dash. Let the hand<br />
brake shaft and bracket hang down below its normal position.<br />
2. The body of the headlight switch under the dash is box-shaped and roughly rectangular, about 3 inches (7.5 cm.) long from<br />
front to back, with several wires connected to it on both sides. Look at the illustration of the switch in the shop manual on page<br />
196. You will see there is a “Knob Release Button” on the side of the switch facing the center of the car under the dash. Pull<br />
the exterior headlight switch knob fully out to its second (headlights on) position. With the hand brake mechanism now out of<br />
the way, lie on your back, slowly slide your hand up to the button on the side of the switch behind the dash and press the<br />
button. With your other hand you should now be able to fully extract (remove) the exterior headlight switch knob and its shaft<br />
from its place in the dash.<br />
3. With the knob and shaft removed, the resulting empty hole in the switch bezel will accept a small Allen wrench, which you<br />
will then use to unscrew and remove the bezel.<br />
4. The threaded dashboard end of the behind-the-dash part of the switch is now visible. Put your hand back behind the dash<br />
and push the rectangular part of the switch toward the front of the car until it is free of the dash. Then, with all the wires still<br />
attached, gently pull it down toward the bottom of the dash. This will take some twisting and pulling, but it can be done since<br />
the wires connected to the switch are relatively long. (Be careful that you don‟t disturb the wires on the nearby fuel gauge.)<br />
Once it is pulled down and the switch body is visible, you can examine the headlight switch and its wires.<br />
The first time I did this back in the „90s, the wire for the tail lights had become disconnected from the headlight switch for<br />
unknown reasons. Looking at the “Chassis Electrical” diagram on page 203 of the shop manual, you‟ll see that the headlight<br />
switch is in the left center of the diagram and that the tail light wire is connected to the terminal numbered “3”. I re-connected<br />
the wire and solved the problem.<br />
When this happened for the second time a few weeks ago I found the tail light wire still connected to Terminal 3, revealing to<br />
my great annoyance that I had partially removed the headlight switch for nothing. However, looking straight back under the<br />
dash to the upper left corner of the inner side of the firewall, I noticed something was not right with a large plug held in a clip<br />
attached to the firewall. This plug connects the under-dash part of the tail light wire harness with the back part of this same<br />
wire harness going to the rear of the car. (From this plug, the rear part of the harness runs up the side of the windshield, then<br />
between the headliner and the roof to the trunk and the tail lights.) The two halves of this plug had become disconnected from<br />
one another for some reason, so connecting them back together solved the problem.<br />
5. Everything is put back in reverse order. An exception is the exterior headlight switch knob and shaft, which can merely be<br />
pushed back into its place in the bezel and switch without pressing the button on the under-dash part of the headlight switch.<br />
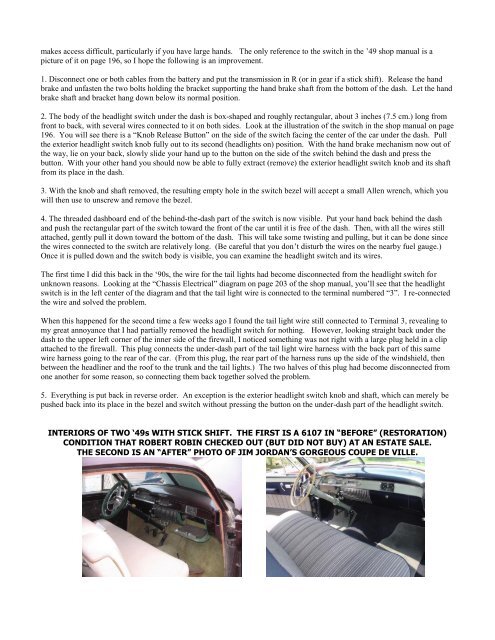
INTERIORS OF TWO „49s WITH STICK SHIFT. THE FIRST IS A 6107 IN “BEFORE” (RESTORATION)<br />
CONDITION THAT ROBERT ROBIN CHECKED OUT (BUT DID NOT BUY) AT AN ESTATE SALE.<br />
THE SECOND IS AN “AFTER” PHOTO OF JIM JORDAN‟S GORGEOUS COUPE DE VILLE.