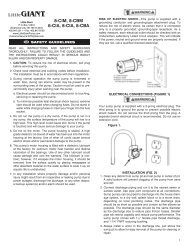
Electric Fence Energizer
Electric Fence Energizer
Electric Fence Energizer

Create successful ePaper yourself
Turn your PDF publications into a flip-book with our unique Google optimized e-Paper software.
10375 State Route 43<br />
Streetsboro, OH 44241<br />
Phone: 800.866.2161<br />
Fax: 330.562.7403<br />
www.powerwizardinc.com<br />
INST-04-0003-00 0092 Rev. 7-07<br />
<strong>Electric</strong> <strong>Fence</strong> <strong>Energizer</strong><br />
Installation, Operating and Warranty Instructions<br />
WARNING:<br />
READ ALL INSTRUCTIONS BEFORE INSTALLATION.<br />
SAVE THIS BOOKLET FOR FUTURE REFERENCE.
Solar <strong>Energizer</strong> Maintenance<br />
• Check the energizer regularly to insure operation is normal.<br />
• Clean the surface of the solar panel regularly. Use a soft, damp cloth.<br />
Do not use abrasive materials that could scratch the panel.<br />
• Set the toggle switch in the “OFF” position when not using the energizer for<br />
more than 5 days. This prevents overcharging of the battery.<br />
• DO NOT use any means for charging the internal battery except for the<br />
solar panel or a constant potential current limited 12VDC battery charger<br />
(Power Wizard Part No. F-2) rated at 500 milliamps maximum.<br />
• When storing the energizer, place the energizer in strong direct sunlight<br />
for 2 days every 3 months with the switch in the “CHARGE” position. Put<br />
switch back into the “OFF” position for storage.<br />
– 30 –<br />
IMPORTANT – READ THE FOLLOWING SAFETY<br />
CONSIDERATIONS CAREFULLY:<br />
1. WARNING: DO NOT CONNECT ENERGIZER SIMULTANEOUSLY TO A<br />
FENCE AND TO ANY OTHER DEVICE SUCH AS A CATTLE TRAINER<br />
OR A POULTRY TRAINER. OTHERWISE, LIGHTNING STRIKING YOUR<br />
FENCE WILL BE CONDUCTED TO ALL OTHER DEVICES.<br />
2. CAUTION: RISK OF ELECTRIC SHOCK. Do not install where small<br />
children, the elderly or unhealthy persons may come in contact with the<br />
live portions of electric fencing. Use electric fence warning signs wherever<br />
humans may come in contact with the fence.<br />
3. NEVER electrify barbed wire or loose fencing materials that risk<br />
entanglement of a human or animal. Exposure to continuous or<br />
multiple shocks is very dangerous.<br />
4. STAY AWAY from the fence energizer and from the fence line just before<br />
and during lightning storms. In lightning prone areas, disconnect the<br />
energizer from the fence and from the power supply in advance of storms<br />
to prevent damage to the energizer.<br />
5. FOLLOW all national, state and local regulations that may apply to installation<br />
of electric fence in your area.<br />
– 3 –
6. REFER TO AUTHORIZED REPAIR CENTER FOR SERVICE. There are<br />
no user serviceable parts. Never alter the design of the energizer. Doing so<br />
is hazardous and will void the warranty.<br />
7. ALWAYS unplug the energizer before handling any part of the energizer.<br />
8. NEVER put more than one energizer on a fence. Doing so is dangerous<br />
because it may reduce time off between pulses, may damage the energizer<br />
and will invalidate the warranty.<br />
9. DO NOT run fence wire above ground near high voltage power lines. If too<br />
close, the electric fence may pick up dangerous levels of power from high<br />
voltage lines. Never cross under a high voltage line with electric fence.<br />
10. ALWAYS maintain an adequate ground system securely attached to the<br />
energizer.<br />
11. DO NOT alter the polarity of the energizer plug on 110V operated energizers.<br />
For battery operated fence energizers, connect the red battery clamp<br />
to the positive battery terminal and the black battery clamp to the negative<br />
battery terminal only.<br />
12. NEVER charge a battery that is connected to a fence energizer. Always<br />
disconnect the battery from the energizer first.<br />
13. WARNING! <strong>Electric</strong> fences are very effective psychological barriers when<br />
properly installed and when animals are trained to the fence. <strong>Electric</strong> fences<br />
are NOT complete physical barriers. Erratic animal behavior cannot be<br />
– 4 –<br />
vegetation, buildings and roof overhangs will not block sunlight from the<br />
panel.<br />
A. A fully charged battery will operate the energizer for up to 18 days in<br />
darkness before the energizer will stop. At this point, the battery is<br />
almost completely discharged.<br />
B. A fully discharged battery will require 20-25 hours of recharging with<br />
the solar panel in strong sunlight before operating the energizer.<br />
On average, 6-8 days of charging in sunlight will restore a fully<br />
discharged battery. Recharge battery with the toggle switch in<br />
the “CHARGE” position.<br />
5. Upon completion of battery charging, the energizer is ready to be installed<br />
on the fence. Locate energizer so that solar panel is facing due south into<br />
the sun at its highest point at 12:00 noon. Select a location where solar<br />
panel will never be shaded from the sun. Locate the energizer out of reach<br />
of animals and children. Secure the energizer so that solar panel will not<br />
move away from the sun.<br />
6. Connect fence and ground wire to labeled terminals and move toggle<br />
switch to “ON” position. Red light will flash when energizer is operating.<br />
– 29 –
Supplemental Instructions for Battery Powered <strong>Energizer</strong>s<br />
1. Use a Deep Cycle Rechargeable Battery rated at 60 amp hour or greater.<br />
Marine batteries are recommended.<br />
2. Avoid placing battery directly under energizer so that corrosive gases will<br />
not damage the energizer. Locate the battery in a cool and dry area for best<br />
performance.<br />
3. Place the battery away from sparks and in a well-ventilated area for safety.<br />
Check battery voltage and energizer performance regularly to ensure continuous<br />
operation.<br />
predicted and occasional fence penetration can occur. Therefore, Power<br />
Wizard assumes no liability for animal containment, injury or the consequences<br />
for the misuse of the equipment.<br />
14. WARNING! Never touch the live fence with the head or mouth.<br />
15. DANGER–SERVICE DOUBLE INSULATED APPLIANCES WITH IDEN-<br />
TICAL PARTS ONLY. Double insulated energizers include two systems for<br />
insulation instead of grounding.<br />
16. WARNING! Sparks may occur in electric fence systems. Therefore, during<br />
periods of high fire risk, electric fence energizers should be turned off.<br />
Supplemental Instructions for Solar Charged <strong>Energizer</strong>s<br />
1. Remove all labels from front of solar panel and clean panel with a damp<br />
cloth.<br />
2. Make sure that the lead wire running from the solar panel is connected to<br />
the fence energizer.<br />
3. Put toggle switch in the “CHARGE” position.<br />
4. IMPORTANT: BEFORE INSTALLING ENERGIZER ON THE FENCE LINE,<br />
mount energizer upright in a location outdoors that will receive the maximum<br />
available direct sunlight for a minimum of 4 days. Face the energizer<br />
due south, into the sunlight. <strong>Energizer</strong> should be in a location where trees,<br />
– 28 –<br />
– 5 –
How Does the <strong>Electric</strong> <strong>Fence</strong> Work?<br />
The fence energizer puts a high voltage pulse of electric energy on the fence<br />
wire at 1 to 2 second intervals. In ideal conditions the energizer, the electric fence<br />
and the ground wire form an incomplete circuit. When an animal comes into<br />
contact with the fence while standing on the ground, the electric circuit is completed.<br />
Electrons immediately flow through the animal’s body from fence wire to<br />
ground. This is experienced as a shock. The shock will only be respected and<br />
repel the animal if the voltage and energy in the pulse are at adequate levels.<br />
Voltage and energy levels in the pulse are determined by the capability of the<br />
fence energizer, the condition of your fence and the quality of the ground system.<br />
Generally, a minimum of 2,000 volts must be maintained on the fence line to<br />
repel most animals. Many animals require several shock experiences before<br />
they are fully conditioned with lasting respect for the fence.<br />
have no liability for damages, incidental or consequential, resulting from or<br />
caused by any failure, malfunction or defect of any product.<br />
The sole obligation of Power Wizard, Inc. shall be limited to repair or replacement,<br />
at its option, of the defective fence energizer or part and prepaid return<br />
to the owner.<br />
TO MAKE A WARRANTY CLAIM<br />
1. First disconnect energizer from fence and confirm that voltage output at the<br />
energizer terminals is not normal.<br />
2. Attach a note showing your name, phone number, return address and brief<br />
description of the problem.<br />
3. Pack product carefully in oversized carton with crushed newspaper for<br />
cushioning.<br />
4. Your product should be shipped prepaid and insured against shipping loss<br />
or damage.<br />
5. Before returning product under warranty, you must call Power Wizard at<br />
(800) 866-2161 to obtain a Return Goods Authorization number and a shipping<br />
address for the service center that will process the return. The RGA<br />
number must accompany the returned product.<br />
– 6 – – 27 –
POWER WIZARD WARRANTY<br />
30 DAY SATISFACTION GUARANTEE<br />
POWER WIZARD, INC. guarantees your complete satisfaction with this<br />
fence energizer. If you are not satisfied with this product, you may return the<br />
energizer to the original place of purchase within 30 days of purchase for a full<br />
refund. Proof of purchase is required for a full refund.<br />
LIMITED WARRANTY<br />
POWER WIZARD, INC. warrants this fence energizer to the original purchaser<br />
for a period of twelve (12) months from the date of purchase, when installed<br />
and used in accordance with the enclosed installation instructions. You must<br />
retain your receipt for proof of purchase. This warranty covers defects in materialsand<br />
workmanship to the fence energizer. The warranty also covers<br />
damage to the energizer caused by lightning and voltage spikes.<br />
TERMS THAT APPLY TO BOTH THE GUARANTEE AND WARRANTY<br />
Improper installation, misuse, neglect and tampering of any kind are NOT<br />
covered under the 30-Day Guarantee or the Limited Warranty. No warranty<br />
other than the above is expressed or implied. Implied warranties of merchantability<br />
and fitness for a particular application are hereby disclaimed unless the<br />
law specifically precludes this disclaimer. The manufacturer and seller shall<br />
– 26 –<br />
Keys to Successful <strong>Energizer</strong> Installation<br />
Take care of the following details and you will prevent many hours of extra work.<br />
1. Use the correct size energizer. It is best to select an energizer that will<br />
adequately power the most difficult fence conditions. This generally<br />
occurs during the peak growing season. Refer to the Power Wizard <strong>Energizer</strong><br />
Selection Guide for proper energizer selection.<br />
2. Carefully install a complete ground system. Most electric fence failures are<br />
caused by an improper ground system (see Diagram #1, pg. 12).<br />
3. Take time to properly connect lead out wire, ground wire and fence line<br />
splices. This is the second most common cause of electric fence failure.<br />
Use clamps, split bolts and taps for securing wire connections. Make sure all<br />
connection surfaces are of bare, shiny metal (see Wire Splice and Connections<br />
Diagram, pg. 22).<br />
4. Use adequately insulated hook-up wire (rated for at least 20,000V) where<br />
the hot wire must travel underground. Never use standard household<br />
insulated wire, which is typically rated for only 600 volts or less.<br />
– 7 –
5. Maintain proper distances from buried and above ground: utility company<br />
ground rods, water pipes, metal siding, telephone wire and stock watering<br />
tanks (see Diagram 1 on pg. 12 for ground and Diagram 2 on pg. 15 for<br />
fence).<br />
6. Use an electric fence volt meter to periodically check the condition of your<br />
fence and to troubleshoot connections and ground conditions.<br />
7. Finally, it is very important that an animal’s first experience with an electric<br />
fence shock is one of respect. Some animals require more than one<br />
shock experience for lasting respect of the fence line. Always train the<br />
animal to the fence prior to unsupervised entry into pastures by insuring that<br />
the animal’s first approach to the fence is slow, without stress and that an<br />
effective repelling shock is experienced.<br />
– 8 – – 25 –
Before You Start<br />
Tools Needed<br />
Installing Your New <strong>Energizer</strong><br />
1. Screwdriver – for mounting energizer, cut-off switch and lightning choke<br />
2. Wire cutters – to cut and strip insulation<br />
3. Post driver – to install ground rods<br />
4. Digital volt meter – for electric fence testing and troubleshooting<br />
Accessories Needed<br />
1. At least three galvanized ground rods – minimum 6 feet by<br />
1/2” (minimum) diameter<br />
2. Three ground rod clamps<br />
3. Insulated underground hook-up wire – 50 feet (20,000V rating)<br />
4. One energizer cut-out switch<br />
5. Line clamps<br />
6. One lightning choke and one lightning diverter or a combination<br />
choke and diverter<br />
7. One surge protector (for AC-powered energizers only)<br />
– 24 –<br />
– 9 –
INSTALLATION STEP 1<br />
Installing the Ground System<br />
The ”ground system” is a series of highly conductive rods driven into the soil<br />
and then connected by wire to the ground terminal of your fence energizer. The<br />
ground system collects electrons from the soil to complete the circuit needed<br />
for delivering an effective shock.<br />
1. Locate an area of soil for placing ground rods that contains good conductive<br />
earth (not sandy or rocky). Soil that is moist throughout the year is<br />
best. The ground system should be located within 75 feet of your fence<br />
energizer and at least 25 feet from buildings.<br />
2. Locate ground system a minimum of 75 feet away from:<br />
a. Utility company (electric, gas, water) ground system.<br />
b. Underground water pipe<br />
c. Metal water tanks<br />
d. Metal siding on building (minimum 25 ft. away)<br />
Diagram 7 – Protecting Your <strong>Fence</strong> <strong>Energizer</strong> From Lightning<br />
– 10 – – 23 –
3. Drive three 6 foot by 1/2” (minimum) galvanized ground rods 10 feet apart<br />
in a straight line or a triangle pattern in the selected ground area. Leave<br />
6 inches above the ground for securing ground clamps. Mark the area as<br />
a hazard.<br />
4. Connect the ground rods, in a series, with one piece of continuous 10 to<br />
14 gauge galvanized wire. The ground hook-up wire should be equal to or<br />
larger than the diameter of the fence line wire.<br />
See Diagram on Next Page<br />
Diagram 6 – Wire Splicing and Connections<br />
– 22 –<br />
– 11 –
GROUND<br />
ROD<br />
CLAMPS<br />
Thread wire<br />
through hole,<br />
tighten screw<br />
Diagram 1 – Ground System Installation<br />
Diagram 5 – Ground Return System<br />
1. 12-14 gauge galvanized fence wire.<br />
2. Ground rods – 6 feet long by 1/2” (or more) in diameter, galvanized steel<br />
For Drier Climates, Hard-to-Control Animals, Sandy Soil,<br />
rods.<br />
Frozen Ground and Snow-Covered Ground<br />
IMPORTANT: Avoid SANDY, DRY and ROCKY soil.<br />
– 12 – – 21 –
INSTALLATION STEP 2<br />
Installing the <strong>Fence</strong> <strong>Energizer</strong><br />
1. Locate the energizer within 75 feet of your ground system. Use only polarized<br />
extension cords. Mount the fence energizer:<br />
a. At eye level and out of the reach of small children and livestock<br />
b. Protected from weather and moisture<br />
c. Away from all flammable materials and gasses in a well-ventilated<br />
area.<br />
2. Before connecting the “fence” and “ground” energizer terminals, plug in or<br />
“power on” the energizer and check the output voltage at the terminals with<br />
an electric fence volt meter (use only voltmeters designed for this purpose).<br />
Record the voltage as a benchmark for future reference. You should see the<br />
indicator light flashing and hear a “click” at 1 to 2 second intervals.<br />
Diagram 4 – Standard Multi-Wire Systems<br />
Wire Spacing for Different Animals and Applications<br />
– 20 –<br />
– 13 –
3. UNPLUG OR TURN THE FENCE ENERGIZER OFF and then connect the<br />
“GROUND” terminal to a 10 to 14 gauge insulated lead-out wire (rated at<br />
20,000V). The lead-out wire is also known as a “hook-up” or “underground<br />
fence wire”. Connect the opposite end of the wire to the closest ground<br />
rod using a ground clamp and shiny bare metal contact surfaces. Then,<br />
connect the “FENCE” terminal to a 10 to 14 gauge insulated lead-out wire<br />
(rated at 20,000V) and connect the opposite end to a fence “cut-out” switch<br />
located on the first fence post.<br />
4. Plug the fence energizer in and measure the voltage at the “cut-out” switch<br />
before and after activating the fence. Record these voltage measurements<br />
for future use as a reference when checking the fence connection.<br />
See Diagram on Next Page<br />
Diagram 3 – Testing the Ground System<br />
– 14 –<br />
– 19 –
. Move your ground system to moist soil until the ground system voltage<br />
is below 200V.<br />
7. Check your ground system condition with a volt meter once during the<br />
driest period and once during the wet season each year to insure<br />
adequate grounding of your electric fence.<br />
See Diagram on Next Page<br />
Diagram 2<br />
1. Insulated hook-up<br />
wire (20,000V)<br />
2. Galvanized fence<br />
wire<br />
3. 6 foot galvanized<br />
ground rod, 1/2 inch<br />
diameter or more.<br />
4. Ground clamps<br />
5. Power supply –<br />
use power supply<br />
specified by label<br />
on energizer only<br />
6. Ground rods MUST<br />
be 25 feet minimum<br />
from building<br />
foundation<br />
– 18 –<br />
– 15 –
INSTALLATION STEP 3<br />
Verify That Your Ground System is Working<br />
The quality of your ground system is vital to maximizing the performance of<br />
your fence energizer. During dry seasons or during seasons when there is excessive<br />
growth or vegetation on the fence line, it may be necessary to upgrade<br />
your ground system with extra ground rods.<br />
To test the quality of your ground system:<br />
1. Unplug your fence energizer.<br />
2. Place the fence under heavy load by “shorting” the fence as follows. At<br />
a location on the fence at least 100 yards from the energizer, lean 3 or 4<br />
steel stakes or T-posts against the “hot” wire of the fence. Alternatively, you<br />
may push several pieces of fence wire into the earth and wrap the opposite<br />
ends around the hot wire.<br />
3. Plug the energizer in and check the fence line voltage with a digital volt<br />
meter. You want to see that the voltage has dropped below 2,000V due to<br />
– 16 –<br />
shorting the fence. Continue to short the fence by leaning steel posts or<br />
by making wire connections to ground at 100 yards distance or more from<br />
energizer until the fence line voltage drops below 2,000V.<br />
4. You are now ready to test the energizer ground system. Connect one lead<br />
of the digital volt meter to a 12 inch metal stake driven into the ground 3 feet<br />
away from the last fence energizer ground rod. Connect the second lead<br />
to the ground rod furthest from the energizer. The voltage reading should<br />
ideally be zero or no more than 200V.<br />
5. If the digital volt meter reading is under 200V, your ground system is<br />
adequate and you will get near maximum performance from your electric<br />
fence energizer.<br />
6. If the reading is above 200V, then your ground system needs improvement.<br />
You must:<br />
a. Add more ground rods connected in series, 3 feet apart.<br />
and/or<br />
– 17 –