4x 2x 2x 2x1 - GK Fachmarkt Shop
4x 2x 2x 2x1 - GK Fachmarkt Shop
4x 2x 2x 2x1 - GK Fachmarkt Shop

Create successful ePaper yourself
Turn your PDF publications into a flip-book with our unique Google optimized e-Paper software.
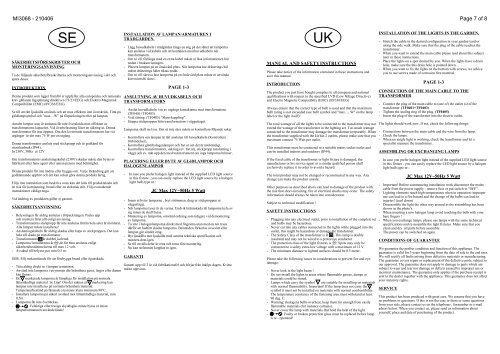
MI3068 - 210406 Page 7 of 8<br />
SE<br />
SÄKERHETSFÖRESKRIFTER OCH<br />
MONTERINGSANVISNING<br />
Ta de följande säkerhetsföreskrifterna och monteringsanvisning i akt och<br />
spara dessa.<br />
INTRODUKTION<br />
Denna produkt som ligger framför er uppfyller alla europeiska och nationala<br />
krav gällande lågspänning direktivet (73/23/EEG) och Elektro-Magnetisk<br />
Compatibilitet (EMC) (89/336/EEG).<br />
Se till att rätt ljuskälla används och att max effekten inte överskrids. Titta på<br />
glödlampsymbol och ”max…W” på förpackningen eller på lampan.<br />
Antalet lampor som är anslutna får inte överskrida max effekten av<br />
transformatorns kapacitet. Vid överbelastning löser en säkring ut. Denna<br />
transformator får inte öppnas. Om den levererade transformatorn har två<br />
utgångar är det max 75 W per en utgång.<br />
Denna transformator ansluts med stickpropp och är godkänd för<br />
utomhusbruk (IP44).<br />
In 230V, 50Hz ut 12V<br />
Om transformatorns anslutningskabel (230V) skadas måste den bytas av<br />
fabrikant eller hans agent eller annan person med behörighet.<br />
Denna produkt får inte ändras eller byggas om. Varje förändring gör att<br />
godkännande upphör och det kan också göra denna produkt farlig.<br />
Följs inte instruktion som beskrivs ovan kan det leda till produktskada och<br />
en risk för kortslutning, brand eller en elektrisk stöt. Följ ovanstående<br />
instruktioner väldigt noga.<br />
Vid ändring av produkten gäller ej garanti.<br />
SÄKERHETSANVISNING<br />
- Belysningen får aldrig anslutas i förpackningen. Packa upp<br />
och montera först allt enligt anvisning.<br />
- Transformatorns stickpropp får inte anslutas förrän hela setet är monterat.<br />
Alla lampor måste installeras!<br />
- Anslutningskabeln får aldrig skadas eller kapa av stickproppen. Det kan<br />
leda till skada på transformator .<br />
- Transformatorn är dubbel isolerad.<br />
- Lamporna/Armaturerna är III ,de får bara anslutas enligt<br />
säkerhetsbestämmelserna till max 12 volt.<br />
- Avstånd till belysta ytor min 0,5 m.<br />
OBS. Följ nedanstående för att förebygga brand eller ögonskada.<br />
- Titta aldrig direkt in i lampan/armaturen.<br />
- Använd inte lamporna i utrymmen där brännbara gaser, ångor eller damm<br />
kan finnas.<br />
- De F markerade lamporna är lämpliga för installation på normala<br />
lättantändliga material. Se Upp! Om det saknas en F markering kan<br />
lampan inte installeras på normala brännbara material.<br />
Temperaturbestånd på fästande yta måste klara minimum 90°C.<br />
- Installera lamporna på säkert avstånd mot lättantändliga material, min<br />
0,5m.<br />
- Lamporna får inte övertäckas.<br />
- Felaktiga eller trasiga skyddsglas måste bytas ut innan<br />
lampan/armaturen används/tänds!<br />
INSTALLATION AV LAMPAN/ARMATUREN I<br />
TRÄDGÅRDEN.<br />
- Lägg huvudkabeln i trädgården längs en stig på det sättet att lamporna<br />
kan anslutas vid kabeln och att kontakten med huvudkabeln når<br />
transformatorn.<br />
- Om ni vill förlänga med en extra kabel måste ni läsa informationen här<br />
nedan i brukanvisningen.<br />
- Placera lampan på en önskvärd plats. När lamporna har dränerings hål<br />
måste dränerings hålet riktas nedåt.<br />
- Om ni vill skruva fast lamporna på en önskvärd plats måste ni använda<br />
korrosionsfri skruv.<br />
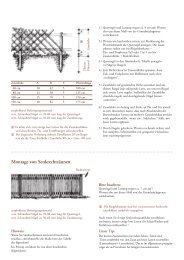
ANSLUTNING AV HUVUDKABELN OCH<br />
TRANSFORMATORN<br />
- Anslut huvudkabeln i en av utgångs kontaktarna med transformatorn.<br />
(TF0401+TF0403)<br />
- Vrid tätring. (TF0405) “Skruvkoppling”.<br />
- Stoppa stickproppen från transformatorn i vägguttaget.<br />
Lamporna skall nu lysa. Om så inte sker måste ni kontrollera följande saker.<br />
- Kontrollera om lampan är rätt ansluten till huvudkabeln (Kontrollera<br />
förbindelser).<br />
- Kontrollera glöd/halogenlampor och byt ut om det är nödvändigt.<br />
- Kontrollera transformatorn, säkring (ev. byt ut), stickpropp (anslutning i<br />
vägg) och ev. mät upp den med testinstrument om inga lamporna brinner.<br />
PLACERING ELLER BYTE AV GLöDLAMPOR OCH<br />
HALOGENLAMPOR<br />
- Innan ni byter lamporna , bryt strömmen, drag ur stickproppen ur<br />
vägguttaget.<br />
- När lamporna lyser är de varma. Undvik brännskada låt lamporna kyla av<br />
sig innan de skall bytas.<br />
- Montering av lamporna, omvänd ordning som tidigare vid demontering<br />
av lamporna.<br />
- Ta inte i halogenlamporna direkt med fingrarna utan med en ren trasa<br />
därför att hudfett skadar lamporna. Brinntiden förkortas avsevärt eller<br />
lampan går sönder omg..<br />
- Byt ljuskälla mot ljuskälla med samma tekniska specifikation och<br />
montera dem igen.<br />
- Se till att alla delar är rena och torra före montering.<br />
- Nu kan strömmen kopplas in igen.<br />
GARANTI<br />
PAGE 1-3<br />
- In case you prefer halogen light instead of the supplied LED light source<br />
in this fixture , you can easily replace the LED light source by a halogen<br />
light bulb,type nr.:<br />
JC Max 12V~50Hz 5 Watt<br />
Garanti upp till 3 år vid fabrikationsfel och börjar från inköps dagen. Kvitto<br />
måste uppvisas.<br />
MANUAL AND SAFETY INSTRUCTIONS<br />
Please take notice of the information contained in these instructions and<br />
save this manual.<br />
INTRODUCTION<br />
The product you just have bought complies to all european and national<br />
qualifications with respect to the specified LVD (Low Voltage Directive)<br />
and Electro Magnetic Compatibilty (EMC) (89/336/EEG)<br />
Always ensure that the correct type of bulb is used and that the maximum<br />
bulb rating is not exceeded (see bulb symbol and "max. ... W" on the lamp<br />
label or the light itself)!<br />
The total wattage of all the lights to be connected to the transformer may not<br />
extend the wattage of the transformer in the lighting set. Too much wattage<br />
connected to the transformer may damage the transformer irreparably. When<br />
the transformer supplied with the kit has 2 outlets, please make sure that you<br />
maximum connect 75 Watt per outlet.<br />
This transformer must be connected to a suitable mains socket outlet and<br />
can be installed indoors and outdoors (IP44).<br />
If the fixed cable of the transformer or light fixture is damaged, the<br />
manufacturer or his service agent or a similar qualified person shall<br />
exclusively replace it in order to avoid a hazard.<br />
The total product may not be changed or reconstructed in any way. Any<br />
change can make the product unsafe.<br />
Other purposes as described above can lead to damage of the product with<br />
the risk that short-circuiting, fire or electrical shocks may occur. The safety<br />
information should always be taken into consideration.<br />
Subject to technical modification !<br />
SAFETY INSTRUCTIONS<br />
UK<br />
- Plugging into any electrical outlet, prior to installation of the complete set<br />
and bulbs may be hazardous.<br />
- Never cut into any cables connected to the lights while plugged into the<br />
outlet, this might be hazardous or damage the transformer.<br />
- The Safety Class of the transformer is II . This lamp is doubly<br />
insulated and may not be wired to a protective conductor<br />
- The protection class of the light fixtures is III . Spots may only be<br />
connected to a safety extra-low voltage with a maximum of 12 V.<br />
- The minimum distance to lighted surfaces should be 0.5 meter.<br />
Please take the following issues in considerations to prevent fire and eyedamage:<br />
- Never look in the light beam !<br />
- Do not install the lights in areas where flammable gasses, damps or<br />
materials could be stored.<br />
- Lamps which carry the symbol F are suitable for installing on materials<br />
with normal flammability. Important! If the lamp does not carry the F<br />
symbol it must not be installed on materials with normal combustibility.<br />
The temperature constancy of the fastening area must withstand at least<br />
90 deg. C.<br />
- Warning: (halogen) bulbs overheat; keep them far enough from easily<br />
flammable materials (for instance curtains).<br />
- Never cover the lamp with materials that hold the heat of the light.<br />
- Faulty or broken protection glass must be replaced before lamp<br />
is re - operated!<br />
INSTALLATION OF THE LIGHTS IN THE GARDEN.<br />
- Stretch the cable in the desired configuration in your garden/yard or<br />
along the side walk. Make sure that the plug of the cable reaches the<br />
transformer.<br />
- When you want to extend the main cable please read about this subject<br />
later in these instructions.<br />
- Place the lights on a spot desired by you. When the lights have a drain<br />
hole, make sure the this drain hole is pointed down.<br />
- When you want to fix the lights on the bottom with screws, we advice<br />
you to use screws made of corrosion free material.<br />
PAGE 1-3<br />
CONNECTION OF THE MAIN CABLE TO THE<br />
TRANSFORMER<br />
- Connect the plug of the main cable to (one of) the outlet (s) of the<br />
transformer. (TF0401+TF0403)<br />
- Tighten the sealing ring of the plug. (TF0405)<br />
- Insert the plug of the transformer into the electric outlet.<br />
The lights should work now. If not, check the following things:<br />
- Connections between the main cable and the wire from the lamp.<br />
- Check the lamps.<br />
- When no single light is working, check the transformer and let a<br />
specialist measure the transformer.<br />
ASSEMBLING OR EXCHANGING LAMPS<br />
- In case you prefer halogen light instead of the supplied LED light source<br />
in this fixture , you can easily replace the LED light source by a halogen<br />
light bulb,type nr.:<br />
JC Max 12V~50Hz 5 Watt<br />
- Important! Before commencing installation work disconnect the mains<br />
cable from the power supply - remove fuse or put switch to "OFF".<br />
- Lighting elements reach high temperatures when in operation: improper<br />
use can lead to a fire hazard and the change of the bulbs can lead to<br />
injuries! (cool down)<br />
- Disassemble the light the other way around as the assembling has been<br />
shown in the photo's.<br />
- When inserting a new halogen lamp avoid touching the bulb with your<br />
bare fingers !<br />
- When you exchange lamps, please use lamps with the same technical<br />
specifications and re-assemble the light fixtures. Make sure that you<br />
clean and dry all parts before assembly.<br />
- The power can be switched on again.<br />
CONDITIONS OF GUARANTEE<br />
We guarantee the perfect condition and function of this appliance. The<br />
guarantee is valid for 3 years beginning from the date of sale to the end user.<br />
We will rectify all faults arising from defective materials or manufacturing.<br />
The guarantee covers repair or replacement of the defective parts, subject to<br />
our approval. The guarantee does not apply to damage to parts which are<br />
subject to wear and tear nor damage or defects caused by improper use or<br />
incorrect maintenance. The guarantee only applies if the purchase receipt is<br />
sent to the dealer together with the appliance. This guarantee does not affect<br />
your statutory rights.<br />
SERVICE<br />
This product has been produced with great care. We assume that you have<br />
no problems or questions. If this is not the case or there or some questions<br />
from your side, please contact us on the telephone-, faxnumber or e-mail<br />
adress below. When you contact us, please send us information about<br />
yourself, place and date of purchasing of the product.

![[>] baubeschlaege_fl.pdf - Larix 24](https://img.yumpu.com/21540832/1/184x260/-baubeschlaege-flpdf-larix-24.jpg?quality=85)