You also want an ePaper? Increase the reach of your titles
YUMPU automatically turns print PDFs into web optimized ePapers that Google loves.
Upgrading to Windows ® 7<br />
<strong>Technical</strong> <strong>Bulletin</strong><br />
Purpose<br />
This technical bulletin describes how to upgrade eligible<br />
General Dynamics <strong>Itronix</strong> computers from Windows XP or<br />
Vista to the Windows 7 operating system.<br />
Determine Your Upgrade Method<br />
Depending on your computer’s Certificate of Authenticity<br />
(COA), there are two methods to upgrade to Windows 7:<br />
• Windows 7 COA: Use the General Dynamics <strong>Itronix</strong> supplied<br />
Recovery Media CD/DVD set.<br />
• Windows XP or Windows Vista COA: Purchase a retail copy<br />
of Windows 7 or acquire a license via an Enterprise license<br />
agreement.<br />
To determine your upgrade method, look at the Microsoft<br />
COA label on the bottom of your computer and see which<br />
operating system is supported. A valid Windows 7 COA<br />
is required to upgrade to Windows 7 using the General<br />
Dynamics <strong>Itronix</strong> supplied Recovery Media CD/DVD set.<br />
If you have a Windows Vista or Windows XP COA you will<br />
need to purchase a retail copy of Windows 7 or acquire a<br />
license via an Enterprise license agreement.<br />
NOTE The COA includes a 24-character product key to help<br />
you verify that your computer is running a genuine Microsoft<br />
product. This product key is also required to install the<br />
operating system. You cannot purchase a COA by itself, only<br />
with the software it authenticates.<br />
Prepare Your Computer for Upgrade<br />
Steps For All Configurations (Strongly Recommended)<br />
Before installing any operating system, these steps are<br />
strongly recommended for ALL computer configurations.<br />
• Ensure your computer meets the minimum hardware<br />
requirements for the version of the operating system you want<br />
to install.<br />
• Ensure your computer meets the minimum BIOS version:<br />
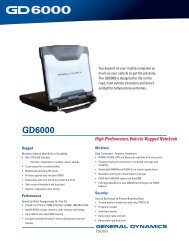
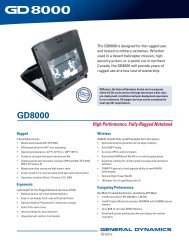
GD6000 BIOS 200; GD8000 BIOS 109<br />
• Check your platform device and application compatibility with<br />
Windows 7. For more information see Windows Upgrade<br />
Advisor.<br />
• Backup your entire system by copying all important data and<br />
files to an external storage drive. For more information see<br />
Windows Easy Transfer at Windows Easy Transfer.<br />
Additional Steps For Computers Configured<br />
with a Recovery Partition (Recommended)<br />
Create a User Backup Recovery Media CD/DVD set of<br />
your existing XP or Vista system prior to upgrade. This<br />
ensures that you can safely fallback to your existing system<br />
configuration if desired.<br />
1. Select Start, All Programs, Mobile Computer Tools,<br />
HDD Backup and Recovery Wizard to create a User<br />
Backup of drive C.<br />
2. Select the option to create a User Backup of the entire<br />
contents of drive C.<br />
3. Once the User Backup image has been created, select<br />
Start, All Programs, Mobile Computer Tools, Recovery<br />
Media Creation Wizard to create the User Backup Recovery<br />
Media CD/DVD set.<br />
4. On the Image Selection window, select User Backup<br />
Image. Then, follow the on screen instructions to complete<br />
the Recovery Media CD/DVD set creation process.<br />
NOTE Restoring from a Recovery Media CD/DVD set will<br />
overwrite all data on the target drive.<br />
Upgrading to Windows 7<br />
Using the Windows 7 Recovery Media Set<br />
Computers with a Windows 7 COA include a Recovery CD/<br />
DVD set containing the device drivers and software designed<br />
for Windows 7.<br />
1. While your computer is booting, press the specified key to<br />
access the boot menu.<br />
2. Insert the Windows 7 Recovery Media disc #1 into the CD/<br />
DVD drive.<br />
3. From the boot menu, select the option to boot to the CD/<br />
DVD drive.<br />
4. When prompted, press any key to boot the computer with<br />
the inserted media.<br />
5. Follow the on screen instructions to finish loading from the<br />
discs.<br />
6. Once the installation is complete, remove the disc. You<br />
have now successfully installed Windows 7 on your system.<br />
97-0139-001 ©2009 General Dynamics. All rights reserved.
Upgrading to Windows ® 7<br />
Using a retail DVD or Enterprise License<br />
Steps For All Configurations<br />
1. It is recommended that you perform a clean install of<br />
Windows 7 following the information provided with your<br />
installation DVD/CD set.<br />
2. After the upgrade process is complete, obtain Windows 7<br />
drivers for your system. Go to the driver downloads section<br />
on the General Dynamics <strong>Itronix</strong> website to obtain device<br />
drivers for eligible computers.<br />
Additional Steps For Computers Configured with a<br />
Recovery Partition<br />
CAUTIONS<br />
• Do not use your current recovery partition after upgrading<br />
using a retail copy of Windows. Your current recovery partition<br />
only contains images of the operating system (OS) prior to<br />
upgrade. Restoring to the factory installed image on the<br />
recovery partition after upgrading the OS would result in the<br />
loss of the new OS.<br />
• Your recovery partition may be incompatible with the upgraded<br />
OS. Prior to upgrading using a retail DVD it is recommended<br />
that you remove the existing recovery partition.<br />
Enabling the Smart Card Option for<br />
GD6000 Notebooks<br />
If your GD6000 computer is configured with a Smart Card,<br />
follow these steps to verify it is enabled after upgrading to<br />
Windows 7:<br />
Enable the Smart Card in the BIOS Setup Utility<br />
1. Reboot your computer by selecting Start, Restart.<br />
2. When you see the on screen prompt, press the F2 key to access<br />
the BIOS Setup Utility.<br />
3. Use the left/right arrow keys to navigate to the Advanced tab.<br />
4. Use the up/down arrow keys to highlight Smart Card Support<br />
and press the Enter key to open its options.<br />
5. Use the up/down arrow keys to highlight the Enabled option,<br />
then press Enter.<br />
6. Press the F10 key to save changes and exit Setup.<br />
Install the Smart Card Drivers<br />
1. In Windows Explorer navigate to C:\DRIVERS\SmartCard and<br />
double-click Setup.exe.<br />
2. Select Start, Restart to reboot. Your Smart Card is now<br />
ready to use.<br />
For More Information<br />
The following Microsoft links have been provided to guide<br />
you through the upgrade process.<br />
• Installing Windows 7<br />
• Upgrading from Windows XP to Windows 7<br />
• Upgrading from Windows Vista to Windows 7<br />
97-0139-001 ©2009 General Dynamics. All rights reserved. 2


