Bauanleitung Bell UH-1D - Ikarus
Bauanleitung Bell UH-1D - Ikarus
Bauanleitung Bell UH-1D - Ikarus

Create successful ePaper yourself
Turn your PDF publications into a flip-book with our unique Google optimized e-Paper software.
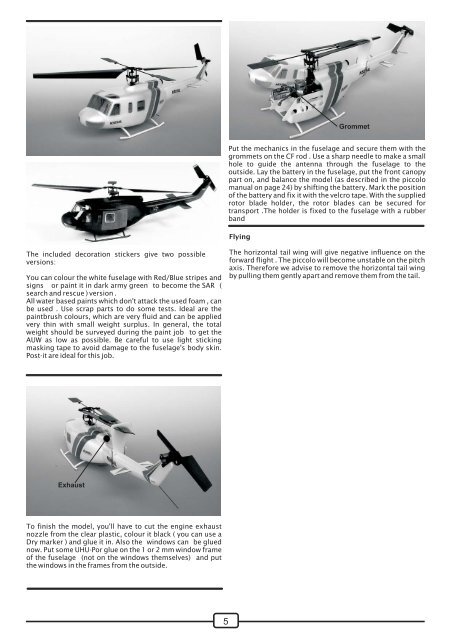
Grommet<br />
Put the mechanics in the fuselage and secure them with the<br />
grommets on the CF rod . Use a sharp needle to make a small<br />
hole to guide the antenna through the fuselage to the<br />
outside. Lay the battery in the fuselage, put the front canopy<br />
part on, and balance the model (as described in the piccolo<br />
manual on page 24) by shifting the battery. Mark the position<br />
of the battery and fix it with the velcro tape. With the supplied<br />
rotor blade holder, the rotor blades can be secured for<br />
transport .The holder is fixed to the fuselage with a rubber<br />
band<br />
Flying<br />
The included decoration stickers give two possible<br />
versions:<br />
You can colour the white fuselage with Red/Blue stripes and<br />
signs or paint it in dark army green to become the SAR (<br />
search and rescue ) version .<br />
All water based paints which don't attack the used foam , can<br />
be used . Use scrap parts to do some tests. Ideal are the<br />
paintbrush colours, which are very fluid and can be applied<br />
very thin with small weight surplus. In general, the total<br />
weight should be surveyed during the paint job to get the<br />
AUW as low as possible. Be careful to use light sticking<br />
masking tape to avoid damage to the fuselage's body skin.<br />
Post-it are ideal for this job.<br />
The horizontal tail wing will give negative influence on the<br />
forward flight . The piccolo will become unstable on the pitch<br />
axis. Therefore we advise to remove the horizontal tail wing<br />
by pulling them gently apart and remove them from the tail.<br />
Exhaust<br />
To finish the model, you'll have to cut the engine exhaust<br />
nozzle from the clear plastic, colour it black ( you can use a<br />
Dry marker ) and glue it in. Also the windows can be glued<br />
now. Put some <strong>UH</strong>U-Por glue on the 1 or 2 mm window frame<br />
of the fuselage (not on the windows themselves) and put<br />
the windows in the frames from the outside.<br />
5