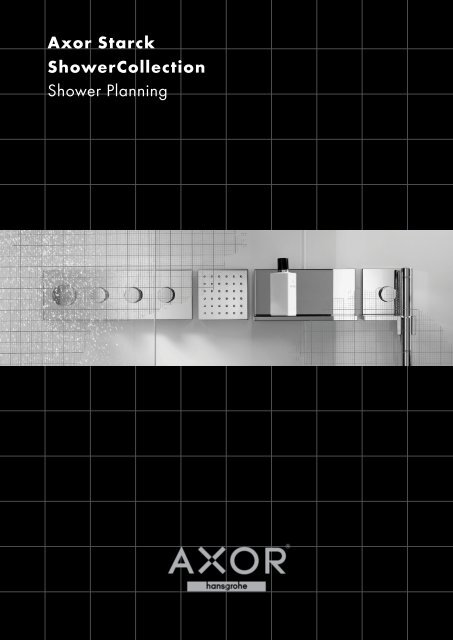
Axor Starck ShowerCollection Shower Planning - Hansgrohe
Axor Starck ShowerCollection Shower Planning - Hansgrohe
Axor Starck ShowerCollection Shower Planning - Hansgrohe

You also want an ePaper? Increase the reach of your titles
YUMPU automatically turns print PDFs into web optimized ePapers that Google loves.
<strong>Axor</strong> <strong>Starck</strong><br />
<strong><strong>Shower</strong>Collection</strong><br />
<strong>Shower</strong> <strong>Planning</strong>
With the <strong>Axor</strong> <strong>Starck</strong> <strong><strong>Shower</strong>Collection</strong>, <strong>Axor</strong> and Philippe <strong>Starck</strong> address<br />
a central part of personal wellbeing at home: The shower. With this modular<br />
collection, Philippe shows that he is a product designer and an interior<br />
decorator all in one. The <strong>Axor</strong> <strong>Starck</strong> <strong><strong>Shower</strong>Collection</strong> is perfect in form<br />
and allows freedom of expression and complete design flexibility.<br />
The basis of the collection is the perfection of the square. All elements of<br />
the collection emanate from a simple 12 x 12 cm square.<br />
The consistency of size and superior quality of materials create a timeless<br />
simple elegance. Innovative solutions behind the wall make way to perfect<br />
designs in front of the wall. This enables simple installation whilst giving the<br />
designer absolute creative freedom.<br />
In this brochure we present some of the endless possibilities of using this<br />
collection. The shower planning examples serve to inspire and give<br />
detailed technical information regarding installations and help support<br />
your individual design. Make use of the flexibility of the <strong>Axor</strong> <strong>Starck</strong><br />
<strong><strong>Shower</strong>Collection</strong> and create your own customised high quality spa<br />
concept. Introducing haute couture for the shower.<br />
<strong>Axor</strong> <strong>Starck</strong> <strong><strong>Shower</strong>Collection</strong>
Product overview<br />
Fittings: The fittings dazzle with their clean<br />
lines. The base consists of the thermostat<br />
module in the 12 grid. The thermostat is<br />
elegantly combined with the shut-off valves<br />
to form one unit. Functions can be added by<br />
combining the many elements of the collection.<br />
A classy combination: the shower head with<br />
integrated shut-off.<br />
Accessories: With the <strong>Axor</strong> <strong>Starck</strong> <strong>Shower</strong><br />
Collection, every detail is in place. With<br />
the two shelves of different sizes, everything<br />
is to hand when in the shower. Your personal<br />
favorite music via a speaker turns your shower<br />
into a special occasion. The ambient room<br />
light creates a balance to your stressful and<br />
hectic life and distributes a sensual-emotional<br />
ambience.<br />
01 02 03 04 05 06 07<br />
<br />
<strong>Axor</strong> <strong>Starck</strong> <strong><strong>Shower</strong>Collection</strong>
<strong>Shower</strong>ing: For individual planning, the<br />
12 x 12 cm shower module offers water in<br />
a square – whether as a shower for your<br />
head, neck or body – only your personal<br />
preferences count. The clear geometrical<br />
shape in polished stainless steel makes the<br />
<strong>Shower</strong>Heaven a luxury architectural design<br />
element. Two different sizes and three types<br />
of jets as well as optional light offer pure<br />
sensuality during your shower.<br />
01 Thermostat module<br />
02 Shut-off valve<br />
03 Trio/Quattro switch valve<br />
04 Hand shower head module<br />
05 Shelf<br />
06 Light module<br />
07 Speaker module<br />
08 <strong>Shower</strong> module<br />
09 <strong>Shower</strong>Heaven 720 x 720 mm<br />
10 <strong>Shower</strong>Heaven 970 x 970 mm<br />
08<br />
09<br />
10<br />
<strong>Axor</strong> <strong>Starck</strong> <strong><strong>Shower</strong>Collection</strong>
<strong>Axor</strong> <strong>Starck</strong> <strong><strong>Shower</strong>Collection</strong>
<strong>Axor</strong> <strong>Starck</strong> <strong><strong>Shower</strong>Collection</strong>
<strong>Axor</strong> <strong>Starck</strong> <strong><strong>Shower</strong>Collection</strong>
Architecture<br />
The generous shower area is located in<br />
the centre of the bathroom. It invites you to<br />
enjoy a soothing shower after a long day.<br />
The relaxation is completed by the nearby<br />
relaxation oasis. The walk-in closet connects<br />
the bathroom to the bedroom. The WC is<br />
in a separate room inside the bathroom.<br />
Material/equipment<br />
Floor. Stone floor, white satin finish glossy,<br />
with expansion grout. In the shower area:<br />
Mineral cast, glued, with cavity and onesided<br />
declination toward the drain slot.<br />
Drain: Illbruck Poresta Slot.<br />
Walls. Walls and ceilings: Concrete, white<br />
stucco. In the shower area and light chute:<br />
Back wall made of glass panels with matte<br />
backs, 2,600 x 400 mm. Glass separating<br />
wall: Double pane safety glass, 12 mm<br />
thickness, up to the ceiling, minimum depth<br />
1,90 m.<br />
Glass pane with twisted stainless steel<br />
support, screwed into the sides of the shower<br />
stall with grooves, stainless steel U profile,<br />
30 x 30 mm (see detail on page 17). Glass<br />
window front.<br />
Light. Daylight through skylight. Build up<br />
ceiling/double lamp Optical by Palluco<br />
above the sink, can be swivelled in opposite<br />
direction (180°), Halogen.<br />
Wall lights: Basik 8633 by grupo-t, chromeplated<br />
frame, diameter 14 cm, t = 5,35,<br />
halogen. Upright lamp: Gilda by Palluco.<br />
Small table lamps: Archimoon by Flos.<br />
Furniture. Clothes closet: Moduli a Giorno<br />
by Porro. Stool: Gnomes by Kartell. Ceramic<br />
stool by Ligne Roset. Shelf: Customised model<br />
made of dark stained oak.<br />
Sink. Wash bowl: <strong>Starck</strong> by Duravit<br />
(# 0408530000). Sink base: Customised<br />
model made from veneer dark stained oak.<br />
In the toilet area:<br />
<strong>Starck</strong> 1 tank with ceramic plate and wooden<br />
base (# 0412000009). WC, wall mounted<br />
– <strong>Starck</strong> by Duravit (# 0210090000) toilet<br />
bowl lid (# 0065810000).<br />
Miscellaneous. Carpet by Axis Mundis.<br />
Mattress 2.00 x 1.40 m with neck roll 1.40<br />
with mirror: Caadre by Fiam.<br />
<strong>Axor</strong> products<br />
1 x <strong>Shower</strong>Heaven 970 x 970 mm with light<br />
# 10 623 800 (inside wall installation)<br />
1 x thermostat module kit<br />
# 10 751 000<br />
1 x basic set for thermostat module<br />
# 10 750 180<br />
2 x shower module<br />
# 28 491 000<br />
2 x basic set for shower module<br />
# 28 486 180<br />
1 x shut-off valve kit<br />
# 10 972 000<br />
1 x basic set for shut-off valve<br />
# 10 971 180<br />
1 x hand shower module<br />
# 10 651 000<br />
1 x basic set for hand shower module<br />
# 10 650 180<br />
1 x short shelf<br />
# 40 872 000<br />
1 x speaker module<br />
# 40 874 000<br />
1 x light module<br />
# 40 871 000<br />
2 x basic light/speaker module kit<br />
# 40 876 180<br />
1 x installation plate<br />
# 10 973 180<br />
1 x <strong>Axor</strong> <strong>Starck</strong> basin mixer for wash bowls<br />
# 10 120 000<br />
WC area<br />
1 x <strong>Axor</strong> <strong>Starck</strong> basin mixer for wash bowls<br />
# 10 120 000<br />
all dimensions in mm, ca. 33 m 2<br />
WC<br />
2400<br />
Bedroom Courtyard Living area<br />
1560 1640<br />
5600<br />
1600<br />
Bath<br />
2000<br />
8630<br />
2600<br />
<strong>Planning</strong>
Ceiling construction<br />
1 – Lowered ceiling<br />
To install the <strong>Shower</strong>Heaven # 10 623 800<br />
flush with the ceiling, you need an intermediate<br />
or lowered ceiling, made e. g. of gypsum<br />
board with a clearance of at least 8 cm. You<br />
cannot install this system into concrete and<br />
later pour around it. We recommend a square<br />
cutout of 950 mm. The net weight of the<br />
<strong>Shower</strong>Heaven without water is approx.<br />
50 kg.<br />
Attention: Not suitable for installation in<br />
hollow areas with flammable surrounding<br />
material.<br />
Sanitary installation<br />
for installation in compound<br />
2 – Warm water supply<br />
Based on the individual showering preferences<br />
as well as on the number of users, the system<br />
must be dimensioned on an individual basis.<br />
Working pressure of the fitting: max. 0.8 MPa,<br />
recommended working pressure:<br />
0.3 – 0.5 MPa (1 MPa = 10 bar = 147 PSI),<br />
hot water temperature: max. 60°,<br />
capacity recommendation: The retention<br />
volume should be at least 300 l.<br />
Note: The <strong>Shower</strong>Heaven cannot be used<br />
with on-demand water heaters. Large<br />
differences in pressure between cold and<br />
warm water connectors must be balanced.<br />
3 – Supply lines<br />
# 10 750 180 basic thermostat module kit:<br />
2 x 1/2" (warm/cold) <strong>Shower</strong>Heaven:<br />
3 x 1/2" (mixed water)<br />
4 – Thermostat module<br />
# 10 751 000 thermostat module kit with<br />
cylindrical handles with increased flow<br />
performance to control the <strong>Shower</strong>Heaven.<br />
A basic kit is required (# 10 750 180) to<br />
install the thermostat module. Both parts<br />
must be ordered separately. Free flow<br />
approx. 58 l/min at 3 bar.<br />
5 – <strong>Shower</strong> module<br />
# 28 491 000 shower set. For the proper<br />
installation of the shower module kit (in one<br />
line – distance 10 mm) it is recommended<br />
using the specific basic kit # 28 486 180.<br />
Both parts must be ordered separately.<br />
Flow volume approx. 9.8 l/min (with 2 shower<br />
modules) at 3 bar.<br />
6 – Shut-off valve<br />
# 10 972 000 shut-off valve kit. Required to<br />
control the two shower modules. The shower<br />
modules are switched together in the shown<br />
configuration. For the proper installation of<br />
the shut-off valve (in one line – distance<br />
10 mm) we recommend using the specific<br />
basic kit # 10 971 180. Both parts must<br />
be ordered separately. Free flow approx.<br />
55 l/min at 3 bar.<br />
7 – Handheld shower module<br />
# 10 651 000 handheld shower module.<br />
The installation of the handheld shower<br />
module requires the basic kit # 10 650 180.<br />
The shut-off valve is already built into the<br />
basic kit of the handheld shower module.<br />
Both parts must be ordered separately. Flow<br />
volume approx. 17 l/min at 3 bar. Free flow<br />
approx. 29,8 l/min at 3 bar.<br />
8 – Short shelf<br />
# 40 872 000 short shelf.<br />
9 – Installation plate<br />
for the optimised positioning (distance 10 mm)<br />
of the light module, speaker module and<br />
the shelf, the installation plate # 10 973 180<br />
is recommended.<br />
10 – Speaker module<br />
# 40 874 000 speaker module kit.<br />
The separate basic kit # 40 876 180<br />
is required. Both parts must be ordered<br />
separately. In order to use the speaker<br />
module not as a passive but as an active<br />
speaker, the active module, which can be<br />
ordered separately from DeToma GmbH<br />
can be switched into the system. The<br />
speaker will then adapt itself to the<br />
acoustic surroundings via digital filters.<br />
11 – Light module<br />
# 40 871 000 light module. This requires<br />
the separate basic set # 40 876 180.<br />
Both parts must be ordered separately.<br />
Draining technique<br />
12 – Drain<br />
Floor drain (without shower tray): Illbruck<br />
Poresta Slot, DN 70 drain line; Alternative:<br />
Drain for shower tray: Raindrain 90 XXL,<br />
drain performance 51 l/min at 15 mm water<br />
depth (connecting line DN 70), suited to be<br />
put into practice as per DIN 1247 1– 3.<br />
Raindrain 90 XXL complete set # 60 067 000.<br />
Caution: The drain performance must be<br />
large enough: > 50 l/min.<br />
Electrical installation<br />
13 – Supply line<br />
Supply line <strong>Shower</strong>Heaven:<br />
3 x 1.5 mm² supply line<br />
1 x 4 mm² equipotential bonding Electric<br />
junction box and transformer included<br />
Note: <strong>Shower</strong>Heaven must be installed<br />
higher 2.25 m.<br />
Supply line to light module:<br />
3 x 1.5 mm² supply line transformer included<br />
Note: You must install an integrated socket<br />
for the transformer.<br />
Note: There must be an empty conduit<br />
installed to run the power supply (light).<br />
Note: The electrical connection may only<br />
be installed by an electrician! Preinstall the<br />
power supply 230 V/N/PE/50 Hz. The<br />
fusing must be conducted via a fault power<br />
protection unit (RCD/FI) with a measuring<br />
differential power of < 30 mA. (not pictured)<br />
14 – Light switch for<br />
<strong>Shower</strong>Heaven and light module<br />
The light switch must be installed outside<br />
the shower area or switched via the ceiling<br />
light (outside the protection area 2 as per<br />
DIN VDE 100, part 701).<br />
The <strong>Shower</strong>Heaven light and the light<br />
module are switched together in this case.<br />
(not shown)<br />
15 – Transformer <strong>Shower</strong>Heaven<br />
Secondary output voltage<br />
12 V/35 – 80 VA<br />
16 – Transformer for light module<br />
The cable length on the secondary side is<br />
7 m. (not pictured)<br />
You will find a detailed description of the<br />
individual installation steps starting on<br />
page 26.<br />
Detailed installation instructions are<br />
included with the respective products<br />
and can also be downloaded from<br />
www.hansgrohe.com<br />
Then, exact flow calculations can be<br />
performed on this basis.<br />
10 <strong>Axor</strong> <strong>Starck</strong> <strong><strong>Shower</strong>Collection</strong>
1<br />
15<br />
11<br />
10<br />
8<br />
9<br />
5<br />
6<br />
3<br />
4<br />
2<br />
5<br />
7<br />
110 cm<br />
12<br />
– Warm water<br />
– Cold water<br />
– Mixed water<br />
Dimensions assume a body<br />
height of 1.80 m<br />
<strong>Planning</strong> 11
12 <strong>Axor</strong> <strong>Starck</strong> <strong><strong>Shower</strong>Collection</strong>
Architecture<br />
The light chute lights up the bathroom in<br />
pleasing daylight. Artificial and natural light<br />
therefore complement each other harmoniously.<br />
The walk-in closet functions as a transition<br />
and a room separator from the bedroom.<br />
Material/equipment<br />
Floor. Stone floor, white satin finish, with<br />
expansion grout. In the shower area:<br />
Mineral cast, glued, with cavity and onesided<br />
declination toward the drain slot.<br />
Drain: Illbruck Poresta Slot. Grating:<br />
Wooden rack 1550 x 1550 mm, 40 x 40 mm<br />
wooden slats made of teak or Robinie, wood<br />
is connected by overlayering. Distance legs<br />
made of stainless steel, glued to shower<br />
cup, with water drain drill holes, to dry the<br />
wood. Grating removable to clean<br />
(see following detail).<br />
Walls. Walls and ceilings coated with white<br />
stucco. In the shower area: Back plate made<br />
concrete plates, acid-treated, 1363 x 796 mm.<br />
Glass separating wall: Double pane safety<br />
glass, 12 mm thickness, as high as the room,<br />
minimum depth 1,90 m. Glass pane with<br />
twisted stainless steel support, on the side<br />
of the shower cup, screwed in with grooves,<br />
stainless steel U profile, 30 x 30 mm (see<br />
detail on page 17). Window front made of<br />
glass.<br />
Light. Daylight through skylight. Build up<br />
wall/double light Optical by Palluco, can<br />
be swivelled in the other direction (180°),<br />
halogen. Wall lights: Basik 8633 by grupo-t,<br />
chrome-plated frame, diameter 14 cm,<br />
t = 5,35, halogen.<br />
Furniture. Clothes closet: Moduli a Giorno<br />
by Porro. Additional table: jiff by Flexform.<br />
Sink. Added sink: <strong>Starck</strong> X<br />
of Duravit (# 2303700070). Sink base:<br />
Customised model made of veneer, dark<br />
stained oak.<br />
Miscellaneous. Carpet by Axis Mundis.<br />
Mattress 2.00 x1.40 m with neck roll<br />
1.40 m. Mirror integrated into the wall.<br />
<strong>Axor</strong> products<br />
1 x <strong>Shower</strong>Heaven 720 x 720 mm<br />
without lighting<br />
# 10 625 800 (on wall – installation)<br />
1 x thermostat module kit<br />
# 10 751 000<br />
1 x basic thermostat module kit<br />
# 10 750 180<br />
4 x shower module kit<br />
# 28 491 000<br />
4 x basic shower module kit<br />
# 28 486 180<br />
1 x shut-off valve kit<br />
# 10 972 000<br />
1 x basic shut-off valve kit<br />
# 10 971 180<br />
1 x hand shower head module<br />
# 10 651 000<br />
1 x basic handheld shower module kit<br />
# 10 650 180<br />
1 x long shelf<br />
# 40 873 000<br />
1 x basic long shelf set<br />
# 40 878 180<br />
1 x <strong>Axor</strong> <strong>Starck</strong> X one-lever basin mixer,<br />
wall version<br />
# 10 074 000<br />
Detail: Installation of wooden grating<br />
Bedroom<br />
2400<br />
20<br />
40<br />
40<br />
40<br />
100<br />
90<br />
5<br />
Courtyard<br />
5600<br />
1560 1640<br />
1600<br />
4910<br />
Bath<br />
30<br />
<strong>Planning</strong> 13
Ceiling construction<br />
1 – Ceiling<br />
The connecting lines to the <strong>Shower</strong>Heaven<br />
# 10 625 800 must be routed in the ceiling.<br />
The net weight of the <strong>Shower</strong>Heaven without<br />
water is approx. 30 kg. The lowered ceiling<br />
must be large enough to carry the weight of<br />
the <strong>Shower</strong>Heaven.<br />
Sanitary installation<br />
2 – Warm water supply<br />
Based on the individual showering preferences<br />
as well as on the number of users, the system<br />
must be dimensioned on an individual<br />
basis. Working pressure of the fitting: max.<br />
0.8 MPa, recommended working pressure:<br />
0.3 – 0.5 MPa (1 MPa = 10 bar = 147 PSI),<br />
hot water temperature: max. 60°,<br />
capacity recommendation: The retention<br />
volume should be at least 300 l.<br />
Note: The <strong>Shower</strong>Heaven cannot be used<br />
with on-demand water heaters. Large<br />
differences in pressure between cold and<br />
warm water connectors must be balanced.<br />
3 – Supply lines<br />
# 10 750 180 basic thermostat module kit:<br />
2 x 1/2" (warm/cold)<br />
<strong>Shower</strong>Heaven: 3 x 1/2" (mixed water)<br />
4 – Thermostat module<br />
# 10 751 000 thermostat module kit with<br />
cylindrical handles with increased flow<br />
performance to control the <strong>Shower</strong>Heaven.<br />
A basic kit is required (# 10 750 180) to<br />
install the thermostat module. Both parts<br />
must be ordered separately. Free flow<br />
approx. 58 l/min at 3 bar.<br />
5 – <strong>Shower</strong> module<br />
# 28 491 000 shower set. For the proper<br />
installation of the shower module kit (in one<br />
line – distance 10 mm) it is recommended<br />
using the specific basic kit # 28 486 180 .<br />
Both parts must be ordered separately. Flow<br />
volume approx. 19.5 l/min (with 4 shower<br />
modules) at 3 bar.<br />
6 – Shut-off valve<br />
# 10 972 000 shut-off valve kit. Required to<br />
control the four shower modules. The shower<br />
modules are switched together in the shown<br />
configuration. For the proper installation of<br />
the shut-off valve (in one line – distance<br />
10 mm) we recommend using the specific<br />
basic kit # 10 971 180. Both parts must be<br />
ordered separately. Free flow approx.<br />
55 l/min at 3 bar.<br />
7 – Handheld shower module<br />
# 10 651 000 handheld shower module kit.<br />
The installation of the handheld shower<br />
module requires the basic kit # 10 650 180.<br />
The shut-off valve is already built into the<br />
basic kit of the handheld shower module.<br />
Both parts must be ordered separately. Flow<br />
volume approx. 17 l/min at 3 bar. Free flow<br />
approx. 29.8 l/min at 3 bar.<br />
8 – Long shelf<br />
# 40 873 000 long shelf. As the long shelf<br />
is installed between two water bearing<br />
parts, the basic set # 40 878 180 is needed<br />
as a water throughput between the shut-off<br />
valve and the handheld shower module.<br />
Draining technique<br />
9 – Drain<br />
Floor drain (without shower tray):<br />
Illbruck Poresta Slot, DN 70 drain line;<br />
Alternative: Drain for shower tray:<br />
Raindrain 90 XXL, drain performance<br />
51 l/min at 15 mm water depth (connecting<br />
line DN 70), suited to be put into practice<br />
as per DIN 1247 1– 3. Raindrain 90 XXL<br />
complete set # 60 067 000.<br />
Caution: The drain performance must<br />
be large enough: > 50 l/min.<br />
Detailed installation instructions are<br />
included with the respective products<br />
and can also be downloaded from<br />
www.hansgrohe.com Then, exact<br />
flow calculations can be performed<br />
on this basis.<br />
14 <strong>Axor</strong> <strong>Starck</strong> <strong><strong>Shower</strong>Collection</strong>
1<br />
8 cm 8 cm<br />
13 cm<br />
3<br />
5<br />
2<br />
4<br />
6<br />
8 7<br />
100 cm<br />
150 cm<br />
9<br />
– Warm water<br />
– Cold water<br />
– Mixed water<br />
Dimensions assume a body<br />
height of 1.80 m<br />
<strong>Planning</strong> 15
16 <strong>Axor</strong> <strong>Starck</strong> <strong><strong>Shower</strong>Collection</strong>
Architecture<br />
The classic corner shower arrangement is<br />
integrated openly into the bathroom with its<br />
transparent glass shower separating wall.<br />
Daylight reaches the bathroom through<br />
a large window across from the shower area.<br />
The bedroom can be reached via the walkin<br />
closet. The WC is physically separate<br />
from the bathroom.<br />
Material/equipment<br />
Floor. Stone floor, white satin finish glossy,<br />
with expansion grout. In the shower area:<br />
Mineral cast, glued, with cavity and one-sided<br />
declination toward the drain slot. Drain:<br />
Illbruck Poresta Slot.<br />
Walls. Walls and ceilings coated with white<br />
stucco. In the shower area: Back plate made<br />
concrete plates, acid-treated, 1363 x 796 mm.<br />
Glass separating wall: Double pane safety<br />
glass, 12 mm thickness, as high as the room,<br />
minimum depth 1,90 m. Glass pane with<br />
twisted stainless steel support, on the side<br />
of the shower cup, screwed in with grooves,<br />
stainless steel U profile, 30 x 30 mm (see<br />
detail below). Window front made of glass.<br />
Light. Lowered ceiling/double lights<br />
Optical by Palluco above the sink, can<br />
be swivelled in the other direction (180°),<br />
halogen. Wall lights: Basik 8633 by grupo-t,<br />
chrome-plated frame, diam.<br />
14 cm, t = 5,35, halogen. Upright lamp:<br />
Glo-Ball F by Flos.<br />
Furniture. Clothes closet: Moduli a Giorno<br />
by Porro.<br />
Sink. Built-in sink: <strong>Starck</strong> by Duravit<br />
(# 0407530000). Sink base: Customised<br />
model made of veneer, dark stained oak.<br />
In the toilet area:<br />
<strong>Starck</strong> 1 tank with ceramic plate and wooden<br />
base (# 0412000009). WC, wall mounted<br />
– <strong>Starck</strong> by Duravit (# 0210090000) toilet<br />
bowl lid (# 0065810000).<br />
Miscellaneous. Chair: Louis Ghost by<br />
Kartell, Sofa: Privée by Cassina. Mirror built<br />
into the wall.<br />
<strong>Axor</strong> products<br />
12 x shower module<br />
# 28 491 000<br />
2 x basic set for shower module<br />
# 28 486 180<br />
1 x installation plate<br />
# 28 470 180<br />
1 x thermostat module kit<br />
# 10 751 000<br />
1 x basic set for thermostat module<br />
# 10 750 180<br />
1 x short shelf<br />
# 40 872 000<br />
1 x basic set for shower module<br />
# 40 877 180<br />
1 x handheld shower module<br />
# 10 651 000<br />
1 x basic set for hand shower head module<br />
# 10 650 180<br />
1 x <strong>Axor</strong> <strong>Starck</strong><br />
one-lever basin mixer fitting<br />
# 10 111 000<br />
WC area<br />
1 x <strong>Axor</strong> <strong>Starck</strong> basin mixer for wash bowls<br />
# 10 120 000<br />
Detail: Mounting to glass separating wall<br />
WC<br />
12<br />
25<br />
2400<br />
1640<br />
Bedroom<br />
15<br />
1560<br />
1000<br />
1600<br />
3200<br />
Bath<br />
30 25 30<br />
<strong>Planning</strong> 17
Ceiling construction<br />
1 – Lowered ceiling<br />
To install the shower modules, the connecting<br />
lines must be routed in the ceiling. For the<br />
proper installation of the 6 shower modules<br />
into the ceiling (# 28 491000), we recommend<br />
using the installation plate # 28 470 180.<br />
Sanitary installation<br />
for the free installation<br />
2 – Warm water supply<br />
Based on the individual showering preferences<br />
as well as on the number of users, the<br />
system must be dimensioned on an<br />
individual basis. Working pressure<br />
of the fitting: max. 0.8 MPa, recommended<br />
working pressure:<br />
0.3 – 0.5 MPa (1 MPa = 10 bar = 147 PSI),<br />
hot water temperature: max. 60°, capacity<br />
recommendation: The retention volume<br />
should be at least 300 l.<br />
Note: This product cannot be used with<br />
on-demand water heaters. Large differences<br />
in pressure between cold and warm water<br />
connectors must be balanced.<br />
3 – Supply lines<br />
# 10 750 180 basic thermostat module kit:<br />
2 x 1/2" (warm/cold)<br />
<strong>Shower</strong> modules in the ceiling:<br />
1x 1/2" (mixed water)<br />
4 – Thermostat module<br />
# 10 751 000 thermostat module kit with<br />
cylindrical handles with increased flow<br />
performance to control the shower modules<br />
in the ceiling the wall. The installation of the<br />
handheld shower module requires the basic<br />
kit # 10 750 180. Both parts must be<br />
ordered separately.<br />
Free flow approx. 58 l/min at 3 bar.<br />
5 – <strong>Shower</strong> module (wall installation)<br />
# 28 491 000 shower module kit for wall<br />
installation. The three shower modules on<br />
the left can be turned on separately from<br />
the three shower modules on the right. The<br />
control takes place via the thermostat<br />
module. In order to properly install the<br />
shower module kits (in one line – distance<br />
10 mm), on the line of the thermostat<br />
module, we recommend installing the specific<br />
basic set # 28 486 180.<br />
The shower modules that are not installed<br />
together with other basic bodies, can be<br />
installed using a standard ½" wall connection.<br />
Flow volume approx. 24.5 l/min (with<br />
6 shower modules) at 3 bar.<br />
6 – Handheld shower module<br />
# 10 651 000 handheld shower module kit.<br />
The installation of the handheld shower<br />
module requires the basic kit # 10 650 180.<br />
The shut-off valve is already built into the<br />
basic kit of the handheld shower module.<br />
Both parts must be ordered separately. Flow<br />
volume approx. 17 l/min at 3 bar.<br />
Free flow approx. 29.8 l/min at 3 bar.<br />
7 – Short shelf<br />
# 40 872 000 short shelf. As the short<br />
shelf is installed between two water bearing<br />
parts, the basic set # 40 877 180 is needed<br />
as a water throughput between the shower<br />
module and the handheld shower module.<br />
Draining technique<br />
8 – Drain<br />
Floor drain (without shower tray):<br />
Illbruck Poresta Slot, DN 70 drain line;<br />
Alternative: Drain for shower tray:<br />
Raindrain 90 XXL, drain performance 51 l/min<br />
at 15 mm water depth (connecting line<br />
DN 70), suited to be put into practice as<br />
per DIN 1247 1– 3.<br />
Raindrain 90 XXL complete set # 60 067 000.<br />
Caution: The drain performance must be<br />
large enough: > 50 l/min.<br />
You will find a detailed description of the<br />
individual installation steps starting on<br />
page 26.<br />
Detailed installation instructions are included<br />
with the respective products and can also be<br />
downloaded from www.hansgrohe.com<br />
Then, exact flow calculations can be<br />
performed on this basis.<br />
18 <strong>Axor</strong> <strong>Starck</strong> <strong><strong>Shower</strong>Collection</strong>
1<br />
3<br />
5<br />
5<br />
7<br />
6<br />
2<br />
5<br />
5<br />
4<br />
5<br />
140 cm<br />
5<br />
60 cm<br />
100 cm<br />
8<br />
– Warm water<br />
– Cold water<br />
– Mixed water<br />
Dimensions assume a body<br />
height of 1.80 m<br />
<strong>Planning</strong> 19
Thermostat module kit<br />
# 10 751 000<br />
Shut-off valve kit<br />
# 10 972 000<br />
As an alternative, the shut-off<br />
valve can also be installed using<br />
the basic kit # 15 973 180/<br />
# 15 974 180/ # 15 970 180,<br />
if it is mounted freely. In combination<br />
with other modules, we<br />
recommend using the indicated<br />
basic kit.<br />
120<br />
63<br />
120<br />
41<br />
60<br />
G ¾<br />
135<br />
105<br />
77<br />
101<br />
135<br />
87<br />
Ø 41<br />
120<br />
Ø 35<br />
20<br />
Ø 49<br />
80<br />
360<br />
80<br />
80<br />
120<br />
60<br />
Ø 35<br />
21<br />
87<br />
matching basic thermostat<br />
module kit<br />
# 10 750 180<br />
matching basic shut-off valve kit<br />
# 10 971 180<br />
70<br />
65<br />
70<br />
65<br />
135<br />
105<br />
77<br />
G ¾<br />
135<br />
105<br />
77<br />
G ¾<br />
80<br />
80<br />
80<br />
80<br />
80<br />
345<br />
80<br />
G ¾<br />
94<br />
86<br />
86<br />
103<br />
103<br />
80<br />
80<br />
80<br />
80<br />
G ¾<br />
G ¾<br />
G ¾<br />
345<br />
G ¾<br />
Ø 41<br />
Ø 41<br />
95<br />
95<br />
20 <strong>Axor</strong> <strong>Starck</strong> <strong><strong>Shower</strong>Collection</strong>
120<br />
68<br />
120<br />
96<br />
Ø 24<br />
21<br />
62<br />
138<br />
G ¾<br />
104<br />
76<br />
60 28<br />
G ¾<br />
60 28<br />
G ¾<br />
77<br />
105<br />
96<br />
Ø 59<br />
96<br />
Ø 59<br />
202<br />
130<br />
86<br />
101<br />
Ø 48<br />
20<br />
38<br />
232<br />
120<br />
60<br />
Ø 35<br />
Fittings<br />
Trio/Quattro<br />
# 10 932 000<br />
Hand shower module<br />
# 10 651 000<br />
12<br />
158<br />
127<br />
15<br />
matching basic kit for Trio<br />
# 15 981 180<br />
matching basic kit for Quattro<br />
# 15 930 180<br />
matching basic handheld shower<br />
module kit<br />
# 10 650 180<br />
75<br />
50<br />
G ¾<br />
G ¾<br />
G ¾<br />
G ¾<br />
Products 21
Short shelf<br />
# 40 872 000<br />
Long shelf<br />
# 40 873 000<br />
Speaker module<br />
# 40 874 000<br />
Light module<br />
# 40 871 000<br />
120<br />
240<br />
120<br />
120<br />
88<br />
21<br />
49<br />
45<br />
Ø28<br />
54<br />
60<br />
60<br />
62<br />
100<br />
115<br />
62<br />
100<br />
115<br />
Ø 72<br />
12<br />
12<br />
120<br />
120<br />
120<br />
120<br />
69<br />
21<br />
101<br />
21<br />
101<br />
21<br />
matching basic short shelf kit<br />
# 40 877 180*<br />
matching basic long shelf kit<br />
# 40 878 180*<br />
matching basic speaker module<br />
kit<br />
# 40 876 180<br />
matching basic light module kit<br />
# 40 876 180<br />
Ø 28<br />
273<br />
262<br />
52<br />
153<br />
87<br />
32<br />
102<br />
120<br />
102<br />
120<br />
112 112<br />
22 <strong>Axor</strong> <strong>Starck</strong> <strong><strong>Shower</strong>Collection</strong>
* The basic kits for the short and<br />
long shelves are only necessary<br />
between water-bearing parts.<br />
Accessories & installation help<br />
Installation Aid 3/4"<br />
# 28 470 180<br />
Installation Plate<br />
# 10 973 180<br />
160<br />
6.5<br />
50<br />
130<br />
102<br />
20<br />
65<br />
50<br />
350<br />
80<br />
50 65<br />
24<br />
45<br />
350<br />
50 50<br />
65 80<br />
175<br />
G ¾<br />
G½<br />
65<br />
24<br />
20<br />
45<br />
119<br />
568<br />
60<br />
24<br />
2<br />
245<br />
45 45<br />
175<br />
Products 23
<strong>Shower</strong> module kit<br />
# 28 491 000<br />
As an alternative, the freely<br />
installed shower module can be<br />
mounted via ½" connection. In<br />
combination with other modules,<br />
we recommend using the<br />
indicated basic kit.<br />
120<br />
29<br />
60<br />
G ¾<br />
135<br />
105<br />
77<br />
101<br />
153<br />
G ¾<br />
87<br />
Ø 41<br />
120<br />
matching basic shower module<br />
kit # 28 486 180<br />
94<br />
24 <strong>Axor</strong> <strong>Starck</strong> <strong><strong>Shower</strong>Collection</strong>
970<br />
830<br />
760<br />
280<br />
720<br />
525<br />
245<br />
2<br />
78<br />
280<br />
760<br />
830<br />
970<br />
245<br />
525<br />
720<br />
55<br />
2<br />
78<br />
<strong>Shower</strong>ing:<br />
<strong>Shower</strong>Heaven<br />
<strong>Shower</strong>Heaven<br />
970 x 970 mm with light<br />
# 10 623 800<br />
<strong>Shower</strong>Heaven<br />
970 x 970 mm without light<br />
# 10 621 800 (not pictured)<br />
<strong>Shower</strong>Heaven<br />
<strong>Shower</strong>Heaven<br />
720 x 720 mm without light<br />
# 10 625 800<br />
<strong>Shower</strong>Heaven<br />
720 x 720 mm with light<br />
# 10 627 800 (not pictured)<br />
Products 25
Installation path<br />
In the following, we will explain<br />
how to install the fittings, the<br />
shower modules and the<br />
accessories from the ambience<br />
No. 1 in a vertical, perpendicular<br />
line. Based on the installation with<br />
other devices (distance 10 mm),<br />
special basic kits are used for<br />
an optimised installation. These<br />
allow for an accurate installation<br />
of the individual modules in<br />
a perfect line.<br />
1 Unscrew the preinstalled<br />
plugs from the top and bottom<br />
of the basic thermostat module<br />
kit.<br />
4 Install the basic shower<br />
module kit at the bottom of the<br />
basic thermostat module kit and<br />
secure with locking pins.<br />
5 Install the basic handheld<br />
shower module kit at the<br />
bottom of the basic shower<br />
module kit and secure with<br />
locking pins.<br />
8 Align the preinstalled basic<br />
kit in the unfinished wall and affix.<br />
9 The fitting must be piped,<br />
flushed and tested. Cementing<br />
the basic kit into the wall<br />
surface. Fill the seams with<br />
silicone.<br />
26 <strong>Axor</strong> <strong>Starck</strong> <strong><strong>Shower</strong>Collection</strong>
2 Install the basic shut-off<br />
valve kit at the top of the basic<br />
thermostat module kit and secure<br />
with locking pins.<br />
3 Install the basic shower<br />
module kit at the top of the basic<br />
shut-off valve kit and secure with<br />
locking pins.<br />
6 Screw in plugs in the shown<br />
positions.<br />
7 Attach the installation plate<br />
to the basic shower module kit<br />
from behind. Screw the integrated<br />
wall sockets for the speaker and<br />
light modules to the installation<br />
plate.<br />
10 Install a sealing collar and<br />
press into the glue and the silicone<br />
below.<br />
11 Cut all construction protection<br />
pieces off 1 mm in front of the tiles.<br />
Installation 27
12 Screw in the threaded sleeves<br />
and shorten to 13 mm from the<br />
wall. All elements must now be<br />
sealed with silicone towards the<br />
wall.<br />
13 Insert the threaded<br />
adapter and shorten to<br />
25 mm from the wall surface.<br />
16 Screw the three handle sleeves<br />
onto the threaded sleeve kit of<br />
the thermostat module and then<br />
insert the handles. Install the<br />
thermostat handle and tighten the<br />
fastening screws.<br />
17 Screw the handle sleeve<br />
onto the threaded sleeve kit<br />
of the shut-off valve and<br />
then attach the handle.<br />
20 Align the borings for the shelf<br />
by means of a drilling template.<br />
Install the fixation plate on the<br />
wall. Install the shelf on the<br />
fixation plate.<br />
21 Install the speakers and<br />
secure them to the basic set<br />
using four screws. Then install<br />
the cover.<br />
28 <strong>Axor</strong> <strong>Starck</strong> <strong><strong>Shower</strong>Collection</strong>
14 Remove the flushing block and<br />
install the thermostat control unit<br />
into the basic thermostat module<br />
kit. Install and fasten the threaded<br />
adapter and the handle stop.<br />
Install the chrome-plated sleeve.<br />
15 Install the cover plate of the<br />
thermostat module.<br />
18 Preinstall the water guide<br />
of the handheld shower module.<br />
Install the preinstalled unit and<br />
screw the handle sleeve onto the<br />
threaded sleeve kit of the handheld<br />
shower module. Then install the<br />
handle.<br />
19 Screw the ½ connection<br />
to the connection of the basic<br />
shower module kit. Then affix the<br />
shower module cartridge to the<br />
½ connection. Then install the<br />
cover plate on the cartridge<br />
using socket head screws.<br />
22 Route a secondary line from<br />
the transformer to the basic kit.<br />
Connect the plugs, light unit<br />
and the secondary cable. Insert<br />
the light unit and fasten using<br />
4 screws. After that preadjust the<br />
ready to use kit using grub bolts<br />
and then hook them in and<br />
secure them.<br />
23 Perform a functional test.<br />
Installation 29
Installation path for<br />
<strong>Shower</strong>Heaven.<br />
The following installation path<br />
describes the installation of the<br />
<strong>Shower</strong>Heaven 970 x 970 mm<br />
with light step by step.<br />
You must plan for a lowered ceiling<br />
to install this system. The frame of<br />
the <strong>Shower</strong>Heaven can already<br />
be installed in the preconstruction<br />
phase.<br />
1 Prior to installation, the<br />
<strong>Shower</strong>Heaven must be<br />
removed, the cylinder screws<br />
must be loosened and the<br />
four bearing bolts must be<br />
pulled out. The dimensions<br />
of the ceiling connections<br />
must be 180 mm from the<br />
center of the <strong>Shower</strong>Heaven.<br />
Hold the frame to the desired<br />
ceiling location and align<br />
accordingly. Mark the borings<br />
using a pen.<br />
4 Install the functional unit<br />
using bearing bolts and cylinder<br />
screws.<br />
5 Connect the<br />
equipotential bonding and<br />
the ground to the frame.<br />
8 Fold the functional unit<br />
upward and secure with the<br />
short carabine hool. Examine<br />
hose connections for tightness.<br />
9 Install the functional<br />
unit using bearing bolts and<br />
cylinder screws. Install the<br />
intermediate ceiling.<br />
12 Remove the centering<br />
sleeves.<br />
13 Secure the decorative<br />
plate using counter-sunk<br />
screws.<br />
30 <strong>Axor</strong> <strong>Starck</strong> <strong><strong>Shower</strong>Collection</strong>
2 Drill the borings with<br />
a diameter of 8 mm. Every boring<br />
has to be fitted with a dowel.<br />
Screw in the hanger bolts, attach<br />
the frame to the ceiling, and<br />
attach them using a washer and<br />
nut (SW 13 mm).<br />
3 Connect the equipotential<br />
bonding to the frame and the<br />
230-V cable to the junction box.<br />
Hempen and screw in the<br />
T-pieces and angle cleats.<br />
6 Turn the power on and test<br />
the lights on the <strong>Shower</strong>Heaven.<br />
If all lights work, switch the<br />
power back off. Secure the<br />
functional unit to the long<br />
Carabine hook.<br />
7 Screw the pressure hoses to<br />
the ceiling connectors.<br />
10 Hook the decorative plate<br />
on the three bowden cables<br />
using Carabine hooks.<br />
11 Insert the decorative plate<br />
into the premounted centering<br />
sleeves and secure with countersunk<br />
screws.<br />
14 Screw on the protective<br />
lenses for the lights. Make<br />
sure the form seal is installed<br />
properly.<br />
15 Perform the functional test.<br />
Installation 31
Installation path<br />
of the shower modules for<br />
ceiling installation.<br />
In ambience no. 3, we have<br />
shown another field of use for the<br />
shower module. In addition to<br />
their installation for a body or<br />
a neck shower, the shower<br />
module can also be used with<br />
several others as a head shower.<br />
In this case, 6 shower modules<br />
are combined.<br />
1 Align the installation<br />
plate with the 6 shower<br />
modules.<br />
2 Pipe the connectors and<br />
install the threaded bars into the<br />
ceiling to secure the installation<br />
plate.<br />
3 Hold the installation<br />
plate with the piping against<br />
the desired location on the<br />
ceiling and screw it on using<br />
the threaded bars and align<br />
it. After that, check the lines<br />
for leaks.<br />
4 Install the intermediate ceiling<br />
and prepare the 6 borings for the<br />
½" connectors. After that, screw<br />
the ½" connectors into the<br />
installation plate.<br />
5 Align the shower modules<br />
with the flat side of the ½"-<br />
connector.<br />
6 Secure the shower module<br />
cartridges to the ½" connectors.<br />
Then install the cover plate on the<br />
cartridge and secure by loosening<br />
the socket head screws.<br />
7 Perform a functional test.<br />
32 <strong>Axor</strong> <strong>Starck</strong> <strong><strong>Shower</strong>Collection</strong>
Installation
Concepts for<br />
individual planning<br />
You can use the flexible modular system of the <strong>Axor</strong><br />
<strong>Starck</strong> <strong><strong>Shower</strong>Collection</strong> to create your own individual<br />
shower areas. The following illustrations show possible<br />
ideas for the concept of your personal well-being zone.<br />
Light, sound<br />
Sensual arrangement for body and mind! The light modules<br />
ensure a mood-pleasing lighting of the shower. Ideally, these are<br />
arranged close to the ceiling or close to the floor. The speakers<br />
are also at head level. The back, neck and legs are strained<br />
in a person's daily life. Therefore, the shower modules should be<br />
arranged in these areas for maximum pleasure. The shower and<br />
temperature control always within reach.<br />
<strong>Shower</strong>s<br />
Function<br />
<strong>Shower</strong>s<br />
Light<br />
The leading shower system for your well-being: With this<br />
approach, all functions of the controls are arranged vertically. The<br />
modules are therefore centralised and easy to use. Different shelves<br />
are arranged on a horizontal level at the same height as the handles.<br />
Thus, the shower supplies are in immediate reach. The body showers<br />
are also arranged horizontally, one pair each for the neck and the<br />
back, as well as at the height of the thighs.<br />
34 <strong>Axor</strong> <strong>Starck</strong> <strong><strong>Shower</strong>Collection</strong>
For all sizes: The shower module is worked into a high-quality,<br />
adjustable metal rosette. A simple sliding motion will change the jet<br />
angle of the shower. This example shows the installation with the jet<br />
at a vertical adjustment. Depending on the user's needs and wishes,<br />
this water experience can easily be adjusted<br />
Larger areas or one point: If the shower module is rotated<br />
by 90° during the installation, the water jets can be adjusted<br />
horizontally. This makes sense especially when the shower modules<br />
are installed in a corner. By altering the angle, the jets either hit<br />
a certain point or a larger area of the body.<br />
Head shower on demand: If it is mounted to the ceiling, the flush<br />
mountable shower module becomes a head shower. The variable<br />
connection of several modules to each other will create a larger<br />
shower head area. It consists of multiple segments, where the<br />
combination of the controls and fittings lets you assign the jets as<br />
desired.<br />
Inspirations 35
Inspirations for creative showering<br />
solutions<br />
With the endless possible combinations, that the <strong>Axor</strong><br />
<strong>Starck</strong> <strong><strong>Shower</strong>Collection</strong> has to offer, individual<br />
requirements can be realised in a creative manner. The<br />
following installation inspirations show, how space and<br />
function, design and architecture are always flexibly<br />
associated.<br />
1<br />
Simply logical: All shower functions are logically assigned to the<br />
intuitive control of the central thermostat module. The upper shut-off<br />
valve controls the head shower, below it is the control for the upper<br />
body shower head pair. The third valve regulates the two lower<br />
body showers. The central thermostat controls the selected shower<br />
temperature. The handheld shower module with integrated shut-off<br />
rounds off this consequently simple operation concept.<br />
2<br />
3<br />
Switch on. Step in. Relax! The thermostat module is located in<br />
the entrance area of the shower. Thus, the correct shower temperature<br />
can simply be adjusted from the outside – even with the water<br />
running and without getting wet. The separately controlled handheld<br />
shower is installed on the side. This handheld shower can be used<br />
to rinse off and can also be used it to conveniently clean the shower<br />
after a nice long water adventure.<br />
36 <strong>Axor</strong> <strong>Starck</strong> <strong><strong>Shower</strong>Collection</strong>
Relax sitting down: The seating area integrated in this shower is<br />
equipped with soothing neck and back massaging jets in the back<br />
area. The lower shower modules can be used for a loosening calf<br />
massage. The additional laminar jet of the handheld shower allows<br />
Kneipp treatments and stimulates your circulation. If you want<br />
a refreshing rain shower: Simply stand up and let the head shower<br />
spoil you. This also makes this concept an asset for high-quality steam<br />
showers.<br />
For large solutions: The <strong>Axor</strong> <strong>Starck</strong> <strong><strong>Shower</strong>Collection</strong> also lets<br />
you realise elegantly perfect solutions for any type of wellness area.<br />
Its balanced symmetry is shown in this example, where two showers<br />
are combined into one unit. The controls are arranged side by side<br />
for the respective shower. Whether for a luxurious hotel room or<br />
a classy spa: This will make the guests feel good.<br />
<strong>Shower</strong>ing in the bathtub. The <strong>Axor</strong> <strong>Starck</strong> <strong><strong>Shower</strong>Collection</strong><br />
is also suited for bathtub solutions. The individual elements of the<br />
collection can be easily integrated into bathtub concepts. Practical<br />
and elegant: The thermostat module is also used to adjust the correct<br />
bath temperature. The integrated step facilitates getting into the<br />
bathtub and also accents the special ambience. NB: Observe<br />
installation guidelines.<br />
Inspirations 37
38 <strong>Axor</strong> <strong>Starck</strong> <strong><strong>Shower</strong>Collection</strong>
Cyprus – <strong>Hansgrohe</strong> · Middle East & Africa Limited · Artemisia Business Center<br />
14 Charalambou Mouskou Office 201 · CY-2015 Strovolos · Nicosia · Cyprus<br />
Tel. +357 22 441370 · Fax +357 22 441374 · nicosia@hansgrohe.com · www.hansgrohe-mea.com<br />
Finland – <strong>Hansgrohe</strong> · Kavallinmäki 15 · FIN-02750 Espoo<br />
Puh. +358 (0) 207 931340 · Fax +358 (0) 207 931349 · info@hansgrohe.fi · www.hansgrohe.com<br />
Great Britain – <strong>Hansgrohe</strong> · Units D1 and D2 · Sandown Park Trading Estate, Royal Mills GB-Esher · Surrey · KT108BL<br />
Tel. +44 (0)1372 465 655 · Fax +44 (0)1372 470 670 · info@hansgrohe.co.uk www.hansgrohe.co.uk<br />
Portugal – <strong>Hansgrohe</strong> · Rua Antoine de Saint Exupéry Alapraia · P-2765-043 Estoril<br />
Tel. +351 21 4667110 · Fax +351 21 4667119 · hansgrohe@jrb.pt · www.hansgrohe.com<br />
Singapore – <strong>Hansgrohe</strong> Pte. Ltd. · 69 Mohamed Sultan Road · Singapore 239015<br />
Tel. +65 6884 5060 · Fax +65 6884 5070 · info@hansgrohe.com.sg · www.hansgrohe.com.sg<br />
EN-<strong>Axor</strong> <strong>Starck</strong> <strong><strong>Shower</strong>Collection</strong> <strong>Shower</strong> Planing · Form no. 84 120 637 · 10/08/14.7 · Printed in Germany · Subject to technical modifications · Printed on 100% chlorine-free bleached paper.<br />
<strong>Axor</strong>-<strong>Hansgrohe</strong> AG · P.O. Box 1145 · 77757 Schiltach, Germany · Phone: +49 7836 51-0<br />
Fax: +49 7836 51-1300 · info@axor-design.com · www.axor-design.com<br />
4 *paqplj#n-,c-c*