The Magazine of the SAOCA - The Sunbeam Alpine Owners Club of ...
The Magazine of the SAOCA - The Sunbeam Alpine Owners Club of ...
The Magazine of the SAOCA - The Sunbeam Alpine Owners Club of ...

You also want an ePaper? Increase the reach of your titles
YUMPU automatically turns print PDFs into web optimized ePapers that Google loves.
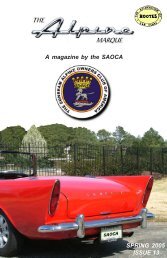
Building an <strong>Alpine</strong> Race Engine<br />
Part I<br />
by Carl Christiansen<br />
<strong>The</strong> building block <strong>of</strong> any race engine begins with a sound engine<br />
block. Begin by "hot tanking" <strong>the</strong> block to remove <strong>the</strong> accumulated<br />
oil and grease. This should be done with all <strong>the</strong> "freeze plugs"<br />
removed as well as <strong>the</strong> oil gallery plugs. By <strong>the</strong> way...before assembling<br />
any parts that flow oil, especially to <strong>the</strong> rocker shafts, if it has an oil hole<br />
blow it clean with compressed air and/or run a "pipe cleaner" thru it to be<br />
sure it's not plugged. Next have <strong>the</strong> block pressure tested to be sure <strong>the</strong><br />
block is not cracked anywhere. <strong>The</strong>n have your machine shop "deck <strong>the</strong><br />
block" to be sure <strong>the</strong> surface that mates with <strong>the</strong> head is flat. Before you<br />
go any fur<strong>the</strong>r "stone" <strong>the</strong> surface <strong>of</strong> <strong>the</strong> block to insure an absolute<br />
smooth surface and also stone <strong>the</strong> main bearing cap registers, just to take<br />
<strong>of</strong>f any burrs that might exist.<br />
<strong>The</strong> number 2 and 4 main caps in <strong>the</strong> <strong>Alpine</strong> engine are subject to breaking<br />
under race conditions(I broke a #2 main cap) so it is very important to have<br />
replacement steel billeted main caps made for those two positions. If a<br />
main cap were to break it would "whip" <strong>the</strong> crankshaft around and could<br />
destroy <strong>the</strong> engine. <strong>The</strong> number 1, 3 and 5 main caps are very sturdy and<br />
do not need to be replaced. Next thing is to have your machine shop<br />
align(line) bore <strong>the</strong> main caps to ensure <strong>the</strong> crankshaft journals have a nice<br />
straight surface to ride on when <strong>the</strong> bearings are installed. I also have rear<br />
main seal housings machined to accomodate FORD "lip-type" rear main<br />
crankshaft seals to stop/slow down oil leaks from that area. Note: <strong>the</strong><br />
crankshaft must be machined smooth also. And at <strong>the</strong> front <strong>of</strong> <strong>the</strong><br />
crankshaft I install a Chevy lip seal in <strong>the</strong> timing chain cover.<br />
Next have your machine shop check <strong>the</strong> alignment <strong>of</strong> <strong>the</strong> cam bearing<br />
registers. If necessary, have <strong>the</strong>m line-bored as you did with <strong>the</strong><br />
crankshaft main bearing caps and install larger cam bearings, if necessary.<br />
Ano<strong>the</strong>r item to replace with a steel billeted part is <strong>the</strong> camshaft retainer.<br />
Two tabs with 1/4-28 bolts hold <strong>the</strong> retainer in place and <strong>the</strong> tabs can, and<br />
will break <strong>of</strong>f, allowing significant movement <strong>of</strong> <strong>the</strong> camshaft. That will<br />
effect <strong>the</strong> ignition timing as well as cause undue wear on <strong>the</strong> camshaft/oil<br />
pump gear.<br />
ISSUE 11 <strong>The</strong> <strong>Alpine</strong> Marque PAGE 23