Download DHL ProView Quick Reference Guide
Download DHL ProView Quick Reference Guide
Download DHL ProView Quick Reference Guide

You also want an ePaper? Increase the reach of your titles
YUMPU automatically turns print PDFs into web optimized ePapers that Google loves.
Web-Based<br />
PC-Based<br />
Integrated<br />
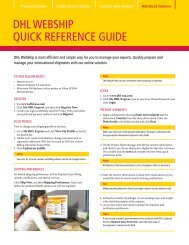
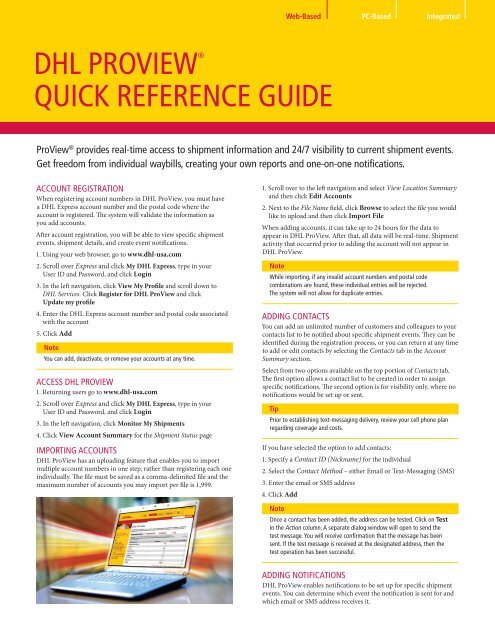
<strong>DHL</strong> WEBSHIP PROVIEW®<br />
QUICK REFERENCE GUIDE<br />
<strong>ProView</strong> ® provides real-time access to shipment information and 24/7 visibility to current shipment events.<br />
Get freedom from individual waybills, creating your own reports and one-on-one notifications.<br />
ACCOUNT REGISTRATION<br />
When registering account numbers in <strong>DHL</strong> <strong>ProView</strong>, you must have<br />
a <strong>DHL</strong> Express account number and the postal code where the<br />
account is registered. The system will validate the information as<br />
you add accounts.<br />
After account registration, you will be able to view specific shipment<br />
events, shipment details, and create event notifications.<br />
1. Using your web browser, go to www.dhl-usa.com<br />
2. Scroll over Express and click My <strong>DHL</strong> Express, type in your<br />
User ID and Password, and click Login<br />
3. In the left navigation, click View My Profile and scroll down to<br />
<strong>DHL</strong> Services. Click Register for <strong>DHL</strong> <strong>ProView</strong> and click<br />
Update my profile<br />
4. Enter the <strong>DHL</strong> Express account number and postal code associated<br />
with the account<br />
5. Click Add<br />
Note<br />
You can add, deactivate, or remove your accounts at any time.<br />
ACCESS <strong>DHL</strong> PROVIEW<br />
1. Returning users go to www.dhl-usa.com<br />
2. Scroll over Express and click My <strong>DHL</strong> Express, type in your<br />
User ID and Password, and click Login<br />
3. In the left navigation, click Monitor My Shipments<br />
4. Click View Account Summary for the Shipment Status page<br />
IMPORTING ACCOUNTS<br />
<strong>DHL</strong> <strong>ProView</strong> has an uploading feature that enables you to import<br />
multiple account numbers in one step, rather than registering each one<br />
individually. The file must be saved as a comma-delimited file and the<br />
maximum number of accounts you may import per file is 1,999.<br />
1. Scroll over to the left navigation and select View Location Summary<br />
and then click Edit Accounts<br />
2. Next to the File Name field, click Browse to select the file you would<br />
like to upload and then click Import File<br />
When adding accounts, it can take up to 24 hours for the data to<br />
appear in <strong>DHL</strong> <strong>ProView</strong>. After that, all data will be real-time. Shipment<br />
activity that occurred prior to adding the account will not appear in<br />
<strong>DHL</strong> <strong>ProView</strong>.<br />
Note<br />
While importing, if any invalid account numbers and postal code<br />
combinations are found, these individual entries will be rejected.<br />
The system will not allow for duplicate entries.<br />
ADDING CONTACTS<br />
You can add an unlimited number of customers and colleagues to your<br />
contacts list to be notified about specific shipment events. They can be<br />
identified during the registration process, or you can return at any time<br />
to add or edit contacts by selecting the Contacts tab in the Account<br />
Summary section.<br />
Select from two options available on the top portion of Contacts tab.<br />
The first option allows a contact list to be created in order to assign<br />
specific notifications. The second option is for visibility only, where no<br />
notifications would be set up or sent.<br />
Tip<br />
Prior to establishing text-messaging delivery, review your cell phone plan<br />
regarding coverage and costs.<br />
If you have selected the option to add contacts:<br />
1. Specify a Contact ID (Nickname) for the individual<br />
2. Select the Contact Method – either Email or Text-Messaging (SMS)<br />
3. Enter the email or SMS address<br />
4. Click Add<br />
Note<br />
Once a contact has been added, the address can be tested. Click on Test<br />
in the Action column. A separate dialog window will open to send the<br />
test message. You will receive confirmation that the message has been<br />
sent. If the test message is received at the designated address, then the<br />
test operation has been successful.<br />
ADDING NOTIFICATIONS<br />
<strong>DHL</strong> <strong>ProView</strong> enables notifications to be set up for specific shipment<br />
events. You can determine which event the notification is sent for and<br />
which email or SMS address receives it.
Event type descriptions:<br />
• Picked Up – <strong>DHL</strong> has received the shipment from the sender and<br />
scanned the waybill barcode to begin tracking<br />
• In Transit – the shipment is moving between origin and<br />
destination in the <strong>DHL</strong> Network<br />
• Clearance Delay – the shipment is being held in customs for<br />
document and content review<br />
• Customs Clearance – the shipment has been cleared by customs<br />
for continued movement<br />
• Exception – this is a checkpoint indicating the shipment progress<br />
has been impacted, such as shipment refusal, bad address, etc.<br />
• Out for Delivery – the shipment is with a <strong>DHL</strong> Courier in route to<br />
the receiver anticipating delivery<br />
• Delivered – the shipment has arrived at the final destination<br />
address and <strong>DHL</strong> tracking has concluded<br />
1. Notifications can be set up during the registration process or<br />
modified by selecting the Notifications tab<br />
2. In the dropdown menu under When My Package Is you can select an<br />
Event Type<br />
3. Choose the Contact ID to be notified<br />
4. For an email digest, designate the specific time for the digest to<br />
be sent<br />
5. Click Add<br />
Note<br />
If an email digest is NOT preferred, leave the time column blank.<br />
Tip<br />
The addition of individual notifications can result in a high number of<br />
daily messages for high-volume shippers.<br />
Example: Individual notifications for 1,000 delivered packages will<br />
result in 1,000 separate emails/SMS messages. In this case, the most<br />
desirable digest would be email.<br />
SHIPMENT STATUS<br />
The Shipment Status tab displays the total number of each shipment<br />
event divided by the shipment billing category. There are two specific<br />
billing categories, Outbound and Receiver and 3rd Party Billed.<br />
Categories are assigned based on how the registered accounts were<br />
billed for the specific shipments:<br />
• Outbound – the sender’s account has been assigned responsibility<br />
for payment<br />
• Receiver Billed – the waybill designated the receiver’s account to<br />
be billed for the shipment<br />
• 3rd Party Billed – the shipment has been pre-approved for<br />
payment by someone other than the sender or the receiver<br />
PROVIEW REPORTING<br />
There are several different pre-designed lists available in the left<br />
navigation pane created to provide at-a-glance convenience, as<br />
well as complete shipment detail. Each list has a quick description<br />
of the information it is providing. For the purpose of this quick<br />
reference guide we will help you get familiar with utilizing the<br />
Shipment Status view.<br />
VIEWING SHIPMENT LIST<br />
In <strong>DHL</strong> <strong>ProView</strong>, from the Shipment Status page you can access<br />
shipment lists for a specific event by simply clicking on the total<br />
number of shipments hyperlink. Information is organized by<br />
the tracking event and classified into billing categories.<br />
Note<br />
The lists do not combine billing types, to receive this information utilize a<br />
predesigned list provided in the left navigation pane.<br />
The shipment list displays all waybills picked up with the <strong>DHL</strong> Express<br />
account numbers you registered for up to 90 days rolling. The easy-toread<br />
format displays 25 shipment records per page with specific details.<br />
You can easily sort and filter your view of the shipment list.<br />
1. Select search criteria from the Find Shipment By pull-down menu<br />
2. Enter in a keyword to narrow the results of the shipment list<br />
3. After your criteria has been entered, click Go<br />
Tip<br />
Click on any of the individual hyperlinked waybill numbers for the<br />
tracking information to be displayed.<br />
OVERRIDING NOTIFICATIONS<br />
From the Shipment List, you can override specific shipment notifications<br />
previously established for contacts. Use the override function to create<br />
updates that apply to some shipments but not to others. This feature<br />
allows you to tailor your updates for specific shipments and individuals.<br />
1. Select the shipment to override and click the Box in the first column<br />
2. Click Override Selected Items, at the bottom right-hand corner of<br />
the list<br />
3. A new window will open and current notifications can be deleted or<br />
new ones added<br />
DOWNLOAD DATA<br />
You can download any list, including custom lists you create using the<br />
Find bar.<br />
Scroll to the bottom of the list and click <strong>Download</strong> List for all the<br />
data to be provided in a spreadsheet-ready format.<br />
ACCESSING THE LOG<br />
The Log File will display details regarding notifications that have been<br />
sent in the past 10 days. Details included are date and time, waybill,<br />
shipment event, contact method, and the contact information where<br />
the notification was sent.<br />
1. Access the log by clicking on the Log tab from the Shipment<br />
Status view<br />
2. Select search criteria from the Find Shipment By pull-down menu<br />
3. Enter in a keyword to narrow the results of the log file<br />
4. After your criteria has been entered, click Go<br />
OBTAINING ASSISTANCE<br />
For additional questions, including other information about <strong>DHL</strong> Express,<br />
please contact Customer Service at 1-800-CALL <strong>DHL</strong> (1-800-225-5345).<br />
Next Step<br />
Watch the demo and register at www.dhl-usa.com/proview<br />
<strong>DHL</strong> Express<br />
1-800-CALL <strong>DHL</strong><br />
1-800-225-5345<br />
www.dhl-usa.com<br />
All services may not be available in all areas and are subject to <strong>DHL</strong>’s Terms and Conditions as published at www.dhl-usa.com<br />
© 2011 <strong>DHL</strong> Express (USA), Inc. All rights reserved. 10/11 PT03447