Wilderness Skills - Olympia Mountaineers
Wilderness Skills - Olympia Mountaineers
Wilderness Skills - Olympia Mountaineers

You also want an ePaper? Increase the reach of your titles
YUMPU automatically turns print PDFs into web optimized ePapers that Google loves.
<strong>Olympia</strong> Branch of The <strong>Mountaineers</strong><br />
Alpine Scrambling, Climbing and Hiking Programs<br />
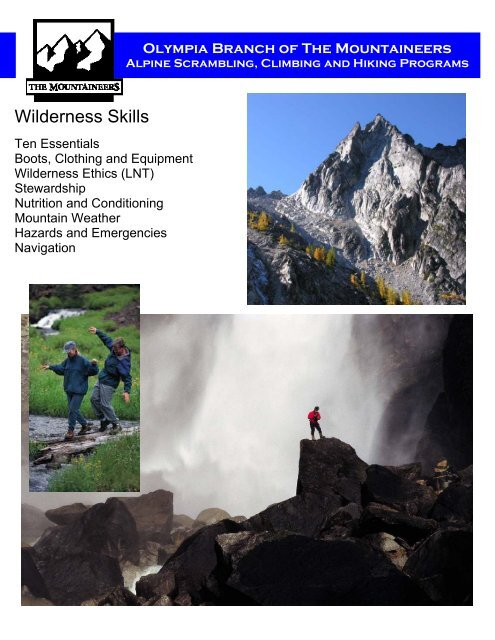
<strong>Wilderness</strong> <strong>Skills</strong><br />
Ten Essentials<br />
Boots, Clothing and Equipment<br />
<strong>Wilderness</strong> Ethics (LNT)<br />
Stewardship<br />
Nutrition and Conditioning<br />
Mountain Weather<br />
Hazards and Emergencies<br />
Navigation
Open to all - Mountaineer members and the general public<br />
<strong>Wilderness</strong> <strong>Skills</strong> is designed to prepare area outdoor enthusiasts for hiking<br />
or backpacking in the forests, mountains and trails of the Pacific Northwest.<br />
This course is also the foundation or first Module for the Alpine Scrambling<br />
Course and the Basic Climbing Courses.<br />
The <strong>Wilderness</strong> <strong>Skills</strong> Course consists of three evening presentations and<br />
one Navigation and Outdoor <strong>Skills</strong> Workshop (field trip) to a local park site<br />
for practice of the new skill.<br />
Tuesday, January 20<br />
Lecture 1: Knowing the essentials, clothing and equipment<br />
10 Essentials, clothing, boots and equipment for day hikes or<br />
overnight trips - Examine traditional clothing and equipment and the<br />
latest high-tech gear and low-tech alternatives<br />
Tuesday, January 27<br />
Lecture 2: Knowing how to prepare for the <strong>Wilderness</strong><br />
<strong>Wilderness</strong> Ethics/Leave No Trace – Nutrition – Physical<br />
Conditioning – Intro to First Aid – Preventing Injuries and Handling<br />
Emergencies<br />
Tuesday, February 3<br />
Lecture 3: Knowing the <strong>Wilderness</strong> environment.<br />
Avoiding hazards and understanding weather for safe, enjoyable<br />
travel - Where to Go and how to get to the "Great Places to Go" in<br />
the Pacific Northwest<br />
Tuesday, February 10<br />
Lecture 4: Navigation (Map and Compass)<br />
Introduction to Backcountry Navigation provides hands-on instruction<br />
in map reading, using a compass, navigating in the backcountry,<br />
terrain association, what to do if lost and how, when and where to<br />
use GPS<br />
Saturday, February 14<br />
Outdoor Workshop - Learn and practice new skills<br />
This field trip takes the students to a park to learn and practice<br />
their new skills on an outdoor challenge course where they<br />
learn using the guided Discovery instructional method while<br />
becoming proficient with the 10 essential.<br />
To earn a course completion certificate, students will also<br />
accompany Mountaineer leaders on a hike or backpacking trip<br />
of their choosing.<br />
<strong>Wilderness</strong> <strong>Skills</strong> Module Page 2 of 73<br />
<strong>Olympia</strong> <strong>Mountaineers</strong> - Hiking, Alpine Scrambling and Basic Climbing
Table of Contents<br />
Introduction ................................................................................................................................................. 4<br />
Student Manual and Course Text ............................................................................................................. 13<br />
The Ten Essential Systems ...................................................................................................................... 14<br />
Clothing and Equipment ……………………………………………………………………………………………18<br />
Equipment Checklist…………………………………………………………………………………………………31<br />
How to Choose a Daypack ....................................................................................................................... 32<br />
Purchasing Clothes and Equipment .......................................................................................................... 35<br />
<strong>Wilderness</strong> Ethics ..................................................................................................................................... 38<br />
Mountain Health & Safety - hypothermia, giardia, safety, blisters, etc. ...................................................... 43<br />
Conditioning ............................................................................................................................................. 44<br />
Staying Safe and Healthy in the Hills ........................................................................................................ 57<br />
Eat to Win ................................................................................................................................................. 53<br />
What is MOFA?............................................................................................................................................58<br />
Hazards……………………………………………………………………………………………………………….60<br />
Navigation Fundamentals ......................................................................................................................... 67<br />
APPLICATION FOR GRADUATION ......................................................................................................... 73<br />
<strong>Wilderness</strong> <strong>Skills</strong> Module Page 3 of 73<br />
<strong>Olympia</strong> <strong>Mountaineers</strong> - Hiking, Alpine Scrambling and Basic Climbing
<strong>Wilderness</strong> <strong>Skills</strong><br />
<strong>Olympia</strong> <strong>Mountaineers</strong><br />
Introduction<br />
Overview<br />
Welcome to <strong>Wilderness</strong> <strong>Skills</strong> and the <strong>Olympia</strong> <strong>Mountaineers</strong>. This is an exciting event in the history of the<br />
outdoor training program of the <strong>Olympia</strong> Branch of The <strong>Mountaineers</strong>. You are the first students to take the<br />
<strong>Wilderness</strong> <strong>Skills</strong> Course, and we are as eager as you to get started on a successful new adventure. After<br />
decades of offering the best mountaineering and outdoor training programs in the South Sound area, the<br />
<strong>Olympia</strong> <strong>Mountaineers</strong> developed a new approach to offering our community courses and information for<br />
getting out into the wilderness, enjoying the alpine environment, reaching the summit of some of North<br />
America’s most revered mountains, or simply enjoying the trails in our local and state parks.<br />
In response to the demanding personal schedules and the growing diversity of interests of today’s outdoor<br />
enthusiast, the traditional course structure has been redesign into a series of shorter, subject matter specific<br />
modules. This “modular approach” offers in-demand classes (modules) that are available more often to<br />
provide easier access, reduced time commitment, greater flexibility and customer friendly training options.<br />
<strong>Wilderness</strong> <strong>Skills</strong> is the first course to be offered in the new modular approach.<br />
[NOTE: As a point of clarification, this text may refer to <strong>Wilderness</strong> <strong>Skills</strong> as a course or a module. As the first<br />
part of Basic Climbing or Alpine Scrambling it is a Module and as class in itself it is a Course. ]<br />
The <strong>Olympia</strong> <strong>Mountaineers</strong> created the new <strong>Wilderness</strong> <strong>Skills</strong> to provide both a quality introduction to hiking in<br />
the backcountry and a foundation for other mountaineering courses and activities of the club. This course is<br />
designed to meet the instructional needs of people with a wide range of interests, skills and aspirations. For<br />
some students this may be the only course needed to furnish them with the information, skills and selfconfidence<br />
to enjoy a life-time of safe, personally rewarding travel in the backcountry. For others, <strong>Wilderness</strong><br />
<strong>Skills</strong> will be the first of many adventures that includes a membership in The <strong>Mountaineers</strong>.<br />
<strong>Wilderness</strong> <strong>Skills</strong> Module Page 4 of 73<br />
<strong>Olympia</strong> <strong>Mountaineers</strong> - Hiking, Alpine Scrambling and Basic Climbing
Club members have access to a broad range of mountaineering and outdoor travel courses and an opportunity<br />
to meet new friends and travel partners who may accompany them on trails, across water routes and to<br />
mountain summits throughout the Pacific Northwest and beyond.<br />
The <strong>Wilderness</strong> <strong>Skills</strong> course offers a solid introduction to safe backcountry travel principles and skills in a<br />
light-hearted and flexible atmosphere. Your time in the mountains should be fun and engender a feeling of<br />
camaraderie. This sense of community will serve to enhance your enjoyment of backcountry travel. For those<br />
who are joining The <strong>Mountaineers</strong>, this course provides a first-rate illustration of the clubs’ training system and<br />
spirit of volunteerism that encourages and supports the personal growth of member. For a few students, this<br />
introductory course will also lay a foundation for leadership responsibilities and possibly a role as a future<br />
course instructor and program leader. Each course demonstrates the critical role that volunteers play in every<br />
aspect of club. Today’s students will become tomorrow’s instructors and leaders.<br />
The Course Committee, along with the instructors, lecturers, field trip and hike leaders look forward to<br />
presenting this course information and to introducing students to new skills. The course instructors are also<br />
interested in learning from students. Everyone brings new information to the class, including their own personal<br />
experiences, perspectives and values for enjoying the freedom of the hills. Realize your input is important to<br />
your classmates and instructors. We appreciate your ideas, comments and full participation.<br />
Course Description<br />
<strong>Wilderness</strong> <strong>Skills</strong> provides information and hands on experience with the top twenty+ topics considered<br />
important for safe adventures in the backcountry. The lectures are intended for all audiences and include<br />
practical tips and personal experiences to help you get started right or to expand your outdoor abilities. The<br />
lecture and interactive presentations include opportunities to learn and practice wilderness skills, to examine<br />
an assortment of clothing and equipment and to enjoy visual presentations of recent trips through<br />
Washington’s breathtakingly beautiful backcountry. Student participation and interaction are encouraged.<br />
The <strong>Wilderness</strong> <strong>Skills</strong> Course consisting of 3 evening presentations and 1Navigation and Outdoor <strong>Skills</strong><br />
Workshop (field trip) to a local park site for practice of the new skill.<br />
Tuesday, January 20<br />
Lecture 1: Knowing the essentials, clothing and equipment<br />
10 Essentials, clothing, boots and equipment for day hikes or overnight trips - Examine traditional clothing and<br />
equipment and the latest high-tech gear and low-tech alternatives<br />
Tuesday, January 27<br />
Lecture 2: Knowing how to prepare for the <strong>Wilderness</strong><br />
<strong>Wilderness</strong> Ethics/Leave No Trace – Nutrition – Physical Conditioning – Intro to First Aid – Preventing Injuries<br />
and Handling Emergencies<br />
Tuesday, February 3<br />
Lecture 3: Knowing the <strong>Wilderness</strong> environment.<br />
Avoiding hazards and understanding weather for safe, enjoyable travel - Where to Go and how to get to the<br />
"Great Places to Go" in the Pacific Northwest<br />
Tuesday, February 10<br />
Lecture 4: Navigation (Map and Compass)<br />
Introduction to Backcountry Navigation provides hands-on instruction in map reading, using a compass,<br />
navigating in the backcountry, terrain association, what to do if lost and how, when and where to use GPS<br />
Saturday, February 14<br />
Outdoor Workshop - Learn and practice new skills<br />
This field trip takes the students to a park to learn and practice their new skills on an outdoor challenge course.<br />
<strong>Wilderness</strong> <strong>Skills</strong> Module Page 5 of 73<br />
<strong>Olympia</strong> <strong>Mountaineers</strong> - Hiking, Alpine Scrambling and Basic Climbing
Requirements for a Course Certificate of Completion<br />
There are no formal prerequisites; however, prospective students are advised that hiking in the Pacific<br />
Northwest requires good physical condition, a positive mental attitude, a collection of quality outdoor clothing<br />
and equipment, and a significant commitment of time and effort. Participation in all lectures and field trip is<br />
required for graduation (course certificate). Students who miss a lecture or the field trip may be forced to<br />
complete the course by making up the lesson during a future course, unless participation at another branch<br />
can be arranged.<br />
This strict requirement applies to all Mountaineer courses.<br />
Each year a number of students are disappointed to<br />
discover they are not going to be able to complete the<br />
course in their first try. For those with a very busy<br />
schedule, it’s reasonable to expect that you may need to<br />
attend a lecture or field trip at another branch or during a<br />
later course offered in <strong>Olympia</strong>.<br />
Sometimes, students loose heart, gradually withdraw and<br />
eventually drop out when they must seek alternative class<br />
dates or locations. We’ll try hard to find students alternative<br />
classes so that they do not have to leave unfulfilled.<br />
Should you discover you have a scheduling conflict or<br />
other questions about course requirements, please consult<br />
with the <strong>Wilderness</strong> <strong>Skills</strong> Course Chair at your earliest<br />
opportunity.<br />
On the bright side, most two-year students appreciate the extra attention of a longer journey to the summit<br />
(graduation). We know you have many demands on your time so the <strong>Wilderness</strong> <strong>Skills</strong> instructors have<br />
compiled a list of the very few alternatives possible for completing the course.<br />
Generally students need a second opportunity to complete a course because of the following obstacles:<br />
Problem: The student was unable to attend all classes or the field trip because of a conflict.<br />
Solution: CAREFULLY REVIEW THE COURSE SCHEDULE and be sure to set aside the necessary dates<br />
and time required. Should a scheduling conflict arise, be sure to contact the Course Chair as soon<br />
as possible to see if there are any alternatives. Unfortunately the alternatives are few in number and<br />
difficult to arrange.<br />
Problem: The student was unable to complete the required hike or backpacking trip.<br />
Solution: Each month the club’s magazine, The Mountaineer, contains a large section called the Go Guide<br />
that lists outings for club members. The Go Guide lists hikes and backpack as well as climbs, alpine<br />
scrambles, sea kayaking trips and others outings for each of the seven western Washington<br />
branches of the club. Students will be eligible to participate in almost any of the hikes and most<br />
backpacking trips, unless there are special skills or other requirements. Remember, you will be<br />
competing with other club members for an opportunity to participate on such trips, so register early.<br />
In addition to the monthly list, the <strong>Olympia</strong> Branch’s Hiking Committee is planning to add several<br />
hikes for <strong>Wilderness</strong> <strong>Skills</strong> students. These hikes will be announced at lectures and you will have an<br />
opportunity to sign up for one at the lectures.<br />
Problem: The student experiences an emergency or simply forgets the class.<br />
Solution: Contact the Course Chair and don’t give up. We’ll try to think of something. If you find you must wait<br />
for another module to complete a course requirement, consider taking one of the other excellent<br />
courses the branch offers such as Navigation or Sea Kayaking. Many of the most committed<br />
graduates take two years to complete a course and we’re all better off for it.<br />
<strong>Wilderness</strong> <strong>Skills</strong> Module Page 6 of 73<br />
<strong>Olympia</strong> <strong>Mountaineers</strong> - Hiking, Alpine Scrambling and Basic Climbing
Course Procedures in Review<br />
Travel in the wilderness is demanding even for skilled outdoor<br />
professional with years of experience. Living in the natural world<br />
requires knowledge, adaptability and resourcefulness because our<br />
natural environment is not under our control. While we are actually outside to play, we must also be ready to<br />
respond to the very serious threats we may experience in the natural world, where we are only visitors.<br />
Teaching a diverse population to explore the wilderness or climb mountains with the backcountry as a<br />
classroom requires structure, discipline and rules that are based on sound and safe practices tested over years<br />
of instruction. At times, it may seem there are too many rules. We expect that you may get frustrated with the<br />
inflexibility of the course instructors. However, with nearly a century of training in mountaineering skills, The<br />
<strong>Mountaineers</strong> have learned that these rules make it possible for students to be successful in a mountain<br />
environment filled with calculated risks. Here are the rules you will need to follow.<br />
1. Be on time at the designated location. The instructors and other students are anxious to get started<br />
and will not be able to wait more than 5 minutes for late arrivals.<br />
2. Be courteous to the lecturers and trip leaders. They are volunteering their time and experience to<br />
teach you. Listen to them.<br />
3. Follow instructions. The information being presented and demonstrated to you is based upon sound<br />
wilderness travel and outdoor living techniques. There may be more than one way of doing some of the<br />
techniques presented to you, but for the purpose of consistent instruction and safety, standardized<br />
techniques will be taught.<br />
4. Do not litter. Carry out everything you brought in.<br />
5. Thoroughly learn and practice The Mountaineer Standards and <strong>Wilderness</strong> Ethics presented in<br />
this manual.<br />
6. Be patient and expect that you will already know some of the material to be presented. Because<br />
students come to the course with vastly different backgrounds and experiences, this introductory<br />
course is designed to bring everyone to a common level of understanding, skills and techniques. Some<br />
students will be hearing and learning nearly everything for the first time while others, with more<br />
experiences, will be able to contribute to the training.<br />
<strong>Wilderness</strong> <strong>Skills</strong> Module Page 7 of 73<br />
<strong>Olympia</strong> <strong>Mountaineers</strong> - Hiking, Alpine Scrambling and Basic Climbing
Schedule Times and Attendance<br />
Please be on time to lectures, field trips, and hikes.<br />
You must sign in to receive credit for lectures. You must attend all lectures and field<br />
trips to graduate from the course. Lectures start promptly at 7:00 p.m. Please be<br />
prepared by completing any required reading and practice.<br />
Lectures are nearly impossible to make up, so plan accordingly.<br />
Please review your personal commitments and schedule early in the course. If you must miss one of the<br />
Lectures or the Outdoor Workshop, consult with the Student Liaison for instructions.<br />
Outdoor Workshop<br />
The <strong>Wilderness</strong> <strong>Skills</strong> Outdoor Workshop (Field Trip) has been designed to provide you with some practical<br />
experience in wilderness travel and outdoor living techniques prior to the time they are actually needed. In<br />
order to meet the intent of the workshop, the following procedures have been adopted:<br />
Hikes<br />
1. Student must have attended all lectures in order to participate in the outdoor workshop or to get<br />
credit for the required outing (hike or backpacking trip).<br />
2. Sign-up for the outdoor workshop or a hike with the designated person before the trip. Early sign-up is<br />
necessary to provide adequate time to prepare detailed trip plans according to the size of the group.<br />
3. Bring the equipment required. A list of the necessary equipment for the outdoor workshop or for an<br />
experience outing (hike or backpacking trip) is provided later in this manual and will be reviewed prior to<br />
the events. Mark your equipment with your name or initials so that it will stand up to abrasion and<br />
moisture. Each student must have his/her own individual equipment and lunch.<br />
4. Be cautious. There is always a degree of risk in any outdoor activity. Pay attention to and follow your<br />
instructor's advice. Your safety and enjoyment are directly related to your cooperation.<br />
5. Stay until the finish. No student will be permitted to leave the outdoor workshop practice site until the<br />
entire class has safely returned or the student is released by the workshop leaders. The leaders will be<br />
taking a role call to be sure everyone is accounted for. Those who leave unannounced cause<br />
considerable work and anxiety while the group searches.<br />
6. Be responsible. While on any trip, you automatically assume a responsibility to your fellow students<br />
and instructors that takes precedence over any other personal obligation.<br />
Experience outings (hikes or backpacking trip) are designed to provide you opportunities to put into practice<br />
the skills you have learned through course lectures and field trips. For this reason, the following additional<br />
procedures have been adopted:<br />
1. Always leave information about your destination, expected return time, and the field trip leader's phone<br />
number with a responsible person. Instruct this person that if you are unreasonably late in returning,<br />
they should call the LEADER'S contact phone number and NOT emergency organizations (e.g., the<br />
Sheriff's Department).<br />
2. Pay your fair share of transportation costs.<br />
3. The Hiking Committee and/or the trip leader will arrange sign-ups for experience trips. Sign-ups will<br />
close at 9:00 p.m. two (2) days prior to the trip. When you sign-up, indicate whether you can take<br />
passengers or need a ride. The trip leader will attempt to match riders with drivers whenever possible.<br />
Notify the trip leader of ANY CHANGES in the transportation arrangements you originally requested.<br />
<strong>Wilderness</strong> <strong>Skills</strong> Module Page 8 of 73<br />
<strong>Olympia</strong> <strong>Mountaineers</strong> - Hiking, Alpine Scrambling and Basic Climbing
How to read and use the GO Guide<br />
The following is a typical hike listing from the monthly Go Guide. The various parts are numbered with<br />
explanations in the key below.<br />
Sept. 10th,Sat. 1 -Fremont Lookout 2 (E) 3 (GT Mt. Rainier E.) 4 5.5 mi.,1200’<br />
gain. 5 Superb view of Mt. Rainier. Meet 9:30 a.m. at Martin Way P&R. Leader: Jane Doe, 7 360-754-<br />
1669. 8 (s8/30-9/7) 9 MR 10<br />
1 Date and date of trip<br />
2 Destination<br />
3 Trip difficulty classification, in this case, easy<br />
4 Type of topographical map to be used<br />
5 Round-trip distance and elevation gain<br />
6 Time and location of meeting point<br />
7 Leader’s name<br />
8 Leader’s phone number<br />
9 For trips handled by Seattle switchboard, first day to sign up with switchboard, last day to cancel<br />
10 Abbreviated title of guidebook (see guidelines in magazine for coding)<br />
How to sign up for a Hike or Backpack Trip -- <strong>Olympia</strong> Branch<br />
Call the leader, preferably at least a week before the trip date. For <strong>Olympia</strong> trips, you may sign up directly with<br />
the leader by phone call or e-mail. Please note that, as good as our leaders are, they are not clairvoyant. When<br />
leaving a phone message or e-mail, please leave your first and last name, your phone number with area code<br />
or e-mail address, your <strong>Mountaineers</strong> Branch affiliation, and the date and destination of the trip you are<br />
interested in. If your message is incomplete, or unclear, the leader may not be able to return your call and you<br />
will miss out on the trip.<br />
If you need to cancel, call the leader as early prior to the trip date as you can. This will enable the leader to<br />
add people from the waiting list. Because there is a limit to how many people can go on a trip, it is important to<br />
release your spot as soon as you know you will have to cancel. If the hike is full when you call the leader, you<br />
will be placed on a waiting list and called if a space opens up.<br />
Carpooling. t the meeting place, the leader will ask for volunteers to drive, riders should be prepared to pay<br />
the driver 5-8 cents per mile. Be prepared for the possibility you might need to drive, with your fuel tank full and<br />
your car in good repair.<br />
The <strong>Mountaineers</strong> Policies and Standards (As applicable for <strong>Wilderness</strong> <strong>Skills</strong>)<br />
All members of "The <strong>Mountaineers</strong>", in order to attain the Club's purposes -- "to explore, study, preserve<br />
and enjoy the beauty of Northwest America" -- in a spirit of good fellowship, shall subscribe to the following<br />
standards:<br />
1. Exercise personal responsibility and conduct themselves on Club activities and premises in a manner<br />
which will not impair the safety of the party, or prevent the collective participation and enjoyment of<br />
others.<br />
2. Respect private property.<br />
3. Enter the outdoors as a visitor, leaving behind no debris, environmental scars, or other indications of<br />
their visit, which would reduce the enjoyment of those who follow.<br />
4. Minimize the environmental impact on the outdoor by using campfires only in designated areas and<br />
extinguishing completely after use; conducting human sanitation and washing away from water<br />
courses; and carrying out all solid waste brought into the outdoors.<br />
5. Pets, firearms, or any other item(s), which would impair the safety or enjoyment of others, shall not be<br />
brought on Mountaineer premises or taken on Club activities.<br />
<strong>Wilderness</strong> <strong>Skills</strong> Module Page 9 of 73<br />
<strong>Olympia</strong> <strong>Mountaineers</strong> - Hiking, Alpine Scrambling and Basic Climbing
6. All applicable and specific regulations of governmental agencies which affect Mountaineer activities and<br />
property must be obeyed.<br />
7. Alcohol, illegal drugs and any drugs or medications incompatible with Mountaineer<br />
activities are not allowed on any outdoor activities, and are cause for dismissal from<br />
the course. This policy applies to students, leaders, and organizers, and includes all<br />
Committee-sponsored activities at The <strong>Mountaineers</strong> lodges, course field trips, and<br />
outings.<br />
Course Expectations<br />
During this course and future outings, you, your classmates and your instructors will invest time, energy, and<br />
money in seeing you through to graduation. We are confident that you will find your investment will return large<br />
dividends in years of safe, enjoyable and satisfying outdoor experiences. Because we take your investment<br />
seriously, we recommend that you carefully this section to be sure you understand your commitment and our<br />
expectations. We want you to have a realistic understanding of all that the course requires and an accurate<br />
expectation of what you will be learning and doing during and after the course.<br />
Your <strong>Wilderness</strong> <strong>Skills</strong> instructors are deeply committed to meeting expectations and will work hard to ensure<br />
students learn and receive their money’s worth, within reason. Some start with basic instructional courses with<br />
the intent of advancing to the Alpine Scrambling or the Basic Climbing Course. Others are satisfied with the<br />
basics of outdoor travel. In either case, it is our intent to teach mountaineering skills in such a manner that<br />
students who wish to go no further than hiking or backpacking, may see that activity as an end in itself, rather<br />
than feel an obligation to advance to Alpine Scrambling of technical climbing. Each student needs to take a few<br />
minutes to complete the Course Expectation form on the following pages to help articulate his or her<br />
expectations for taking the course. This form gives students an opportunity to rank their interests in the various<br />
course topics as well as their own personal motivations for participating in the course. Where possible, the<br />
instructors will use your responses to align this and future courses toward students common expectations.<br />
<strong>Wilderness</strong> <strong>Skills</strong> Module Page 10 of 73<br />
<strong>Olympia</strong> <strong>Mountaineers</strong> - Hiking, Alpine Scrambling and Basic Climbing
<strong>Wilderness</strong> <strong>Skills</strong> Course Content<br />
Course Expectations<br />
When you enrolled, how important were these topics to you<br />
Very Important<br />
Unimportant<br />
Topics of Instruction 5 4 3 2 1<br />
The Ten Essentials of outdoor/ wilderness<br />
travel<br />
Selection and use of clothing and equipment<br />
Learning to travel efficiently in winter/snow<br />
conditions<br />
Learning to travel efficiently in the backcountry<br />
and mountains<br />
Learning route finding skills for adventures in<br />
backcountry<br />
Learning to Climb on Rock<br />
Learning to Climb on Snow and Ice<br />
Learning Navigation skills (Map and Compass)<br />
Learning to identify Hazards and Hazardous<br />
Weather<br />
Learning skill to go Off-Trail<br />
Getting back in shape<br />
Finding a (any) way to get outdoors more often<br />
Building greater self-confidence in the<br />
outdoors<br />
Enjoying thrill of summiting without the risks of<br />
climbing<br />
Finding directions to Columbian Hall<br />
Preparing to travel/climb with non-Mountaineer<br />
friends<br />
Meeting people to enjoy and share the<br />
freedom of the hills<br />
Take a step toward leading trips with friends or<br />
The Mountaineer<br />
Preparing to take the Scrambling or<br />
Climbing Course in the future<br />
<strong>Wilderness</strong> <strong>Skills</strong> Module Page 11 of 73<br />
<strong>Olympia</strong> <strong>Mountaineers</strong> - Hiking, Alpine Scrambling and Basic Climbing
For decades the <strong>Olympia</strong> Branch of the <strong>Mountaineers</strong> has offered a variety of outdoor training courses<br />
including: Alpine Scrambling, Basic Climbing, Winter Travel, Sea Kayaking and other human powered travel<br />
courses. We believe we are serving a need of South Sound residents, but we may be misleading ourselves.<br />
What motivates you to participate is very important to us. What attracted you to the course, how did you heard<br />
about the courses and why did you decided to enroll? Your thoughts will add reality to our perceptions.<br />
We’d really appreciate knowing<br />
this stuff.<br />
Please Answer Something Below.<br />
Your comments are very useful and our only source of authentic student<br />
background information.<br />
How did you hear about this<br />
year’s course?<br />
How long have you been<br />
considering taking this course?<br />
Why did you decided to enroll<br />
this year?<br />
Did you know which course you<br />
favored prior to the Orientation?<br />
What method(s) of promotion do you recommend for future courses?<br />
Postings at local Outdoor<br />
Retailers? Please specify.<br />
Postings at local Parks and<br />
Recreation Departments?<br />
Postings at local Colleges and<br />
High Schools? Please specify<br />
Postings at work sites. Please<br />
specify.<br />
Posting at local grocery or retail<br />
stores? Please specify.<br />
Postings at local community<br />
bulletin boards? Please specify.<br />
Radio Broadcast? Please specify<br />
station(s).<br />
Publish in local Organization<br />
Newsletters? Please specify.<br />
Person-to-Person (student to<br />
friend)?<br />
Distribute flyers or written course<br />
outline? Please specify location.<br />
How valuable<br />
5 = High<br />
1 = Low<br />
Other<br />
<strong>Wilderness</strong> <strong>Skills</strong> Module Page 12 of 73<br />
<strong>Olympia</strong> <strong>Mountaineers</strong> - Hiking, Alpine Scrambling and Basic Climbing
Student Manual and Course Text<br />
The <strong>Wilderness</strong> <strong>Skills</strong> Committee has developed this student manual to provide you with a course overview, to<br />
enhance each lecture and the outdoor workshop and to explain how to successfully complete all the<br />
requirements for graduation. This manual contains essential information for your enjoyment and success in this<br />
course. Students should carefully review the pertinent information in the manual before each lecture and<br />
before the outdoor workshop.<br />
Course Text Books<br />
You are not required to purchase a text book for this course. Most mountaineering courses conducted around<br />
the nation and many others parts of the world have adopted Mountaineering - The Freedom of the Hills,<br />
published by The <strong>Mountaineers</strong> as the course text book. The Freedom of the Hills is considered the leading<br />
text in North American mountaineering. Should you decide to go on in mountaineering you will find The<br />
Freedom of the Hills (7th Edition) to be an excellent text and source of information long after you have<br />
completed your first or your fifth course of instruction.<br />
There are a number of Hiking and Backpacking guides published by The <strong>Mountaineers</strong> that are great<br />
references texts and are written such that they follow and support the format of this course. A brief list of such<br />
reference books published by The <strong>Mountaineers</strong> includes:<br />
<strong>Wilderness</strong> Basics – from the Sierra Club<br />
Day Hiker’s Handbook – from Backpacker Magazine, © 2003 by Michael Lanza<br />
Trekker’s Handbook – from Backpacker Magazine, © 2003 by Buck Tilton<br />
Trekking Washington – from Backpacker Magazine © 2003 by Mike Woodmansee<br />
Leave No Trace – from Magazine © 2003 by Annette McGivney<br />
In addition to the many advice and reference guides The <strong>Mountaineers</strong> also published scores of guide books<br />
that provide basic backcountry travel information and point to point trip descriptions of dozens of classic and<br />
unique hikes. You can usually find a limited number of these books at the public library or you may be able to<br />
borrow a copy from friends. Students can also purchase a copy at ”The <strong>Mountaineers</strong>” bookstore at the<br />
clubhouse in Seattle, or can order a copy by mail at 206-284-6310. Most local book stores have copies or can<br />
order them.<br />
Clothing and Equipment<br />
Selection of clothing and equipment will be covered during the course. At a minimum, you will need a pair of<br />
serviceable, backpacking or hiking boots suitable for long-tern use, a day pack capable of carrying up to 20<br />
pounds in comfort, adequate clothing for your protection and comfort in any of the various weather patters<br />
expected in the Pacific Northwest, food, water and the 10 essentials. If you have little or no usable equipment,<br />
expect equipment expenses of up to $500.00, if you buy new equipment. Careful and selective bargain<br />
hunting, however, may reduce this estimate considerably.<br />
Reasonable Goals and Personal Responsibilities<br />
When participating in the outdoor workshop, a hike or a backpacking trip, remember that you are responsible<br />
for your own safety and well-being at all times. To put it plainly, the workshop or hike leader is not a tour guide.<br />
Come to the outdoor workshop and any hike you may choose with the requirements for the day, the expected<br />
weather conditions, and all proper equipment you think necessary. Be flexible enough for changes in schedule<br />
due to weather of other unexpected events. Don’t blindly follow other students or instructors through the day’s<br />
activities. Stay alert and pay attention to your location and your return route.<br />
After all, if you become separated from the party, you may have to lead yourself and others out of the<br />
mountains.<br />
<strong>Wilderness</strong> <strong>Skills</strong> Module Page 13 of 73<br />
<strong>Olympia</strong> <strong>Mountaineers</strong> - Hiking, Alpine Scrambling and Basic Climbing
The Ten Essential Systems<br />
The Ten Essentials, first developed in the 1930’s, have been required on all Mountaineer backcountry outings<br />
for decades. The exact list has evolved over the year and today may be referred to as a System, as a reminder<br />
that the backcountry traveler must select the proper items for the terrain and techniques the trip requires. A<br />
climber’s 10 essentials will likely be different in technical design and capacity from those of a day hiker’s. A<br />
system encourages you to give greater consideration to the nature and capabilities of each essential in<br />
relationship to the demands of the activity in which you will be participating.<br />
The Ten Essentials are intended to provide protection against the raw forces of nature and to offer emergency<br />
assistance for the kind of calamities that occur in the backcountry. They are useful for a variety of every day<br />
necessities, quenching thirst, showing the way to your destination, trimming your nails or providing illumination<br />
when the sun sets. Most importantly, they are indispensable when things go wrong. The 10 essentials are<br />
selected to provide you with the basics to spend an unplanned night (or more) in the backcountry. The<br />
<strong>Mountaineers</strong> require that all party members must have their own essentials; a group package won’t meet the<br />
needs.<br />
If you’re like most people, a memorized list of 10 items, such as groceries, test answers or street names has a<br />
short lifespan. Associating the 10 essentials with one of three basic application can become a quick mental<br />
checklist y review as you ou pack for a trip. Try divided the essentials into three groups (to help you remember<br />
them): (1) finding your way, (2) for your protection, and (3) for emergencies.<br />
Finding Your Way<br />
1. Illumination: A headlamp or flashlight with extra batteries and bulb<br />
These should be lightweight and reliable. Headlamps work much better for backcountry use because your<br />
hands will be free to hold on to rock, brush, etc.;. You can also wear a headlamp around your neck if you don't<br />
like it on your head. Use only alkaline or lithium batteries (lithium batteries are the lightest, most durable, and<br />
least sensitive to cold temperatures, but are the most expensive). You will need to know the remaining battery<br />
life or buy new batteries frequently.<br />
One excellent strategy to help you track the remaining battery life is to use nickel metal hydride or nickel<br />
cadmium instead. These kinds of batteries are rechargeable, and so are easier on the environment and<br />
cheaper over the long run. But their most important advantage is that they can be fully charged before every<br />
trip for increased safety.<br />
To keep the batteries from running down when not in use, you can carry them outside of the flashlight until<br />
needed or put one battery in upside down. When you need a flashlight, you can quickly load the batteries<br />
properly and have full use of the batteries. Extra bulbs should be stored to avoid breakage. Test your light<br />
before each trip.<br />
2. Navigation: Map and compass<br />
A detailed topographic map of where you are going (and how to get back)<br />
and a compass are basic navigational tools. The trip leader decides the<br />
initial destination but each individual needs the tools to be able to confirm the<br />
correctness of the route and his or her location on the route should a problem<br />
arise. Never go anywhere without a compass.<br />
It is hard to imagine getting turned around 180 degrees, but it happens. Once<br />
you lose that all-important sense of direction, the backcountry suddenly<br />
appears featureless, inscrutable and hostile. Compasses come in a variety of<br />
sizes, shapes and prices - you should carry one that you are comfortable with and can use. There is more<br />
information on compasses in the Navigation section later in this manual.<br />
<strong>Wilderness</strong> <strong>Skills</strong> Module Page 14 of 73<br />
<strong>Olympia</strong> <strong>Mountaineers</strong> - Hiking, Alpine Scrambling and Basic Climbing
A USGS or comparably detailed topographic map has been the standard for all backcountry travels. Fold your<br />
map so that it shows the area in which you will be traveling, then carry it in a protective map case or zip lock<br />
bag will keep your map dry and readable.<br />
For Your Protection<br />
3. Hydration<br />
You can survive for days without food provided you<br />
conserve your energy. Do not waste energy looking for<br />
food. You must have water to survive. Going for even<br />
a day without water will make you seriously vulnerable to<br />
sickness or incapacitation.<br />
Always carry at least one water container and two or<br />
more on a hot day with a long trip. Again, if you plan to<br />
carry only the water you will need for the day hike, what will you do if the trip is extended due to an unexpected<br />
event? Soda is not a good substitute for water on a hike.<br />
4. Nutrition: Extra food<br />
In addition to your regular lunch and snacks, take along extra food: enough so something is left over at the end<br />
of the trip (in case your day is extended or you need to spend the night on the mountain). The food should<br />
require no cooking, be lightweight, and be high in carbohydrates (granola bars, cheese, nuts, etc.). The extra<br />
food is to provide energy and, as importantly, to boost morale. If you select extra food with a long shelf life you<br />
will not have to replace it after each trip. Pack your extra food separately from your lunch and trail snacks so<br />
you will not be tempted by it. Your extra food should be for emergencies only!!!<br />
5. Insulation: Extra clothing<br />
Your extra clothing should get you through 24 hours in the worst conditions that can be realistically expected<br />
for the time of year and the trip route chosen. Extra clothing should be wool or synthetic - NO COTTON!!! A<br />
minimal list of extra clothing during cool wet weather would include a shirt or sweater, a hat or balaclava,<br />
gloves or mittens, extra socks and liner socks, extra polypro underwear (shirt and leggings), and rain gear. The<br />
extra clothing should provide you with an extra measure of warmth and protection from the elements. Take<br />
more than you think you will need for the expected weather and be prepared for any unexpected changes in<br />
the weather.<br />
6. Sun Protection: Sunglasses and sunscreen<br />
Protection against snow blindness and eye damage is critical because cornea<br />
damage occurs before any discomfort is felt. Glasses should be very dark and block<br />
out most or all ultraviolet (UV) rays and, ideally, offer side protection (wrap-around<br />
lenses or side shields). In 1994, Consumer Reports tested over 200 pairs costing<br />
$15 - $150 and found that they all blocked UV rays, so take your pick. But don’t buy<br />
glasses with mirror-finish lenses; they reflect sunlight onto your nose. Glass fogs<br />
more easily in cold weather; polycarbonate scratches more easily.<br />
Sun protection is important at high altitudes and on cloudy/overcast days as well as on bright/snowy days. The<br />
intensity of the sun’s rays increases 4% with every 1000 feet of elevation gain. Non-water soluble sunscreen<br />
with SPF of 15 or higher is desirable. Without adequate protection against both direct sunlight and reflected<br />
light, damage to skin and eyes can occur.<br />
<strong>Wilderness</strong> <strong>Skills</strong> Module Page 15 of 73<br />
<strong>Olympia</strong> <strong>Mountaineers</strong> - Hiking, Alpine Scrambling and Basic Climbing
For Emergencies<br />
NOTE: There are extraordinary emergencies, such as animal attacks or<br />
natural disasters that we read about or envision in our worst nightmares.<br />
They do happen, but for the most part are confined to specific locations,<br />
usually well posted and at specific times, generally well forecasted. Be sure<br />
to research local warnings carefully.<br />
The types of situations for which you will need to prepare are far less<br />
severe yet potentially as dangerous, and much more common. A situation<br />
becomes an emergency when the environment is unsafe for your party to<br />
spend additional time, even overnight, to resolve.<br />
7. Repair kit and tools: Knife<br />
The number one tool for multipurpose use is the pocket knife. They are indispensable for use in first aid,<br />
emergencies, equipment and clothing repairs, and food preparation. The knife should be small, lightweight,<br />
folding, and sharp. Tools may come as part of a knife if the knife can remain lightweight; otherwise a few small<br />
lightweight tools are likely to meet most needs. Carry only those tools you are likely to need. A repair kit should<br />
contain duct tape, safety pins, cable ties, short pieces of wire, cord and hook and loop (Velcro TM) and repair<br />
fabric.<br />
8. First aid kit<br />
Foot travel dictates you’ll need to include materials to keep “hot spots” on your feet from turning<br />
into blisters. Also plan to carry supplies for cuts, scratches, burns, sun burn or sprains and<br />
other common injuries when you are hours from the trailhead and further still from the doctor’s<br />
office or the emergency room. If you store first-aid items in plastic bags within your first-aid kit<br />
they will be easy to find and will stay clean and dry.<br />
Your first-aid kit should be clearly marked in your pack so that if you are injured someone else could quickly<br />
find your supplies and not have to open everything in your pack in the search. This is particularly important if<br />
you have a medical condition such as asthma or an allergy to bee stings which require the prompt use of<br />
special medication. Consider taking the Mountaineering Oriented First Aid (MOFA) course. It will provide an<br />
excellent set of skills for emergency response as well as a comprehensive list of first aid supplies.<br />
9. Fire: Waterproof matches and fire starter<br />
Fire will be needed if you have a trip-extending emergency. Carry the means to start a fire in any possible<br />
condition. A number one choice is windproof matches in a waterproof container with a compatible striker. Fire<br />
starter comes in a variety of forms: candles, fuel tablets, fuel ribbons, butane lighters, chemical fuel, tinder,<br />
etc.........in case of an emergency --something that will hold a flame long enough to start a fire with wet wood.<br />
For starting damp wood fires, the constant flame of a candle is excellent, and it's amazing the amount of light<br />
and heat that a candle will provide. Check your favorite equipment supplier and see what you would be most<br />
comfortable using and stowing in your pack.<br />
10. Emergency Shelter<br />
Some form of emergency shelter may be necessary for overnight protections against the elements. On the<br />
minimalist side a plastic trash bag or piece of plastic sheeting can serve as a short-term shelter. A bivy sack<br />
and a small tent are examples of shelters that offer greater protection for more severe conditions. In between<br />
these you will find that rip-stop nylon makes a lightweight, waterproof material while a plastic tarp with<br />
grommets offers waterproofing at low cost. Consider the conditions in which you may find your party and select<br />
your shelter accordingly. Consider an insulating pad or a reflective emergency blanket in cold weather to help<br />
protect against heat loss and hypothermia.<br />
<strong>Wilderness</strong> <strong>Skills</strong> Module Page 16 of 73<br />
<strong>Olympia</strong> <strong>Mountaineers</strong> - Hiking, Alpine Scrambling and Basic Climbing
Food and Water - Nutritious, lots of it<br />
Without proper and adequate food and water the body will slow down,<br />
signal problems, and eventually shut down. A hiker needs a continuous<br />
supply of calories from food or substance specifically intended to serve<br />
as a source of calories. On a one-day strenuous hike of 4 to 8 hours, a<br />
person probable needs only one mid-day meal and several food breaks.<br />
The most common diets contain:<br />
• a large complex carbohydrate source<br />
• a medium sugar source<br />
• a small to medium protein source<br />
The most common menu among hikers includes:<br />
• a favorite high-energy snack that is very likely to be eaten even when not feeling well<br />
• a favorite sandwich with meat or some form of protein<br />
• fruit or dried fruit or vegetables<br />
• granola or grain<br />
Take items that you know that you like to eat. Most day hikes include a brief lunch at the mid-point or summit,<br />
but you will want to snack en route as well. Trail mix, granola bars, nuts, fresh or dried fruit, cheese, and<br />
crackers are good choices for snacking while hiking or during short breaks. Eat frequently, even if you don't<br />
feel hungry: your body reacts to stress and cold by erasing the desire for food (and water) when it's needed<br />
most. During cold weather, eat and drink small amounts frequently rather than large amounts infrequently (this<br />
will provide more available energy to maintain body warmth).<br />
Many <strong>Olympia</strong> Branch leaders will suggest stopping to eat somewhere after a day hike. (It's optional.) You'll<br />
have a chance to stretch and rest, and you won’t have to cook when you get home! You'll have an opportunity<br />
to discuss the day’s trip with your friends, get to know each other, and have a good time.<br />
Water, two liters minimum<br />
Drink, drink, drink - even if you don't feel thirsty. Thirst is a poor indicator of the need for water. Your body<br />
reacts to stress and cold by reducing the desire for water (and food) when it's needed most. Performance<br />
starts to decline when you lose as little as 2 percent of your body weight in water, and it's not unusual to lose 3<br />
or 4 pounds of water during a strenuous up-hill hike. It's a good idea to have a bottle carrier on your pack waist<br />
belt so you can drink water without having to take off your pack. A water bladder with a drinking tube is another<br />
option. Since drinking directly out of mountain streams is no longer advisable, you should carry enough water<br />
for the entire day, or carry a water filter.<br />
Water is as vital to life as oxygen – about 70 percent of your body weight is water. It has many functions:<br />
• distributes your energy supply – water helps carry nutrients and oxygen to your muscles.<br />
• eliminating waste – water provides liquid for urination, which carries away wastes and reduces muscle<br />
cramps and soreness (urine will be light in color if you are drinking enough water).<br />
• lubricating your joints; maintaining proper muscle tone.<br />
• controlling your body temperature:<br />
o water cools you in warm weather (by sweat evaporation), protecting you from high body<br />
temperatures, which could cause heat exhaustion or heat stroke.<br />
o water warms you in cold weather by providing more blood to your extremities.<br />
Drink as much water as you can the night before a strenuous outing and in the morning before leaving, to<br />
reduce your need for water during the trip. Drink until you slosh! You should also drink plenty of water after you<br />
return from a trip, to replace liquids lost while you were out -- you will be less sore afterwards and recover<br />
faster. Headaches, during or after a long, hard day may be a sign of dehydration.<br />
<strong>Wilderness</strong> <strong>Skills</strong> Module Page 17 of 73<br />
<strong>Olympia</strong> <strong>Mountaineers</strong> - Hiking, Alpine Scrambling and Basic Climbing
During cold weather, it is even more important to consciously drink water, because you don't see or feel<br />
yourself sweating like you do when it's hot. Furthermore, because cold air doesn't hold as much moisture as<br />
warm air, your body must use its moisture to warm the cold air that you breathe before it gets to your lungs.<br />
Drinking warm water will conserve body heat and energy. Consider carrying an insulated water bottle carrier<br />
and put hot water in your bottles before you leave (you can add boiling water to a polycarbonate (Lexan) bottle<br />
as long as the bottle is not too cold). You may want to carry a thermal bottle in cold weather.<br />
In freezing weather, carry or store your water bottle upside down; if the water begins to freezes, the ice will<br />
form at the top of the up-side-down bottle where the air is, and won't freeze the threads. The drinking tube of a<br />
water bladder can quickly freeze and become useless in very cold temperatures. Be prepared to access the<br />
water without the tube. On overnight trips when the night time temperature is at or below freezing, there may<br />
be no running water available in the morning. You will likely need to melt snow or ice with your stove and then<br />
filter the water for safe drinking. Boiling the water is an option, but will require considerable time and fuel.<br />
Clean your water containers regularly, especially if you use them for sugary drinks: mold or bacteria can grow<br />
on bottle threads or in drinking tubes, and may make you sick with dysentery.<br />
Clothing and Equipment<br />
This section and the accompanying lecture is meant to offer<br />
additional information on clothing and equipment -- what it costs,<br />
where to get it, what you will need for success during the course’s<br />
required field trip, and what factors you should consider for a<br />
lifetime of enjoyment in the backcountry. We will look at your<br />
equipment during the upcoming outdoor workshop and if you<br />
wish, during lectures when appropriate, to be sure your<br />
equipment will meet the demands of this course. Your instructors<br />
may also be able to make recommendations on practical ways to<br />
minimize your expenditures.<br />
With new gear being developed as you read your materials, you<br />
need to remember this information is not up-to-the-minute. Having<br />
the right equipment can be a life-long pursuit. There’s always new<br />
and improved gear available to consider. Many people enjoy<br />
researching and shopping for the “right” gear to help improve their<br />
performance and enjoyment.<br />
As a student, you’ll notice some experienced outdoor travelers have become first-rate technical experts on<br />
clothing and equipment. Their opinions are valuable to you, since you’ll probably be making substantial<br />
purchases in the near future. You may also find their opinions very useful in purchasing “experienced” (used)<br />
equipment. Please feel free to ask questions and compare opinions.<br />
You may notice the occasional “Gearhead” who has simply overdone the quest for gear. Gearing Up can be a<br />
sport in itself. But it’s not really necessary unless you are planning a solo expedition to an uncharted<br />
wilderness or an epic backpacking trip into a very remote location.<br />
At the other extreme is the ”Minimalist” who enjoys the challenge of carrying as little as possible and relying<br />
on wits and resourcefulness to overcome any emergency. Duct tape and painkillers don’t really serve well as a<br />
first aid kit, nor does a trash bag serve as extra clothing and rain gear. It’s nice to know you can improvise in a<br />
pinch, but the lack of basic backup equipment can be very hazardous. By making it a habit to carry only what is<br />
absolutely going to be used, a person is not really prepared for the unexpected and is likely to become a<br />
liability to companions or other encountered on the trail.<br />
<strong>Wilderness</strong> <strong>Skills</strong> Module Page 18 of 73<br />
<strong>Olympia</strong> <strong>Mountaineers</strong> - Hiking, Alpine Scrambling and Basic Climbing
Backpacker Magazine published as article by Kristin Hosteller in June 1999 titled Modern Man Vs. Mad Dog,<br />
which chronicles the experiences of both the Techno-packer and the Minimalist. It’s an amusing but very<br />
common dual between what cool new stuff to take and what to leave at home. Although the article does not<br />
choose a winner, it does suggest that an individual who can focus on trail rather than the gear is the likely<br />
victor.<br />
You’ll no doubt find yourself somewhere in between these two extremes. As you gain more experience you<br />
need to evaluate your equipment. You’ll learn you won’t use or even need all that your asked to carry. This<br />
spring, you find yourself on a trail carrying a heavy pack and you’ll see others with almost nothing. They may<br />
look happier and less burdened with their load. Resist the temptation to believe their bliss is worth the risk. The<br />
natural world can be a hostile environment, even for the most experienced. There’s no doubt that your 10<br />
essentials will someday be used to comfort or repair or rescue someone who has not bothered to carry the<br />
basic necessities for a safe, secure trip.<br />
Boots<br />
Without a doubt, the single most important item of equipment is your boots.<br />
Whether you rent, borrow, or buy is up to you; but it is critical to your comfort and<br />
safety that you do not try to cut corners by using inadequate footwear. Heavyduty<br />
boots will protect your feet from rocks and other rough terrain, allow you to<br />
kick steps in snow, and help you maintain your balance on steep snow slopes.<br />
Good quality, lightweight boots are becoming much more reliable and popular.<br />
They have the advantages or being more comfortable and easier on your feet,<br />
legs and muscles because they require less energy to lift. Inferior quality shoes,<br />
court or basketball shoes are not acceptable and will not be allowed on the<br />
outdoor workshop or club hikes or backpacking trips<br />
A good boot has a full-leather upper, a stiff toe and shank, lug soles, and a square heel. Leather boots can be<br />
used for snow travel, trail hiking and backpacking, and off-trail travel. One-piece all-leather uppers are best<br />
because they have few seams to leak and will conform to the shape of your foot. Tapered heels will not work<br />
for hiking or carrying a heavy pack. Soft waterproof rubber sole boots are not acceptable because the shank is<br />
too flexible, and is not adequate for kicking steps in snow. Plastic boots keep your feet warmer and dryer in<br />
snow, and may offer better footing when kicking steps up steep snow slopes, but are not at all comfortable or<br />
suitable on trails.<br />
A good "mountaineering" or outdoor store can help you choose appropriate boots for hiking and backpacking.<br />
Go to a reputable dealer who is knowledgeable and will take the time to work with you. Buy a good insole to<br />
replace the insoles supplied by the mountaineering boot manufacturer. Standard factory insoles typically do not<br />
provide adequate arch support. It is best to use the better insoles when trying on boots, as they drastically alter<br />
the fit of the boot. Remember to check out the return policy and buy boots from a store that will exchange them<br />
at no cost after several trips for another size. Getting the right size for a boot can be a trial-and-error process.<br />
Try on new or rental boots using the insole, liner, and socks (thick outer and thin liner socks) that you plan to<br />
wear on hikes or while backpacking. Shop for boots late in the day because your feet get slightly larger after<br />
you stand or walk on them for a while. Your toes should not touch the front of your boots (with the foot laced<br />
securely in the boot) even when you scuff your foot firmly forward. Cramped toes become cold toes because of<br />
reduced circulation. A sloppy heel fit will cause nasty blisters. Seek out boots that are as comfortable as you<br />
can find. The best boot for you is the one that fits the best.<br />
Wear your new boots to work, around the house, or on short hikes to break them in before wearing them on a<br />
hike of any distance over a couple of miles. If your planned hike has any elevation gain, be sure to break in you<br />
boots (and your feet) by walking up hill. When possible and not destructive to the landscaping, walk on the side<br />
of the road, in the gravel and over uneven terrain. Walking on sidewalks or road surfaces does not prepare you<br />
foot/boot combination for the real world and does not help you build up the necessary foot/ankle strength you<br />
will need to carry you weight and pack up or down hill.<br />
<strong>Wilderness</strong> <strong>Skills</strong> Module Page 19 of 73<br />
<strong>Olympia</strong> <strong>Mountaineers</strong> - Hiking, Alpine Scrambling and Basic Climbing
Prevent blisters. Blisters develop when your boots are going one way and the bones of your feet are going<br />
another, rubbing and stressing the skin. In addition to buying well-fitting boots, breaking them in properly, and<br />
using a quality insole, try the following to prevent blisters:<br />
• Wear a thin inner sock and a thicker outer sock, to keep friction between the socks instead of between<br />
your boots and feet.<br />
• Retie your bootlaces snugly before a steep descent to prevent toe blisters.<br />
• If your feet sweat heavily, use foot powder. Moisture encourages blisters.<br />
• If you know you have a blister-prone area, protect it before trouble develops, with:<br />
• moleskin - soft cotton flannel with adhesive; sold in outdoor, department, and drug stores.<br />
• Compeed - a blister cover with tapered edges that resist the tendency to roll up.<br />
• 2nd Skin - it’s cool and soothing, but must be held in place with tape or moleskin.<br />
A sore “hot spot” will develop before a blister forms. If you feel a “hot spot”, apply moleskin or other protection<br />
to the spot as soon as you can. Duct tape or other tape may help, if nothing else is available.<br />
Clean your boots immediately upon returning from each trip; they are easier to clean when they are still damp.<br />
Remove the insoles so that the boots can dry inside and not mildew; stuff crumpled newspaper inside them to<br />
absorb moisture. Waterproof your boots as needed. Use the waterproofing treatment the manufacturer<br />
recommends and according to manufacturer’s directions.<br />
Clothing<br />
Because your clothing is so important to your success and personal<br />
safety, many instructors suggest you think of it as your first item of<br />
equipment. Wearing the right clothes into the mountains is pretty, darn<br />
important. Fortunately, good outdoor clothing is sold almost<br />
everywhere. Unfortunately, not-so-good clothing is even more<br />
accessible. In fact, it seems that outdoor adventure is one of the<br />
leading fashion themes for today’s adults.<br />
Practicality, durability, protection from the elements and versatility are<br />
traditional features of outdoor clothing, while technical advances in<br />
fabric and design have added to their comfort and attraction.<br />
Yesterday’s styles looked rugged if not homely, but thanks to some discerning marketing, appearance has<br />
become as important as function to the style conscious. But, what makes a garment suitable for serious<br />
outdoor use? Are today’s trendy, high-tech clothes better than traditional clothes worn for decades? Do you get<br />
what you pay for when you spend $70.00 for a set of wonder-tech undies verses a $15.00 pair of wool long<br />
johns.<br />
The choices you make when selecting and packing your clothing determine how comfortable you will be during<br />
your journey. The simplest, most common aspects of life, putting on your clothes, become critical to your<br />
enjoyment or contribute to your misery. On a day trip in the backcountry or an overnight backpack through on<br />
of the state’s many <strong>Wilderness</strong> areas these choices may also determine your success and your safety. The<br />
following information will help you better understand what you really need to know to buy clothes for a<br />
comfortable, safe journey in the mountains.<br />
<strong>Wilderness</strong> <strong>Skills</strong> Module Page 20 of 73<br />
<strong>Olympia</strong> <strong>Mountaineers</strong> - Hiking, Alpine Scrambling and Basic Climbing
Understanding and applying a few<br />
elementary principals of thermodynamics,<br />
physiology and fabric technology can help<br />
you choose the best clothing for your<br />
needs. These basic concepts include:<br />
Heat Production, Temperature<br />
Requirements, Heat Retention, Insulation,<br />
Moisture Management, and Weather<br />
Protection. With the following information,<br />
you can apply a little science to your<br />
challenge of selecting clothes for safe and<br />
comfortable adventures, or you can buy<br />
what everyone else is wearing and skip<br />
this stuff.<br />
The following information also covers<br />
some practical lessons on selecting the<br />
right clothes for your needs. This<br />
information should help you select an item of clothing for its<br />
adaptability, range of applications, price, longevity, ease and<br />
cost of care, and finally appearance.<br />
Practical Information for Selecting the Right Clothes<br />
Heat Production<br />
The human body generates heat as result of normal<br />
metabolism, the oxidation of the food consumed or stores in the<br />
body. When the ambient temperature, the temperature of the<br />
surrounding air, is around 70° F, a healthy body generates more<br />
than enough heat to stay comfortable. With exertion, the body<br />
will produce excess heat, and will heat the air around it. During<br />
the average day of modern office-home activity, a person burns between 100 and 200 calories per hour. At this<br />
level of exertion a person will perspire, but at a low level that will usually evaporate rather than accumulate.<br />
During 4 to 6 hours of high exertion during a scramble with 3500 ft elevation gain, the body consumes greater<br />
quantities of energy ranging between 250 and 1000 calories per hour. This level of exertion will generate great<br />
quantities of excess heat and perspiration for all but the most fit climber or the coldest weather conditions. The<br />
scrambler will need an effective system for venting this heat or suffer wetness from the body’s natural cooling<br />
agent; perspiration. Worse consequences include; exhaustion, disorientation, and heat exhaustion.<br />
To reduce the build up of body heat, the efficient hiker will simply shed clothing as the most common option.<br />
During rain or snow conditions, this doesn’t work as well. A great deal of heat will be trapped inside rain gear<br />
although most of the insulating clothing has been removed. Traditional options for ventilation include oiled or<br />
raw wool, poncho, or stop and cool down. New options include breathable, waterproof clothing with zippered<br />
vents or waterproof; non-breathable clothing that functions as a vapor barrier (a moisture trapping system).<br />
Temperature Requirements<br />
To function properly, the human body maintains a core temperature (central organs and brain) of nearly 100°<br />
F, actually 98.6° F. The core temperature must be stay within a narrow range because the central organs<br />
cannot tolerate changes of more than a few degrees above or below 98.6°. The extremities, such as the arms,<br />
hands, feet, and skin however, can adjust to a much wider range of temperatures. Your face, for example, is<br />
able to endure a temperature range of over 50° F (from 40° to 90°) without noticeable difficulty. With core<br />
temperature change of 3 to 4 degrees, however and you’ll feel sick and look sick.<br />
<strong>Wilderness</strong> <strong>Skills</strong> Module Page 21 of 73<br />
<strong>Olympia</strong> <strong>Mountaineers</strong> - Hiking, Alpine Scrambling and Basic Climbing
In the outdoors, a person feels comfortable when the air temperature is approximately 70°, although that is a<br />
difference of 30° between the outside temperature and the core. At this temperature, a person is able to<br />
effectively heat the air around the body and needs very little clothing. At higher ambient temperatures, clothing<br />
isn’t really needed. As the air temperature rises, the body protects the core temperature by eliminating heat<br />
through increasing perspiration and respiration. When the air temperature decreases, the body also reacts to<br />
maintain the core temperature by producing more heat through involuntary shivering and other responses.<br />
With the air temperature drops below 70° F, more clothing is needed to maintain comfort and the critical core<br />
temperature. In the mountains, when the air temperature drops, a person unable to add thermal protection<br />
(more clothes) will eventually experience a decrease in core temperature. As the core temperature drops to 96<br />
° the body responds by spontaneously shivering and forming goose pimples on the surface of the skin. When<br />
the core temperature reaches 93 ° the body reduces the blood flow to the extremities as the body works to<br />
preserve the core at the expense of the arms and legs, which loose heat much faster. The result is a loss of<br />
dexterity and performance. As the core temperature continues to drop a person experiences progressive loss<br />
of mental acuity, unconsciousness, and eventually will die. Survival in a cold environment requires proper<br />
clothing to insulate the core temperature of the body (temperatures are approximate).<br />
Heat Loss<br />
The body looses heat in several ways. Convection is the loss of heat as the warmed air surrounding the body<br />
rises and escapes through the openings in the clothing and is replaced by cooler air. It’s referred to as the<br />
chimney effect. Conduction is the exchange of heat from a warmer object to a cooler object through physical<br />
contact. Radiation is the transmission of thermal energy, primarily through infrared radiation waves.<br />
Evaporation of perspiration from the skin results in the loss of heat energy. Respiration results in heat loss<br />
when warm air is exhaled and cooler air is inhaled. The amount of heat lost to each of these factors will vary<br />
depending on the weather conditions, clothing, exertion, and the ability to stay dry.<br />
During the strenuous hike, a person with high quality clothing looses heat mainly through conduction, contact<br />
with cooler air. A smaller amount of heat is lost through radiation and perspiration and a small amount yet<br />
through convection and respiration. Factors that shape the heat loss include: the kind and amount of clothing,<br />
the amount of wind and water in the environment and the hikers level of exertion.<br />
OK, We understanding heat loss is important, but what really matters is the way we can use this information to<br />
vent excess heat in hot weather and reduce heat loss in cold, wet weather.<br />
By understand that through convection, the warm air inside clothes will rise and flow out of openings in clothes<br />
only to be replaced by cooler air, allows the informed hiker to cinch down openings and billowing clothes to<br />
better contain warmth. By understanding that by reducing exertion rather than rushing through the bush with<br />
poor clothing, could help the lost hiker stay warm because it will help conserve body heat by reducing<br />
perspiration and respiration. By understanding that conduction, contact with cooler air, is often the greatest<br />
cause of heat loss, the informed back country traveler can take control of this loss by better insulating high<br />
heat loss areas from contact with cooler air.<br />
The body has a few high heat loss areas where there is high arterial blood flow and little or no muscle mass<br />
to shield these areas. These high heat loss areas include the head, the neck, under the arms, down the sides<br />
of the torso, and through the groin area. Protecting these areas with greater insulation can significantly reduce<br />
heat loss and help the entire body stay warm. The old saying, “if your feet are cold put on a hat”, is very<br />
true.<br />
This information could be useful to the hiker who reaches the summit on a cloudy, wet day. After a 20-minute<br />
rest at the summit, a hiker begin to descend and notices the temperature is dropping. As exertion decreases<br />
on the decent, heat production decreases. Unprotected heat loss areas will eventually give up lots of body<br />
heat. Without a hat and an open collar, the hiker will loose heat rapidly, much faster than it’s produced. After a<br />
shivering spell, the hiker will notice her hands and feet become not only cold, but stiff. The body has begun to<br />
restrict blood flow to the extremities. At this point, it is too late to simple protect heat loss areas. The hiker must<br />
quickly add heat.<br />
<strong>Wilderness</strong> <strong>Skills</strong> Module Page 22 of 73<br />
<strong>Olympia</strong> <strong>Mountaineers</strong> - Hiking, Alpine Scrambling and Basic Climbing
Better clothing takes advantage of these heat loss areas by allowing ventilation during excessive heat output,<br />
and ensuring protect during critical heat loss periods. A jacket designed with heat loss areas I mind will provide<br />
a hood and zippers under the arms, down the sides of the torso and up a high collar.<br />
When the body becomes wet, moisture increases heat loss. Water is an excellent conductor of heat and will<br />
absorb and transport heat energy rapidly. In water, a body looses heat 25 times faster than in air. As<br />
mentioned earlier, a person fees comfortable with an air temperature of 70° F. In water that is 70° F, a person<br />
can feel comfortable for a while, but will eventually loose too much body heat to the water to stay in this<br />
environment long. We are not able to heat the entire pool and the conduction won’t stop. The swimmer may<br />
feel OK, but as the heat loss continues, the person will begin to exhibit signs of hypothermia. Increasing activity<br />
may make the body feel warmer temporarily, but it actually increases the rate of heat loss. Staying dry is a<br />
most important factor in maintaining control over body heat. (See Moisture Management and Weather<br />
Protection.)<br />
Insulation<br />
Insulation functions primarily to trap and protect a thin layer of air around your body. Insulation does not<br />
produce or provide any heat. Heat is generated through your body’s metabolism and increases with exertion.<br />
For the alpine scrambler, air is the best available insulator. All garments trap your body’s heat in the air spaces<br />
of the fabric, however some are superior to others. The more small cavities a fabric provides where air is<br />
trapped warmed by body heat and protected from cold air conductivity, the better it insulates.<br />
Steel wool could act as an insulator because it can trap heat in the air spaces in its wool-like structure. Steel<br />
wool however, has other significant disadvantageous that eliminate it as a fabric for clothing. Can you list any?<br />
It is important to note that a person who is suffering from hypothermia, abnormal lowering of the body core<br />
temperature, should not be insulated from the cold without receiving additional heat to slowly re-warm the core.<br />
Wrapping a hypothermia victim in sleeping bags stops any loss or gain in heat. If the victim’s extremities are<br />
cold they will remain cold and may even contribute to further heat loss of the core. Follow the suggested<br />
protocols for providing heat to the core of this victim.<br />
Moisture Management<br />
As noted above, water is an important factor in determining persons’ ability to survive and to stay comfortable<br />
outdoors. It is a necessity for life. On any hike, moisture management ranges in importance from a matter of<br />
personal choice to survival. At one point the hiker may be concerned with comfort and personal hygiene, and<br />
must deal with too much perspiration or excessively dry conditions for the skin. At another point, the need for<br />
drinking water or to combat hypothermia due to wet clothes could preoccupy a hiking party.<br />
For the body to perform effectively, it needs sufficient quantities of water. To stay warm, a hiker must consume<br />
plenty of water, even before feeling thirsty. Be sure you have it or can get it. (see Food and Water)<br />
For the hiker to be comfortable, she must be able to vent heat and allow perspiration to evaporate. Clothing<br />
designed to wick moisture away from the body also removes heat energy. This same garment will move the<br />
moisture toward the atmosphere, which will allow evaporation of the moisture to further remove heat energy.<br />
Designing clothing with moisture wick qualities rather than a moisture barrier has become the leading strategy<br />
in helping the outdoor enthusiast enjoy more comfortable and safer outings. Clothing has also been designed<br />
to allow the moisture producing areas to receive extra ventilation through zippered openings or patches of<br />
material that allow better air flow.<br />
Weather Protection<br />
Regular clothing can’t protect you very well from rain, snow, high heat, and wind. When its wet outside and the<br />
temperature drops, the need for protection is serious. You will need a garment that will keep water out and<br />
your insulation layer dry, while allowing your moisture-managing layer to continue to move water vapor your<br />
clothing to the outside. Since most garments are good at only one of these jobs, you’ll need decide which<br />
combination of characteristics will meet your needs on any specific hike: to protect yourself from wet weather,<br />
or to protect yourself from you own moisture. The weather forecast and the nature of you trip will help dictate<br />
which you choose.<br />
<strong>Wilderness</strong> <strong>Skills</strong> Module Page 23 of 73<br />
<strong>Olympia</strong> <strong>Mountaineers</strong> - Hiking, Alpine Scrambling and Basic Climbing
Wind is often overlooked as a factor in outdoor travel. Although the weather forecast includes wind speed and<br />
direction, it is usually overshadowed by information on the chance of rain, snow or sunshine. An unblocked,<br />
continuous wind will remove body heat and body moisture. A strong continuous wind is a threat to the<br />
backcountry traveler who can not provide or find adequate wind protection.<br />
What does it all mean to me?<br />
It helps explain why a layering system is mentioned in every outdoor guidebook. It’s hard to imagine wearing<br />
clothes without layers. In the outdoors, the layering system becomes the most practical and effective way of<br />
maintaining your comfort and safety. Each layer has at least one job to accomplish.<br />
Next to the skin Wicking Layer Moisture management<br />
In between Insulation Layer Thermal Protection from Heat Loss<br />
Outside Shell Layer Protection from the forces of nature exposure<br />
Several layers of clothing provide greater temperature control and flexibility than one or two bulky items. All<br />
clothing should be loose fitting for maximum freedom of movement (if in doubt about which of two items may fit<br />
better, get the larger one). The clothing next to your skin should wick moisture away and insulate even if wet<br />
from sweat or rain. Avoid nylon for the inner layers because it doesn't breathe. Outer layers should provide<br />
warmth. Avoid down and cotton because neither will insulate when wet.<br />
Fabrics<br />
Clothing manufacturers can choose from many natural and man-made fabrics. But, why would anyone pick<br />
clothing made from natural materials when chemists have gone to all the trouble to create modern textiles?<br />
Aren’t these petrochemical miracles superior to what nature has provided? Many are superior, but each has its<br />
place in outdoor clothing and equipment. To understand how fabrics perform you must look at the fibers and<br />
the construction techniques used.<br />
Natural Fibers<br />
Cotton is an ancient fabric dating back 12,000 BC, but it was not in wide use in clothing until modern times.<br />
Today cotton is the principal clothing fiber used throughout the world. Cotton is a plant fiber that grows in ball<br />
form, having short fibers about ¾” long. Cotton is quite versatile and can be processed into many different<br />
fabrics including canvas, sail cloth, muslin, duck, organdy, poplin and many others. It is soft, comfortable,<br />
absorbent and economical.<br />
Cotton breathes, shrinks, wrinkles, and is easy to dye. Traveling in a warm climate, cotton’s ability to breath<br />
and its absorbency is quite useful, as water absorbed into the fabric will conduct heat energy away from the<br />
source toward a cooler environment. Even if the air temperature is higher than the skin, evaporation of the<br />
moisture will have a cooling effect. Because of its absorbency, a cotton bandana is one of the most versatile<br />
pieces of equipment you can carry. For outdoor use in cooler climates, however the cotton fiber’s absorbency<br />
is a serious disadvantage.<br />
Flax is a nearly woody fiber that comes from a plant stalk. Flax is made into LINEN, once the main material<br />
used I clothing. Today linen and a linen-cotton blend are used in more luxurious clothing. It is very comfortable,<br />
highly absorbent, wrinkles easily and is expensive. Its cost and absorbency should eliminate it as a choice for<br />
hiking clothes.<br />
Ramie is also similar to linen and is a plant fiber. It has a high luster and an unusual resistance to bacteria and<br />
molds. Used in fabrics, and often mistaken for linen, it is extremely absorbent and dries quickly. Ramie has<br />
excellent abrasion resistance and has been tested to be three to five times stronger than cotton and twice as<br />
strong as flax. It is an inexpensive fiber from an East Asian plant and can be spun or woven into a fabric.<br />
Hemp is currently being used by designers in clothing. No, hemp fabric does not contain the narcotic chemical<br />
that, when smoked produces the "high" that smoking marijuana produces. Hemp fabric is made from the stems<br />
of the plant. The stems are processed to dissolve the gum or pectin and separate the fibers, which are then<br />
<strong>Wilderness</strong> <strong>Skills</strong> Module Page 24 of 73<br />
<strong>Olympia</strong> <strong>Mountaineers</strong> - Hiking, Alpine Scrambling and Basic Climbing
processed again and woven into yarns and fabric. Hemp fabric is like linen in both hand and appearance.<br />
Hemp fabric withstands water better than any other textile product. It wrinkles easily and should not be creased<br />
excessively to avoid wear and breakage of the fibers.<br />
NOTE: Clothing made of plant fibers will capture and hold perspiration and precipitation. Through conduction,<br />
these wet fabrics will rapidly transfer body heat. In the alpine regions of the Pacific Northwest, cotton, linen,<br />
ramie, and hemp are not an acceptable choice for clothing and can be hazardous to the backcountry traveler<br />
because when wet these fabrics will draw body heat away faster than it can be replaced.<br />
Wool is an animal fiber made of protein. It is a complex fiber, covered with a water-resistant cuticle and<br />
contains honeycombed air spaces within the fiber itself. Wool is processed in a number of ways, to wield softer<br />
easier to care for fabrics. The more processing the wool receives the less natural water repellency remains in<br />
the fibers. Wool is resilient (wrinkle resistant), absorbent, versatile, and has a wide range of weights. It requires<br />
great care in cleaning to avoid permanent shrinkage through compression of the fibers. Wool has been used<br />
for centuries in cold, wet climates because it retains most of its insulation qualities when wet.<br />
Silk is also of animal protein origin, created by a caterpillar building a cocoon for its transformation to a moth.<br />
Silk is not a fiber but rather one continuous filament from 300 to 1,000 yards long. The filament is a triangular<br />
shaped rod with uniquely high strength and superior insulation for its weight. Silk is luxurious, durable,<br />
absorbent, and very soft. It requires extra care to avoid shrinkage, continuous loss of color, and water spotting.<br />
Silk is most commonly used in thin insulating garments and in a blend with wool and polyester in heavier<br />
garments. As an insulator it is very efficient but because it is absorbent it will hold some moisture. Because it is<br />
so thin the moisture will usually evaporate quickly, initially cooling and then insulating in a short period. To<br />
some people, silk simply feels so good that its moisture retention is easily overlooked.<br />
NOTE: Natural fibers like cotton and wool can be distinguished from man-made fabrics because the fiber will<br />
burn rather than melt.<br />
Man-Made Fabrics<br />
Rayon was the first man-made fabric to be used in the construction of garments. Created in 1884 in France as<br />
artificial silk, rayon is a cellulose derivative, or boiled down wood pulp (Spruce). Once the wood is in solution, it<br />
is forced through spinnerets and hardened in a chemical bath to form a continuous filament (the same process<br />
the silk worm uses). Rayon is best known for its soft feel and draping characteristics. It has many of the<br />
qualities of cotton, is economical, strong, extremely absorbent, and is easily wrinkled. Although a durable fiber,<br />
it cannot tolerate water and is difficult to clean. Rayon is most frequently used in a blend with other fabrics that<br />
are more easily cleaned. Its leading characteristics are not consistent with outdoor use.<br />
Nylon was created in the 1930 as petroleum based fabric, to replace silk in parachute manufacturing. It is<br />
created in a continuous filament. The manufacturer is able to give the filament different shapes and in turn<br />
create different qualities and textures. Nylon is strong, versatile, economical, elastic, resilient, non-absorbent<br />
and dries quickly. It can be crimped during processing to form LYCRA. Nylon melts at high temperatures.<br />
Because of its strength and ability to stretch, it makes an ideal climbing rope, abrasion resistant pack material<br />
and outerwear.<br />
Acrylic is a petrochemical and plastic-like in nature. It is a lofty, thick, lightweight fiber. Acrylic is soft, supple,<br />
economical, dries quickly, draws moisture away from the body and is washable. It does not hold it shape well<br />
and abrades easily. Acrylic is typically used in sweaters and other insulating garment, but does not have the<br />
strength or durability to be used for outerwear in the outdoors.<br />
Polyester is a strong fiber that is resistant to crease and wears exceptionally well. Created in 1953 as Dacron<br />
Polyester it gained fame during the double knit fad of the 1950. As a result many people dislike polyester and<br />
are unaware of its wide versatility and exceptional properties for outdoor clothing including it excellent ability to<br />
wick moisture and breath. It is manufactured in many weights and has become the leading man-made fabric.<br />
Although polyester is used extensively in blends with other fibers, cotton-polyester blends should be avoided in<br />
outdoor clothing because the cotton’s tendency to absorb and hold moisture offsets the benefits of polyester.<br />
<strong>Wilderness</strong> <strong>Skills</strong> Module Page 25 of 73<br />
<strong>Olympia</strong> <strong>Mountaineers</strong> - Hiking, Alpine Scrambling and Basic Climbing
Polypropylene is one of those rather versatile polymers out there. It serves double duty, both as a plastic and<br />
as a fiber. As a fiber, polypropylene is used to make indoor-outdoor carpeting because polypropylene doesn't<br />
absorb water, like nylon does. It is high temperature resistance and excellent chemical resistance, low water<br />
absorption, and a low price. Polypropylene is fabricated into the base or wicking layer for outdoor clothing. In<br />
recent years Polypropylene has been replaced in many clothing items, especially upper torso clothes, by<br />
polyester, because of its tendency to retain odor and to reshape itself into a scrunched mass after laundering.<br />
CONSTRUCTION<br />
In general fabric construction consists of woven, knit or non-woven (matted) yarns. There are several different<br />
techniques for each construction method. Almost all clothing purchased for alpine use is woven by machine.<br />
Occasionally you see knit clothing made by hand. Types of weaves have often been mistaken for types of<br />
fabrics. For example, satin is a type of weave, and does not denote fabric content. Satin is woven from silk,<br />
polyester, acetate, or even blends of fibers. Today’s mountaineering garments often feature pile weaves or<br />
fleece. Pile, sheared pile, and fleece combines plain weave with filling yarns drawn through the plain weave<br />
pattern to create loops, which may be sheared to finish the surface.<br />
Some of the more technical outdoor clothing, from underwear to weather and wind-proof shells, use tight,<br />
complex weave patterns to create breathable, waterproof clothing. Fabric treatments are also a major player in<br />
garment construction. Factory applied water-repellent finish (DWR) causes the rain to bead up on the outer<br />
surface. These treatments are used to create stain resistance, enhance moisture wicking, increase resilience<br />
and reduce wrinkles. The treatment will wear off with use, but can be substantially restored with spray-on or<br />
wash-in products sold by manufacturers for home treatment.<br />
COLOR can make a difference is comfort for you and in the visual impact for others. Most people remember<br />
that dark colors will absorb more heat than light colors when there is sufficient sunlight present. However, this<br />
characteristic has its low light alternative, which is often overlooked. Dark colors will radiate more heat than<br />
light colors during periods of low light. Wearing a black hat can both overheat you during the day and rob you<br />
of precious heat during dusk. You may want to consider a compromise color such as gray or tan.<br />
SIZE is important primarily when your garment is either too tight or too loose. The better fit is on the loose side<br />
because it will allow a greater range of movement, your clothing will trap more warm air, and your blood flow<br />
will not be restricted.<br />
Care And Cleaning<br />
The expense and technical complexity of mountaineering clothes necessitates great care in cleaning and<br />
storage. Almost every garment comes with cleaning instructions, which should be strictly followed if not<br />
exceeded in the mildness of cleaning treatment. Detergent can be too harsh on some fabrics or can alter the<br />
physical water repellency character on many technical garments with waterproof treatment. As a result, some<br />
manufacturers offer their own or recommend certain non-detergent cleaners.<br />
Machine washing may be indicated on the garment’s label, but repeated machine washings and drying will<br />
change the feel and performance of most fabrics. If you like the way the garment feels and you’re willing to<br />
invest a little time to maintain your investment, consider one of the non-detergent cleaner sold specifically for<br />
the type fabric.<br />
You may want to hand-wash your clothes with the non-detergent cleaner. Just follow the directions on the<br />
bottle. Ask the sales person if they have ever used the product and consider their experiences and results<br />
before you use the cleaner on you clothing.<br />
Hand-wash similar fabrics and colors, rinse thoroughly and check the label to see if you can machine dryer on<br />
low heat long enough to remove wrinkles and the surface water. Machine drying can stiffen, shrink or<br />
deteriorate many fabrics.<br />
<strong>Wilderness</strong> <strong>Skills</strong> Module Page 26 of 73<br />
<strong>Olympia</strong> <strong>Mountaineers</strong> - Hiking, Alpine Scrambling and Basic Climbing
Home water and weatherproofing treatment is quite easy and relatively inexpensive. The fabric treatments<br />
range in cost from $10 to 15 dollars per garment per treatment. The treatment will last for several extended<br />
uses.<br />
Other Thoughts<br />
Here are some basic ideas on purchasing priorities<br />
Safety<br />
No Compromise<br />
Destination Where do you want to go? What’s the terrain and weather condition?<br />
Commitment Are you in this for the long run?<br />
Budget<br />
Do you really need to own it?<br />
Versatility What else can I use it for?<br />
The Short Answer to Clothing<br />
Synthetic or wool clothing must always be worn. Cotton is not acceptable.<br />
Items of Clothing needed for the Backcountry<br />
Socks, heavy pair and liner pair, and extra set - Thin socks worn under outer socks will minimize friction<br />
and lessen the chance of getting blisters. Thicker outer socks will be warmer and more comfortable on your<br />
feet, provided that there is enough room in your boots. Thick socks pad the feet more and reduce the chance<br />
of getting blisters. For cold weather, you may consider chemical toe warmers. Be sure to test them in your<br />
boots at home before you use them in the backcountry.<br />
Gaiters, long - Help keep your feet warm and dry by keeping rain, water, and snow out of your boots and<br />
socks. Full-calf gaiters are preferred.<br />
Underwear, tops and bottoms - Lightweight synthetic required. Also, synthetic briefs (Capilene, etc.) will<br />
keep you significantly warmer and dryer. In winter, you should always wear synthetic briefs! Buying higher<br />
quality tops is more important than bottoms because the top covers the core body, and also because tops last<br />
longer than bottoms since they receive less wear and tear. High quality underwear should last for several years<br />
of outdoor activity. Mid-weight underwear is probably the most versatile weight, as it can be used in all<br />
seasons.<br />
Pants or shorts - Lightweight synthetic or wool recommended. Wear over your long underwear.<br />
Pants and shirt, second pair - Synthetic or wool recommended. Shirt should be long sleeved. Fleece pants<br />
are better than heavy wool for warmth. Side zips will allow you to put them on without taking your boots off in<br />
cold or wet weather, so you will be more likely to use them when you need them.<br />
Sweater or jacket - Synthetic or wool recommended, thick enough to be your primary insulating layer for the<br />
upper body. Fleece is excellent (Polar Proof will make fleece water-resistant). Sweaters and jackets should be<br />
long enough to keep your waist covered when you bend over.<br />
Hats - one for sun and one for warmth - and a bandana - Hats are essential to protect your head from the<br />
sun and from cold. "If you get cold, put on a hat" really works. Most of your body heat is lost through your<br />
uncovered head. If your feet are cold, wear warmer head-gear, or put on a sweater -- warming your head and<br />
torso will raise your body core temperature and thereby warm your extremities. A balaclava weighs very little<br />
and is nice to have for severe cold or wind. Make sure the hat you use for warmth is made of synthetic material<br />
such as fleece -- Wind-Stopper fleece is significantly warmer than other materials.<br />
A cotton bandana is the one item of cotton you should carry. You can use it to dry yourself, wipe off sweat, or<br />
clean off your glasses. Wear it as a head band and look cool, wear it on your head for sun protection and look<br />
super cool. In an emergency, you can use it to make a bandage or sling.<br />
<strong>Wilderness</strong> <strong>Skills</strong> Module Page 27 of 73<br />
<strong>Olympia</strong> <strong>Mountaineers</strong> - Hiking, Alpine Scrambling and Basic Climbing
Mittens or gloves - For the same thickness, mittens are significantly warmer than gloves - try to get mittens<br />
made of Wind-Stopper material (it's significantly warmer). Ideally, you should also carry waterproof overmitts or<br />
shells.<br />
Don't wait until your hands are cold to put on mittens or gloves, because it takes an immense amount of heat<br />
and energy to re-warm them. If it is cold, wear mittens from the start; if your hands get hot, take them off for a<br />
while. Attach wrist loops to your mittens and gloves, so that when you take them off they are still attached to<br />
you by the loop. If you do not use wrist loops, put your mittens inside your coat rather than on the ground or<br />
snow. An extra set of cheap, light, synthetic glove liners are nice to carry for when your regular ones get wet. If<br />
you get cold easily, consider carrying a few packets of chemical hand warmers (available from most outdoor<br />
stores).<br />
Rain and Wind Gear: This the second most important gear that you will carry, after boots.<br />
Pants - Full side-zip models are preferred because you can put them on and take them off<br />
without removing your boots. This is especially important in cold or wet weather, or when<br />
you need to put them on and take them off repeatedly. They should be large enough to fit<br />
over all other layers.<br />
Parka or jacket - Essential to stop rain and snow, and to prevent wind from robbing the<br />
insulating value of inner clothing. Must have a hood, and be large enough to fit comfortably<br />
over all inner clothing. Zip front parkas offer greater temperature control than pullovers or<br />
anoraks. Ponchos and cagoules don't work well in wind, and are cumbersome because<br />
they don't allow you to see your feet.<br />
Equipment for the Backcountry<br />
Day pack - Your daypack should be large enough to hold all needed items, at least 2,000 cubic inches. It<br />
should have a large waist belt, preferably padded, to comfortably transfer its weight to the hips and legs. A<br />
pack with a long, narrow shape will be more stable on scrambles and transfer weight to your hips better than a<br />
short, wide pack. You may line your pack with a plastic bag or use smaller plastic or nylon bags to keep your<br />
gear dry and organized. Stow extra clothing and survival gear at the bottom of your pack, and heavy items<br />
close to your back. If you plan to use your pack for winter trips, get one of 3,500 cubic inches or more, to allow<br />
room for additional clothing. If in doubt about size, take your gear to an outdoor store and test the pack, to<br />
make sure everything will fit.<br />
Whistle or mirror - For emergency signaling. (3 blasts = “Help, I'm lost!”)<br />
Pad, insulating - Most insulating pads are cheap, lightweight, durable, and versatile. A form pad will provide<br />
insulation and comfort as a seat during breaks or as a sleeping pad on an unplanned night out. It can also be<br />
used to splint injured limbs. Closed-cell pads won't soak up water. A 1/2" thick sit pad or 3/4 length pad is good<br />
for warm weather, full length is best for cold weather.<br />
Toilet paper - Essential for personal sanitation. Carry a digging tool<br />
(plastic trowel, ice ax, etc.) in the summer for burying your waste.<br />
Bring Ziploc plastic disposal bags for carrying out used toilet paper<br />
and hygiene products, and dispose of them at home. On snow, also<br />
carry out your waste. See page 53 of this syllabus, <strong>Wilderness</strong><br />
Ethics, for instructions on proper wilderness disposal of human<br />
waste.<br />
Paper and pencil - Useful for marking maps, recording elevations,<br />
times, route descriptions, names, and for completing accident report<br />
forms or recording rescue information.<br />
<strong>Wilderness</strong> <strong>Skills</strong> Module Page 28 of 73<br />
<strong>Olympia</strong> <strong>Mountaineers</strong> - Hiking, Alpine Scrambling and Basic Climbing
Optional Equipment<br />
Camera, binoculars – Cameras are popular pack items because hiking and backcountry travel provides many<br />
opportunities for scenic photographs. Binoculars can be used to check possible travel routes or watch wildlife.<br />
Altimeter - An altimeter is helpful in estimating where you are, especially while on trails or near natural<br />
features like ridges or streams. Usually, at least one person in a hiking party will have an altimeter.<br />
Trekking poles - You may want to carry one or two trekking poles to aid your ascent and descent when the<br />
terrain is not steep enough to require an ice ax. Several studies have suggested that using trekking poles while<br />
hiking reduces stress on the knees. Old ski poles are a cheap alternative, but they don’t adjust or collapse for<br />
safe storage as most trekking poles do.<br />
Camp stove – occasionally there may come a time when a stove’s ability to heat water for emergency use or<br />
simply for cooking dinner is indispensable. Although rarely carried on day trips, the camp stove is essential for<br />
a backpacking trip and overnighter. Often one stove will meet the needs of 2 to 5 people, depending on the<br />
availability of running water (more stoves are needed if snow must be melted) and the amount of water<br />
needed. Generally white gasoline is used in liquid fueled stoves and Butane/Propane mix is used in stoves<br />
fueled by pressurized gas canisters. Each has advantageous and special safety considerations.<br />
Water purification tablets or filter - You may want to carry purification tablets or a water filter or purifier,<br />
especially on hot days or overnight trips. Don't plan on finding water sources on a day trip unless you’re sure<br />
there are plenty on your route. Purification tablets cost and weigh much less than filters or purifiers. Water<br />
purifiers kill viruses; water filters do not, but filters usually cost less than purifiers and are adequate for use in<br />
the wild. Purification tablets and iodine-based purifiers give water a chemical taste, which is harmless but<br />
unpleasant to many people.<br />
Insect repellent - many people don't like using repellents, but you should carry some in<br />
case you absolutely need some - which eventually will happen in the mountains. Insects are<br />
very seasonal in the mountains, but at certain times, you may consider insect repellent an<br />
emergency need. The most effective repellents contain DEET. Repellents are available with<br />
DEET concentrations up to 100%, but according to Consumer Reports, concentrations<br />
above 50% do not increase effectiveness. Most repellents are harmful to synthetic materials<br />
(nylon, etc.), so don't use it on synthetic clothing or equipment.<br />
Pack rain cover - A pack rain cover will help keep your pack and the gear inside it drier in the rain, and lighter<br />
(wet items are heavier). A heavy-duty trash bag with shoulder-strap slits cut in it will also work. You may want<br />
to use a large plastic bag to line your pack, then put all your gear inside the bag, so the gear inside will stay dry<br />
without a pack cover. The large plastic bag can also be used for an emergency bivy sack. (So can your pack.)<br />
Avalanche rescue beacon (transceiver) - If you hike in the winter, or snowshoe or backcountry ski, you'll<br />
eventually want to get an avalanche rescue beacon. Rescue beacons are required on some winter hikes. (Only<br />
course graduates may sign up for The <strong>Mountaineers</strong>’ winter scrambles.) Although expensive, an avalanche<br />
beacon could save your or another’s life. Before purchasing one, you should take a course that teaches you<br />
how to use one. Many outdoor stores, commercial courses, or The <strong>Mountaineers</strong>’ Snowshoe Course can<br />
provide instruction.<br />
Snow shovel – When traveling in snow during avalanche season, all party members should carry a shovel.<br />
Shovels are used to build snow shelters, dig out tents, dig pits or snow break platforms to assess avalanche<br />
conditions, and - most importantly - for avalanche rescue. In hard snow, aluminum shovels work better than<br />
plastic. When digging, don't pry - you'll break any lightweight shovel. Use the shovel to cut loose the snow,<br />
then scoop it out. Shovels with extendable handles are easier to use, and removable handles pack better. Wax<br />
the blade before a snow trip to prevent snow from sticking to it and increase the shovel’s effectiveness.<br />
<strong>Wilderness</strong> <strong>Skills</strong> Module Page 29 of 73<br />
<strong>Olympia</strong> <strong>Mountaineers</strong> - Hiking, Alpine Scrambling and Basic Climbing
Friends - It is always safer to be out there with others, especially when venturing off-trail or on snow, in case of<br />
an accident, injury, major equipment failure, or becoming lost. Hiking with others allows you to share good<br />
times, and learn from each other. The <strong>Mountaineers</strong> Climbing Code requires a minimum party of three for<br />
backcountry trips. (See page 48.)<br />
Dry clothes in car - After a hike, you may feel too tired and worn out to change your clothes. But if you do,<br />
you'll feel so much better! Guaranteed! You won't continue to lose energy trying to heat your body in wet<br />
clothes. Your partners will appreciate how much better you'll smell; and if you go out to eat afterwards, the<br />
restaurant staff and patrons will also appreciate it. You'll notice that most experienced hikers change some<br />
clothing after their hike.<br />
When carpooling, always take along an equipment bag or garbage bag to hold your muddy/wet boots and<br />
clothing after a trip. Some drivers in a carpool can be very concerned about dirt in their car. And there will be<br />
less lost/misplaced equipment at the parking lot if all your stuff is in one bag, as opposed to spread over the<br />
trunk or back seat.<br />
Other Helpful Items<br />
• Identification<br />
• Trowel With Plastic Bag<br />
• Stuff Bags<br />
• Watch<br />
• Extra Car Keys (To Give Someone Else On Trip In Case You Lose Yours.)<br />
• Personals (Extra Eye Glasses, Eye Lotion, Tampons, Personal Medications, Medic Alert Tag.)<br />
• <strong>Wilderness</strong> Permit<br />
• Book (Nature Guide, Etc.)<br />
• Photocopy Of Guidebook Page Describing Trip & Driving Instructions.<br />
• Fishing Gear & License<br />
• Pot Gripper Or Hot Pad<br />
• Lightweight Thermos<br />
• Bio-Degradable Soap And Scrubby<br />
• Hand Towel<br />
• Candle Lantern<br />
• Plastic Bag (For Shoes/Boots To Keep Vehicle Clean)<br />
<strong>Wilderness</strong> <strong>Skills</strong> Module Page 30 of 73<br />
<strong>Olympia</strong> <strong>Mountaineers</strong> - Hiking, Alpine Scrambling and Basic Climbing
Equipment Checklist: Best Quality and Options<br />
Clothing / Equipment<br />
Cost Range New Range Used-Sale<br />
Illumination (flashlight extra bulb and batteries) $15 - $50 $2 - $10<br />
Navigation (map and compass) $20 - $100 NO<br />
Hydration (water) $20 - $75 NO<br />
Nutrition (extra food) $1 - $3 NO<br />
Insulation (extra clothing) $18 - $100 $5 - $25<br />
Sun Protection (sunglasses and sunscreen) $15 - $110 $10<br />
Repair Kit and Tools (knife) $4 - $10 NO<br />
First Aid Kit $1 - $3 NO<br />
Fire (waterproof matches and fire starter) $4 - $25 NO<br />
Emergency Shelter $70 - $250 $18 - $30<br />
Wicking underwear (top & bottom) $28 - $70 No Thanks<br />
Wool/Fleece Pants (Insulation) $25 - $75 $5 - $25<br />
Wool/Fleece Shirt (More Insulation) $20 - $60 $5 - $20<br />
Wool/Fleece Sweater (More Insulation) $20 - $60 $5 - $20<br />
Wool/Fleece Hat/Ear Covers (Insulation) $10 - $25 $3 - $10<br />
Wool Socks (with liners) $10 - $20 No Thanks<br />
Nylon Walking Shorts (Shell) $18 - $45 $5 - $15<br />
Gloves, Preferably Wool/Fleece $19 - $50 $5 - $20<br />
Mittens (Insulation)<br />
Over Mitts – Waterproof (Shell) $25 - $55 $10 - $20<br />
Boots - Lug Sole – Steel/Fiber Shank $150 - $350 Hard to find $50+<br />
Parka Waterproof-Breathable $100 - $300 $5 - $30<br />
Rain Gear (coat and pants) (if Parka not suitable) $30 - $55 Hard to find<br />
Wind Breaker (if Parka not suitable) $45 - $125 $10 - $30<br />
Gaiters (Shell) $25 - $55 $5 - $25<br />
Belt or Suspenders $8 - $20 $2 - $5<br />
Snowshoes $115 - $215 Hard to find $50+<br />
Ski/Trekking Poles $50 - $110 $12 - $45<br />
Summit Pack $70 - $210 $30 - $70<br />
Water Containers with water $5 - $15 $2 - $12<br />
Seat Pad $5 - $50 $0 - $5<br />
Add from Useful Items List<br />
Meal with sufficient nutrition and energy for the day $5 - $10 Get it fresh<br />
Snack easy to access, healthy and interesting $5 - $10 Get it fresh<br />
Electrolyte Mix to replenish loss $5 - $10 Get it fresh<br />
Leave a set of dry clothes and shoes in the car $ 0 $ 0<br />
Wallet, keys for your car, snack for the trip home $ 0 $ 0<br />
Some way to call home - they may be interested $ 0 $ 0<br />
Large Overnight Pack $125 - $425 $50 - $100<br />
Sleeping Bag $100 - $200 $25 - $100<br />
Insulating Pad $25 - $55 $3 - $15<br />
Backpack Stove and Fuel 40 - $90 $8 - $35<br />
Cook Kit Cup $20 - $60 $5 - $25<br />
Utensils and other Tools $1 - $10 $0 - $3<br />
Kitchen cleanup $5 - $15 $1 - $5<br />
Tent – Fly – Ground Cloth $120 - $450 $50 - $180<br />
Water Filter (or treatment) $12 - $110 Don’t skimp<br />
Camp Shoes (light comfortable) $20 - $60 $3 - $10<br />
<strong>Wilderness</strong> <strong>Skills</strong> Module Page 31 of 73<br />
<strong>Olympia</strong> <strong>Mountaineers</strong> - Hiking, Alpine Scrambling and Basic Climbing<br />
Ten Essentials<br />
Clothing<br />
Equipment<br />
Food<br />
In Car<br />
Overnight
Clothing / Equipment<br />
Cost Range New Range Used-Sale<br />
Personal hygiene (compact / light) $12 - $40 Use what you have<br />
Pillow (or substitute) $8 - $15 $1 - $5<br />
Cord or rope for general camp purposes $2 - $8 $1<br />
Use Permit $4 - $50 Buy it Don’t cheat<br />
Personal Items Identification – Money – Eye Glasses $2 - $25 Use what you have<br />
Toilet paper – blue bags and resealable over bag $1 Use what you have<br />
Insect Repellent $2 - $10 Get it new<br />
Watch $5 - $100 Use what you have<br />
Bandana – Handkerchief - Towel $2 - $10 No Thanks<br />
Neck Gaiter (scarf) $8 - $20 $1 - $5<br />
Camera and Film $12 - $$$$ $10 - $$<br />
Note Pad, Pen and Pencil $1 - $5 $0 - $2<br />
Repair kit $8 - $30 Use what you have<br />
Trowel $2 - $8 $1 - $3<br />
Nylon Cord $5 - $10 Use what you have<br />
Stuff Sack $5 - $25 $1 - $5<br />
Trash-Litter Bag 2+ $1 Use what you have<br />
Emergency shelter $10 - $15 $2<br />
Very Useful<br />
How to Choose a Daypack<br />
For any activity that involves more gear than you can carry in your pockets — hiking, climbing, a full day at<br />
school – you can find a daypack that will make the experience more efficient and better organized. Images<br />
from Outside Magazine.<br />
Panel Loader or Top Loader?<br />
Panel-loading daypacks offer a main storage compartment that is<br />
accessed via a U-shaped zipper. Fully opened, one sidewall (or panel) of the<br />
compartment falls away like a flap.<br />
Such a wide opening makes panel loaders easier to load and rummage<br />
through when you're searching for something. This makes them particularly<br />
appealing for students, parents or trip leaders. If organization is important to<br />
you, consider a panel loader.<br />
Top-loading daypacks generally are<br />
simpler in design and a little lighter than<br />
panel loaders of a comparable size.<br />
(Zippers and extra compartments add ounces.) Top loaders, which usually<br />
close with a drawstring, are also easier to overstuff when needed.<br />
Some top-loaders offer a "floating" (extendable) top lid that creates space for<br />
extra gear so you can exceed the pack's stated capacity. This is valuable to<br />
climbers who may need to carry a lot of gear during the approach but don't<br />
want to climb with a larger volume pack once most of the contents (rope,<br />
rack, shoes, helmet) are in use.<br />
Top loaders with side compression straps also do a nice job of stabilizing a<br />
load, making them appealing to climbers, scramblers and skiers.<br />
<strong>Wilderness</strong> <strong>Skills</strong> Module Page 32 of 73<br />
<strong>Olympia</strong> <strong>Mountaineers</strong> - Hiking, Alpine Scrambling and Basic Climbing
The downside? Organizing and locating gear in a top loader can be a challenge. Something important, it<br />
seems, always migrates to the bottom of the pack.<br />
A few daypacks offer dual access points—top and panel. That's a handy option.<br />
What's the Best Size?<br />
The sweet spot for most hiking and multisport daypacks is 30 liters (roughly 1,800 cubic inches). That's enough<br />
capacity to hold the 10 Essentials plus some extras.<br />
Some specialized packs lie at the far ends of the daypack-capacity continuum. A trail-running pack may be<br />
designed to hold as little as 10 liters (600 cu. in.). A climbing pack may hold 40 to 50 liters (around 2,400 to<br />
3,000 cu. in.).<br />
Are you often a trip leader? Someone who carries extra gear for other members of your family such as small<br />
children? Look for a pack in the 40-liter range—perhaps even larger.<br />
In most cases, though, packs with capacities at or near 30 liters are a popular choice for a typical day hike.<br />
Match Your Pack with Your Activity<br />
If you day hike in the summer and ski tour in the winter, you may want more than one daypack to<br />
accommodate both activities. If, however, you'd prefer a single, do-it-all pack, evaluate your ambitions and<br />
expectations. Images from Outside Magazine.<br />
For example, will your pack get as much use (or more?) at school as it will on the trail? Then steer yourself<br />
toward a larger-capacity book bag. Plan to do some scrambling during some of your hikes? Consider packs<br />
with narrower profiles so your arms have room to swing freely.<br />
Day hiking: The following attributes or features are often preferred by day hikers:<br />
• an adequate capacity, typically 30 liters<br />
• side pockets (usually elasticized mesh slots that lie flat against the packwedge<br />
an item into place)<br />
• compartments (slots or pockets) for organizing small items and loose gear<br />
• hydration-system compatibility<br />
Scrambling/climbing: Choose a narrow-profile pack, perhaps one that includes a<br />
padded back or a framesheet. Often you'll be climbing to higher elevations where the<br />
air is cooler, so you'll need a capacity of 40 liters (about 2,400 cubic inches) or so to<br />
hold extra clothing. Your ambitions will determine whether you need a lower-capacity<br />
multiday backpack or a large technical daypack. Compare your standard equipment<br />
load (ropes, carabiners, etc.) with the list of specialized features a pack may provide<br />
(ice axe loop, crampon patches, daisy chain). A variety of load-stabilizing compression<br />
straps and a sternum strap are also valuable. Ask your climbing companions what<br />
features work best for them.<br />
Ski touring: A smooth, narrow profile is a plus. Your range of travel (and the extra<br />
clothing you usually carry) will determine your capacity requirements. Look for a<br />
means to attach your skis to the pack and a secure place to keep your shovel and<br />
probe handy. A sternum strap and hipbelt are essential. Climbing packs often work<br />
very well for backcountry touring.<br />
<strong>Wilderness</strong> <strong>Skills</strong> Module Page 33 of 73<br />
<strong>Olympia</strong> <strong>Mountaineers</strong> - Hiking, Alpine Scrambling and Basic Climbing
Trail running/adventure racing: A lumbar pack, water-bottle<br />
pack or small technical daypack (at 25 liters or less) are all good<br />
choices. Lumbar packs (also called waist packs) are less inclined<br />
to shift while you run, and it's nice to keep your back clear so<br />
perspiration can escape.<br />
Overnighters: If you have a minimalist's mentality and the gear to match it (a teeny sleeping bag; a bivy sack<br />
or similar next-to-nothing shelter; and so on), a technical daypack can handle an ultralight overnight load.<br />
Typically, packing with such efficiency is a talent of an elite few. Newcomers to the ultralight scene are<br />
probably better advised to go with an ultralight multiday pack.<br />
You may want to look for a pack that offers a padded back (or some type of framesheet) to help support a load,<br />
a modest lumbar pad and a padded (though not necessarily beefy) hipbelt. Some models offer one or two<br />
aluminum stays to accommodate a heavier load. The more amenities you crave, of course -- even during an<br />
overnight trip -- may push you into a larger multiday pack.<br />
Ventilated Back Panels<br />
This relatively recent design feature uses lightweight framing (or other engineering techniques) to suspend the<br />
load away from your back. The result: A steady flow of air can reach your back. This delivers a big bonus in<br />
comfort when carrying a pack on warm days. Packs from Gregory, Osprey and Deuter are among the first<br />
packs to offer this innovation.<br />
Note: If you routinely carry bulky or heavy loads, these packs may not be your best choice—a heavy load<br />
suspended away from your body could affect your balance. If you are shopping for such a pack at an REI<br />
store, try loading it with some weight and take a test-stroll around the store to gauge how it carries.<br />
What Makes a Quality Daypack?<br />
Many stores sell backpacks. So which is a better value: A bargain pack from a department store or a wellengineered<br />
technical pack? You may wonder: "A daypack is a daypack, right? It's a sack attached to a couple<br />
of shoulder straps. How different can they be?"<br />
You'll initially save money with a bargain pack, but you'll likely miss out on design refinements found in topbrand<br />
packs that deliver better performance, convenience and comfort. Such as? Well, to name a few:<br />
• Padding, support and shaping: Shoulder straps and, on some models, scapula pads, offer plusher<br />
padding and great longevity in comfort; some packs include shaped bottoms or structured back panels<br />
to prevent loads from sagging, keeping items closer to your back.<br />
• Women-specific designs: Shoulder straps are contoured to comfortably conform to the female form;<br />
some offer narrower profiles.<br />
• Tougher fabrics at lighter weights: Discount packs commonly use weightier fabrics purchased in bulk<br />
to cut costs; more sophisticated packs may use a rugged 630-denier nylon that offers superb durability<br />
at a noticeable weight savings.<br />
• Ventilated back panels: Mentioned previously.<br />
• Sustainable fabrics and materials: An emerging trend already seen in packs such as the Osprey<br />
React.<br />
• Water-resistant zippers: Eliminates storm flaps, saving weight and creating a cleaner look. Many<br />
times these zippers are welded, or glued, in place. This eliminates stitching, increases watertightness,<br />
boosts strength and further reduces weight.<br />
<strong>Wilderness</strong> <strong>Skills</strong> Module Page 34 of 73<br />
<strong>Olympia</strong> <strong>Mountaineers</strong> - Hiking, Alpine Scrambling and Basic Climbing
• Waistbelt pockets: Handy for keeping small items (gel packs, for instance) within easy but unobtrusive<br />
reach.<br />
• Hydration system compatibility: Some packs include sleeves for a hydration reservoir; most offer a<br />
port for a hydration hose.<br />
• Tool loops and daisy chains: External attachment points for an ice axe, crampons, climbing gear,<br />
trekking poles.<br />
• Small but useful nuances, including:<br />
o Padded back panels<br />
o Media pockets, even earbud holders<br />
o Laptop slots or sleeves in school, commuter or travel packs<br />
o Organizers and keyholders<br />
Contributor: Terry Wood, REI Expert Advice editor<br />
Purchasing Clothes and Equipment<br />
Expen$e$<br />
<strong>Wilderness</strong> travel requires a fair amount of equipment, including a pack, sturdy boots and<br />
outdoor clothing. If you are not already well equipped for hiking in the Pacific Northwest, it<br />
can be expensive to outfit yourself. If you want new, top-of-the-line gear, you could easily<br />
spend $1,000 or more.<br />
Fortunately, there are many options available if you are on a tight budget. We will provide<br />
information throughout the course on what equipment and clothing you will need. But take<br />
no one's advice as absolute. It's ultimately YOUR choice to determine what's best for you.<br />
Here are a few tips for saving money:<br />
USE THINGS YOU ALREADY HAVE ON HAND. Most everyone has a few items at home that are adequate<br />
for hiking - - - wool clothing, first aid supplies, hats, mittens, sunglasses, etc.<br />
BORROW FROM A FRIEND OR RELATIVE WHO HAS THE GEAR. With the ever-increasing numbers of<br />
hikers, you shouldn't have to look far to find someone who can help you. This is a good way to find things like<br />
ice axes, maps, gaiters, rain gear, packs, or stiff mountaineering boots. Make sure though that the equipment<br />
is reliable and fits properly.<br />
RENT. Most local outdoor shops rent packs, ice axes, mountaineering boots, and other outdoor equipment.<br />
These items are usually around $5 - $10 each per day. This is an excellent way to try out major items before<br />
purchasing them. Be sure that you don't wait until the last minute to rent because most stores have limited<br />
supplies, and demand on weekends is VERY high.<br />
BUY USED EQUIPMENT. There are several second-hand sporting and outdoor shops in the area (see list at<br />
end of the section). Thrift stores, surplus stores, and even garage sales are also great places to check.<br />
The <strong>Mountaineers</strong> Gear Grab. The <strong>Olympia</strong> <strong>Mountaineers</strong> generally host a Used Equipment Sale in February<br />
to help students find useful equipment at affordable prices. Other branches also host used equipment sales<br />
throughout the year such as Seattle <strong>Mountaineers</strong> “Gear Grab”, where members sell their used equipment in a<br />
flea market setting. Look for the next Gear Grab in the January or February Go Guide newsletter.<br />
Additional information on gathering, purchasing or borrowing the necessary equipment for this course can be<br />
found at the end of this section.<br />
<strong>Wilderness</strong> <strong>Skills</strong> Module Page 35 of 73<br />
<strong>Olympia</strong> <strong>Mountaineers</strong> - Hiking, Alpine Scrambling and Basic Climbing
In the South Puget Sound area, several excellent outdoor stores offer students in the Mountaineer’s Courses<br />
good equipment at good prices. (See following list.) The owners and staff at each site are very knowledgeable<br />
about the kind of equipment that works best in our environment. They climb too. Based on the comments they<br />
received from earlier students, they know the successes and failures of the equipment and can probably tell<br />
you how it will work for the applications you have in mind. These stores are a great resource for outdoor travel<br />
students and your patronage is mutually beneficial.<br />
Purchasing your equipment is educational and enjoyable. During the process you will learn why and how each<br />
piece of equipment can be used to its maximum potential. In the alpine environment, you will want dependable,<br />
quality equipment. Since you will be carrying it on your back, you’ll want light-weight items that have multifunctions,<br />
such as waterproof stuff sack that you can fill with clothes for a pillow or seat cushion, or carry water<br />
in an emergency, or . . . You will also want to become familiar enough with your equipment to make minor<br />
repairs if necessary.<br />
If you’re looking for bargains, you need to know a lot about the item before you buy it. You should be familiar<br />
with quality materials, workmanship, and long-standing manufacturers who back their products. Buying<br />
equipment on sale can be fairly easy once you know brands and products you are willing to trust. Watch for<br />
sales, generally at the end of the season is the most common times for sales. Buying used equipment can be<br />
tricky. You may not recognize the manufacturer, the style and the original condition of the equipment. Look for<br />
damage, or wear. Discuss its features. Try to get the original manufacture’s product literature. Test it out. Ask if<br />
you can return it undamaged if you’re not satisfied with its performance.<br />
Here are a few tips to help you organize your purchases for economy and necessity.<br />
• Make a list of equipment you need in priority order.<br />
• Carry the list and make notes on the products you like.<br />
• Check out other folk’s gear. Those who have been around for a while can tell you a lot about why they<br />
like their equipment for what they would purchase if they needed to do it over again.<br />
• Mark your calendar with dates of sales, used equipment sales and upcoming hikes.<br />
• Become familiar with equipment and prices while visiting at local outdoor stores, in catalogues or at<br />
web sites of various manufacturers.<br />
• Check out catalogues or web sites of wholesaler such as, Sierra Trading Post and Campmor.com.<br />
• Try the club Gear Grab or Used Equipment Sales. It’s not likely that your fellow club members will<br />
offer unreliable clothing or equipment.<br />
• Visit used experienced clothing and furnishings stores. You’re sure to find a bargain if you know quality<br />
equipment and can tell its condition. You will probably have a week or more to try it out and be sure it<br />
meets your needs.<br />
Cheap gear on line<br />
o www.gearengine.com<br />
o www.steepandcheap.com<br />
<strong>Wilderness</strong> <strong>Skills</strong> Module Page 36 of 73<br />
<strong>Olympia</strong> <strong>Mountaineers</strong> - Hiking, Alpine Scrambling and Basic Climbing
Equipment - Where To Get It?<br />
New Equipment & Clothing - The "mountaineering" stores listed below sell quality equipment suitable for<br />
hiking and mountaineering. Based on the experience of the Hiking and Alpine Scrambling Committee<br />
members, the highlighted stores are local and offer experienced and knowledgeable staff available to give<br />
advice and recommendations. (These lists are not intended to be endorsements.)<br />
Store Type Phone Address City<br />
The Alpine Experience Mountaineering 360-956-1699 408 <strong>Olympia</strong> Ave <strong>Olympia</strong><br />
Backpacker's Supply Mountaineering 253-472-4402 5206 S Tacoma Way Tacoma<br />
Big Five Sporting Goods General Outdoors 360-786-6529 1001 Cooper Point Rd <strong>Olympia</strong><br />
Bill's Blueprint Compasses 425-259-0859 2920 Rockefeller Everett<br />
Cabelas’ Outdoor plus 360-252-3500 1600 Gateway Blvd NE Lacey<br />
Feathered Friends Mountaineering 206-392-2210 119 Yale Ave N Seattle<br />
Great Pacific Patagonia Clothing 206-622-9700 2100 1st Ave Seattle<br />
JanSport Outlet Packs/equipment 425-353-0200 10411 Airport Road Everett<br />
Marmot Mountain Works Mountaineering 206-453-1515 827 Bellevue Way NE Bellevue<br />
McHale Packs Packs 206-281-7861 29 Dravus St. Seattle<br />
Mountain Safety Research Mountaineering 206-624-8573 4225 2nd Ave S Seattle<br />
North Face Mountaineering 206-622-4111 1023 1st Ave Seattle<br />
Olympic Outfitters General Outdoors 360-943-1114 407 E. 4th Avenue <strong>Olympia</strong><br />
Outdoor & More General Outdoors 800-460-5939 510 Westlake Ave N Seattle<br />
Outdoors Northwest General Outdoors 360-794-8100 19551 State Road 2 Monroe<br />
Proguide & Mountain Supply Mountaineering 260-528-7515 8954 Aurora Ave. N Seattle<br />
Recreational Equipment Inc. Mountaineering 206-233-1944 222 Yale Ave. N Seattle<br />
Recreational Equipment Inc. Mountaineering 425-882-1158 7500 166 Ave NE Redmond<br />
Recreational Equipment Inc. Mountaineering 206-774-1300 4200 194th St SW Lynnwood<br />
Recreational Equipment Inc. Mountaineering 206-941-4994 2565 S Gateway Center Fed. Way<br />
Recreational Equipment Inc. Mountaineering 206-248-1938 240 Andover Park W Tukwila<br />
Sportsman’s Warehouse General Outdoors 360 459-5800 1220 Marvin Road NE Lacey<br />
Rental Equipment<br />
Some mountaineering and backpacking equipment may be rented: boots, helmets, sleeping bags, packs, ice<br />
axes, gaiters, tents, etc. Most major outlets rent; check with The Alpine Experience, Olympic Outfitters, REI,<br />
<strong>Wilderness</strong> Sports, and Backpacker's Supply.<br />
Many outdoor stores sell their used rental equipment at reduced prices; e.g., The Alpine Experience, Olympic<br />
Outfitters, Marmot Mountain Works, <strong>Wilderness</strong> Sports, REI. Know what you want when you buy, because you<br />
may not be able to return used items.)<br />
Equipment/Clothing Repairs -<br />
Dave Page, Cobbler Boots 206-632-8686 3509 Evanston Ave N Seattle<br />
Northwest Garment General 206-545-8683 4250 Fremont Ave N. Seattle<br />
Rainy Pass Repairs General 206-523-8135 5307 Roosevelt Way NE Seattle<br />
<strong>Wilderness</strong> <strong>Skills</strong> Module Page 37 of 73<br />
<strong>Olympia</strong> <strong>Mountaineers</strong> - Hiking, Alpine Scrambling and Basic Climbing
<strong>Wilderness</strong> Ethics<br />
As the wilderness becomes more heavily used, it is important<br />
for each of us to learn and practice minimum impact skills.<br />
We must, or someday there won't be any wilderness for us to<br />
enjoy and appreciate. As "knowledgeable <strong>Mountaineers</strong>", we<br />
have a special responsibility to be examples for other lessknowledgeable<br />
back-country travelers. The <strong>Mountaineers</strong><br />
take wilderness ethics seriously.<br />
<strong>Wilderness</strong> Ethic Guidelines<br />
The popularity of hiking, backpacking, backcountry skiing, and climbing grows each year. Competition for<br />
space and solitude increases. Soil, plants, water, wildlife and scenery bear the brunt of the seasonal onslaught.<br />
Litter, pollution, erosion, and noise increasingly scar the wilderness we seek to enjoy.<br />
When we step from the car and onto the trail, the protective asphalt is left behind us. Our attitude and actions<br />
must change to conform to the fragile surroundings we're visiting. A backcountry ethic must take hold.<br />
We're obligated, as backcountry users, as <strong>Mountaineers</strong>, to help sustain the illusion of solitude and the illusion<br />
of being first. Most of us are sensitive to the obvious--no littering, no polluting, no tree or trail cutting. The land,<br />
however, demands more of us. We must learn how to minimize our impacts even more. We may have to work<br />
at it, but only until it becomes second nature, just like learning to take the proper equipment into the<br />
backcountry.<br />
<strong>Wilderness</strong> <strong>Skills</strong> Module Page 38 of 73<br />
<strong>Olympia</strong> <strong>Mountaineers</strong> - Hiking, Alpine Scrambling and Basic Climbing
Minimum Impact <strong>Skills</strong> – Leave No Trace<br />
Protect The Water Supply<br />
Human activity should be dispersed away from water supplies to keep them unpolluted.<br />
ALWAYS CARRY WATER AWAY FROM THE SOURCE TO USE IT: never wash dishes or<br />
bodies directly in the source. By doing these chores away from shore (i.e. 200 feet), you<br />
allow pollutants to be filtered out by the soil. Remember that even though "biodegradable" soap is preferred<br />
over regular soap, it is still a pollutant.<br />
Dispose Of Human Waste Correctly<br />
Use available facilities before you leave on a trip and watch for opportunities to use established latrine while<br />
hiking. Don't be uncomfortable or modest when you "need to go" - - it's natural and something that we all must<br />
do. In hiking, we simply ask the leader to “take a party separation", leave the group. and go do your thing.<br />
Personal Sanitation. Male hikers need to recognize that while it may be easy for them to take care of<br />
personal sanitation needs, it is not easy for women to do so in the back-country, particularly in mixed groups,<br />
and even more difficult in "open" type country. Men and women must coordinate this activity, and allow<br />
everyone adequate time, privacy, and respect. Nothing makes a trip more unpleasant than needing to "take a<br />
party separation", but not doing so.........or even worse, not drinking water so that you won't need to take a<br />
party separation!<br />
In the field, disperse your impact by using scattered sites, which will biodegrade the waste more quickly than<br />
will a group site. Always choose sites far from any trail, campsite or water source (200 feet or more). For solid<br />
waste, dig a "cat hole" (6" to 8" down) to get into the "biological disposal" layer, and then cover with topsoil;<br />
pack used toilet paper and tampons back out in plastic bags (zip-lock) and dispose of at home.<br />
When there's snow on the ground, never bury your waste. No matter how deep you dig, when spring comes,<br />
the snow will melt and your un-decomposed waste will be there for all to see. Bring supplies for carrying your<br />
waste back out: use double zip-lock plastic bags inside of a larger plastic bag. Containerize your solid waste<br />
using the same technique as urban dog walkers: put a inverted sandwich bag over your hand like a glove,<br />
grasp the waste, pick it up, then turn the baggie other-side out and seal it. Pack it out with you! Dispose of the<br />
waste at home by dumping it out of the bag into a toilet. Double bag the dirty bag and put it in the trash, not in<br />
the toilet.<br />
Pack It Out<br />
If you brought it in, you should take it out. This includes everything from paper and cans to biodegradable food<br />
items including apple cores and orange peels. Burying trash and garbage is not satisfactory, for animals will<br />
often expose the debris. Take a trash bag with you on all trips. Pick up trash you find; leave the wilderness<br />
cleaner than you found it.<br />
Litter life<br />
• Paper 2-5 months<br />
• Orange Peels 6 months<br />
• Plastic Containers 20 years<br />
• Cigarette butts 10-12 years<br />
• Plastic bag 10-12 years<br />
• Nylon cloth 30-40 years<br />
• Aluminum 80-100 years<br />
• Plastic foam doesn't decompose<br />
<strong>Wilderness</strong> <strong>Skills</strong> Module Page 39 of 73<br />
<strong>Olympia</strong> <strong>Mountaineers</strong> - Hiking, Alpine Scrambling and Basic Climbing
Travel With Care<br />
Your boots are potent weapons for wreaking havoc on the environment. While the damage done by one pair<br />
may be slight, the effect of dozens or hundreds can be devastating. Extreme care is necessary in the fragile<br />
alpine meadows at higher elevations. For minimum impact, it is better to walk on snow or rock, instead of<br />
vegetation. Remember that if you are not walking on a trail, you want to keep a new one from developing.<br />
Travel in small groups, share equipment; don't overwhelm others (people or animals) trying to seek solitude.<br />
Plan your trip and carpool. Leave natural features undisturbed. Hiking can do considerable damage to fragile<br />
alpine ecosystems. To minimize damage:<br />
CAMP SELECTION<br />
On Trails: When possible, keep on established trails. Do not cut switchbacks. Walk<br />
single file to protect trail-side vegetation. Stay on the trail even if it's muddy or rutted.<br />
Trails widen when hikers walk around mud or other obstacles on the trail. The result is<br />
more mud and a wider trail.<br />
Off Trails: When traveling cross country, spread out and avoid creating new trails. Try<br />
to walk on snow or rock, and avoid fragile meadows. Leave areas without trails free of<br />
cairns and flagging unless they are already there. Let others have the same adventure<br />
of route-finding that you experienced. If you need to mark your route, remove the<br />
markers when you leave.<br />
In areas where there are established campsites, use the existing campsites. The idea is to prevent damage to<br />
areas that have not already been sacrificed. When an area lacks established sites, you want to keep new sites<br />
from developing. Try to stay off fragile vegetation, and move your site every couple of days to help the plants to<br />
recover. If you encounter a site that has just been used, give it a chance to recover. Never engage in<br />
"engineering projects"; such as digging a trench around you tent. Instead, choose a site that does not require<br />
such projects. Finally, camp at least some distance from water sources.<br />
Campfires<br />
A backpacking stove is really the way to go for minimum impact camping. Roaring campfires are too hard to<br />
justify, because of the long-term damage done to the entire environment: soil, plants and animal life and even<br />
the air. If you find you really must have a fire, use established fire rings (it keeps from sterilizing a new patch of<br />
soil) burn only dead and downed wood, and make sure that the fire is completely out before you leave. Many<br />
areas are closed to open fires so check with the ranger station prior to your trip.<br />
Be Unobtrusive<br />
Try to travel in small groups, which create less noise and do not overwhelm<br />
others trying to seek solitude. Use equipment that comes in minimum impact<br />
colors (dark green, brown, dark blue). Remember that many areas have minimum<br />
party size limits.<br />
Do Not Disturb Animals<br />
Observe, enjoy and appreciate them, but always keep your distance from them.<br />
Realize that you are a visitor in their home! Not only can animals not control their<br />
"guests", but animals have nowhere else to go. As we continue to impact their<br />
environment more and more, we need to treat animals and their homes with<br />
increased care and respect. You should not feed animals; the chipmunk (or bear)<br />
that you feed may quickly learn to associate food with humans and eat holes in your expensive packs and<br />
tents to get to your ("their") food.<br />
<strong>Wilderness</strong> <strong>Skills</strong> Module Page 40 of 73<br />
<strong>Olympia</strong> <strong>Mountaineers</strong> - Hiking, Alpine Scrambling and Basic Climbing
Minimum Impact<br />
Minimum Impact (Leave No Trace) information and materials are available at Forest Service and Park Service<br />
ranger stations. You can also call the Leave No Trace "hot line" 1-800-332-4100 for free materials and<br />
information.<br />
Stewardship<br />
A Generous Spirit for service to the forests,<br />
mountains, trails, wildlife and waterways of our<br />
natural world.<br />
The incredible trail system throughout our<br />
beautiful Pacific Northwest needs continuous<br />
attention, in part, because of use by outdoor<br />
organizations like the <strong>Mountaineers</strong>. Each year<br />
the <strong>Olympia</strong> Branch of The <strong>Mountaineers</strong> trains<br />
over 200 students in backcountry travel, requiring a minimum of 3 trips and often as many as 10 trips on trails<br />
in parks, forests and wilderness area. Couple the student trips with the outings of over 700 members and the<br />
<strong>Olympia</strong> Branch accounts for hundreds of hiking/climbing days on backcountry trails.<br />
The <strong>Mountaineers</strong> is one of the nation’s oldest and strongest advocates for the preservation of our federal and<br />
state lands for human powered travel. For decades <strong>Mountaineers</strong> have testify on the need to protect and<br />
increase access to public lands. Because of the additional management requirements of increased access and<br />
shrinking budgets, land managing agencies now need help. It follows that those organizations, which champion<br />
for and use the outdoors for their own benefit, should have a similar enthusiasm for the upkeep of the trails and<br />
public lands and for volunteering for a Stewardship Project. There are several returns to be gained from the<br />
time invested in helping to maintain our trail system and volunteer Stewardship projects.<br />
• Stewardship provides an opportunity to give back to the land for all the personal enrichment received.<br />
• Stewardship is an extension of <strong>Wilderness</strong> ethics. It’s the next step beyond Leave-No-Trace by taking<br />
action to restore our natural world.<br />
• The trails are in better condition when needed.<br />
• You may gain additional outdoor skills, leadership training, conditioning and camaraderie as a byproduct<br />
of your service.<br />
• Stewards enjoy the experience and receive a sense of accomplishment and personal fulfillment from<br />
good deeds.<br />
• You may uncover a hidden spirit for volunteer service in the outdoors.<br />
• Most land managing agencies provide a pass for free access or entry for a minimum number of hours<br />
of volunteer service.<br />
<strong>Wilderness</strong> <strong>Skills</strong> Module Page 41 of 73<br />
<strong>Olympia</strong> <strong>Mountaineers</strong> - Hiking, Alpine Scrambling and Basic Climbing
In 2003, the <strong>Olympia</strong> Branch adopted the special Frank Maranville<br />
Memorial Stewardship Award in honor of one of our branch’s most<br />
notable and dedicated Conservationists and Backcountry Stewards,<br />
Frank Maranville who passed away in 2001. The award is given<br />
annually to recognize those branch members who have taken a<br />
leadership role in helping to protect and preserve our natural world.<br />
The branch also adopted a Stewardship Award (shown to the right) to<br />
be given to any branch member who completes 12 hours of<br />
stewardship, in a single year, to help protect, preserve and enhance our<br />
trails, waterways, forests, wildlife, atmosphere or other part of our<br />
environment.<br />
Trail Maintenance as you travel<br />
If you use and enjoy wilderness and backcountry travel, it may be important to you to “pitch in” for the<br />
enjoyment you receive. You can contribute as you hike along. Here are a few simple but helpful practices that<br />
contribute to the health and safety of our trails and wilderness areas.<br />
• Remove fallen branches from the trail; scatter them on the downhill side.<br />
• Move rocks off the trail as needed, especially those over six inches in diameter......but do so only if<br />
you won't endanger anyone below you.<br />
• Drainage problems cause the most damage to trails. Use your boot heel to drain puddles. If the trail has<br />
become a stream bed, go to the source and remove the debris from the natural water course.<br />
• Report major washouts, blow-downs, missing trail signs, and mud wallows to the district ranger station.<br />
Leave a note at the trailhead on your way home or call the ranger station the next day.<br />
• Sign up for work parties. Un-maintained trails disappear. Spend a day preserving our environment.<br />
Give back to Nature for some of the enjoyment and pleasure that you have received from your outdoor<br />
trips.<br />
<strong>Wilderness</strong> <strong>Skills</strong> Module Page 42 of 73<br />
<strong>Olympia</strong> <strong>Mountaineers</strong> - Hiking, Alpine Scrambling and Basic Climbing
Mountain Health & Safety - hypothermia, giardia, safety, blisters, etc.<br />
Hypothermia can be a problem even on a day hike. If you are not wearing enough clothes your core<br />
temperature can drop precipitously. You will also get cold when you get wet, whether from perspiration, rain, or<br />
an unexpected dunking in a mountain stream. Clothing layers and being sensible are the solution. When you<br />
stop, even if for a short rest, put another layer of clothes on if you start to feel at all cool. Adding a hat and<br />
mittens or gloves will lessen heat loss. You will quickly lose heat through your extremities - your head, hands<br />
and arms. When your extremities cool down you run the risk of having your core temperature drop. It is easier<br />
to keep your hands and arms and head warm than it is to rewarm your whole body when hypothermia sets in.<br />
An ounce of prevention….<br />
Dehydration occurs, quite simply, if you are getting rid of more moisture than you are taking in. Simply put,<br />
you are not drinking enough. It is important to drink BEFORE you are thirsty. If you wait until you are thirsty to<br />
drink, you have waited too long. Carry enough water and have it accessible enough, even if it means a quick<br />
stop to fish take frequent sips. Limiting your liquid intake to avoid having to ask the party to stop for a water<br />
break or the subsequent “party separation” is not wise. In addition to dry lips, leg cramps or stiffness in your<br />
legs, and lightheadness are all telling you that you waited too long to take a drink.<br />
DON’T DRINK THE WATER - unless you brought it with you or you have filtered it or otherwise treated it with<br />
an acceptable procedure. Those cool clear mountain streams can harbor a number of parasites, bacteria, and<br />
viruses which would happily set up housekeeping in your intestinal tract. Just because you can’t see Giardia<br />
and other parasites and bacteria with the naked eye does not mean they aren’t there. Use your own drinking<br />
water supply to wash your hands and face. Quite simply, Giardia and its “cousins” are transmitted via the fecaloral<br />
route, with water a favored transportation system. Disturbing an animal’s nest can also result in exposure<br />
to these pathogens.<br />
Blisters are perhaps the most common malady of hikers. At the first sign of a “hot spot” you should stop and<br />
attend to the area. Sometimes simply readjusting your socks and retying your boots will solve the problem.<br />
Applying second skin or moleskin and Band-Aids will protect the area. You won’t be the first person to make a<br />
hiking party stop to take care of a potential blister. Anyone who has “toughed it out” to avoid inconveniencing<br />
the group can attest to the folly of that.<br />
Aside from the discomfort, a blister can result in open skin which can get infected. Everyone would rather wait<br />
while you attend to your feet than have to carry you out if you become unable to walk on your own.<br />
Adjusting your boot laces can avoid blisters and other foot problems. The action of your foot going down a<br />
steep grade is different from going up and you may need to tighten your boot up for the return part of the trip or<br />
adjust the tension in the laces.<br />
Bee stings and other medical concerns - if you are allergic to bee stings or are asthmatic, diabetic, or have<br />
some other medical problem, you need to do two things before each hike: you need to be sure you have the<br />
proper medication clearly labeled in your first aid kit and you need to notify the leader. Even if you think it<br />
highly unlikely that your condition will flare up, if it does and you have not told anyone of your problem, the<br />
group may waste precious time figuring out what the problem is before they can help you.<br />
Also, you need to be sure that your first aid kit is clearly identifiable. If you are hurt your hiking partners will<br />
need to be able to find your first aid kit to locate any special medication you brought with you and to add your<br />
supplies to the group’s first aid resources. Label your first aid kit clearly on the outside so someone looking for<br />
it will find it quickly.<br />
“Party Separations” & “Cat Holes”. While pit toilets or port-a-potties are found at many trailheads, they are<br />
not at all trailheads, and they are not found along the trails. This is a concern for day hikers as well as for<br />
backpackers staying over night. The issues are those of personal privacy, responsible sanitation practices and<br />
environmental awareness.<br />
<strong>Wilderness</strong> <strong>Skills</strong> Module Page 43 of 73<br />
<strong>Olympia</strong> <strong>Mountaineers</strong> - Hiking, Alpine Scrambling and Basic Climbing
“Party separations” are how <strong>Mountaineers</strong> deal with the absence of toilets out in the wilderness. The term<br />
refers to those times when the group will split up by gender and go off the trail in search of some semblance of<br />
privacy for everyone.<br />
It is important to go at least 200 feet from any open water - streams and lakes, allowing for the bottle out of<br />
your pack, that you can maximum water level around lakes. It is acceptable practice to urinate in random<br />
locations away from water and not directly on fragile plants, although it is courteous to cover yellow snow. A<br />
“cat hole” can be dug and filled in with loose soil after use. A “cat hole” should be 8 to 10 inches in diameter<br />
and no more than 8 inches deep. Biodegradable waste buried in the humus layer in this manner will<br />
decompose quickly.<br />
Used toilet paper, feminine hygiene products, and Band-Aids should be packed out for disposal at home. While<br />
toilet paper will eventually decompose, an accumulation of toilet paper in the wilderness is not aesthetically<br />
pleasing and is subject to being dug up and exposed by animals. Nonbiodegradable items by their nature will<br />
not decompose. Used toilet paper and other items can be sealed in plastic bags or other airtight container and<br />
can be unobtrusively and inoffensively carried out in an exterior pocket of your pack.<br />
Conditioning<br />
As part of the preparation for this course, it is important that each student develop sufficient physical strength<br />
in order to have the energy and endurance necessary to put into practice skills that you will be taught. If you<br />
are NOT "in condition", any or all of the following may occur:<br />
• You will fatigue easily after a short period of exercise.<br />
• Your body is operating inefficiently – you use more oxygen for a given amount of work and your<br />
muscles accumulate more lactic acid during exertion, which tends to produce cramps and bring on<br />
stiffness and pain in the following days.<br />
• As you push yourself toward exhaustion, you may frequently stumble and become too tired to<br />
concentrate on route finding and other technical skills.<br />
• You will have little or no reserves available for an emergency.<br />
• You may become a liability to your party.<br />
• You will recuperate slowly and will be dead-tired the next day.<br />
Energy expenditures may be nearly identical for all party members on a trip together. However, there may be<br />
wide variations in their available aerobic power (the body's ability to absorb and use oxygen), depending upon<br />
age, sex and training. An individual's maximum oxygen consumption is that amount he/she uses in working to<br />
exhaustion. Thus, the length of time the expenditure of energy is required is significant. The experienced<br />
wilderness traveler sets the pace, budgeting the use of available power, so that he/she is capable of continued<br />
exertion to reach the destination, return safely and drive home. If you have less aerobic power than other party<br />
members do, you will use a much greater proportion of your total aerobic capacity. You will, therefore, have to<br />
push harder to keep up and will be exhausted sooner.<br />
Aerobic power can only be gained if one REGULARLY participates in STRENUOUS, physical activity, such as<br />
running, swimming, bicycling, hiking, or climbing stairs. The activity should be sufficiently long enough -- 15 to<br />
30 minutes -- to elevate your heart rate to the appropriate "working heart rate". To get the most out of your<br />
aerobic workout, your activity should be done, at a minimum, three (3) times per week.<br />
Until you become experiences in outdoor exercise, it can be difficult to judge your level of exertion until its too<br />
late, and you’re near exhaustion. Traveling up hill on steep, difficult terrain requires a deceptively high amount<br />
of energy and determination. You will get better with every step, but until you know your abilities and limitations<br />
you need to monitor your exertion level through your pulse, perspiration and breathing. Stop periodically to see<br />
if you’re short of breath, or unable to carry on a normal conversation with your companions. If you nee more<br />
than a few minutes rest to recover and breath normally, you’re working too hard. Slow down.<br />
<strong>Wilderness</strong> <strong>Skills</strong> Module Page 44 of 73<br />
<strong>Olympia</strong> <strong>Mountaineers</strong> - Hiking, Alpine Scrambling and Basic Climbing
B Silverstein: Physical Conditioning as Part of a Balanced System<br />
<strong>Wilderness</strong> <strong>Skills</strong> Module Page 45 of 73<br />
<strong>Olympia</strong> <strong>Mountaineers</strong> - Hiking, Alpine Scrambling and Basic Climbing
<strong>Wilderness</strong> <strong>Skills</strong> Module Page 46 of 73<br />
<strong>Olympia</strong> <strong>Mountaineers</strong> - Hiking, Alpine Scrambling and Basic Climbing
<strong>Wilderness</strong> <strong>Skills</strong> Module Page 47 of 73<br />
<strong>Olympia</strong> <strong>Mountaineers</strong> - Hiking, Alpine Scrambling and Basic Climbing
Knee overuse injury<br />
prevention<br />
<strong>Wilderness</strong> <strong>Skills</strong> Module Page 48 of 73<br />
<strong>Olympia</strong> <strong>Mountaineers</strong> - Hiking, Alpine Scrambling and Basic Climbing
<strong>Wilderness</strong> <strong>Skills</strong> Module Page 49 of 73<br />
<strong>Olympia</strong> <strong>Mountaineers</strong> - Hiking, Alpine Scrambling and Basic Climbing
Gear<br />
Environmental Conditions<br />
Variable Weather: cold, heat, wet, visibility<br />
Terrain: Steep, slippery<br />
Forceful gripping for support in awkward postures<br />
Duration<br />
•Breaks<br />
•Feedback<br />
•Group dynamics<br />
•Leader experience<br />
Organizational Factors<br />
Task requirements<br />
Conditioner, snow, rock, glacier<br />
Does it have to be accomplished today?<br />
Distance<br />
Level of difficulty<br />
Skill requirement<br />
Adequate fuel, hydration, food, warmth<br />
<strong>Wilderness</strong> <strong>Skills</strong> Module Page 50 of 73<br />
<strong>Olympia</strong> <strong>Mountaineers</strong> - Hiking, Alpine Scrambling and Basic Climbing
Barbara Silverstein: Physical Conditioning as Part of a Balanced System<br />
<strong>Wilderness</strong> <strong>Skills</strong> Module Page 51 of 73<br />
<strong>Olympia</strong> <strong>Mountaineers</strong> - Hiking, Alpine Scrambling and Basic Climbing
Staying Safe and Healthy in the Hills<br />
Preventing Injuries and Illnesses<br />
1. Bring water and drink it<br />
2. Bring food and eat it<br />
3. Bring your medicines – especially for diabetes, allergies and heart disease<br />
4. Don’t believe the weather report – be ready for hot, cold, wet<br />
5. Be serious about the 10 Essentials<br />
6. Don’t skimp on your equipment<br />
7. Watch your step – Concentrate<br />
8. Watch each other<br />
9. Don’t be shy – Discuss plans for emergencies<br />
10. Always respect the mountains<br />
Treating Injuries and Illnesses<br />
Airway<br />
Breathing / Bleeding ABC<br />
Circulation<br />
CPR – 2 breaths, 30 compressions<br />
Heimlich maneuver<br />
Rest<br />
Ice<br />
RICE<br />
Compress<br />
Elevate<br />
Water, sugar and salt<br />
<strong>Wilderness</strong> <strong>Skills</strong> Module Page 52 of 73<br />
<strong>Olympia</strong> <strong>Mountaineers</strong> - Hiking, Alpine Scrambling and Basic Climbing
Eat to Win<br />
Know why, when, and how to fuel with our complete guide to the athlete's diet. By Monique Ryan<br />
Eating for basic health and fitness is simple. Seriously, people. Just cook with a high variety of whole foods,<br />
emphasis on grains and produce. And eat five perfectly planned small meals a day—not three. Oh, and try to<br />
memorize the glycemic index of every enticing product in the grocery store. Even better, hire a personal<br />
shopper and a live-in chef ... Not the world you're living in? Here's another way to simplify: Read our<br />
comprehensive guide to performance nutrition and follow the straightforward rules. We guarantee you'll feel—<br />
and play—better. Or we'll eat our words.<br />
Guts, At Work<br />
Understand how your digestive system turns food into fuel and you've<br />
taken the first step toward smart eating. The process starts with simply<br />
chewing well, which adds saliva (1) and breaks food down for easier<br />
digestion. When you swallow, food travels down the esophagus (2) and<br />
into the stomach (3). There, acid and enzymes convert food into a pastelike<br />
mix, while the pyloric valve (4) prevents this acidic brew from backing<br />
up. Digested food leaves your stomach in one to four hours.<br />
Carbohydrates go first, followed by protein, then fat. These macronutrients<br />
enter the duodenum (5), the first section of your small intestine (6).<br />
Enzymes stored in the duodenum, and those supplied by the pancreas<br />
(7), complete most of the digestion process.<br />
Bile manufactured by the liver (8) and secreted by the gallbladder (9)<br />
assists with fat digestion and absorption. The smaller molecules produced<br />
by this secondary breakdown are absorbed through the walls of the next<br />
two sections of your small intestine, the jejunum (10) and ileum (11),<br />
which supply more than 20 feet of absorptive tissue. This length is<br />
multiplied many times over by numerous folds in the intestinal lining called<br />
villi, which are themselves covered by small, fingerlike projections called microvilli and which ultimately provide<br />
more than 820 square feet of absorptive capacity—an area larger than a tennis court. From there, nutrients are<br />
shipped off to your liver for further processing, then to cells, which create and store glucose, amino acids, and<br />
fatty acids.<br />
Power Supply<br />
Think of your body as a house equipped with electricity, gas, and solar: different power sources for different<br />
purposes. The fuel you tap for exercise depends on the intensity and duration of your workout.<br />
ENERGY SYSTEM: Aerobic<br />
USED FOR: Steady burning of fuel for any moderately paced, sustained cardio training (running, cycling,<br />
swimming, etc.)<br />
HOW IT WORKS: For longer efforts, this system provides a sustainable supply of adenosine triphoshate<br />
(ATP), the molecule that causes contractions in your muscles. For the first 15 to 30 minutes, fuel comes mainly<br />
from glycogen stored in your muscles. Muscle fat contributes more fuel for up to 90 minutes, and after that,<br />
adipose fat (the jiggly kind) is burned as well. You have about 1,400 calories' worth of stored glycogen in your<br />
muscles and another 400 in your liver—enough for a 1.5-hour run.<br />
<strong>Wilderness</strong> <strong>Skills</strong> Module Page 53 of 73<br />
<strong>Olympia</strong> <strong>Mountaineers</strong> - Hiking, Alpine Scrambling and Basic Climbing
ENERGY SYSTEM: Anaerobic glycolysis<br />
USED FOR: Sustained speed for high-paced efforts, extended resistance training, intervals<br />
HOW IT WORKS: This system kicks in when you're out of breath but still moving fast. It produces ATP at a<br />
high rate for about two minutes, using a combination of creatine phosphate (a naturally occurring compound<br />
chemical stored in muscles) and muscle glycogen. Lactic acid is a by-product.<br />
ENERGY SYSTEM: Creatine phosphate<br />
USED FOR: Explosive energy required for resistance training and repeated sprints<br />
HOW IT WORKS: This system rapidly produces ATP from creatine phosphate. It yields about six to eight<br />
seconds of fuel for explosive efforts. You can take creatine supplements to bolster the system, but it helps you<br />
do only a few extra reps during power building or gives you an additional boost for repeated sprints.<br />
Food Q&A: What's the difference between whole grains and processed whole grains?<br />
Nothing, in terms of nutrition. Here's a primer. Whole grains: Seeds are intact, surrounded by an<br />
endosperm and nutrient-rich germ and bran.<br />
Processed whole grains: Seeds have been cracked, rolled, crushed, or ground and provide the same<br />
nutrition as the original whole grain.<br />
Avoid refined grains (nutrient-poor white flour) and enriched grains (same as refined but with some<br />
nutrients restored).<br />
Five Habits of Highly Successful Eaters<br />
1. EAT A GOOD BREAKFAST. It jump-starts your metabolism, provides energy for mid-morning<br />
workouts, and keeps you from losing steam before lunch.<br />
2. SNACK OFTEN. Skipping meals, or waiting more than five hours between them, can slow your<br />
metabolism, cause energy dips, and lead to overeating. Bring fresh fruit and vegetables to work so you<br />
never resort to the candy machine.<br />
3. PLAN AHEAD. Look at your schedule for the coming week, plan meals, and allow time for grocery<br />
shopping. You make time for working out; you should do the same for cooking healthy food.<br />
4. BE RESTAURANT SAVVY. It's fine to eat out; just don't treat it like a nutritional vacation. Avoid<br />
supersize portions, ask about ingredients, and make smart substitutions (like a baked potato instead of<br />
fries).<br />
5. GET EIGHT HOURS OF SLEEP. Inadequate rest alters levels of appetite-regulating hormones, leading<br />
to increased appetite (but not increased activity.<br />
Weight Q&A: How can I avoid gaining weight over the holidays?<br />
Lose five pounds before Thanksgiving. Here's how: Bump up your strength training to three times weekly,<br />
which increases lean muscle mass and the rate at which you burn calories. Then aim for a steady weight<br />
loss of half a pound to one pound weekly by reducing intake by 350 to 500 calories daily. Emphasize highfiber,<br />
low-fat foods and mix in modest amounts of lean protein. The combination will keep you feeling<br />
satiated longer.<br />
<strong>Wilderness</strong> <strong>Skills</strong> Module Page 54 of 73<br />
<strong>Olympia</strong> <strong>Mountaineers</strong> - Hiking, Alpine Scrambling and Basic Climbing
Legal Aid ( as opposed to illegal sports aid)<br />
Lab Rat. By Nick Heil<br />
On the label of 5-Hour Energy—a fatigue-fighting drink that claims to be a healthy alternative to sugar bombs<br />
like Red Bull, Monster, and venti Frappuccinos—a silhouetted runner bounds up a mountain at sunset. I<br />
received the sample, which comes in a two-ounce plastic bottle, after spending a deskbound summer under a<br />
brutal book-project deadline. I looked wistfully at the image of the runner. When was the last time I'd felt like<br />
that? I read the label. FOR MODERATE ENERGY: DRINK A HALF BOTTLE OR LESS ... FOR MAXIMUM<br />
ENERGY: DRINK ENTIRE BOTTLE AT ONE TIME.<br />
I tend to be skeptical of such products, but suddenly I found myself tearing off the cap and gulping the<br />
contents, the ultra-tart liquid making a little glick-glick-glick sound as it emptied into my mouth. It was around 2<br />
p.m., and that afternoon I finished writing a book chapter, did three loads of laundry, cleaned and organized my<br />
office, and took my dog out for an hour-long trail run. Shazam—I was that guy on the bottle!<br />
The boost behind the juice comes from large doses of B vitamins and a proprietary energy blend that includes,<br />
among other things, caffeine, taurine, and phenylalanine. I tried 5-Hour again the next day, with similar results;<br />
I even scored the winning goal in my weekly soccer game.<br />
I was so amazed by the jolt that I called up sports dietitian Dave Ellis, who works with pros from the NFL and<br />
NBA. He hadn't tried 5-Hour, but he wasn't impressed. "You build a tolerance to these stimulants, and when<br />
you can't feel one, you go to two; when you can't feel two, you go to three," he said. "That creates a cycle of<br />
codependence."<br />
Living Essentials, the maker of 5-Hour, claims it's not just the caffeine but the large hit of B vitamins that<br />
provides the punch. Each shot contains 40 milligrams of vitamin B6 and 500 micrograms of B12—respectively,<br />
2,000 and 8,333 percent of the recommended daily allowances. It's long been known that B vitamins aid the<br />
metabolism and sharpen mental acuity; my grandfather, a physician, used to give my grandmother B12 shots<br />
to crank up her energy. "The problem is, we don't know what happens over time when you isolate nutrients,"<br />
Ellis said. "The combination of nutrients in real food offers benefits that we're just beginning to discover."<br />
This Just In<br />
News from the nutrition frontier<br />
COFFEE: Stop feeling guilty about your java cravings. First, it's a myth that a moderate amount of caffeine<br />
causes dehydration during exercise. Coffee contains heart-healthy soluble fiber—known to reduce cholesterol<br />
levels—according to a study published in the Journal of Agricultural and Food Chemistry. Another study, in the<br />
American Journal of Clinical Nutrition, suggests that drinking two to three cups of coffee daily lowers the risk of<br />
developing cardiovascular disease. Coffee is also a good source of antioxidants, including cancer-fighting<br />
polyphenols.<br />
VITAMIN D: Don't go light on this critical vitamin. Not only is D essential to bone health; it may also help<br />
prevent certain cancers and autoimmune diseases. Researchers from the Harvard School of Public Health<br />
found that higher vitamin D levels are associated with a lower risk of developing multiple sclerosis. Most people<br />
naturally get 200 to 400 IU daily, but experts now recommend 800 IU each day from food and supplements<br />
combined. Get yours from a daily multivitamin. We like Centrum Silver Tablets, which have 500 IU of vitamin D<br />
(ignore the marketing message for "older" adults).<br />
SNACKS: Munching small portions evenly throughout the day—rather than overeating at meal times—is good<br />
for your waistline and your job. A study in the journal Medicine & Science in Sports & Exercise found that<br />
firefighters who split their usual meals into regular snacks had significant increases in productivity, especially<br />
during the latter hours of the day.<br />
<strong>Wilderness</strong> <strong>Skills</strong> Module Page 55 of 73<br />
<strong>Olympia</strong> <strong>Mountaineers</strong> - Hiking, Alpine Scrambling and Basic Climbing
Nutrition Q&A: Is it worth splurging on exotic juices that claim health benefits?<br />
While juices made from mangosteen, noni, goji, açai, and others are high in antioxidants, there's little<br />
evidence that these trendy "superfruits" are better for you than other dark-colored berries. The best advice:<br />
Just eat a variety of brightly colored fruits and vegetables daily.<br />
Energizers<br />
Get the right mix of highs and lows by understanding the glycemic index.<br />
You know that carbo-loading preps your body for a big effort by topping off glycogen stores in your muscles<br />
and liver. But not all pasta parties are equal. Some carbs (like white pasta) hit your system hard, giving you a<br />
quick boost but dropping off abruptly, while others (like whole-grain pasta) are processed slowly, supplying<br />
sustained energy. This difference in the blood-sugar spike is called the glycemic index (GI) or glycemic load<br />
(GL). (You'll see both terms in the marketplace.) High-glycemic foods are particularly helpful for training and<br />
recovery eating, when you need to replenish glycogen quickly. For routine meals and snacks, however, round<br />
out your diet with foods lower on the glycemic scale. The most important thing is simply to remember that<br />
athletes need a mix of low-, moderate-, and high-glycemic carbs in their daily diet. Use the following guide.<br />
Glycemic Index: Low = less than 55; moderate = 55–70; high = more than 70<br />
Glycemic Load: Low = less than 10; moderate = 11–19; high = more than 20<br />
Here are GL figures for some common foods. Get more at glycemicindex.com.<br />
HIGH<br />
Serving size Total carbs GL<br />
Baked potato 7.1 oz 29.0 g 27.3<br />
Spaghetti (white) 6.4 oz 44.3 g 25.7<br />
Bagel (white) 2.5 oz 35.5 g 25.6<br />
Pancakes 2.8 oz 32.5 g 21.8<br />
MODERATE<br />
Muesli 1.8 oz 30.2 g 18<br />
Spaghetti (whole-grain) 6.4 oz 44.3 g 14.2<br />
Sweet potato 5.3 oz 26.0 g 12.5<br />
Banana 4.2 oz 23.9 g 12.2<br />
Orange juice 9.3 oz 21.1 g 12.0<br />
LOW<br />
Apple 4.2 oz 14.6 g 5.9<br />
Lentils 5.3 oz 14.9 g 4.2<br />
Fuel Your Sport<br />
Boost performance with the right meal plan for every race.<br />
Runners<br />
PRE-RUN: About three hours before the start, drink lots of liquids (water, juice, sports drinks) and eat an easily<br />
digested carbohydrate snack (jam-covered bagel).<br />
RUN: For runs longer than one hour, sip a sugary sports drink with plenty of sodium and two to three sources<br />
of carbohydrates. If needed, down a gel for a carb boost.<br />
POST-RUN: Immediately after the finish, down a high-carb recovery drink that contains a modest amount of<br />
protein and sodium.<br />
Winter Training<br />
PRE-TRAINING: Have hot cereal with milk, raisins, and juice before a cold day out on the snow or slopes. Add<br />
peanut butter for protein.<br />
<strong>Wilderness</strong> <strong>Skills</strong> Module Page 56 of 73<br />
<strong>Olympia</strong> <strong>Mountaineers</strong> - Hiking, Alpine Scrambling and Basic Climbing
TRAINING: Warm your beverage and use an insulated hydration system. Store energy bars and gels close to<br />
your body so they don't freeze.<br />
POST-TRAINING: Hot chocolate, thank God, makes a great recovery drink. Have it with a high-GL snack, like<br />
a baked potato, to quickly replenish fuel and help you warm up.<br />
Starter Course<br />
This menu provides a day's worth of balanced nutrition for a 160-pound man who exercises an hour daily.<br />
Total calories: 2,400 (58% CARBS, 25% FAT, 17% PROTEIN)<br />
BREAKFAST<br />
- 1 cup cooked oatmeal with 1 tbsp honey and 7 walnuts<br />
- 1 hard-boiled egg<br />
- Grape juice (4 oz)<br />
- Yogurt (8 oz)<br />
SNACKS (split between morning and afternoon)<br />
- 1 peach<br />
- 1 apple<br />
- 1 granola bar<br />
- 12 almonds<br />
LUNCH<br />
- Whole-wheat tortilla<br />
- Chicken (3 oz)<br />
- Pinto beans (1/2 cup, cooked)<br />
- Rice (1/2 cup, cooked)<br />
- low-fat cheese (1 oz)<br />
- Avocado (two slices)<br />
- Salsa (4 tbsp)<br />
DINNER<br />
- Whole-wheat pasta (2 cups, cooked)<br />
- Marinara sauce (1 cup)<br />
- Mixed salad greens (2 cups)<br />
- Light salad dressing (2 tbsp)<br />
DESSERT<br />
- Frozen yogurt (4 oz)<br />
- Blueberries (1 cup)<br />
The numbers:<br />
Carbs: 350 g<br />
Protein: 106 g<br />
Fat: 69 g<br />
Calcium: 1,000 mg<br />
Fiber: 40 g<br />
Vitamin C: 120 mg<br />
TIME TO EAT<br />
As an athlete, you should schedule your meals<br />
and snacks around the day's workout. Here's a<br />
guide for morning, noon, and evening training<br />
sessions.<br />
WORKOUT: Morning<br />
PROBLEM: You don't want to eat much right<br />
before training. But with an empty stomach, you<br />
won't have the fuel you need.<br />
SOLUTION: Drink a glass of juice and eat a<br />
piece of toast with jam. Have a more substantial<br />
breakfast—like whole-grain cereal, fruit, and<br />
skim milk—after your workout.<br />
WORKOUT: Noon<br />
PROBLEM: You're heading out just as your<br />
energy from breakfast is fading.<br />
SOLUTION: Eat a balanced snack at midmorning.<br />
Example: low-fat yogurt (6 ounces), a<br />
tablespoon of nuts, and fresh fruit, like an apple<br />
or banana.<br />
WORKOUT: Evening<br />
PROBLEM: With the chaos of afternoon<br />
deadlines and meetings, you haven't eaten in<br />
five hours. You're tempted by the candy<br />
machine, but a poor choice now can hurt you<br />
later.<br />
SOLUTION: You need a quick hit of carbs but<br />
nothing too heavy. Eat a handful of highglycemic<br />
pretzels on your way out the door.<br />
<strong>Wilderness</strong> <strong>Skills</strong> Module Page 57 of 73<br />
<strong>Olympia</strong> <strong>Mountaineers</strong> - Hiking, Alpine Scrambling and Basic Climbing
WHAT IS MOFA?<br />
Mountaineering Oriented First Aid (MOFA) is the first aid course The <strong>Mountaineers</strong> have<br />
adopted for Alpine Scrambling and all the Climbing courses. It is also required for all trip leaders including<br />
hiking trip leaders so that participants are able to respond effectively and efficiently to the type of injuries that<br />
may occur in the mountains. Hikers, backpackers and anyone traveling in the backcountry should give serious<br />
consideration to completing the MOFA course.<br />
Trail <strong>Skills</strong> MOFA Class<br />
To help you respond efficiently and effectively to small injuries and serious injuries by providing first aid<br />
functions to:<br />
● Stabilize the patient<br />
● Provide CPR if needed<br />
● Treat injuries<br />
● Get help – primary care<br />
Also to understand and recognize risk and practice prevention. All in the <strong>Wilderness</strong> setting – 2 or more hours<br />
from primary care. A group of dedicated volunteers will help you learn<br />
patient care & stabilization<br />
first-aid level injury treatment<br />
effective team response<br />
7 steps to help you effectively:<br />
1. recognize the situation<br />
2. respond safely<br />
3. find and treat urgent injuries<br />
4. stabilize your patients<br />
5. apply first-aid and team skills<br />
6. make a plan to provide continuing first aid while getting patients<br />
primary care<br />
7. carry out the plan which may mean; stopping your trip, walking out, or sheltering in place and requesting<br />
rescue.<br />
REGISTRATION<br />
Online signup: http://www.mountaineers.org//source/atrips/tripselection.cfm<br />
Main club website – activity search. Activity name: mofa. Click “any date is fine”<br />
Contact: Eric Quinn email: traileq@ubrdo.com or phone 360-556-4969<br />
Seven Steps for First Aid Response<br />
1.Take Charge<br />
Calm and organize group for an effective response in a minimum amount of time.<br />
2.Approach the Patient Safely<br />
Avoid further injury to patient, keep group safe.<br />
3. Perform Emergency Rescue and Urgent First Aid<br />
Treat conditions that can cause loss of life in a few minutes. Breathing, pulse, bleeding, site risks.<br />
4. Protect the Patient<br />
Reduce physical and emotional demands on patient. Protect from hot or cold. TLC.<br />
<strong>Wilderness</strong> <strong>Skills</strong> Module Page 58 of 73<br />
<strong>Olympia</strong> <strong>Mountaineers</strong> - Hiking, Alpine Scrambling and Basic Climbing
5.Check for Other Injuries<br />
Once the life-threatening emergencies have been identified and controlled perform exam to find and<br />
ALL injuries.<br />
6. Plan What to Do<br />
Once urgent care and secondary exam is complete assess:<br />
injuries, resources, team, and conditions. Plan further first aid and evacuation.<br />
7.Carry Out the Plan and First Aid<br />
Coordinate and execute the plan.<br />
The Mountaineering First Aid Kit<br />
Item ----- Quantity --- & --- Size Use<br />
• Adhesive Bandages 6, 1-inch minor wounds<br />
• Butterfly bandages 3, various sizes minor lacerations<br />
• Sterile gauze pads 4, 4”x4” larger wounds<br />
• 1, 4” severe bleeding<br />
• Non-adherent dressings 2, 4”x4” abrasions, burns<br />
• Self-adherent roller bandage 2 rolls, 2” x 5 yards hold dressing in place<br />
• Cloth-based adhesive tape 2”-wide roll multiple use<br />
• Triangular bandage 2, 36” x 36” x 52” sling, cravat<br />
• Moleskin / mole foam 4” to 6” square blisters<br />
• ½ ounce adhesive, protects skin, optional<br />
• 2 packages antiseptic<br />
• Alcohol or soap pads 3 packages cleanse skin<br />
• Thermometer 90 F to 105 F estimate body temperature<br />
• Sugar packet 4 packages diabetes<br />
• Aspirin 6 tablets headache, pain<br />
• Acetaminophen 6 tablets<br />
• 6 tablets allergic reactions<br />
• Elastic Bandage 1 sprains, RICE<br />
• 2 pair barriers against infection<br />
• Plastic bag 1, 12” x 18” hold contaminated material<br />
• Personal medication<br />
• Accident Report form<br />
• Carlisle dressing or sanitary napkins<br />
• Tincture of benzoin<br />
• Povidone iodine swabs<br />
• headache, pain, use for kids or those allergic to aspirin<br />
• Diphenhydramine<br />
• Barrier gloves & mask, natrile or latex<br />
<strong>Wilderness</strong> <strong>Skills</strong> Module Page 59 of 73<br />
<strong>Olympia</strong> <strong>Mountaineers</strong> - Hiking, Alpine Scrambling and Basic Climbing
Hazards<br />
There are many hazards in the mountains. Hopefully, we have taught you skills for making your travel safer<br />
and you have acquired knowledge for making your judgment sound. We cannot eliminate the hazards, except<br />
by staying home. Each of us must balance the joys of mountaineering with the risks. Ultimately, that<br />
responsibility is a personal one.<br />
A hazardous situation is one that includes a possible injury.<br />
A dangerous situation is one that includes a probable injury.<br />
Hazardous becomes dangerous through your actions, changes in the surroundings, or both.<br />
Objective Dangers<br />
• Avalanche<br />
• Rock fall<br />
• Lightning<br />
• River or creek crossing<br />
• Glissading<br />
• Equipment failure<br />
• First aid<br />
• Driving to and from (defensive driving)<br />
Subjective Dangers<br />
• Lack of knowledge and capability.<br />
• Judgment - when in doubt, be conservative.<br />
• Taking calculated risks - evaluate the consequences.<br />
Lost - What to do<br />
• Stop! Stay calm, try to attract attention.<br />
• Conserve energy -- review the situation, formulate a plan, mentally retrace the last few minutes.<br />
• Before darkness, select shelter and gather firewood.<br />
• Show National Distress Signal (three (3) of anything).<br />
• If not found after two (2) days, self-rescue.<br />
Mental Stress<br />
• Fear of things<br />
• Peer pressure<br />
• Obligations<br />
Your Obligations<br />
• To respect life - yours, others, the creatures too<br />
• To protect life - "the margin of safety “<br />
• Be aware of the hazards are or can be.<br />
• Learn techniques<br />
• Use knowledge and attitude to reduce change of injury<br />
• Follow the Mountaineer Code!<br />
<strong>Wilderness</strong> <strong>Skills</strong> Module Page 60 of 73<br />
<strong>Olympia</strong> <strong>Mountaineers</strong> - Hiking, Alpine Scrambling and Basic Climbing
Emergencies<br />
Accidents<br />
Accidents on <strong>Mountaineers</strong> trips should be reported to The <strong>Mountaineers</strong>. In case of an emergency:<br />
1. Assist the victim<br />
2. Initiate rescue through the appropriate local agency (usually the county sheriff's office).<br />
3. Complete a First Aid/Accident Report Form. You will receive one in your MOFA course, and each trip<br />
leader carries a copy.<br />
Survival<br />
Survival is simply staying alive long enough to get out of your predicament. Any survival situation requires<br />
mental control over unnecessary physical movement. Survival in this modern age is generally a short-term<br />
situation. Usually an organized search is initiated as soon as you are reported overdue. Sheltering the body<br />
and conserving energy and body heat is your greatest concern.<br />
If you're lost:<br />
• Stop<br />
• Look around<br />
• Listen<br />
• Shout and use your whistle<br />
• Sit down<br />
• Be calm<br />
• Relax<br />
• Stay put. If lost or unsure of direction to travel, stay put - near an open area if possible, and await the<br />
searchers who will be looking for you.<br />
• Display something conspicuous so the searcher can find you.<br />
• Find shelter<br />
If the entire party is lost or in trouble, do not separate the party unless each separated team is fully selfsufficient.<br />
Can your team spend the night safely in the mountains? Help is a long way away and a long time<br />
coming.<br />
Other Factors<br />
• Shelter. Seek protection from wind, cold, rain, sun. Use any ready-made natural shelter: underneath<br />
trees, logs, rocks, cliffs - - any place with a lee (away from the wind) side to protect the body from wind<br />
and rain.<br />
• Travel. If you are sure of direction to travel, travel slowly, conserving energy. Stay near open areas.<br />
• Ice. Beware of walking on ice. Generally, in the higher elevations in winter, all lakes are frozen and<br />
snow covered. In the spring and fall, however, and at lower elevations, ice may not support your weight.<br />
As a general rule, ice should be 2 inches thick to safely support walking. Clear ice is safest; if it's foggylooking,<br />
that means it's soft. If in doubt, stay off of it.<br />
• Sleeping in cold weather. If your clothes are dry and you have conserved your energy, you may sleep<br />
safely for short periods. On awakening, move vigorously to warm yourself. When circulation is restored<br />
<strong>Wilderness</strong> <strong>Skills</strong> Module Page 61 of 73<br />
<strong>Olympia</strong> <strong>Mountaineers</strong> - Hiking, Alpine Scrambling and Basic Climbing
you may sleep again. People who die from exposure or freezing generally have exhausted their body<br />
heat and energy before sleeping.<br />
• Compass and maps. Never go anywhere without a compass and map - - and know how to use them.<br />
• Equipment. Never separate yourself from the equipment you require for survival. Your clothing and<br />
equipment improve considerably your chances for survival.<br />
Weather<br />
Weather is often the critical factor when making “ GO of NO GO”<br />
decisions before or during a hike. In Washington State, the variability<br />
of the weather makes knowledge and observation of changes in the<br />
sky, air temperature, wind direction, formation of clouds, moisture<br />
content of the air and many other climatic factors an essential part of<br />
mountaineering.<br />
Mountain Weather<br />
Weather Forecast<br />
• TV weather map - satellite photo<br />
• Weather service - phone, newspaper, and radio<br />
Origins of Weather<br />
• Fronts<br />
• Prevailing winds<br />
Forecasting With Clouds<br />
• Types Of Cloud<br />
o Cirrus: warning of approaching bad weather (24-hours)<br />
o Alto: approaching bad weather (6-10 hours)<br />
o Stratus: low level clouds (morning fog, afternoon sun)<br />
o Nimbo Stratus: steady rain<br />
o Cumulus: moist, unstable air (cotton puffs when fair weather)<br />
o Cumulo Nimbus: thunderstorms<br />
o Cloud Caps: descending means bad weather<br />
• Cloud Orientation Rules<br />
o High or middle clouds moving from the south are an indicator of deteriorating weather.<br />
Movement from the north indicates fair weather.<br />
o Low clouds moving from the south indicate deteriorating weather, especially if moving fast.<br />
Movement from the north indicates fair or improving weather.<br />
o When clouds are absent, a strong north wind indicates fair weather.<br />
Local Weather Patterns<br />
• Adiabatic cooling and heating<br />
• Chinook winds<br />
• Mountain and valley winds<br />
Weather (General Information)<br />
• Wind. Protect yourself from it; cover your body or find adequate shelter.<br />
• Rain. Keep as dry as possible - remain in shelter. Wet clothing causes excessive body heat loss.<br />
• Blizzard. Do not travel. Quickly find shelter from wind and cold. Remain until storm is over. Keep<br />
insulation under you.<br />
<strong>Wilderness</strong> <strong>Skills</strong> Module Page 62 of 73<br />
<strong>Olympia</strong> <strong>Mountaineers</strong> - Hiking, Alpine Scrambling and Basic Climbing
• White-out. Do not travel. Wait for clearing skies.<br />
• Dense fog. Do not travel. Find shelter.<br />
• Darkness. Do not travel. Improvise shelter and wait for daylight.<br />
• Lightning. Leave high, exposed areas immediately. Crouch down away from trees, caves and cliffs.<br />
• Check on the weather! It's not just the trip leader's responsibility to be aware of the weather; it is every<br />
member of the party's responsibility. Before every trip, listen to the NOAA weather report on a<br />
"weather" radio, or call the local weather phone numbers in the appendix.<br />
Weather Predicting<br />
Below is a compendium of folk sayings, common observations, and "scientific" principles useful in predicting<br />
local weather. The most reliable sources for weather predictions is NOAA Weather Radio or computerized<br />
weather data services (see phone lists ).<br />
• In the absence of any contradictory signs, predict tomorrow the weather<br />
you had today. In our area, the weather frequently occurs in seven-day<br />
patterns; today's weather will likely occur on the same day next week.<br />
• A halo around the moon or sun means rain, usually within 24 hours.<br />
• Red sky by night, sailor's delight. Red sky by morning, sailor take warning.<br />
True? The night part is about 70% accurate.<br />
• Tomorrow's weather usually comes from the west, and when the sky is<br />
clear (no water or moisture), the atmosphere scatters the light at the blue<br />
end of the spectrum, leaving mostly red. Thus, tomorrow's weather is likely<br />
to be good.<br />
• A lenticular cloud cap on Mt. Rainier, or other high peaks, is nearly always a sign of rain, probably<br />
within 24-36 hours. If Rainier is absolutely clear in the afternoon, the weather usually will hold for 24<br />
hours. High cirrus clouds usually mean precipitation possible within 24-48 hours.<br />
• The distinction between thick fog and real storm clouds is not easy to make from a canyon or valley;<br />
but, if it is raining, there is no hope of climbing above the clouds (except on very high mountains).<br />
• Rising fog is not normally associated with the onset of a storm; descending fog does indicate an<br />
approaching storm and, worse, may prevent you from seeing it until too late.<br />
• A steady fall of a barometer (while you are not climbing) is an indication that rain is coming. The greater<br />
the rate of change, the more certain the storm. In worsening weather, an altimeter reads higher, the<br />
opposite of a barometer.<br />
• A rising barometer (while you are not descending) indicates good weather. An altimeter reads lower.<br />
• You can determine the time until sunset by counting the number of your fingers between the horizon<br />
and the sun; each finger equals approximately 15 minutes.<br />
• The driest time of the year is the last 10 days of July and first 2 weeks of August.<br />
• You can estimate the temperature where you are going:<br />
o<br />
o<br />
o<br />
As elevation increases, temperature generally decreases at approximately 3.6 degrees per<br />
1,000 feet of elevation:<br />
5 degrees Fahrenheit for each 1,000 feet of elevation in dry, stable weather,<br />
3 degrees Fahrenheit for each 1,000 feet of elevation in moist weather.<br />
• If hot air rises, then why is it always cooler in the mountains? Because as hot air rises, it cools. On its<br />
way skyward, decreasing atmospheric pressure causes it to expand and, consequently, gradually grow<br />
colder. Air is warmed mainly by sunlight hitting the Earth's surface. The farther you get from the radiant<br />
<strong>Wilderness</strong> <strong>Skills</strong> Module Page 63 of 73<br />
<strong>Olympia</strong> <strong>Mountaineers</strong> - Hiking, Alpine Scrambling and Basic Climbing
effects of the ground, the lower the temperature.......but mountains are ground too -- while sunlight<br />
warms peaks just as it warms valleys, mountains are surrounded by brisk, breezy, high-altitude air,<br />
which keeps them refrigerated. All things being equal, the summit of Mount Everest ought to be an<br />
invigorating 104 degrees cooler than sea level.<br />
• Storms generally start occurring in October, and persistent snow begins in November in the mountains.<br />
Precipitation increases in December, reaching maximum intensity in January. Expect snowstorms in the<br />
mountains through April, and snow presence through June.<br />
Beaufort Wind Scale<br />
Developed in 1805 by Sir Francis Beaufort of England<br />
Force<br />
0<br />
Wind<br />
(Knots)<br />
Less<br />
than 1<br />
WMO<br />
Classification<br />
On the Water<br />
Appearance of Wind Effects<br />
<strong>Wilderness</strong> <strong>Skills</strong> Module Page 64 of 73<br />
<strong>Olympia</strong> <strong>Mountaineers</strong> - Hiking, Alpine Scrambling and Basic Climbing<br />
On Land<br />
Calm Sea surface smooth and mirror-like Calm, smoke rises vertically<br />
1 1-3 Light Air Scaly ripples, no foam crests<br />
2 4-6 Light Breeze<br />
3 7-10 Gentle Breeze<br />
4 11-16<br />
Moderate<br />
Breeze<br />
5 17-21 Fresh Breeze<br />
6 22-27 Strong Breeze<br />
7 28-33 Near Gale<br />
8 34-40 Gale<br />
9 41-47 Strong Gale<br />
10 48-55 Storm<br />
11 56-63 Violent Storm<br />
12 64+ Hurricane<br />
Small wavelets, crests glassy, no<br />
breaking<br />
Large wavelets, crests begin to break,<br />
scattered whitecaps<br />
Small waves 1-4 ft. becoming longer,<br />
numerous whitecaps<br />
Moderate waves 4-8 ft taking longer form,<br />
many whitecaps, some spray<br />
Larger waves 8-13 ft, whitecaps<br />
common, more spray<br />
Sea heaps up, waves 13-20 ft, white<br />
foam streaks off breakers<br />
Moderately high (13-20 ft) waves of<br />
greater length, edges of crests begin to<br />
break into spindrift, foam blown in streaks<br />
High waves (20 ft), sea begins to roll,<br />
dense streaks of foam, spray may reduce<br />
visibility<br />
Very high waves (20-30 ft) with<br />
overhanging crests, sea white with<br />
densely blown foam, heavy rolling,<br />
lowered visibility<br />
Exceptionally high (30-45 ft) waves, foam<br />
patches cover sea, visibility more<br />
reduced<br />
Air filled with foam, waves over 45 ft, sea<br />
completely white with driving spray,<br />
Smoke drift indicates wind<br />
direction, still wind vanes<br />
Wind felt on face, leaves rustle,<br />
vanes begin to move<br />
Leaves and small twigs<br />
constantly moving, light flags<br />
extended<br />
Dust, leaves, and loose paper<br />
lifted, small tree branches move<br />
Small trees in leaf begin to sway<br />
Larger tree branches moving,<br />
whistling in wires<br />
Whole trees moving, resistance<br />
felt walking against wind<br />
Whole trees in motion, resistance<br />
felt walking against wind<br />
Slight structural damage occurs,<br />
slate blows off roofs<br />
Seldom experienced on land,<br />
trees broken or uprooted,<br />
"considerable structural damage"
visibility greatly reduced<br />
Most of these books and films are available through the <strong>Olympia</strong> <strong>Mountaineers</strong> Library or the<br />
Timberland Library.<br />
Links to much of the information below are available at our branch website<br />
http://www.olympiamountaineers.org/<br />
Weather<br />
• "Mountain Weather", Jeff Renner<br />
This is a good reference for those of us who aren't weather scientists.<br />
• Washington State Dept. of Transportation<br />
o<br />
• NOAA<br />
o<br />
o<br />
o<br />
o<br />
o<br />
Mountain Pass Report<br />
You've got to be able to drive there, right? http://www.wsdot.wa.gov/traffic/passes/<br />
Mt. Rainier forecast<br />
The 3-day forecast for the West side & summit:<br />
http://www.nws.noaa.gov/view/validProds.php?prod=REC&node=KSEW<br />
Western Region<br />
http://www.wrh.noaa.gov/<br />
River Forecast Centers<br />
http://www.weather.gov/ahps/rfc/rfc.php<br />
RSS<br />
Interested in RSS feeds of current weather information? http://www.weather.gov/rss/<br />
Beaufort Wind Scale<br />
http://www.spc.noaa.gov/faq/tornado/beaufort.html<br />
• Other local forecasts & webcams<br />
o<br />
o<br />
o<br />
• Avalanches<br />
o<br />
Cascade Volcano WebCams<br />
This is a good series of links to local webcams.<br />
http://www.skimountaineer.com/CascadeSki/CascadeWebCams.php<br />
Mt. Rainier: Paradise<br />
http://mms.nps.gov/mora/cam/paradise.jpg<br />
Smith Rock<br />
http://www.smithrock.com/<br />
Northwest Weather and Avalanche Center<br />
If you're heading out in the snow you should definitely check out these avalanche predictions<br />
http://www.nwac.us/<br />
o Facebook Group: Avalanche - Decision Making Before and During Backcountry Travel<br />
• Surf Forecasts<br />
WaveWatch http://www.wavewatch.com/Surf-Forecast-Region.php?RegionID=1<br />
Magic Seaweed http://magicseaweed.com/<br />
Hazards<br />
• Adventure Experience Paradigm<br />
o My explanation of this theory is very basic. You'll find more complete details in these works.<br />
Martin, P., & Priest, S. (1986). Understanding the Adventure Experience, Journal of Adventure<br />
Education, 3, 18-21.<br />
Priest, S. (1990). The Adventure Experience Paradigm, Adventure Education, 157-162<br />
• Fauna<br />
o "Don't Get Eaten: The Dangers of Animals that Charge or Attack", Dave Smith<br />
o "Don't Get Bitten: The Dangers of Things That Bite or Sting", Buck Tilton, M.S.<br />
<strong>Wilderness</strong> <strong>Skills</strong> Module Page 65 of 73<br />
<strong>Olympia</strong> <strong>Mountaineers</strong> - Hiking, Alpine Scrambling and Basic Climbing
o<br />
o<br />
o<br />
o<br />
o<br />
These are excellent, small and cheap references published by <strong>Mountaineers</strong> Books. Lots of<br />
information on hazards, prevention & treatment. Word of warning: "Don't Get Bitten" is not for<br />
the squeamish or those with bug phobias. Spray your DEET.<br />
"Backcountry Bear Basics: the Definitive Guide to Avoiding Unpleasant Encounters",<br />
Dave Smith<br />
This is another <strong>Mountaineers</strong> book that is a good reference for traveling in the backcountry.<br />
Plenty of information on bear biology and avoidance strategies. Debunks a lot of bear myths.<br />
"Bear Attacks: Their Causes and Avoidance", Stephen Herrero<br />
Herrero is a professional wildlife biologist and an expert in bear biology. This book provides a lot<br />
of historical and statistical information on bear attacks, and advice in avoiding conflicts.<br />
Giardia, Yellowjackets & Ticks<br />
National Library of Medicine site: http://medlineplus.gov/ Good information on diseases &<br />
prevention. Many links to other good sites.<br />
Cougars<br />
http://www.mountainlion.org<br />
Montana Fish Wildlife & Parks Bear Identification Test<br />
Bear hunters in Montana must be able to distinguish between black and grizzly bears. Their<br />
interactive training and test are at this link. Who needs Xbox?<br />
http://fwp.mt.gov/bearid/default.html<br />
Fun stuff that I couldn't find a better place for…<br />
Metolius: Near-Miss Harness Safety Stories<br />
o Scary tales of harness abuse (all of which plug Metolius products)<br />
http://metoliusclimbing.com/article_safetechstories.htm<br />
Ticks<br />
Ticks are not insects but close relatives of mites and spiders. If something nearly round,<br />
dark, about the thickness of cereal box cardboard, and with more legs than you can easily<br />
count is scuttling over any part of you...and you cannot crush it between thumb and<br />
forefinger, then it almost certainly is a tick. Ticks hatch from eggs and grow through three<br />
distinct stages: nymph (too small to see), larva (just visible), and adult (ready to copulate<br />
and lay eggs). Ticks at any stage of development can use us for food, and at each stage<br />
they need a ‘blood meal’ before they can grow to the next stage. With the blood they pick<br />
up any microbes that are circulating in their temporary host and carry them to their next<br />
meal, thus spreading disease.<br />
The biggest problem ticks have is finding an appropriate host for their next meal. They cannot fly, they crawl<br />
only slowly so generally they cannot travel more than a few yards without some help. Lacking the machinery<br />
for moving through space, ticks have become masters at moving through time. They can wait for months,<br />
years, or even decades for the next host(meal) to come along. This is called questing behavior. They crawl or<br />
scuttle up on a blade of grass or a twig and settle in. If nothing with blood walks by, they wait, wait, wait. How<br />
do they know when something with blood is walking by? They don’t see well but have an extremely sensitive<br />
and rapid response to a whiff of carbon dioxide, what we and all animals exhale. Given such a whiff, the nearly<br />
dormant tick is instantly activated. It scuttles rapidly or almost leaps onto anything that brushes by. Since ticks<br />
lay large numbers of eggs and the offspring don’t often travel far, it is possible to walk through a whole batch of<br />
activated ticks, or heaven help you, to lie down among them.<br />
Most of the ways getting rid of ticks don’t work very well. Covering the tick with nail polish or oil is often<br />
suggested. Removal is best done with a pair of tweezers small enough to grasp only the head of the tick. Pull<br />
the head and attached tick out slowly and apply a dab of antiseptic.<br />
<strong>Wilderness</strong> <strong>Skills</strong> Module Page 66 of 73<br />
<strong>Olympia</strong> <strong>Mountaineers</strong> - Hiking, Alpine Scrambling and Basic Climbing
Navigation Fundamentals<br />
Navigation in mountainous terrain and wilderness areas requires a set of skill,<br />
of which using a map and compass is only one part. These skills will not only<br />
assist in reaching a destination, but may also be necessary for taking an<br />
alternate route. Navigation is an art because of the abilities and techniques<br />
required and a science because it is based on the systematic application of<br />
physical laws. All navigation, from the most elementary to the most complex,<br />
involves two things: (1) Determining your present location; and (2) Getting from<br />
one known point to another.<br />
Selecting a Compass<br />
Required Features<br />
The principal parts of the compass must include: (See fig. 1)<br />
• A rectangular, transparent base plate with a direction of travel and a scale (inch, centimeter, or<br />
millimeter) on at least one edge.<br />
• A rotating, graduated dial marked from "0" to "360", a liquid damped magnetic needle, meridian lines<br />
and an orienting arrow.<br />
• Degree graduations of no more than two degrees.<br />
Figure 1<br />
<strong>Wilderness</strong> <strong>Skills</strong> Module Page 67 of 73<br />
<strong>Olympia</strong> <strong>Mountaineers</strong> - Hiking, Alpine Scrambling and Basic Climbing
Optional Features<br />
There are optional features available, in addition to the basic requirements that should be considered. These<br />
extras will increase the cost of the compass, but may be worth the expenditure depending on the intended use.<br />
1. Luminous points - enhances the use of the compass in minimum lighting conditions.<br />
2. Offsetting mechanism - a feature that, when set, will automatically correct for declination in any given<br />
area. The adjustment simultaneously takes care of both map and field bearing.<br />
3. Sighting mirror - more accurate in taking bearings. Cover can be opened to extend straightedge<br />
making map work easier. It may also be used for emergency signaling.<br />
The following brands and models meet all the basic requirements. Some have additional features and are so<br />
noted.<br />
Make - Model Opt. 1 Opt. 2 Opt. 3<br />
Silva - Explorer ̌ ̌<br />
Silva - Polaris<br />
Silva - Ranger ̌ ̌ ̌<br />
Suunto - A10 Partner<br />
Suunto - Leader ̌ ̌<br />
Suunto - Locator ̌ ̌<br />
Suunto - Navigator ̌ ̌ ̌<br />
Map Interpretation<br />
A map is nothing more than a drawing of a piece of the earth's surface, as would be seen<br />
from an airplane, looking straight down. Being able to visualize terrain features from<br />
contour lines is one of the most useful map reading skills that can be developed. The<br />
map not only shows terrain, but also streams, rivers, lakes, roads, trails, and sometimes<br />
man-made objects.<br />
Maps are drawn to SCALE, which is usually printed at the bottom of the map. This<br />
means that a certain distance on a map equals a certain distance in the field. A map is<br />
said to have a LARGE scale when there is a lot of detail within a given area. A BAR<br />
SCALE is usually printed at the bottom in three different units: miles, feet and kilometers. To find the distance<br />
in the field, measure the distance between the two points of the map. Take this measurement and place it just<br />
under one of the bar scales, and then read the field distance.<br />
Thin brown (sometimes-red) lines called CONTOUR LINES represent the terrain<br />
on a TOPOGRAPHIC map. Each line shows the height above sea level. Contour<br />
lines never cross one another. Printed at the bottom of the map is the CONTOUR<br />
INTERVAL, which is the difference in height (elevation) between one brown line<br />
and the one next to it. Contour intervals are not the same on all maps. Typically,<br />
they are 40, 80, 100 feet and sometimes as much as 250 feet, depending on the<br />
scale of the map and the steepness of the terrain. Usually every fifth contour line<br />
is wider, and its elevation is printed periodically along its length (see fig. 2).<br />
Figure 2<br />
<strong>Wilderness</strong> <strong>Skills</strong> Module Page 68 of 73<br />
<strong>Olympia</strong> <strong>Mountaineers</strong> - Hiking, Alpine Scrambling and Basic Climbing
Interpretation of topographic maps is quite simple. Contour lines widely spaced show a gentle slope. When<br />
they are close together the slope is steep (see fig. 3). When the contour lines are close together at the top of a<br />
hill, the hilltop is pointed (see fig. 4). The hilltop is flat when the contour lines are widely spaced at the top (see<br />
fig. 5).<br />
Figure 3 Figure 4 Figure 5<br />
Contour lines across a stream always come together in<br />
a "V". The point of the "V" points upstream (see fig. 6).<br />
Another terrain feature is the RIDGE. A ridge is a fairly<br />
long and narrow piece of terrain. Standing on a ridge,<br />
the ground will go uphill in one direction and downhill in<br />
the other three directions. The "U"s point downhill (see<br />
fig. 7). Sometimes contour lines show two hilltops<br />
fairly close together.<br />
Figure 6 Figure 7<br />
Figure 8<br />
The lower terrain between the two hilltops is called a<br />
SADDLE (see fig. 8). Roads, railroad tracks, power<br />
lines, and other manmade objects are usually shown<br />
in black, glacier and permanent snowfields in white,<br />
vegetation in green, and blue is used for water<br />
features.<br />
The date of the survey, revision of the map, and the<br />
reference names of adjacent maps for other areas are<br />
usually given as well. Study the contour lines,<br />
symbols, colors, and other features before going in<br />
the field.<br />
The magnetic needle in the compass is attracted by<br />
the earth's magnetism, and that is why it points north. However, there are two north’s to be considered. One<br />
is MAGNETIC NORTH, which is where the magnetic lines of force come together. The other is TRUE<br />
NORTH, which is located geographically by longitude (north-south) lines that pass through each of the earth's<br />
poles. The compass needle points to magnetic north which is located in the Hudson Bay region of northeast<br />
<strong>Wilderness</strong> <strong>Skills</strong> Module Page 69 of 73<br />
<strong>Olympia</strong> <strong>Mountaineers</strong> - Hiking, Alpine Scrambling and Basic Climbing
Canada but moves slightly each year. Maps and directions are usually based on true north, which does not<br />
move.<br />
Map Sources<br />
Topographical maps and other commercially prepared maps are available at most outdoor supply stores in our<br />
area including: The Alpine Experience, Olympic Outfitters, REI. Larger suppliers of maps include: Metsker<br />
Maps and Pioneer Maps. The Forest Service offices, ranger stations (limited supplies), and The <strong>Mountaineers</strong><br />
clubhouse in Seattle (at a discount; also mail order).<br />
Declination<br />
The DECLINATION is the angle between true north and magnetic north. The amount of declination in a given<br />
area depends on the location of that point on the earth. Where true and magnetic north are the same direction,<br />
then the declination is zero. In North America, zero declination runs roughly from west of Hudson Bay down<br />
along eastern Lake Michigan to the Atlantic coast of Georgia. At any point on the West Side of this line, the<br />
compass needle will point east of true north. This is called EASTERLY declination (see fig. 9). Conversely, at<br />
any point on the East Side of this line, the compass needle will point west of true north. This is called<br />
WESTERLY declination (see fig. 10). In North America, the declination varies from 30 degrees east in Alaska<br />
to 30 degrees west in Labrador.<br />
Declination is complex – you can’t guess about what the declination is in a particular place. It also changes –<br />
about a degree every five or six years, here, right now – so an old map will have inaccurate values. You can<br />
find the current declination of any place on earth, for any time, by visiting NOAA's National Geophysical Data<br />
Center Web site at http://www.ngdc.noaa.gov/geomag/declination.shtml.<br />
Using a Compass<br />
Bearings<br />
The direction from one point to another, on a map or in the field, is called a BEARING. If the direction is<br />
relative (in reference) to true north, such as a map, it is a true bearing. If the direction is relative to magnetic<br />
north, such as in the field, it is a magnetic bearing (see figures below).<br />
Figure 9 Figure 10<br />
Bearings (direction of travel and/or sighting on an objective / landmark) are given a number. The number of<br />
degrees starting from “(0” zero at north and going around clockwise to)” 360” north again determines this. The<br />
bearings are expressed as three digit numbers (i.e. 008, 075, 247, etc).<br />
When the compass is used with a map (true bearings) and in the field (magnetic bearings), an adjustment must<br />
be made to allow for the declination. The amount of declination and whether it is easterly or westerly is given<br />
on topographic maps. The magnetic bearing is determined by either subtracting or adding the declination from<br />
the true bearing. If the declination is easterly - subtract; westerly - add (see figs. 9 & 10). To avoid a<br />
misunderstanding on the direction, the bearing number is further clarified by adding a "T" for true bearing and<br />
an "M" for magnetic bearings (i.e. "100T/081M for a 19 degree E declination; "200T/210M for a 10 degree W<br />
declination).<br />
<strong>Wilderness</strong> <strong>Skills</strong> Module Page 70 of 73<br />
<strong>Olympia</strong> <strong>Mountaineers</strong> - Hiking, Alpine Scrambling and Basic Climbing
The principle / cardinal directions are:<br />
Bearing<br />
(True degrees)<br />
Cardinal<br />
Direction<br />
Bearing<br />
(True degrees)<br />
Cardinal<br />
Direction<br />
0° and 360° North (N) 180° South (S)<br />
45° Northeast (NE) 225° Southwest (SW)<br />
90° East (E) 270° West (W)<br />
135° Southeast (SE) 315° Northwest (NW)<br />
NOTE: IF THE COMPASS HAS AN OFFSETTING MECHANISM FOR DECLINATION, SET TO ZERO (0)<br />
BEFORE DOING THE FOLLOWING STEPS.<br />
Bearing to an Object (Field Bearing)<br />
You would use this to find the direction of an object to either: use it later on a map to identify the object or to<br />
follow the bearing toward the object. This might be useful if weather is coming in and you can point toward<br />
where you started – the bearing could help you get back in poor visibility.<br />
How to:<br />
1. Point the direction arrow toward the object, holding the compass level, and sighting along the sight<br />
lines.<br />
2. Twist the dial until the magnetic needle lines up with the orienting arrow.<br />
3. Make sure the compass is still level and pointing toward the object, and adjust the dial until you’re<br />
satisfied.<br />
4. Read the bearing in degrees by looking at the tick on the dial at the direction pointer.<br />
Field Bearing onto a Map<br />
You would use this to put a bearing you’ve acquired in the field onto the map to see what the object was<br />
named or to see what else might lie between your position and the object.<br />
How to:<br />
1. With your compass set to the bearing you took, put it on the map.<br />
2. Line up one of the straightedges with your position or a known landmark.<br />
3. Twist the whole compass, keeping the straightedge on your point, until the north on the graduated dial<br />
points to the map’s true north. The meridian lines will also point true north.<br />
4. Follow the straightedge to the destination on the map.<br />
Bearing from a Map<br />
You would use this to learn what direction to travel from a starting point to a destination, or to learn in which<br />
direction a particular named object lies from your position.<br />
How to:<br />
1. Put your compass on the map.<br />
2. Line up a straightedge so that both your starting point and the destination lie along it.<br />
<strong>Wilderness</strong> <strong>Skills</strong> Module Page 71 of 73<br />
<strong>Olympia</strong> <strong>Mountaineers</strong> - Hiking, Alpine Scrambling and Basic Climbing
3. Twist the graduated dial, keeping the straightedge on both points, until the north on the graduated dial<br />
points to the map’s true north and the meridian lines also point true north.<br />
4. Read the bearing in degrees by looking the tick on the dial at the direction pointer.<br />
Orient the Map<br />
This is useful for a quick assessment of your situation and for generally “orienting” yourself to the items on the<br />
map and what they look like in the field.<br />
How to:<br />
1. Set the graduated dial so that north lines up with the direction pointer.<br />
2. Line up one of the compass’s straightedges so that it’s lined up with a north-south line on the map.<br />
3. Keeping the map and compass pressed together, so they don’t shift relative to each other, turn the map<br />
until the compass needle is lined up in the orientation arrow.<br />
4. The map is now oriented to the earth. Things to the right of the map are east, to the left, west.<br />
Triangulation<br />
Triangulation is the process of finding two or more lines that intersect on the map, so that where they intersect<br />
is your location. Triangulation is sometimes referred to as "cross bearings", or "intersection". It requires a<br />
minimum of known two lines, which can be compass bearings to two known landmarks, or they can be “lines”<br />
in the terrain: an elevation contour line, a ridge top, a creek or gully, a power line, a shoreline, a road, etc. The<br />
closer the two lines are to right angles to each other, the more accurate the positioning you get from<br />
triangulation. The most common landmarks are two peaks.<br />
How to:<br />
1. Take a bearing to the first object. See Bearing to an Object (Field Bearing) above.<br />
2. Transfer the bearing line to the map. See Field Bearing onto a Map above. Note: The map does not<br />
have to be oriented to do this. Disregard the magnetic needle; the compass is only used as a<br />
protractor.<br />
3. The point at which the bearing was taken is somewhere along the line formed by the straightedge.<br />
4. Repeat steps 1 and 2 for the second known landmark. Your location is near where the lines or bearings<br />
cross on the map.<br />
<strong>Wilderness</strong> <strong>Skills</strong> Module Page 72 of 73<br />
<strong>Olympia</strong> <strong>Mountaineers</strong> - Hiking, Alpine Scrambling and Basic Climbing
APPLICATION FOR GRADUATION<br />
<strong>Olympia</strong> <strong>Mountaineers</strong> <strong>Wilderness</strong> <strong>Skills</strong> Module<br />
____ I wish to apply for graduation from the 2009 <strong>Wilderness</strong> <strong>Skills</strong> Module.<br />
____ I wish to apply for an extension in order to graduate from the 2010 <strong>Wilderness</strong> <strong>Skills</strong> Module.<br />
This application should be mailed to the address below by October 15, 2009<br />
Name: ________________________________________________________________________<br />
Address: ______________________________________________________________________<br />
City: _____________________________________________________ Zip: ________________<br />
Phone: ___________________________________ Email: ______________________________<br />
I have met the following requirements (please check):<br />
________ Attended all three class lectures<br />
Ten Essentials –<strong>Wilderness</strong> Ethics – Nutrition – Conditioning – Injury Prevention<br />
Equipment –Boots – Clothing – Places to Hike<br />
Navigation – Hazards – Weather<br />
________ Completed the Outdoor Workshop<br />
________ Completed an Experience Trip (Please indicate sponsoring branch if other than <strong>Olympia</strong>)<br />
Destination (Hike, Snowshoe, Backpack,<br />
Scramble, Climb, or Paddle) Date Leader’s Name (Branch)<br />
______________________________________ ___________ ________________________<br />
My recommendation for the Trip Leader of the Year is: ___________________________________<br />
Complete and mail this application by October 15, 2009, to:<br />
The <strong>Olympia</strong> <strong>Mountaineers</strong><br />
Climbing Committee – AS Graduation Application<br />
3110 Hampton Drive SW<br />
<strong>Olympia</strong>, WA 98512<br />
OR<br />
e-mail to: jimfrenchwa@comcast.net<br />
CONGRATULATIONS!<br />
<strong>Wilderness</strong> <strong>Skills</strong> Module Page 73 of 73<br />
<strong>Olympia</strong> <strong>Mountaineers</strong> - Hiking, Alpine Scrambling and Basic Climbing