
Create successful ePaper yourself
Turn your PDF publications into a flip-book with our unique Google optimized e-Paper software.
Instructions for Use<br />
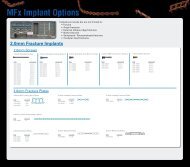
Osteomed <strong>M3</strong>-X <strong>Lag</strong> <strong>Screw</strong>s<br />
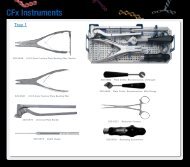
1. Place a bone clamp to create the necessary compression across the<br />
osteotomy or fusion site (when applicable). Note: This step is very<br />
important in arthrodesis and in very dense bone, as the axial force<br />
necessary for inserting the lag screw could temporarily distract the<br />
fragments at the fracture/arthrodesis line.<br />
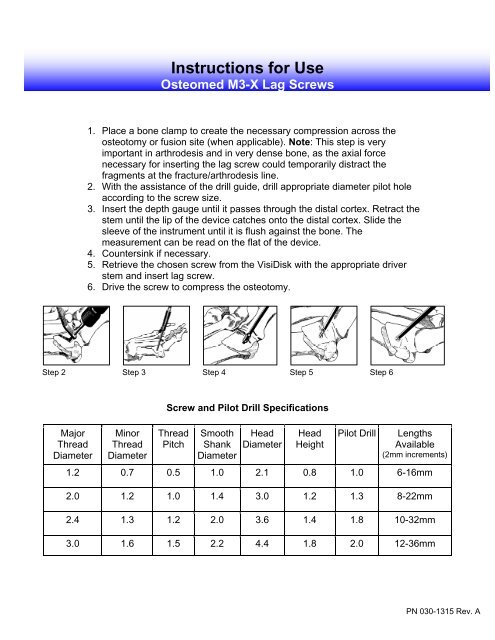
2. With the assistance of the drill guide, drill appropriate diameter pilot hole<br />
according to the screw size.<br />
3. Insert the depth gauge until it passes through the distal cortex. Retract the<br />
stem until the lip of the device catches onto the distal cortex. Slide the<br />
sleeve of the instrument until it is flush against the bone. The<br />
measurement can be read on the flat of the device.<br />
4. Countersink if necessary.<br />
5. Retrieve the chosen screw from the VisiDisk with the appropriate driver<br />
stem and insert lag screw.<br />
6. Drive the screw to compress the osteotomy.<br />
Step 2 Step 3 Step 4 Step 5 Step 6<br />
Major<br />
Thread<br />
Diameter<br />
Minor<br />
Thread<br />
Diameter<br />
<strong>Screw</strong> and Pilot Drill Specifications<br />
Thread<br />
Pitch<br />
Smooth<br />
Shank<br />
Diameter<br />
Head<br />
Diameter<br />
Head<br />
Height<br />
Pilot Drill<br />
Lengths<br />
Available<br />
(2mm increments)<br />
1.2 0.7 0.5 1.0 2.1 0.8 1.0 6-16mm<br />
2.0 1.2 1.0 1.4 3.0 1.2 1.3 8-22mm<br />
2.4 1.3 1.2 2.0 3.6 1.4 1.8 10-32mm<br />
3.0 1.6 1.5 2.2 4.4 1.8 2.0 12-36mm<br />
PN 030-1315 Rev. A