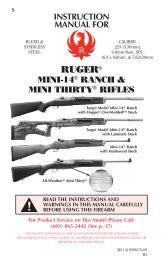
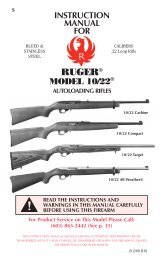
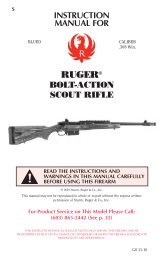
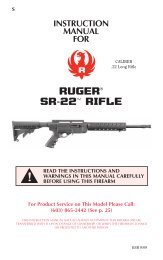
Instruction Manual - Ruger
Instruction Manual - Ruger
Instruction Manual - Ruger

You also want an ePaper? Increase the reach of your titles
YUMPU automatically turns print PDFs into web optimized ePapers that Google loves.
conditions. If the rifle is to be stored, coat it with a light film of oil or preservative.<br />
Where the rifle is in continuing use, and the presence of oil or grease would be<br />
objectionable, then the external surfaces can be coated (after cleaning and drying) with a<br />
paste wax formulated for use on metals. Apply the wax sparingly, allow time for it to dry<br />
hard, then buff lightly with a soft cloth. When applying the wax, take care that it does not<br />
get into the mechanism or on the functioning parts or in the bore.<br />
ATTACHING RUGER SCOPE RINGS<br />
Each <strong>Ruger</strong> telescope ring is a mated assembly of a top and a base. Do not mix the parts<br />
of the two ring assemblies as they are not interchangeable. On the underside of each<br />
mounting ring assembly there is an integral lug, located off center with respect to the<br />
front and back sides of the mount. The lug is nearer to the front surface. By reference to<br />
the lug, the mounting ring can be correctly assembled with the front of the ring toward<br />
the muzzle of the rifle.<br />
1. Disassemble one ring and reassemble over the scope body between the turret and the<br />
eyepiece. Remember - the lug on the base should be on the front side of the scope.<br />
2. Install the four top screws. Do not tighten.<br />
3. Disassemble the other ring and install it on the forward section of the scope tube with<br />
the lug forwardly also. Install the four top screws. Again, do not tighten.<br />
4. Assemble the rings to the receiver with the lugs engaging the recesses in the top<br />
surface of the receiver. Tighten the clamp nuts so that the rings are locked to the<br />
semicircular cuts on the sides of the receiver.<br />
5. Rotate the scope until cross-hairs are aligned properly and slide scope to desired eye<br />
relief. Then tighten the eight top screws each a bit at a time to grip the scope body.<br />
6. Sight in according to the directions with your scope.<br />
SIGHT ADJUSTMENT<br />
(For Rifles Equipped With Open Sights)<br />
The folding leaf rear sight is adjustable for elevation. The slide must be moved one<br />
graduation to change the point of impact by approximately one inch at 25 yards.<br />
Shooting to determine the slide setting for ‘zero’ at a particular distance should be done<br />
from a bench rest and over a measured distance. Use only a small screwdriver with a<br />
blade tip that exactly fits the screw-head. Loosen the screws only slightly so the slide<br />
doesn’t move too freely. Move the slide in the direction you want the point of impact of<br />
the bullet to move. When the slide is positioned at the desired height, carefully tighten<br />
both screws.<br />
Lateral (windage) adjustment is made by “drifting’ the sight base in its slot. Place a short<br />
brass rod against the sight base (and only the base) and tap the sight in the direction you<br />
wish to move the point of impact.<br />
SUGGESTED SIGHT PICTURE<br />
Top of front sight even with top of rear<br />
sight slide. Front sight centered in notch<br />
of rear sight slide. Target bull’s-eye<br />
centered on top of front sight.<br />
29