Great Lengths - Masters Swimming Association of British Columbia
Great Lengths - Masters Swimming Association of British Columbia
Great Lengths - Masters Swimming Association of British Columbia

Create successful ePaper yourself
Turn your PDF publications into a flip-book with our unique Google optimized e-Paper software.
16 <strong>Masters</strong> <strong>Swimming</strong> <strong>Association</strong> <strong>of</strong> BC<br />
Mar-Apr 2004<br />
Injury Prevention through<br />
Shoulder Stabilization<br />
Part 3<br />
By Steve Jorgensen<br />
(Special thanks to my friend and<br />
colleague Rich Burman, who took the<br />
photographs for this series).<br />
Steve Jorgensen is a Registered<br />
Physiotherapist specializing in<br />
Sports and Orthopaedic<br />
Physiotherapy at Summit Injury<br />
Management Downtown, in<br />
Victoria, telephone (250) 383-<br />
3638. He is a brand new father<br />
<strong>of</strong> Rachel, currently on hiatus<br />
from the Victoria <strong>Masters</strong> Swim<br />
Club, though he plans to return<br />
to the club in the not-toodistant<br />
future. You can reach<br />
him at sjorgensen@sumhab.com<br />
with specific questions.<br />
In the final installment <strong>of</strong> this<br />
series, I will describe exercises<br />
that more closely approximate<br />
the positions required for<br />
swimming. As with the<br />
exercises in Part 2, these build<br />
on the previous exercises.<br />
The same cautions<br />
mentioned in Part 2 regarding<br />
pain when exercising apply<br />
here: please don’t push<br />
through pain, and consult a<br />
medical pr<strong>of</strong>essional should<br />
you experience pain that does<br />
not go away.<br />
I wish you the best <strong>of</strong> luck. I<br />
hope the exercises contained<br />
in this series will help you<br />
remain free <strong>of</strong> injury and in the<br />
water.<br />
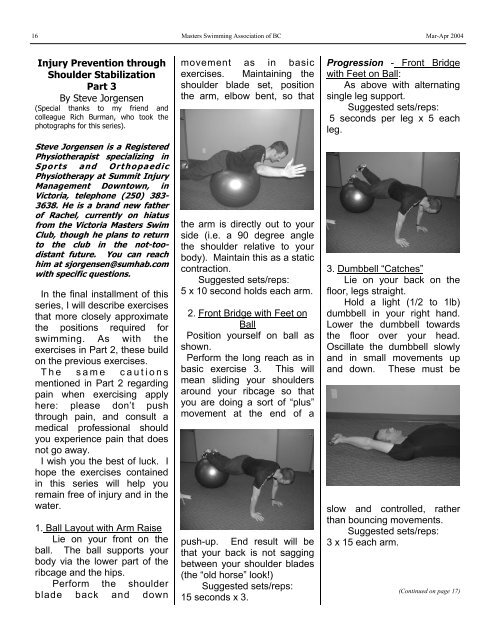
1. Ball Layout with Arm Raise<br />
Lie on your front on the<br />
ball. The ball supports your<br />
body via the lower part <strong>of</strong> the<br />
ribcage and the hips.<br />
Perform the shoulder<br />
blade back and down<br />
movement as in basic<br />
exercises. Maintaining the<br />
shoulder blade set, position<br />
the arm, elbow bent, so that<br />
the arm is directly out to your<br />
side (i.e. a 90 degree angle<br />
the shoulder relative to your<br />
body). Maintain this as a static<br />
contraction.<br />
Suggested sets/reps:<br />
5 x 10 second holds each arm.<br />
2. Front Bridge with Feet on<br />
Ball<br />
Position yourself on ball as<br />
shown.<br />
Perform the long reach as in<br />
basic exercise 3. This will<br />
mean sliding your shoulders<br />
around your ribcage so that<br />
you are doing a sort <strong>of</strong> “plus”<br />
movement at the end <strong>of</strong> a<br />
push-up. End result will be<br />
that your back is not sagging<br />
between your shoulder blades<br />
(the “old horse” look!)<br />
Suggested sets/reps:<br />
15 seconds x 3.<br />
Progression - Front Bridge<br />
with Feet on Ball:<br />
As above with alternating<br />
single leg support.<br />
Suggested sets/reps:<br />
5 seconds per leg x 5 each<br />
leg.<br />
3. Dumbbell “Catches”<br />
Lie on your back on the<br />
floor, legs straight.<br />
Hold a light (1/2 to 1lb)<br />
dumbbell in your right hand.<br />
Lower the dumbbell towards<br />
the floor over your head.<br />
Oscillate the dumbbell slowly<br />
and in small movements up<br />
and down. These must be<br />
slow and controlled, rather<br />
than bouncing movements.<br />
Suggested sets/reps:<br />
3 x 15 each arm.<br />
(Continued on page 17)