Underwater Photography - SENSACIONES.org
Underwater Photography - SENSACIONES.org
Underwater Photography - SENSACIONES.org

You also want an ePaper? Increase the reach of your titles
YUMPU automatically turns print PDFs into web optimized ePapers that Google loves.
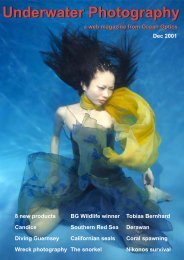
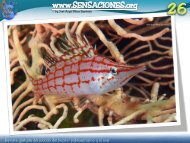
Close-ups with<br />
flash<br />
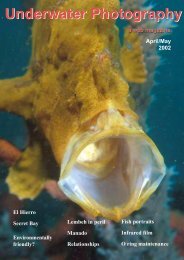
Macro shooting is usually handled very well in fully automatic<br />
mode. The large, well shaded LCD screen makes it easy to<br />
accurately select an interesting composition. Olympus C220.<br />
5mm lens. 1/100 th @ f13. Automatic (GS).<br />
day off! Finally, we decided<br />
to limit our use of Photoshop<br />
in preparing the pictures you<br />
see here to auto-levels, minor<br />
backscatter removal and<br />
sharpening after resizing.<br />
The evaluation<br />
Both of us are used to<br />
cameras that offer much more<br />
flexibility and control, so we<br />
were sure that our<br />
photography with the C220<br />
was going to be limited by its<br />
40<br />
technology. Its lens covers a<br />
standard mid-range, ideal on<br />
land, but neither wide enough<br />
for scenery nor tight enough<br />
for macro underwater. And its<br />
flash, coming from within the<br />
housing, is ideally placed for<br />
lighting up backscatter and<br />
not powerful enough to<br />
illuminate large subjects. The<br />
other major limitation of<br />
many digital compacts is<br />
shutter delay - a seemingly<br />
endless period of time that<br />
starts when you press the<br />
shutter, and waits until the<br />
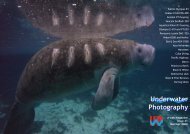
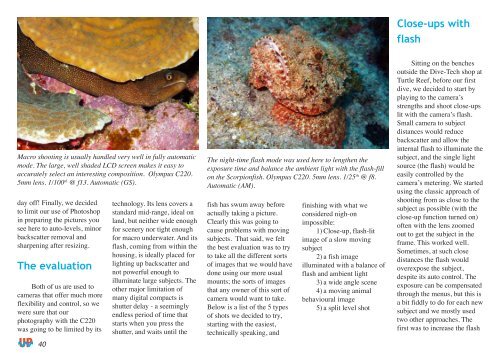
The night-time flash mode was used here to lengthen the<br />
exposure time and balance the ambient light with the flash-fill<br />
on the Scorpionfish. Olympus C220. 5mm lens. 1/25 th @ f8.<br />
Automatic (AM).<br />
fish has swum away before<br />
actually taking a picture.<br />
Clearly this was going to<br />
cause problems with moving<br />
subjects. That said, we felt<br />
the best evaluation was to try<br />
to take all the different sorts<br />
of images that we would have<br />
done using our more usual<br />
mounts; the sorts of images<br />
that any owner of this sort of<br />
camera would want to take.<br />
Below is a list of the 5 types<br />
of shots we decided to try,<br />
starting with the easiest,<br />
technically speaking, and<br />
finishing with what we<br />
considered nigh-on<br />
impossible:<br />
1) Close-up, flash-lit<br />
image of a slow moving<br />
subject<br />
2) a fish image<br />
illuminated with a balance of<br />
flash and ambient light<br />
3) a wide angle scene<br />
4) a moving animal<br />
behavioural image<br />
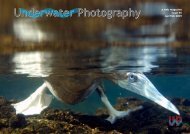
5) a split level shot<br />
Sitting on the benches<br />
outside the Dive-Tech shop at<br />
Turtle Reef, before our first<br />
dive, we decided to start by<br />
playing to the camera’s<br />
strengths and shoot close-ups<br />
lit with the camera’s flash.<br />
Small camera to subject<br />
distances would reduce<br />
backscatter and allow the<br />
internal flash to illuminate the<br />
subject, and the single light<br />
source (the flash) would be<br />
easily controlled by the<br />
camera’s metering. We started<br />
using the classic approach of<br />
shooting from as close to the<br />
subject as possible (with the<br />
close-up function turned on)<br />
often with the lens zoomed<br />
out to get the subject in the<br />
frame. This worked well.<br />
Sometimes, at such close<br />
distances the flash would<br />
overexpose the subject,<br />
despite its auto control. The<br />
exposure can be compensated<br />
through the menus, but this is<br />
a bit fiddly to do for each new<br />
subject and we mostly used<br />
two other approaches. The<br />
first was to increase the flash