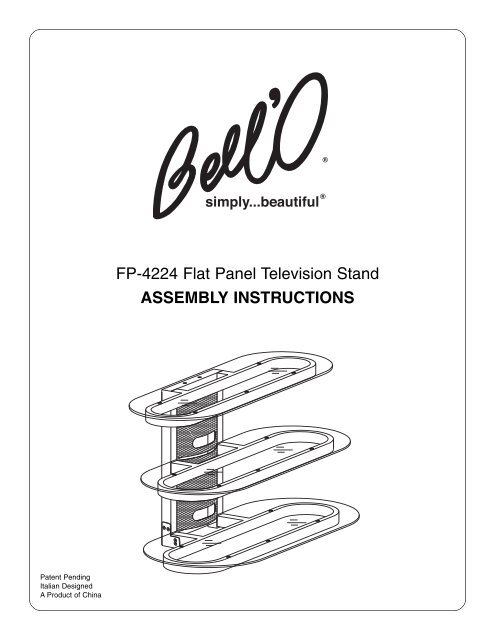
FP-4224 Flat Panel Television Stand ASSEMBLY INSTRUCTIONS
FP-4224 Flat Panel Television Stand ASSEMBLY INSTRUCTIONS
FP-4224 Flat Panel Television Stand ASSEMBLY INSTRUCTIONS

Create successful ePaper yourself
Turn your PDF publications into a flip-book with our unique Google optimized e-Paper software.
<strong>FP</strong>-<strong>4224</strong> <strong>Flat</strong> <strong>Panel</strong> <strong>Television</strong> <strong>Stand</strong><br />
<strong>ASSEMBLY</strong> <strong>INSTRUCTIONS</strong><br />
Patent Pending<br />
Italian Designed<br />
A Product of China
FOR YOUR SAFETY, PLEASE FOLLOW THESE PRECAUTIONS:<br />
! ALWAYS REMOVE THE TV AND OTHER EQUIPMENT FROM THE FURNITURE PRIOR TO MOVING THE ASSEMBLED UNIT.<br />
! BE CAREFUL WHEN MOVING THE ASSEMBLED FURNITURE AFTER THE GLASS SHELVES HAVE BEEN INSTALLED,<br />
AND/OR WHEN THERE IS EQUIPMENT LOCATED ON THE FURNITURE AS THIS MAY CAUSE THE SHELVES TO<br />
BECOME UNSECURED AND FALL.<br />
! WHEN IN USE, THIS FURNITURE MUST BE PLACED ON A FLAT, SOLID AND LEVEL SURFACE.<br />
! DO NOT LEAN ON THE TV WHEN IT IS ON THE TV STAND.<br />
! DO NOT CLIMB OR STEP ON THE STAND.<br />
! DO NOT BANG OR PLACE YOUR OWN WEIGHT ON THE GLASS SHELF.<br />
! DO NOT PLACE ITEMS ON THE SHELVES WHICH EXCEED THE MAXIMUM WEIGHT LIMITS OF 100 LBS. FOR TOP SHELF<br />
AND 50 LBS. FOR MIDDLE AND LOWER SHELVES
Assembly Instructions<br />
NOTE: TWO PEOPLE ARE RECOMMENDED TO ASSEMBLE THIS TABLE.<br />
A. PLACE the bottom shelf frame (C) on the floor upside<br />
down, with the five holes in the frame bottom facing<br />
upward. (This shelf frame is the largest of the three shelf<br />
frames, and has five holes in the underside of the frame<br />
and four holes in each of the rear side bars.) SCREW the<br />
five adjustable leveling feet (1) into the frame.<br />
B. PLACE the CMS ® (Cable Management System) post (D)<br />
upright with the two holes in the top edge of the post<br />
frame facing upward. SECURE the bottom shelf frame (C)<br />
to the CMS ® post as shown in Fig. 1 using four 55mm<br />
bolts (2) and the supplied Allen wrench. Tighten fully.<br />
C. SECURE the middle shelf frame (B) to the CMS ® using<br />
four 55mm bolts (2) and the supplied Allen wrench as<br />
shown in Fig. 1. Tighten fully.<br />
D. SECURE the TOP shelf frame (A) to the CMS ® using four<br />
55mm bolts (2) and the supplied Allen wrench as shown<br />
in Fig. 1. The top shelf frame is the smallest of the three<br />
shelf frames. Tighten fully.<br />
Fig. 1<br />
E. ATTACH two "L" support plates (I) to the bottom sides of<br />
the CMS ® post (D) and rear bars of the bottom shelf<br />
frame (C) as shown in Fig. 2 using four 12mm bolts (5)<br />
for each plate. Tighten fully.<br />
Fig. 2<br />
F. ATTACH two triangular brackets (H) to the top front sides<br />
of the CMS ® post (D) and undersides of the arms of the<br />
top shelf support frame (A) using four 8mm bolts (8) for<br />
each plate as shown in the Fig. 2 insets. Tighten fully.<br />
G. PLACE five of the smaller glass pads (4) onto the top<br />
edge of the bottom shelf frame (C) and five of the smaller<br />
glass pads onto the top edge of the middle shelf frame<br />
(B). PLACE five of the larger glass pads (3) onto the top<br />
edge of the top shelf frame (A) as shown in Fig. 1.<br />
H. Move the stand to the location it will occupy when fully<br />
assembled and in use.<br />
I. CAREFULLY PLACE the bottom glass shelf (F), (the<br />
deepest shelf), onto the bottom shelf frame (C) and SLIDE<br />
the edge with the hole through the slot in the CMS ® .<br />
Working from the rear of the CMS ® post, PLACE the<br />
plastic T-pin (7) through the hole in the glass to prevent<br />
the shelf from falling out of place.<br />
J. CAREFULLY PLACE the middle glass shelf (E), (the<br />
second deepest shelf), onto the middle shelf frame (B)<br />
and SLIDE the edge with the hole through the slot in the<br />
CMS ® . Working from the rear of the CMS ® post, PLACE<br />
the plastic T-pin (7) through the hole in the glass to<br />
prevent the shelf from falling out of place.<br />
K. CAREFULLY PLACE the top glass shelf (G), (the least deep<br />
shelf and the one with the two silver discs), onto the top<br />
shelf frame (A) and PLACE the two silver discs into the<br />
holes located on the top edge of the CMS ® post. Working<br />
from behind and below the top of the CMS ® post, SECURE<br />
the shelf to the CMS ® with two 35mm bolts (6).<br />
Fig. 3<br />
NOTE: ADJUST THE FIVE ADJUSTABLE FEET (1) UNDER THE BOTTOM<br />
SHELF FRAME (C) TO ENSURE THAT THE FURNITURE IS LEVEL.
Warranty<br />
One (1) Year Limited Warranty<br />
All Bell’O International products are warranted, with the exception of glass, to the original purchaser at the time of<br />
purchase and for a period of one (1) year thereafter. Glass is warranted to the original purchaser at the time of<br />
purchase and for a period of thirty (30) days thereafter. Warranty is only valid in the United States of America.<br />
In order to provide you with timely assistance, please thoroughly inspect your furniture for missing or defective parts<br />
immediately after opening the carton. To receive replacement or missing part(s) under this warranty, go to our<br />
website at www.bello.com or call our Customer Service Department at 1-888-235-7646. Please have the model<br />
number and part number(s) for reference. You will also need your sales receipt or other proof of purchase.<br />
Replacement part(s) will be shipped to you at no charge with Bell’O International assuming all shipping and handling<br />
expense.<br />
We warrant to you, the original purchaser, that our furniture and all of its parts and components are free of defects in<br />
material or workmanship. "Defects", as used in this warranty, is defined as any imperfections that impair the use of<br />
the furniture or product.<br />
Our warranty is expressly limited to the replacement of furniture parts and components. For one (1) year after the<br />
date of purchase, Bell’O International will replace any part described on the enclosed furniture parts list that is<br />
defective in material or workmanship.<br />
This warranty applies under conditions of normal use. Our furniture products are not intended for outdoor use. The<br />
warranty does not cover: 1) defects caused by improper assembly or disassembly; 2) defects caused by shipping,<br />
claims for damage during transit to you should be placed immediately by you to the transportation company;<br />
3) defects occurring after purchase due to product modification, intentional damage, accident, misuse, abuse,<br />
negligence or exposure to the elements; 4) cosmetic damage and 5) labor or assembly costs.<br />
There are no warranties, express or implied, including without limitation merchantability or fitness for particular use,<br />
except as (i) contained herein or (ii) required by applicable law in the state whose law governs (which shall be New<br />
Jersey absent controlling law imposing the law of another state in lieu thereof as governing law). All warranties of<br />
whatsoever derivation shall be limited to the term set forth above, unless otherwise required by applicable law.<br />
Manufacturer’s employees or representatives’ … ORAL OR OTHER WRITTEN STATEMENTS DO NOT CONSTITUTE<br />
WARRANTIES, shall not be relied upon by Buyer, and are not a part of the contract for sale or this limited warranty.<br />
Except as provided herein, Bell’O International shall have no liability or responsibility to the purchaser or any other<br />
person or entity with respect to any liability, loss or damage caused directly or indirectly by use of the product,<br />
including, but not limited to, any incidental or consequential damages. Some states do not allow limitation on how<br />
long an implied warranty can last or the exclusion of limitation of incidental or consequential damages, so the above<br />
limitation and exclusion may not apply to you.<br />
This warranty gives you specific legal rights. You may also have other rights, which vary from state to state.<br />
BELL'O INTERNATIONAL CORPORATION, 711 Ginesi Drive, Morganville, NJ 07751-1235<br />
Phone: (732) 972-1333 Fax: (732) 536-6482 Web: www.bello.com E-mail: sales@bello.com