Wolfgang Puck - Meijer
Wolfgang Puck - Meijer
Wolfgang Puck - Meijer

Create successful ePaper yourself
Turn your PDF publications into a flip-book with our unique Google optimized e-Paper software.
DL_ElecWokmanual09 6/2/09 11:38 AM Page 1<br />
<strong>Meijer</strong>.com<br />
IMPORTANT NOTICE<br />
PLEASE DO NOT RETURN TO STORE.<br />
If you have any problems with this unit,<br />
contact Consumer Relations for service<br />
PHONE: 1-800-275-8273 or<br />
visit our website at wphousewares.com<br />
Please read operating instructions<br />
before using this product.<br />
Please keep original box and packing materials<br />
in the event that service is required.<br />
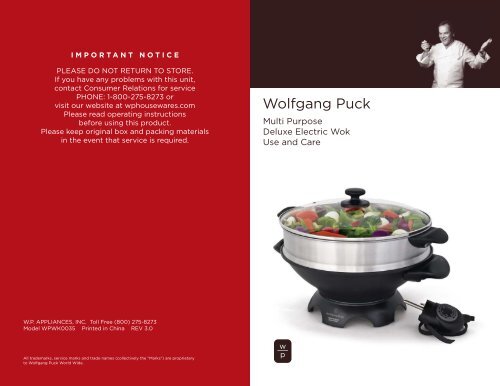
<strong>Wolfgang</strong> <strong>Puck</strong><br />
Multi Purpose<br />
Deluxe Electric Wok<br />
Use and Care<br />
W.P. APPLIANCES, INC. Toll Free (800) 275-8273<br />
Model WPWK0035 Printed in China REV 3.0<br />
All trademarks, service marks and trade names (collectively the “Marks”) are proprietary<br />
to <strong>Wolfgang</strong> <strong>Puck</strong> World Wide.
DL_ElecWokmanual09 6/2/09 11:38 AM Page 1<br />
<strong>Meijer</strong>.com<br />
IMPORTANT SAFEGUARDS<br />
Additional Safety Precautions<br />
When using electrical appliances, basic safety precautions should<br />
always be followed, including the following:<br />
1 Read all instructions carefully.<br />
2 To protect against risk of electrical shock, do not put cord, plug<br />
or temperature control in water or other liquid.<br />
3 Close supervision is necessary when any appliance is used by<br />
or near children.<br />
4 Unplug from outlet when not in use or before cleaning.<br />
Allow to cool before putting on or taking off parts and before<br />
cleaning the appliance.<br />
5 Do not touch hot surfaces. Use handles or knobs.<br />
6 Do not operate any appliance with a damaged cord or<br />
plug or after the appliance malfunctions or is dropped or<br />
damaged in any manner. Return the appliance to an authorized<br />
service facility for examination, repair, or electrical or<br />
mechanical adjustment.<br />
7 The use of attachments not recommended or sold by the<br />
appliance manufacturer may cause fire, electric shock, or injury.<br />
8 Do not use outdoors.<br />
9 Do not let cord hang over edge of table or counter or touch hot<br />
surfaces, including the stove.<br />
10 Do not place on or near a hot gas or electric burner, or in a<br />
heated oven.<br />
11 Extreme caution must be used when moving an appliance<br />
containing hot oil or other hot liquids.<br />
12 Always attach probe to appliance first, then plug cord into wall<br />
outlet. To disconnect, turn any control to MIN, then remove plug<br />
from wall outlet.<br />
13 Do not use this appliance for other than intended use.<br />
14 Use ONLY with Probe Type VDP30 provided with this appliance.<br />
15 Extreme caution must be used when moving the Wok containing<br />
hot oil.<br />
GROUNDING INSTRUCTIONS: This appliance must be grounded.<br />
It is equipped with a 3-prong cord having a grounded plug. The plug<br />
must be plugged into an outlet which is properly installed and<br />
grounded.<br />
WARNING: Improper use of the grounded cord can result in the risk<br />
of electric shock. Consult a qualified electrician if necessary. Do not<br />
attempt to defeat this safety feature by modifying plug.<br />
A short power-supply cord is provided to reduce the hazards<br />
resulting from entanglement or tripping over a longer cord. If it is<br />
necessary to use an extension cord, it should be positioned such<br />
that it does not drape over the counter or tabletop where it can<br />
be pulled on by children or tripped over and:<br />
a. Use only 3-prong extension cord with 3-blade<br />
grounding plug.<br />
b. The marked rating of the extension cord must be equal to<br />
or greater than the rating of this appliance. The electrical<br />
rating is listed on the bottom of this unit.<br />
SAVE THESE INSTRUCTIONS<br />
HOUSEHOLD USE ONLY<br />
1 2
DL_ElecWokmanual09 6/2/09 11:38 AM Page 3<br />
<strong>Meijer</strong>.com<br />
Table of Contents<br />
Important Safeguards 1<br />
Additional Safety Precautions 2<br />
About <strong>Wolfgang</strong> <strong>Puck</strong> 3<br />
Know Your Multi-Purpose<br />
Deluxe Electric Wok 5<br />
Before Your First Use 7<br />
Using Your Electric Wok 8<br />
<strong>Wolfgang</strong> <strong>Puck</strong>,<br />
owner of the famous<br />
Spago restaurants and<br />
one of the most influential<br />
chef-restauranteurs in<br />
America, is credited with<br />
reviving California’s rich<br />
culinary heritage. His<br />
cooking innovations, a<br />
result of blending fresh<br />
California ingredients with his classical French techniques, are<br />
enjoyed by world leaders, stars and fellow chefs alike. He established<br />
other trend-setting restaurants like Postrio in San Francisco, Chinois<br />
on Main in Santa Monica, Trattoria del Lupo, Cut, and his latest<br />
creation, Jai, an Asian fusion restaurant in San Diego. Home chefs can<br />
also share Mr. <strong>Puck</strong>’s talents through his cookbooks, cutlery,<br />
cookware and, of course, through his appliances!<br />
Using Your Steaming Pan 8<br />
Care and Cleaning 9<br />
Electric Wok Cooking Tips 10<br />
Fresh Vegetable Steaming Chart 11<br />
Recipes 12<br />
Limited Warranty 26<br />
Contact Information<br />
back<br />
3 4
DL_ElecWokmanual09 6/2/09 11:38 AM Page 5<br />
<strong>Meijer</strong>.com<br />
Know Your Multi Purpose<br />
Deluxe Electric Wok<br />
Steel Rack<br />
Wok Socket<br />
(on rear of<br />
wok near base)<br />
Tempered Glass Lid<br />
Detachable Base<br />
Steaming Pan<br />
Removable Temperature Probe<br />
with quick release lever<br />
5 6
DL_ElecWokmanual09 6/2/09 11:38 AM Page 7<br />
<strong>Meijer</strong>.com<br />
Before Your First Use<br />
Using Your Electric Wok<br />
Wash, rinse and dry the wok, lid, rack,<br />
and detachable base to remove any dust or<br />
particles due to shipping. DO NOT<br />
IMMERSE THE PROBE IN WATER OR<br />
ANY OTHER LIQUID.<br />
WARNING: Ensure that your temperature<br />
probe and wok socket are completely dry<br />
prior to inserting probe into Wok socket<br />
Season the cooking surface by applying a<br />
thin coat of cooking oil to the nonstick surface<br />
with a paper towel. This appliance requires<br />
1500 watts and should be the only appliance<br />
operating on the circuit. Plug the Wok into a<br />
120 volt 60 Hz AC only outlet.<br />
DETACHABLE BASE<br />
The base should always be removed when<br />
cleaning your wok. To remove simply turn the<br />
wok upside down and remove the locking<br />
screw by turning counter-clockwise. See<br />
Figure 1. Lift the base straight up to remove,<br />
(see Figure 2) to reattach the base simply line<br />
up the notch for the temperature control on<br />
the base to the socket on the wok. Replace<br />
the locking screw by turning clockwise.<br />
Figure 1<br />
Figure 2<br />
WARNING: Ensure that your Wok base is FIRMLY attached to the<br />
bottom of the wok prior to use. NEVER attempt to cook without the<br />
base attached.<br />
WARNING: The exterior of your wok becomes very hot during use,<br />
similar to any cooking vessel on a stovetop. Do not touch any hot<br />
surfaces, use handles or knobs. Do not attempt to move your wok<br />
until it has completely cooled.<br />
1 Place your Electric Wok on a flat, stable, level surface.<br />
2 Insert the temperature probe control into the socket on the Wok.<br />
3 Plug the cord into a 120-volt 60 Hz AC only outlet. This appliance<br />
requires 1500 watts and should be the only appliance operating on<br />
the circuit.<br />
4 Set the temperature control to the temperature desired. The<br />
indicator light will turn on.<br />
5 Once the selected temperature has been reached, the indicator light<br />
on the temperature control will switch off; however we recommend<br />
that you preheat the wok for 10 minutes to allow the heat to reach<br />
up the sides of the cooking surface. The light will cycle on and off as<br />
the selected temperature is maintained.<br />
6 When you have finished cooking your meal set the temperature<br />
control to MIN before unplugging from the outlet. Allow the Wok to<br />
cool completely before moving or cleaning.<br />
REMOVABLE ADJUSTABLE<br />
TEMPERATURE PROBE<br />
Your temperature has a quick release handle<br />
allowing you to effortlessly remove the probe<br />
from the wok by simply squeezing the lever<br />
Figure 3<br />
into the probe. The adjustable temperature<br />
probe has been designed to match the settings of a standard stovetop<br />
control. There are 5 settings comprised of Min, Keep Warm, Medium,<br />
High, and Sear. You will notice during the cooking process that the light<br />
will cycle on and off. This indicates that the adjustable thermostat is<br />
cycling to ensure the set temperature is maintained.<br />
Using your Steaming Pan<br />
1 Set the temperature to Medium High (halfway between Medium and High<br />
on your Wok Probe).<br />
2 Add 2 cups of water to the wok.<br />
3 Place the Steaming Pan on the Wok ensuring that it sits level and within<br />
the ridge along the top of the wok.<br />
4 Place food into the steaming pan, place lid on pan, and steam to your<br />
desired doneness.<br />
7 8
DL_ElecWokmanual09 6/2/09 11:38 AM Page 9<br />
<strong>Meijer</strong>.com<br />
Care and Cleaning<br />
Electric Wok Cooking Tips<br />
1 Never immerse the temperature control, cord or plug in water or<br />
other liquid. If cleaning of the probe is necessary, wipe with a damp<br />
cloth and dry thoroughly. Your Wok, tempered glass lid, and rack can<br />
be washed by hand in warm, soapy water or in the dishwasher (with<br />
the temperature probe and base removed).<br />
2 Avoid using abrasive cleaners or scouring pads. Do not place<br />
in dishwasher. Store and handle the temperature control carefully.<br />
Avoid knocking or dropping the control as this can damage<br />
the probe.<br />
3 Use caution when handling the glass lid. Avoid sudden temperature<br />
changes as this can cause the lid to crack. For example, do not<br />
immerse a hot glass lid in cold water. Do not over tighten the knob<br />
on the glass lid as this can result in damage or cracking.<br />
4 Any other servicing should be performed by an authorized service<br />
representative.<br />
5 To clean your steaming pan, wash by hand in warm, soapy water and<br />
dry thoroughly. Do not let the Steaming Pan air dry.<br />
1 Don’t overload the wok when stir-frying. Add only about 8 ounces<br />
of meat or 2 cups of vegetables at a time. If you add too much food<br />
at one time, you will be “stewing” your food instead of stir-frying.<br />
Overloading the wok is a common mistake to make when stir-frying.<br />
2 Stir-fry food in small batches. Remove each batch before starting<br />
another, and then combine them all prior to serving.<br />
3 Cut all vegetables into similar small sizes when stir-frying.<br />
4 Do all of the meal prep prior to adding food to the wok. Line up<br />
all ingredients in the order of how they will be cooked. This allows<br />
the food to be more evenly cooked.<br />
5 When using the wok to braise foods, use high heat to sear the meat,<br />
then add remaining ingredients, cover and turn heat to low until a<br />
gentle bubbling can be seen.<br />
6 When using the wok as a candy pot, set temperature to a high heat<br />
setting until mixture boils, then lower heat to the temperature called<br />
for in the recipe. Clean-up when making candy is much easier due to<br />
the non-stock coating.<br />
9<br />
10
DL_ElecWokmanual09 6/2/09 11:38 AM Page 11<br />
<strong>Meijer</strong>.com<br />
Fresh Vegetable<br />
Steaming Chart<br />
Pour 2 cups of water into wok; place vegetables in steamer pan.<br />
VEGETABLE<br />
Asparagus, stems<br />
trimmed<br />
Green or Wax Beans,<br />
whole<br />
Broccoli, spears<br />
Broccoli, flowerets<br />
Cabbage,<br />
cut into 4 wedges<br />
Carrots, 1-inch slices<br />
Carrots, 1-inch slices<br />
Cauliflower, flowerets<br />
Corn-on-the cob,<br />
each halved<br />
Red or white potatoes,<br />
medium, quartered<br />
Red or white potatoes,<br />
medium, quartered<br />
Sweet potatoes,<br />
medium, quartered<br />
Snow peas<br />
Spinach, stems trimmed<br />
Zucchini or summer<br />
squash, sliced<br />
TIME<br />
10 to 12 minutes<br />
12 to 13 minutes<br />
13 to 15 minutes<br />
12 to 14 minutes<br />
16 to 18 minutes<br />
10 to 12 minutes<br />
13 to 15 minutes<br />
12 to 14 minutes<br />
12 to 14 minutes<br />
18 to 20 minutes<br />
27 to 30 minutes<br />
19 to 20 minutes<br />
8 to 9 minutes<br />
10 to 11 minutes<br />
11 to 12 minutes<br />
Braised Beef Short Ribs<br />
This wonderful dish is so easy to make and can be made several days<br />
ahead of time. It tastes better if made ahead making this a great dish<br />
for entertaining. I love to serve it with soft, cheesy polenta and a big<br />
salad.<br />
Makes 4 - 8 servings<br />
INGREDIENTS<br />
8 meaty beef short ribs<br />
2 tablespoons all-purpose flour<br />
kosher salt and fresh pepper to taste<br />
2 tablespoons olive oil<br />
2 large onions, chopped<br />
2 large carrots, peeled and chopped<br />
1 golden delicious apple, peeled, cored and chopped<br />
1/3 cup garlic cloves, peeled<br />
2 bay leaves<br />
a few sprigs fresh thyme<br />
a few sprigs fresh sage<br />
3 tablespoons tomato paste<br />
2 cups red wine<br />
3 cups beef stock or broth<br />
METHOD<br />
1 Set the temperature probe on your wok to "High". Add oil until hot.<br />
2 Dredge the ribs in the flour, salt and pepper and add to wok in a<br />
single layer. (Do this in 2 batches if ribs are large.) Brown ribs on all<br />
sides. Turn heat to very low.<br />
3 Add remaining ingredients to pan and stir to combine. Cover and<br />
cook for 2 - 3 hours or until meat is fall-apart tender. Remove, cool<br />
and then refrigerate overnight.<br />
4 After approximately 12 hours of refrigeration, peel off fat, being<br />
careful not to dislodge the bones from the ribs. Reheat, taste<br />
carefully and correct seasonings when ready to serve.<br />
Recipe Courtesy, Marian Getz, <strong>Wolfgang</strong> <strong>Puck</strong> Chef<br />
11<br />
12
DL_ElecWokmanual09 6/2/09 11:38 AM Page 13<br />
<strong>Meijer</strong>.com<br />
Hot and Sour Hot Pot<br />
Stir Fry Vegetables<br />
Makes 2 - 4 servings<br />
INGREDIENTS<br />
4 cups chicken stock<br />
1 tablespoon ginger, minced<br />
2 teaspoons cornstarch<br />
2 tablespoons water<br />
1 teaspoon salt<br />
1/2 teaspoon white pepper<br />
2 tablespoons cider vinegar<br />
2 tablespoons lemon juice<br />
2 green onions, chopped<br />
For Dippers:<br />
1 can drained bamboo shoots<br />
2 cups halved fresh mushrooms<br />
1 pound boneless skinless chicken breast, sliced thin in 1-inch strips<br />
1 cup cauliflower<br />
METHOD<br />
1 Set the temperature probe on your wok to "High". Add chicken broth<br />
and ginger to wok.<br />
2 Dissolve cornstarch in water in separate container and add to<br />
chicken broth in the wok.<br />
3 Add salt, pepper, vinegar and lemon juice.<br />
4 Add green onions, and cook for 15 minutes.<br />
5 Keep the wok temperature set to "High" for dipping. Assemble<br />
vegetable platters and assign skewers. Have guests dip ingredients<br />
into boiling liquid and cook their individual meals to desired<br />
doneness.<br />
Makes 4 servings<br />
INGREDIENTS<br />
2 tablespoons sesame oil<br />
2 cloves garlic<br />
1 tablespoon freshly grated ginger<br />
1 medium onion, sliced thin<br />
1 cup carrots, cut diagonally<br />
2 cups broccoli flowerets<br />
2 cups sugar snap peas<br />
1 red bell pepper, julienne<br />
1/4 cup bottle stir fry sauce<br />
2 teaspoons toasted sesame seeds<br />
METHOD<br />
1 Set the temperature probe on your wok to "High". Add oil and heat<br />
for 2 minutes.<br />
2 Add the garlic and ginger cook for 2 minutes. Add all the vegetables<br />
and toss and cook for 5 minutes. Add the stir fry sauce and toss and<br />
coat well. Finish with a sprinkling of sesame seeds. Serve over rice.<br />
Recipe courtesy Debra Murray, <strong>Wolfgang</strong> <strong>Puck</strong> HSN Host<br />
Recipe courtesy Debra Murray, <strong>Wolfgang</strong> <strong>Puck</strong> HSN Host<br />
13<br />
14
DL_ElecWokmanual09 6/2/09 11:38 AM Page 15<br />
<strong>Meijer</strong>.com<br />
Stir-Fried Chinese Vegetables<br />
Makes 4 to 6 servings<br />
INGREDIENTS<br />
4 tablespoons peanut oil or vegetable oil<br />
1 tablespoon minced fresh ginger<br />
1 tablespoon minced garlic<br />
1/4 teaspoon crushed red chili flakes<br />
1/2 red onion, trimmed and cut into 4 wedges, layers separated<br />
2 heads baby bok choy, trimmed, cut lengthwise in quarters<br />
1/4 pound Chinese broccoli, stems and leaves separated,<br />
each cut into 1-inch pieces<br />
1/4 pound Chinese long beans, trimmed and cut into 1-inch pieces<br />
6 scallions, trimmed, 5 cut diagonally into 1-inch pieces,<br />
1 thinly sliced and reserved separately<br />
1/4 head Napa cabbage, leaves cut crosswise into 1-inch-wide strips<br />
2/3 cup good-quality chicken stock or broth, vegetable broth,<br />
or water, heated<br />
1 tablespoon soy sauce<br />
1 tablespoons cornstarch, dissolved in 1 tablespoon cold water<br />
2 teaspoons toasted sesame seeds<br />
METHOD<br />
1 Set the temperature probe on your Wok to "Sear" and preheat for<br />
5 minutes. Add 2 tablespoons of the oil. When the oil is hot, add the<br />
ginger, garlic, and chili flakes and stir fry just until they are aromatic,<br />
about 30 seconds. Scoop out the aromatics and set them aside.<br />
2 Add the remaining oil to the wok. When it is hot, add the onion<br />
pieces and stir-fry until they turn glossy and bright, 1 to 2 minutes.<br />
3 Add the bok choy and the Chinese broccoli stem pieces. Stir-fry 1<br />
to 2 minutes more.<br />
4 Add the long beans and the 1-inch scallion pieces. Continue stirfrying<br />
until they are bright green and glossy, 1 to 2 minutes more.<br />
5 Add the Napa cabbage and the Chinese broccoli leaves, along with<br />
about 1/3 cup of the hot stock and the reserved aromatics. Continue<br />
stir-frying until the vegetables are all tender-crisp, about 2 minutes<br />
more. Add the remaining stock, soy sauce, and cornstarch mixture<br />
and stir-fry until the vegetables all look lightly glazed with sauce,<br />
about 1 minute more.<br />
6 Transfer the stir-fried vegetables to a heated serving dish. Garnish<br />
with the sliced scallions and sesame seeds and serve immediately.<br />
Makes 4 servings<br />
INGREDIENTS<br />
Yvette’s Sweet and<br />
Sour Chicken<br />
2 tablespoons sesame oil<br />
2 tablespoons soy sauce<br />
2 tablespoons cornstarch<br />
1 pound boneless skinless chicken breast, cut into 1-inch cubes<br />
1 cup pineapple chunks<br />
1 can (28 ounce) oriental mixed vegetables, drained<br />
1/2 cup mandarin orange slices, drained<br />
12 maraschino cherries, halved<br />
1 12-ounce container of Sweet and Sour Sauce<br />
Jasmine Rice<br />
METHOD<br />
1 Combine soy sauce and cornstarch in a bowl. Add cubes of chicken<br />
and let set for 30 minutes.<br />
2 Set the temperature probe to "High" and heat oil in wok for<br />
2 minutes.<br />
3 Add chicken mixture to wok and cook until brown on all sides, about<br />
5 minutes. Add sweet and sour sauce.<br />
4 Add remaining ingredients and cook until sauce thickens and boils,<br />
about 5 minutes. Serve over jasmine rice.<br />
Recipe courtesy Debra Murray, <strong>Wolfgang</strong> <strong>Puck</strong> HSN Host<br />
15<br />
16
DL_ElecWokmanual09 6/2/09 11:38 AM Page 17<br />
<strong>Meijer</strong>.com<br />
Twice Fried Rice<br />
Vegetable Fried Rice<br />
Makes 2 to 4 servings<br />
INGREDIENTS<br />
1 cup long grain rice<br />
3/4 cup chicken stock<br />
1 teaspoon salt<br />
1 red or yellow bell pepper, 1 green bell pepper, seeded,<br />
cored and cut into small dice<br />
1 cup sliced Napa cabbage<br />
1/2 cup mushrooms, sliced<br />
1/4 cup snow peas, strings removed<br />
1 to 2 tablespoons peanut oil<br />
1 egg, beaten<br />
1/4 cup soy sauce<br />
2 scallions, trimmed and cut into chiffonade<br />
METHOD<br />
1 Place the rice in a saucepan and add the stock, water and salt.<br />
Bring the liquid to a boil, reduce the heat, cover and cook slowly<br />
for 15 to 18 minutes. It is important to cook the rice until dry. Turn<br />
the rice out onto a large platter or baking sheet and let it air dry for<br />
up to an hour. (Or place the rice on a baking sheet and dry it in the<br />
oven at 200 degrees F for 30 minutes, stirring two or three times<br />
with a fork.)<br />
2 Take a fork and thoroughly fluff the rice.<br />
3 Set the temperature control on your Wok to "Sear" and preheat for<br />
5 minutes. Pour the oil in around the edges, and then stir fry all the<br />
vegetables for 30 seconds. Add the rice and continue to stir fry for<br />
another 30 seconds. Pour the egg in around the edges of the wok<br />
and quickly stir it into the rice and vegetables.<br />
4 Stir in the soy sauce.<br />
5 Prepare the scallion chiffonade immediately before serving. Slice the<br />
scallions very thinly on the bias.<br />
Makes 4 servings<br />
INGREDIENTS<br />
2 tablespoons peanut oil<br />
1/2 cup broccoli florettes<br />
1/2 cup chopped red bell pepper<br />
1/2 cup snow peas<br />
1 cup diced cooked lobster, duck or chicken meat (optional)<br />
2 cups cooked long grain rice<br />
(cooked the day before, the grains should be separate)<br />
1 egg, lightly beaten<br />
2 tablespoons soy sauce<br />
METHOD<br />
1 Set the temperature probe of your Wok to "High" and preheat for<br />
5 minutes.<br />
2 Add the peanut oil and heat until hot. Then add all the vegetables<br />
and the fish or fowl, if used, and stir fry for 2 minutes.<br />
3 Add the rice and stir fry for another 2 minutes, or until the rice is<br />
jumping off the wok. Then add all the vegetables and the cooked<br />
lobster, chicken or duck meat, and stir-fry for 2 minutes.<br />
4 Pour the beaten egg around the rim of the wok so that the egg<br />
scrambles before it touches the rice. Mix the scrambled egg into the<br />
rice, add the soy sauce and stir well. Season to taste with salt and<br />
pepper.<br />
PRESENTATION<br />
Turn into a heated serving dish. Serve immediately<br />
PRESENTATION<br />
Turn the rice out onto a heated platter. Sprinkle the scallion chiffonade<br />
over the rice. Serve with chopsticks.<br />
17 18
DL_ElecWokmanual09 6/2/09 11:38 AM Page 19<br />
<strong>Meijer</strong>.com<br />
Makes 2 servings<br />
INGREDIENTS<br />
Kung Pao Chicken<br />
Marinade:<br />
1 tablespoon rice wine<br />
1 tablespoon peanut oil<br />
1 tablespoon soy sauce<br />
1/2 teaspoon salt<br />
1 tablespoon cornstarch<br />
8 ounces boneless, skinless chicken breast, thinly sliced<br />
Sauce:<br />
3 tablespoons light soy sauce<br />
2 tablespoons rice wine<br />
3 tablespoons rice vinegar<br />
2 tablespoons sugar<br />
2 tablespoons hoisin sauce<br />
2 tablespoons peanut oil<br />
4 dried red chilies, stems removed and discarded, pods cut in halves<br />
1/2-inch piece ginger, peeled, thinly sliced, smashed<br />
1 garlic clove, smashed<br />
1 green onion, white part cut into 1/2 -inch pieces,<br />
green part cut into julienne strips<br />
1/4 cup deep-fried peanuts<br />
2 tablespoons cold chicken stock<br />
METHOD<br />
1 In a nonreactive bowl, prepare the Marinade: Combine the rice wine,<br />
peanut oil, soy sauce, salt and cornstarch. Stir in the chicken pieces<br />
and refrigerate for 20 to 30 minutes.<br />
2 In a small bowl, stir together the ingredients for the Sauce. Set aside.<br />
3 Set the temperature probe of your Wok to "Sear" and preheat for 5<br />
minutes. Bring the peanut oil to almost smoking temperature. Stir-fry<br />
the chilies, ginger, garlic and white part of the green onions for 30 to<br />
40 seconds, or until the chilies turn dark. Add the chicken and stirfry<br />
for 1 to 2 minutes, until golden in color.<br />
4 Add the sauce and bring to a boil. Add the peanuts. Stir in the slurry<br />
and continue stirring until the sauce is glossy and thick enough to<br />
coat the chicken. Transfer to a serving plate and garnish with<br />
julienned green onions.<br />
Stir-Fried Chicken with<br />
Cashews and Pine Nuts<br />
Makes 4 servings<br />
INGREDIENTS<br />
3 tablespoons peanut oil<br />
1 pound boneless, skinless chicken breasts cut into 1 1/2 inch cubes<br />
Salt<br />
Freshly ground black pepper<br />
1/4 cup plum wine or sherry<br />
1 tablespoon minced garlic<br />
2 teaspoons chopped peeled ginger<br />
1/2 teaspoon crushed chili pepper flakes<br />
1 1/4 cups chicken stock<br />
2 teaspoons <strong>Wolfgang</strong>'s Asian Rib Sauce (see following recipe)<br />
1 cup sliced shiitake mushrooms<br />
1/2 cup each 1-inch cubes of yellow and red bell pepper<br />
2 scallions, cut into 1-inch slices<br />
1/4 cup each cashews and pine nuts<br />
4 tablespoons (2 ounces) unsalted butter<br />
METHOD<br />
1 Set the temperature probe of your Wok to "Sear" and preheat for<br />
5 minutes. Heat the peanut oil until smoking.<br />
2 Season the chicken lightly with salt and pepper and sear, about<br />
1 minute on each side. Deglaze the pan with the plum wine or sherry<br />
and stir in the garlic, ginger and chili flakes. Pour in the stock and<br />
reduce by half (sauce will begin to thicken). Add the rib sauce,<br />
mushrooms, peppers, scallion and nuts, and cook 1 or 2 minutes<br />
longer, stirring occasionally, until chicken is done. Stir in the butter<br />
and correct seasoning to taste.<br />
3 Spoon the stir-fried chicken onto a large heated serving platter,<br />
arranging all the ingredients evenly throughout. Or divide among<br />
4 heated plates and serve immediately.<br />
Recipe Courtesy, Marian Getz, <strong>Wolfgang</strong> <strong>Puck</strong> Chef<br />
Recipe Courtesy, Marian Getz, <strong>Wolfgang</strong> <strong>Puck</strong> Chef<br />
19 20
DL_ElecWokmanual09 6/2/09 11:38 AM Page 21<br />
<strong>Meijer</strong>.com<br />
<strong>Wolfgang</strong>'s Asian Rib Sauce<br />
Pineapple Cream Candy<br />
Makes 1 1/3 cup<br />
INGREDIENTS<br />
1 1/4 cups rice wine vinegar*<br />
1 cup honey<br />
3/4 cup soy sauce<br />
3/4 cup mirin*<br />
2 scallions, chopped<br />
1 teaspoon minced garlic<br />
1 teaspoon fresh ginger, finely chopped<br />
3/4 teaspoon crushed red pepper flakes<br />
METHOD<br />
1 In a 4-cup enamel or stainless steel saucepan, combine all the<br />
ingredients and cook, over medium-high heat until syrupy, 50 to 60<br />
minutes. Strain into a clean container and cool.<br />
2 Refrigerate, covered, and use as needed.<br />
*Note Rice wine vinegar and mirin can be purchased in markets that<br />
carry Asian products.<br />
Makes 1 pound<br />
INGREDIENTS<br />
2 cups sugar<br />
1 cup brown sugar<br />
1/2 cup heavy cream<br />
1 cup crushed or pureed fresh pineapple<br />
1 tablespoon unsalted butter<br />
1 cup chopped, toasted, salted macadamia nuts<br />
METHOD<br />
1 Line an 8-inch pan with aluminum foil and spray with non-stick<br />
spray. Set aside.<br />
2 Combine sugars, cream and pineapple in wok. Stir until sugars are<br />
moistened.<br />
3 Set the temperature probe of your Wok to "High" and bring sugars<br />
to a boil. Use a candy thermometer and bring mixture to 245<br />
degrees. Turn off heat and add butter and nuts. Stir and pour out<br />
into prepared pan. Let cool. Remove from pan by grasping foil to lift<br />
candy out of pan. Remove foil. Cut candy into small squares. Can be<br />
stored airtight for up to 1 month.<br />
Recipe Courtesy, Marian Getz, <strong>Wolfgang</strong> <strong>Puck</strong> Chef<br />
21<br />
22
DL_ElecWokmanual09 6/2/09 11:38 AM Page 23<br />
<strong>Meijer</strong>.com<br />
Almond Toffee<br />
Cherries Jubilee<br />
Makes 1 1/2pounds<br />
INGREDIENTS<br />
1/4 cup water<br />
1 cup sugar<br />
1/2 cup light corn syrup<br />
1/2 cup unsalted butter, at room temperature<br />
1 cups sliced almonds, toasted<br />
1 teaspoon kosher salt<br />
1/2 teaspoon baking soda<br />
1 teaspoon vanilla extract<br />
1/4 teaspoon butter vanilla extract<br />
1 pound semi sweet chocolate chips, for coating afterwards<br />
1/2 cup additional toasted almonds, for topping<br />
METHOD<br />
1 Line a cookie sheet with a strip of silicone-coated aluminum foil or a<br />
silpat. Fill a 2 cup glass measuring cup with water and ice to test<br />
candy with later. Set aside.<br />
2 Set the temperature probe of your Wok to "High" and add water,<br />
corn syrup, and sugar and gently stir to moisten all of the sugar.<br />
Bring to a boil. Reduce temperature to medium-high. Add butter<br />
and stir gently until butter is melted. When candy is amber in color,<br />
carefully drop a few drops of the mixture into measuring glass with<br />
water and ice. Stir for a few seconds with a fork, then remove and<br />
test – it should cleanly snap in two and be a delicious caramel flavor.<br />
If it bends without breaking, cook a few minutes longer. A candy<br />
thermometer should show the finished candy to be between 300<br />
to 310 degrees.<br />
3 Turn off wok and add the 1 cup of nuts, salt, baking soda and both<br />
extracts. Stir quickly but thoroughly, using caution. Mixture will foam<br />
up and become lighter in color. Immediately pour out onto foil-lined<br />
cookie sheet. Use an oiled spatula to spread mixture as thin as<br />
possible. When warm to the touch, evenly sprinkle over the<br />
chocolate chips. Wait a few minutes for chips to soften, then spread<br />
evenly over candy in a thin layer. Sprinkle over remaining almonds.<br />
Cool completely. Break candy into irregular shards. Candy will keep<br />
for a month, stored airtight.<br />
Makes 6 - 8 servings<br />
INGREDIENTS<br />
4 cups frozen cherries, thawed or 4 cups fresh pitted<br />
1/2 cup sugar<br />
1 tablespoon cornstarch<br />
1/2 cup Brandy, Cherry Brandy or Kirsch<br />
Vanilla Ice Cream<br />
METHOD<br />
1 Strain cherries, reserving juice.<br />
2 Set the temperature probe of your Wok to "High". Add reserved<br />
juice, sugar and cornstarch. Cook and stir until thickened and bubbly.<br />
3 Stir in cherries, cook and stir for 2 minutes more.<br />
4 Add Brandy, and stir well.<br />
5 Serve over vanilla ice cream.<br />
Recipe courtesy Debra Murray, <strong>Wolfgang</strong> <strong>Puck</strong> HSN Host<br />
Recipe Courtesy, Marian Getz, <strong>Wolfgang</strong> <strong>Puck</strong> Chef<br />
23<br />
24
DL_ElecWokmanual09 6/2/09 11:38 AM Page 25<br />
<strong>Meijer</strong>.com<br />
Recipe Notes<br />
Limited Warranty<br />
This warranty covers all defects in workmanship or materials in the<br />
mechanical and electrical parts, arising under normal usage and care,<br />
in this product for a period of 12 months from the date of purchase<br />
provided you are able to present a valid proof-of-purchase. A valid<br />
proof-of-purchase is a receipt specifying item, date purchased, and<br />
cost of item. A gift receipt with date of purchase and item is also an<br />
acceptable proof-of-purchase. Product is intended for household use<br />
only. Any commercial use voids the warranty.<br />
This warranty covers the original retail purchaser or gift recipient.<br />
During the applicable warranty period within normal household use, we<br />
will repair or replace, at our discretion, any mechanical or electrical part<br />
which proves defective, or replace unit with a comparable model.<br />
To obtain service under the terms of this warranty,<br />
call Toll Free (800) 275-8273.<br />
THIS LIMITED WARRANTY COVERS UNITS PURCHASED AND USED<br />
WITHIN THE UNITED STATES AND DOES NOT COVER:<br />
• Damages from improper installation.<br />
• Defects other than manufacturing defects.<br />
• Damages from misuse, abuse, accident, alteration, lack of proper<br />
care and maintenance, or incorrect current or voltage.<br />
• Damage from service by other than an authorized dealer or<br />
service center.<br />
This warranty gives you special legal rights and you may also have other<br />
rights to which you are entitled which may vary from state to state.<br />
25 26