Controls
Controls
Controls

You also want an ePaper? Increase the reach of your titles
YUMPU automatically turns print PDFs into web optimized ePapers that Google loves.
-.<br />
i<br />
!<br />
--.
~~<br />
7<br />
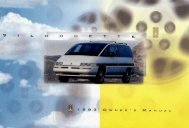
Pontiac Trans Sport<br />
Introduction<br />
1994 Owner’s Manual<br />
Table of Contents<br />
............. HOW to Use this Manual 3G<br />
........... Part I Seats & Restraint Systems 7e<br />
Part 2 Features & ...............<br />
<strong>Controls</strong><br />
e 53<br />
Part 3 Comfort <strong>Controls</strong> & . Audio Systems 119<br />
.........<br />
Part 4 Your Driving and the Road<br />
Part 5 ............. Problems on the Road 175 1<br />
........ Part 6 Service & Appearance Care 205 y<br />
Part 7 ............ r<br />
Maintenance Schedule 255<br />
.. Part 8 Customer Assistance Information 273 L<br />
a<br />
Includes “Reporting<br />
...........................<br />
Safety Defects” on page 277.<br />
part9 Index 297<br />
Service Station Information . . Last Page<br />
Printed in USA 10260060 A Second Edition ...
Important Notes About this Manual<br />
Please keep this manual in your Pontiac, so it will be there if you ever need it when you’re on the road. If you sell the<br />
vehicle, please leave this manual in it so the new owner can use it.<br />
This manual includes the latest information at the time it was printed. We reserve the right to make changes in the product<br />
after that time without further notice.<br />
Note to Canadian Owners<br />
For vehicles first sold in Canada, substitute the name “General Motors of Canada Limited” for Pontiac Motor Division<br />
whenever it appears in this manual.<br />
For Canadian Owners Who Prefer a French Language Manual:<br />
Aux propriktaires canadiens: Vous pouvez vous procurer un exemplaire de ce guide en fraqais chez votre concessionaire<br />
ou au DGN Marketing Services Ltd., 1500 Bonhill Rd., Mississauga, Ontario L5T lC7.<br />
Published by Pontiac Motor Division<br />
General Motors Corporation<br />
The *ord Pontiac, the Pontiac Emblem and the name<br />
Trans Sport are registered trademarks of General<br />
Motors Corporation.<br />
The word Delco is a registered trademark of General<br />
Motors Corporation.<br />
@ Copyright 1993 General Motors Corporation, Pontiac Motor Division. All rights reserved.<br />
m . . 2
How to Use this Manual<br />
Using Your 1994 Pontiac<br />
Owner’s Manual<br />
Many people read their owner’s manual<br />
from beginning to end when they first<br />
receive their new vehicle. This will help<br />
you learn about the features and controls<br />
for your vehicle. In this manual, you’ll<br />
find that pictures and words work<br />
together to explain things quickly.<br />
There are nine parts with black-tabbed<br />
pages in this manual. Each part begins<br />
with a brief list of contents, so you can<br />
usually tell at a glance if that part contains<br />
the information you want.<br />
You can bend the manual slightly to reveal<br />
the black tabs that help you find a part.<br />
Part 1: Seats & Restraint Systems<br />
This part tells you how to use your seats<br />
and safety belts properly. It also explains<br />
the “SIR”(Air Bag) System.<br />
Part 2: Features & <strong>Controls</strong><br />
Part 3: Comfort <strong>Controls</strong> & Audio<br />
Systems<br />
This part tells you how to adjust the<br />
ventilation and comfort controls and how<br />
to operate your sound system.<br />
Part 4: Your Driving and the Road<br />
Here you’ll find helpful information and<br />
tips about the road and how to drive under<br />
different conditions.<br />
Part 5: Problems on the Road<br />
This part tells you what to do if you have<br />
3 problem while driving, such as a flat tire<br />
3r engine overheating.<br />
Part 6: Services & Appearance Care<br />
Here the manual tells you how to keep<br />
your Pontiac running properly and<br />
looking good.<br />
Part 7: Maintenance Schedule<br />
This part tells you when to perform<br />
vehicle maintenance and what fluids and<br />
lubricants to use.<br />
Part 8: Customer Assistance<br />
Information<br />
This part tells you how to contact Pontiac<br />
for assistance and how to get service<br />
publications. It also gives you information<br />
on “Reporting Safety Defects’’ on page<br />
277.<br />
Part 9: Index<br />
Here’s an alphabetical listing of almost<br />
every subject in this manual. You can use it<br />
to quickly find something you want to read.<br />
Service Station Information<br />
This is a quick reference of service<br />
information. You can find it on the last<br />
page of this manual.<br />
This part explains how to start and<br />
operate your Pontiac.<br />
d...
How to Use this Manual<br />
Safety Warnings and<br />
Symbols<br />
You will find a number of safety cautions<br />
in this book. We use a box with gray<br />
background and the word CAUTION to<br />
tell you about things that could hurt you if<br />
you were to ignore the warning.<br />
You will also find a circle with a slash<br />
ihrough it in this book. This safety<br />
symbol means:<br />
“Don’t,”<br />
“Don’t do this,”<br />
or “Don’t let this happen.”<br />
Vehicle Damage Warnings<br />
Also, in this book you will find these<br />
notices:<br />
NOTICE:<br />
These mean there is something that<br />
could damage your vehicle.<br />
In the gray caution area, we tell you what<br />
the hazard is. Then we tell you what to do<br />
to help avoid or reduce the hazard. Please<br />
read these cautions. If you don’t, you or<br />
others could be hurt.<br />
In the notice area, we tell you about<br />
something that can damage your vehicle.<br />
Many times, this damage would not be<br />
covered by your warranty, and it could be<br />
costly. But the notice will tell you what to<br />
do to help avoid the damage.<br />
When you read other manuals, you might<br />
see CAUTION and NOTICE warnings<br />
different colors or in different words. In<br />
this manual, we’ve used the familiar<br />
words that Pontiac has used for years.<br />
You’ll also see warning labels on your<br />
vehicle. They use yellow for cautions,<br />
blue for notices, and the words<br />
CAUTION or NOTICE.<br />
... 4
For example,<br />
these symbols<br />
are used on an<br />
original battery:<br />
PROTECT<br />
EYES BY<br />
SHIELDING<br />
CAUSTIC<br />
BURNS<br />
SPARK OR<br />
FLAME<br />
COULD<br />
EXPLODE<br />
BATTERY<br />
,\I/,<br />
These symbols<br />
are important<br />
for you and<br />
your passengers<br />
whenever your<br />
vehicle is<br />
driven:<br />
DOOR LOCK<br />
UNLOCK<br />
FASTEN<br />
BELTS<br />
4 SEAT<br />
These symbols<br />
have to do with<br />
your lights:<br />
e<br />
TURN<br />
SIGNALS<br />
HIGH<br />
FOG LAMPS $0<br />
=o<br />
OR BEAM<br />
These symbols<br />
are on some of<br />
your controls:<br />
WINDSHIELD<br />
WIPER<br />
WINDOW<br />
DEFOGGER<br />
VENTILATING c<br />
FAN<br />
rl<br />
r;-<br />
These symbols<br />
are used on<br />
warning and<br />
indicator lights:<br />
F-<br />
ENGINE<br />
-<br />
COOLANT<br />
TEMP<br />
BATTERY<br />
CHARGING I-1<br />
SYSTEM<br />
a<br />
RADIATOR<br />
COOLANT<br />
FUEL @<br />
ENGINE OIL<br />
PRESSURE 9%<br />
TEMP OIL<br />
ANTIU)CK BRAKE (i)<br />
Here are some<br />
other symbols<br />
you may see:<br />
FUSE -%-<br />
k<br />
RADIO<br />
VOLUME ,I<br />
43<br />
CONDITIONING AIR<br />
a<br />
TRUNK<br />
RELEASE<br />
LIGHTER<br />
m<br />
SPEAKER<br />
b<br />
5...
Notes<br />
/<br />
... 6
Seats &<br />
Part I<br />
Restraint Systems<br />
Here you’ll find information about the<br />
seats in pur Pontiac and how to use<br />
your safety belts properly . You can<br />
also tearn about some things you<br />
should not do with safety belts .<br />
.<br />
Seats and Seat <strong>Controls</strong> ............................................... 8<br />
Removing and Replacing Rear Seats ............................... : .... 11<br />
SafetyBelts ....................................................... 17<br />
How to Wear Safety Belts Properly ..................................... 21<br />
DriverPosition ..................................................... 21<br />
Supplemental Inflatable Restraint System ................................ 25<br />
Safety Belt Use During Pregnancy ..................................... 30<br />
Right Front Passenger Position .................................... : ... 30<br />
RearSeatPassengers ................................................ 30<br />
Children .......................................................... 35<br />
Smaller Children and Babies .......................................... 36<br />
Built-In Child Restraint ................. ............................ 37<br />
Child Restraints .................................................... 43<br />
LargerChildren .................................................... 49<br />
Safety Belt Extender ................................................ 51<br />
Replacing Seat and Restraint System Parts After a Crash .................... 51<br />
.<br />
7 ...
Seats & Restraint Systems<br />
Seats and Seat <strong>Controls</strong><br />
This section tells you about the<br />
seats-how to adjust them, take them out,<br />
put them back in, and fold them up and<br />
down.<br />
Manual Front Seats<br />
%dl up the lever on the front of the seat to<br />
~nlock it. Slide the seat to where you<br />
vant it. Then release the lever and try to<br />
nove the seat with your body, to make<br />
are the seat is locked into place.<br />
Four- Way Manual Seat<br />
The driver’s seat can be adjusted four<br />
ways.<br />
Use the lever on the front of the seat to<br />
adjust the seat forward or back (see<br />
“Manual Front Seats” earlier in this<br />
section).<br />
To raise the driver’s seat, pull up the lever<br />
on the side of the seat. To lower the seat,<br />
push the lever down.<br />
-..8
Six- Way Power Seat<br />
(OPTION)<br />
To adjust the driver’s six-way power seat:<br />
Front Control (A): Raise the front of the<br />
seat by holding the switch up. Hold the<br />
switch down to lower the front of the seat.<br />
Center Control (B): Move the seat<br />
forward or back by holding the control to<br />
the front or back. Raise or lower the seat<br />
by holding the control up or down.<br />
Rear Control (C): Raise the rear of the<br />
seat by holding the switch up. Hold the<br />
switch down to lower the rear of the seat.<br />
Reclining Front Seatbacks<br />
To adjust the seatback, rotate this knob.<br />
Do not have a seatback reclined if your<br />
vehicle is moving.<br />
9...
Seats & Restraint Systems<br />
Reclining Front Seatbacks<br />
(CONK)<br />
Head Restraints<br />
Slide the head restraint up or down so that<br />
the top of the restraint is closesto the top<br />
of your ears.<br />
This position reduces the chance of a<br />
neck injury in a crash.<br />
On some models, the head restraints tilt<br />
forward and rearward also.<br />
Bench Seat<br />
If you have a rear bench seat, the seatback<br />
can be folded down. Also, the bench seat<br />
can be removed or moved to a different<br />
floor location to provide extra storage<br />
space.<br />
0 .<br />
IO
Folding the Seatback<br />
To fold down the seatback, lift the<br />
seatback latch release while folding the<br />
seatback forward.<br />
To raise the seatback, lift the seatback<br />
latch release while raising the seatback<br />
until it locks upright. Push and pull on the<br />
seatback to check that it is locked.<br />
Removing the Bench Seat<br />
1. Make sure the seatback is in the<br />
upright position, and that all safety<br />
belts are on the seat.<br />
2. Then lift the seatback latch release<br />
while folding the seatback forward.<br />
3. From behind the bench seat, pull up<br />
the two rear levers, and lift the bench<br />
seat.<br />
4. Remove the bench seat from the<br />
vehicle.<br />
Replacing the Bench Seat<br />
Don’t put the bench seat in so it faces<br />
backward, because it won’t latch that way.<br />
If you want more storage room behind the<br />
seat, use the floor pins closer to the front<br />
of the vehicle. See “Adjusting Rear Seats”<br />
later in this section.<br />
1. Place the front hooks of the bench seat<br />
latch onto the front floor pins.<br />
II ...
Seats & Restraint Systems<br />
Replacing the Bench Seat<br />
(CONT.) ’<br />
2. Push the rear hooks into’the rear floor<br />
pins, then push down onuhe two levers<br />
to lock the rear of the bench in place.<br />
3. Try to raise the bench seat to check<br />
that it is locked down.<br />
0 . . I2<br />
4. Lift the seatback latch release and<br />
raise the seatback until it locks<br />
upright.<br />
5. Push and pull on the seatback to check<br />
that it is locked.<br />
Semovable Rear Bucket<br />
Seats (OPTION)<br />
?here are three types of rear seats:<br />
‘RIGHT ONLY”, “CENTER or LEFT”,<br />
.nd “LEFT ONLY”. “RIGHT ONLY” and<br />
‘LEFT ONLY” seats may be equipped<br />
vith the built-in child restraint option.<br />
The rear bucket seats can be removed to<br />
Irovide extra storage. Each seat that has<br />
he built-in child restraint option fits in<br />
mly one location in your vehicle, but<br />
‘eats that don’t have the built-in child<br />
estraint can be moved to different floor<br />
ocations. The back of each seat has a<br />
liagram (similar to the one above) that<br />
;bows where the seat must be located in<br />
/our vehicle.
“RIGHT ONLY” seats that don’t have the<br />
built-in child restraint fit only in the right<br />
locations. “LEFT ONLY” seats that don’t<br />
have the built-in child restraint fit only in<br />
the left locations. The “CENTER OR<br />
LEFT” seat fits in the center location and<br />
in either left location.<br />
“RIGHT ONLY” seats that have the<br />
built-in child restraint option fit onIy in<br />
the rear set of floor pins in the right<br />
location of the second row. “LEFT<br />
ONLY” seats that have the built-in child<br />
restraint option fit only in the rear set of<br />
floor pins in the left location of the<br />
second row.<br />
To install third row seats, the second row<br />
seats must be tilted forward or removed.<br />
Don’t put the seats in the wrong locations.<br />
Entry to Third Row Bucket<br />
Seats<br />
The “RIGHT ONLY” seats have a lower<br />
lever to tilt the seat forward. To get into<br />
third row seats, push the lever on the<br />
“RIGHT ONLY” seat nearest the sliding<br />
door and tilt the seat forward. Then pull<br />
the seat back and check that it locks into<br />
place.<br />
To get out of the third row seats, push<br />
down on the rear release bar under the<br />
seat ahead of you to tilt the seat forward.
Seats & Restraint Systems<br />
Removing Rear Bucket<br />
Seats<br />
Removing the RIGHT ONLY Seats:<br />
1. Lift the upper lever to fold the<br />
seatback forward.<br />
2. Push the lower lever back so the entire<br />
seat and seatback tilt forward.<br />
3. Then, from behind the seat, support<br />
the top portion of the seat with one<br />
hand as you squeeze the front release<br />
bar toward the crossbar. The seat will<br />
release from the floor pins.<br />
temoving LEFT ONLY and CENTER<br />
IR LEFT Seats:<br />
I. Lift the upper lever to fold the<br />
seatback forward.
I 2. Push down on the rear release bar. The<br />
entire seat will tilt forward.<br />
3. Then, from behind the seat, support<br />
the top portion of the seat with one<br />
hand as you squeeze the front release<br />
bar toward the crossbar. The seat will<br />
release from the floor pins.<br />
Adjusting Rear Seats<br />
Each rear seat location has two sets of<br />
floor pins. Seats equipped with the<br />
built-in child restraint option must be<br />
secured in the rear set of floor pins. Seats<br />
that don’t have the built-in child restraint<br />
can be secured in either set of floor pins.<br />
Move the position of these seats up or<br />
back to provide a little more room behind<br />
or in front of a seat.<br />
IS...
Seats & Restraint Systems<br />
I<br />
Replacing Rear Bucket<br />
Seats<br />
Follow the diagram on the back of the<br />
seats to replace the seats in their proper<br />
location.<br />
The “LEFT ONLY” seats fit only in the<br />
left positions. The “RIGHT ONLY” seats<br />
fit only in the right positions. The<br />
“CENTER OR LEFT” seat fits in the<br />
center position and in either left position.<br />
To install third row seats, if your vehicle<br />
is equipped with them, the second row<br />
seats must be tilted forward or removed.<br />
Don’t try to place the seats in backward,<br />
because they won’t latch that way.<br />
. . 16<br />
1. With the entire seat tilted forward,<br />
place the front hooks of the seat latch<br />
onto the front floor pins.<br />
2. Firmly press the rear hooks onto the<br />
rear floor pins. The seat should lock<br />
into position.<br />
3. Lift the upper lever and pull up on the<br />
seatback until it locks upright.<br />
4. Push and pull on the seat to check that<br />
it is locked.<br />
5. Check to see that you have put the<br />
seats into the proper location,<br />
according to the label on each seat. If<br />
not, the seats may not latch properly,<br />
and your passengers may not have the<br />
proper safety belt.<br />
Dump And Stow Feature
Second and third row seats have been<br />
modified to allow them to fold fully<br />
upward and forward when the seats are<br />
anchored in the rear-most position. This<br />
modification improves both<br />
luggage/cargo capacity and rear seat<br />
entry/exit.<br />
Safety Belts: They’re<br />
For Everyone<br />
This part of the manual tells you how to<br />
use safety belts properly. It also tells you<br />
some things you should not do with safety<br />
belts.<br />
And it explains the Supplemental<br />
Inflatable Restraint, or “air bag” system.<br />
This figure lights up as a reminder to<br />
buckle up. (See “Safety Belt Reminder<br />
Light” in the Index.)<br />
In many states and Canadian provinces,<br />
the law says to wear safety belts. Hexe’s<br />
why: Thev work.<br />
You never know if you’ll be in a crash. If<br />
you do have a crash, you don’t know if it<br />
will be a bad one.<br />
17...
Seats & Restraint Systems<br />
Safety Belts: They’re<br />
For Everyone (CONI)<br />
A few crashes are mild, and some crashes<br />
can be so serious that even buckled up a<br />
person wouldn’t survive. But most<br />
crashes are in between. In many of them,<br />
people who buckle up can survive and<br />
sometimes walk away. Without belts they<br />
could have been badly hurt or killed.<br />
After more than 25 years of safety belts in<br />
vehicles, the facts are clear. In most<br />
crashes buckling up does matter ... a lot!<br />
Why Safety Belts Work<br />
When you ride in or on anything, you go<br />
as fast as it goes.<br />
1. For example, if the bike is going<br />
10 mph (16 km/h), so is the child.<br />
2. When the bike hits the block, it stops.<br />
But the child keeps going!<br />
3. Take the simplest vehicle. Suppose it’s<br />
just a seat on wheels.<br />
... 18
4. Put someone on it.<br />
6. The person keeps going until stopped<br />
by something.<br />
In a real vehicle, it could be the<br />
windshield . . .<br />
8. or the safety belts!<br />
"Y.<br />
I<br />
With safety belts, you slow down as<br />
the vehicle does. You get more time to<br />
stop. You stop over more distanqe, and<br />
your strongest bones take the forFes.<br />
That's why safety belts make such<br />
good sense.<br />
5. Get it up to speed. Then stop the<br />
vehicle. The rider doesn't stop.<br />
7. or the instrument panel ...<br />
19.
Seats & Restraint Systems<br />
Here Are Questions<br />
I‘<br />
Many People Ask<br />
About Safety Belts --<br />
and the Answers<br />
Q: Won’t I be trapped in the vehicle<br />
after an accident if I’m wearing a<br />
safety belt? ,! - :- r ‘,.?.2<br />
.*:y.:&;,$;@& ,.;<<br />
A: You could bme --.whet er you rewearing<br />
a safety belt or not. But you<br />
can easily unbuckle a safety belt, even<br />
if you’re upside down. And your<br />
chance of being conscious during and<br />
after an accident, so you can unbuckle<br />
and get out, is much greater if you are<br />
belted.<br />
Q: Why don’t they just put in air bags<br />
so people won’t have to wear safety<br />
belts?<br />
A: Air bags, or Supplemental Inflatable<br />
Restraint systems, are in some<br />
vehicles today and will be in more of<br />
them in the future. But they are<br />
supplemental systems only -- so they<br />
work with safety belts, not instead of<br />
them. Every air bag system ever<br />
offered for sale has required the use of<br />
safety belts. Even if you’re in a<br />
vehicle that has air bags, you still have<br />
to buckle up to get the most<br />
protection. That’s true not only in<br />
frontal collisions, but especially in<br />
side and other collisions.<br />
c<br />
2: If I’m a good driver, and I never<br />
drive far from home, why should I<br />
wear safety belts?<br />
4: You may be an excellent driver, but if<br />
you’re in an accident -- even one that<br />
isn’t your fault -- you and your<br />
passengers can be hurt. Being a good<br />
driver doesn’t protect you from things<br />
beyond your control, such as bad<br />
drivers.<br />
Most accidents occur within 25 miles<br />
:40 km) of home. And the greatest number<br />
Df serious injuries and deaths occur at<br />
speeds of less than 40 mph (65 km/h).<br />
Safety belts are for everyone.
Safety Beli Reminder<br />
Light<br />
When the key is turned to “Run” or<br />
“Start,” a chime will come on for about<br />
eight seconds to remind people to fasten<br />
their safety belts, unless the driver’s<br />
safety belt is already buckled. The safety<br />
belt light will also come on and stay on<br />
until the driver’s belt is buckled.<br />
1 1 How To Wear Safety<br />
Belts Properly<br />
Adults<br />
This section is only for people of adult<br />
size.<br />
Be aware that there are special things to<br />
know about safety belts and children. And<br />
there are different rules for smaller<br />
children and babies. If a child will be<br />
riding in your Pontiac, see “Children,”<br />
located later in this section. Follow those<br />
rules for everyone’s protection.<br />
First, you’ll want to know which restraint<br />
systems your vehicle has.<br />
We’ll start with the driver position.<br />
f<br />
1 Driver Position<br />
This section describes the driver’s<br />
restraint system.<br />
21 ...
Seats & Restraint Systems<br />
I<br />
Lapshoulder Belt<br />
The driver has a lap-shoulder belt. Here’s<br />
how to wear it properly.<br />
1. Close and lock the door.<br />
2. Adjust the seat (to see how, see<br />
“Seats” in the Index) so you can sit<br />
up straight.<br />
3. Pick up the latch plate and pull the<br />
belt across you. Don’t let it get<br />
twisted.<br />
4. Push the latch plate into the buckle<br />
until it clicks.<br />
If the belt stops before it reaches the<br />
buckle, tilt the latch plate and keep<br />
pulling until you can buckle the belt.<br />
Pull up on the latch plate to make sure<br />
it is secure.<br />
If the belt isn’t long enough, see<br />
“Safety Belt Extender” at the end of<br />
this section.<br />
Make sure the release button on the<br />
buckle is positioned so you would be<br />
able to unbuckle the safety belt<br />
quickly if you ever had to.<br />
... 22
c<br />
r<br />
5. To make the lap part tight, pull down<br />
on the buckle end of the belt as you<br />
pull up on the shoulder belt.<br />
I,<br />
7 ’he lap part of the belt should be worn<br />
1( IW and snug on the hips, just touching<br />
tl le thighs. In a crash, this applies force to<br />
tl le strong pelvic bones. And you’d be<br />
le :ss likely to slide under the lap belt. If<br />
Y ou slid under it, the belt would apply<br />
fc xce at your abdomen. This could cause<br />
st xious or even fatal injuries. The<br />
SI noulder belt should go over the shoulder<br />
a1 nd across the chest. These parts of the<br />
bl ody are best able to take belt restraining<br />
fc xces.<br />
T he safety belt locks if there’s a sudden<br />
st :op or a crash.<br />
2: What’s wrong with this?<br />
\: The shoulder belt is too loose. It won’t<br />
give nearly as much protection this<br />
way.<br />
23. .
Seats & Restraint Systems<br />
Lap-Shoulder Belt (CONT.)<br />
Q: What’s wrong with this?<br />
A: The belt is buckled in the wrong<br />
place.<br />
Q: What’s wrong with this?<br />
A: The belt is over an armrest.<br />
3: What’s wrong with this?<br />
k The shoulder belt is worn under the<br />
arm. It should be worn over the<br />
shoulder at all times.<br />
... 24
I’<br />
I<br />
Q: What’s wrong with this?<br />
A: The belt is twisted across the body.<br />
3efore you close the door, be sure the belt<br />
3 out of the way. If you slam the door on<br />
t, you can damage both the belt and your<br />
,chicle.<br />
Supplemental<br />
Inflatable Restraint<br />
System (Air Bag)<br />
This section explains the driver’s<br />
Supplemental Inflatable Restraint (SIR)<br />
system, commonly referred to as an air<br />
bag. Here are the most important things to<br />
know:<br />
To unlatch the belt, just push the button<br />
on the buckle. The belt should go back<br />
out of the way.<br />
25...
Seats & Restraint Systems<br />
Supplemental<br />
Inflatable Restraint<br />
System (Air Bag) (CONT.)<br />
AIR BAG<br />
Air Bag Readiness Light<br />
There is an air bag readiness light on the<br />
instrument panel, which shows “AIR<br />
BAG’ on it. The system checks for<br />
electrical malfunctions, and the light tells<br />
you if there is a problem.<br />
... 26
You will see this light flash for a few<br />
seconds when you turn your ignition to<br />
“Run” or “Start.” Then the light should go<br />
out, which means the system is ready.<br />
Remember, if the air bag readiness light<br />
doesn’t come on when you start your<br />
vehicle, or stays on, or comes on when<br />
you are driving, your air bag system may<br />
not work properly. Have your vehicle<br />
serviced right away.<br />
H0.w The Air Bag System<br />
Works<br />
Where is the air bag?<br />
The driver’s air bag is in the middle of the<br />
steering wheel.
Seats & Restraint Systems<br />
How The Air Bag System<br />
Works (CONT.)<br />
What makes an air bag inflate?<br />
In a frontal impact of sufficient severity, the<br />
air bag sensing system detects that the<br />
vehicle is suddenly stopping as a result of a<br />
crash. The sensing system triggers a<br />
chemical reaction of the sodium azide<br />
sealed in the inflator. The reaction produces<br />
nitrogen gas, which inflates the cloth bag.<br />
The inflator, cloth bag, and related<br />
hardware are all part of the air bag inflator<br />
module packed inside the steering wheel.<br />
How does an air bag restrain?<br />
In moderate to severe frontal or<br />
near-frontal collisions, even belted<br />
occupants can contact the steering w rhee :l.<br />
The air bag supplements the protection<br />
provided by safety belts. Air bags<br />
distribute the force of the impact more<br />
evenly over the occupant’s upper body,<br />
stopping the occupant more gradually.<br />
But air bags would not provide protection<br />
in many types of collisions, including<br />
rollovers and rear and side impacts,<br />
primarily because an occupant’s motion is<br />
not toward the air bag. Air bags should<br />
never be regarded as anything more than<br />
a supplement to safety belt protection in<br />
moderate to severe frontal and<br />
near-frontal collisions.<br />
What will you see after an air bag<br />
inflation?<br />
After the air bag has inflated, it will then<br />
quickly deflate. This occurs so quickly<br />
that some people may not even realize<br />
that the air bag inflated. Some<br />
components of the air bag module in the<br />
steering wheel hub may be hot for a short<br />
time, but the portion of the bag that comes<br />
into contact with you will not be hot to<br />
the touch. There will be small amounts of<br />
smoke and dust coming from vents in the<br />
deflated air bag. The air bag will not<br />
impede the driver’s vision or ability to<br />
steer the vehicle, nor will it hinder the<br />
occupants from exiting the vehicle.<br />
0<br />
0<br />
0<br />
The air bag is designed to inflate only<br />
once. After it inflates, you’ll need<br />
some new parts for your air bag<br />
system. If you don’t get them, the air<br />
bag system won’t be there to help<br />
protect you in another crash. A new<br />
system will include the air bag module<br />
and possibly other parts. The service<br />
manual has information about the<br />
need to replace other parts.<br />
Your vehicle is equipped with a<br />
diagnostic module, which records<br />
information about the air bag system<br />
if the air bag deploys during a crash.<br />
The module records information about<br />
the readiness of the system, which<br />
sensors activated the deployment, and<br />
whether the driver’s safety belt was in<br />
use.<br />
Let only qualified technicians work on<br />
your air bag system. Improper service<br />
can mean that your air bag system<br />
won’t work properly. See your dealer<br />
for service.
1 I NOTICE:<br />
If you damage the cover for the<br />
driver’s air bag, it may not work<br />
properly. You may have to replace<br />
the air bag on the steering wheel.<br />
Do not open or break the air bag<br />
I I cover.<br />
Is the smoke from an air bag inflation<br />
harmful?<br />
The particles emitted during air bag<br />
inflation are not harmful to most people.<br />
Some people with respiratory ailments<br />
may experience difficulty breathing if<br />
they stay in the vehicle with the windows<br />
closed after air bag inflation. So, if your<br />
air bag inflates, you and any passengers<br />
should exit the vehicle if and when it is<br />
safe to do so. If you or your passengers<br />
can’t get out of the vehicle, try to get<br />
fresh air by opening a window, turning or<br />
the fan, or opening a door.<br />
Servicing Your Air<br />
Bag-Equipped Pontiac<br />
The air bag affects how your Pontiac<br />
should be serviced. There are parts of the<br />
air bag system in several places around<br />
your vehicle. You don’t want the system<br />
to inflate while someone is working on<br />
your vehicle. Your Pontiac dealer and the<br />
1994 Pontiac Service Manual have<br />
information about servicing your vehicle<br />
and the air bag system. The air bag<br />
system does not need regular<br />
maintenance.<br />
r<br />
I
Seats & Restraint Systems<br />
I Rear Seat Passengers<br />
X’s very important for rear seat<br />
Jassengers to buckle up! Accident<br />
itatistics show that unbelted people in the<br />
-ear seat are hurt more often in crashes<br />
:han those who are wearing safety belts.<br />
Safety Belt Use During<br />
Pregnancy<br />
Safety belts work for everyone, including<br />
pregnant women. Like all occupants, they<br />
are more likely to be seriously injured if<br />
they don’t wear safety belts.<br />
A pregnant woman should wear a lapshoulder<br />
belt, and the lap portion should<br />
be worn as low as possible throughout the<br />
pregnancy.<br />
The best way to protect the fetus is to<br />
protect the mother. When a safety belt is<br />
worn properly, it’s more likely that the<br />
fetus won’t be hurt in a crash. For<br />
pregnant women, as for anyone, the key<br />
to making safety belts effective is wearing<br />
them properly.<br />
30<br />
Right Front Passenger<br />
Position<br />
The right front passenger’s safety belt<br />
works the same way as the driver’s safetl<br />
belt. See “Driver Position,” earlier in<br />
this part.<br />
Rear passengers who aren’t safety belted<br />
:an be thrown out of the vehicle in a<br />
:rash. And they can strike others in the<br />
vehicle who are wearing safety belts.
C<br />
Rear Seat Outside<br />
Passenger Positions<br />
Lap-Shoulder Belt<br />
The positions next to the windows have<br />
lap-shoulder belts. Here’s how to wear<br />
one properly.<br />
1. Pick up the latch plate and pull the<br />
belt across you. Don’t let it get<br />
twisted.<br />
2. Push the latch plate into the buckle<br />
until it clicks.<br />
If the belt stops before it reaches the<br />
buckle, tilt the latch plate and keep<br />
pulling until you can buckle it.<br />
Pull up on the latch plate to make sure it<br />
is secure.<br />
If the belt is not long enough, see “Safety<br />
Belt Extender’’ at the end of this section.<br />
Make sure the release button on the<br />
buckle is positioned so you would be able<br />
to unbuckle the safety belt quickly if you<br />
Zver had to.<br />
31 ...
Seats & Restraint Systems<br />
The safety belt locks if there’s a sudden<br />
;top or a crash.<br />
Rear Seat Outside<br />
Passenger Positions<br />
(CONI)<br />
3. To make the lap part tight, pull down<br />
on the buckle end of the belt as you<br />
pull up on the shoulder part.<br />
The lap part of the belt should be worn<br />
low and snug on the hips, just touching<br />
the thighs. In a crash, this applies force to<br />
the strong pelvic bones. And you’d be<br />
less likely to slide under the lap belt. If<br />
you slid under it, the belt would apply<br />
force at your abdomen. This could cause<br />
serious or even fatal injuries. The<br />
shoulder belt should go over the shoulder<br />
and across the chest. These parts of the<br />
body are best able to take belt restraining<br />
forces.
a<br />
To unlatch the belt, just push the<br />
button on the buckle.<br />
Center Passenger<br />
Position (Bench Seat)<br />
If your vehicle has a rear bench seat,<br />
someone can sit in the center position.<br />
Lap Belt<br />
When you sit in the center position of the<br />
bench seat, you have a lap safety belt,<br />
which has no retractor.<br />
To make the belt longer, tilt the latch plate<br />
and pull it along the belt.
Seats & Restraint Systems<br />
Lap Belt (CONK)<br />
To make the belt shorter, pull its free end<br />
as shown until the belt is snug.<br />
Buckle, position and release it the same<br />
way as the lap part of a lap-shoulder belt.<br />
If the belt isn’t long enough, see “Safety<br />
Belt Extender” at the end of this section.<br />
Make sure the release button on the<br />
buckle is positioned so you would be able<br />
to unbuckle the safety belt quickly if you<br />
ever had to.<br />
1 Center Passenger<br />
Position (Bucket Seat)<br />
f your vehicle has bucket seats, someone<br />
:an sit in the center bucket seat.<br />
lap Belt<br />
Nhen you sit in the center position buck€<br />
eat, you have a lap safety belt which has<br />
1 retractor.<br />
1.<br />
2.<br />
3.<br />
Pick up the latch plate and, in a single<br />
motion, pull the belt across you. Don’t<br />
let it get twisted.<br />
Push the latch plate into the buckle<br />
until it clicks. If the belt stops before it<br />
reaches the buckle, let it go back all<br />
the way and start again. Pull up on the<br />
latch plate to make sure it is secure.<br />
Feed the lap belt into the retractor to<br />
tighten it.<br />
00.34
4. Position and release it the same way<br />
as the lap part of a lap-shoulder belt.<br />
If the belt isn’t long enough, see<br />
“Safety Belt Extender” at the end of<br />
this section. Make sure the release<br />
button on the buckle is positioned so<br />
you would be able to unbuckle the<br />
safety belt quickly if you ever had to.<br />
The center position bucket seat is a<br />
“Center or Left” type seat. Because it is<br />
the only bucket seat with a lap belt, and<br />
has a buckle on only one side, there are<br />
certain places a “Center or Left” type<br />
bucket seat should, and should not, be<br />
used. See “Seats” in the Index. If the<br />
“Center or Left” bucket seat is used on<br />
the left side of the vehicle, the person<br />
sitting there should use the lap-shoulder<br />
belt. It works the same way as the driver’s<br />
safety belt. See “Driver Position” in the<br />
Index.<br />
Children<br />
Everyone in a vehicle needs protechon!<br />
That includes infants and all childta<br />
smaller than adult size. In fact, the,;haw in<br />
every state in the United States and,in<br />
every Canadian province says chilqken up<br />
to some age must be restrained whife in a<br />
vehicle.<br />
35.0.
Seats & Restraint Systems<br />
Smaller Children and<br />
Babies<br />
... 36
Built-Zn Child Restrain,<br />
(OPTION)<br />
If you have a rear seat with the optional<br />
built-in child restraint, refer to this pictun<br />
to become familiar with the parts of each<br />
child seat and 5-point harness listed<br />
below:<br />
A. Child Head Restraint<br />
B. Head Restraint Release Strap<br />
C. Shoulder Harness Straps<br />
D. Shoulder Harness Clip<br />
E. Removable Pad<br />
F. Seat Belt Latch Plates<br />
G. Buckle<br />
H. Seat Belt Buckle Release Button<br />
(Red)<br />
I. Shoulder Harness Release Strap<br />
(Black)<br />
J. Shoulder Harness Adjustment Strap<br />
(Grey 1<br />
K. Child Restraint Cushion<br />
This child restraint system conforms to all<br />
applicable Federal Motor Vehicle Safety<br />
Standards.<br />
This child restraint is designed for use<br />
only by children who weigh between 20<br />
and 40 pounds (9 and 18 kg) and whose<br />
height is 40 inches ( 102 cm) or less and<br />
who are capable of sitting upright alone.<br />
In addition, the child must be one year old<br />
or more and at least 28 inches (71 cm) in<br />
height. It is important to use an approved,<br />
rear-facing infant restraint for a full year<br />
to allow the neck and spine to develop<br />
enough to support the weight of the<br />
child’s head in the event of a collision.
Seats & Restraint Systems<br />
WARNING! FAILURE TO FOLLOW<br />
THE MANUFACTURER’S<br />
[NSTRUCTIONS ON THE USE OF<br />
I’HIS CHILD RESTRAINT SYSTEM<br />
CAN RESULT IN YOUR CHILD<br />
STRIKING THE VEHICLE’S<br />
[NTERIOR DURING A SUDDEN STOP<br />
OR CRASH. SNUGLY ADJUST THE<br />
BELTS PROVIDED WITH THIS CHILD<br />
RESTRAINT AROUND YOUR CHILD.<br />
I Built-In Child Restraini<br />
(COPIT.)<br />
:o make sure that the child is tall enough!<br />
ompare the child’s standing height to the<br />
op surface of the bucket seat, which is<br />
.bout 29 inches (74 cm) from the floor.<br />
The booster seat can be used by children<br />
wer 40 pounds (1 8 kg) or whose<br />
.boulders are above the shoulder belt<br />
mchorages of the 5-point child restraint<br />
larness. The vehicle lap-shoulder belt is<br />
lsed instead of the 5-point harness<br />
,ystem. If a child’s shoulders are higher<br />
han the shoulder belt anchorages while<br />
lsing the 5-point harness, the spine could<br />
)e injured in a collision.<br />
Just like the other restraint system in you<br />
vehicle, your built-in child restraint needs<br />
to be periodically checked and may need<br />
to have parts replaced after a crash. See<br />
”Checking Your Restraint Systems’’ and<br />
“Replacing Seat and Restraint System<br />
Parts After a Crash” in the Index.<br />
.. -38
II<br />
I '<br />
I<br />
To Use the Built-in Child<br />
Restraint<br />
1. Pull the child head restraint release<br />
strap and raise the head restraint until<br />
you hear the latch click.<br />
!. Lower the child restraint cushion.<br />
I<br />
3. Before placing. the child in the child<br />
restraint, add slack to the shoulder<br />
hamess. Pull the black shoulder<br />
harness release strap firmly. At the<br />
same time pull both shoulder harness<br />
straps through the slots in the sedback<br />
as shown. ..*+ -,'<br />
'.)s#<br />
. $'.i<br />
. .<br />
-. 1<br />
39.m.
Seats & Restraint Systems<br />
To Use the Built-in Child<br />
7estraint (CONT.)<br />
E. Separate<br />
the halves of the shoulder<br />
harness clip.<br />
i. Place the child in the child restraint<br />
and put a shoulder harness strap over<br />
each shoulder. Insert both seat belt<br />
latch plates into the buckle and pull ul<br />
on them to make sure they are firmly<br />
latched.<br />
Be sure that the seat buckle is free of<br />
foreign objects that may prevent you<br />
from properly latching the latch plates<br />
If an object is in the opening, see your<br />
Pontiac dealer for service before using<br />
the child restraint.<br />
6 Fasten the two halves of the shoulder<br />
harness clip together and put it two to<br />
three inches (5-8 cm) below the<br />
child’s chin. The purpose of the clip is<br />
to keep the shoulder harness straps<br />
positioned correctly on the shoulders.<br />
... 40
If you expect the child will sleep while<br />
riding, a U-shaped pillow that supports<br />
the child’s chin may be helpful in<br />
providing additional comfort. Such<br />
devices may be found in the child<br />
restraint section of major toy stores or<br />
other stores where children’s accessories<br />
are sold.<br />
1.<br />
Pull the shoulder harness adjustment<br />
strap (grey) firmly until the shoulder<br />
harness straps are snug against the<br />
child’s shoulders.<br />
To release the child from the harness,<br />
separate the halves of the shoulder<br />
harness clip. Then push the red releast<br />
button in the buckle. Move the<br />
shoulder harness straps to the side an(<br />
remove the child.<br />
i To Store the Built-ln Child<br />
t qestraint<br />
Make sure that the crotch strap is held<br />
flush to the child restraint cushion<br />
with the fastener strip. Also be sure<br />
the shoulder harness adjustment strap<br />
(grey) is folded up in the seat. This<br />
will allow the cushion to fold<br />
completely into the seatback. Raise<br />
the cushion.<br />
41 ...
Seats & Restraint Systems<br />
To Store the Built-ln Child<br />
Sestraint (CQNT.);,<br />
!. Unlatch the child head restraint by<br />
pulling the release.strap. Lower the<br />
head restraint and press it firmly into<br />
the seatback until you hear the latch<br />
click.<br />
To Use as a Booster Seat<br />
1. Pull the head restraint release strap<br />
and raise the head restraint until you<br />
hear the latch click.<br />
!. Lower the child restraint cushion.<br />
.7<br />
... 42
3. Store the 5-point child restraint<br />
harness behind the removable pad.<br />
The pad is held in place by fastener<br />
strips.<br />
5. Place the child on the cushion and<br />
fasten the vehicle lap-shoulder belt<br />
around the child.<br />
. To release the child from the vehicle<br />
lap-shoulder belt, push the red button<br />
on the buckle.<br />
Child Restraints<br />
Be sure to follow the instructions for the<br />
restraint. You may find these instructions<br />
on the restraint itself or in a booklet, or<br />
both. These restraints use the belt system<br />
in your vehicle, but the child also has to<br />
be secured within the restraint to help<br />
reduce the chance of personal injury. The<br />
instructions that come with the infant or<br />
child restraint will show you how to do<br />
that.<br />
43...
Seats & Restraint Systems<br />
Where to Put the Restraint<br />
Accident statistics show that children are<br />
safer if they are restrained in the rear<br />
rather than the front seat. We at General<br />
Motors therefore recommend that you put<br />
your child restraint in the rear seat unless<br />
the child is an infant and you’re the only<br />
adult in the vehicle. In that case, you<br />
might want to secure the restraint in the<br />
front seat where you can keep an eye on<br />
the baby.<br />
Wherever you install it, be sure to secure’<br />
the child restraint properly.<br />
Keep in mind that an unsecured child<br />
restraint can move around in a collision or<br />
sudden stop and injure people in the<br />
vehicle. Be sure to properly secure any<br />
child restraint in your vehicle -- even<br />
when no child is in it.<br />
m a . 4 4<br />
Top Strap<br />
If your child restraint has a top strap, It<br />
should be anchored.<br />
If your vehicle has third row seats, anchor<br />
brackets for the second row outside<br />
positions are located just above the place<br />
where the third row lap-shoulder belts<br />
meet the floor. There’s a vinyl sleeve<br />
there; to get to the bracket, push this vinyl<br />
sleeve aside slightly. Anchor the top strap<br />
to the bracket.<br />
If your vehicle does not have third row<br />
seats and belts, or if you need to have an<br />
anchor bracket installed for any additional<br />
passenger seat position, you can ask your<br />
Pontiac dealer to put it in for you. If you<br />
want to install an anchor bracket yourself,<br />
your dealer can tell you how to do it.<br />
Once you have the top strap anchored,<br />
you’ll be ready to secure the child<br />
restraint itself.
n<br />
3. Pick up the latch plate, and run the lap<br />
and shoulder portions of the vehicle’s<br />
safety belt through or around the<br />
restraint. The child restraint<br />
instructions will show you how. Tilt<br />
the latch plate to adjust the belt if<br />
needed.<br />
If the shoulder belt goes in front of the<br />
child’s face or neck, put it behind the<br />
child restraint.<br />
c<br />
Securing a Chi-ld Restrain4<br />
n an Outside Position<br />
bu’ll be using the lap-shoulder belt. See<br />
le earlier section about the top strap if<br />
le child restraint has one.<br />
. Put the restraint on the seat. Follow<br />
the instructions for the child restraint.<br />
. Secure the child in the child restraint<br />
as the instructions say.<br />
4.<br />
B,uckle the belt. Make sure the xelease<br />
button is positioned so you woild be<br />
able to unbuckle the safety beli:’.<br />
quickly if you ever had to. ’
Seats & Restraint Systems<br />
Securing a Child Restraint<br />
in an Outside Position<br />
(CON7J<br />
5. To tighten the belt, pull up on the<br />
shoulder belt while you push down on<br />
the child restraint.<br />
6. Push and pull the child restraint in<br />
different directions to be sure it is<br />
secure.<br />
To remove the child restraint, just<br />
unbuckle the vehicle’s safety belt and let<br />
it go back all the way. The safety belt will<br />
move freely again and be ready to work<br />
for an adult or larger child passenger.<br />
Securing a Child Restraint<br />
in the Center Seat Position<br />
(Bench Seat)<br />
When you secure a child restraint in a<br />
center seating position, you’ll be using the<br />
lap belt.<br />
If the child restraint has a top strap, see<br />
“Top Strap” earlier in this section.<br />
... 46
1. Make the belt as long as possible by<br />
tilting the latch plate and pulling it<br />
along the belt.<br />
2. Put the restraint on the seat. Follow<br />
the instructions for the chi1.d restraint.<br />
3. Secure the child in the child restraint<br />
as the instructions say.<br />
4. Run the vehicle’s safety belt through<br />
or around the restraint. The child<br />
restraint instructions will show you<br />
how.<br />
5. Buckle the belt. ‘Make sure the release<br />
button is positioned so you would be<br />
able to unbuckle the safety belt<br />
quickly if you ever had to.<br />
6. To tighten the belt, pull its free end<br />
while you push down on the child<br />
restraint.<br />
7. Push and pull the child restraint in<br />
different directions to be sure it is<br />
secure. If the child restraint isn’t<br />
secure, turn the latch plate over and<br />
buckle it again. Then see if it is<br />
secure. If it isn’t, secure the restraint<br />
in a different place in the vehicle and<br />
contact the child restraint makdr for<br />
their advice about how to attach the<br />
child restraint properly.<br />
To remove the child restraint, just<br />
unbuckle the vehicle’s safety belt. It will<br />
be ready to work for an adult or l&ger<br />
child passenger.<br />
r<br />
470.0
Seats & Restraint Systems<br />
Securing a Child Restraint<br />
in the Center Seat Positior:<br />
(Bucket Seat)<br />
You’ll be using the lap belt. See the<br />
earlier section about the top strap if the<br />
child restraint has one.<br />
1. Put the restraint on the seat. Follow<br />
the instructions for the child restraint.<br />
2. Secure the child in the child restraint<br />
as the instructions say.<br />
3. Pull the lap belt all the way out<br />
without stopping.<br />
4. While holding it out, run the belt<br />
through or around the child restraint.<br />
The child restraint instructions will<br />
show you how.<br />
5. Buckle the belt. Make sure the release<br />
button is positioned so you would be<br />
able to unbuckle the safety belt<br />
quickly if you ever had to.<br />
... 48
6. To tighten the belt, feed it back into<br />
the retractor while you push down on<br />
the child restraint.<br />
7. Push and pull the child restraint in<br />
different directions to be sure it is<br />
secure.<br />
To remove the child restraint, just<br />
unbuckle the vehicle’s safety belt and let<br />
it go back all the way. The safety belt will<br />
move freely again and be ready to work<br />
for an adult or larger child passenger.<br />
Larger Children<br />
3hildren who have outgrown child<br />
*estraints should wear the vehicle’s safety<br />
>elk<br />
f you have the choice, a child should sit<br />
lext to a window so the child can wear a<br />
ap-shoulder belt and get the additional<br />
.estraint a shoulder belt can provide.<br />
4ccident statistics show that children are<br />
iafer if they are restrained in the rear seat.<br />
3ut they need to use the safety belts<br />
xoperly.<br />
D<br />
Children who aren’t buckled up can<br />
be thrown out in a crash.
Seats & Restraint Systems<br />
Larger Children (CONT.)<br />
0 Children who aren’t buckled up can<br />
strike other people who are.<br />
Q: What if a child is wearing a<br />
lap-shoulder belt, but the child is so<br />
small that the shoulder belt is very<br />
close to the child’s face or neck?<br />
A: Move the child toward the center of<br />
the vehicle, but be sure that the<br />
shoulder belt still is on the child’s<br />
shoulder, so that in a crash the child’s<br />
upper body would have the restraint<br />
that belts provide.. If the child is so<br />
small that the shoulder belt is still very<br />
close to the child’s face or neck, you<br />
might want to place the child in a sea-t<br />
that has a lap belt, if your vehicle has<br />
one.<br />
... 50
Seats & Restraint Systems<br />
Replacing Seat and<br />
Restraint System Parts<br />
After a Crash (CONT.)<br />
Q: What’s wrong with this?<br />
[f your vehicle has the built-in child<br />
Yestraint, torn or frayed harness straps can<br />
rip apart under impact forces just like torn<br />
3r frayed safety belts can. They may not<br />
protect a child in a crash. If a harness<br />
strap is torn or frayed, get a new harness<br />
right away.<br />
Before replacing any safety belt, see your<br />
dealer for the correct part number. You’ll<br />
need the model year and model number<br />
for your vehicle. The model year is on<br />
your title and registration. And you can<br />
find the model number on the<br />
Certification/Tire label of your vehicle.<br />
See “Certification/Tire Label” in the<br />
Index.<br />
The model number on the replacement<br />
belt must be listed on the safety belt you<br />
want to replace.<br />
Pull the shoulder belt all the way out to<br />
see the label.<br />
A: The belt is torn.<br />
Torn or frayed belts may not protect you<br />
in a crash. They can rip apart under<br />
impact forces. If a belt is tom or frayed,<br />
get a new one right away.<br />
... 52
Here you can learn about the many<br />
standard and optional features on<br />
your Pontiac. and information on<br />
starting. shifting and braking . Atso<br />
explained are the instrument panel<br />
and the warning systems that tell you<br />
if everything is working properly ..<br />
and what to do if you have a problem .<br />
Part 2<br />
Features & <strong>Controls</strong><br />
Keys .............................................................. 54<br />
Front Doors ....................................................... 55<br />
Locks ............................................................ 55<br />
Remote Keyless Entry ............................................ .. 58<br />
Sliding Door ......................................................... 62<br />
Liftgate ........................................................... 67<br />
Ignition ............................................................ 69<br />
Starting Your Engine ................................................. 70<br />
Engine Coolant Heater (Engine Block Heater) ......................... .. 72<br />
Shifting the Transaxle ................................................. 73<br />
ParkingBrake ...................................................... 77<br />
c<br />
Shifting into Park ......................................... "'''''.I . . 78<br />
Horn ...........................................................<br />
81<br />
Tilt Steering Wheel .............................................. 1 . . 81<br />
Windows ....................................................... .. a1<br />
Turn Signal and Lane Change Indicator ................................. 83<br />
CruiseControl ..................................................... 84<br />
Headlights ........................................................ 87<br />
Windshield Wipers .................................................. 90<br />
Windshield Washer ................................................. 91<br />
Rear Window Wiper and Washer ....................................... 92<br />
Interior Lights ..................................................... 92<br />
Mirrors ........................................................... 96<br />
Glove Box and Storage Compartments .................................. 98<br />
Luggagecarrier ................................................... 102<br />
Instrumentpanel .................................................. 105<br />
Warning Lights. Gages and Indicators .................................. 110<br />
53 ...
Features & <strong>Controls</strong><br />
w Keys<br />
The ignition keys are for the ignition only.<br />
[hen a new Trans Sport is delivered, the<br />
Zaler removes the plugs from the keys,<br />
Id gives them to the first owner.<br />
ach plug has a code on it that tells your<br />
zaler or a qualified locksmith how to<br />
lake extra keys. Keep the plugs in a safe<br />
lace. If you lose your keys, you’ll be<br />
Ae to have new ones made easily using<br />
lese plugs.<br />
NOTICE:<br />
Your Pontiac has a number of new<br />
features that can help prevent theft.<br />
But you can have a lot of trouble<br />
getting into your vehicle if you ever<br />
lock your keys inside. You may<br />
even have to damage your vehicle to<br />
get in. So be sure you have extra<br />
keys.<br />
The door keys are for the doors and all<br />
other locks.<br />
. . e 5 4
Door Locks<br />
Front Doors<br />
There are several ways to lock and unlock<br />
your vehicle.<br />
From the Outside:<br />
Use your door key or remote keyl&<br />
entry transmitter, if your vehicle his this<br />
option. I .<br />
'?
Features & <strong>Controls</strong><br />
;witch or the remote transmitter. This<br />
’eature is designed to help keep you from<br />
ocking your keys in your vehicle.<br />
w Door Locks (CONT.)<br />
From the Inside:<br />
To lock the door, slide the locking lever<br />
rearward.<br />
To unlock the door, slide the locking lever<br />
forward.<br />
... 56<br />
w Power Door Locks<br />
(OPTION)<br />
From the outside of either front door, the<br />
door key unlocks all doors and the<br />
liftgate. From the inside, press the front of<br />
the power door lock switch on either front<br />
door.<br />
You can lock all doors and the liftgate<br />
from inside by pressing the rear of the<br />
power lock switch on either front door.<br />
If you have the optional Remote Keyless<br />
Entry System, your vehicle has a special<br />
security feature. If the driver’s door is<br />
open and your key is in the ignition in the<br />
off position, you won’t be able to set the<br />
door locks with the power door lock<br />
[f the sliding door is open when you press<br />
:he power door lock switch, it will lock<br />
mtomatically within five seconds after<br />
you close it.<br />
[f you have the optional Remote Keyless<br />
Entry System, this feature will be<br />
replaced by a different lock delay system.<br />
See “Remote Keyless Entry” later in this<br />
section.<br />
With power locks, when the doors are<br />
locked, the inside as well as the outside<br />
door latch release cannot open the doors.<br />
This safety feature prevents a door from<br />
being accidentally opened from the inside<br />
by moving the handle.<br />
To override this safety feature, slide the<br />
locking lever to the unlock position on the<br />
door you want to open.<br />
When the liftgate has been unlocked with<br />
the power door locks, you won’t need the<br />
key to open it. Simply turn the lock<br />
clockwise until the latch releases. This is<br />
also true if you use the optional remote<br />
keyless entry transmitter. See “Remote<br />
Keyless Entry’’ later in this section.
To lock the liftgate, use the power door<br />
lock switch, the optional remote keyless<br />
entry transmitter, or lock it manually by<br />
turning the lock counterclockwise.<br />
Automatic Door Locks<br />
(OPTION)<br />
With this feature you can unlock all of the<br />
doors from the outside by holding the key<br />
in the unlock position for one second. To<br />
unlock only the driver’s or passenger’s<br />
door, turn the key to the unlock position<br />
and release.<br />
From the inside, when the ignition is on<br />
and the driver’s door is closed, all doors<br />
will lock each time you move the shift<br />
lever out of “P” (Park), or manually lock<br />
1he.doors using the power lock switches<br />
they will lock when closed.<br />
If the sliding door is open when you move<br />
the shift lever out of “P” (Park), a lock<br />
delay feature allows the sliding door to<br />
lock five seconds after it is closed.<br />
With the automatic door locks feature,<br />
you can still lock or unlock the doors at<br />
any time, either manually or with the<br />
power door lock switches.<br />
Overriding Lock Delay<br />
To override the lock delay feature, press<br />
the front of the power door locks switch<br />
(the unlock position) while the shift lever<br />
is in “P” (Park).<br />
If you have the Remote Keyless Entry<br />
System, there are three additional ways<br />
you can disable the lock delay feature:<br />
Press the unlock symbol on your<br />
remote transmitter,<br />
0 Return the shift lever to “P” (Park), or<br />
0 Turn the ignition off.<br />
Customizing Your Automatic Door<br />
Locks Feature<br />
With the Remote Keyless Entry System<br />
you can customize your automatic door<br />
locks feature to suit your individual<br />
needs. (See “Remote Keyless Entry” later<br />
.in this section.)<br />
With the doors closed and the ignition on,<br />
press and hold the driver’s power door<br />
lock switch in the lock position for ten<br />
seconds. The doors will lock, then unlock,<br />
indicating that you have ten seconds in<br />
which to program one of four custom<br />
modes.<br />
0<br />
0<br />
To program the automatic door locks<br />
system to unlock only the driver’s<br />
door when the shift lever is returned to<br />
“I?” (Park), press the unlock symbol<br />
on your remote transmitter once. The<br />
driver’s door will unlock, indicating<br />
that this mode has been successfully<br />
programmed.<br />
To program the automatic door locks<br />
system to unlock all doors when the<br />
shift lever is returned to “P” (Park),<br />
press the unlock symbol on your<br />
remote transmitter once (the driver’s<br />
door will unlock), then press the<br />
unlock symbol again. All doors will<br />
unlock, indicating that this mode has<br />
been successfully programmed.<br />
To program the automatic door locks<br />
system to leave all doors locked when<br />
the shift lever is returned to “P”<br />
(Park), press the lock symbol on your<br />
remote transmitter once. All doors will<br />
lock, indicating that this mode has<br />
been successfully programmed.<br />
s/...
Features & <strong>Controls</strong><br />
Automatic Door Locks<br />
(CONT.)<br />
0 To disengage the automatic door locks<br />
system, press the lock symbol on your<br />
remote transmitter once (all doors will<br />
lock). Then press the lock symbol<br />
again. All doors will lock again,<br />
indicating that this mode has been<br />
successfully programmed.<br />
You can reprogram the automatic door<br />
locks system at any time. If you do not<br />
program the automatic door locks system,<br />
all doors will remain locked when the<br />
shift lever is returned to “P” (Park).<br />
If you have more than one remote<br />
transmitter for your vehicle, your<br />
automatic door locks system will operate<br />
as programmed with any of them. There<br />
is no need to program each one<br />
individually.<br />
w Leaving Your Vehicle<br />
If you are leaving the vehicle, take your<br />
keys, open your door and set the locks<br />
from inside. Then get out and close the<br />
door.<br />
... 58<br />
w Remote Keyless Entry<br />
(OPTION)<br />
If your Pontiac has this option, you can<br />
lock and unlock your doors and liftgate<br />
from up to 30 feet (9 m) away using the<br />
key chain transmitter supplied with your<br />
vehicle.<br />
Your Remote Keyless Entry System<br />
operates on a radio frequency subject to<br />
Federal Communications Commission<br />
(FCC) Rules.<br />
This device complies with Part 15 of the<br />
FCC Rules. Operation is subject to the<br />
following two conditions: (1) This devicl<br />
may not cause harmful interference, and<br />
(2) This device must accept any<br />
nterference received, including<br />
nterference that may cause undesired<br />
)peration.<br />
should interference to this system occur,<br />
.ry this:<br />
D<br />
D<br />
0<br />
0<br />
Be sure to use the transmitter with the<br />
ignition switch “OFF’ to eliminate<br />
interference from other electronic<br />
systems in the vehicle.<br />
Check to determine if battery<br />
replacement is necessary. See the<br />
instructions on battery replacement.<br />
Check the distance. You may be too<br />
far from your vehicle. This product<br />
has a maximum range.<br />
Check the location. Other vehicles or<br />
objects may be blocking the signal.<br />
See your Pontiac dealer or a qualified<br />
technician for service.<br />
Changes or modifications to this system<br />
by other than an authorized service<br />
facility could void authorization to use<br />
this equipment.
Operation<br />
The driver’s door will unlock and the<br />
interior lights will go on when a is<br />
pressed (see “Illuminated Entry System”<br />
later in this section). If pressed again<br />
within five seconds, all doors and the<br />
liftgate will unlock. All doors and the<br />
liftgate will lock when 6 is pressed.<br />
If the driver’s door is open and your key<br />
is in the ignition in the Ofposition, you<br />
won’t be able to set the door locks with<br />
the power door lock switch or the remote<br />
transmitter. This security feature is<br />
designed to help keep you from locking<br />
your keys in your vehicle.<br />
Lock Delay<br />
This lock delay feature can be operated<br />
using either the remote key chain<br />
transmitter or the power door lock switch<br />
(see “Power Door Locks” earlier in this<br />
section).<br />
For the lock delay feature to work, the<br />
ignition and the interior lights control to<br />
the left of the instrument panel cluster<br />
must be off. If you wish to lock the doors<br />
with the interior lights on, press 6 or the<br />
rear of either power door lock switch<br />
twice.<br />
If any door is open when you press 6 or<br />
the rear of either power door lock switch,<br />
a chime will sound three times. This<br />
indicates that all doors and the liftgate<br />
will lock about five seconds after the last<br />
door has been closed.<br />
To override the lock delay feature, press<br />
the lock symbol or the rear of either<br />
power door lock switch again, and the<br />
Joors and liftgate will lock immediately.<br />
[f the sliding door is open, it will lock<br />
mtomatically within five seconds after it<br />
.s closed, and the doors and liftgate will<br />
-ock again.<br />
To cancel the lock delay feature, press the<br />
unlock symbol or the front of either<br />
power door lock switch.<br />
:emote Operation of Power Sliding<br />
boor<br />
’ you have the optional power sliding<br />
oor (see “Power Sliding Door” later in<br />
lis section), your remote transmitter will<br />
ave a third button labeled Press<br />
. to open or close the sliding door.’<br />
F the sliding door is locked, first press<br />
3 twice to unlock all doors, then press<br />
a to open the sliding door.<br />
‘ou can operate the power sliding door<br />
rith the remote transmitter only when the<br />
ower sliding door enable switch on the<br />
verhead console is in the “ON” position.<br />
59.. .
Features & <strong>Controls</strong><br />
Matching Transmitterfs)<br />
To Your Vehicle<br />
Each key chain transmitter is coded to<br />
prevent another transmitter from<br />
unlocking your vehicle. If a transmitter is<br />
lost or stolen, a replacement can be<br />
purchased through your dealer.<br />
Remember to bring the remaining<br />
transmitter with you when you go to your<br />
dealer. When the dealer matches the<br />
replacement transmitter to your vehicle,<br />
the remaining transmitter must also be<br />
matched‘ Once the new transmitter is<br />
coded, the lost transmitter will not unlock<br />
your vehicle.<br />
You can match a transmitter to as many<br />
different vehicles as you own, provided<br />
they are equipped with exactly the same<br />
model system. (General Motors offers<br />
several different models of these systems<br />
on their vehicles.) Each vehicle can have<br />
only four transmitters matched to it.<br />
See your dealer to match transmitters to<br />
another vehicle.<br />
1 Battery Replacement<br />
1 Jnder normal use, the batteries in your<br />
E Ley chain transmitter should last about<br />
t wo years.<br />
7<br />
fou can tell the batteries are weak if the<br />
t ransmitter won’t work at the normal<br />
r; ange in any location. If you have to get<br />
C .lose to your vehicle before the<br />
tl ransmitter works, it’s probably time to<br />
C :hange the batteries.<br />
Ib Replace Batteries in the Kemote<br />
Keyless Entry:<br />
I. Remove the screw from the back<br />
cover.<br />
2. Lift the front cover off, bottom half<br />
first.<br />
3. Remove and replace the two 3-volt<br />
batteries (DL 2016).<br />
4. Reassemble the transmitter.<br />
5. Check the transmitter operation.<br />
... 60
If the back of your transmitter has a slot<br />
instead of a screw, follow these battery<br />
replacement instructions:<br />
To Replace Batteries in the Remote<br />
Keyless Entry:<br />
1. Insert a coin into the slot in the back<br />
of the transmitter, and turn<br />
counterclockwise to open the cover.<br />
2. Remove the cover.<br />
3. Remove and replace the two 3-volt<br />
batteries (DL 20 16).<br />
4. Reassemble the transmitter.<br />
5. Check the transmitter operation.<br />
Illuminated Entry<br />
System (OPTION)<br />
This option comes with the optional<br />
Remote Keyless Entry System.<br />
When you open the driver’s door, by itself<br />
or in combination with any passenger<br />
door or the liftgate, the interior lights will<br />
come on and then gradually dim to off 10<br />
seconds after the last door is closed. (If<br />
the driver’s door has not been opened, the<br />
interior lights will immediately dim to<br />
off.)<br />
When you press a on your remote<br />
transmitter, the lights inside your vehicle<br />
will go on, then gradually dim to off after<br />
40 seconds, unless a door or the liftgate is<br />
opened.<br />
When you turn on the ignition, the<br />
interior lights will immediately dim to off.<br />
Theft<br />
Vehicle theft is big business, especially in<br />
some cities. Although your Pontiac has a<br />
number of theft deterrent features, we<br />
know that nothing we put on it can make<br />
it impossible to steal. However, there are<br />
ways you can help.<br />
Key in the Ignition<br />
If you walk away from your vehicle with<br />
the keys inside, it’s an easy target for joy<br />
riders or professional thieves -- so don’t<br />
do it.<br />
When you park your Pontiac and open the<br />
driver’s door, you’ll hear a chime<br />
reminding you to remove your key from<br />
the ignition and take it with you. Always<br />
do this. Your steering wheel will be<br />
locked, and so will your ignition and<br />
transaxle. And remember to lock the<br />
doors.<br />
61 ...
Features & <strong>Controls</strong><br />
Parking at Night<br />
Park in a lighted spot, close all windows<br />
and lock your vehicle. Remember to keep<br />
your valuables out of sight. Put them in a<br />
storage area, or take them with you.<br />
Parking Lots<br />
If you park in a lot where someone will be<br />
watching your vehicle, it’s best to lock it<br />
up and take your keys. But what if you<br />
have to leave your ignition key? What if<br />
you have to leave something valuable in<br />
your vehicle?<br />
0 Put your valuables in a storage area,<br />
like your glove box or locking storage<br />
bin.<br />
Lock the storage bin.<br />
0 Lock all the doors except the driver’s.<br />
0 Then take the door key with you.<br />
Sliding Door<br />
To open the sliding door from outside the<br />
vehicle, pull the front of the latch release<br />
out and then toward the rear. If you slide<br />
the door all the way back, it will latch in<br />
the open position.<br />
To move the door forward, you must first<br />
pull the inside or outside latch release out<br />
and then forward or the door will remain<br />
latched in the open position.<br />
... 62
c<br />
Sliding Door Lock<br />
From inside the vehicle, lock the sliding<br />
door by moving the manual locking lever<br />
down. Unlock by moving the lever up.<br />
If you have the optional power door<br />
locks, the sliding door lock has a delay<br />
feature. See “Power Door Locks” in the<br />
Index.<br />
Power Sliding Door<br />
(OPTION)<br />
With this option, you can open and close<br />
the sliding door with switches inside your<br />
vehicle. If you have the optional Remote<br />
Keyless Entry System, you can also<br />
operate the sliding door with your remote<br />
transmitter. See “Remote Keyless Entry”<br />
in the Index.<br />
To operate the power sliding door, the<br />
power sliding door enable switch must be<br />
in the “ON” position. This switch is<br />
located overhead on the edge of the front<br />
reading lights console. To disable the<br />
power sliding door feature, slide the<br />
switch to “OFF”.<br />
To open or close the sliding door, press<br />
and release one of two “PWR DOOR’’<br />
(Power Door) switches. There is one<br />
located overhead between the front<br />
reading lights, and one mounted on the<br />
wall, just in front of the sliding door.<br />
63 ...
~~<br />
Features & <strong>Controls</strong><br />
Power Sliding Door (CONE)<br />
The sliding door must be unlocked for the<br />
power sliding door to operate. The key<br />
does not have to be in the ignition. To<br />
help avoid accidental operation of the<br />
sliding door, disable the power sliding<br />
door by placing the power sliding door<br />
enable switch in the “OFF” position.<br />
The power sliding door will only open if<br />
the transaxle is in “P” (Park). The<br />
transaxle does not have to be in “P’<br />
(Park) to close the door. If the enable<br />
switch is “ON” and the power sliding<br />
door is open or in the process of closing<br />
when you shift out of “P” (Park), a buzzer<br />
will sound and the “SLIDING DOOR”<br />
light on your instrument panel will flash<br />
(see “Sliding Door Ajar Warning Light”<br />
in the Index). This is a warning that the<br />
sliding door is not completely closed.<br />
-<br />
I f anything obstructs the sliding door<br />
V vhile it is closing, the door will<br />
a utomatically reverse to the open<br />
I: losition, provided it meets sufficient<br />
r esistance. Resistance must be as strong<br />
a .s the force of the closing door, or<br />
S tronger. The force of the closing door<br />
i: ncreases significantly as the door<br />
a ,pproaches the latch position.<br />
f<br />
... 64
Objects caught in the path of the sliding<br />
door may be damaged. Make sure the<br />
door path is clear before closing the door.<br />
To manually .open the power sliding door<br />
when the sliding door enable switch is in<br />
the “ON” position, pull the inside or<br />
outside latch release and let go; the door<br />
will open fully.<br />
To manually open the power sliding door<br />
when the enable switch is in the “OFF”<br />
position, pull the inside or outside latch<br />
release and slide the door all the way<br />
back.<br />
To manually close the power sliding door<br />
when the sliding door enable door switch<br />
is in the “ON” position, pull the inside or<br />
outside latch release or the edge of the<br />
door. Move the door about four inches<br />
toward the closed position and release.<br />
The door will close completely and latch<br />
for you.<br />
To manually close the power sliding door<br />
when the enable switch is in the “OFF”<br />
position, pull the inside or outside latch<br />
release and slide the door all the way<br />
forward to the latch position.<br />
On vehicles equipped with the optional<br />
power sliding door, a low voltage battery<br />
may cause the system to become<br />
inoperative. This is a built in feature to<br />
prevent damage to the power sliding door<br />
motor.<br />
When the battery has been charged, follow<br />
these steps:<br />
1.<br />
2.<br />
3.<br />
4.<br />
5.<br />
6.<br />
Make sure the door is in the closed<br />
position.<br />
Turn the ignition off.<br />
Remove the fuse marked “TAIL” from<br />
the fuse panel.<br />
Wait 30 seconds.<br />
Reinstall the fuse.<br />
Cycle the door open and closed with<br />
either the wall mounted or overhead<br />
console switch. Wait three seconds<br />
before opening and closing the door<br />
again.<br />
If this does not restore power sliding door<br />
operation, see your dealer for service.
Features & <strong>Controls</strong><br />
Siding Door Child<br />
Security Lock<br />
Your Pontiac may be equipped with a<br />
sliding door child security lock that helps<br />
prevent young children or other<br />
passengers from opening the sliding door<br />
from the inside.<br />
If you have the optional power sliding<br />
door, you can override the security lock<br />
by pressing either “PWR DOOR’ (Power<br />
Door) switch when the power sliding door<br />
enable switch is in the “ON” position. See<br />
“Power Sliding Door” earlier in the<br />
section.<br />
The security lock lever is located on the<br />
inside of the sliding door, near the rear<br />
edge of the door. To access the lever, open<br />
the sliding door. Use the security lock<br />
label on the rear edge of the door as a<br />
guide. Reach your hand around the inside<br />
rear corner of the sliding door to access<br />
the lever.<br />
To Use the Security Lock:<br />
1. Move the security lock lever all the<br />
way up.<br />
2. Close the door.<br />
With Optional Power Sliding Door<br />
1. Slide the power sliding door enable<br />
switch on the overhead console to the<br />
“OFF” position.<br />
The sliding door cannot be opened using<br />
the inside handle when the security lock<br />
feature is in use.<br />
’ You Want to Open the Sliding Door<br />
Vhen the Security Lock is On:<br />
. Unlock the sliding door from the<br />
inside.
~ ~<br />
m<br />
0<br />
m<br />
0<br />
CHILD<br />
ECURIT Y<br />
LOCK<br />
2. Then open the door from the outside.<br />
With Optional Power Sliding Door<br />
1. Slide the power sliding door enable<br />
switch to the “ON” position.<br />
2. Press either “PWR DOOR” (Power<br />
Door) switch.<br />
You should let adults and older children<br />
know how the security lock works, and<br />
how to cancel the lock. If you don’t,<br />
adults or older children who ride in the<br />
rear won’t be able to open the sliding<br />
door from the inside when the security<br />
lock feature is in use.<br />
To Cancel the Sliding Door Lock:<br />
1. Unlock the sliding door from the<br />
inside and open the door.<br />
2. Move the security lock lever all the<br />
way down.<br />
The sliding door lock will now work<br />
normally.<br />
Liftgate Lock<br />
To unlock, insert the door key and turn<br />
the lock clockwise. The liftgate will<br />
automatically lock when you close it.<br />
If you have the optional power door locks<br />
or the Remote Keyless Entry System, the<br />
liftgate will lock and unlock differently.<br />
See “Power Door Locks’’ or “Remote<br />
Keyless Entry” in the Index.
~~<br />
Features & <strong>Controls</strong><br />
Raising the Lij’tgate<br />
Open the liftgate using the handle<br />
recessed above the license plate. Then,<br />
step back and the liftgate will rise by<br />
itself. Lights in the liftgate will come on,<br />
illuminating the rear cargo area (see<br />
“Interior Lights” in the Index).<br />
[<br />
NOTICE:<br />
Be sure there are no overhead<br />
obstructions, such as a garage door,<br />
before you open the liftgate. You<br />
could slam the liftgate into<br />
something and break the glass.<br />
To close the liftgate, pull down on the<br />
strap, then firmly shut the liftgate. Don’t<br />
drive with the liftgate open, even slight11<br />
See “Exhaust” in the Index. A light on<br />
your instrument panel will warn you if tf<br />
liftgate is not completely closed (see<br />
“Liftgate Ajar Warning Light” in the<br />
Index).<br />
... 68
New Vehicle<br />
“Break-In”<br />
NOTICE:<br />
Your modern Pontiac doesn’t need<br />
an elaborate “break-in.’’ But it will<br />
perform better in the long run if you<br />
follow these guidelines:<br />
Don’t drive at any one speed<br />
-- fast or slow -- for the first<br />
500 miles (804 km). Don’t<br />
make full-throttle starts.<br />
Avoid making hard stops for<br />
the first 200 miles (322 km)<br />
or so. During this time your<br />
new brake linings aren’t yet<br />
broken in. Hard stops with<br />
new linings can mean<br />
premature wear and earlier<br />
replacement. Follow this<br />
“breaking-in” guideline<br />
every time you get new<br />
brake linings.<br />
Ignition Switch<br />
Nith the ignition key in the ignition<br />
witch, you can turn the switch to five<br />
jositions:<br />
kcessory: An “on” position in which<br />
rou can operate your electrical power<br />
Iccessories. Press in the ignition switch a5<br />
rou turn the top of it toward you.<br />
Jock: The only position in which you car<br />
emove the key. This locks your steering<br />
vheel, ignition and transaxle.<br />
Off: Unlocks the steering wheel, ignition,<br />
and transaxle, but does not send electrical<br />
power to any accessories. Use this<br />
position if your vehicle must be pushed or<br />
towed, but never try to push-start your<br />
vehicle. A warning chime will sound if<br />
you open the driver’s door when the<br />
ignition is off and the key is in the<br />
ignition.<br />
Run: An “on” position to which the<br />
switch returns after you start your engine<br />
and release the switch. The switch stays<br />
in the Run position when the engine is<br />
running. But even when the engine is not<br />
running, you can use Run to operate your<br />
electrical power accessories, and to<br />
display some instrument panel warning<br />
lights.<br />
Start: Starts the engine. When the e.ngine<br />
starts, release the key. The ignition switch<br />
will return to Run for normal driving.<br />
69. ..
Features 8t <strong>Controls</strong><br />
Ignition Switch (CONK)<br />
Note that even if the engine is not<br />
running, the positions Accessory and Run<br />
are “on” positions that allow you to<br />
operate your electrical accessories, such<br />
as the radio.<br />
NOTICE:<br />
If your key seems stuck in “Lock”<br />
and you can’t turn it, be sure it is all<br />
the way in. If it is, then turn the<br />
steering wheel left and right while<br />
you turn the key hard. But turn the<br />
key only with your hand. Using a<br />
tool to force it could break the key<br />
or the ignition switch. If none of this<br />
works, then your vehicle needs<br />
service.<br />
Starting Your Engine<br />
Engines start differently. The 8th digit of<br />
your Vehicle Identification Number (VIh<br />
shows the code letter or number for your<br />
engine. You will find the VIN at the top<br />
left of your instrument panel. (See<br />
“Vehicle Identification Number” in the<br />
Index.) Follow the proper steps to start<br />
the engine.<br />
Move your shift lever to “P” (Park) or<br />
“N” (Neutral). Your engine won’t start in<br />
any other position -- that’s a safety<br />
feature. To restart when you’re already<br />
moving, use “N” (Neutral) only.<br />
NOTICE:<br />
Don’t try to shift to “P” (Park) if<br />
your Pontiac is moving. If you do,<br />
you could damage the transaxle.<br />
Shift to “P” (Park) only when your<br />
vehicle is stopped.<br />
3 start your 3.1 Liter engine:<br />
. Without pushing the accelerator pedal,<br />
turn your ignition key to “Start.”<br />
When the engine starts, let go of the<br />
key. The idle speed will go down as<br />
your engine gets warm.<br />
NOTICE:<br />
Holding your key in “Start” for<br />
longer than 15 seconds at a time will<br />
cause your battery to be drained<br />
much sooner. And the excessive<br />
heat can damage your starter motor.<br />
If it doesn’t start right away, hold your<br />
key in “Start.” If it doesn’t start in<br />
three seconds (or starts but then<br />
stops), push the accelerator pedal<br />
about one-quarter of the way down<br />
for 12 more seconds, or until it starts.<br />
If your engine still won’t start<br />
(or starts but then stops), it could be<br />
flooded with too much gasoline. Try<br />
this:<br />
... /u
Wait 15 seconds to let the starter<br />
motor cool down. Then push your<br />
accelerator pedal all the way to the<br />
floor. Hold it there. Then hold the key<br />
in “Start.” This clears the extra<br />
gasoline from the engine. When the<br />
engine starts, let go of the key and the<br />
accelerator pedal. If the engine still<br />
doesn’t start, wait another 15 seconds<br />
and do Step 3 again.<br />
NOTICE:<br />
Your engine is designed to work<br />
with the electronics in your vehicle.<br />
If you add electrical parts or<br />
accessories, you could change the<br />
way the fuel injection system<br />
operates. Before adding electrical<br />
equipment, check with your dealer.<br />
If you don’t, your engine might not<br />
perform properly.<br />
If you ever have to have your<br />
vehicle towed, see the part of this<br />
manual that tells how to do it<br />
without damaging your vehicle. See<br />
“Towing Your Pontiac” in the<br />
Index.<br />
To start your 3.8 Liter engine:<br />
1. Without pushing the accelerator pedal,<br />
turn your ignition key to “Start.”<br />
When the engine starts, let go of the<br />
key. The idle speed will go down as<br />
your engine gets warm.<br />
NOTICE:<br />
Holding your key in “Start” for<br />
longer than 15 seconds at a time will<br />
cause your battery to be drained<br />
much sooner. And the excessive<br />
heat can damage your starter motor.<br />
2. If it doesn’t start right away, hold your<br />
key in “Start” for about three to five<br />
seconds at a time until your engine<br />
starts. Wait about 15 seconds between<br />
each try to help avoid draining your<br />
battery.<br />
3. If your engine still won’t start (or<br />
starts but then stops), it could be<br />
flooded with too much gasoline. Try<br />
pushing your accelerator pedal all the<br />
way to the floor and holding it there as<br />
you hold the key in “Start” for about<br />
three seconds. If the vehicle starts<br />
briefly but then stops again, do the<br />
same thing, but this time keep the<br />
pedal down for five or six seconds.<br />
This clears the extra gasoline from the<br />
engine. After waiting about 15<br />
seconds, repeat the normal starting<br />
procedure.<br />
/I ...
Features & <strong>Controls</strong><br />
w Starting Your Engine<br />
(CONT)<br />
w Driving Through Deep<br />
Standing Water<br />
NOTICE:<br />
Your engine is designed to work<br />
with the electronics in your vehicle.<br />
If you add electrical parts or<br />
accessories, you could change the<br />
way the fuel injection system<br />
operates. Before adding electrical<br />
equipment, check with your dealer.<br />
If you don’t, your engine might not<br />
perform properly.<br />
If you ever have to have your<br />
vehicle towed, see the part of this<br />
manual that tells how to do it<br />
without damaging your vehicle. See<br />
“Towing Your Pontiac” in the<br />
Index.<br />
NOTICE:<br />
If you drive too quickly through<br />
deep puddles or standing water,<br />
water can come in through your<br />
engine’s air intake and badly<br />
damage your engine. If you can’t<br />
avoid deep puddles or standing<br />
water, drive through them very<br />
slowly.<br />
Engine Coolant Heater<br />
(Engine Block Heater)<br />
(OPTION)<br />
In very cold weather, 0°F (-18°C) or<br />
colder, the engine coolant heater can help.<br />
You’ll get easier starting and better fuel<br />
economy during engine warm-up.<br />
Usually, the coolant heater should be<br />
plugged in a minimum of four hours prior<br />
to starting your vehicle.<br />
... 72
To use the coolant heater:<br />
1. Turn off the engine.<br />
2. Open the hood and unwrap the<br />
electrical cord.<br />
3. Plug it into a normal, grounded<br />
110-volt outlet.<br />
NOTICE:<br />
After you’ve used the coolant<br />
heater, be sure to store the cord as it<br />
was before to keep it away from<br />
moving engine parts. If you don’t, it<br />
could be damaged.<br />
e<br />
How long should you keep the coolant<br />
heater plugged in? The answer depends<br />
on the weather, the kind of oil you have,<br />
and some other things. Instead of trying to<br />
list everything here, we ask that you<br />
contact a Pontiac dealer in the area where<br />
you’ll be parking your vehicle. The dealer<br />
can give you the best advice for that<br />
particular area.<br />
Shifting the Automatic<br />
Transaxle<br />
There are several different positions for<br />
your shift lever. In this manual, these are<br />
referred to by the commonly used<br />
symbols in the right column below:<br />
Park<br />
Reverse<br />
Neutral<br />
Overdrive<br />
Drive<br />
P<br />
R<br />
N<br />
@<br />
Second 2<br />
D<br />
First 1
Features & <strong>Controls</strong><br />
Park<br />
P (Park): This locks your front wheels.<br />
It’s the best position to use when you start<br />
your engine because your vehicle can’t<br />
move easily.<br />
Index. if) you’re pulling a trailer,<br />
see “Towing a Trailer’’ in the Index.<br />
Reverse<br />
R (Reverse): Use this gear to back up.<br />
I NOTICE: I<br />
Shifting to “R” (Reverse) while<br />
your vehicle is moving forward<br />
could damage your transaxle. Shift<br />
to “R” only after your vehicle is<br />
stopped.<br />
I<br />
... 74<br />
To rock your vehicle back and forth to.<br />
get out of snow, ice or sand without<br />
damaging your transaxle. see “If You’re<br />
Stuck: In Sand, Mud, Ice or Snow” in the<br />
Index.
I<br />
Neutral<br />
d (Neutral): In this position, your engine<br />
loesn’t connect with the wheels. To<br />
estart when you’re already moving, use<br />
‘N” (Neutral) only. Also, use “N” when<br />
’our vehicle is being towed.<br />
NOTICE:<br />
Damage to your transaxle caused by<br />
shifting out of “P’ (Park) or “N”<br />
(Neutral) with the engine racing<br />
isn’t covered by your warranty.<br />
Forward Gears<br />
@ (Automatic Overdrive): If your<br />
automatic transaxle has automatic<br />
overdrive, this position is for normal<br />
driving. If you need more power for<br />
passing, and you’re:<br />
0<br />
0<br />
Going less than 35 mph (56 km/h),<br />
push your accelerator pedal about<br />
halfway down.<br />
Going about 35 mph (56 km/h) or<br />
more, push the accelerator all the way<br />
down.<br />
You’ll shift down to the next gear and<br />
have more power.<br />
75 ...
Features & <strong>Controls</strong><br />
Forward Gears (CONT.)<br />
NOTICE:<br />
This Notice applies only if you<br />
have the 3.8L V6 engine and the<br />
automatic Overdrive transaxle. If<br />
your vehicle is so equipped, and if it<br />
se’erns to start up rather slowly, or if<br />
it seems not to shift gears as you go<br />
faster, something may be wrong<br />
with a transaxle system sensor. If<br />
you drive very far that way, your<br />
vehicle can be damaged. So, if this<br />
happens, have your vehicle serviced<br />
right away. Until then, you can use<br />
“2” (Second Gear) when you are<br />
drivin less than 35 mph (56 km/h)<br />
and B D (Overdrive) for higher<br />
speeds.<br />
D (Third Gear): If your automatic<br />
transaxle does not have Overdrive, this<br />
position is for normal driving, at all<br />
speeds, in most street and highway<br />
situations.<br />
If your automatic transaxle has Overdrivc<br />
“D’ is like @, but you never go into<br />
Overdrive. Here are some times you<br />
might choose “D” instead of @:<br />
When driving on hilly, winding roads<br />
When towing a trailer, so there is less<br />
shifting between gears<br />
When going down a steep hill<br />
(Second Gear): This position gives you<br />
lore power but lower fuel economy. You<br />
Ln use “2”on hills. It can help control<br />
mr speed as you go down steep<br />
lountain roads, but then you would also<br />
ant to use your brakes off and on.<br />
NOTICE:<br />
Don’t drive in “2” (Second Gear)<br />
for more than 5 miles (8 km), or at<br />
speeds over 55 mph (88 km/h), or<br />
you can damage your transaxle. Use<br />
“D” (@ or “D” if your vehicle has<br />
Overdrive) as much as possible.<br />
Don’t shift into “2” unless you are<br />
going slower than 65 mph (105<br />
km/h), or you can damage your<br />
engine.<br />
... 76
1 (First Gear): This position gives you<br />
even more power (but lower fuel<br />
economy) than “2”. You can use it on<br />
very steep hills, or in deep snow or mud.<br />
If the selector lever is put in “I”, the<br />
transaxle won’t shift into first gear until<br />
the vehicle is going slowly enough.<br />
NOTICE:<br />
If your front wheels can’t rotate,<br />
don’t try to drive. This might<br />
happen if you were stuck in very<br />
deep sand or mud or were up<br />
against a solid object. You could<br />
damage your transaxle.<br />
Also, if you stop when going uphill,<br />
don’t hold your vehicle there with<br />
only the accelerator pedal. This<br />
could overheat and damage the<br />
transaxle. Use your brakes to hold<br />
your vehicle in position on a hill.<br />
Parking Brake<br />
To Set the Parking Brake:<br />
Hold the regular brake pedal down with<br />
your right foot. Push down the parking<br />
brake pedal with your left foot. If the<br />
ignition is on, the brake system warning<br />
light will come on. See “Brake System<br />
Warning Light” in the Index.<br />
o Release the Parking Brake:<br />
old the regular brake pedal down with<br />
3ur right foot while you push down on<br />
le parking brake pedal with your left foot.<br />
To release the tension on the parking<br />
-ake cable, you will need to apply about<br />
le same amount of pressure to the parking<br />
-ake pedal as you did when you set the<br />
Irking brake.) When you remove your<br />
pot from the parking brake pedal, it will<br />
3p up to the release position.<br />
-<br />
NOTICE:<br />
Driving with the parking brake on<br />
can cause your rear brakes to<br />
overheat. You may have to replace<br />
them, and you could also damage<br />
other parts of your vehicle.<br />
‘You are Towing a Trailer and are<br />
xking on Any Hill: See “Towing a<br />
railer” in the Index. That section shows<br />
hat to do first to keep the trailer from<br />
loving.<br />
C<br />
77
Features & <strong>Controls</strong><br />
66 99<br />
Shifting Into P<br />
(Park)<br />
2. Move the shift lever into “P” (Park)<br />
position like this:<br />
0 Pull the lever toward you.<br />
Move the lever up as far as it<br />
will go.<br />
3. Move the ignition key to Lock.<br />
4. Remove the key and take it with you.<br />
If you can walk. away from your<br />
vehicle with the ignition key in your<br />
hand, your vehicle is in “P” (Park).<br />
1. Hold the brake pedal down with your<br />
right foot and set the parking brake.<br />
e o . 7 8
Leaving Your Vehicle With<br />
the Engine Running<br />
If you have to leave your vehicle with the<br />
engine running, be sure your vehicle is in<br />
“P” (Park) and your parking brake is<br />
firmly set before you leave it. After<br />
you’ve moved the shift lever into the “P’<br />
(Park) position, hold the regular brake<br />
pedal down. Then, see if you can move<br />
the shift lever away from “P’(Park)<br />
without first pulling it toward you. If you<br />
can, it means that the shift lever wasn’t<br />
fully locked into “P’(Park).<br />
Torque Lock<br />
If you are parking on a hill and you don’t<br />
shift your transaxle into “P” (Park)<br />
properly, the weight of the vehicle may<br />
put too much force on the parking pawl in<br />
the transaxle. You may find it difficult to<br />
pull the shift lever out of “P” (Park). This<br />
is called “torque lock.” To prevent torque<br />
lock, set the parking brake and then shift<br />
into “P” (Park) properly before you leave<br />
the driver’s seat. To find out how, see<br />
“Shifting Into ‘P’ (Park)” in the Index.<br />
r<br />
When you are ready to drive, move the<br />
shift lever out of “P” (Park) BEFORE you<br />
release the parking brake.<br />
If “torque lock” does occur, you may<br />
need to have another vehicle push .yours a<br />
Little uphill to take some of the pressure<br />
from the transaxle, so you can pull the<br />
shift lever out of “P’ (Park).<br />
79...
Features & <strong>Controls</strong><br />
Engine Exhaust<br />
I<br />
Parking Over Things<br />
That Burn<br />
Running Your Engine<br />
While You’re Parked<br />
It’s better not to park with the engine<br />
running. But if you ever have to, here are<br />
some things to know.<br />
... 80
I<br />
Tilt Wheel (OPTION)<br />
A tilt steering wheel allows you to adjust<br />
the steering wheel before you drive.<br />
Follow the proper steps to be sure your<br />
vehicle won’t move. See “Shifting Into<br />
‘P’ (Park)” in the Index.<br />
If you are pulling a trailer, see “Towing a<br />
Trailer” in the Index.<br />
Horn<br />
You can sound the horn by pressing the<br />
horn symbols on your steering wheel.<br />
You can also raise it to the highest level to<br />
give your legs more room when you exit<br />
and enter the vehicle.<br />
To tilt the wheel, hold the steering wheel<br />
and pull the lever. Move the steering<br />
wheel to a comfortable level, then release<br />
the lever to lock the wheel in place.<br />
Manual Windows<br />
Use the manual crank to open and close<br />
the front windows.<br />
81 ...
Features & <strong>Controls</strong><br />
Side Window Latches<br />
The rear of the side windows swings<br />
open.<br />
To Open: Pull the latch forward to release<br />
it, then swing the window outward and<br />
press the center of the latch to secure the<br />
window in the open position.<br />
To Close: Pull the center of the latch<br />
forward and then close the latch.<br />
... a2<br />
Power Windows (OPTION)<br />
With power windows, switches on the<br />
driver’s door armrest control the fi-ont<br />
windows when the ignition is on. The left<br />
switch controls the driver’s window. The<br />
right switch controls the passenger’s window. 0 Turn Signal and Lane Change<br />
The driver’s power window switch has Indicator<br />
two down positions. Hold the rear of the<br />
0 Headlight High-Low Beam<br />
switch in the first position to lower the<br />
window normally.<br />
0 Cruise Control (Option)<br />
To activate the auto down feature, fully<br />
press the rear of the switch, then release.<br />
The window will lower completely. To<br />
stop the window from lowering all the<br />
way, press the front of the switch.<br />
To raise the window, press and hold the<br />
front of the switch.<br />
Turn Signal/<br />
Multifunction Lever<br />
The lever on the left side of the steering<br />
column includes your:<br />
The High-Low Beam feature is discussed<br />
under “Headlights”. See “Headlights” in<br />
the Index.
Turn Signal and Lane<br />
Change Indicator<br />
The turn signal has two upward (for<br />
Right) and two downward (for Left)<br />
positions. These positions allow you to<br />
signal a turn or a lane change.<br />
To signal a turn, move the lever all the<br />
way up or down. When the turn is<br />
finished, the lever will return<br />
automatically.<br />
11. ‘<br />
A green arrow on the instrument panel<br />
will flash in the direction of the turn or<br />
lane change.<br />
To signal a lane change, just raise or<br />
lower the lever until the green arrow starts<br />
to flash. Hold it there until you complete<br />
your lane change. The lever will return by<br />
itself when you release it.<br />
As you signal a turn or a lane change, if<br />
the arrows don’t flash but just stay on, a<br />
signal bulb may be burned out and other<br />
drivers won’t see your turn signal.<br />
I If a bulb is burned out, replace it to help<br />
avoid an accident. If the green arrows<br />
don’t go on at all when you signal a turn,<br />
check the fuse (see “Fuses & Circuit<br />
Breakers” in the Index) and for<br />
burned-out bulbs.<br />
If you have a trailer towing option with<br />
added wiring for the trailer lights, a<br />
different turn signal flasher is used. With<br />
this flasher installed, the signal indicator<br />
will flash even if a turn signal bulb is<br />
burned out. Check the front and rear turn<br />
signal lights regularly to make sure they<br />
are working.
Features & <strong>Controls</strong><br />
When you apply your brakes, the Cruise<br />
Clontrol shuts off.<br />
To Set Cruise Control<br />
I. Move the Cruise Control switch to<br />
“ON’.<br />
Cruise Control (OPTION)<br />
With Cruise Control, you can maintain a<br />
speed of about 25 mph (40 km/h) or more<br />
without keeping your foot on the<br />
accelerator. This can really help on long<br />
trips.<br />
Cruise Control does not work at speeds<br />
below about 25 mph (40 kmh).<br />
2. Get up to the speed you want.<br />
... 84
3. Push in the set button at the end of the<br />
lever and release it.<br />
4. Take your fo-ot off the accelerator<br />
pedal.<br />
To Resume a Set Speed<br />
Suppose you set your Cruise Control at a<br />
desired speed and then you apply the<br />
brake. This, of course, shuts off the<br />
Cruise Control. But you don’t need to<br />
reset it. Once you’re going about 25 mph<br />
(40 km/h) or more, you can move the<br />
Cruise Control switch from “ON” to<br />
“RESUME/ACCEL” (which stands for<br />
Resume/Accelerate) for about half a<br />
second.<br />
You’ll go right back up to your chosen<br />
speed and stay there.<br />
If you have the 3800 Vb engine, cruise<br />
control memory will be erased when you<br />
place the transaxle in “P” (Park). If this is<br />
the case, you will not be able to resume<br />
your set speed by moving the cruise<br />
control switch to “RESUME/ACCEL”.<br />
Use the “SET” button to reset cruise (see<br />
“To Set Cruise Control” earlier in this<br />
section).<br />
If you hold the switch at “Resume/,Accel”<br />
longer than half a second, the vehicle will<br />
keep going faster until you release the<br />
switch or apply the brake. You could be<br />
startled and even lose control. So unless<br />
you want to go faster, don’t hold the<br />
switch at “Resume/Accel”.<br />
To Increase Speed Wh#e<br />
Using Cruise Control :<br />
There are two ways to go to a highkr<br />
speed. Here’s the first:<br />
0<br />
0<br />
Use the accelerator pedal to get.to the<br />
higher speed.<br />
Push the button at the end of the lever,<br />
then release the button and the<br />
accelerator pedal. You’ll now cruise at<br />
the higher speed.
Features & <strong>Controls</strong><br />
To Increase Speed While<br />
Using Cruise Control (CONT.)<br />
Here’s the second way to go to a higher<br />
speed:<br />
@<br />
Move the Cruise switch from “ON” to<br />
“RESUME/ACCEL”. Hold it there<br />
until you get up to the speed you want,<br />
and then release the switch.<br />
To increase your speed in very small<br />
amounts, move the switch to<br />
“RESUME/ACCEL” for less than half<br />
a second and then release it. Each time<br />
you do this, your vehicle will go about<br />
1 mph (1.6 km/h) faster.<br />
The accelerate feature will only work<br />
after you’ve set the initial cruise control<br />
speed by pushing the “SET” button. If<br />
you have the 3.1L V6 engine, the<br />
accelerate feature will work whether or<br />
not you have set an initial cruise control<br />
speed.<br />
To Reduce Speed While<br />
Using Cruise Control<br />
Push in the button at the end of the<br />
lever until you reach the lower speed<br />
you want, then release it.<br />
0 To slow down in very small amounts,<br />
push the button for less than half a<br />
second. Each time you do this, you’ll<br />
go 1 mph (1.6 km/h) slower.<br />
Passing Another Vehicle<br />
While Using Cruise<br />
Control<br />
Use the accelerator pedal to increase your<br />
speed. When you take your foot off the<br />
pedal, your vehicle will slow down to the<br />
Cruise Control speed you set earlier.<br />
Using Cruise Control on<br />
Hills<br />
How well your Cruise Control will work<br />
on hills depends upon your speed, load,<br />
and the steepness of the hills. When going<br />
up steep hills, you may have to step on<br />
the accelerator pedal to maintain your<br />
speed. When going downhill, you may<br />
have to brake or shift to a lower gear to<br />
keep your speed down. Of course,<br />
applying the brake takes you out of<br />
Cruise Control. Many drivers find this to<br />
be too much trouble and don’t use Cruise<br />
Control on steep hills.<br />
To Get Out of Cruise<br />
Control<br />
rhere are two ways to turn off the Cruise<br />
Control:<br />
Step lightly on the brake pedal; OR<br />
0 Move the Cruise switch to “OFF”.<br />
To Erase Speed Memory<br />
When you turn off the Cruise Control or<br />
the ignition, your Cruise Control set speed<br />
memory is erased. If you have the 3800<br />
V6 engine, cruise control memory will<br />
also be erased when you place the<br />
transaxle in “P” (Park).
I Headlights<br />
'ush the p' switch to turn on:<br />
1 Parking Lights<br />
1 Side Marker Lights<br />
D<br />
D<br />
Taillights<br />
Instrument Panel Lights<br />
lull the switch to turn off the lights.<br />
Operation of Lights<br />
Although your vehicle's lighting system<br />
(headlights, parking lights, fog lamps,<br />
side marker lights and taillights) meet all<br />
applicable federal lighting requirements,<br />
certain states and provinces may apply<br />
their own lighting regulations that may<br />
require special attention before you<br />
operate these lights.<br />
For example, some jurisdictions may<br />
require that you operate your fog lamps<br />
only when your lower beam headlights<br />
are also on, or that headlights be turned<br />
on whenever you must use your<br />
windshield wipers. In addition, most<br />
jurisdictions prohibit driving solely with<br />
parking lights, especially at dawn or dusk.<br />
It is recommended that you check with<br />
your own state or provincial highway<br />
authority for applicable lighting<br />
regulations.<br />
a7 ...
Features & <strong>Controls</strong><br />
Lights On Reminder<br />
If you turn the ignition key to the off or<br />
Lock position while leaving the lights on,<br />
you will hear a warning chime.<br />
Daytime Running Lights<br />
(Canada Only)<br />
The Canadian Federal Government has<br />
decided that Daytime Running Lights<br />
(DRL) are a useful feature, in that DRL<br />
can make your vehicle more visible to<br />
pedestrians and other drivers during<br />
daylight hours. DRL are required on new<br />
vehicles sold in Canada.<br />
Your DRL work with a light sensor on top<br />
of the instrument panel. Don’t cover it up.<br />
The low beam headlights will come on at<br />
reduced brightness in daylight when:<br />
The ignition is on<br />
0 The headlight switch is off, and<br />
0 The parking brake is released.<br />
At dusk, the exterior lights will come on<br />
automatically and the low beams will<br />
change to full brightness. At dawn, the<br />
exterior lights will go out and the low<br />
beams will change to the reduced<br />
brightness of DRL (if the headlight switch<br />
is off). Of course, you may still turn on<br />
the headlights any time you need to.<br />
To idle your vehicle with the DRL off, set<br />
the parking brake while the ignition is in<br />
the off or Lock position. Then start the<br />
vehicle. The DRL will stay off until you<br />
release the parking brake.<br />
Yeadlight High-Low Beam<br />
?hanger<br />
:o change the headlights from low beam<br />
o high or high to low, pull the turn signal<br />
ever all the way toward you. Then<br />
elease it.<br />
Nhen the high beams are on, a blue light<br />
In the instrument panel also will be on.
.<br />
I<br />
interior Lights Control<br />
Slide the lower control up to turn on the<br />
interior lights, down to turn them off.<br />
Your standard front overhead console<br />
control can be overridden by the interior<br />
lights override switch located in the<br />
console. See “Interior Lights Override<br />
Switch” in the Index.<br />
Instrument Panel Intensity<br />
Controi<br />
Slide the upper control up to increase the<br />
brightness of the instrument panel lights,<br />
down to decrease the brightness. Slide the<br />
control all the way down to turn them off.<br />
Fog Lights<br />
Slide the lower control up to turn on the<br />
fog lights, down to turn them off. An<br />
amber indicator light next to the control<br />
will glow when the fog lights are on.<br />
Your headlights must be on for your fog<br />
lights to go on.<br />
Although your fog lights will go on when<br />
your high beams are on, high beams are<br />
not recommended for driving in fog.<br />
89...
Features & <strong>Controls</strong><br />
U<br />
Windshield Wipers<br />
The windshield wiper and washer controls<br />
are located to the right of the instrument<br />
cluster.<br />
For a Single Wiper Cycle: Press the<br />
switch marked “MIST” and release. For<br />
more cycles, press and hold the switch.<br />
For Pulse Delay Wiper Cycles: The<br />
pulse delay cycle system allows you to set<br />
the wiper speed as slow as 20 seconds<br />
between cycles, or faster. Pulse delay<br />
cycles are very useful in light rain or<br />
snow. Slide the upper control to the<br />
“DELAY” area. The lower the position,<br />
the slower the cycle; the higher the<br />
position, the faster the cycle.<br />
or Steady Wiper Cycles: Slide the<br />
pper control either to the “LO” or “HI”<br />
xition, depending on the wiper speed<br />
3u want.<br />
... 90
I<br />
To Turn the Wipers Off: Slide the upper<br />
control to the “OFF” position.<br />
Heavy snow or ice can overload your<br />
wiper motor. A circuit breaker will stop<br />
the motor until it cools. Clear away snow<br />
or ice to prevent an overload.<br />
Windshield Washer<br />
To wash your windshield, press and hold<br />
the windshield washer switch. The<br />
washers and wipers will operate. When<br />
you release the switch, the washers will<br />
stop, and the wipers will continue to<br />
operate for two cycles, unless your wipers<br />
had already been on. In that case, the<br />
wipers will resume the wiper speed you<br />
had selected earlier.
Features & <strong>Controls</strong><br />
Rear Window Wiper and<br />
Washer<br />
To Use Your Rear Wiper: Slide the<br />
lower control to<br />
cycles.<br />
for steady wiping<br />
For a Delayed Wiper Cycle: Slide the<br />
lower control to 0 “DEL”.<br />
To Wash the Rear Window: Slide the<br />
lower control to a and hold it. The<br />
washer and wiper will operate only as<br />
ng as the control is held in that position.<br />
nen the wiper will return to<br />
NOTICE:<br />
0 When using concentrated<br />
washer fluid, follow the<br />
manufacturer’s instructions<br />
for adding water.<br />
0 Don’t mix water with<br />
ready-to-use washer fluid.<br />
Water can cause the solution<br />
to freeze and damage your<br />
washer fluid tank and other<br />
parts of the washer system.<br />
Also, water doesn’t clean as<br />
well as washer fluid.<br />
Fill your washer fluid tank<br />
only 3/4 full when it’s very<br />
cold. This allows for<br />
expansion, which could<br />
damage the tank if it is<br />
completely full.<br />
Don’t use radiator antifreeze<br />
in your windshield washer. It<br />
can damage your washer<br />
system and paint.<br />
“DEL”.<br />
Interior Lights<br />
Override Switch<br />
This switch is located to the left of the<br />
cigarette lighter on the center instrument<br />
panel console. It has two positions<br />
“DOOR” (on) and “OFF”, and overrides<br />
all interior lights except the reading lights.<br />
The interior lights go on each time you<br />
open the doors. You can turn off these<br />
lights so that the doors may be left open<br />
without running down the battery by<br />
turning the interior lights override switch<br />
to “OFF”.<br />
... YL
Interior Lights<br />
Your vehicle has two overhead dome<br />
lights-one in the center of the passenger<br />
compartment and one in the rear. If you<br />
have the optional rear climate control, you<br />
will not have a center dome light.<br />
The rear dome light has an on-off switch;<br />
the center dome light has no switch. Both<br />
lights will go on each time you open the<br />
front doors unless you have the rear light<br />
switched off.<br />
If the interior lights override switch in the<br />
center instrument panel console is in the<br />
“OFF’ position, the overhead lights will<br />
remain off when the doors open. See<br />
“Interior Lights Override Switch” earlier<br />
in this section.<br />
There are also two lights in the liftgate to<br />
light the rear cargo area. These will come<br />
on each time you open the liftgate, unless<br />
the interior lights override switch is in the<br />
“OFF” position.<br />
To turn the interior lights on when the<br />
doors are closed, slide the interior lights<br />
control up to the “ON” position (the rear<br />
dome light switch must be in the on<br />
position). See “Interior Lights Control”<br />
earlier in this section.<br />
Front Reading Lights<br />
There are two reading lights located in the<br />
optional front overhead console. To turn<br />
on or off either reading light, press the<br />
switch next to it.<br />
If you have the optional power sliding<br />
door, your overhead console will also<br />
have two power sliding door switches. To<br />
operate these switches, see “Power<br />
Sliding Door” in the Index.<br />
93...
Features & <strong>Controls</strong><br />
Rear Reading Lights<br />
The rear dome light also has two reading<br />
lights.<br />
To turn on either reading light, press the<br />
switch next to it.<br />
Accessory Power Outlet<br />
The power outlet is located in the rear<br />
compartment on the driver’s side. To<br />
open, slide the latch down and remove the<br />
cover. If you have the optional<br />
saddlebags, lift the saddlebag flap to<br />
expose the latch.<br />
The power outlet can be used to plug in<br />
electrical equipment such as a cellular<br />
telephone, CB radio, etc. Follow the<br />
proper installation instructions that are<br />
included with any electrical equipment<br />
you install.<br />
When not in use, always cover the outlet<br />
with the protective cap.<br />
NOTICE:<br />
When using the accessory power<br />
outlet:<br />
a Maximum load of any<br />
electrical equipment should<br />
not exceed 20 amps.<br />
a Be sure to turn off any<br />
electrical equipment when<br />
not in use. Leaving electrical<br />
equipment on for extended<br />
periods can drain your .<br />
battery.<br />
... 94
Air Inflator System<br />
(OPTION)<br />
Your vehicle may be equipped with an air<br />
inflator. With it, you can inflate things<br />
like air mattresses and basketballs, and<br />
you can also use it to bring your tires up<br />
to the proper pressure.<br />
The air inflator is located in the rear<br />
compartment on the driver’s side. The<br />
compartment door latch is located at the<br />
top of the cover. If you have the optional<br />
saddlebags, lift the flap on the saddlebag<br />
to expose the latch. To open the<br />
compartment, slide the latch down and<br />
remove the cover.<br />
’he air inflator kit is stored in a pouch in<br />
he glove box or, if you have the optional<br />
addlebags, in the driver side saddlebag.<br />
t includes a 20-foot (6 m) hose with an<br />
ir pressure gage, nozzle adapters and<br />
nstructions.<br />
To use your air inflator system, attach the<br />
appropriate nozzle adapter, if required, to<br />
the end of the hose that has the pressure<br />
gage. Then attach that end of the hose to,<br />
the object you wish to inflate. Remove the<br />
protective cap covering the outlet. Attach<br />
the other end of the hose to the outlet.<br />
Press the “ON” switch. The “ON” switch<br />
will work even with the ignition off.<br />
950..
Features & <strong>Controls</strong><br />
Air Inflator System<br />
(CONK)<br />
Your air inflator will automatically shut<br />
off after about 10 minutes. To reset, press<br />
the “ON” switch again.<br />
Don’t run your air inflator for longer than<br />
30 minutes at one time. If you do, you<br />
may damage the system. After 30<br />
minutes, wait at least 10 minutes before<br />
restarting the air inflator.<br />
To turn off the inflator, press “OFF” and<br />
detach the hose, first fi-om the inflated<br />
object, then from the outlet. Replace the<br />
protective cap. Place the inflator kit tools<br />
in the pouch, and store in the glove box.<br />
Inside Day/Night<br />
Rearview Mirror<br />
To reduce glare from lights behind you,<br />
pull the lever toward you to the night<br />
position.<br />
Convex Outside Mirror<br />
Your right side mirror is convex.<br />
A convex mirror’s surface is curved so<br />
you can see more from the driver’s seat.<br />
... 96
.' Manual Remote<br />
Control Mirrors<br />
Both the driver and passenger side outside<br />
mirrors can be adjusted with the control<br />
lever on each door so that you can just see<br />
the side of your vehicle when you are<br />
sitting in a comfortable driving position.<br />
Both outside mirrors can be folded<br />
forward or rearward. In the rearward<br />
position, they will fold flush with the<br />
vehicle. This feature is particularly useful<br />
in automatic car washes and when<br />
maneuvering your vehicle in narrow<br />
spaces.<br />
Power Remote Control<br />
The control on the driver's door controls<br />
both outside rearview mirrors. Turn the<br />
control to the left to select the driver side<br />
rearview mirror, or to the right to select<br />
the passenger side rearview mirror. Then<br />
use the control to adjust each mirror so<br />
that you can just see the side of your<br />
vehicle when you are sitting in a<br />
comfortable driving position.<br />
Both outside mirrors can be folded forward<br />
or rearward. In the rearward position, they<br />
will fold flush with the vehicle. This<br />
feature is particularly useful in automatic<br />
car washes and when maneuvering your<br />
vehicle in narrow spaces.<br />
97.. .
Features & <strong>Controls</strong><br />
Sun Visors<br />
To block out glare, you can swing down<br />
the visors. You can also remove them<br />
from the center mount and swing them to<br />
the side. If the visors swing too easily,<br />
tighten the screw on the rear of the visors.<br />
Glove BoxlStorage<br />
Compartment<br />
Your vehicle has a storage compartment<br />
on top of the dash and a glove box below<br />
it.<br />
To open the storage compartment, push in<br />
the latch release, then lift the lid.<br />
... 98
To remove the ashtray for cleaning, close<br />
the lid, then grasp the rear edge of the<br />
ashtray with your fingertips and pull up<br />
and out, in a rocking motion.<br />
To use the lighter, push it in all the way<br />
and let go. When it’s ready, it will pop<br />
back by itself.<br />
To open the glove box, pinch the latch<br />
release.<br />
The fuse panel is located inside the glove<br />
box door. See “Fuses & Circuit Breakers’<br />
in the Index.<br />
Cup Holders1<br />
AshtraylLighter<br />
Two cup holders, an ashtray and a lighter<br />
are located in the center instrument panel<br />
console.<br />
The foam cup holder liners can be<br />
removed for cleaning. Should the liners<br />
ever become damaged, see your dealer for<br />
replacement.<br />
To use the ashtray, lift the lid.<br />
NOTICE:<br />
Don’t hold a cigarette lighter in with<br />
your hand while it is heating. If you<br />
do, it won’t be able to back away<br />
from the heating element when it’s<br />
ready. That can make it overheat,<br />
damaging the lighter and the heating<br />
element.<br />
NOTICE:<br />
Don’t put papers and other things<br />
that burn into your ashtrays. If you<br />
do, cigarettes or other smoking<br />
materials could set them on fire,<br />
causing damage.<br />
9 9 . e .
Features & <strong>Controls</strong><br />
Locking Storage Bin<br />
At the base of the center instrument panel<br />
console is a storage bin. Use the door key<br />
to lock and unlock it. To open the bin,<br />
pinch the latch release. You may have a<br />
coinholder inside the storage bin.<br />
To remove the bin for cleaning, open it<br />
part way, then pull out and slightly up.<br />
To clean the inside of the bin, vacuum or<br />
wipe with a slightly damp cloth.<br />
To replace the bin, set the hinge pins (one<br />
on each side of the bin, at the bottom) into<br />
the hinge guides (one at each side of the<br />
console opening, at the base), then close<br />
the bin. If the hinge pins are placed<br />
properly in the guides, the bin will close<br />
easily.<br />
Rear Storage<br />
Compartment and<br />
Ashtray<br />
The rear ashtray is located in the rear<br />
storage compartment.<br />
To open the ashtray, press one side and<br />
turn it open.<br />
To remove the ashtray for cleaning, press<br />
the snuffer as you lift up the bottom of the<br />
ashtray.<br />
. . . 100
The side of the convenience net closest to<br />
the front of the vehicle is higher than the<br />
side closest the liftgate. Once you've<br />
loaded items into the net, stretch the<br />
higher side of the net up and over the top<br />
of the load to hold it firmly in place.<br />
I Convenience Net<br />
(OPTION)<br />
'he optional convenience net is designed<br />
3 help keep small loads, like grocery<br />
lags, from falling over during sharp turns<br />
r quick stops and starts.<br />
The convenience net has a maximum<br />
capacity of 100 pounds (45 kg). It is not<br />
designed to holder larger, heavier loads.<br />
Store such loads on the floor of your<br />
vehicle, as far forward as you can.<br />
When not in use, we recommend that you<br />
take down the convenience net to extend<br />
its life and retain its elasticity, and to keep<br />
the rear exit clear. Store the net in the<br />
pouch behind either front seat or in one of<br />
the optional saddlebags.<br />
The optional saddlebags provide extra<br />
storage space. They are located at the rear<br />
of your vehicle, attached to the covers on<br />
the two rear compartments.<br />
nstall the convenience net at the rear of<br />
our vehicle, just inside the liftgate.<br />
ittach the upper loops to the posts on<br />
ither side of the liftgate opening (the<br />
lbel on the net should be in the upper<br />
ght-hand corner). Attach the lower<br />
lops to the hooks on the floor.<br />
101 ...
Features & <strong>Controls</strong><br />
Luggage Carrier<br />
(OPTION)<br />
If you have the optional luggage carrier,<br />
you can load things on top of your<br />
vehicle. The luggage carrier has slats and<br />
side rails attached to the roof, sliding<br />
crossrails and places to use for tying<br />
things down. These let you load some<br />
things on top of your vehicle, so long as<br />
they are not wider or longer than the<br />
luggage carrier.<br />
NOTICE:<br />
Loading cargo that weighs more<br />
than 125 pounds (56 kg) on the<br />
luggage carrier may damage your<br />
vehicle. When you carry cargo on<br />
the luggage carrier of a proper size<br />
and weight, put it on the slats, as far<br />
forward as you can and distribute<br />
the load evenly along the slats. Then<br />
slide the crossrail up against the rear<br />
of the load, to help keep it from<br />
moving. You can then tie it down.<br />
. . 102
Don’t exceed the maximum vehicle<br />
capacity when loading your Pontiac. For<br />
more information on vehicle capacity and<br />
loading, see “Loading Your Vehicle’’ in<br />
the Index.<br />
To prevent damage or loss of cargo as<br />
you’re driving, check now and then to<br />
make sure the luggage carrier and cargo<br />
are still securely fastened.<br />
Your luggage carrier has release knobs set<br />
in the ends of each crossrail. Turn the<br />
release knobs counterclockwise, then<br />
slide the crossrails forward or back, as<br />
needed, to accommodate loads of varying<br />
size.<br />
After repositioning the crossrails, be sure<br />
to tighten the release knobs by turning<br />
them clockwise, locking the crossrails in<br />
place.<br />
Use the adjustable tiedown loops in the<br />
side rails to help secure large loads:<br />
Reposition the tiedowns by turning them<br />
counterclockwise, then slide them Along<br />
the side rail. Turn the tiedowns clodkwise<br />
to tighten them in place.<br />
Tiedowns may be removed and used in<br />
the adjustable tapped plates in the 1:<br />
crossrails. You may also use these tapped<br />
plates to secure bicycle or ski racks.<br />
. .:<br />
/’<br />
103...
Features & <strong>Controls</strong><br />
rn Electronic Level<br />
Control (OPTION)<br />
With this option, the rear of the vehicle<br />
automatically adjust to changes in load<br />
weight. (See “Loading Your Vehicle” in<br />
the Index.)<br />
You may hear the compressor operating<br />
when you load or unload your vehicle,<br />
and periodically as the system<br />
self-adjusts. This is normal.<br />
The compressor should operate for brief<br />
periods of time. If the sound continues for<br />
an extended period of time, your vehicle<br />
needs service. To keep your battery from<br />
being drained, you may want to remove<br />
the 20-amp ELC fuse in the fuse control<br />
panel until you can get your vehicle<br />
serviced (see “Fuses & Circuit Breakers”<br />
in the Index).<br />
rn Sunroof (OPTION)<br />
This feature may not be available on your<br />
vehicle.<br />
The sunroof has a glass panel that opens<br />
for ventilation.<br />
To Open the Sunroof:<br />
Pull down on the latch release handle and<br />
then push it forward and up until the glass<br />
panel locks into place.<br />
To Close the Sunroof:<br />
Pull the latch release handle forward and<br />
down, then push it back and up. Press<br />
firmly to lock the latch release handle intl<br />
the closed position.<br />
NOTICE:<br />
The optional sunroof panel is not<br />
designed to be removed. It is made<br />
to open and close but to remain<br />
attached to the vehicle.<br />
. . . 104
I’<br />
6<br />
I The Instrument Panel-Your Information System<br />
3ur instrument panel is designed to let<br />
)u know at a glance how your vehicle is<br />
nning. You’ll know how fast you’re<br />
jing, how much fuel you’re using, and<br />
any other things you’ll need to drive<br />
fely and economically.<br />
Refer to the accompanying diagrams of<br />
your instrument panel, center console and<br />
instrument cluster.<br />
1. Exterior Lights<br />
2. I/P Light Dimmer<br />
3. Front Fog Lamps<br />
4. Windshield Wiper/Washer <strong>Controls</strong><br />
5. Rear Wiper Control<br />
IOS...
Features & <strong>Controls</strong><br />
1.<br />
2.<br />
3.<br />
Vents<br />
Parking Brake Pedal<br />
Glove Compartment And Fuse<br />
Center<br />
. . 106
1. HVAC <strong>Controls</strong><br />
2. Rear Window Defog (Opt.)<br />
3. Radio<br />
4. Traction Control Switch (Opt.)<br />
5. Courtesy Lamp Override<br />
6. Cigar Lighter<br />
7. Rear HVAC <strong>Controls</strong> (Opt.)<br />
8. Open Storage Area<br />
9. Ashtray<br />
10. Locking Storage Bin<br />
11. Bucket, Removes For Cleaning<br />
12. Air Vent<br />
107.. .
Features & <strong>Controls</strong><br />
Engine Instrument Panel Cluster<br />
four cluster includes indicator warning<br />
ights and gages that are explained on the<br />
ollowing pages.<br />
1. Traction Control “ON”<br />
2. Service Air Bag<br />
3. Service Engine Soon<br />
4. Sliding Door Ajar Symbol<br />
5. Liftgate Ajar<br />
6. Park Brake/Fluid Level Indicator<br />
. e . I08<br />
7. Voltage Gage<br />
8. Oil Pressure Indicator 3.1 L<br />
(Shown)/Oil Pressure Gage<br />
3800 (Similar)<br />
9. Tachometer<br />
IO. Seat Belts<br />
11. Right Turn Signal<br />
12. Service Antilock Brakes<br />
13. Speedometer<br />
14. High Beam Indicator<br />
15. Service Traction Control<br />
16. Left Turn Signal<br />
17. Odometer<br />
18. Trip Odometer Reset<br />
19. Trip Odometer<br />
20. Fuel Gage<br />
21. Low Fuel Warning<br />
22. Coolant Temperature Gage
Speedometer and<br />
Odometer<br />
Your speedometer lets you see your speed<br />
in both miles per hour (mph) and<br />
kilometers per hour (km/h). Your<br />
odometer shows how far your vehicle has<br />
been driven, in either miles (used in the<br />
U.S.) or kilometers (used in Canada).<br />
Tamper Resistant<br />
Odometer<br />
Your Pontiac has a tamper resistant<br />
odometer. If you see silver lines between<br />
the numbers, you’ll know that someone<br />
has probably tried to turn it back, so the<br />
numbers may not be true.<br />
You may wonder what happens if your<br />
vehicle needs a new odometer installed. If<br />
the new one can be set to the mileage total<br />
of the old odometer, then it must be. But<br />
if it can’t, then it’s set at zero and a label<br />
must be put on the driver’s door to show<br />
the old mileage reading when the new<br />
odometer was installed.<br />
Tachometer<br />
The tachometer displays the engine speed<br />
in revolutions per minute (rpm).<br />
NOTICE:<br />
Do not operate the engine with the<br />
tachometer in the red area, or engine<br />
damage may occur.<br />
109. ..
Features & <strong>Controls</strong><br />
Trip Odometer<br />
The trip odometer can tell you how far<br />
your vehicle has been driven since you<br />
last set it to zero. To set it to zero, push<br />
the reset button located above the fuel<br />
gage.<br />
H Warning Lights, Gages<br />
and Indicators<br />
This section describes the warning lights<br />
and gages that may be on your vehicle.<br />
The pictures will help you locate them.<br />
Warning lights and gages can signal that<br />
something is wrong before it becomes<br />
serious enough to cause an expensive<br />
repair or replacement. Paying attention to<br />
your warning lights and gages could also<br />
save you or others from injury.<br />
Warning lights go on when there may be<br />
or is a problem with one of your vehicle’s<br />
functions. As you will see in the details<br />
on the next few pages, some warning<br />
lights come on briefly when you turn the<br />
ignition key just to let you know they’re<br />
working. If you are familiar with this<br />
section, you should not be alarmed when<br />
this happens.<br />
Sages can indicate when there may be or<br />
is a problem with one of your vehicle’s<br />
Functions. Often gages and warning lights<br />
work together to let you know when<br />
there’s a problem with your vehicle.<br />
When one of the warning lights comes on<br />
and stays on when you are driving, or<br />
when one of the gages shows there may<br />
be a problem, check the section that tells<br />
you what to do about it. Please follow the<br />
manual’s advice. Waiting to do repairs<br />
can be costly -- and even dangerous. So<br />
please get to know your warning lights<br />
and gages. They’re a big help.<br />
... 110
Fuel Gage<br />
Your fuel gage tells you about how much<br />
fuel you have left, when the ignition is on.<br />
When the gage first indicates “E”<br />
(Empty), you still have a little fuel left,<br />
but you should get more soon.<br />
Here are four things that some owners ask<br />
about. None of these show a problem with<br />
your fuel gage:<br />
At the service station, the gas pump<br />
shuts off before the gage reads “F”<br />
(Full).<br />
It takes a little more or less fuel to fill<br />
up than the gage indicated. For<br />
example, the gage may have indicated<br />
the tank was half full, but it actually<br />
took a little more or less than half the<br />
tank’s capacity to fill the tank.<br />
The gage moves a little when you turn<br />
a corner, brake or speed up.<br />
The gage doesn’t go back to “E” when<br />
you turn off the ignition.<br />
For your fuel tank capacity, see “Service<br />
Station Information’’ on the last page of<br />
this manual.<br />
Low Fuel Warning Light<br />
When there is between 3 gallons<br />
(1 1 liters) and 0.5 gallon (1.8 liters) of<br />
fuel left in the tank, the warning light next<br />
to the fuel symbol will go on.<br />
This light will also come on when you<br />
turn on the ignition, but the engine is not<br />
running, to show you it is working. If it<br />
doesn’t come on as you start your vehicle,<br />
have it fixed right away.<br />
111 ...
Features & <strong>Controls</strong><br />
'/ WJ<br />
i<br />
H -1<br />
4<br />
I20 'I/, 1<br />
Ys 0 0- cw<br />
Oil Pressure Indicator<br />
(3.I L V6 Engine)<br />
Your vehicle is equipped with an oil pressure<br />
indicator rather than an oil pressure gage.<br />
Your oil pressure indicator lets you know<br />
when you may have a problem with your<br />
engine oil pressure.<br />
When the engine is running, readings within<br />
the whte graduation band indicate the normal<br />
operating range. Readings in or below the red<br />
area indicate that the engine's oil level may be<br />
dangerously low, or there may be another<br />
problem causing low oil pressure.<br />
Driving your vetucle with low oil pressure<br />
can cause extensive engine damage. Have<br />
your vehicle serviced immediately.<br />
I NOTICE:<br />
Damage to your engine from<br />
neglected oil problems can be costly<br />
and is not covered by your warranty.<br />
Oil Pressure Gage<br />
(3800 V6 Engine)<br />
Your oil pressure gage shows the oil<br />
pressure in psi (pounds per square inch)<br />
when the engine is running. Canadian<br />
vehicles indicate pressure in kPa<br />
(kilopascals). Oil pressure may vary with<br />
engine speed, outside temperature and oil<br />
viscosity. In fact, while the engine is<br />
warming up, the oil pressure will be<br />
higher than at the normal operating<br />
temperature. Readings above the red<br />
warning zone indicate the normal<br />
operating range.<br />
... 112
I If<br />
--<br />
the gage reads in the red warning zone,<br />
your engine’s oil level may be<br />
dangerously low or there may be another<br />
problem causing low oil pressure.<br />
Driving your vehicle with low oil<br />
pressure can cause extensive engine<br />
damage. Have your vehicle serviced<br />
immediately.<br />
NOTICE:<br />
Damage to your engine from<br />
neglected oil problems can be costly<br />
and is not covered by your warranty.<br />
Voltmeter<br />
Your charging system gage will show the<br />
rate of charge when the engine is running.<br />
The reading will change as the rate of<br />
charge changes (with engine speed, etc.),<br />
but readings between the red warning<br />
zones indicate the normal operating<br />
range. Readings in either red zone<br />
indicate a possible problem with your<br />
charging system. Have your Pontiac<br />
serviced immediately.<br />
When the engine is not running but the<br />
ignition is on (in the Run position), the<br />
clisplay measures the voltage output of<br />
your battery.<br />
Engine Coolant<br />
Temperature Gage<br />
This gage shows the engine coolant<br />
temperature. If the gage pointer moves<br />
into the red area, your engine is too hot! It<br />
means that your engine coolant has.<br />
overheated. If you have been operating<br />
your vehicle under normal driving<br />
conditions, you should pull off the road,<br />
stop your vehicle and turn off the engine<br />
as soon as possible.<br />
HOT COOLANT CAN BURN YOU<br />
BADLY!<br />
In “Problems on the Road”, this manual<br />
shows what to do. See “Engine<br />
Overheating” in the Index.<br />
113 ...
Features & <strong>Controls</strong><br />
I<br />
carefully. You may notice that the pedal is<br />
harder to push. Or, the pedal may go<br />
closer to the floor. It may take longer to<br />
stop. If the light is still on, or if the<br />
anti-lock brake system warning light is<br />
flashing, have the vehicle towed for<br />
service. (See “Anti-Lock Brake System<br />
Warning Light” and “Towing Your<br />
Pontiac” in the Index.)<br />
.<br />
Brake System Warning<br />
Light<br />
Your Pontiac’s hydraulic brake system is<br />
divided into two parts. If one part isn’t<br />
working, the other part can still work and<br />
stop you. For good braking, though, you<br />
need both parts working well.<br />
If the warning light comes on, there coulc<br />
be a brake problem. Have your brake<br />
system inspected right away.<br />
This light should come on as you start thc<br />
vehicle. If it doesn’t come on then, have i<br />
fixed so it will be ready to warn you if<br />
there’s a problem.<br />
If the light comes on while you are<br />
driving, pull off the road and stop<br />
. 114<br />
The brake system warning light will also<br />
come on when you set your parking<br />
brake, and -it will stay on if your parking<br />
brake doesn’t release fully. If it stays on<br />
after your parking brake is fully released,<br />
it means you have a brake problem.<br />
Anti-Lock Brake System<br />
Warning Light<br />
With anti-lock, this light will go on when<br />
you start your engine and it will stay on<br />
for three seconds. That’s normal. If the<br />
light doesn’t come on, have it fixed so it<br />
will be ready to warn you if there is a<br />
problem.<br />
If the light flashes when you’re driving,<br />
you don’t have anti-lock brakes and<br />
there’s a problem with your regular brakes.<br />
Pull off the road and stop carefully. You<br />
may notice that the pedal is harder to push.<br />
Or, the pedal may go closer to the floor. It<br />
may take longer to stop. Have the vehicle<br />
towed for service. (See “Towing Your<br />
Pontiac” in the Index.)
~~~ ~~~~ ~~ ~~~~~~~ ~<br />
I A CAUTION:<br />
Your regular brake system may not<br />
be working properly if the anti-lock<br />
brake system warning light is<br />
flashing. Driving with the anti-lock<br />
brake system warning light fashing<br />
can lead to an accident. After<br />
you’ve pulled off the road and<br />
stopped carefully, have the vehicle<br />
towed for service.<br />
If the anti-lock brake system warning<br />
light stays on longer than normal after<br />
you’ve started your engine, turn the<br />
ignition off. Or, if the light comes on and<br />
stays on when you’re driving, stop as<br />
soon as possible and turn the ignition off.<br />
Then start the engine again to reset the<br />
system. If the light still stays on, or conles<br />
on again while you’re driving, your<br />
Pontiac needs service. If the light is on<br />
but not flashing and the regular brake<br />
system warning light isn’t on. you still<br />
have brakes, but you don’t have anti-lock<br />
brakes.<br />
LOW<br />
TRACTION<br />
Low Traction Light<br />
(OPTION: 3800 V6 ENGINE)<br />
If your vehicle has the traction control<br />
system, there will be a ”LOW<br />
TRACTION” light on the instrument<br />
panel. It is located above the “AIR RAG”<br />
light. When your anti-lock system is<br />
adjusting brake pressure to help avoid a<br />
braking skid. or when your traction<br />
control system is limiling wheel spin, the<br />
“LOW TRACTION” light will come on.<br />
Slippery road conditions may exist if this<br />
light comes on. so adjust your driving<br />
accordingly. The light will come on and<br />
stay on for four seconds when your<br />
anti-lock system adjusts brake pressure<br />
for less than four seconds or when your<br />
I<br />
traction control system limits wheel spin<br />
for less than four seconds. Otherwise, the<br />
light will go out as soon as the anti-lock<br />
system stops ad-justing brake pressure or<br />
the traction control system stops limiting<br />
wheel spin. The “LOW TRACTION”<br />
light also comes on briefly, as a bulb<br />
check, when the engine is started.<br />
I<br />
NOTICE:<br />
Spinning your wheels when the<br />
“TCS” warning light is on can<br />
destroy parts of your vehicle as well<br />
as the tires. If you spin you wheels<br />
too fast while shifting your transaxle<br />
back and forth. you can destroy<br />
your transaxle. When you‘re stuck.<br />
spin the wheels as little as possible.<br />
I<br />
115 ...
Features & <strong>Controls</strong><br />
If the “TCS” warning light comes on and<br />
stays on for . . an extended period of time,<br />
your vehicle needs service.<br />
Traction Control System<br />
Warning Light<br />
(OPTION: 3800 V6 ENGINE)<br />
The “TCS” (Traction Control System)<br />
warning light means that the system is not<br />
working.<br />
The “TCS” warning light may come on if<br />
your brakes overheat. This means that<br />
your traction control system has<br />
temporarily shut down to allow the brakes<br />
to cool. (The control system will not shut<br />
down while it is actively controlling<br />
wheel spin.) When the brakes have cooled<br />
down, the “TCS” warning light will go<br />
off.<br />
Walfunction Indicator<br />
Lamp (Service Engine<br />
Soon Light)<br />
1 computer monitors operation of your<br />
uel, ignition and emission control<br />
,ystems. This light should come on whe :n<br />
he ignition is on, but the engine is not<br />
,unning, as a check to show you it is<br />
vorking. If it does not come on at all,<br />
lave itkxed right away. If it stays on, or<br />
t comes on while you are driving, the<br />
:omputer is indicating that you have a<br />
Jroblem. You should take your vehicle in<br />
for service soon.<br />
. 116
NOTICE:<br />
If you keep driving your vehicle<br />
with this light on, after a while^ the<br />
emission controls won’t work as<br />
well, your fuel economy won’t be as<br />
good and your engine may not run<br />
as smoothly. This could lead to<br />
costly repairs not covered by your<br />
warranty.<br />
Liftgate Ajar Warning<br />
Light<br />
The liftgate ajar symbol on your<br />
instrument panel will come on if your<br />
liftgate is not completely closed.<br />
117...
Features & <strong>Controls</strong><br />
Sliding Door Ajar Warning<br />
Light<br />
With the optional power sliding door, the<br />
sliding door ajar symbol on your<br />
instrument panel will come on if your<br />
sliding door is not completely closed.<br />
If you shift the transaxle out of “P” (Park<br />
while the sliding door is open or in the<br />
process of closing, and the power sliding<br />
door enable switch is in the “ON”<br />
position, the sliding door ajar symbol<br />
light will flash and a buzzer will sound.<br />
This is a warning that the sliding door is<br />
not completely closed.<br />
tf you manually slam the power sliding<br />
door shut when the ignition is on, the<br />
sliding door ajar symbol warning light<br />
may come on and stay on. To turn the<br />
light off, reopen and close the door using<br />
either power door switch, or manually<br />
open and close the door again more<br />
slowly.<br />
... 118
Part 3<br />
Comfort <strong>Controls</strong> & Audio Systems<br />
C<br />
In this part you’ll find out how to<br />
operate the comfort control systems<br />
and audio systems offered with your<br />
Pontiac . Be sure to read about the<br />
particular system supplied with your<br />
vehicle .<br />
Climate Control System Quick Reference Guide ........<br />
Heater and Ventilation System ............................<br />
Climate Control System ...................................<br />
Rear Climate Control System ....................................<br />
... 120<br />
... 121<br />
.... 123<br />
.... 125<br />
Defogging and Defrosting .. ......................... ..... 127<br />
Rear Window Defogger ......................... ........... 128<br />
Setting the Clock .............................. ............... 130<br />
AM/FM Stereo Radio ............................................... 131<br />
AM/FM Stereo with Cassette Player .................................... 133<br />
AM/FM Stereo with Cassette Player and Graphic Equalizer ................. 136<br />
AM/FM Stereo with Compact Disc Player and Graphic Equalizer ............ 138<br />
CD Player Anti-Theft Feature ........................................ 141<br />
Steering Wheel Touch <strong>Controls</strong> ....................................... 143<br />
Understanding Radio Reception .......................... ........ 144<br />
Care of Your Cassette Tape Player ..................................... 145<br />
Care of Your<br />
Integrated Roof Antenna<br />
Compact Discs ............... ................. 145<br />
.......... ....... ........... 146<br />
119 ...
Comfort <strong>Controls</strong> & Audio Systems<br />
Climate Control System<br />
Quick Reference Guide<br />
Your Climate Control System<br />
has been designed to provide an<br />
expanded range of comfort options.<br />
Use ,this diagram as a quick<br />
reference guide for operating the<br />
controls. For a complete explanation<br />
of this system, see “Climate Control<br />
System” later in this section.<br />
FRONT FAN CONTROL -<br />
LEVER<br />
A/C (Air Conditioning) -<br />
Press to turn the A/C on<br />
and off.<br />
OFF -<br />
Press to turn the system<br />
Off.<br />
FRONT TEMPERATURE -<br />
CONTROL LEVER<br />
R. DEF (Rear Defog)<br />
Press to defog the rear<br />
window.<br />
DIRECTIONAL<br />
CONTROLS -<br />
- A lighted button lets<br />
you know that a<br />
selected control is on.<br />
SUGGESTED OPERATlNG MODES:<br />
REAR FAN<br />
FOR HEAT, USE<br />
7<br />
FOR VENT (OUTSIDE AIR), USE<br />
U<br />
OFF REAR LO MED HI<br />
u<br />
FOR MAX COOLING, USE<br />
FOR OTHER AlC OPTIONS, USE<br />
These positions allow the<br />
driver to adjust the rear<br />
This position transfers control of the rear fan to<br />
the second row passenger (for vehicles with the<br />
Rear Climate Control option only).<br />
. . . I20
~ vehicle<br />
~ described<br />
I<br />
Heater and Ventilation<br />
System<br />
Your vehicle’s heater will work best if<br />
you keep your windows closed. Your<br />
also has flow-through ventilation,<br />
later in this section, to bring<br />
outside air into your vehicle.<br />
If you have the optional engine coolant<br />
heater and use it during cold weather, 0°F<br />
(- 18 “C) or lower, your heating system<br />
will more quickly provide heat because<br />
the engine coolant is already warmed. See<br />
“Engine Coolant Heater” in the Index.<br />
OFF: Press to turn the system off. Press<br />
any function to turn the system on.<br />
3f : Slide the lever to the right to<br />
increase fan speed, to the left to decrease<br />
fan speed.<br />
Temperature Control Lever: Slide the<br />
lever to the right for warmer, heated air;<br />
slide it to the left for cooled air.<br />
UPPER: This setting brings in outside air<br />
through the instrument panel outlets. You<br />
may warm the air using the temperature<br />
control lever.<br />
BI-LEV (Bi-Level): This setting is<br />
designed for use on sunny days when the<br />
air is only moderately warm or cool. On<br />
days like these, the sun may adequately<br />
warm your upper body, but your lower<br />
body may not be warm enough.<br />
The “BI-LEV” setting directs outside air<br />
into your vehicle in two ways. Cooler air<br />
is directed toward your upper body<br />
through the front instrument panel outlets,<br />
while warmed air is directed through the<br />
heater ducts at your feet. At times this<br />
temperature difference may be more<br />
apparent than others. For the best results,<br />
slide the temperature control lever to the<br />
middle position, and then adjust it for<br />
comfort.<br />
LOWER: This setting brings in most<br />
heated air through the heater ducts, and<br />
some through the defroster vents.<br />
MIX: Because of your Trans Sport’s<br />
larger windshield area, this mode is<br />
particularly useful during cold or<br />
inclement weather. Press to direct warmed<br />
air to the windshield and through the<br />
heater ducts.<br />
DEF (Defrost): Press to direct most<br />
warmed air to the windshield and side<br />
window vents.<br />
e<br />
I21 ...
Comfort <strong>Controls</strong> & Audio Systems<br />
To maintain a comfortable temperature in<br />
he rear area without making the front<br />
Iassengers uncomfortable, adjust the front<br />
an speed first, then adjust the<br />
emperature setting.<br />
To turn off the rear fan, slide the control<br />
o “OFF”.<br />
Heater and Ventilation<br />
System (CONK)<br />
If your vehicle is equipped with seats in<br />
the third row, you will have a rear air<br />
outlet and a rear fan. To maximize air<br />
flow to the rear of your vehicle, place the<br />
left second row bucket seat in the forward<br />
position (see “Adjusting Rear Seats” in<br />
the Index). This uncovers the rear air<br />
outlet.<br />
Also keep the area around the base of the<br />
center instrument panel console and the<br />
area between and under the front seats<br />
free of objects that could obstruct air flow<br />
to the rear.<br />
Rear Fan<br />
The control for the rear fan is located<br />
below the audio system.<br />
First, select “LOWER’, “BI-LEV” or<br />
“MIX” to direct air flow to the rear air<br />
outlet and to the rear side windows. Use<br />
the temperature control lever to adjust th<br />
temperature setting. Then, select the forc<br />
of air you want, from “LO” to “HI”, by<br />
sliding the rear fan control to the desired<br />
setting.<br />
. . . ILL
(OPTION)<br />
Your vehicle’s heater and air conditioner<br />
work best if you keep your windows<br />
closed. Your vehicle also has<br />
flow-through ventilation, described later<br />
in this section, to bring outside air into<br />
your vehicle.<br />
If you have the optional engine coolant<br />
heater and use it during cold weather, 0°F<br />
(- 18 O C> or lower, your heating system<br />
will more quickly provide heat because<br />
the engine coolant is already warmed. See<br />
“Engine Coolant Heater” in the Index.<br />
OFF: Press to turn the system off. Press<br />
any climate control setting to turn the<br />
system on.<br />
8 : Slide the lever to the right to<br />
increase fan speed, to the left to decrease<br />
fan speed.<br />
Temperature Control Lever: Slide the<br />
lever to the right for warmer, heated air;<br />
slide it to the left for cooled air.<br />
Air Conditioner<br />
When the temperature outside is above<br />
freezing, the air conditioner compressor<br />
will automatically condition the air when<br />
you press “RECIRC” (the “A/C” indicator<br />
light will glow), “MIX” or “DEF”(the<br />
“A/,,’ indicator light will not glow).<br />
Press “A/C” (the “A/C” indicator light<br />
will glow) to condition the air when you<br />
press “UPPER’, “BI-LEV” or<br />
“LOWER”. To turn off the air conditioner<br />
compressor in these settings, press “A/C7’<br />
again (the indicator light will go off‘).<br />
Each time you turn on the ignition, the air<br />
conditioner will default to the setting you<br />
had selected before last turning off the<br />
ignition.<br />
When the air conditioner compressor is<br />
on, you may sometimes notice slight<br />
changes in your vehicle’s engine<br />
performance and power. This is normal,<br />
because the system is designed to help<br />
fuel economy while it maintains the<br />
desired cooling level.<br />
The air conditioner removes moisture<br />
from the air, so you may sometimes<br />
notice water dripping from under your<br />
vehicle when it is idling or after it has<br />
been turned off. This is normal.<br />
On very hot days, your vehicle will .cool<br />
down more quickly and economically if<br />
you open the windows long enough to let<br />
hot inside air escape. For all settings,<br />
adjust the temperature control lever and<br />
fan speed as desired.<br />
123 ...
Comfort <strong>Controls</strong> & Audio Systems<br />
Directional <strong>Controls</strong><br />
RECIRC (Recirculate): Press to get<br />
maximum cooling or quick cool-down on<br />
very hot days. This setting recirculates<br />
much of the air inside your vehicle. It<br />
should not be used for long periods of<br />
time because the air may become too cold<br />
and dry.<br />
Slide the temperature control lever down<br />
to the coolest setting and adjust the fan<br />
speed as desired.<br />
UPPER: For normal cooling on hot days,<br />
press “A/C” along with “UPPER”. This<br />
setting cools outside air and directs it<br />
through the instrument panel outlets.<br />
Adjust the temperature of the air with the<br />
temperature control lever.<br />
BI-LEV (Bi-Level): This setting is<br />
designed for use on sunny days when the<br />
air is only moderately warm or cool. On<br />
days like these, the sun may adequately<br />
warm your upper body, but your lower<br />
body may not be warm enough.<br />
The “BI-LEV” setting directs outside air<br />
.nto your vehicle in two ways. Cooler air<br />
1s directed toward your upper body<br />
:hrough the front instrument panel outlets,<br />
while warmed air is directed through the<br />
heater ducts at your feet. At times this<br />
temperature difference may be more<br />
apparent than others. For best results,<br />
slide the temperature control lever to the<br />
middle position, and then adjust it for<br />
comfort.<br />
LOWER: This setting brings in most<br />
heated air through the heater ducts, and<br />
some through the defroster vents.<br />
MIX: Because of your Trans Sport’s<br />
larger windshield area, this mode is<br />
particularly useful during cold or<br />
inclement weather. Press to direct warmed<br />
lir to the windshield and through the<br />
heater ducts.<br />
DEF (Defrost): Press to direct most<br />
warmed air to the windshield and side<br />
window vents.<br />
If your vehicle is equipped with seats in<br />
the third row, you will have a rear air<br />
outlet and a rear fan. To maximize air<br />
flow to the rear of your vehicle, place the<br />
left second row bucket seat in the forward<br />
position (see “Adjusting Rear Seats” in<br />
the Index). This uncovers the rear air<br />
outlet.<br />
Also keep the area around the base of the<br />
center instrument panel console and the<br />
area between and under the front seats<br />
free of objects that could obstruct air flow<br />
to the rear.<br />
. . 124
Comfort <strong>Controls</strong> & Audio Systems<br />
Rear Climate Control<br />
System (OPTION) (CONT.)<br />
will be directed to the rear of the vehicle<br />
:hrough the overhead and third-row air<br />
-0nditioning outlets. If you select “A/C”<br />
in the “LOWER” mode, cooled air will be<br />
Sirected through the rear floor vent unless<br />
the temperature control lever is set<br />
approximately 30% from the full cold<br />
setting. Heated air will result with the<br />
temperature control lever setting above<br />
30% from the full cold setting. However,<br />
temperature adjustment of the heated air<br />
is not possible. Cooled air will return<br />
when the temperature control lever setting<br />
is returned to approximately 25% from<br />
the full cold setting. (See “Rear Air<br />
Vents” later in this section).<br />
If you do not select “A/,” in the<br />
“UPPER” or “BI-LEV” modes, air<br />
directed to the rear of the vehicle will be<br />
cabin temperature.<br />
Select “LOWER’, “MIX” or “DEF’ when<br />
outside temperatures are cool. In these<br />
modes, heated air will be directed to the<br />
rear of the vehicle through the rear side<br />
window vents and the rear floor heater<br />
vent.<br />
... 126<br />
Rear Air Vents<br />
To maximize air flow through the rear<br />
heater outlet, place the left second row<br />
bucket seat or the bench seat in the<br />
forward position (see “Adjusting Rear<br />
Seats” in the Index).<br />
The vent forward of the rear heater outlet<br />
is the cold air return vent. Be sure to keel<br />
it free of obstructions.<br />
Also keep the area around the base of the<br />
center instrument panel console and the<br />
area between and under the front seats<br />
free of objects that could obstruct air flo~<br />
to the rear.<br />
Rear Fan-Master Control<br />
The master control for the rear fan is<br />
located below the audio system.<br />
To maintain a comfortable temperature in<br />
the rear area, select the force of air you<br />
want, from “LO” to “HI”, by sliding the<br />
control to the desired setting.<br />
To transfer control of the rear fan to the<br />
rear control switch, slide the master<br />
control to “REAR”. The rear control<br />
switch will not operate when the master<br />
control is in any other position.<br />
To turn off the rear fan, slide the master<br />
control to “OFF’.
Rear Fan-Rear Control<br />
This feature allows passengers riding in<br />
the rear seats to control the flow of air to<br />
the rear area of the vehicle.<br />
The rear control switch is located on the<br />
armrest next to the second row seat, left<br />
position. The rear fan master control on<br />
the instrument panel must be in the<br />
“REAR” position for the rear control<br />
switch to operate.<br />
Select the force of air you want, from<br />
“LO” to “HI”, by turning the switch to the<br />
desired setting. To turn the rear fan off,<br />
turn the switch to “OFF”. The rear fan can<br />
also be turned off at the master control.<br />
Defogging and Defrosting<br />
To rapidly defrost the windshield, slide<br />
the temperature control lever all the way<br />
to “WARM” and press “DEF”.<br />
Adjust the fan to the highest speed.<br />
To keep the windshield clear and bring in<br />
heated air through the heater ducts, press<br />
“~1x97.<br />
When the temperature outside is above<br />
freezing, the air conditioner compressor<br />
will run in these settings to help remove<br />
moisture from the air.<br />
Your vehicle is equipped with side<br />
window defogger vents located on the top.<br />
of the instrument panel. For additional<br />
side window defogging, press the<br />
“BI-LEV” button and adjust the fan to the<br />
highest speed. Aim the side vents on the<br />
instrument panel toward the side<br />
windows. For increased air flow to the<br />
side vents, close the center vents.<br />
127.. .
Comfort <strong>Controls</strong> & Audio Systems<br />
Do not attach a temporary vehicle licenst<br />
icross the defogger grid on the rear<br />
window.<br />
Rear Window Defogger<br />
(OPTION)<br />
Press “R. DEF” (Rear Defog) to warm the<br />
defogger grid on the rear window. The<br />
indicator light will glow while the rear<br />
window defogger is operating. The rear<br />
window defogger will turn off<br />
automatically after about 10 minutes of<br />
use. If you turn it on again, the defogger<br />
will operate for about five minutes only.<br />
You can also turn the defogger off by<br />
turning off the ignition or pressing the<br />
switch again.<br />
NOTICE:<br />
Don’t use a razor blade or<br />
something else sharp on the inside<br />
of the rear window. If you do, you<br />
could cut or damage the warming<br />
grid, and the repairs wouldn’t be<br />
covered by your warranty.<br />
=/ow=Through Ventilation<br />
system<br />
lour vehicle’s flow-through ventilation<br />
ystem supplies outside air into the<br />
rehicle when it is moving. Outside air<br />
vi11 also enter the vehicle when the heater<br />
)r the air conditioning fan is running.<br />
... 128
Ventilation Tips:<br />
Keep the hood and front air inlet free<br />
of ice, snow, or any other obstruction<br />
(such as leaves). The heater and<br />
ddffoster will work far better, reducing<br />
the chance of fogging the inside of<br />
your windows.<br />
Hearing damage from loud noise is<br />
almost undetectable until it is too late.<br />
Your hearing 'can adapt to higher volumes<br />
of sound. Sound that seems normal can be<br />
loud and harmful to your hearing. Take<br />
precautions by adjusting the volume<br />
control on your radio to a safe sound level<br />
before your hearing adapts to it.<br />
To help avoid hearing loss or damage:<br />
Adjust the volume control to the<br />
lowest setting.<br />
0 Increase volume slowly until you hear<br />
comfortably and clearly.<br />
129...
Comfort <strong>Controls</strong> & Audio Systems<br />
w Audio Systems (CONT)<br />
NOTICE:<br />
Before you add any sound<br />
equipment to your vehicle -- like a<br />
tape player, CB radio, mobile<br />
telephone or two-way radio -- be<br />
sure’you can add what you want. If<br />
you can, it’s very important to do it<br />
properly. Added sound equipment<br />
may interfere with the operation of<br />
your vehicle’s engine, Delco@ radio<br />
or other systems, and even damage<br />
them. And, your vehicle’s systems<br />
may interfere with the operation of<br />
sound equipment that has been<br />
added improperly.<br />
So, before adding sound equipment,<br />
check with your dealer and be sure<br />
to check Federal rules covering<br />
mobile radio and telephone units.<br />
Setting the CIock<br />
For radios with v “SEEK’A :<br />
1. With the radio on or off, press “SET”.<br />
The “SET” indicator will appear on<br />
the digital display for five seconds.<br />
You must begin to set the clock to the<br />
correct hour and minute during those<br />
five seconds.<br />
2. Press and hold v “SEEK” until the<br />
correct hour appears on the display.<br />
3. Press and hold “SEEK”A until the<br />
correct minute appears on the display.<br />
For radios with 4 “SEEK’ b:<br />
1 . With the radio on or off, press “SET”.<br />
The “SET” indicator will appear on<br />
the digital display for five seconds.<br />
You must begin to set the clock to the<br />
correct hour and minute during those<br />
five seconds.<br />
2. Press and hold 4 “SEEK” until the<br />
correct hour appears on the display.<br />
3. Press and hold “SEEK’ b until the<br />
correct minute appears on the display.<br />
. . . 130
AM/FM Stereo Radio<br />
The digital display indicates information<br />
on time or radio station frequency, the<br />
AM or FM radio band, whether the<br />
station is in stereo, and other radio<br />
functions.<br />
Upper Knob (PWRoVOL): This knob<br />
does four things:<br />
0 Turn it to turn the system on and off<br />
(your ignition must be on).<br />
Turn it to control the volume.<br />
When the radio is on, press it to recall<br />
the station frequency to the digital<br />
display screen.<br />
0 When the ignition is off, press it to<br />
display the clock.<br />
BAL (Balance): The control ring behind<br />
the upper knob adjusts the lefthight<br />
speaker balance.<br />
Lower Knob (TUNE): This knob does<br />
two things:<br />
0 Turn it to tune in radio stations.<br />
0 Press it to change between the AM<br />
and FM bands (the digital screen will<br />
momentarily display AM or FM, and<br />
indicate if the radio is in stereo).<br />
FADE: The control ring behind the lower<br />
knob adjusts the front/rear speaker<br />
balance.<br />
!.'<br />
....<br />
131 ...
Comfort <strong>Controls</strong> & Audio Systems<br />
AM/FM Stereo Radio<br />
(C0;NT.)<br />
SEEK A : Press to seek and stop on the<br />
next station higher or lower on the radio<br />
band.<br />
You can also use the “SEEK” buttons to<br />
scan radio stations up or down the AM or<br />
FM bands.<br />
To scan stations up the band, press and<br />
hold “SEEK”A, then press “SEEK”,<br />
then release both buttons. The radio will<br />
go to the next station and pause there for<br />
a few seconds. It will continue to scan<br />
until you press either “SEEK” button.<br />
To scan stations down the band, press and<br />
hold “SEEK”, then press “SEEK’A ,<br />
then release both buttons. The radio will<br />
go to the next station and pause there for<br />
a few seconds. It will continue to scan<br />
until you press either “SEEK” button.<br />
rREB (Treble): Slide this lever up to<br />
ncrease treble, or down to decrease it. If<br />
I station is weak or noisy, reduce the<br />
reble.<br />
BASS: Slide this lever up to increase<br />
,ass, or down to decrease it.<br />
I‘o Preset Radio Stations:<br />
I. Tune in the desired station.<br />
2. Press “SET”. The word “SET” will<br />
appear on the digital screen for five<br />
seconds.<br />
3. While “SET” is displayed, press one<br />
of the four pushbuttons.<br />
4. Repeat steps 1-3 for each of four AM<br />
and four FM stations.<br />
Jp to three additional stations on each<br />
)and may be preset by “pairing”<br />
Jushbuttons:<br />
1. Tune in the desired station.<br />
2.<br />
3.<br />
Press “SET”, and within five seconds<br />
press any two adjacent pushbuttons at<br />
the same time.<br />
The station can be tuned in when the<br />
same two pushbuttons are pressed at<br />
the same time.<br />
. . 132
BAL (Balance): The control ring behind<br />
the upper knob adjusts the left/right<br />
speaker balance.<br />
Lower Knob (TUNE): This knob does<br />
two things:<br />
Turn it to tune in radio stations.<br />
0 Press it to change between the AM<br />
and FM bands (the digital screen will<br />
momentarily display AM or FM, and<br />
indicate if the radio is in stereo).<br />
FADE: The control ring behind the lower<br />
knob adjusts the front/rear speaker<br />
balance.<br />
AMIFM Stereo with<br />
Cassette Player<br />
The digital display indicates information<br />
on time or radio station frequency, the<br />
AM or FM radio band, whether the<br />
station is in stereo, and other radio<br />
functions.<br />
Upper Knob (VOL): This knob does<br />
four things:<br />
Turn it to turn the system on and off<br />
(your ignition must be on).<br />
Turn it to control the volume.<br />
When the radio is on, press it to recall<br />
the station frequency to the digital<br />
display screen.<br />
0 When a tape is playing, press it to hear<br />
the other side of the tape.<br />
133...
Comfort <strong>Controls</strong> & Audio Systems<br />
AM/FM Stereo with<br />
Cassette Player (CONK)<br />
TREBLE: Slide this lever up to increase<br />
treble, or down to decrease it. If a station<br />
is weak or noisy, reduce the treble.<br />
BASS: Slide this lever up to increase<br />
bass, or down to decrease it.<br />
v SEEK A : Press to seek and stop on the<br />
next station higher or lower on the radio<br />
band.<br />
You can also use the “SEEK’ buttons to<br />
scan radio stations up or down the AM or<br />
FM bands.<br />
To scan stations up the band, press and<br />
1old “SEEK’A, then press “SEEK”,<br />
:hen release both buttons. The radio will<br />
go to the next station and pause there for<br />
few seconds. It will continue to scan<br />
until you press either “SEEK” button.<br />
To scan stations down the band, press and<br />
hold v “SEEK”, then press “SEEK’A ,<br />
then release both buttons. The radio will<br />
go to the next station and pause there for<br />
a few seconds. It will continue to scan<br />
until you press either “SEEK” button.<br />
I’o Preset Radio Stations:<br />
Up to three additional stations on each<br />
band may be preset by “pairing”<br />
pushbuttons:<br />
1. Tune in the desired station.<br />
2. Press “SET”, and within five seconds<br />
press any two adjacent pushbuttons at<br />
the same time.<br />
3. The station can be tuned in when the<br />
same two pushbuttons. are pressed at<br />
the same time.<br />
.* 134
To Play a Cassette Tape:<br />
With the power switch on, insert.a tape<br />
into the cassette door. Do not use tapes<br />
that are longer than 45 minutes on each<br />
side.<br />
When the right indicator arrow is lit,<br />
selections listed on the bottom side of the<br />
cassette are playing. When the left arrow<br />
is lit, selections listed on the top side of<br />
the cassette are playing. To change sides<br />
of the tape while the cassette is playing,<br />
press the upper knob. When the end of a<br />
tape is reached, the other side will then<br />
Play-<br />
Fast Forward: Press the button with the<br />
arrow pointing in the same direction that<br />
the tape is playing. To stop fast forward,<br />
lightly press the “STOP-EJECT” button.<br />
Reverse: Press the button with the arrow<br />
pointing in the opposite direction that the<br />
tape is playing. To stop reverse, lightly<br />
press the “STOP-EJECT” button.<br />
STOP-EJECT To stop playing a tape,<br />
fully press this button (the cassette will be<br />
partially ejected, and the radio will begin<br />
playing).<br />
135...
Comfort <strong>Controls</strong> & Audio Systems<br />
AIWIFM Stereo with<br />
Cassette Player and<br />
Graphic Equalizer<br />
The digital display indicates information<br />
on time or radio station frequency, the<br />
AM or FM radio band, whether the<br />
station is in stereo, and other radio<br />
functions.<br />
PWR (Power): Press to turn the unit on<br />
and off when the ignition is on.<br />
Upper Knob (VOL): This knob does twc<br />
things:<br />
0 Turn it slightly to the left or right to<br />
control the volume.<br />
0 Press it to mute the radio or tape<br />
player. Press again to listen.<br />
BAL (Balance): The control ring behind<br />
the upper knob adjusts the left/right<br />
speaker balance.<br />
Lower Knob (TUNE): This knob does<br />
two things:<br />
0 Turn it slightly to the left or right to<br />
tune in radio stations. If you hold it to<br />
the left or right, it will tune rapidly.<br />
You can also turn it one stop at a time<br />
to fine-tune a specific frequency.<br />
0 Press to change between the AM,<br />
FMl or FM2 bands. (FMl allows you<br />
to preset five stations, FM2 allows<br />
you to preset another five stations.)<br />
The band you select will momentarily<br />
appear on the digital display, and<br />
indicate if the radio is in stereo.<br />
Your radio has an AMAX-certified<br />
receiver. It can produce quality AM stereo<br />
sound and receive C-Quam’ stereo<br />
broadcasts. AMAX reduces noise without<br />
reducing the high frequencies you need<br />
for the best sound. You don’t have to do<br />
anything to your Delco/GM radio because<br />
AMAX is automatic.<br />
FADE: The control ring behind the lower<br />
knob adjusts the front/rear speaker<br />
balance.<br />
4 SEEK b: Press “SEEK” b to seek and<br />
stop on the next station higher on the<br />
radio band. Press 4 “SEEK” to seek and
stop on the next station lower on the<br />
band.<br />
RCL (Recall): Press to alternate the<br />
display between the time and the selected<br />
station and radio band.<br />
EQUALIZER: Boost the bass,<br />
emphasize a voice in a song, brighten the<br />
treble -your equalizer gives you freedom<br />
to adjust five separate frequencies of<br />
sound to your individual taste. Move a<br />
lever. up to emphasize a frequency, move<br />
it down to de-emphasize. It’s best to<br />
begin with the levers in the middle<br />
position, then adjust each lever as you<br />
like.<br />
The five pushbuttons under the cassette<br />
entry door can be used to preset up to 15<br />
radio stations (five AM, five FM1 and<br />
five FM2). The buttons have other uses<br />
when you are playing a tape (see “TO Play<br />
a Cassette Tape” later in this section).<br />
To. Preset Radio Stations:<br />
1 .. Tune the digital display to the station<br />
you want.<br />
2. Press’ “SET”. The “SET” indicator<br />
will appear on the digital screen for<br />
five seconds.<br />
3. While the “SET” indicator is<br />
displayed, press one of the five<br />
pushbuttons.<br />
4. Repeat steps 1-3 for each of five AM<br />
and five FM stations.<br />
5. Press the lower knob until FM2<br />
appears on the digital display. You can<br />
then follow steps 1-3 for five more<br />
FM stations.<br />
’, ,, I. r l i .<br />
,.<br />
I,<br />
%.’<br />
&.b<br />
.-A.<br />
I..:
Comfort <strong>Controls</strong> & Audio Systems<br />
AMIFM Stereo with<br />
Cassette Player and<br />
Graphic Equalizer (CONT.)<br />
To Play a Cassette Tape:<br />
Press “PWR” to turn the radio on. The<br />
radio will play until a cassette is pushed<br />
into the cassette entry door (the tape side<br />
goes in first). Do not use tapes that are<br />
longer than 90 minutes (45 minutes on<br />
each side).<br />
This system has automatic Dolby B NR’<br />
to reduce background noise on Dolby<br />
encoded tapes. Dolby@ Noise Reduction<br />
is manufactured under license from Dolby<br />
Laboratories Licensing Corporation.<br />
Dolby@ and the symbol 00 are<br />
trademarks of Dolby Laboratories<br />
Licensing Corporation.<br />
PROG (Program): Press to change the<br />
side of tape being played. When the end<br />
of a tape is reached, the other side will<br />
then play.<br />
Cr02: This button sets tape bias. When<br />
playing high bias chrome or metal tapes,<br />
press the button to turn the Cr02 display<br />
on. When playing standard tapes, press<br />
again to turn the display off.<br />
REV (Reverse): Press to reverse the tape<br />
rapidly; press again to play the tape. (The<br />
radio plays while a tape is rewinding.)<br />
FWD (Fast Forward): Press to advance<br />
[he tape rapidly; press again to play. (The<br />
radio plays while the tape is advancing.)<br />
PREV (Previous): Press “PREV” to<br />
repeat a passage. The tape will back up<br />
and stop at the first four-second quiet spot<br />
in the tape, or when you press “PREV”<br />
sgain or “PROG”.<br />
NEXT Press to go to the next selection<br />
on the tape. The tape will stop at the first<br />
four-second quiet spot in the tape, or<br />
when you press “NEXT” again or<br />
”PROG”.<br />
SToPL (StopoPlay): Press to switch from<br />
the tape to the radio. Press again to<br />
resume playing the tape.<br />
EJECT Press to eject the cassette tape<br />
(the radio will then play).<br />
. . 138
AM/FM Stereo with<br />
Compact Disc Player and<br />
Graphic Equalizer<br />
The digital display indicates information<br />
on time or radio station frequency, the,<br />
AM or FM radio band, whether the<br />
station is in stereo, and other radio<br />
functions.<br />
PWR (Power): Turns the unit on and<br />
off when the ignition is on.<br />
Upper Knob (VOL): This knob does two<br />
things:<br />
0 Turn it slightly to the left or right to<br />
control the volume.<br />
Press it to mute the radio or compact<br />
disc player. Press again to listen.<br />
BAL (Balance): The control ring behind<br />
the upper knob adjusts the left/right<br />
speaker balance.<br />
Lower Knob (TUNE): This knob does<br />
two things:<br />
0 Turn it slightly to the left or right to<br />
tune in radio stations. If you hold it to<br />
the left or right, it will tune rapidly.<br />
You can also turn it one stop at a time<br />
to fine-tune a specific frequency.<br />
Press to change between the AM,<br />
FM1 or FM2 bands. (FMl allows you<br />
to preset five stations, FM2 allows<br />
you to preset another five stations.)<br />
The digital screen will momentarily<br />
display AM, FMl or FM2, and<br />
indicate if the radio is in stereo.<br />
Your radio has an AMAX-certified<br />
receiver. It can produce quality AM stereo<br />
sound and receive C-Quam@ stereo<br />
broadcasts. AMAX reduces noise without<br />
reducing the high frequencies you need<br />
for the best sound. You don’t have to do<br />
anything to your Delco/GM radio because<br />
AMAX is automatic.<br />
139...
Comfort <strong>Controls</strong> & Audio Systems<br />
AM/FM Stereo with<br />
Compact Disc Player and<br />
Graphic Equalizer (CONT.)<br />
FADE: The control ring behind the lower<br />
knob adjusts the front/rear speaker<br />
balance.<br />
4 SEEK b: Press to seek and stop on the<br />
next station higher or lower on the radio<br />
band.<br />
RCL (Recall): Press to alternate the<br />
display between the time and the selected<br />
station and radio band.<br />
EQUALIZER: Boost the bass,<br />
emphasize a voice in a song, brighten the<br />
treble - your equalizer gives you<br />
freedom to adjust five separate<br />
frequencies of sound to your individual<br />
taste. Move a lever up to emphasize a<br />
frequency, move it down to<br />
de-emphasize. It’s best to begin with the<br />
levers in the middle position, then adjust<br />
each lever as you like.<br />
The five numbered pushbuttons can be<br />
lsed to preset up to 15 radio stations<br />
five AM, five-FM1 and five FM2).<br />
The buttons have other uses when you are<br />
)laying a compact disc (see “TO Play a<br />
Zompact Disc” later in this section).<br />
ro Preset Radio Stations:<br />
1.<br />
2.<br />
Tune the digital display to the station<br />
you want.<br />
Press “SET”. The “SET” indicator<br />
will appear on the digital screen for<br />
five seconds.<br />
3. While the “SET” indicator is displayed,<br />
press one of the five pushbuttons.<br />
4. Repeat steps 1-3 for each of five AM<br />
and five FM stations.<br />
5. Press the lower knob until FM2<br />
appears on the digital display. You can<br />
then follow steps 1-3 for five more<br />
FM stations.<br />
To Play a Compact Disc:<br />
Many of the controls for the radio also<br />
have functions for the compact disc<br />
player, as explained here.<br />
Don’t use mini-discs that are called<br />
singles. They won’t eject. Use only<br />
full-size compact discs.<br />
1.<br />
2.<br />
Press “PWR” to turn the radio on.<br />
Insert a disc part-way into the slot,<br />
with the label side up. The player will<br />
pull it in. In a few seconds, the disc<br />
should play.<br />
... 140
If the disc comes back out and/or “Err”<br />
appears on the display:<br />
The disc may be upside down.<br />
The disc may be dirty, scratched or<br />
wet.<br />
There may be too much moisture in<br />
the air (wait about one hour and try<br />
again).<br />
The player may be too hot, or the road<br />
may be too rough for the disc to play.<br />
As soon as things get back to normal,<br />
the disc should play.<br />
While a disc is playing, the “CD”<br />
indicator is displayed on the digital<br />
screen, as is the clock.<br />
RCL (Recall): Press once to see what<br />
track is playing. Press again within five<br />
seconds’to see how long your selection<br />
has.been playing. The track number also<br />
will be displayed when the volume is<br />
changed or a new track starts to play.<br />
COMP (Compression): Depressing this<br />
button makes soft and loud passages more<br />
equal in volume. Press again to resume<br />
normal play.<br />
RDM (Random): Press to play tracks in<br />
random order.<br />
REV (Reverse): Press and hold to rapidly<br />
back up to a favorite passage. Release to<br />
resume playing.<br />
FWD (Fast Forward): Press and hold to<br />
rapidly advance the disc. Release to<br />
resume playing.<br />
PREV (Previous): Press to play a track<br />
again. If you keep pressing the “PREV”<br />
button, the disc will keep backing up to<br />
previous’ tracks.<br />
NEXT Press when you want to hear the<br />
next track. If you keep pressing the<br />
“NEXT” button, the disc will keep<br />
advancing to other tracks.<br />
When Finished with the Compact Disc<br />
Player:<br />
If you press “PWR” or turn off the<br />
ignition, the disc will stay in the player<br />
and start again when you turn on the<br />
ignition or power switch. The disc will<br />
begin playing at the point where it had<br />
been stopped.<br />
STePL (StopoPlay): Press to stop the<br />
disc player; the radio will play. Press<br />
again to play the disc (the player will start<br />
playing the disc where it was stopped<br />
earlier).<br />
EJCT (Eject): Press to eject the disc; the<br />
radio will play.<br />
CD Player Anti-Theft<br />
Feature<br />
Delco-LOC II@ is a security feature for<br />
the compact disc player. It can be used or<br />
ignored. If ignored, the system plays<br />
normally. If it is used, your player won’t<br />
be usable if it is ever stolen, because it<br />
will go to “LOC” mode any time batFery<br />
power is removed. Until an un “LOC”<br />
code is entered, it will not turn on. .<br />
The instructions below tell you how to<br />
enter a secret code into the system. If your<br />
vehicle loses battery power for any<br />
reason, you must unlock the system with<br />
the secret code before the radio will turn<br />
on.<br />
141 ...
Comfort <strong>Controls</strong> & Audio Systems<br />
CD Player Anti-Theft<br />
Feature (CONI)<br />
To Set the Anti-Theft System:<br />
1. Write down any six-digit number and<br />
keep it in a safe place.<br />
2. Turn the ignition to the Accessory or<br />
Run position.<br />
3. Press the “PWR” button to turn the<br />
radio off.<br />
4. Press the “1” and “4” buttons together.<br />
Hold them down until “- - -” shows<br />
on the display (at least five seconds).<br />
You are ready to enter your secret<br />
code.<br />
NOTE: If you allow more than 15<br />
seconds to elapse between any steps,<br />
the radio automatically reverts to time<br />
and you must start the procedure over<br />
at step 4.<br />
5. Press “SET” and “OOO” will appear on<br />
the display.<br />
E. Press the “SEEK” button to make<br />
the first number appear.<br />
7. Rotate the lower (“TUNE’) knob right<br />
or left to make the last two numbers<br />
agree with your code.<br />
B. Press the lower (“BAND’) knob and<br />
“000” will appear again. Now you are<br />
ready to enter the last three digits of<br />
your code.<br />
9. Repeat steps 6 and 7 for the last three<br />
digits of your code.<br />
1O.Press the lower (“BAND’) knob and<br />
“REP” will appear for five seconds<br />
and then “000” will appear.<br />
11 .Repeat steps 6 through 10. This time<br />
“SEC” will appear, indicating that the<br />
radio is secure.<br />
I’o Unlock the System After a Power<br />
Loss:<br />
When battery power is reapplied to a<br />
secured radio, the radio won’turn on and<br />
“LOC” will appear on the display. Enter<br />
your secret code as follows; pause no<br />
more than 15 seconds between steps.<br />
1. Turn the ignition on. (Radio off.)<br />
2. Press the “SET” button. The display<br />
will show “000”.<br />
3. Enter the six digits of the code<br />
following steps 6-9 above. The<br />
display will show the numbers as<br />
entered.<br />
4. Press the lower (“BAND’) knob and<br />
the time appears, indicating that the<br />
disabling sequence was successful. If<br />
the display indicates “SEC”, the<br />
numbers did not match and the unit is<br />
still secured.<br />
... 142
Disabling the Anti-Theft System:<br />
1. Press the “1” and “4” buttons together<br />
for five seconds with ignition on and<br />
radio power off. The display will<br />
show “SEC”, indicating the unit is in<br />
the secure mode. (If “- - -” appears on<br />
the display, the anti-theft system has<br />
already been disabled.)<br />
2. Press the “SET” button. The display<br />
will show “000”.<br />
3. Enter the first three digits of the code<br />
following steps 6 and 7 of the<br />
preceding paragraphs. The display<br />
will show the numbers as entered.<br />
4. Press the lower (“BAND”) knob. The<br />
radio will display “000”<br />
5. Enter the second three digits of the<br />
code. The display will show the<br />
numbers as entered.<br />
6. Press the lower (“BAND”) knob. If<br />
the display shows “- - -” then the<br />
time, the disabling sequence was<br />
successful (the numbers matched the<br />
user-selected code or the factory<br />
back-up code) and the unit is in the<br />
“UNSECURED” mode. If the display<br />
shows “SEC”, the disabling sequence<br />
was unsuccessful and the numbers did<br />
not match either of the codes and the<br />
unit will remain in the “SECURED”<br />
mode.<br />
Steering Wheel Touch<br />
<strong>Controls</strong> (OPTION)<br />
Some audio system functions can be<br />
operated with these controls.<br />
AM/FM: Press to select either the AM or<br />
FMl and FM2 radio bands. The band you<br />
select will be displayed on the digital<br />
screen. The frequency of the station will<br />
be displayed, and if the station is in<br />
stereo, the stereo indicator will also be<br />
displayed.<br />
143.. .
Comfort <strong>Controls</strong> & Audio Systems<br />
..<br />
Steering Wheel Touch<br />
COntrOlS (OPTION) (CONI)<br />
SEEK: Each time you press an up or<br />
down arrow on “SEEK”, you will tune in<br />
the next station up or down the AM or<br />
FM radio band.<br />
When listening to a cassette tape or<br />
compact disc, you can change to the<br />
previous or next selection by pressing the<br />
“SEEK” up or down arrow.<br />
RCL (Recall): When the radio is on,<br />
press to change between the clock and the<br />
radio station frequency displayed on the<br />
digital screen.<br />
144<br />
PRE-SET Press this to hear the radio<br />
stations that are set on your system.<br />
VOL (Volume): Press A to increase<br />
volume. Press to lower the volume.<br />
PWR: Turns the unit on and off when the<br />
ignition is on.<br />
Understanding Radio<br />
Reception<br />
FM Stereo<br />
FM stereo will give you the best sound,<br />
but FM signals will reach only about 10<br />
to 40 miles (16 to 65 km). Tall buildings<br />
or hills can interfere with FM signals,<br />
causing the sound to come and go.<br />
AM<br />
The range for most AM stations is greater<br />
than for FM, especially at night. The<br />
longer range, however, can cause stations<br />
to interfere with each other. AM can also<br />
pick up noise from things like storms and<br />
power lines. To lower this noise, try<br />
reducing the treble level.<br />
AM Stereo<br />
Your Delco@ system may be able to<br />
receive C-Quam@ stereo broadcasts.<br />
Many AM stations around the country use<br />
C-Quam@ to produce stereo, though<br />
some do not. C-Quam@ is a registered<br />
trademark of Motorola, Inc. If your<br />
Delco@ system can get C-Quam@ signals,<br />
your stereo indicator light will come on<br />
when you are receiving it.
Care of Your Cassette<br />
Tape Player<br />
A tape player that is not cleaned regularly<br />
can cause reduced sound quality, ruined<br />
cassettes, or a damaged mechanism.<br />
Cassette tapes should be stored in their<br />
cases away from contaminants, direct<br />
sunlight, and extreme heat. if they aren’t,<br />
they may not operate properly or cause<br />
failure of the tape player.<br />
Your tape player should be cleaned after<br />
every 50 hours or use. If you notice a<br />
reduction in sound quality, try a known<br />
good cassette to see if the tape or the tape<br />
player is at fault. If this other cassette has<br />
no improvement in sound quality, clean<br />
the tape player.<br />
Cleaning may be done with a scrubbing<br />
action non-abrasive cleaning cassette. This<br />
system uses a cleaning cassette with pads<br />
which scrub the tape head as the hubs of<br />
the cleaner cassette turn. It is normal for<br />
the cartridge to eject while cleaning. Insert<br />
the cassette at least 3 times to ensure<br />
thorough cleaning. A scrubbing action<br />
cleaning cassette is available through your<br />
Chevrolet dealership.<br />
You may also choose a non-scrubbing<br />
action, wet-type cleaner which uses a<br />
cassette with a fabric belt to clean the tape<br />
head. This type of cleaning cassette will<br />
not eject. It may not clean as thoroughly<br />
as the scrubbing type cleaner.<br />
Cassettes are subject to wear and the<br />
sound quality and may degrade over time.<br />
Always make sure that the cassette tape is<br />
in good condition before you have your<br />
tape player serviced.<br />
Care of Your Compact<br />
Discs<br />
Handle discs carefully. Store them in their<br />
original cases or other protective cases<br />
and away from direct sunlight and dust. If<br />
the surface of a disc is soiled, dampen a<br />
clean, soft cloth in a mild, neutral<br />
detergent solution and clean it, wiping<br />
from the center to the edge.<br />
Be sure never to touch the signal surface<br />
when handling discs. Pick up discs by<br />
grasping the outer edges or the edge of<br />
the hole and the outer edge.<br />
145.. .
Comfort <strong>Controls</strong> & Audio Systems<br />
NOTICE:<br />
Don’t mount anything to your roof,<br />
such as an antenna or a luggage<br />
carrier, or to your headliner. If you<br />
puncture the roof or headliner, you<br />
could damage or destroy your<br />
integrated roof antenna. Have any<br />
work of this type done by your<br />
dealer.<br />
Integrated Roof Antenna<br />
Your state-of-the-art integrated roof<br />
antenna is not visible. It is located<br />
between the roof and headliner of your<br />
vehicle, covering the entire roof area frorr<br />
the rear edge of the front doors to the<br />
liftgate.<br />
’ you want to add a mobile phone or<br />
No-way radio to your vehicle, there are<br />
3ecial precautions you’ll need to take.<br />
ee “Adding Sound Equipment” in the<br />
Idex.
Here YOU’II find information about<br />
driving on different kinds of roads and<br />
in varying weather conditions . We’ve<br />
also included many other useful tips<br />
on driving .<br />
Part 4<br />
Your Driving and the Road<br />
Defensive Driving .................................................<br />
DrunkenDriving ...................................................<br />
Control of a Vehicle ................................................<br />
148<br />
148<br />
150<br />
Braking ......................................................... ..151<br />
Anti-LockBrakes (ABS) ............................................ 151<br />
Traction Control System ............................................ 153<br />
SteeringTips ..................................................... 154<br />
Steering in Emergencies ............................................. 155<br />
Passing .......................................................... 156<br />
DrivingatNight ................................................... 158<br />
Driving in the Rain ................................................. 159<br />
CityDriving ...................................................... 161<br />
Freeway Driving .................................................. 162<br />
Hill and Mountain Roads ............................................ 164<br />
WinterDriving .................................................... 165<br />
TowingaTrailer ................................................... 168<br />
147 ...<br />
I
Your Driving and the Road<br />
Defensive Driving<br />
The best advice anyone can give about<br />
driving is: Drive defensively.<br />
Please start with a very important safety<br />
device in your Pontiac: Buckle up. (See<br />
“Safety Belts” in the Index.)<br />
Defensive driving really means “be ready<br />
for anything.” On city streets, rural roads,<br />
or freeways, it means “always expect the<br />
unexpected.”<br />
Assume that pedestrians or other drivers<br />
are going to be careless and make<br />
mistakes. Anticipate what they might do.<br />
Be ready for their mistakes.<br />
Rear-end collisions are about the most<br />
preventable of accidents. Yet they are<br />
common. Allow enough following<br />
distance. It’s the best defensive driving<br />
maneuver, in both city and rural driving.<br />
You never know when the vehicle in front<br />
of you is going to brake or turn suddenly.<br />
w Drunken Driving<br />
Death and injury associated with drinking<br />
and driving is a national tragedy. It’s the<br />
number one contributor to the highway<br />
death toll, claiming thousands of victims<br />
every year. Alcohol takes away three<br />
things that anyone needs to drive a<br />
vehicle:<br />
Judgment<br />
Muscular Coordination<br />
Vision<br />
Police records show that almost half of all<br />
motor vehicle-related deaths involve<br />
alcohol - a driver, a passenger or<br />
someone else, such as a pedestrian, had<br />
been drinking. In most cases, these deaths<br />
are the result of someone who was<br />
drinking and driving. About 20,000 motor<br />
vehicle-related deaths occur each year<br />
because of alcohol, and thousands of<br />
people are injured.<br />
lust how much alcohol is too much if a<br />
person plans to drive? Ideally, no one<br />
should drink alcohol and then drive. But<br />
if one does, then what’s “too much”? It<br />
can be a lot less than many might think.<br />
Although it depends on each person and<br />
situation, here is some general<br />
information on the problem.<br />
The Blood Alcohol Content (BAC) of<br />
someone who is drinking depends upon<br />
four things:<br />
0<br />
How much alcohol is in the drink.<br />
The drinker’s body weight.<br />
The amount of food that is consumed<br />
before and during drinking.<br />
The length of time it has taken the<br />
drinker to consume the alcohol.<br />
... 148
HOURS<br />
According to the American Medical<br />
Association, a 180-pound (82 kg) person<br />
who drinks three 12-ounce (355 ml)<br />
bottles of beer in an hour will end up with<br />
a BAC of about 0.06 percent. The person<br />
would reach the same BAC by drinking<br />
three 4-ounce (120 ml) glasses of wine or<br />
three mixed drinks if each had 1 - 1/2<br />
ounces (45 ml) of a liquor like whiskey,<br />
gin or vodka.<br />
It’s the amount of alcohol that counts. For<br />
example, if the same person drank three<br />
double martinis (3 ounces or 90 ml of<br />
liquor each) within an hour, the person’s<br />
BAC would be close to 0.12 percent. A<br />
person who consumes food just before or<br />
during drinking will have a slightly lower<br />
BAC level.<br />
NUMBER<br />
OF DRINKS<br />
(as in picture)<br />
T ‘he law in most U.S. states sets the legal<br />
li mit at a BAC of 0.10 percent. In Canada<br />
tt le limit is 0.08 percent, and in some<br />
01 ther countries it’s lower than that. The<br />
I3 #AC will be over 0.10 percent after three<br />
tc ) six drinks (in one hour). Of course, as<br />
w re’ve seen, it depends on how much<br />
100 120 140 160 180 200 220 240<br />
BODY WEIGHT IN POUNDS<br />
HOURS<br />
1 HOUR<br />
alcohol is in the drinks, and how quickly<br />
the person drinks them.<br />
But it’s very important to keep in mind<br />
that the ability to drive is affected well<br />
below a BAC of 0.10 percent. Research<br />
shows that the driving skills of many<br />
people are impaired at a BAC<br />
149...
Your Driving and the Road<br />
Drunken Driving (CONT.)<br />
approaching 0.05 percent, and that the<br />
effects are worse at night. All drivers are<br />
impaired at BAC levels above 0.05<br />
percent. Statistics show that the chance of<br />
being in an accident increases sharply for<br />
drivers who have a BAC of 0.05 percent<br />
or above. A driver with a BAC level of<br />
0.06 percent (three beers in one hour for a<br />
180-pound or 82 kg person) has doubled<br />
his or her chance of having an accident.<br />
At a BAC level of 0.10 percent, the<br />
chance of that driver having an accident is<br />
six times greater; at a level of 0.15<br />
percent, the chances are twenty-five times<br />
greater! And, the body takes about an<br />
hour to rid itself of the alcohol in one<br />
drink. No amount of coffee or number of<br />
cold showers will speed that up.<br />
“I’ll be careful” isn’t the right answer.<br />
What if there’s an emergency, a need to<br />
take sudden action, as when a child darts<br />
into the street? A person with a higher<br />
BAC might not be able to react quickly<br />
enough to avoid the collision.<br />
rhere’s something else about drinking<br />
tnd driving that many people don’t know.<br />
Medical research shows that alcohol in B<br />
Yerson’s system can make crash injuries<br />
worse. That’s especially true for brain,<br />
spinal cord and heart injuries. That means<br />
:hat if anyone who has been drinking --<br />
jriver or passenger -- is in a crash, the<br />
:hance of being killed or permanently<br />
disabled is higher than if that person had<br />
not been drinking. And we’ve already<br />
seen that the chance of a crash itself is<br />
higher for drinking drivers.<br />
Control of a Vehicle<br />
You have three systems that make your<br />
vehicle go where you want it to go. They<br />
are the brakes, the steering and the<br />
accelerator. All three systems have to do<br />
their work at the places where the tires<br />
meet the road.<br />
Sometimes, as when you’re driving on<br />
snow or ice, it’s easy to ask more of those<br />
control systems than the tires and road<br />
can provide. That means you can lose<br />
control of your vehicle.<br />
... 150
Braking<br />
Braking action involves perception time<br />
and reaction time.<br />
First, you have to decide to push on the<br />
brake pedal. That’s perception time. Then<br />
you have to bring up your foot and do it.<br />
That’s reaction time.<br />
Average reaction time is about 3/4 of a<br />
second. But that’s only an average. It<br />
might be less with one driver and as long<br />
as two or three seconds or more with<br />
another. Age, physical condition,<br />
alertness, coordination, and eyesight all<br />
play a part. So do alcohol, drugs and<br />
frustration. But even in 314 of a second, a<br />
vehicle moving at 60 mph (100 km/h)<br />
travels 66 feet (20 m). That could be a lot<br />
of distance in an emergency, so keeping<br />
enough space between your vehicle and<br />
others is important.<br />
And, of course, actual stopping distances<br />
vary greatly with the surface of the road<br />
(whether it’s pavement or gravel); the<br />
condition of the road (wet, dry, icy); tire<br />
tread; and the condition of your brakes.<br />
Avoid needless heavy braking. Some<br />
people drive in spurts -- heavy acceleration<br />
fallowed by heavy braking -- rather than<br />
keeping pace with traffic. This is a mistake.<br />
Your brakes may not have time to cool<br />
between hard stops. Your brakes will wear<br />
out much faster if you do a lot of heavy<br />
braking. If you keep pace with the traffic<br />
and allow realistic following distances, you<br />
will eliminate a lot of unnecessary braking.<br />
That .means better braking and longer<br />
brake life.<br />
If your engine ever stops while you’re<br />
driving, brake normally but don’t pump<br />
your brakes. If you do,.the pedal may get<br />
harder to push down. If your engine stops,<br />
you will still have some power brake<br />
assist. But you will use it when you brake.<br />
Once the power assist is used up, it may<br />
take longer to stop and the brake pedal<br />
will be harder to push.<br />
Anti-Lock Brakes (ABS)<br />
Your Pontiac has an advanced electmnic<br />
braking system that will help prevent<br />
skidding.<br />
C
Your Driving and the Road<br />
Anti-Lock Brakes (ABS)<br />
(CONT)<br />
When you start your vehicle, or when you<br />
begin to drive away, you may hear a<br />
momentary motor or clicking noise. And<br />
you may even notice that your brake<br />
pedal moves a little while this is going on.<br />
This is the ABS system testing itself.<br />
(You may also hear a clicking noise if you<br />
leave the ignition in the “Run” position<br />
for about four seconds before starting the<br />
vehicle.) If there’s a problem with the<br />
anti-lock brake system, the anti-lock<br />
brake system warning light will stay on or<br />
flash.<br />
See “Anti-Lock Brake System Warning<br />
Light” in the Index.<br />
. 152<br />
Here’s how anti-lock works. Let’s say the<br />
road is wet. You’re driving safely.<br />
Suddenly an animal jumps out in front of<br />
you.<br />
You slam on the brakes. Here’s what<br />
happens with ABS.<br />
A computer senses that wheels are<br />
slowing down. If one of the wheels is<br />
about to stop rolling, the computer will<br />
separately work the brakes at each front<br />
wheel and at the rear wheels.<br />
The anti-lock system can change the<br />
brake pressure Faster than any driver<br />
could. The computer is programmed to<br />
make the most of available tire and road<br />
conditions.<br />
You can steer around the obstacle while<br />
braking hard.<br />
As you brake, your computer keeps<br />
receiving updates on wheel speed and<br />
controls braking pressure accordingly.<br />
Remember: Anti-lock doesn’t change the<br />
time you need to get your foot up to the<br />
brake pedal. If you get too close to the<br />
vehicle in front of you, you won’t have<br />
time to apply your brakes if that vehicle<br />
suddenly slows or stops. Always leave<br />
enough room up ahead to stop, even<br />
though you have anti-lock brakes.
Your Driving and the Road<br />
Traction Control System<br />
(Option: 3800 V6 Engine)<br />
(CONI)<br />
The traction control system automatically<br />
comes on whenever you start your<br />
vehicle.<br />
To limit wheel spin, especially in slippery<br />
road conditions, you should always leave<br />
the system on. But you can turn the<br />
traction control system off if you ever<br />
need to. (You should turn the system off if<br />
your vehicle ever gets stuck in sand, mud,<br />
ice or snow. See “Rocking Your Vehicle”<br />
in the Index.)<br />
To turn the system off, press the button.<br />
The light on the button will go off. If the<br />
raction control system is limiting wheel<br />
;pin when you press the button, the<br />
;ystem won’t turn off right away. It will<br />
rYait until there’s no longer a current need<br />
.o limit wheel spin.<br />
You can turn the system back on at any<br />
:ime by pressing the button again. The<br />
ight on the button should come on.<br />
Braking in Emergencies<br />
Use your anti-lock braking system when<br />
you need to. With anti-lock, you can steer<br />
md brake at the same time. In many<br />
emergencies, steering can help you more<br />
than even the very best braking.<br />
Steering<br />
Power Steering<br />
If you lose power steering assist because<br />
the engine stops or the system is not<br />
functioning, you can steer but it will take<br />
much more effort.<br />
Steering Tips<br />
Driving on Curves<br />
:t’s important to take curves at a<br />
.easonable speed.<br />
9 lot of the “driver lost control” accidents<br />
nentioned on the news happen on curves.<br />
-Iere’s why:<br />
Zxperienced driver or beginner, each of<br />
1s is subject to the same laws of physics<br />
when driving on curves. The traction of<br />
.he tires against the road surface makes it<br />
Jossible for the vehicle to change its path,<br />
when you turn the front wheels. If there’s<br />
IO traction, inertia will keep the vehicle<br />
going in the same direction. If you’ve<br />
ever tried to steer a vehicle on wet ice,<br />
you’ll understand this.<br />
The traction you can get in a curve<br />
depends on the condition of your tires and<br />
the road surface, the angle at which the<br />
curve is banked, and your speed. While<br />
you’re in a curve, speed is the one factor<br />
you can control.<br />
... 154
Suppose you’re steering through a sharp<br />
curve. Then you suddenly accelerate.<br />
Both control systems -- steering and<br />
acceleration -- have to do their work<br />
where the tires meet the road. Unless you<br />
have traction control and the system is on,<br />
adding the sudden acceleration can<br />
demand too much of those places. You<br />
can lose control.<br />
What should you do if this ever happens?<br />
Ease up on the accelerator pedal, steer the<br />
vehicle the way you want it to go, and<br />
slow down.<br />
Speed limit signs near curves warn that<br />
you should adjust your speed. Of course,<br />
the posted speeds are based on good<br />
weather and road conditions. Under less<br />
favorable conditions you’ll .want to go<br />
slower.<br />
If you need to reduce your speed as you<br />
approach a curve, do it before you enter<br />
the curve, while your front wheels are<br />
straight ahead.<br />
Try to adjust your speed so you can.<br />
“drive” through the curve. Maintain a<br />
reasonable, steady speed. Wait to<br />
accelerate until you are out of the curve,<br />
and then accelerate gently into the<br />
straightaway.<br />
Steering in Emergencies<br />
There are times when steering can be<br />
more effective than braking. For example,<br />
you come over a hill and find a truc,k<br />
stopped in your lane, or a car suddenly<br />
pulls out from nowhere, or a child darts<br />
out from between parked cars and stops<br />
right in front of you. You can avoid these<br />
problems by braking -- if you can stop in<br />
time. But sometimes you can’t; there isn’t<br />
room. That’s the time for evasive action<br />
-- steering around the problem.<br />
155...
Your Driving and the Road<br />
Steering in Emergencies<br />
(CONT.)<br />
Your Pontiac can perform very well in<br />
emergencies like these, First apply your<br />
brakes. It is better to remove as much<br />
speed as you can from a possible<br />
collision. Then steer around the problem,<br />
to the left or right depending on the space<br />
available.<br />
An emergency like this requires close<br />
attention and a quick decision. If you are<br />
holding the steering wheel at the<br />
recommended 9 and 3 o’clock positions,<br />
you can turn it a full 180 degrees very<br />
quickly without removing either hand.<br />
But you have to act fast, steer quickly,<br />
and just as quickly straighten the wheel<br />
once you have avoided the object.<br />
The fact that such emergency situations<br />
are always possible is a good reason to<br />
practice defensive driving at all times and<br />
wear safety belts properly.<br />
Off-Road Recovery<br />
You may find sometime that your right<br />
wheels have dropped off the edge of a<br />
road onto the shoulder while you’re<br />
driving.<br />
If the level of the shoulder is only slightl:<br />
below the pavement, recovery should be<br />
fairly easy. Ease off the accelerator and<br />
then, if there is nothing in the way, steer<br />
so that your vehicle straddles the edge of<br />
the pavement. You can turn the steering<br />
wheel up to 1/4 turn until the right front<br />
tire contacts the pavement edge. Then<br />
turn your steering wheel to go straight<br />
down the roadway.<br />
Passing<br />
The driver of a vehicle about to pass<br />
another on a two-lane highway waits for<br />
just the right moment, accelerates, moves<br />
around the vehicle ahead, then goes back<br />
into the right lane again. A simple<br />
maneuver?<br />
Not necessarily! Passing another vehicle<br />
on a two-lane highway is a potentially<br />
dangerous move, since the passing<br />
vehicle occupies the same lane as<br />
oncoming traffic for several seconds. A<br />
miscalculation, an error in judgment, or a<br />
brief surrender to frustration or anger can<br />
suddenly put the passing driver face to<br />
face with the worst of all traffic accidents<br />
-- the head-on collision.<br />
So here are some tips for passing:<br />
0 “Drive ahead.” Look down the road,<br />
to the sides, and to crossroads for<br />
situations that might affect your<br />
passing patterns. If you have any<br />
doubt whatsoever about making a<br />
successful pass, wait for a better time.<br />
... 156
0<br />
Watch for traffic signs, pavement<br />
markings, and lines. If you can see a<br />
sign up ahead that might indicate a<br />
turn or an intersection, delay your<br />
pass. A broken center line usually<br />
indicates it’s all right to pass<br />
(providing the road ahead is clear).<br />
Never cross a solid line on your side<br />
of the lane or a double solid line, even<br />
if the road seems empty of<br />
approaching traffic.<br />
Do not get too close to the vehcle you<br />
want to pass while you’re awaiting an<br />
opportunity. For one thing, following<br />
too closely reduces your area of<br />
vision, especially if you’re following a<br />
larger vehicle. Also, you won’t have<br />
adequate space if the vehicle ahead<br />
suddenly slows or stops. Keep back a<br />
reasonable distance.<br />
When it looks like a chance to pass is<br />
coming up, start to accelerate but stay<br />
in the right lane and don’t get too<br />
close. Time your move so you will be<br />
increasing speed as the time comes to<br />
move into the other lane. If the way is<br />
clear to pass, you will have a “running<br />
start” that more than makes up for the<br />
distance you would lose by dropping<br />
back. And if something happens to<br />
cause you to cancel your pass, you<br />
need only slow down and drop back<br />
again and wait for another opportunity.<br />
If other cars are lined up to pass a<br />
slow vehicle, wait your turn. But take<br />
care that someone isn’t trying to pass<br />
you as you pull out to pass the slow<br />
vehicle. Remember to glance over<br />
your shoulder and check the blind<br />
spot.<br />
Check your mirrors, glance over your<br />
shoulder, and start your left lane<br />
change signal before moving out of<br />
the right lane to pass. When you are<br />
far enough ahead of the passed vehicle<br />
to see its front in your inside mirror,<br />
activate your right lane change signal<br />
and move back into the right lane.<br />
(Remember that your right outside<br />
mirror is convex. The vehicle you just<br />
passed may seem to be farther away<br />
from you than it really is.)<br />
0<br />
0<br />
0<br />
Try not to pass more than one vehicle<br />
at a time on two-lane roads.<br />
Reconsider before passing the next<br />
vehicle.<br />
Don’t overtake a slowly moving<br />
vehicle, too rapidly. Even though the<br />
brake lights are not flashing, it may be<br />
slowing down or starting to turn.<br />
If you’re being passed, make it easy<br />
for the following driver to get ahead<br />
of you. Perhaps you can ease a little to<br />
the right.<br />
Loss of Control<br />
Let’s review what driving experts say<br />
about what happens when the three‘<br />
control systems (brakes, steering and<br />
acceleratiori) don’t have enough friction<br />
where the tires meet the road to do what<br />
the driver has asked.<br />
In any emergency, don’t give up. Keep<br />
trying to steer and constantly seek an<br />
escape route or area of less danger.<br />
157...
Your Driving and the Road<br />
Skidding<br />
In a skid, a driver can lose control of the<br />
vehicle. Defensive drivers avoid most<br />
skids by taking reasonable care suited to<br />
existing conditions, and by not<br />
“overdriving” those conditions. But skids<br />
are always possible.<br />
The three types of skids correspond .to<br />
your Pontiac’s three control systems. In the<br />
braking skid your wheels aren’t rolling. In<br />
the steering or cornering slud, too much<br />
speed or steering in a curve causes tires to<br />
slip and lose cornering force. And in the<br />
acceleration skid too much throttle causes<br />
the driving wheels to spin.<br />
A cornering skid is best handled by<br />
easing your foot off the accelerator pedal.<br />
If you have the traction control system,<br />
remember: It helps avoid only the<br />
acceleration skid. If you do not have<br />
traction control, or if the system is off,<br />
then an acceleration skid is also best<br />
handled by easing your foot off the<br />
accelerator pedal.<br />
If your vehicle starts to slide, ease your<br />
foot off the accelerator pedal and quickly<br />
steer the way you want the vehicle to go.<br />
If you start steering quickly enough, your<br />
vehicle may straighten out. Always be<br />
ready for a second skid if it occurs.<br />
Of course, traction is reduced when water,<br />
snow, ice, gravel, or other material is on<br />
the road. For safety, you’ll want to slow<br />
down and adjust your driving to these<br />
conditions. It is important to slow down<br />
on slippery surfaces because stopping<br />
distance will be longer and vehicle<br />
control more limited.<br />
While driving on a surface with reduced<br />
traction, try your best to avoid sudden<br />
steering, acceleration, or braking<br />
(including engine braking. by shifting to a<br />
lower gear). Any sudden changes could<br />
cause the tires to slide. You may not<br />
realize the surface is slippery until your<br />
vehicle is skidding. Learn to recognize<br />
warning clues -- such as enough water,<br />
ice or packed snow on the road to make a<br />
“mirrored surface” -- and slow down<br />
when you have any doubt.<br />
Remember: Any anti-lock braking system<br />
(ABS) helps avoid only the braking skid.<br />
Driving at Night<br />
\Tight driving is more dangerous than day<br />
hiving. One reason is that some drivers<br />
re likely to be impaired -- by alcohol or<br />
lrugs, with night vision problems, or by<br />
atigue.<br />
-€ere are some tips on night driving.<br />
D<br />
D<br />
D<br />
Drive defensively.<br />
Don’t drink and drive.<br />
Adjust your inside rearview mirror to<br />
reduce the glare from headlights<br />
behind you.<br />
... 158
~ space<br />
’ 0 Since you can’t see as well, you may<br />
need to slow down and keep more<br />
between you and other vehicles.<br />
l<br />
0 Slow down, especially on higher<br />
speed roads. Your headlights can light<br />
up only so much road ahead.<br />
0 In remote areas, watch for animals.<br />
a If you’re tired, pull off the road in a<br />
safe place and rest.<br />
Night Vision<br />
No one can see as well at night as in the<br />
daytime. But as we get older these<br />
differences increase. A 50-year-old driver<br />
may require at least twice as much light to<br />
see the same thing at night as a<br />
20-year-old.<br />
What you do in the daytime can also<br />
affect your night vision. For example, if<br />
you spend the day in bright sunshine you<br />
are wise to wear sunglasses. Your eyes<br />
will have less trouble adjusting to night.<br />
But if you’re driving, don’t wear<br />
sunglasses at night. They may cut down<br />
on glare from headlights, but they also<br />
make a lot of things invisible.<br />
You can be temporarily blinded by<br />
approaching lights. It can take a second or<br />
two, or even several seconds, for your<br />
eyes to readjust to the dark. When you are<br />
faced with severe glare (as from a driver<br />
who doesn’t lower the high beams, or a<br />
vehicle with misaimed headlights), slow<br />
down a little. Avoid staring directly into<br />
the approaching lights.<br />
Keep your windshield and all the glass on<br />
your vehicle clean -- inside and out.<br />
Glare at night is made much worse by dirt<br />
on the glass. Even the inside of the glass<br />
can build up a film caused by dust. Dirty<br />
glass makes lights dazzle and flash more<br />
than clean glass would, making the pupils<br />
of your eyes contract repeatedly.<br />
Remember that your headlights light up<br />
far less of a roadway when you are in a<br />
turn or curve. Keep your eyes moving;<br />
that way, it’s easier to pick out dimly<br />
lighted objects. Just as your headlights<br />
should be checked regularly for proper<br />
aim, so should your eyes be examined<br />
regularly. Some drivers suffer from night<br />
blindness -- the inability to see in dim<br />
light -- and aren’t even aware of it.<br />
Driving in the Rain;<br />
Rain and wet roads can mean drivfng<br />
trouble. On a wet road you can’t stop,<br />
accelerate or turn as well because your<br />
tire-to-road traction isn’t as good as on<br />
dry roads. And, if your tires don’t ‘have<br />
much tread left, you’ll get even less<br />
traction. It’s always wise to go slower and<br />
be cautious if rain starts to fall while you<br />
are driving. The surface may get wet<br />
suddenly when your reflexes are tuned for<br />
driving on dry pavement.<br />
159 ...
Your Driving and the Road<br />
Driving in the Rain<br />
(CONE)<br />
The heavier the rain, the harder it is to<br />
see. Even if your windshield wiper blades<br />
are in good shape, a heavy rain can make<br />
it harder to see road signs and traffic<br />
signals, pavement markings, the edge of<br />
the road, and even people walking.<br />
It’s wise to keep your wiping equipment<br />
in good shape and keep your windshield<br />
washer tank filled. Replace your<br />
windshield wiper inserts when they show<br />
signs of streaking or missing areas on the<br />
windshield, or when strips of rubber start<br />
to separate from the inserts.<br />
. . I60<br />
Driving too fast through large water<br />
puddles or even going through some car<br />
washes can cause problems, too. The<br />
water may affect your brakes. Try to<br />
avoid puddles. But if you can’t, try to<br />
slow down before you hit them.<br />
Hydroplaning<br />
Hydroplaning is dangerous. So much<br />
water can build up under your tires that<br />
they can actually ride on the water. This<br />
can happen if the road is wet enough and<br />
you’re going fast enough. When your<br />
vehicle is hydroplaning, it has little or no<br />
contact with the road.<br />
Hydroplaning doesn’t happen often. But it<br />
can if your tires haven’t much tread or if<br />
the pressure in one or more is low. It can<br />
happen if a lot of water is standing on the<br />
road. If you can see reflections from trees,<br />
telephone poles, or other vehicles, and<br />
raindrops “dimple” the water’s surface,<br />
there could be hydroplaning.
Hydroplaning usually happens at higher<br />
speeds. There just isn’t a hard and fast<br />
rule about hydroplaning. The best advice<br />
is to slow down when it is raining.<br />
Some Other Rahy<br />
Weather Tips<br />
0<br />
0<br />
Turn on your low-beam headlights --<br />
not just your parking lights -- to help<br />
make you more visible to others.<br />
Besides slowing down, allow some<br />
extra following distance. And be<br />
especially careful when you pass<br />
another vehicle. Allow yourself more<br />
clear room ahead, and be prepared to<br />
have your view restricted by road<br />
spray.<br />
Have good tires with proper tread<br />
depth. (See “Tires” in the Index.)<br />
City Driving<br />
One of the biggest problems with city<br />
streets is the amount of traffic on them.<br />
You’ll want to watch out for what the<br />
other drivers are doing and pay attention<br />
to traffic signals.<br />
Here are ways to increase your safety in<br />
city driving:<br />
0 Know the best way to get to where<br />
you are going. Get a city map and pian<br />
your trip into an unknown part of the<br />
city just as you would for a<br />
cross-country trip.<br />
Try to use the freeways that rim and<br />
crisscross most large cities. You’ll<br />
save time and energy. (See the next<br />
section, “Freeway Driving.”)<br />
Treat a green light as a warning signal.<br />
A traffic light is there because the<br />
corner is busy enough to need it.<br />
When a light turns green, and just<br />
before you start to move, check both<br />
ways for vehicles that have not<br />
cleared the intersection or may be<br />
running the red light.<br />
161 ...
Your Driving and the Road<br />
1 Freeway Driving<br />
Mile for mile, freeways (also called<br />
thruways, parkways, expressways,<br />
turnpikes, or superhighways) are the<br />
safest of all roads. But they have their<br />
own special rules.<br />
The most important advice on freeway<br />
driving is: Keep up with traffic and keep<br />
to the right. Drive at the same speed most<br />
of the other drivers are driving. Too-fast<br />
or too-slow driving breaks a smooth<br />
traffic flow. Treat the left lane on a<br />
freeway as a passing lane.<br />
At the entrance there is usually a ramp<br />
that leads to the freeway. If you have a<br />
clear view of the freeway as you drive<br />
along the entrance ramp, you should<br />
begin to check traffic. Try to determine<br />
where you expect to blend with the flow.<br />
Try to merge into the gap at close to the<br />
prevailing speed. Switch on your turn<br />
signal, check your mirrors and glance<br />
over your shoulder as often as necessary.<br />
Try to blend smoothly with the traffic<br />
flow.<br />
Once you are on the freeway, adjust your<br />
speed to the posted limit or to the<br />
prevailing rate if it’s slower. Stay in the<br />
right lane unless you want to pass.<br />
Before changing lanes, check your<br />
mirrors. Then use your turn signal.<br />
Just before you leave the lane, glance<br />
quickly over your shoulder to make sure<br />
there isn’t another vehicle in your “blind”<br />
spot.<br />
Once you are moving on the freeway,<br />
make certain you allow a reasonable<br />
following distance. Expect to move<br />
slightly slower at night.<br />
When you want to leave the freeway,<br />
nove to the proper lane well in advance.<br />
f you miss your exit do not, under any<br />
ircumstances, stop and back up. Drive on<br />
o the next exit.<br />
The exit ramp can be curved, sometimes<br />
pite sharply.<br />
The exit speed is usually posted.<br />
Reduce your speed according to your<br />
speedometer, not to your sense of motion.<br />
4fter driving for any distance at higher<br />
speeds, you may tend to think you are<br />
going slower than you actually are.<br />
Before Leaving on a<br />
Long Trip<br />
Make sure you’re ready. Try to be well<br />
rested. If you must start when you’re not<br />
fresh -- such as after a day’s work --<br />
don’t plan to make too many miles that<br />
first part of the journey. Wear comfortable<br />
clothing and shoes you can easily drive<br />
in.<br />
Is your vehicle ready for a long trip? If<br />
you keep it serviced and maintained, it’s<br />
ready to go. If it needs service, have it<br />
done before starting out. Of course, you’ll<br />
. . . 162
find experienced and able service experts<br />
in Pontiac deaierships all across North<br />
America. They’ll be ready and willing to<br />
help if you need it.<br />
Here are some things you can check<br />
before a trip:<br />
0<br />
Windshield Washer Fluid: Is the<br />
reservoir full? Are all windows clean<br />
inside and outside?<br />
Wiper Blades: Are they in good<br />
shape?<br />
Fuel. Engine Oil, Other Fluids: Have<br />
you checked all levels?<br />
Lights: Are they all working? Are the<br />
lenses clean?<br />
Tires: They are vitally important to a<br />
safe, trouble-free trip. Is the tread<br />
good enough for long-distance<br />
driving? Are the tires all inflated to<br />
the recommended pressure?<br />
Weather Forecasts: What’s the<br />
weather outlook along your route?<br />
Should you delay your trip a short<br />
time to avoid a major storm system?<br />
Maps: Do you have up-to-date maps?<br />
Highway Hypnosis<br />
Is there actually such a condition as<br />
“highway hypnosis”? Or is it just plain<br />
falling asleep at the wheel? Call it<br />
highway hypnosis, lack of awareness, or<br />
whatever.<br />
There is something about an easy stretch<br />
of road with the same scenery, along with<br />
the hum of the tires on the road, the drone<br />
of the engine, and the rush of the wind<br />
against the vehicle that can make you<br />
sleepy. Don’t let it happen to you! If it<br />
does, your vehicle can leave the road in<br />
less than a second, and you could crash<br />
and be injured.<br />
What can you do about highway<br />
hypnosis? First, be aware that it can<br />
happen.<br />
Then here are some tips:<br />
Make sure your vehicle is well<br />
ventilated, with a comfortably cool<br />
interior.<br />
Keep your eyes moving. Scan the road<br />
ahead and to the sides. Check your<br />
mirrors and your instruments<br />
frequently.<br />
If you get sleepy, pull off the road into<br />
a rest, service, or parking area and<br />
take a nap, get some exercise, or both.<br />
For safety, treat drowsiness on the<br />
highway as an emergency.<br />
163...
Your Driving and the Road<br />
B<br />
Know how to go down hills. The most<br />
important thing to know is this: let<br />
your engine do some of the slowing<br />
down. Shift to a lower gear when you<br />
go down a steep or long hill.<br />
Hill and Mountain<br />
Roads<br />
Driving on steep hills or mountains is<br />
different from driving in flat or rolling<br />
terrain.<br />
If you drive regularly in steep country, or<br />
if you’re planning to visit there, here are<br />
some tips that can make your trips safer<br />
and more enjoyable.<br />
e Keep your vehicle in good shape.<br />
Check all fluid levels and also the<br />
brakes, tires, cooling system and<br />
transaxle. These parts can work hard<br />
on mountain roads.<br />
0<br />
Know how to go uphill. You may<br />
want to shift down to a lower gear.<br />
The lower gears help cool your engine<br />
and transaxle, and you can climb the<br />
hill better.<br />
Stay in your own lane when driving<br />
on two-lane roads in hills or<br />
mountains. Don’t swing wide or cut<br />
across the center of the road. Drive at<br />
speeds that let you stay in your own<br />
lane.<br />
. . . 164
Your Driving and the Road<br />
Driving on Snow or Ice<br />
Most of the time, those places where your<br />
tires meet the road probably have good<br />
traction.<br />
However, if there is snow or ice between<br />
your tires and the road, you can have a<br />
very slippery situation. You’ll have a lot<br />
less traction or “grip” and will need to be<br />
very careful.<br />
What’s the worst time for this? “Wet ice.”<br />
Very cold snow or ice can be slick and<br />
hard to drive on. But wet ice can be even<br />
more trouble because it may offer the<br />
least traction of all. You can get “wet ice”<br />
when it’s about freezing (32°F; OOC) and<br />
freezing rain begins to fall. Try to avoid<br />
lriving on wet ice until salt and sand<br />
:rews can get there.<br />
Nhatever the condition -- smooth ice,<br />
lacked, blowing or loose snow -- drive<br />
vith caution.<br />
f you have the traction control system,<br />
Leep the system on. It will improve your<br />
tbility to accelerate when driving on a<br />
ilippery road. Even though your vehicle<br />
las a traction control system, you’ll want<br />
o slow down and adjust your driving to<br />
.he road conditions. See “Traction Control<br />
system” in the Index.<br />
[f you don’t have the traction control<br />
Gystem, accelerate gently. Try not to break<br />
:he fragile traction. If you accelerate too<br />
Fast, the drive wheels will spin and polish<br />
:he surface under the tires even more.<br />
Your anti-lock brakes improve your<br />
2bility to make a hard stop on a slippery<br />
road. Even though you have an anti-lock<br />
braking system, you’ll want to begin<br />
stopping sooner than you would on dry<br />
pavement. See “Anti-Lock” in the Index.<br />
Allow greater following distance on<br />
any slippery road.<br />
Watch for slippery spots. The road<br />
might be fine until you hit a spot that’s<br />
covered with ice. On an otherwise<br />
clear road, ice patches may appear in<br />
shaded areas where the sun can’t<br />
reach: around clumps of trees, behind<br />
buildings, or under bridges.<br />
Sometimes the surface of a curve or<br />
an overpass may remain icy when the<br />
surrounding roads are clear. If you see<br />
a patch of ice ahead of you, brake<br />
before you are on it. Try not to brake<br />
while you’re actually on the ice, and<br />
avoid sudden steering maneuvers.<br />
. 166
newspapers, burlap bags, rags, floor mats<br />
-- anything you can wrap around yourself<br />
or tuck under your clothing to keep warm.<br />
You can run the engine to keep warm, but<br />
be careful.<br />
If You’re Caught in a<br />
Blizzard<br />
If you are stopped by heavy snow, you<br />
could be in a serious situation. You should<br />
probably stay with your vehicle unless<br />
you know for sure that you are near help<br />
and you can hike through the snow. Here<br />
are some things to do to summon help and<br />
keep yourself and your passengers safe:<br />
Turn on your hazard flashers. Tie a red<br />
cloth to your vehicle to alert police that<br />
you’ve been stopped by the snow. Put on<br />
extra clothing or wrap a blanket around<br />
you. If you have no blankets or extra<br />
clothing, make body insulators from<br />
Run your engine only as long as you<br />
must. This saves fuel. When you run the<br />
engine, make it go a little faster than just<br />
idle. That is, push the accelerator slightly.<br />
This uses less fuel for the heat that you<br />
get and it keeps the battery charged. You<br />
will need a well-charged battery to restart<br />
the vehicle, and possibly for signaling<br />
later on with your headlights. Let the<br />
heater run for awhile.<br />
167 ...
Your Driving and the Road<br />
If You’re Caught in a<br />
Blizzard (CONX)<br />
Then, shut the engine off and close the<br />
window almost all the way to preserve the<br />
heat. Start the engine again and repeat this<br />
only when you feel really uncomfortable<br />
from the cold. But do it as little as<br />
possible. Preserve the fuel as long as you<br />
can. To help keep warm, you can get out<br />
of the vehicle and do some fairly vigorous<br />
exercises every half hour or so until help<br />
comes.<br />
I‘<br />
Towing a Trailer<br />
NOTICE:<br />
Pulling a trailer improperly can<br />
damage your vehicle and result in<br />
costly repairs not covered by your<br />
warranty. To pull a trailer correctly,<br />
follow the advice in this section, and<br />
see your Pontiac dealer for<br />
important information about towing<br />
a trailer with your vehicle.<br />
-<br />
Your vehicle can tow a trailer. To identify<br />
what the vehicle trailering capacity is for<br />
your vehicle, you should read the<br />
information in “Weight of the Trailer” that<br />
appears later in this section. But trailering<br />
is different than just driving your vehicle<br />
by itself. Trailering means changes in<br />
handling, durability, and fuel economy.<br />
Successful, safe trailering takes correct<br />
equipment, and it has to be used properly.<br />
. . . 168
That’s the reason for this section. In it are<br />
many time-tested, important trailering<br />
tips and safety rules. Many of these are<br />
important for your safety and that of your<br />
passengers. So please read this section<br />
carefully before you pull a trailer.<br />
Load-pulling components such as the<br />
engine, transaxle, wheel assemblies, and<br />
tires are forced to work harder against the<br />
drag of the added weight. The engine is<br />
required to operate at relatively higher<br />
speeds and under greater loads,<br />
generating extra heat. What’s more, the<br />
trailer adds considerably to wind<br />
resistance, increasing the pulling<br />
requirements.<br />
If You Do Decide To Pull A Trailer<br />
If you do, here are some important points.<br />
There are many different laws having<br />
to do with trailering. Make sure your<br />
rig will be legal, not only where ,you<br />
live but also where you’ll be driving.<br />
A good source for this information<br />
can be state or provincial police.<br />
Consider using a sway control if your<br />
trailer will weigh 2000 pounds<br />
(900 kg) or less. You should always<br />
use a sway control if your trailer<br />
will weigh more than 2000 pounds<br />
(900 kg).<br />
You can ask a hitch dealer about sway<br />
controls.<br />
Don’t tow a trailer at all during the<br />
first 500 miles (800 km) your new<br />
vehicle is driven. Your engine, axle or<br />
other parts could be damaged.<br />
0 Then, during the first 500 miles<br />
(800 km) that you tow a trailer, don’t<br />
drive over 50 mph (80 km/h) and<br />
don’t make starts at full throttle. This<br />
helps your engine and other parts of<br />
your vehicle wear in at the heavier<br />
loads.<br />
Three important considerations have to do<br />
with weight:<br />
. ,
Your Driving and the Road<br />
\<br />
...<br />
A<br />
1 Weight of the Trailer<br />
€ low heavy can a trailer safely be?<br />
E 3ut even that can be too heavy. It depends<br />
C m how you plan to use your rig. For<br />
e :xample, speed, altitude, road grades,<br />
C mtside temperature and how much your<br />
lehicle is used to pull a trailer are all<br />
I 70<br />
p<br />
I<br />
B<br />
important. And, it can also depend on an!<br />
special equipment that you have on your<br />
vehicle.<br />
I t should never weigh more than 1,400<br />
€ Iounds (630 kg) with up to six occupants<br />
c )r more than 2,000 pounds (900 kg) with<br />
11p to two occupants unless you have the<br />
( >ptional trailer-towing package. With the<br />
t railer-towing package (available only with<br />
t he 3800 V6 engine), your vehicle can tow<br />
I ~p to 2,400 pounds (1 090 kg) with up<br />
tl D six occupants or up to 3,000 pounds<br />
( 1360 kg) with up to two occupants.<br />
In Canada, write to:<br />
You can ask your dealer for our trailering<br />
information or advice, or you can write u<br />
at:<br />
Customer Assistance Center<br />
Pontiac Division<br />
One Pontiac Plaza<br />
Pontiac, MI 48340-2952<br />
General Motors of Canada Limited,<br />
Customer Assistance Center,<br />
1908 Colonel Sam Drive,<br />
Oshawa, Ontario L1H 8P7.<br />
Weight of the Trailer<br />
Tongue<br />
The tongue load (A) of any trailer is an<br />
important weight to measure because it<br />
affects the total capacity weight of your<br />
vehicle. The capacity weight includes the<br />
curb weight of the vehicle, any cargo you<br />
may carry in it, and the people who will<br />
be riding in the vehicle. And if you will<br />
tow a trailer, you must subtract the tongue<br />
load from your vehicle’s capacity weight<br />
because your vehicle will be carrying that<br />
weight, too. See “Loading Your Vehicle’’<br />
in the Index for more information about<br />
your vehicle’s maximum load capacity.<br />
If you’re using a “dead-weight” hitch, the<br />
trailer tongue (A) should weigh 10% of<br />
the total loaded trailer weight (B). If you<br />
have a “weight-distributing” hitch, the<br />
trailer tongue (A) should weigh 12% of<br />
the total loaded trailer weight (B).<br />
After you’ve loaded your trailer, weigh<br />
the trailer and then the tongue, separately,<br />
to see if the weights are proper. If they<br />
aren’t, you may be able to get them right<br />
simply by moving some items around in<br />
the trailer.
Total Weight on Your<br />
Vehicle’s Tires<br />
Be sure your vehicle’s tires are inflated to<br />
the limit for cold tires. You’ll find these<br />
numbers on the Certification label at the<br />
rear edge of the driver’s door<br />
Certificationnire label at the edge of the<br />
driver’s door or see “Tire Loading” in the<br />
Index. Then be sure you don’t go over the<br />
GVW limit for your vehicle.<br />
Hitches<br />
It’s important to have the correct hitch<br />
equipment. Crosswinds, large trucks<br />
going by, and rough roads are a few<br />
reasons why you’ll need the right hitch,<br />
Here are some rules to follow:<br />
If you’ll be pulling a trailer that, when<br />
loaded, will weigh more than 2,000<br />
pounds (900 kg), be sure to use a<br />
properly mounted, weight-distributing<br />
hitch and sway control of the proper<br />
size. This equipment is very important<br />
for proper vehicle loading and good<br />
handling when you.’re driving,<br />
Will you have to make any holes in<br />
the body of your vehicle when you<br />
install a trailer hitch? If you do, then<br />
be sure to seal the holes later when<br />
you remove the hitch. If you don’t<br />
seal them, deadly carbon monoxide<br />
(CO) from your exhaust can get into<br />
your vehicle (see “Carbon Monoxide”<br />
in the Index). Dirt and water can, too.<br />
0 The bumpers on your vehicle are not<br />
intended for hitches. Do not attach<br />
rental hitches or other bumper-type<br />
hitches to them. Use only a<br />
frame-mounted hitch that does not<br />
attach to the bumper.<br />
Safety Chains<br />
You should always attach chains between<br />
your vehicle and your trailer. Cross the<br />
safety chains under the tongue of the<br />
trailer so that the tongue will not drop to<br />
the road if it becomes separated from the<br />
hitch. Instructions about safety chains<br />
may be provided by the hitch<br />
manufacturer or by the trailer<br />
manufacturer. Follow the manufact6,rer’s<br />
recommendation for attaching safety<br />
chains. Always leave just enough dack so<br />
you can turn with your rig. And, never<br />
allow safety chains to drag on the ground.<br />
171 ...
Your Driving and the Road<br />
Trailer Brakes<br />
[f your trailer weighs more than 1,000<br />
pounds (450 kg) loaded, then it needs its<br />
own brakes -- and they must be adequate.<br />
Be sure to read and follow the instructions<br />
for the trailer brakes so you’ll be able to<br />
install, adjust and maintain them properly.<br />
NOTE: Because you have anti-lock<br />
brakes, do not try to tap into your<br />
vehicle’s brake system. If you do, both<br />
brake systems won’t work well, or at all.<br />
Driving with a Trailer<br />
Towing a trailer requires a certain amount<br />
of experience. Before setting out for the<br />
open road, you’ll want to get to know<br />
your rig. Acquaint yourself with the feel<br />
of handling and braking with the added<br />
weight of the trailer. And always keep in<br />
mind that the vehicle you are driving is<br />
now a good deal longer and not nearly so<br />
responsive as your vehicle is by itself.<br />
Before you start, check the trailer hitch<br />
and platform, safety chains, electrical<br />
connector, lights, tires and mirror<br />
adjustment. If the trailer has electric<br />
brakes, start your vehicle and trailer<br />
moving and then apply the trailer brake<br />
... 172<br />
:ontroller by hand to be sure the brakes<br />
ire working. This lets you check your<br />
Aectrical connection at the same time.<br />
During your trip, check occasionally to be<br />
sure that the load is secure, and that the<br />
lights and any trailer brakes are still<br />
working.<br />
Following Distance<br />
Stay at least twice as far behind the<br />
vehicle ahead as you would when driving<br />
your vehicle without a trailer. This can<br />
help you avoid situations that require<br />
heavy braking and sudden turns.
1 Passing<br />
You’ll need more passing distance up<br />
ahead when you’re towing a trailer. And,<br />
because you’re a good deal longer, you’ll<br />
need to go much farther beyond the<br />
passed vehicle before you can return to<br />
your lane.<br />
Backing Up<br />
Hold the bottom of the steering wheel<br />
with one hand. Then, to move the trailer<br />
to the left, just move that hand to the left.<br />
To move the trailer to the right, move<br />
your hand to the right. Always back up<br />
slowly and, if possible, have someone<br />
guide you.<br />
Making Turns<br />
When you’re turning with a trailer, make<br />
wider turns than normal. Do this so your<br />
trailer won’t strike soft shoulders, curbs,<br />
road signs, trees, or other objects. Avoid<br />
jerky or sudden maneuvers Signal well in<br />
advance.<br />
Turn Signals When<br />
Towing a Trailer<br />
When you tow a trailer, your vehicle has<br />
to have a different turn signal flasher and<br />
extra wiring. The green arrows on your<br />
instrument panel will flash whenever you<br />
signal a turn or lane change. Properly<br />
hooked up, the trailer lights will also<br />
flash, telling other drivers you’re about to<br />
turn, change lanes or stop.<br />
When towing a trailer, the green arrows<br />
on your instrument panel will flash for<br />
turns even if the bulbs on the trailer are<br />
burned out. Thus, you may think drivers<br />
behind you are seeing your signal when<br />
they are not. It’s important to check<br />
occasionally to be sure the trailer bulbs<br />
are still working.<br />
Driving On Grades<br />
Reduce speed and shift to a lower gear<br />
before you start down a long or steep<br />
downgrade. If you don’t shift down, you<br />
might have to use your brakes so much<br />
that they would get hot and no longer<br />
work well.<br />
On a long uphill grade, shift down and<br />
reduce your speed to around 45 mph<br />
(70 km/h) to reduce the possibility of<br />
engine and transaxle overheating.<br />
173...
Your Driving and the Road<br />
Parking on Hills<br />
You really should not park your vehicle,<br />
with a trailer attached, on a hill. If<br />
something goes wrong, your rig could<br />
start to move. People can be injured, and<br />
both your vehicle and the trailer can be<br />
damaged.<br />
But if you ever have to park your rig on a<br />
hill, here’s how to do it:<br />
1.<br />
2.<br />
3.<br />
4.<br />
5.<br />
Apply your regular brakes, but don’t<br />
shift into “P” (Park) yet.<br />
Have someone place chocks under the<br />
trailer wheels.<br />
When the wheel chocks are in place,<br />
release the regular brakes until the<br />
chocks absorb the load.<br />
Reapply the regular brakes. Then<br />
apply your parking brake, and then<br />
shift to “P’ (Park).<br />
Release the regular brakes.<br />
When You Are Ready to<br />
Leave After Parking on a<br />
Hill<br />
1.<br />
2.<br />
3.<br />
4.<br />
Apply your regular brakes and hold<br />
the pedal down while you:<br />
0 Start your engine;<br />
0 Shift into a gear; and<br />
Release the parking brake.<br />
Let up on the brake pedal.<br />
Drive slowly until the trailer is clear<br />
of the chocks.<br />
Stop and have someone pick up and<br />
store the chocks.<br />
Maintenance When Trailer<br />
Towing<br />
Your vehicle will need service more often<br />
when you’re pulling a trailer. See the<br />
Maintenance Schedule for more on this.<br />
Things that are especially important in<br />
trailer operation are automatic transaxle<br />
fluid (don’t overfill), engine oil, belts,<br />
cooling system, and brake adjustment.<br />
Each of these is covered in this manual,<br />
and the Index will help you find them<br />
quickly. If you’re trailering, it’s a good<br />
idea to review these sections before you<br />
start your trip.<br />
Check periodically to see that all hitch<br />
nuts and bolts are tight.<br />
174
Problems on the<br />
Part 5<br />
Road<br />
Here you’ll find what to do about<br />
some problems that can occur on the<br />
road .<br />
Hazard Warning Flashers ............................................ 176<br />
Jumpstarting ..................................................... 177<br />
TowingYourPontiac ............................................... 181<br />
Engine Overheating ................................................ 186<br />
If a Tire Goes Flat ................................................. 193<br />
ChangingaFlatTire ................................................ 193<br />
Compactspare .................................................... 202<br />
If You’re Stuck: In Sand. Mud. Ice or Snow ............................ 202<br />
c<br />
175 ...
Problems on the Road<br />
Hazard Warning<br />
Flashers<br />
Your hazard warning flashers let you<br />
warn others. They also let police know<br />
you have a problem. Your front and rear<br />
turn signal lights will flash on and off.<br />
But they won’t flash if you‘re braking.<br />
Your hazard warning flashers switch is 01 n 1 :o turn off the flashers, pull out on the<br />
the steering column, below the ignition C :ollar. When the hazard warning flashers<br />
switch. Press the button in to make your a .re on, your turn signals won’t work.<br />
front and rear turn signal lights flash on<br />
and off.<br />
I<br />
Your hazard warning flashers work no<br />
matter what position your key is in, and<br />
even if the key isn’t in.<br />
Other Warning Devices<br />
I f you carry reflective triangles, you can<br />
S ,et one up at the side of the road about<br />
c<br />
)OO feet (100 m) behind your vehicle.<br />
. . . 176
Jump Starting<br />
If your battery has run down, you may<br />
want to use another vehicle and some<br />
jumper cables to start your Pontiac. But<br />
please follow the steps below to do it<br />
safely.<br />
On vehicles equipped with the optional<br />
power sliding door, a low voltage battery<br />
may cause the system to become<br />
inoperative. Refer to “Power Sliding<br />
Door” in the Index for more information.<br />
NOTICE:<br />
Ignoring these steps could result in<br />
costly damage to your vehicle that<br />
wouldn’t be covered by your<br />
warranty.<br />
Trying to start your Pontiac by<br />
pushing or pulling it won’t work,<br />
and it could damage your vehicle.<br />
I To Jump Start Your<br />
Pontiac:<br />
. Check the other vehicle. It must have<br />
a 12-volt battery with a negative<br />
ground system.<br />
NOTICE:<br />
If the other system isn’t a 12-volt<br />
system with a negative ground, both<br />
vehicles can be damaged.<br />
.. ><br />
1 C
Problems on the Road<br />
2.<br />
To Jump Start Your<br />
Pontiac: (CONTI<br />
Get the vehicles close enough so the<br />
jumper cables can reach, but be sure<br />
the vehicles aren’t touching each<br />
other. If they are, it could cause a<br />
ground connection you don’t want.<br />
You wouldn’t be able to start your<br />
Pontiac, and the bad grounding could<br />
damage the electrical systems.<br />
You could be injured if the vehicles roll.<br />
Set the parking brake firmly on each<br />
vehicle. Make sure the vehicles are in<br />
“P’ (Park), or “N” (Neutral) if equipped<br />
with manual transmission.<br />
3. Turn off the ignition on both vehicles.<br />
Turn off all lights that aren’t needed,<br />
and radios. This will avoid sparks and<br />
help save both batteries. And it could<br />
save your radio!<br />
NOTICE:<br />
If you leave your radio on, it could<br />
be badly damaged. The repairs<br />
wouldn’t be covered by your<br />
warranty.<br />
4. Open the hoods and locate the<br />
batteries.<br />
..e 178
Your Pontiac has a remote positive (+)<br />
jump starting terminal. The terminal is in<br />
the red box on the same side of the engine<br />
compartment as your battery. You should<br />
always use the remote positive (+)<br />
terminal instead of the positive (+)<br />
terminal on your battery.<br />
To open the remote positive (+) terminal<br />
box, pull the tab and open the cover.<br />
5. Check that the jumper cables don’t<br />
have loose or missing insulation. If<br />
they do, you could get a shock. The<br />
vehicles could be damaged, too.<br />
Before you connect the cables, here are<br />
some basic things you should know:<br />
Positive (+) will go to positive (+) and<br />
negative (-) will go to negative (-) or a<br />
metal engine part. Don’t connect (+) to<br />
(-) or you’ll get a short that would<br />
damage the battery and maybe other<br />
parts, too.<br />
179.. .
Problems on the Road<br />
To Jump Start Your<br />
Pontiac: (CONT.)<br />
6. Connect the red positive (+) cable to<br />
the positive (+) terminal of the vehicle<br />
with the dead battery. Use a remote<br />
positive (+) terminal if the vehicle has<br />
one.<br />
... 180<br />
7. Don’t let the other end touch metal.<br />
Connect it to the positive (+) terminal<br />
of the good battery. Use a remote<br />
positive (+) terminal if the vehicle has<br />
one.<br />
8. Now connect the black negative (-)<br />
cable to the good battery’s negative<br />
(-) terminal.<br />
Don’t let the other end touch anything<br />
until the next step. The other end of<br />
the negative cable doesn’t go to the<br />
dead battery. It goes to a heavy<br />
unpainted metal part on the engine of<br />
the vehicle with the dead battery.<br />
3. Attach the cable at least 18 inches<br />
(45 cm) away from the dead battery,<br />
but not near engine parts that move.<br />
The electrical connection is just as<br />
good there, but the chance of sparks<br />
getting back to the battery is much less.
10.Now start the vehicle with the good<br />
battery and run the engine for a while.<br />
11. Try to start the vehicle with the dead<br />
battery. If it won't start after a few<br />
tries, it probably needs service.<br />
B<br />
DEAD BATTERY<br />
12.Remove the cables in reverse order to<br />
prevent electrical shorting. Take care<br />
that they don't touch each other or an!<br />
other metal.<br />
C<br />
I Towing Your Pontiac<br />
'ry to have a GM dealer or a professional<br />
)wing service tow your Pontiac. The<br />
sua1 towing equipment is:<br />
A) Sling-type tow truck<br />
B) Wheel-lift tow truck<br />
C) Car carrier.<br />
F your vehicle has been changed or<br />
Iodified since it was factory-new by<br />
dding aftermarket items like fog lamps,<br />
ero skirting, or special tires and wheels,<br />
lese instructions and illustrations may<br />
ot be correct.<br />
lefore you do anything, turn on the<br />
azard warning flashers.<br />
181 ...<br />
L
Problems on the Road<br />
Towing Your Pontiac<br />
(CONK)<br />
When you call, tell the towing service:<br />
That your vehicle cannot be towed<br />
from the front with sling-type<br />
equipment.<br />
0 That your vehicle has front-wheel<br />
drive.<br />
0 The make, model, and year of your<br />
vehicle.<br />
0 Whether you can still move the shift<br />
lever.<br />
0 If there was an accident, what was<br />
damaged.<br />
When the towing service arrives, let the<br />
tow operator know that this manual<br />
contains detailed towing instructions and<br />
illustrations. The operator may want to<br />
see them.<br />
When your vehicle is being towed, have<br />
the ignition key off. The steering wheel<br />
should be clamped in a straight-ahead<br />
position, with a clamping device designed<br />
for towing service. Do not use the<br />
vehicle’s steering column lock for this.<br />
The transaxle should be in Neutral and the<br />
parking brake released.<br />
Don’t have your vehicle towed on the front<br />
wheels, unless you must. If the vehicle<br />
must be towed on the front wheels, don’t<br />
go more than 35 mph (55 km/h) or farther<br />
than 50 miles (80 km) or your transaxle<br />
will be damaged. If these limits must be<br />
exceeded, then the front wheels have to be<br />
supported on a dolly.<br />
. . . 182
Towing from the<br />
Front-Vehicle Hook-up<br />
Before hooking up to a tow truck, be sure<br />
to read all the information on “Towing<br />
Your Pontiac” earlier in this section.<br />
NOTICE:<br />
Towing a vehicle over rough<br />
surfaces could damage a vehicle.<br />
Damage can occur from vehicle to<br />
ground or vehicle to wheel-lift .’<br />
equipment. To help avoid damage,<br />
install a towing dolly and raise<br />
vehicle until adequate clearance is<br />
obtained between the ground and/or<br />
wheel-lift equipment.<br />
Do not attach winch cables or<br />
J-hooks to suspension componeqts<br />
when using car carrier equipment,<br />
Always use T-hooks inserted in the<br />
-<br />
T-hook slots.<br />
NOTICE:<br />
Do not tow with sling-type<br />
equipment or fascia/fog light<br />
damage will occur. Use wheel-lift or<br />
car carrier equipment. Additional<br />
ramping may be required for car<br />
carrier equipment.<br />
183. ..
Problems on the Road<br />
I<br />
AI<br />
Towing from the<br />
Front-Vehicle Hook-up<br />
(CON?)<br />
1. Attach T-hook chains on both sides<br />
in the slotted holes in the bottom of<br />
the frame rails, about 2 feet behind<br />
the front wheels.<br />
,.<br />
2. Attach a separate safety chain around<br />
the outboard end of each lower control<br />
arm.<br />
I<br />
Towing from the<br />
9ear-Vehicle Hook-up<br />
5efore hooking up to a tow truck, be sure<br />
3 read all the information on "Towing<br />
lour Pontiac" earlier in this section.<br />
1 Attach T-hook chains on both sides in<br />
the slotted holes in the frame rails just<br />
ahead of the rear wheels.
2. Position the lower sling crossbar<br />
directly under the rear bumper. No<br />
4x4 wood beam is needed.<br />
3. Attach a separate safety chain around<br />
the end of each .axle inboard of the<br />
spring.<br />
4. Be certain your vehicle is towed no<br />
fasteT than 35 mph (55 km/h) and no<br />
farther than 50 miles (80 km) to avoid<br />
damage to your transaxle.<br />
, -<br />
, , $'<br />
NOTICE'<br />
~ j .<br />
8<br />
Towing a vehicle over rough<br />
surfaces could damage a vehicle.<br />
Damage can oGcur from vehicle to<br />
ground or vehicle to wheel-lift :.<br />
equipment. To help avoid damage,<br />
install a towing dolly and raise ',<br />
vehicle until adequate clearance is<br />
obtained between the ground and/or<br />
wheel-lift equipment.<br />
Do not attach Winch cables or , I)<br />
J-hooks to suspension componehts<br />
when using car carrier equipme&<br />
Always use T-hooks inserted in @e<br />
T-hook slots.<br />
...<br />
185 ...
Problems on the Road<br />
Engine Overheating<br />
You will find a coolant temperature gage<br />
an your Pontiac’s instrument panel. See<br />
“Coolant Temperature Gage” in the<br />
[ndex.<br />
If Sfeam /s Coming From<br />
Your Engine<br />
NOTICE:<br />
If your engine catches fire because<br />
you keep driving with no coolant,<br />
your vehicle can be badly damaged.<br />
The costly repairs would not be<br />
covered by your warranty.<br />
-.. I86
If No Steam Is Coming<br />
From Your Engine<br />
If you get the overheat warning but see or<br />
hear no steam, the problem may not be<br />
too serious. Sometimes the engine can get<br />
a little too hot when you:<br />
0 Climb a long hill on a hot day.<br />
0 Stop after high speed driving.<br />
Idle for long periods in traffic.<br />
Tow a trailer.<br />
If you get the overheat warning with no<br />
sign of steam, try this for a minute or so:<br />
1. If you have an air conditioner, turn it<br />
Off.<br />
2. Turn on your heater to full hot at the<br />
highest fan speed and open the<br />
window as necessary.<br />
3. Try to keep your engine under load<br />
(in a drive gear where the engine runs<br />
slower).<br />
If you no longer have the overheat<br />
warning, you can drive. Just to be safe,<br />
drive slower for about ten minutes. If the<br />
warning doesn’t come back on, you can<br />
drive normally.<br />
If the warning continues, pull over, stop,<br />
and park your vehicle right away.<br />
If there’s still no sign of steam, you can<br />
idle the engine for two or three minutes<br />
while you’re parked, to see if the warning<br />
stops. But then, if you still have the<br />
warning, TURN OFF THE ENGINE<br />
AND GET EVERYONE OUT OF THE<br />
VEHICLE until it cools down.<br />
You may decide not to lift the hood but to<br />
get service help right away.<br />
Cooling System<br />
When you decide it’s safe to lift the hood,<br />
here’s what you’ll see:’<br />
(A) Coolant recovery tank<br />
(B) Radiator pressure cap<br />
(c) Electric engine fan, or fans if you<br />
have the 3800 V6 engine.<br />
[f the coolant inside the coolant recovery<br />
tank is boiling, don’t do anything else<br />
until it cools down.<br />
C<br />
187 ...
Problems on the Road<br />
The coolant level should be at or above<br />
:he “FULL HOT” mark. If it isn’t, you<br />
nay have a leak in the radiator hoses,<br />
leater hoses, radiator, water pump or<br />
somewhere else in the cooling system.<br />
Cooling System (CONT.)
I I NOTICE:<br />
Engine damage from running your<br />
engine without coolant isn’t covered<br />
by your warranty.<br />
I<br />
If there seems to be no leak, check to see<br />
if the electric engine fan is running. If the<br />
engine is overheating, the fan should be<br />
running. If it isn’t, your vehicle needs<br />
service.<br />
How to Add Coolant to the<br />
Coolant Recovery Tank<br />
If you haven’t found a problem yet, but<br />
the coolant level isn’t at or above the<br />
“FULL HOT” mark, mark, add a 50/50<br />
mixture of clean water (preferably<br />
distilled) and a proper antifreeze at the<br />
coolant recovery tank. (See “Engine<br />
Coolant” in the Index for more<br />
information about the proper coolant<br />
mix.)<br />
NOTICE:<br />
In cold weather, water can freeze<br />
and crack the engine, radiator,<br />
heater core and other parts. Use the<br />
recommended coolant.<br />
v<br />
Vhen the coolant in the coolant recovery<br />
ti m n k is at or above the “FULL HOT”<br />
IT lark, start your vehicle.<br />
If the overheat warning continues, there’s<br />
0: ne more thing you can try. You can add<br />
tf le proper coolant mix directly to the<br />
rz ldiator but be sure the cooling system is<br />
C( 301 before you do it.<br />
189 ...<br />
E
Problems on the Road<br />
Uow to Add Coolant to the<br />
Radiator<br />
I. You can remove the radiator pressure<br />
cap when the cooling system,<br />
including the radiator pressure cap and<br />
upper radiator hose, is no longer hot.<br />
Turn the pressure cap slowly to the<br />
left until it first stops. (Don’t press<br />
down while turning the pressure cap).<br />
... 190
2.<br />
If you hear a hiss, wait for that to stop.<br />
A hiss means there is still some<br />
pressure left.<br />
Then keep turning the pressure cap,<br />
but now push down as you turn it.<br />
Remove the pressure cap.<br />
3 I. Fill the radiator with the proper mix,<br />
up to the base of the filler neck.<br />
1. Then fill the coolant recovery tank to<br />
the “FULL HOT” mark.<br />
191 ...
Problems on the Road<br />
7. By this time the coolant level inside<br />
the radiator filler neck may be lower.<br />
If the level is lower, add more of the<br />
proper mix through the filler neck<br />
until the level reaches the base of the<br />
filler neck.<br />
5. Put the cap back on the coolant<br />
recovery tank, but leave the radiator<br />
pressure cap off.<br />
6. Start the engine and let it run until you<br />
can feel the upper radiator hose gettinl r<br />
Y<br />
hot. Watch out for the engine fan(s).<br />
... 192
8. Then replace the pressure cap. Be sure<br />
the arrows on the pressure cap line up<br />
like this.<br />
If a Tire Goes Flat<br />
It’s unusual for a tire to “blow out” while<br />
you’re driving, especially if you maintain<br />
your tires properly. If air goes out of a<br />
tire, it’s much more likely to leak out<br />
slowly. But if you should ever have a<br />
“blowout,” here are a few tips about what<br />
to expect and what to do:<br />
If a front tire fails, the flat tire will create<br />
a drag that pulls the vehicle toward that<br />
side. Take your foot off the accelerator<br />
pedal and grip the steering wheel firmly.<br />
Steer to maintain lane position, then<br />
gently brake to a stop well out of the<br />
traffic lane.<br />
A rear blowout, particularly on a curve,<br />
acts much like a skid and may require the<br />
same correction you’d use in a skid. In<br />
any rear blowout, remove your foot from<br />
the accelerator pedal. Get the vehicle<br />
under control by steering the way you<br />
want the vehicle to go. It may be very<br />
bumpy and noisy, but you can still steer.<br />
Gently brake to a stop, well off the road if<br />
possible.<br />
If a tire goes flat, the next section shows<br />
how to use your jacking equipment to<br />
change a flat tire safely.<br />
Air Influtor<br />
Your vehicle may have an air inflator for<br />
use in bringihg tires up to the proper<br />
pressure. To learn about it, see “Air<br />
Inflator System” in the Index.<br />
193...
Problems on the Road<br />
Changing a Flat Tire<br />
(CONK)<br />
The following steps will tell you how to<br />
use the jack and change a tire.<br />
The equipment you'll need is in the<br />
storage compartment at the rear of the<br />
vehicle.<br />
1. Open the jack storage compartment by<br />
sliding the latch down and removing<br />
the compartment cover.<br />
... 194
2. Remove the jack and jacking tools by<br />
loosening the wing nut and retainer<br />
bar.<br />
3. Separate the plastic pouch from the<br />
jack and remove the jacking tools<br />
(folding wrench and shaft) from the<br />
pouch.<br />
'. The compact spare tire is located<br />
under the vehicle, behind the rear<br />
bumper. Insert the narrow end of the<br />
shaft into the hole above the rear<br />
bumper. Then attach the folding<br />
wrench to the shaft.<br />
. Rotate the folding wrench<br />
counterclockwise to lower the<br />
compact spare tire until it can be<br />
pulled from under the vehicle.<br />
6. Slide the cable retainer through the<br />
center of the spare, then place'ihe<br />
compact spare tire near the flat:tire.<br />
195...
Problems on the Road<br />
Changing a Flat Tire<br />
(CONT.)<br />
7. If your vehicle has aluminum wheels,<br />
each wheel nut is covered with a<br />
nylon cap. Use the folding wrench to<br />
remove the nylon caps from the whee<br />
nuts before you loosen the nuts.<br />
... 196<br />
If your vehicle has the plastic<br />
“bolt-on’’ wheel covers, you cannot<br />
separate the nylon wheel nut caps<br />
from the cover. Loosen them<br />
completely using the folding wrench,<br />
and remove the wheel cover. If the<br />
wheel nut caps have been completely<br />
loosened, the wheel cover will come<br />
off easily.<br />
8. If your vehicle has aluminum wheels,<br />
each wheel has one wheel locknut in<br />
place of a standard wheel nut. A<br />
special wheel lock key (removal tool)<br />
and instructions are stored in your<br />
glove box. Attach the wheel lock key<br />
to the socket of the folding wrench.<br />
Remove the locking wheel nut by<br />
turning counterclockwise.<br />
If your vehicle has the plastic<br />
“bolt-on” wheel covers, you will not<br />
have a locking wheel nut.<br />
9. Loosen the wheel nuts-but do not<br />
remove them-using the folding<br />
wrench.
1O.Attach the folding wrench to the jack,<br />
and rotate the wrench clockwise to<br />
rais'e the jack head a few inches.<br />
1. Near each wheel, there is a notch in<br />
the vehicle's frame. Position the jack<br />
and raise the jack head until it fits<br />
firmly into the notch in the vehicle's<br />
frame nearest the flat tire. Do not raist<br />
the vehicle yet. Put the compact spare<br />
tire near you.<br />
C<br />
197...
Problems on the Road<br />
Changing a Flat Tire<br />
(CONI)<br />
I3.Remove all the wheel nuts and take<br />
off the flat tire.<br />
NOTICE:<br />
Raising your vehicle with the jack<br />
improperly positioned will damage<br />
the vehicle or may allow the vehicle<br />
to fall off the jack. Be sure to fit the<br />
jack lift head into the proper<br />
location before raising your vehicle.<br />
12.Raise the vehicle by rotating the<br />
folding wrench clockwise in the jack.<br />
Raise the vehicle far enough off the<br />
ground so there is enough room for<br />
the spare tire to fit.<br />
. b. 198
14.Remove any corrosion or dirt from the<br />
wheel bolts, mounting surfaces or<br />
spare wheel. Place the spare on the<br />
wheel mounting surface.<br />
15.Replace the wheel nuts with the<br />
rounded end of the nuts toward the<br />
wheel. Tighten each .nut by hand until<br />
the wheel is held against the hub.<br />
16.Lower the vehicle by attaching the<br />
folding wheel wrench to the jabk and<br />
rotating the wrench counterclockwise.<br />
Lower the jack completely. .., C<br />
199...
Problems on the Road<br />
NOTICE:<br />
Wheel covers won’t fit on your<br />
compact spare. If you try to put a<br />
wheel cover on your compact spare,<br />
you could damage the cover or the<br />
spare.<br />
Changing a Flat Tire<br />
(CONI)<br />
17.Tighten the wheel nuts firmly in a<br />
criss-cross sequence, as shown.<br />
Don’t try to put a wheel cover on the<br />
I compact spare tire. It won’t fit. Store the<br />
wheel cover securely in the rear of the<br />
vehicle until you have the flat tire<br />
repaired or replaced.<br />
‘top somewhere as soon as you can and<br />
ave the nuts tightened with a torque<br />
rrench. The torque setting should be 100<br />
ound-feet (140 Nom).<br />
. 200
18.Lay the flat tire near the rear of the<br />
vehicle with the valve stem down.<br />
Slide the cable retainer through the<br />
center of the wheel and raise the flat<br />
tire until you hear the hoist<br />
mechanism click twice. This means<br />
the wheel is firmly stored against the<br />
underside of the vehicle.<br />
When storing the spare tire, be certain<br />
to turn the spare so the valve stem is<br />
near the rear of the vehicle. This will<br />
help you to check and maintain tire<br />
pressure in the spare.<br />
Push against the tire to be certain it is<br />
stored firmly.<br />
19.Replace all jacking tools as they were<br />
stored in the jack storage compartment<br />
and replace the compartment cover.<br />
Unless you have the plastic “bolt-on”<br />
wheel covers, be sure to also store the<br />
nylon nut caps. When you replace the<br />
compact spare with a full-size tire,<br />
replace the bolt-on wheel covers or<br />
the nylon nut caps. Tighten them<br />
“hand tight” over the wheel nuts, using<br />
the folding wrench (see step 7).<br />
201 ...
Problems on the Road<br />
Compact Spare Tire<br />
Although the compact spare was fully<br />
inflated when your vehicle was new, it<br />
can lose air after a time. Check the<br />
inflation pressure regularly. It should be<br />
60 psi (420 kPa). After installing the<br />
compact spare on your vehicle, you<br />
should stop as soon as possible and make<br />
sure your spare tire is correctly inflated.<br />
The compact spare is made to perform<br />
well at posted speed limits for distances<br />
up to 3,000 miles (5 000 km), so you can<br />
finish your trip and have your full-size<br />
tire repaired or replaced where you want.<br />
Of course, it’s best to replace your spare<br />
with a full-size tire as soon as you can.<br />
Your spare will last longer and be in good<br />
shape in case you need it again.<br />
NOTICE:<br />
Don’t take your compact spare<br />
through an automatic car wash with<br />
guide rails. The compact spare can<br />
get caught on the rails. That can<br />
damage the tire and wheel, and<br />
maybe other parts of your vehicle.<br />
Dl on’t use your compact spare on some<br />
ot her vehicle.<br />
A nd don’t mix your compact spare or<br />
W heel with other wheels or tires. They<br />
W on’t fit. Keep your spare and its wheel<br />
to lgether.<br />
NOTICE:<br />
Tire chains won’t fit your compact<br />
spare. Using them will damage your<br />
vehicle and destroy the chains too.<br />
Don’t use tire chains on your<br />
compact spare.<br />
I If You’re Stuck: In<br />
Sand, Mud, Ice or<br />
Snow<br />
Vhat you don’t want to do when your<br />
rehicle is stuck is to spin your wheels.<br />
?he method known as “rocking’’ can help<br />
~OU get out when you’re stuck, but you<br />
nust use caution.<br />
. e . 202
NOTICE:<br />
Spinning your wheels can destroy<br />
parts of your vehicle as well as the<br />
tires. If you spin the wheels too fast<br />
while shifting your transaxle back<br />
and forth, you can destroy your<br />
transaxle.<br />
Rocking your vehicle to get it out:<br />
First, turn your steering wheel left and<br />
right. That will clear the area around your<br />
front wheels. You should turn your<br />
traction control system off. (See “Traction<br />
Control System” in the Index.) Then shift<br />
back and forth between “R” (Reverse)<br />
and a forward gear, spinning the wheels<br />
as little as possible. Release the<br />
accelerator pedal while you shift, and<br />
press lightly on the accelerator pedal<br />
when the transaxle is in gear. If that<br />
doesn’t get you out after a few tries, you<br />
may need to be towed out. If you do need<br />
to be towed out, see “Towing Your<br />
Pontiac” in the Index.
Notes<br />
204
Part 6<br />
Service & Appearance Care<br />
Here you will find information about<br />
the care of your Pontiac . This part<br />
begins with service and fuel<br />
information. and then it shows how to<br />
check important fluid and lubricant<br />
levels . There is also technical<br />
information about your vehicle. and a<br />
section devoted to its appearance<br />
care .<br />
Service .................................................... ..... 206<br />
Fuel .................................................<br />
Hood Release ......................................<br />
..... ..... 207<br />
..... ..... 209<br />
Engineoil ................................ .. ..... ..... 211<br />
Aircleaner .............................. ........................ 215<br />
Transaxle Fluid ...........................<br />
Engine Coolant ...........................<br />
Power Steering Fluid ...................... .....<br />
Windshield Washer Fluid ...........<br />
Brake Master Cylinder .............<br />
Battery .........................<br />
Headlight Bulb Replacement ........<br />
Windshield Wiper Blade Replacement<br />
Loading Your Vehicle .............<br />
Tires ...........................<br />
.......<br />
.......<br />
.....<br />
.....<br />
....<br />
Appearance Care ...............<br />
Appearance Care Chart ............<br />
Vehicle Identification Number (V IN) .<br />
Add-on Electrical Equipment .......<br />
Fuses & Circuit Breakers ...............<br />
Capacities and Specifications ...........<br />
Normal Maintenance Replacement Parts ...<br />
Replacement Bulbs ...................<br />
..<br />
.....<br />
...<br />
...<br />
..<br />
..<br />
..<br />
..<br />
..<br />
...<br />
....<br />
...<br />
........... 217<br />
......... 219<br />
...... 221<br />
...... 222<br />
........<br />
..................... 223<br />
..................... 225<br />
..... ........... 226<br />
..................... 228<br />
..... ........... 228<br />
.............. 230<br />
.............. 235<br />
............. 241<br />
...<br />
...................... 242<br />
...................... 242<br />
...................... 243<br />
... ........... 248<br />
... ............. 250<br />
....................... 251<br />
205 ...
Service & Appearance Care<br />
I Service<br />
four Pontiac dealer knows your vehicle<br />
)est and wants you to be happy with it.<br />
Ne hope you’ll go to your dealer for all<br />
lour service needs. You’ll get genuine<br />
3M parts and GM-trained and supported<br />
;ervice people.<br />
We hope you’ll want to keep your GM<br />
dehicle all GM. Genuine GM parts have<br />
me of these marks.<br />
Doing Your Own Service<br />
Work<br />
[f you want to do some of your own<br />
jervice work, you’ll want to get the<br />
,roper Pontiac Service Manual. It tells<br />
you much more about how to service your<br />
Pontiac than this manual can, To order the<br />
proper service manual, see “Service<br />
Publications” in the Index.<br />
Your vehicle has an air bag system.<br />
Before attempting to do your own service<br />
work, see “Servicing Your Air<br />
Bag-Equipped Pontiac” in the Index.<br />
You should keep a record with all parts<br />
receipts and list the mileage and the date<br />
of any service work you perform. See<br />
“Maintenance Record” in the Index.<br />
NOTICE:<br />
If you try to do your own service<br />
work without knowing enough<br />
about it, your vehicle could be<br />
damaged.<br />
. . .206
Fuel<br />
Use regular unleaded gasoline rated at<br />
87 octane or higher. It should meet<br />
specifications ASTM D4814 in the U.S.<br />
and CGSB 3.5-92 in Canada. These fuels<br />
should have the proper additives, so you<br />
should not have to add anything to<br />
the fuel.<br />
In the U.S. and Canada, it’s easy to be<br />
sure you get the right kind of gasoline<br />
(unleaded). You’ll see “UNLEADED”<br />
right on the pump. And only unleaded<br />
nozzles will fit into your vehicle’s<br />
filler neck.<br />
Be sure the posted octane is at least 87. If<br />
the octane is less than 87, you may get a<br />
heavy knocking noise when you drive. If<br />
it’s bad enough, it can damage your<br />
engine.<br />
If you’re using fuel rated at 87 octane or<br />
higher and you still hear heavy knocking,<br />
your engine needs service. But.don’t<br />
worry if you hear a little pinging noise<br />
when you’re accelerating or driving up a<br />
hill. That’s normal, and you don’t have to<br />
buy a higher octane fuel to get rid of<br />
pinging. It’s the heavy, constant knock<br />
that means you have a problem.<br />
What about gasoline with blending<br />
materials that contain oxygen<br />
[oxygenates), such as MTBE or alcohol?<br />
MTBE is “methyl tertiary-butyl ether.”<br />
Fuel that is no more than 15% MTBE is<br />
Fine for your vehicle.<br />
Ethanol is ethyl or grain alcohol.<br />
Properly-blended fuel that is no more<br />
than 10% ethanol is fine for your vehicle.<br />
Methanol is methyl or wood alcohol.<br />
NOTICE:<br />
Fuel that is more than 5% methanol<br />
is bad for your vehicle. Don’t use it.<br />
It can corrode metal parts in your<br />
fuel system and also damage plastic<br />
and rubber parts. That damage<br />
wouldn’t be covered under your<br />
warranty. And even at 5% or less,<br />
there must be “cosolvents” and<br />
corrosion preventers in this fuel to<br />
help avoid these problems.<br />
Fuel Capacity: 20 U.S. Gallons (76L).<br />
Use unleaded fuel only.<br />
207.. .
Service & Appearance Care<br />
Gasolines for Cleaner Air<br />
Your use of gasoline with deposit control<br />
additives will help prevent deposits from<br />
forming in your engine and fuel system.<br />
That helps keep your engine in tune and<br />
your emission control system working<br />
properly. It’s good for your vehicle, and<br />
you’ll be doing your part for cleaner air.<br />
Many gasolines are now blended with<br />
oxygenates. General Motors recommends<br />
that you use gasolines with these blending<br />
materials, such as MTBE and ethanol. By<br />
doing so, you can help clean the air,<br />
especially in those parts of the country<br />
that have high carbon monoxide levels.<br />
In addition, some gasoline suppliers are<br />
now producing reformulated gasolines.<br />
These gasolines are specially designed to<br />
reduce vehicle emissions. General Motors<br />
recommends that you use reformulated<br />
gasoline. By doing so, you can help clean<br />
the air, especially in those parts of the<br />
country that have high ozone levels.<br />
You should ask your service station<br />
operators if their gasolines contain deposit<br />
control additives and oxygenates, and if<br />
they have been reformulated to reduce<br />
vehicle emissions.<br />
Fuels in Foreign<br />
Countries<br />
[f you plan on driving in another country<br />
outside the U.S. or Canada, unleaded fuel<br />
may be hard to find. Do not use leaded<br />
gasoline. If you use even one tankful,<br />
your emission controls won’t work well<br />
or at all. With continuous use, spark plugs<br />
can get fouled, the exhaust system can<br />
corrode, and your engine oil can<br />
deteriorate quickly. Your vehicle’s oxygen<br />
sensor will be damaged. All of that means<br />
costly repairs that wouldn’t be covered by<br />
your warranty.<br />
To check on fuel availability, ask an auto<br />
club, or contact a major oil company that<br />
does business in the country where you’ll<br />
be driving.<br />
You can also write us at the following<br />
address for advice. Just tell us where<br />
you’re going and give your Vehicle<br />
identification Number (VIN).<br />
General Motors Overseas Distribution<br />
Corporation,<br />
North American Export Sales (NAES)<br />
1908 Colonel Sam Drive<br />
Oshawa, Ontario LlH 8P7<br />
I Filling Your Tank<br />
:he cap is behind a hinged door on the<br />
eft side of your vehicle. You will notice<br />
hat on the inside of the hinged door there<br />
s a place to hold the gas cap while you<br />
re adding fuel.<br />
3e careful not to spill gasoline. Clean<br />
5asoline from painted surfaces as soon as<br />
Iossible. See “Cleaning the Outside of<br />
four Pontiac” in the Index.<br />
. 208
Be careful not to spill gasoline. Clean<br />
gasoline from painted surfaces as soon as<br />
possible. See “Cleaning the Outside of<br />
Your Pontiac” in the Index.<br />
When you put the cap back on, turn it to<br />
the right until you hear a clicking noise.<br />
To take off the cap, turn it slowly to the<br />
left (counterclockwise).<br />
NOTICE:<br />
If you need a new cap, be sure to get<br />
the right type. Your dealer can get<br />
one for you. If you get the wrong<br />
type, it may not fit or have proper<br />
venting, and your fuel tank and<br />
emissions system might be damaged.<br />
Checking Things<br />
Under the Hood<br />
Hood Release<br />
To open the hood, first pull the hood<br />
release handle inside the vehicle.<br />
C<br />
Then go to the front of the vehicle and pull<br />
up on the underhood release. Lift the hood.<br />
209.. .
Service & Appearance Care<br />
Checking Things<br />
Under the Hood (CONK)<br />
The hood prop may be hot due to<br />
increased engine temperatures under the<br />
good, so be careful when handling it. Use<br />
your good prop sleeve when handling the<br />
good prop.<br />
Pull forward on the hood prop to release it<br />
from its storage clip. Then put the end of<br />
the hood prop into the slot in the<br />
underside of the hood.<br />
Before closing the hood, be sure all the<br />
filler caps are on properly. Then lift the<br />
hood to relieve the pressure on the hood<br />
prop. Remove the hood prop from the slot<br />
in the hood and return the prop to its<br />
retainer. Then just let the hood down and<br />
close it firmly.<br />
8 210
Engine Oil<br />
It’s a good idea to check your engine oil<br />
every time you get fuel. In order to get an<br />
accurate reading, the oil must be warm<br />
and the vehicle must be on level ground.<br />
Turn off the engine and give the oil a few<br />
minutes to drain back into the oil pan. If<br />
you don’t, the oil dipstick might not show<br />
the actual level.<br />
Underhood Light (oPTIcTN)<br />
Your underhood light will go on when<br />
you open the hood.<br />
To Check Engine Oil<br />
Pull out the dipstick and clean it with a<br />
paper towel or cloth, then push it back in<br />
all the way. Remove it again, keeping the<br />
tip lower, and check the level.<br />
3.1L V6: Checking Engine Oil<br />
C<br />
3800 V6: Checking Engine Oil<br />
211 0<br />
. .
Service & Appearance Care<br />
Wen to Add Oil<br />
the oil is at or below the ADD mark,<br />
len you’ll need to add some oil. But you<br />
lust use the right kind. This section<br />
tplains what kind of oil to use. For<br />
rankcase capacity, see “Capacities and<br />
pecifications” in the Index.<br />
NOTICE:<br />
Don’t add too much oil. If your<br />
engine has so much oil that the oil<br />
level gets above the cross-hatched<br />
area that shows the proper operating<br />
range, your engine could be<br />
damaged.<br />
ust fill it enough to put the level<br />
xnewhere in the proper operating range.<br />
ush the dipstick all the way back in<br />
[hen you’re through.<br />
L1L V6: Adding Engine Oil<br />
3800 V6: Adding Engine Oil<br />
What Kind of Oil to Use<br />
3eginning midyear 1993, oils of the<br />
roper quality for your vehicle will be<br />
dentified with this new “starburst”<br />
ymbol. The “starburst” symbol indicates<br />
hat the oil has been certified by the<br />
imerican Petroleum Institute (API), and<br />
s suitable for use in your gasoline engine<br />
r‘ou should look for this on the front of<br />
he oil container, and use & oils that<br />
lisplay this new symbol.<br />
r‘ou should also use the proper viscosity<br />
)il for your vehicle, as shown in the<br />
ollowing chart:<br />
212
Recommended SAE Viscosity<br />
Grade Engine Oils<br />
For best fuel economy and cold starting,<br />
select the lowest SAE viscosity grade oil<br />
for the expected temperature range.<br />
HOT<br />
HWTHER<br />
\<br />
COLD<br />
WEATHER<br />
IF NEITHER SAE 5W-30 NOR SAE 1 OW-30<br />
GRADE OILS ARE AVAILABLE, SAE 30<br />
GRADE MAY BE USED AT TEMPERATURES<br />
PBOVE 40 DEGREES F (4 DEGREES C).<br />
DO NOT USE SAE 1OW-40, SAE 2OW-50 OR<br />
MOTHER GRADE OIL NOT RECOMMENDED.<br />
;AE 5W-30 (3.1L V6 Engine)<br />
LS shown in the chart, SAE 5W-30 is bes;<br />
jr your vehicle. However, you can use<br />
AE 1OW-30 if it's going to be 0°F<br />
- 18 "C) or above. These numbers on an<br />
il container show its viscosity, or<br />
lickness. Do not use other viscosity oils,<br />
uch as SAE 1OW-40 or SAE 20W-50.<br />
IAE 1OW-30 (3800 V6 Engine)<br />
is shown in the chart, SAE 1OW-30 is<br />
est for your vehicle. However, you can<br />
se SAE 5W-30 if it's going to be'colder<br />
Ian 60°F ( 16°C) before your next oil<br />
hange. When it's very cold, you should<br />
se SAE 5W-30. These numbers dn an oil<br />
ontainer show its viscosity, or thickness.<br />
10 not use other viscosity oils, such as<br />
AE 1OW-40 or SAE 20W-50.<br />
F you cannot find oils with the new<br />
starburst" symbol on the front of the<br />
ontainer, you should look for and use<br />
ils containing the following three things:<br />
213...
Service & Appearance Care<br />
Recommended SAE Viscosity<br />
Grade Engine Oils<br />
For best fuel economy and cold starting,<br />
select the lowest SAE viscosity grade oil<br />
for the expected temperature range;<br />
HOT<br />
WEATHER<br />
COLD<br />
WEATHER<br />
-<br />
-<br />
LOOK FOR<br />
ONE LABELS OF THESE &souN#<br />
SAE 1OW-30<br />
PREFERRED<br />
SAE 5W-30 (-18”’)<br />
LYI)IYCC<br />
IF NEITHER SAE 5W-30 NOR SAE 1 OW-30<br />
GRADE OILS ARE AVAILABLE, SAE 30<br />
GRADE MAY BE USED AT TEMPERATURES<br />
ABOVE 40 DEGREES F (4 DEGREES C).<br />
DO NOT USE SAE IOW-40, SAE 2OW-50 OR<br />
ANOTHER GRADE OIL NOT RECOMMENDED.<br />
What Kind of Oil to Use<br />
(CONT)<br />
0 SGor SH<br />
“SG” or “SH” must be on the oil<br />
container, either by itself or combined<br />
with other quality designations, such<br />
a6 “SH/CD,” “SH,SG,CD,” or<br />
“SG/CD” etc. These letters show<br />
American Petroleum Institute (API)<br />
levels of quality.<br />
0 SAE 1OW-30 (3800 V6 Engine)<br />
SAE 5W-30 (3.1L V6 Engine)<br />
0 Energy Conserving I1<br />
Oils with these words on the container<br />
will help you save fuel.<br />
These three things are usually included in<br />
a doughnut shaped logo (symbol) on most<br />
containers. If you cannot find oils with<br />
the “starburst” symbol, you should look<br />
for oils with the doughnut shaped symbol,<br />
containing the three things noted above.<br />
NOTICE:<br />
If you use oils that do not have<br />
either the “starburst” symbol or an<br />
API SH designation, you can cause<br />
engine damage not covered by your<br />
warranty.<br />
GM Goodwrench@ oil (in Canada, GM<br />
Engine Oil) meets all the requirements for<br />
your vehicle.<br />
Engine Oil Additives<br />
Don’t add anything to your oil. Your<br />
Pontiac dealer is ready to advise if you<br />
think something should be added.
When to Change Engine<br />
Oil<br />
See if any one of these is true for you:<br />
Most trips are less than 4 miles<br />
(6 km).<br />
0 It’s below freezing outside and most<br />
trips are less than 10 miles (16 km).<br />
0 The engine is at low speed most of the<br />
time (as in door-to-door delivery, or<br />
in stop-and-go traffic).<br />
Youtow a trailer often.<br />
Most trips are through dusty places.<br />
If any one of these is true for your<br />
vehicle, then you need to change your oil<br />
and filter every 3,000 miles (5 000 km)<br />
or 3 months -- whichever comes first.<br />
(See “Change Oil Indicator” in the Index.)<br />
If none of them is true, change the oil<br />
every 7,500 miles (12 500 km) or 12<br />
months -- whichever comes first. Change<br />
the filter at the first oil change and at<br />
every other oil change after that.<br />
It<br />
(See “Change Oil Indicator” in the Index.)<br />
Engine Coolant Heater<br />
(Engine Block Heater)<br />
An engine coolant heater can be a big<br />
help if you have to park outside in very<br />
cold weather, 0°F (- 1 8 “C) or colder. If<br />
your vehicle has this option, see “Engine<br />
Coolant Heater” in the Index.<br />
What to Do with Used Oil<br />
Did you know that used engine oil contains<br />
certain elements that may be unhealthy for<br />
your skin and could even cause cancer?<br />
Don’t let used oil stay on your skin for very<br />
long. Clean your skin and nails with soap<br />
and water, or a good hand cleaner. Wash or<br />
properly throw away clothing or rags<br />
containing used engine oil. (See the<br />
manufacturer’s warnings about the use<br />
and disposal of oil products.)<br />
Used oil can be a real threat to the<br />
environment. If you change your own oil,<br />
be sure to drain all free-flowing oil from the<br />
filter before disposal. Don’t ever dispose of<br />
oil by putting it in the trash, pouring it on the<br />
ground, into sewers, or into streams or<br />
bodies of water. Instead, recycle it by taking<br />
it to a place that collects used oil. If you<br />
have a problem properly disposing of your<br />
used oil, ask your dealer, a service station or<br />
a local recycling center for help.<br />
I Air Cleaner<br />
Lefer to the Maintenance Schedule to<br />
etermine when to replace the air filter.<br />
lee “Scheduled Maintenance Services” in<br />
le Index.<br />
NOTICE:<br />
If the air cleaner is off, a backfire<br />
can cause a damaging engine fire.<br />
And, dirt can easily get into your<br />
engine, which will damage it.<br />
Always have the air cleaner in place<br />
when you’re driving.<br />
C
Service & Appearance Care<br />
3.1L V6: Checking Air Cleaner Filter<br />
Air Cleaner (CONK)<br />
To Check or Replace:<br />
1. Remove the large wing nut and lift the<br />
cover.<br />
3.1L V6: Replacing Air Cleaner Filter<br />
2.<br />
3.<br />
Remove the air cleaner filter.<br />
Be sure to install the air cleaner filter,<br />
replace the cover and tighten the wing<br />
nut securely.<br />
3800 V6: Checking Air Cleaner Filter<br />
To Check or Replace:<br />
1. Loosen the four wing nuts.<br />
. . .216
~~<br />
3800 V6: Replacing Air Cleaner Filter<br />
2. Pull the top of the air cleaner toward<br />
the front of the vehicle and remove the<br />
air cleaner filter.<br />
3. Be sure to install the air cleaner filter,<br />
replace the cover and tighten the wing<br />
nuts securely.<br />
Automatic Transaxle<br />
Fluid<br />
When to Cheekand<br />
Change<br />
A good time to check your automatic<br />
transaxle fluid level is when the engine oil<br />
is changed. Refer to the Maintenance<br />
Schedule to determine when to change<br />
your fluid. See “Scheduled Maintenance<br />
Services” in the Index.<br />
How to Check<br />
Because this operation can be a little<br />
difficult, you may choose to have this<br />
done at a Pontiac dealership Service<br />
Department.<br />
If you do it yourself, be sure to follow all<br />
the instructions here, or you could get a<br />
false reading on the dipstick.<br />
NOTICE:<br />
Too much or too little fluid can<br />
damage your transaxle. Too much<br />
can mean that some of the fluid<br />
could come out and fall on hot<br />
engine parts or exhaust system,<br />
starting a fire. Be sure to get an<br />
accurate reading if you check your<br />
transaxle fluid.<br />
Wait at least 30 minutes before checking<br />
the transaxle fluid level if you have been<br />
driving:<br />
0<br />
0<br />
0<br />
0<br />
When outside temperatures are above<br />
90°F (32°C).<br />
At high speed for quite a while.<br />
In heavy traffic -- especially in hot<br />
weather.<br />
While pulling a trailer.<br />
217...
Service & Appearance Care<br />
How to Check (CONT.)<br />
To get the right reading, the fluid should<br />
be at normal operating temperature,<br />
which is 180°F to 200°F (82°C to 93°C).<br />
Get the vehicle warmed up by driving<br />
about 15 miles (24 km) when outside<br />
temperatures are above 50°F (10°C). If<br />
it’s colder than 50°F ( 1 OOC), you may<br />
have to drive longer.<br />
To check the fluid level<br />
1. Park your vehicle on a level place.<br />
2. With the parking brake applied, place<br />
the shift lever in “P” (Park).<br />
3. With your foot on the brake pedal,<br />
move the shift lever through each gear<br />
range, pausing for about three seconds<br />
in each range. Then, position the shift<br />
lever in “P” (Park).<br />
4. Let the engine run at idle for three to<br />
five minutes.<br />
Then. without shutting off the engine,<br />
follow these steps:<br />
3.lL V6: Checking Automatic<br />
Transaxle Fluid<br />
3800 V6: Checking Automatic<br />
Transaxle Fluid<br />
3.1L V6: Adding Automatic<br />
Transaxle Fluid<br />
3800 V6: Adding Automatic Transaxle<br />
Fluid<br />
. .218
Pull out the dipstick and wipe it with a<br />
clean rag or paper towel.<br />
1. Push it back in all the way, wait three<br />
seconds and then pull it back out<br />
again.<br />
2. Check both sides of the dipstick, and<br />
read the lower level. The fluid level<br />
must be in the cross-hatched area.<br />
3. If the fluid level is in the acceptable<br />
range, push the dipstick back in all the<br />
way.<br />
How to Add Fluid<br />
Refer to the Maintenance Schedule to<br />
determine what kind of transaxle fluid to<br />
use. See “Recommended Fluids and<br />
Lubricants” in the Index.<br />
If the fluid level is low, add only enough<br />
of the proper fluid to bring the level into<br />
the cross-hatched area on the dipstick.<br />
1. Pull out the dipstick.<br />
2. Using a long-neck funnel, add enough<br />
fluid at the dipstick hole to bring it to<br />
the proper level& doesn’t take much<br />
fluid, generally less than a pint (0.5L).<br />
Don’t overfill. We recommend ou<br />
use only fluid labeled DEXRON & -111<br />
or DEXRON@-IIE, because fluids<br />
with that label are made especially for<br />
your automatic transaxle. Damage<br />
caused by fluid other than<br />
DEXRON@-111 or DEXRON@-IIE is<br />
not covered by your new vehicle<br />
warranty.<br />
After adding fluid, recheck the fluid<br />
level as described under “How to<br />
Check.”<br />
When the correct fluid level is<br />
obtained, push the dipstick back in all<br />
the way.<br />
Engine Coolant<br />
The following explains your cooling<br />
system and how to add coolant when it is<br />
low. If you have a problem with engine<br />
overheating, see “Engine Overheating” in<br />
the Index.<br />
The proper coolant for your Pontiac will:<br />
0<br />
9<br />
9<br />
9<br />
0<br />
Give freezing protection down to<br />
-34°F (-37°C).<br />
Give boiling protection up to 262°F<br />
(128°C).<br />
Protect against rust and corrosion.<br />
Help keep the proper engine<br />
temperature.<br />
Let the warning lights work as they<br />
should.<br />
219...
Service & Appearance Care<br />
Engine Coolant (CONE)<br />
What to Use<br />
Use a mixture of one-half clean water<br />
(preferably distilled) and one-half<br />
antifreeze that meets “GM Specification<br />
1825-M,” which won’t damage aluminum<br />
parts. You can also use a recycled coolant<br />
conforming to GM Specification 1825-M<br />
with a complete coolant flush and refill. If<br />
you use this mixture, you don’t need to<br />
add anything else.<br />
NOTICE:<br />
If you use an improper coolant mix,<br />
your engine could overheat and be<br />
badly damaged. The repair cost<br />
wouldn’t be covered by your<br />
warranty. Too much water in the<br />
mix can freeze and crack the engine,<br />
radiator, heater core and other parts.<br />
Adding Coolant<br />
To Check Coolant<br />
When your engine is cold, the coolant<br />
level should be at “COLD’ or a little<br />
higher. When your engine is warm, the<br />
level should be up to “FULL HOT,” or a<br />
little higher.<br />
3.1L V6: Checking Coolant<br />
3800 V6: Checking Coolant
To Add Coolant<br />
If you need more coolant, add the proper<br />
mix at the coolant recovery tank.<br />
Add coolant mix at the recovery tank, but<br />
5e careful not to spill it.<br />
Radiator Pressure Cap<br />
NOTICE:<br />
Your radiator cap is a 15 psi ( 105<br />
kPa) pressure-type cap and must bc;<br />
tightly installed to prevent coolant<br />
loss and possible engine damage<br />
from overheating. Be sure the<br />
arrows on the cap line up with the<br />
overflow tube on the radiator filler<br />
neck.<br />
When you replace your radiator pressure<br />
cap, an AC’ cap is recommended.<br />
Thermostat<br />
Engine coolant temperature is controlled<br />
by a thermostat in the engine coolant<br />
system. The thermostat stops the flow of<br />
soolant through the radiator until the<br />
soolant reaches a preset temperature.<br />
When you replace your thermostat, an<br />
4C’ thermostat is recommended.<br />
Power Steering Fluid<br />
How To Check Power<br />
Steering Fluid<br />
Unscrew the cap and wipe the dipstick<br />
with a clean rag. Replace the cap and<br />
completely tighten it. Then remove the<br />
cap again and look at the fluid level on<br />
the dipstick.<br />
When the engine compartment is hot,<br />
the level should be at the “HOT”<br />
mark.<br />
When the engine compartment is cool,<br />
the level should be at the “FULL<br />
COLD’’ mark.<br />
221 ...
Service & Appearance Care<br />
What to Add<br />
iefer to the Maintenance Schedule to<br />
letermine what kind of fluid to use. See<br />
‘Recommended Fluids and Lubricants” i<br />
:he Index.<br />
3.1L V6: Checking Power Steering Fluid<br />
NOTICE:<br />
When adding power steering fluid<br />
or making a complete fluid change,<br />
always use the proper fluid. Failure<br />
to use the proper flEid can cause<br />
leaks and damage hoses and seals.<br />
Windshield Washer<br />
Fluid<br />
To Add<br />
Open the cap labeled “WASHER FLUID<br />
ONLY.” Add washer fluid until the bottle<br />
is full.<br />
3800 V6: Checking Power Steering Fluid<br />
How To Check Power<br />
Steering Fluid (CONK)
pF--<br />
When using concentrated<br />
washer fluid, follow the<br />
manufacturer’s instructions<br />
for adding water.<br />
0 Don’t mix water with<br />
ready-to-use washer fluid.<br />
Water can cause the solution<br />
to freeze and damage your<br />
washer fluid tank and other<br />
parts of the washer system.<br />
Also, water doesn’t clean as<br />
well as washer fluid.<br />
0 Fill your washer fluid tank<br />
only 3/4 full when it’s very<br />
cold. This allows for<br />
expansion, which could<br />
damage the tank if it is<br />
completely full.<br />
Don’t use radiator antifreeze<br />
in your windshield washer. It<br />
can damage your washer<br />
system and paint.<br />
Brake Master Cylinder<br />
Your brake master cylinder is here. It is<br />
filled with DOT-3 brake fluid.<br />
There are only two reasons why the brake<br />
fluid level in your master cylinder might<br />
go down. The first is that the brake fluid<br />
goes down to an acceptable level during<br />
normal brake lining wear. When new<br />
linings are put in, the fluid level goes<br />
back up. The other reason is that fluid is<br />
leaking out of the brake system. If it is,<br />
you should have your brake system fixed,<br />
since a leak means that sooner or later<br />
your brakes won’t work well, or won’t<br />
work at all. So, it isn’t a good idea to “top<br />
off’ your brake fluid. Adding brake fluid<br />
won’t correct a leak. If you add fluid<br />
when your linings are worn, then you’ll<br />
have too much fluid when you get new<br />
brake linings. You should add (or remove)<br />
brake fluid, as necessary, only when work<br />
is done on the brake hydraulic system.<br />
When your brake fluid falls to a low level,<br />
lour brake warning light will come on.<br />
See “Brake System Warning Light” in the<br />
hdex.<br />
What to Add<br />
When you do need brake fluid, use only<br />
DOT-3 brake fluid -- such as Delco<br />
Supreme 11 @ (GM Part No. 1052535).<br />
Use new brake fluid from a sealed<br />
zontainer only, and always clean the brake<br />
fluid reservoir cap before removing it.<br />
223 .
Service & Appearance Care<br />
Brake Master Cylinder<br />
(CONT.)<br />
NOTICE:<br />
DOT-5 silicone brake fluid<br />
can damage your vehicle.<br />
Don’t use it.<br />
Don’t let someone put in the<br />
wrong kind of fluid. For<br />
example, just a few drops of<br />
mineral-based oil, such as<br />
engine oil, in your brake<br />
system can damage brake<br />
system parts so badly that<br />
they’ll have to be replaced.<br />
Brake fluid can damage<br />
paint, so be careful not to<br />
spill brake fluid on your<br />
vehicle. If you do, wash it off<br />
immediately. See<br />
“Appearance Care” in the<br />
Index.<br />
Brake Wear<br />
Your Pontiac has front disc brakes and<br />
rear drum brakes.<br />
Disc brake pads have built-in wear<br />
indicators that make a high-pitched<br />
warning sound when the brake pads are<br />
worn and new pads are needed. The<br />
sound may come and go or be heard all<br />
the time your vehicle is moving (except<br />
when you are pushing on the brake peda<br />
firmly).<br />
11<br />
NOTICE:<br />
Continuing to drive with worn-out<br />
brake pads could result in costly<br />
brake repair.<br />
Some driving conditions or climates may<br />
cause a brake squeal when the brakes are<br />
first applied or lightly applied. This does<br />
not mean something is wrong with your<br />
brakes.<br />
Your rear drum brakes don’t have wear<br />
indicators, but if you ever hear a rear<br />
brake rubbing noise, have the rear brake<br />
linings inspected. Also, the rear brake<br />
drums should be removed and inspected<br />
each time the tires are removed for<br />
rotation or changing. When you have the<br />
front brakes replaced, have the rear<br />
brakes inspected, too.<br />
Brake linings should always be replaced<br />
as complete axle sets.<br />
. . 224
Brake Pedal Travel<br />
See your dealer if the brake pedal does<br />
not return to normal height, or if there is a<br />
rapid increase in pedal travel. This could<br />
be a sign of brake trouble.<br />
Brake Adjustment<br />
Every time you apply the brakes<br />
moderately, with or without the vehicle<br />
moving, your brakes adjust for wear.<br />
[f your brake pedal goes down farther<br />
:han normal, your rear drum brakes may<br />
1eed adjustment. Adjust them by backing<br />
~p and firmly applying the brakes a few<br />
cimes.<br />
Replacing Brake System<br />
Parts<br />
The braking system on a modern vehicle<br />
is complex. Its many parts have to be of<br />
top quality and work well together if the<br />
vehicle is to have really good braking.<br />
Vehicles we design and test have<br />
top-quality GM brake parts in them, as<br />
your Pontiac does when it is new. When<br />
you replace parts of your braking system<br />
-- for example, when your brake linings<br />
wear down and you have to have new<br />
ones put in -- be sure you get new<br />
genuine GM replacement parts. If you<br />
don’t, your brakes may no longer work<br />
properly. For example, if someone puts in<br />
brake linings that are wrong for your<br />
vehicle, the balance between your front<br />
and rear brakes can change, for the worse.<br />
The braking performance you’ve come to<br />
expect can change in many other ways if<br />
someone puts in the wrong replacement<br />
brake parts.<br />
Battery<br />
Every new Pontiac has a Delco Freedom@<br />
battery. You never have to add water to<br />
one of these. When it’s time for a new<br />
battery. we recommend a Delco<br />
Freedom -‘ @ battery. Get one that has the -<br />
catalog number shown on the original<br />
battery’s label.<br />
On vehicles equipped with the optional<br />
power sliding door, a low voltage battery<br />
or replacing the battery may cause the<br />
system to become inoperative. Refer to<br />
“Power Sliding Door” in the Index for<br />
more information.<br />
225 . .
Service & Appearance Care<br />
Vehicle Storage<br />
Halogen Bulbs<br />
[f you’re not going to drive your vehicle<br />
For 25 days or more, take off the black,<br />
negative (-) cable from the battery. This<br />
will help keep your battery from running<br />
down.<br />
Contact your dealer to learn how to<br />
prepare your vehicle for longer storage<br />
periods.<br />
Jump Starting<br />
For jump starting instructions, see “Jump<br />
Starting” in the Index.<br />
Headlight Bulb<br />
Replacement<br />
For the type of bulb, see “Replacement<br />
Bulbs” in the Index.<br />
1. Remove the two black knobs.<br />
2. Tilt the bulb housing forward.<br />
. . . f f6
3. Twist the L-shaped bulb assembly<br />
counterclockwise 116 turn until the<br />
flanges align with the slots in the<br />
retainer ring.<br />
4. Pull out the bulb assembly.<br />
5. Disconnect the bulb wiring harness<br />
from the bulb assembly by lifting the<br />
plastic locking tab.<br />
6. Snap a new bulb assembly onto the<br />
wiring harness.<br />
7. Replace the bulb assembly by<br />
reversing step 3.<br />
8. Replace the bulb housing and the two<br />
black knobs.<br />
Taillight Bulb<br />
Replacement<br />
1<br />
For the type of bulb, see “Replacement<br />
Bulbs” in the Index.<br />
1.<br />
2.<br />
3.<br />
Open the rear side windows and<br />
liftgate.<br />
Remove the two screws from the<br />
taillight housing.<br />
Undo the spring clips under the<br />
weatherstrip at the rear of the side<br />
window.<br />
4.<br />
5.<br />
6.<br />
7.<br />
Pull off the entire taillight houking.<br />
Pinch the lever and twist the bulb<br />
assembly 1/6 turn counterclockwise to<br />
remove.<br />
Remove the bulb by pressing in and<br />
turning 1/8 turn counterclockwise.<br />
Line up the small retainer bumps on<br />
the replacement bulb so that the lower<br />
bump slides into the deepest slot in the<br />
housing. Press in and twist the bulb<br />
1/8 turn clockwise. Reposition the<br />
bulb assembly in the taillight housing.<br />
Turn the assembly 1/6 turn clockwise<br />
to lock in place.<br />
227 . .
~<br />
~ THIS<br />
TIRESIZE<br />
Service & Appearance Care<br />
I ~~<br />
MFD BY GENERALMOTORSCORPM1Y3<br />
CAWR FRT OAWR RR<br />
LB/KC<br />
,<br />
VEHICLE CONFORMS TO ALL APPLICABLE US. FEDERAL<br />
MOTOR VEHICLE SAFETY STANDARDS IN EFFECT ON THE DATE<br />
OF MANUFACTURE SHOWN ABOVE.<br />
SERlAL<br />
NUMBER M.P.V.<br />
MODEL<br />
SPEED<br />
MPBY<br />
RTC RIM PSVI(PA (COLD1<br />
SPA<br />
SEEOWNERS MANUAL FOR ADDITIONAL INFORMATION<br />
Taillight Bulb<br />
Replacement (CONT.)<br />
3. Replace the entire taillight housing<br />
and screws.<br />
3. Attach the spring clips to the taillight<br />
housing and secure them.<br />
I 0.Close the rear side windows and<br />
liftgate.<br />
11. Test the bulbs by using your turn<br />
signals and taillights.<br />
s .220<br />
Windshield Wiper Blade<br />
Replacement<br />
Replacement blades for your vehicle are<br />
24 inches in length. They come in<br />
different types and are removed in<br />
different ways. Here's-how to remove the<br />
type with a release clip:<br />
1.<br />
2.<br />
3.<br />
Pull the windshield wiper arm away<br />
from the windshield.<br />
Lift the release clip with a screwdriver<br />
and pull the blade assembly off the<br />
wiper arm.<br />
Push the new wiper blade securely on<br />
the wiper arm.<br />
Loading Your Vehicle<br />
'he CertificationRire label is found on<br />
he rear edge of the driver's door. The<br />
abel shows the size of your original tires<br />
.nd the inflation pressures needed to<br />
bbtain the gross weight capacity of your<br />
rehicle. This is called the GVWR (Gross<br />
Jehicle Weight Rating). The GVWR<br />
ncludes the weight of the vehicle, all<br />
mupants, fuel and cargo.<br />
The Certificationnire label also tells you<br />
he maximum weights for the front and<br />
'ear axles, called Gross Axle .Weight<br />
cating (GAWR). To find out the actual<br />
oads on your front and rear axles, you<br />
leed to go to a weigh station and weigh<br />
lour vehicle. Your dealer can help you
with this. Be sure to spread out your load<br />
equally on both sides of the centerline.<br />
Never exceed the GVWR for your<br />
vehicle, or the Gross Axle Weight Rating<br />
(GAWR) for either the front or rear axle.<br />
And, if you do have a heavy load, you<br />
should spread it out.<br />
Electronic Level Control<br />
On vehicles equipped with optional<br />
electronic level control, the rear of the<br />
vehicle is automatically kept level as you<br />
load or unload your vehicle. For more<br />
about this option, see “Electronic Level<br />
Control” in the Index.<br />
Using heavier suspension components to<br />
get added durability might not change<br />
your weight ratings. Ask your dealer to<br />
help you load your vehicle the right way.<br />
If you put things inside your vehicle -<br />
like suitcases, tools, packages, or<br />
anything else - they will go as fast as the<br />
vehicle goes. If you have to stop or turn<br />
quickly, or if there is a crash, they’ll keep<br />
going.<br />
NOTICE:<br />
Your warranty does not cover parts<br />
or components that fail because of<br />
overloading.<br />
229. . -
Service & Appearance Care<br />
Tires<br />
We don’t make tires. Your new vehicle<br />
comes with high quality tires made by<br />
leading tire manufacturers. These tires are<br />
warranted by the tire manufacturers and<br />
their warranties are delivered with every<br />
new Pontiac. If your spare tire is a<br />
different brand than your road tires, you<br />
will have a tire warranty folder from each<br />
of these manufacturers.<br />
/I<br />
TI he CertificationEire label which is on<br />
th le rear edge of the driver’s door shows<br />
th Le correct inflation pressures for your<br />
til res, when they’re cold. “Cold” means<br />
Y‘ 3ur vehicle has been sitting for at least<br />
th tree hours or driven no more than a mile<br />
I<br />
qflation - Tire Pressure<br />
NOTICE:<br />
Don’t let anyone tell you that<br />
underinflation overinflation is<br />
all right. It’s not. If your tires don’t<br />
have enough air (underinflation)<br />
you can get:<br />
Too much flexing<br />
Too much heat<br />
Tire overloading<br />
0 Bad wear<br />
0 Bad handling<br />
0 Bad fuel economy.<br />
NOTICE: (Continued)<br />
I
NOTICE:(Continued)<br />
If your tires have too much air<br />
(overinflation), you can get:<br />
0 Unusual wear<br />
0 Bad handling<br />
Rough ride<br />
0 Needlessdamagefromroad<br />
hazards.<br />
When to Check<br />
Check your tires once a month or more.<br />
Don’t forget your compact spare tire. It<br />
should be at 60 psi (420 kPa).<br />
How to Check<br />
Use a good quality pocket-type gage to<br />
check tire pressure. Simply looking at the<br />
tires will not tell you the pressure.<br />
especially if you have radial tires --<br />
which may look properly inflated even if<br />
they’re underinflated.<br />
If your tires have valve caps, be sure to<br />
put them back on. They help prevent<br />
leaks by keeping out dirt and moisture.<br />
\ /<br />
Tire Inspection and<br />
Rotation<br />
To make your tires last longer, have them<br />
inspected and rotated at the mileages<br />
recommended in the Maintenance<br />
Schedule. See “Scheduled Maintenance<br />
Services” in the Index.<br />
Use this rotation pattern.<br />
After the tires have been rotated, adjust<br />
the front and rear inflation pressure as<br />
shown on the Certification/Tire label.<br />
Make certain that all wheel nuts are<br />
properly tightened. See “Wheel Nut<br />
Torque” in the Index.<br />
231 ...
Service & Appearance Care<br />
TREAD WEAR INDICATORS<br />
Tire Inspection and<br />
Potation (CONT.)<br />
When It’s Time for New Tires<br />
)ne way to tell when it’s time for new<br />
ires is to check the treadwear indicators,<br />
vhich will appear when your tires have<br />
mly 2/32 inch (1.6 mm) or less of tread<br />
emaining.<br />
You need a new tire if<br />
You can see the indicators at three or<br />
more places around the tire.<br />
You can see cord or fabric showing<br />
through the tire’s rubber.<br />
The tread or sidewall is cracked, cut<br />
or snagged deep enough to show cord<br />
or fabric.<br />
0 The tire has a bump, bulge or split.<br />
0 The tire has a puncture, cut, or other<br />
damage that can’t be repaired well<br />
because of the size or location of the<br />
damage.<br />
Buying New Tires<br />
To find out what kind and size of tires you<br />
leed, look at the Certification/Tire label.<br />
The tires installed on your vehicle when it<br />
was new had a Tire Performance Criteria<br />
Specification (TPC Spec) number on each<br />
:ire’s sidewall. When you get new tires,<br />
get ones with that same TPC Spec<br />
number. That way, your vehicle will<br />
zontinue to have tires that are designed to<br />
give proper endurance, handling, speed<br />
rating, traction, ride and other things<br />
during normal service on your vehicle. If<br />
your tires have an all-season tread design,<br />
the TPC number will be followed by a<br />
“MS” (for mud and snow).<br />
If you ever replace your tires with those<br />
not having a TPC Spec number, make<br />
sure they are the same size, load range,<br />
speed rating and construction type (bias,<br />
bias-belted or radial) as your original<br />
tires.<br />
. . .232
Uniform Tire Qua/ity<br />
Grading<br />
The following information relates to the<br />
system developed by the United States<br />
National Highway Traffic Safety<br />
Administration which grades tires by<br />
treadwear, traction and temperature<br />
performance. (This applies only to<br />
vehicles sold in the United States.)<br />
Treadwear<br />
The treadwear grade is a comparative<br />
rating based on the wear rate of the tire<br />
when tested under controlled conditions<br />
on a specified government test course. For<br />
example, a tire graded 150 would wear<br />
one and a half (1 1/2) times as well on the<br />
government course as a tire graded 100.<br />
The relative performance of tires depends<br />
upon the actual conditions of their use,<br />
however, and may depart significantly<br />
from the norm due to variations in driving<br />
habits, service practices and differences in<br />
road characteristics and climate.<br />
Traction - A, B, C<br />
The traction grades, from highest to<br />
lowest are: A, B, and C. They represent<br />
the tire’s ability to stop on wet pavement<br />
as measured under controlled conditions<br />
on specified government test surfaces of<br />
asphalt and concrete. A tire marked C<br />
may have poor traction performance.<br />
Warning: The traction grade assigned to<br />
this tire is based on braking<br />
(straight-ahead) traction tests and does<br />
not include cornering (turning) traction.<br />
Temperature - A, B, C<br />
The temperature grades are A (the<br />
highest), B, and C, representing the tire’s<br />
resistance to the generation of heat and its<br />
ability to dissipate heat when tested under<br />
controlled conditions on a specified<br />
indoor laboratory test wheel. Sustained<br />
high temperature can cause the material<br />
of the tire to degenerate and reduce tire<br />
life, and excessive temperature can lead to<br />
sudden tire failure. The grade C<br />
corresponds to a level of performance<br />
which all passenger car tires must meet<br />
under the Federal Motor Vehicle Safety<br />
Standard No. 109. Grades B and A<br />
represent higher levels of performance on<br />
the laboratory test wheel than the<br />
minimum required by law.<br />
Warning: The temperature grade for this<br />
tire is established for a tire that is properly<br />
inflated and not overloaded. Excessive<br />
speed, underinflation, or excessive<br />
loading, either separately or in<br />
combination, can cause heat buildup and<br />
possible tire failure.<br />
These grades are molded on the sidewalls<br />
of passenger car tires.<br />
233 . . .
Service & Appearance Care<br />
Temperature - A, B, C (CONT.)<br />
While the tires available as standard or<br />
optional equipment on General Motors<br />
vehicles may vary with respect to these<br />
grades, all such tires meet General Motors<br />
performance standards and have been<br />
approved for use on General Motors<br />
vehicles. All passenger type (P Metric)<br />
tires must conform to Federal safety<br />
requirements in addition to these grades.<br />
Wheel Alignment and Tire<br />
Balance<br />
The wheels on your vehicle were aligned<br />
and balanced carefully at the factory to<br />
give you the longest tire life and best<br />
overall performance.<br />
In most cases, you will not need to have<br />
your wheels aligned again. However, if<br />
you notice unusual tire wear or your<br />
vehicle pulling one way or the other, the<br />
alignment may need to be reset. If you<br />
notice your vehicle vibrating when<br />
driving on a smooth road, your wheels<br />
may need to be rebalanced.<br />
Wheel Replacement<br />
Replace any wheel that is bent, cracked or<br />
badly rusted. If wheel nuts keep coming<br />
loose, the wheel, wheel bolts, and wheel<br />
nuts should be replaced. If the wheel<br />
leaks air, replace it (except some<br />
aluminum ,wheels, which can sometimes<br />
be repaired). See your Pontiac dealer if<br />
any of these conditions exist.<br />
Your dealer will know the kind of wheel<br />
you need.<br />
Each new wheel should have the same<br />
load carrying capacity, diameter, width,<br />
offset, and be mounted the same way as<br />
the one it replaces.<br />
If you need to replace any of your wheels,<br />
wheel bolts, or wheel nuts, replace them<br />
only with new GM original equipment<br />
parts. This way, you will be sure to have<br />
the right wheel, wheel bolts, and wheel<br />
nuts for your Pontiac Model.<br />
NOTICE:<br />
The wrong wheel can also cause<br />
problems with bearing life, brake<br />
cooling, speedometer/odometer<br />
calibration, headlight aim, bumper<br />
height, vehicle ground clearance,<br />
and tire or tire chain clearance to the<br />
body and chassis.<br />
234
ked Replacement Wheels<br />
Tire Chains<br />
NOTICE:<br />
Use tire chains only where legal and<br />
only when you must. Use only SAE<br />
Class “S” type chains that are the<br />
proper size for your tires. Install<br />
them on the front tires and tighten<br />
them as tightly as possible with the<br />
ends securely fastened. Drive slowly<br />
and follow the chain manufacturer’s<br />
instructions. If you can hear the<br />
chains contacting your vehicle, stop<br />
and retighten them. If the contact<br />
continues, slow down until it stops.<br />
Driving too fast with chains on will<br />
damage your vehicle.<br />
Appearance Care<br />
Remember, cleaning products can be<br />
hazardous. Some are toxic. Others can<br />
burst into flame if you strike a match or<br />
get them on a hot part of the vehicle.<br />
Some are dangerous if you breathe their<br />
fumes in a closed space. When you use<br />
anything from a container to clean your<br />
Pontiac, be sure to follow the<br />
manufacturer’s warnings and instructidns.<br />
And always open your doors or windows<br />
when you’re cleaning the inside. See<br />
“Appearance Care Chart” in the Index for<br />
recommended products.<br />
Never use these to clean your vehicle:<br />
0 Gasoline<br />
0 Benzene<br />
0 Naphtha<br />
0 Carbon Tetrachloride<br />
0 Acetone<br />
0 Paint Thinner<br />
0 Turpentine<br />
0 Lacquer Thinner<br />
Nail Polish Remover<br />
They can all be hazardous -- some more<br />
than others -- and they can all damage<br />
your vehicle, too.<br />
235.. .
Service & Appearance Care<br />
Appearance Care (CONI)<br />
NOTICE:<br />
Don’t use any of these unless this<br />
manual says you can. In many uses,<br />
these will damage your vehicle:<br />
Laundry Soap<br />
Bleach<br />
Reducing Agents<br />
Alcohol<br />
Cleaning the Inside of<br />
Your Pontiac<br />
Use a vacuum cleaner often to get rid of<br />
dust and loose dirt. Wipe vinyl or leather<br />
with a clean, damp cloth.<br />
Your Pontiac dealer has two GM cleaners,<br />
a solvent-type spot lifter and a foam-type<br />
powdered cleaner. They will clean normal<br />
spots and stains very well. Do not use<br />
them on vinyl or leather.<br />
Here are some cleaning tips:<br />
. 236<br />
Always read the instructions on the<br />
cleaner label.<br />
D Clean up stains as soon as you can --<br />
before they set.<br />
Use a clean cloth or sponge, and change<br />
to a clean area often. A soft brush may<br />
be used if stains are stubborn.<br />
Use solvent-type cleaners in a<br />
well-ventilated area only. If you use<br />
them, don’t saturate the stained area.<br />
If a ring forms after spot cleaning,<br />
clean the entire area immediately or it<br />
will set.<br />
Using Foam-Type Cleaner<br />
on Fabric<br />
a<br />
a<br />
a<br />
a<br />
a<br />
Vacuum and brush the’area to remove<br />
any loose dirt.<br />
Always clean a whole trim panel or<br />
section. Mask surrounding trim along<br />
stitch or welt lines.<br />
Mix Multi-Purpose Powdered Cleaner<br />
following the directions on the<br />
container label.<br />
Use suds only and apply with a clean<br />
sponge.<br />
Don’t saturate the material.<br />
Don’t rub it roughly.<br />
As soon as you’ve cleaned the section,<br />
use a sponge to remove the suds.<br />
Rinse the section with a clean, wet<br />
sponge.<br />
Wipe off what’s left with a slightly<br />
damp paper towel or cloth.<br />
Then dry it immediately with a blow<br />
dryer or a heat’ lamp.<br />
NOTICE:<br />
Be careful with a hair dryer or heat<br />
lamp. You could scorch the fabric.<br />
Wipe with a clean cloth.<br />
Using Solvent-Type<br />
Cleaner on Fabric<br />
First, see if you have to use solvent-type<br />
cleaner at all. Some spots stains and will clean<br />
off better with just water and mild soap.<br />
If you need to use a solvent:<br />
Gently scrape excess soil from the<br />
trim material with a clean, dull knife
0<br />
or scraper. Use very little cleaner, lighl<br />
pressure and clean cloths (preferably<br />
cheesecloth). Cleaning should start at<br />
the outside of the stain, “feathering”<br />
toward the center. Keep changing to a<br />
clean section of the cloth.<br />
When you clean a stain from fabric,<br />
immediately dry the area with an air<br />
hose, hair dryer, or heat lamp to help<br />
prevent a cleaning ring. (See the<br />
previous NOTICE.)<br />
Special Cleaning<br />
Problems<br />
Greasy or Oily Stains<br />
Such as grease, oil, butter, margarine,<br />
shoe polish, coffee with cream, chewing<br />
gum, cosmetic creams, vegetable oils,<br />
wax crayon, tar and asphalt.<br />
Carefully scrape off excess stain.<br />
0 Follow the solvent-type instructions<br />
described earlier.<br />
0 Shoe polish, wax crayon, tar and<br />
asphalt will stain if left on a vehicle<br />
seat fabric. They should be removed<br />
as soon as possible. Be careful,<br />
because the cleaner will dissolve them<br />
and may cause them to spread.<br />
Non-Greasy Stains<br />
Such as catsup, coffee (black), egg, fruit,<br />
fruit juice, milk, soft drinks, wine, vomit,<br />
urine and blood.<br />
e<br />
0<br />
e<br />
0<br />
Carefully scrape off excess stain, then<br />
sponge the soiled area with cool water.<br />
If a stain remains, follow the<br />
foam-type instructions described<br />
earlier.<br />
If an odor lingers after cleaning<br />
vomit or urine, treat the area with<br />
a waterbaking soda solution:<br />
1 teaspoon (5 ml) of baking soda to<br />
1 cup (250 ml) of lukewarm water.<br />
If needed, clean lightly with<br />
solvent-type cleaner.<br />
Combination Stains<br />
Such as candy, ice cream, mayonnaise,<br />
:hili sauce and unknown stains.<br />
Carefully scrape off excess stain,<br />
then clean with cool water and allow<br />
to dry.<br />
If a stain remains, clean it with<br />
solvent-type cleaner.<br />
Cleaning Vinyl<br />
Use warm water and a clean cloth.<br />
0 Rub with a clean, damp cloth to<br />
remove dirt. You may have to do it<br />
more than once.<br />
Things like tar, asphalt and shoe<br />
polish will stain if you don’t get them<br />
off quickly. Use a clean cloth and a<br />
solvent-type vinyl cleaner.<br />
Cleaning Leather<br />
Use a soft cloth with lukewarm water and<br />
I mild soap or saddle soap.<br />
For stubborn stains, use a mild<br />
solution of 10% isopropyl alcohol<br />
(rubbing alcohol) and 90% water.<br />
Never use oils, varnishes,<br />
solvent-based or abrasive cleaners,<br />
furniture polish or shoe polish on<br />
leather.<br />
Soiled leather should be cleaned<br />
immediately. If dirt is allowed to work<br />
into finish, it can harm the leather.<br />
237.. .
Service & Appearance Care<br />
Care of Safety Belts<br />
Cleaning the Top of the<br />
lnstrurnent Panel<br />
Use only mild soap and water to clean the<br />
top surfaces of the instrument panel. Sprays<br />
containing silicones or waxes may cause<br />
annoying reflections in the windshield and<br />
even make it difficult to see through the<br />
windshield under certain conditions.<br />
Cleaning the Built-In Child<br />
Restraint Pad<br />
The built-in child restraint pad is attached<br />
to the seat frame with fastener strips. You<br />
can remove the pad and hand wash it with<br />
mild soap and water.<br />
Keep belts clean and dry.<br />
Glass<br />
3ass should be cleaned often. GM Glass<br />
Zleaner (GM Part No. 1050427) or a<br />
liquid household glass cleaner will<br />
remove normal tobacco smoke and dust<br />
Films.<br />
Don’t use abrasive cleaners on glass,<br />
because they may cause scratches. Avoid<br />
placing decals on the inside rear window,<br />
since they may have to be scraped off<br />
later. If abrasive cleaners are used on the<br />
inside of the rear window, an electric<br />
defogger element may be damaged. Any<br />
temporary license should not be attached<br />
across the defogger grid.<br />
. .238
Cleaning the Outside<br />
of the Windshield,<br />
Backglass and Wiper<br />
Blades<br />
If the windshield is not clear after using<br />
the windshield washer, or if the wiper<br />
blade chatters when running, wax or other<br />
material may be on the blade or<br />
windshield.<br />
Clean the outside of the windshield with<br />
GM Windshield Cleaner, Bon-Ami<br />
Powder@ (GM Part No. 1050011). The<br />
windshield is clean if beads do not form<br />
when you rinse it with water.<br />
Clean the blade by wiping vigorously<br />
with a cloth soaked in full strength<br />
windshield washer solvent. Then rinse the<br />
blade with water.<br />
Wiper blades should be checked on a<br />
regular basis and replaced when worn.<br />
Cleaning the Outside of<br />
Your Pontiac<br />
The paint finish on your vehicle provides<br />
beauty, depth of color, gloss retention and<br />
durability.<br />
Washing Your Vehicle<br />
The best way to preserve your vehicle’s<br />
finish is to keep it clean by washing it<br />
often with lukewarm or cold water.<br />
Don’t wash your vehicle in the direct rays<br />
of the sun. Don’t use strong soaps or<br />
chemical detergents. Use liquid hand, dish<br />
or car washing (mild detergent) soaps.<br />
Don’t use cleaning agents that contain<br />
acid or abrasives. All cleaning agents<br />
should be flushed promptly and not<br />
allowed to dry on the surface, or they<br />
could stain. Dry the finish with a soft,<br />
clean chamois or a 100% cotton towel to<br />
avoid surface scratches and water<br />
spotting.<br />
High pressure truck washes may cause<br />
water to enter your vehicle.<br />
Finish Care<br />
Occasional waxing or mild polishing of<br />
your Pontiac may be necessary to remove<br />
residue from the paint finish. You can get<br />
GM approved cleaning products from<br />
your dealer. (See “Appearance Care and<br />
Materials” in the Index.)<br />
Your Pontiac has a “basecoat/clearcoat”<br />
paint finish. The clearcoat gives more<br />
depth and gloss to the colored basecoat.<br />
Always use waxes and polishes that are<br />
non-abrasive and made for a<br />
basecoat/clearcoat paint finish.<br />
NOTICE:<br />
Machine compounding or<br />
aggressive polishing on a<br />
basecoat/clearcoat paint finish may<br />
dull the finish or leave swirl marks.<br />
239.. .
Service & Appearance Care<br />
Aluminum Wheels<br />
I I Tires<br />
(If So Equipped)<br />
Your aluminum wheels have a protective<br />
coating similar to the painted surface of<br />
your Pontiac. Don’t use strong soaps,<br />
chemicals, chrome polish, abrasive<br />
cleaners or abrasive cleaning brushes on<br />
them because you could damage this<br />
coating. After rinsing thoroughly, a wax<br />
may be applied.<br />
NOTICE:<br />
If you have aluminum wheels, don’t<br />
use an automatic vehicle wash that<br />
has hard silicon carbide cleaning<br />
brushes. These brushes can take off<br />
the protective coating.<br />
I<br />
L<br />
Your Pontiac dealer has a GM White<br />
Sidewall Tire Cleaner. You can use a stiff<br />
1 msh with the cleaner.<br />
1<br />
When applying a tire dressing, always<br />
1 rake care to wipe off any over spray or<br />
! splash from painted surfaces. Petroleom-<br />
1 based products may damage the paint<br />
1 finish.<br />
Weatherstrips<br />
Silicone grease on weatherstrips will<br />
make them last longer, seal better, and not<br />
stick or squeak. Apply silicone grease<br />
with a clean cloth at least every six<br />
months. During very cold, damp weather<br />
more frequent application may be<br />
required. (See “Recommended Fluids &<br />
Lubricants” in the Index.)<br />
Foreign Material<br />
Calcium chloride and other salts, ice<br />
melting agents, road oil and tar, tree sap,<br />
bird droppings, chemicals from industrial<br />
chimneys, and other foreign matter can<br />
damage your vehicle’s finish if they<br />
remain on painted surfaces. Use cleaners<br />
that are marked safe for painted surfaces<br />
to remove foreign matter.<br />
Finish Damage<br />
Any stone chips, fractures or deep<br />
scratches in the finish should be repaired<br />
right away.<br />
Minor chips and scratches can be repaired<br />
with touch-up materials akailable from<br />
your dealer or other service outlets.<br />
Larger areas of finish damage can be<br />
corrected in your dealer’s body and paint<br />
shop.<br />
. . .240
n Underbody<br />
Maintenance<br />
Chemicals used for ice and snow removal<br />
and dust control can collect on the<br />
underbody. If these are not removed,<br />
accelerated corrosion (rust) can occur on<br />
the underbody parts such as fuel lines,<br />
frame, floor pan, and exhaust system even<br />
though they have corrosion protection.<br />
At least every spring, flush these<br />
materials from the underbody with plain<br />
water. Clean any areas where mud and<br />
other debris can collect. Dirt packed in<br />
closed areas of the frame should be<br />
loosened before being flushed. Your<br />
dealer or an underbody vehicle washing<br />
system can do this for you.<br />
rn Collision rcepair<br />
Your vehicle was built with composite<br />
SMC (Sheet Molded Compound)<br />
fiberglass body panels and molded RIM<br />
(Reaction Injection Molded) front fenders<br />
and bumper covers. These panels require<br />
different collision repair procedures than<br />
metal-paneled vehicles. See your Pontiac<br />
dealer for information on collision repair.<br />
Chemical Paint<br />
Spotting<br />
Some weather and atmospheric conditions<br />
can create a chemical fallout. Airborne<br />
pollutants can fall upon and attack painted<br />
surfaces on your vehicle. This damage<br />
can take two forms: blotchy,<br />
ringlet-shaped discolorations, and small<br />
irregular dark spots etched into the paint<br />
surface.<br />
Although no defect in the paint job causes<br />
this, Pontiac will repair, at no charge to<br />
the owner, the surfaces of new vehicles<br />
damaged by this fallout condition within<br />
12 months or 12,000 miles (20 000 km)<br />
of purchase, whichever comes first.<br />
241 ...
Service & Appearance Care<br />
Appearance Care and Maintenance Materials<br />
You can get these from your Pontiac dealer.<br />
Stops squeaks<br />
1052349 I2 oz. (0.340kg) Lubriplate (White Grease) For hood, trunk, door hinges and latches<br />
1051055 16 oz. (0.473L) Preservatone Vinyl Top Dressing<br />
IO5 I398* 8 oz. (0.237L) Spot Lifter For cloth<br />
1051515 32 oz. (0.946L) Washer Solvent Windshield-washing system<br />
1052870 16 oz. (0.473L) Wash-Wax (conc.) Exterior Wash<br />
* Not recommended for pigskin suede leather.<br />
See Your General Motors Dealers for These Products.<br />
See Your Maintenance Schedule for Other Products.
I Vehicle IdentiJication<br />
Number (VIN)<br />
rhis is the legal identifier for your<br />
’ontiac. It appears on a plate in the front<br />
:orner of the instrument panel, on the<br />
lriver’s side. You can see it if you look<br />
hrough the windshield from outside your<br />
rehicle. The VIN also appears on the<br />
Jehicle Certification and Service Parts<br />
abels and the certificates of title and<br />
egistration.<br />
Engine identification<br />
The eighth character in your VIN is the<br />
:ngine code. This code will help you<br />
dentify your engine, specifications, and<br />
eplacement parts.<br />
Service Parts<br />
Identification Label<br />
You’ll find this label inside the glove box<br />
door. It’s very helpful if you ever need to<br />
order parts. On this label is:<br />
0 your VIN,<br />
0 the model designation,<br />
0 paint information, and<br />
0 a list of all production options and<br />
special equipment.<br />
Be sure that this label is not removed<br />
from the vehicle.<br />
Add-on Electrical<br />
Equipment<br />
NOTICE:<br />
Don’t add anything electrical to<br />
your Pontiac unless you check with<br />
your dealer first. Some electrical<br />
equipment can damage your vehicle<br />
and the damage wouldn’t be<br />
covered by your warranty. Some<br />
add-on electrical equipment can<br />
keep other components from<br />
working as they should.<br />
Your vehicle has an air bag system..<br />
Before attempting to add anything ’:<br />
electrical to your Pontiac see “Servicing<br />
Your Air Bag-Equipped Pontiac” in the<br />
Index.
Service & Appearance Care<br />
To identify and check fuses, refer to the<br />
Fuse panel, which is behind the lower<br />
glove box door, and the fuse usage chart<br />
later in this section.<br />
A fuse puller is clipped inside the fuse<br />
panel door. Place the wide end of the fuse<br />
puller over the plastic end of the fuse.<br />
Squeeze the ends over the fuse and pull it<br />
out.<br />
Fuses & Circuit<br />
Breakers<br />
The wiring circuits in your vehicle are<br />
mtected from short circuits by a<br />
:ombination of fuses, circuit breakers,<br />
lnd fusible thermal links in the wiring<br />
tself. This greatly reduces the chance of<br />
'ires caused by electrical problems.<br />
Look at the silver-colored band inside thc<br />
fuse. If the band is broken or melted,<br />
replace the fuse. Be sure you replace a<br />
bad fuse with a new one of the correct<br />
size.
67<br />
&<br />
HORN<br />
€33<br />
STOP-HA2<br />
F-PUMP<br />
RDO 2<br />
Oa<br />
rn<br />
R-WIPER<br />
F-WIPER<br />
IGN<br />
AUX ABS R-BLWR<br />
Fuse Panel (3.I L V6)<br />
Position<br />
CTSY<br />
ELC<br />
HORN<br />
STOP<br />
HAZ<br />
F PUMP<br />
AUX<br />
TAIL<br />
ECM<br />
TURN<br />
BKJ<br />
GAGE<br />
LPS<br />
ABS<br />
RD02<br />
R/WIPER<br />
F/WIPER<br />
IGN<br />
HTR A/C<br />
RR BLWR<br />
Rating<br />
(AMP.)<br />
15<br />
20<br />
15<br />
15<br />
10<br />
20<br />
15<br />
10<br />
15<br />
7.5<br />
7.5<br />
3<br />
15<br />
20<br />
25<br />
15<br />
25<br />
25<br />
Circuitry<br />
Dome Lamm, Courtesv Lamps, Power Door Lock Switches, Glove Box<br />
Lamp, Powkr'Mirrors,Power Sliding Delay Lock Module<br />
Auto Level Control, Underhood Lamp<br />
Horns, Horn Relay, Safety Belt Buzzer<br />
Front/Rear Turn Lamps, Front Side Marker Lamps, Rear Stop Lamps,<br />
Instrument Cluster Turn Indicator Lamps, Cruise Brake Switch<br />
Fuel Pump, Oil Pressure Sender/Fuel Pump Switch<br />
Radio, Front Cigar Lighter, Accessory Power Outlet<br />
Front Park Lamps, Rear Tail Lamps, Front Side Marker Lamps, Licens<br />
Plate Lamp, Radio, Heat/Vent/AC Control Head, Power Sliding Door<br />
Throttle Body Fuel Injection, Fuel Pump Relay, Elec. Vac. Reg. Valve,<br />
Elec. Control Module, Elec. Spark Control Module<br />
Frontmear Turn Lamps, Front Side Marker Lamps, Cluster Turn Telltale,<br />
Back-up Lamps<br />
Cluster, Anti-Lock Brake System Lamp Module, Elec. Level Control Sensor<br />
Cluster, Radio, Wiper Switch, Headlamp Switch, Rear Blower Switch,<br />
Heat/Vent/AC Control Head, Door Switch Illumination, Front/Rear<br />
Ashtray Illumination Bulbs<br />
Anti-Lock Brake System<br />
Radio<br />
Rear Wipermasher Motors<br />
Front Wipermasher Motor<br />
A/C Compressor, A/C Solenoid Box, Compressor Relay, Temp. Door<br />
Motor, Low Blower Relay; Heat/Vent/AV Control Head; Cruise Module;<br />
Cooling Fan Relay; Rear Defogger Relay; Key Chime; Daytime<br />
Running Lights Module; Vehicle Speed Sensor Buffer and Generator<br />
Charge Discrete, Transaxle Converter Clutch Switch<br />
Front/Rear Blower Motors, High Blower Relay<br />
Rear Blower, Rear Heat/Vent/AC
Service & Appearance Care<br />
r&<br />
TURN BIU<br />
prpl<br />
GAGE<br />
p-"1<br />
INJ 3365<br />
173<br />
LPS<br />
RDO 2<br />
p?a"r<br />
R-WIPER<br />
€33<br />
F-WIPER<br />
PKS<br />
$1<br />
3 R-BLWR<br />
Fuse Panel (3800 V6)<br />
Position<br />
CTSY<br />
ELC<br />
HORN<br />
;TOP HAZ<br />
:DO 1/AUX<br />
TAIL<br />
ABS<br />
ECM<br />
rURN B/U<br />
GAGE<br />
INJ<br />
LPS<br />
RD02<br />
R/WIPER<br />
F/WIPER<br />
IGN<br />
HTR A/C<br />
RR BLWR<br />
Rating<br />
(AMP.)<br />
15<br />
20<br />
15<br />
15<br />
20<br />
15<br />
3<br />
10<br />
15<br />
7.5<br />
20<br />
7.5<br />
15<br />
20<br />
25<br />
15<br />
25<br />
25<br />
Circuitry<br />
Dome Lamps, Courtesy Lamps, Power Door Lock Switches, Glove<br />
Box Lamp, Power Mirrors, Power Sliding Delay Lock Module<br />
Auto Level Control, Underhood Lamp<br />
Horns, Horn Relay, Safety Belt Buzzer<br />
Front/Rear Turn Lamps, Front Side Marker Lamps, Rear Stop Lamps,<br />
Instrument Cluster Turn Indicator Lamps<br />
Radio, Front Cigar Lighter, Accessory Power Outlet<br />
Front Park Lamps, Rear Tail Lamps, Front Side Marker Lamps, License<br />
Plate Lamp, Radio, Heat/Vent/AC Control Head, Power Sliding Door<br />
Anti-Lock Brake System<br />
Mass Air Flow Sensor, Electronic Control Module<br />
Frontmear Turn Lamps, Front Side Marker Lamps, Cluster Turn<br />
Telltale, Back-up Lamps<br />
Cluster, Anti-Lock Brake System Lamp Module, Elec. Level<br />
Control Sensor<br />
Injector 3365 Fuse - Remote Location (See Page 247)<br />
Cluster, Radio, Wiper Switch, Headlamp Switch, Rear Blower Switch,<br />
Heat/Vent/AC Control Head, Door Switch Illumination, Front/Rear<br />
Ashtray Illumination Bulbs<br />
Radio<br />
Rear Wipermasher Motors<br />
Front Wiper/Washer Motor<br />
A/C Solenoid Box, Temp. Door Motor, Low Blower Relay;<br />
Heat/Vent/AC Control Head; Cooling Fan Relay; Rear Defogger Relay;<br />
Key Chime; Daytime Running Lights Module; Transaxle Converter<br />
Clutch Solenoid and Generator Charge Discrete<br />
Front/Rear Blower Motors, High Blower Relay<br />
Rear Blower, Rear Heat/Vent/AC<br />
. . .246
L h"<br />
P .<br />
Circuit BreakevRelay Panel<br />
Zircuit breakers and relays are located in the circuit breaker/relay panel. This is<br />
ocated behind the panel under the glove box, near the passenger's door.<br />
Position Rating Circuitry<br />
(AMP.)<br />
1<br />
2 15<br />
Hazard Flasher<br />
With 3800 V6 engine only: Canister Purge Solenoid, A/C<br />
3<br />
Clutch Control Relay, Cruise Control<br />
20 Daytime Running Lights (DRL)<br />
4 30 Power Windows Circuit Breaker<br />
5 30 Power Seat/Power Sliding Door Motor Circuit Breaker<br />
6 30 Rear Defogger Circuit Breaker<br />
7<br />
8<br />
9<br />
10<br />
Air Conditioning Blower Relay<br />
Horn Relay<br />
Chime Module<br />
Defogger Timer Relay<br />
Anti-Lock Brake System<br />
(ABS) Junction Block<br />
Fuse<br />
You'll find this fuse under the hood in<br />
the ABS junction block, located next to<br />
the remote positive jump starting<br />
terminal.<br />
To open the junction block, press in on<br />
both sides of the cover.<br />
247. . .
Service & Appearance Care<br />
-<br />
l njector 3365 Fuse<br />
'3800 V6 ENGINE ONLY)<br />
1 'his 20-amp fuse is located underhood,<br />
0 In a bracket just behind the passenger<br />
S ide headlight. It is mounted on the face<br />
0 If the bracket in the position closest to thl<br />
P lassenger side of the vehicle. The fuse<br />
Si ervices the injectors, fuel pump, oil<br />
P lressure sender and fuel pdmp'switch.<br />
7 '0 access the fuse, pry back the latch wit1<br />
a screwdriver, then pull down on'the base<br />
0 If the unit. If you need to replace the<br />
f use, be sure to use a 20-amp fuse.<br />
F 'ush the base of the unit firmly up into<br />
tl he cover until the latch snaps into the<br />
1( xked position.<br />
Headlight Wiring<br />
The headlight wiring is protected by a<br />
circuit breaker in the light switch. An<br />
electrical overload will cause the lights to<br />
go on and off, or in some cases to remain<br />
off. -If this happens, have your headlight<br />
system checked right away.<br />
Windshield Wipers<br />
The windshield wiper motor is protected<br />
by a circuit breaker and a fuse. If the<br />
motor overheats due to heavy snow, etc.,<br />
the wiper will stop until the motor cools.<br />
If the overload is caused by some<br />
electrical problem, have it fixed.<br />
Power Windows and Other<br />
Power Options<br />
Circuit breakers in the circuit<br />
breaker/relay panel protect the power<br />
windows and other power accessories.<br />
When the current load is too heavy, the<br />
Zircuit breaker opens and closes,<br />
protecting the circuit until the problem is<br />
fixed.<br />
248
Capacities and Specifications<br />
Engine Crankcase (All Models) .................................. 4 quarts<br />
3.80 L<br />
When changing filter, up to quart (I12 liter) more oil may be needed.<br />
Automatic Transaxle<br />
When draining or replacing torque converter, more fluid may be needed.<br />
3-Speed:<br />
I<br />
Pan Removal and Replacement ................................. 4 quarts<br />
3.80 L<br />
After Complete Overhaul ..................................... 7 quarts<br />
6.60 L<br />
4-Speed:<br />
Pan Removal and Replacement ................................. 6 quaits<br />
5.70 L<br />
After Complete Overhaul ..................................... 8 quarts<br />
4.70 L<br />
Cooling System<br />
3.1L V6 Engine:<br />
With Heater Only ............................................ 12 quarts 11.50 L<br />
With Air Conditioning ........................................ 12 quarts 12.00 L<br />
With Rear Heater (Canada Only) ................................ 14 quarts 13.25 L<br />
3800 V6 Engine:<br />
With Conditioning Air ....................................... 11 quarts 10.75 L<br />
With Rear Climate Control .................................... 13 quarts 12.25 L<br />
With Rear Heater (Canada Only) ................................ 13 quarts 12.25 L<br />
Refrigerant, Air Conditioning ................................... See refrigerant charge label under hood.<br />
Not all air conditioning refrigerants are the same. If the air conditioning<br />
system in your vehicle needs refrigerant, be sure the proper refrigerant is<br />
used. If you’re not sure, ask your Pon.tiac dealer.<br />
FuelTank ..................................................... 20 gallons 76.00 L<br />
NOTE: All capacities are approximate. When adding, be sure to fill to the appropriate level, as recommended in this manual.<br />
249.. .
Service & Appearance Care<br />
Capacities and Specifications (CONT.)<br />
Power Steering<br />
3.1L V6 Engine:<br />
PumpOnly ...............................................<br />
Complete System ..........................................<br />
3800 V6 Engine:<br />
.. 1 pint<br />
.. 1 1/4 pint<br />
0.50 L<br />
0.60 L<br />
PumpOnly ................................................. 1 pint 0.50 L<br />
Complete System ............................................ 1 1/2 pint 0.70 L<br />
Tire Pressures, Sizes ...........................................<br />
Wheel NutTorque ............................................. 100 pound-feet (140 Nmm)<br />
See Certification/Tiri= label on driver’s door.<br />
NOTE: All capacities are approximate. When adding, be sure to fill to the appropriate level, as recommended in this manual.<br />
. .250
Engine Specifications<br />
3.1L V4 ENGINE<br />
VINEngineCode ..................... D ................................<br />
Type ............................... V6 ...............................<br />
Displacement ........................ 3.1 Liters ..........................<br />
Compression Ratio .................... 8.5: 1 .............................<br />
Firing Order ......................... 1-2-3-4-5-6 ........................<br />
Thermostat Temperature Specification .... 195 "F (91"C) ......................<br />
Normal Maintenance Replacemenf Parts<br />
Air Cleaner Element ................... AC Type A-773C ...................<br />
Engine Oil Filter. .....................<br />
AC Type PF-51<br />
.....................<br />
PCVValve .......................... AC Type CV-789C ..................<br />
Spark Plugs ......................... AC Type oR43TS ...................<br />
Gap: 0.045 inch<br />
Remote Lock Control Batteries (2) ....... DL 20 16 ..........................<br />
3800 V6 ENGINE<br />
L<br />
V6<br />
3.8 Liters<br />
9.0: 1<br />
1-6-5-4-3-2<br />
195°F (91 "C)<br />
AC Type A-974C<br />
AC Type PF-47<br />
AC Type CV-892C<br />
AC Type 4 1-600<br />
Gap: 0.060 inch (1.52 mm)<br />
DL 2016<br />
I<br />
251 ...
Service & Appearance Care<br />
Replacement Bulbs<br />
OUTSIDE LIGHTS<br />
Back-up Lights ................................................<br />
Front Parkingnurn Signal Lights ..................................<br />
License Plate Light ..............................................<br />
Halogen Headlights<br />
Outer .......................................................<br />
Inner .......................................................<br />
Front Side Marker Lights .........................................<br />
Stop/Tail/Turn Signal Lights<br />
Upper 2 Positions .............................................<br />
Lower 2 Positions .............................................<br />
UnderhoodLight ...............................................<br />
BULB<br />
3057<br />
3057NA<br />
194<br />
9006<br />
9005<br />
194NA<br />
194<br />
2057<br />
561
Replacement Bulbs (COMT.)<br />
INSIDE LIGHTS<br />
Courtesy Lights<br />
CargoArea ..................................................<br />
Sliding Door Stepwell ..........................................<br />
FrontFloor ..................................................<br />
Reading Light(s)<br />
Front .......................................................<br />
Rear ........................................................<br />
Dome Light(s)<br />
Front .......................................................<br />
Rear ........................................................<br />
Glove Compartment Light ........................................<br />
IndicatorLights ................................................<br />
Turn Signal Indicators ...........................................<br />
562<br />
562<br />
194<br />
562<br />
906<br />
561<br />
561<br />
194<br />
74<br />
74<br />
253 . .
Notes<br />
. 254
I<br />
KEEP ENGINE OIL<br />
AT THE PROPER<br />
LEVEL AND CHANGE AS<br />
RECOMMENDED<br />
This part covers the maintenance<br />
required for your Pontiac . Your vehicle<br />
needs these services to retain its<br />
safety. dependability and emission<br />
control performance .<br />
Part 7<br />
Maintenance Schedule<br />
Introduction<br />
A Word About Maintenance ............. .......... . . 256<br />
Your Vehicle and the Environment .............................. 256<br />
How This Part is Organized ..................... ............ 256<br />
A . Scheduled Maintenance Services<br />
Using Your Maintenance Schedules ... ................ 257<br />
Selecting the Right Schedule ..... ........................ 257<br />
Schedule1 ............................................... 258-259<br />
Schedule11 ............................... ............ 260-261<br />
Explanation of Scheduled Maintenance Services . . .............. 262<br />
B . Owner Inspections & Services<br />
Have you purchased the<br />
AtEachFuelFill ........................................... 264<br />
GM Protection Plan?<br />
At Least Once a Month ......................................... 265<br />
The Plan supplements your<br />
At Least Once a Year ...................................... 265-267<br />
new vehicle warranties . C Periodic Maintenance Inspections ............................ 267-268<br />
See your Chevrolet dealer for details . D Recommended Fluids & Lubricants ........................... 268-270<br />
E . Maintenance Record ............... ................. 270-272<br />
255 . .
Maintenance Schedule<br />
Introduction<br />
A Word About Maintenance<br />
We at General Motors want to help you keep your vehicle in good<br />
working condition. But we don’t know exactly how you’ll drive<br />
it. You may drive very short distances only a few times a week.<br />
Or you may drive long distances all the time in very hot, dusty<br />
weather. You may use your vehicle in making deliveries. Or you<br />
may drive it to work, to do errands or in many other ways.<br />
Because of all the different ways people use their GM vehicles,<br />
maintenance needs vary. You may even need more frequent<br />
checks and replacements than you will find in the schedules in<br />
this part. So please read this part and note how you drive. If<br />
you have any questions on how to keep your vehicle in good<br />
condition, see your Pontiac dealer, the place many GM owners<br />
choose to have their maintenance work done. Your dealer can<br />
be relied upon to use proper parts and practices.<br />
Your Vehicle and the Environment<br />
Proper vehicle maintenance not only helps to keep your vehicle<br />
in good working condition, but also helps the environment. All<br />
recommended maintenance procedures are important. Improper<br />
vehicle maintenance or the removal of important components<br />
can significantly affect the quality of the air we breathe.<br />
Improper fluid levels or even the wrong tire inflation can<br />
increase the level of emissions from your vehicle. To help<br />
protect our environment, and to help keep your vehicle in good<br />
condition, please maintain your vehicle properly.<br />
How This Part is Organized<br />
The remainder of this part is divided into five sections:<br />
“Section A: Scheduled Maintenance Services” shows what to<br />
have done and how often. Some of these services can be<br />
complex, so unless you are technically qualified and have the<br />
necessary equipment, you should let your dealer’s service<br />
department or another qualified service center do these jobs.<br />
If you are skilled enough to do some work on your vehicle, you<br />
will probably want to get the service information GM<br />
publishes. You will find a list of publications and how to get<br />
them in this manual. See “Service Publications’.’ in the Index.<br />
“Section B: Owner Checks and Services” tells you what should<br />
be checked whenever you stop for fuel. It also explains what<br />
you can easily do to help keep your vehicle in good condition.<br />
“Section C: Periodic Maintenance Inspections” explains<br />
important inspections that your Pontiac dealer’s service<br />
department or another qualified service center should perform.
“Section D: Recommended Fluids and Lubricants” lists some<br />
products GM recommends to help keep your vehicle properly<br />
maintained. These products, or their equivalents, should be<br />
used whether you do the work yourself or have it done.<br />
“Section E: Maintenance’ Record” provides a place for you to<br />
record the maintenance performed on your vehicle. Whenever<br />
any maintenance is performed, be sure to write it down in this<br />
section. This will help you determine when your next<br />
maintenance should be done. In addition, it is a good idea to<br />
keep your maintenance receipts. They may be needed to<br />
qualify your vehicle for warranty repairs.<br />
Section A: Scheduled Maintenance<br />
Services<br />
Using Your Maintenance Schedule<br />
This section tells you the maintenance services you should<br />
have done and when you should schedule them. Your Pontiac<br />
dealer knows your vehicle best and wants you to be happy with<br />
it. If you go to your dealer for your service needs, you’ll know<br />
that GM-trained and supported service people will pkrform the<br />
work using genuine GM parts.<br />
These schedules are for vehicles that:<br />
carry passengers and cargo within recommended limits.<br />
You will find these limits on your vehicle’s<br />
Certificationrnire label. See “Loading Your Vehicle” in the<br />
Index.<br />
are driven on reasonable road surfaces within legal driving<br />
limits.<br />
use the recommended unleaded fuel. See “Fuel” in the<br />
Index.<br />
Selecting the Right Schedule<br />
First you’ll need to decide which of the two schedules is right<br />
for your vehicle. Here’s how to decide which schedule to<br />
follow:<br />
Schedule I<br />
Is any one of these true for your vehicle?<br />
Most trips are less than 4 miles (6 km).<br />
0 Most trips are less than 10 miles (16 km) when outside<br />
temperatures are below freezing.<br />
The engine is at low speed most of the time (as in<br />
door-to-door delivery, or in stop-and-go traffic).<br />
0 You operate your vehicle in dusty areas.<br />
You tow a trailer.<br />
If any one (or more) of these is true for your driving, follow<br />
Schedule I.<br />
Schedule I1<br />
Follow Schedule I1 only if none of the above conditions is true.<br />
.-<br />
.‘i.<br />
..<br />
I ,<br />
257. . .
Maintenance Schedule<br />
Scheduled Maintenance Services Schedule I<br />
Follow Schedule I if your car is MAINLY driven under one or more of the following conditions:<br />
0 When most trips are less than 4 miles (6 kilometers).<br />
0 When most trips are less than 10 miles ( 16 kilometers) and outside temperatures remain below freezing.<br />
0 When most trips include extended idling and/or frequent low-speed operation as in stop-and-go traffic.<br />
0 Towing a trailer.”?‘<br />
0 When operating in dusty areas.<br />
Schedule I should also be followed if the car is used for delivery service, police, taxi or other commercial applications.<br />
WHAT TO SERVICE<br />
(See “Explanation of<br />
Scheduled Maintenance<br />
Services” following<br />
Schedules I and 11)<br />
Item No.<br />
I. Engine Oil & Filter<br />
Change“<br />
2. Chassis Lubrication<br />
3. Tire & Wheel Rotation<br />
& Inspection<br />
4. Engine Accessory Drive<br />
Belt Inspection<br />
5. Cooling System<br />
Service”<br />
6. Transaxle Service<br />
.258<br />
WHEN TO PERFORM<br />
Miles (kilometers) or<br />
Months, Whichever<br />
Occurs First<br />
Every 3,000 mi. (5000 km) or<br />
3 months<br />
Every 3,000 mi. (5000 km) or<br />
12 months<br />
At 6,000 mi. (10 000 km) and<br />
every 15,000 mi. (25 000 km)<br />
or as necessary<br />
Every 60,000 mi.<br />
(100 000 km) or 60 months.<br />
Every 30,000 mi. (50 000 km)<br />
or 24 months.<br />
See “Explanation of Scheduled<br />
Maintenance Services”<br />
following Schedules I and I1<br />
MILES (000) . .<br />
1<br />
KILOMETERS (000)<br />
I
WHAT TO SERVICE I r- MILES (000)<br />
The services shown in this schedule up to 48,000 miles (80000 km) should be Derformed after 48,000 miles at the same intervals.<br />
An Emission Control Service.<br />
The US. Environmental Protection Agency or the California Air Resources Board has determined thnt the failure to perform this maintenance item will not nullify the<br />
emission warranty or limit recall liobilily prior to the compleiion of vehicle useful life. General Motors. however. urges that a11 recommended maintenance services be<br />
performed at the indicated intervals and the maintenance be recorded in "Section E:Maintenance Record".<br />
259. .
Maintenance Schedule<br />
Scheduled Maintenance Services Schedule I1<br />
Follow Schedule I1 ONLY if none of the driving conditions specified in Schedule I apply.<br />
WHAT TO SERVICE<br />
(See ‘,‘Explanation of<br />
Scheduled Maintenance<br />
Services’’ following<br />
Schedules I and 11)<br />
Item No.<br />
1. Engine Oil & Filter Change*<br />
Oil Filter Change*<br />
2. Chassis Lubrication<br />
3. Tire & Wheel Rotation & Inspection<br />
4. Engine Accessory Drive Belt<br />
Inspection<br />
5. Cooling System Service”<br />
6. Transaxle Service<br />
WHEN TO PERFORM<br />
Miles (kilometers) or<br />
Months, Whichever<br />
Occurs First<br />
Every 7,500 mi. (12 500 km) or<br />
12 months<br />
At first and then every other oil change<br />
Every 7,500 mi. (12 500 km) or 12<br />
months<br />
At 7,500 mi. (12 500 km) and then every<br />
15,000 mi. (25 000 km) or as necessary<br />
Every 60,000 mi. (100 000 km) or<br />
60 months<br />
Every 30,000 mi. (50 000 km) or<br />
24 months<br />
See “Explanation of Scheduled<br />
Maintenance Services” following<br />
Schedules I and I1<br />
MlLES (000)<br />
KILOMETERS (000)<br />
75 87.5 100<br />
0 0 0<br />
0<br />
0 0 0<br />
0<br />
0<br />
0
~~<br />
~<br />
WHAT TO SERVICE MILES (000)<br />
(See Explanation of<br />
WHEN TO PERFORM<br />
Scheduled Maintenance<br />
Miles (kilometers) or<br />
Services Following<br />
Months, Whichever<br />
Schedules I and 11) KILOMETERS (000)<br />
Item No.<br />
Occurs First<br />
12.5 25 37.5 50 62.5 75 87.5 100<br />
7. Spark Plug Replacement*<br />
8. Spark Plug Wire Inspection*<br />
9. EGR System Inspection<br />
(3.1L Code D engine only)*?<br />
Every 30,000 mi. (50 000 km)<br />
Every 60,000 mi. (100 000 km) or<br />
60 months<br />
10. Air Cleaner Filter Replacement” See “Explanation of Scheduled<br />
Maintenance Services” following<br />
Schedules I and I1<br />
1 1. Air Cleaner Inspection<br />
(3.1L Code D engine only)*f‘<br />
12. Fuel Tank, Cap & Lines Inspection*?<br />
13. Engine Timing and Distributor Check<br />
(3.1L Code D engine only)*?<br />
Every 30,000 mi. (50 000 km)<br />
Every 60,000 mi. ( 100000 km) or<br />
60 months<br />
1<br />
The services shown in this schedule up to 60,000 miles (100 000 km) should be performed after 60,000 miles at the same<br />
intervals.<br />
* An Emission Control Service.<br />
The U.S. Environmental Protection Agency or the California Air Resources Board has determined that the failure to perform this maintenance item will not nullify the<br />
emission warranty or limit recall liabilily prior to the completion of vehicle useful life. General Motors. however, urges that all recommended maintenance services be<br />
performed at the indicated intervals and the maintenance be recorded in “Section E:Maintenance Record”.<br />
0<br />
0<br />
0<br />
0<br />
0<br />
0<br />
0<br />
0<br />
0<br />
0<br />
.<br />
261 ...
Maintenance Schedule<br />
Explanation of Scheduled Maintenance<br />
Services<br />
Following are explanations of the services listed in Schedule I<br />
and Schedule 11.<br />
The proper fluids and lubricants to use are listed in Section D.<br />
Make sure whoever services your vehicle uses these. All parts<br />
should be replaced and all necessary repairs done before you or<br />
anyone else drives the vehicle.<br />
NOTE: To determine your engine’s displacement and code, see<br />
“Engine Identification” in the Index.<br />
1.<br />
2.<br />
Engine Oil and Filter Change* -- Always use SG or SH<br />
Energy Conserving I1 oils of proper viscosity. The “SH” or<br />
“SG” designation may be shown alone or in combination<br />
with others, such as “SH/CD”, “SH, SG, CD”, “SG/CD”,<br />
etc.<br />
Chassis Lubrication -- Lubricate suspension and steering<br />
linkage. Lubricate the Transaxle shift linkage, and parking<br />
brake cable guides, underbody contact points and linkage.<br />
3. Tire and Wheel Rotation and Inspection -- For proper<br />
wear and maximum tire life, rotate your tires following the<br />
instructions in this manual. See “Tires, Inspection &<br />
Rotation” in the Index. Check the tires for uneven wear or<br />
damage. If you see irregular or premature wear, check the<br />
wheel alignment. Check for damaged wheels also.<br />
4. Engine Accessory Drive Belt Inspection -- Inspect the<br />
drive belt for cracks, fraying, wear and proper tension.<br />
Replace as needed.<br />
5. Cooling System Service* -- Drain, flush and refill the<br />
system with new or approved recycled coolant conforming<br />
to GM Specification 1825M. Keep coolant at the proper<br />
mixture as specified. See “Coolant” in the Index. This<br />
provides proper freeze and boil protection, corrosion<br />
inhibitor level and maintains proper engine operating<br />
temperature.<br />
Inspect hoses and replace if they are cracked, swollen or<br />
deteriorated. Tighten screw-type hose clamps. Clean the<br />
outside of the radiator and air conditioning condenser. Wash<br />
the pressure cap and neck.<br />
To help ensure proper operation, we recommend a pressure<br />
test of both the cooling system and the pressure cap.<br />
* An Emission Control Service.<br />
The U.S. Environmental Protection Agency or the California Air Resources Board has determined that the failure to perform this maintenance item will not nullify the<br />
emission warranty or limit recall liability prior to the completion of vehicle useful life. General Motors, however, urges that all recommended maintenance services be<br />
performed at the indicated intervals and the maintenance be recorded in “Section E:Maintenance Record”.<br />
. . .262
6. Transaxle Service -- Change both the fluid and filter every<br />
15,000 miles (25 000 km) if the vehicle is mainly driven<br />
under one or more of these conditions:<br />
0 In heavy city traffic where the outside temperature<br />
regularly reaches 90°F (32°C) or higher.<br />
0 In hilly or mountainous terrain.<br />
0 When doing frequent trailer towing. (With some<br />
models, you shouldn’t ever tow a trailer. See “Towing a<br />
Trailer” in the Index.)<br />
0 Uses such as found in taxi, police car or delivery<br />
service.<br />
If you do not use your vehicle under any of these<br />
conditions, change both the fluid and filter every 100,000<br />
miles ( 166 000 km).<br />
7. Spark Plug Replacement” -- Replace spark plugs with the<br />
proper type. See “Replacement Parts” in the Index.<br />
8. Spark Plug Wire Inspectioa” -- Inspect for burns, cracks<br />
or other damage, Check the boot fit at the distributor or<br />
coils and at the spark plugs. Replace wires as needed.<br />
.. :<br />
. “<br />
2 - c<br />
$$<br />
9. Exhaust Gas Recirculation (EGR) System InSpption<br />
(3.1L Code D engine only)*? -- Conduct the EGR<br />
,*!<br />
system<br />
‘1<br />
service as described in the service manual. To purchase a<br />
service manual, see “Service Publications’’ in tfihndex.<br />
10. Air Cleaner Filter Replacement” -- Replace every<br />
30,000 miles (50 000 km) or more often under dusty<br />
conditions. Ask your dealer for the proper replacement<br />
intervals for your driving conditions.<br />
11. Air Cleaner Inspection (3.1L Code D engine only)*? --<br />
Inspect all hoses and ducts for proper hookup. Make sure<br />
the valve works properly.<br />
12.Fuel Tank, Cap and Lines Inspection*? -- Inspec‘t .fuel<br />
tank, cap and lines for damage or leaks. Inspect fuel ‘cap<br />
gasket for an even filler neck imprint or any damage.<br />
Replace parts as needed. Periodic replacement of the fuel<br />
filter is not required.<br />
13.Engine Timing and Distributor Check (3.1L Code,D<br />
engine only)*? -- Adjust the timing to the underhoqd label<br />
specifications. Inspect the inside and outside of the<br />
distributor cap and rotor for cracks, carbon tracking and<br />
corrosion. Clean or replace as needed.<br />
C
Maintenance Schedule<br />
Section B: Owner Checks and<br />
Services<br />
Listed below are owner checks and services which should be<br />
performed at the intervals specified to help ensure the safety,<br />
dependability and emission control performance of your<br />
vehicle.<br />
Be sure any necessary repairs are completed at once. Whenever<br />
any fluids or lubricants are added to your vehicle, make sure<br />
they are the proper ones, as shown in Section D.<br />
At Each Fuel Fill (It is important for you or<br />
a service station attendant to perform these<br />
underhood checks at each fuel fill.)<br />
-<br />
CHECK OR<br />
SERVICE<br />
Engine Oil Level<br />
Engine Coolant<br />
Level<br />
Windshield<br />
Washer Fluid<br />
Level<br />
-<br />
WHAT TO DO<br />
Check the engine oil level and add the<br />
proper oil if necessary. See “Engine<br />
Oil” in the Index for further details.<br />
Check the engine coolant level and add<br />
the proper coolant mix if necessary. See<br />
“Coolant” in the Index for further<br />
details.<br />
Check the windshield washer fluid<br />
level in the windshield washer tank and<br />
add the proper fluid if necessary. See<br />
“Windshield Washer Fluid” in the<br />
Index for further details.
1 At Least Once a Month<br />
CHECK OR<br />
SERVICE<br />
Tire Inflation<br />
Cassette Deck<br />
WHAT TO DO<br />
‘Check tire inflation. Make sure they are<br />
inflated to the pressures specified on the<br />
Certificationnire label located on the<br />
rear edge of the driver’s door. See<br />
“Tires”’ in the Index for further details.<br />
Clean cassette deck. Cleaning should<br />
be done every 15 hours of tapeplay. See<br />
“Audio Systems” in the Index for<br />
further ‘details.<br />
At Least Once a Year<br />
‘CHECK OR<br />
SERVICE<br />
Key Lock<br />
Cylinders<br />
Body Lubrication<br />
grter Switch<br />
WHAT TO DO<br />
Lubricate the key lock cylinders with<br />
the lubricant specified in Section D.<br />
Lubricate all body door hinges,<br />
including the liftgate. Also lubricate all<br />
hinges and latches, including those for<br />
the hood, sliding door track, rear<br />
compartment, glove box door and any<br />
folding seat hardware. Section D tells<br />
you what to use.<br />
.<br />
1. Before you start, be sure you have<br />
enough room around the vehicle.<br />
2. Firmly apply both the parking brake<br />
(see “Parking Brake” in the index if<br />
necessary) and the regular brake.<br />
3. Try to start the engine in each gear.<br />
The starter should work only in “P”<br />
(Park) or “N’(Neutral). If the starter<br />
works in any other position, your<br />
vehicle needs service.<br />
I<br />
265 ...
Maintenance Schedule<br />
CHECKOR SERVICE I<br />
WHAT TO DO<br />
Steering Column<br />
Lock<br />
While parked, and with the parking<br />
brake set, try to turn the key to “LOCK”<br />
in each shift lever position.<br />
I<br />
0 The key should turn to “LOCK”<br />
only when the shift lever is in “P”<br />
(Park).<br />
The key should come out only in<br />
“LOCK.”<br />
CHECK OR<br />
SERVICE<br />
Parking Brake and<br />
Automatic<br />
Transaxle “P”<br />
(Park) Mechanism<br />
Check<br />
WHAT TO DO<br />
0 To check the parking brake: With the<br />
engine running and transmission in<br />
“N’ (Neutral), slowly remove foot<br />
pressure from the regular brake<br />
pedal. Do thisuntilthevehicle is<br />
held by the parking brake only.<br />
0 To check the “P” (Park) mechanism’s<br />
holding ability: Shift to “P” (Park).<br />
Then release all brakes.
I<br />
CHECK OR<br />
SERVICE<br />
Underbody<br />
Flushing<br />
WHAT TO DO<br />
At least every spring, use plain water to<br />
flush any corrosive materials from the<br />
underbody. Take care to clean<br />
thoroughly any areas where mudand<br />
other debris can collect.<br />
Section C: Periodic Maintenance<br />
Inspections<br />
Listed below are inspections and services which should be<br />
performed at least twice a year (for instance, each spring and<br />
fall). You should let your GM dealer’s service department or<br />
other qualified service center do these jobs. Make sure any<br />
necessary repairs are completed at once.<br />
I<br />
CHECK OR<br />
SERVICE<br />
Restraint Systems<br />
WHAT TO DO<br />
Now and then, make sure all your belts,<br />
buckles, latch plates, retractors,<br />
anchorages and reminder systems are<br />
working properly. Look for any loose<br />
parts or damage. If you see anything<br />
that might keep a restraint system from<br />
doing its job, have it repaired.<br />
CHECK OR<br />
SERVICE<br />
Steering,<br />
Suspension and<br />
Front-Wheel-<br />
Drive Axle Boot<br />
and Seal<br />
Inspection<br />
Exhaust System<br />
Inspection<br />
Throttle Linkage<br />
[nspection<br />
WHAT TO DO<br />
Inspect the front and rear suspension<br />
and steering system for damaged, loose<br />
or missing parts, signs of wear, or lack<br />
of lubrication. Inspect the power<br />
steering lines and hoses for proper<br />
hookup, binding, leaks, cracks,<br />
chafing, etc. Clean and then inspect the<br />
drive axle boot seals for damage, tears<br />
or leakage. Replace seals if necessary.<br />
Inspect the complete exhaust system.<br />
Inspect the body near the exhaust<br />
system. Look for broken, damaged,<br />
missing or out-of-position parts as well<br />
as open seams, holes, loose connections,<br />
or other conditions which could cause a<br />
heat build-up in the floor pan or could let<br />
exhaust fumes into the vehicle. See<br />
“Engine Exhaust” in the Index.<br />
Inspect the throttle linkage for<br />
interference or binding, and for<br />
damaged or missing parts. Replace<br />
parts as needed.
Maintenance Schedule<br />
CHECK OR<br />
SERVICE<br />
Brake System<br />
[nspection<br />
WHAT TO DO<br />
inspect the complete system. Inspect<br />
brake lines and hoses for proper<br />
hookup, binding, leaks, cracks,<br />
chafing, etc. Inspect disc brake pads for<br />
wear and rotors for surface condition.<br />
Also inspect drum brake linings for<br />
wear and cracks. Inspect other brake<br />
parts, including drums, wheel<br />
cylinders, calipers, parking brake, etc.<br />
Check parking brake adjustment. You<br />
may need to have your brakes inspected<br />
more often if your driving habits or<br />
conditions result in frequent braking.<br />
NOTE: A low brake fluid level can<br />
indicate worn disc brake pads which<br />
may need to be serviced, Also, if the<br />
brake system warning light stays on or<br />
comes on, something may be wrong<br />
with the brake system. See “Brake<br />
System Warning Light” in the Index. If<br />
your anti-lock brake system warning<br />
light stays on, comes on or flashes,<br />
something may be wrong with the<br />
anti-lock brake system. See “Anti-Lock<br />
Brake System Warning Light” in the<br />
Index.<br />
Section D: Recommended Fluids and<br />
Lubricants<br />
NOTE: Fluids and lubricants identified below by name, part<br />
number or specification may be obtained from your GM dealer.<br />
USAGE<br />
~~<br />
Engine Oil<br />
Engine Coolant<br />
Hydraulic Brake<br />
System<br />
FLUIDlLUBRICANT<br />
API service SH or SG Energy<br />
Conserving I1 oils of the proper<br />
viscosity. The “SG” or “SH”<br />
designation may be shown alone or in<br />
combination with others, such as<br />
“SH/CD,”“SG/CD” or “SH,SG,CD,”<br />
etc. To determine the preferred<br />
viscosity for your vehicle’s engine, see<br />
“Engine Oil” in the Index.<br />
50/50 mixture of water (preferably<br />
distilled) and good quality ethylene<br />
glycol base antifreeze (GM Part No.<br />
1052753 or equivalent) conforming to<br />
GM Specification 1825M or approved<br />
recycled coolant conforming to GM<br />
Specification 1825M.<br />
Delco Supreme 1 l@ Brake Fluid (GM<br />
Part No. 1052535 or equivalent DOT-3<br />
brake fluid).<br />
- ~.
USAGE<br />
Parking Brake<br />
Guides<br />
Power Steering<br />
System<br />
Automatic<br />
Transaxle<br />
FLUID/LUBRICANT<br />
Chassis lubricant (GM Part No.<br />
1052497 or equivalent) or lubricant<br />
meeting requirements of NLGI Grade<br />
2, Category LB or GC-LB.<br />
GM Hydraulic Power Steering Fluid<br />
(GM Part No. 1052884 or equivalent).<br />
DEXRON@-111 or DEXRON@-IIE<br />
Automatic Transmission Fluid.<br />
Key Lock Lubricate with Multi-Purpose<br />
Cylinders Lubricant (GM Part No. 12345120), or<br />
synthetic SAE 5W-30 engine oil.<br />
Automatic<br />
Transaxle Shift<br />
Linkage<br />
Engine oil.<br />
Chassis<br />
Chassis lubricant (GM Part No.<br />
Lubrication 1052497 or equivalent) or lubricant<br />
meeting requirements of NLGI Grade<br />
2, Category LB or GC-LB.<br />
Windshield<br />
Washer Solvent<br />
GM Optikleen@ Washer Solvent (GM<br />
Part No. 1051515) or equivalent.<br />
USAGE<br />
Hood Latch<br />
Assembly<br />
a. Pivots and<br />
Spring Anchor<br />
b. Release Pawl<br />
Hood and Door<br />
Hinges, Liftgate<br />
Hinge and<br />
Linkage, Fuel<br />
Door Hinge,<br />
Folding Seat<br />
Hardware, Rear<br />
Compartment Lid<br />
Hinges<br />
Sliding Door Track<br />
Weatherstrips<br />
-<br />
a. Engine oil.<br />
FLUID/LUBRICANT<br />
b. Chassis lubricant (GM Part No.<br />
1052497 or equivalent) or lubricant<br />
meeting requirements of NLGI<br />
Grade 2, Category LB or GC-LB.<br />
-<br />
Engine oil or Lubriplate Lubricant (GM<br />
Part No. 1050 109).<br />
Lubriplate Lubricant aerosol (GM Part<br />
No. 1052349) or equivalent white grease.<br />
Dielectric Silicone Grease (GM Part<br />
No. 12345579 or equivalent).<br />
See “Replacement Parts” in the Index for recommended<br />
replacement filters, valves and spark plugs.<br />
269. . .
Maintenance Schedule<br />
Section E: Maintenance Record<br />
After the scheduled services are performed, record the date,<br />
odometer reading and who performed the service in the<br />
columns indicated. When completing the Maintenance<br />
Performed column, insert the numbers from the Schedule I or<br />
Schedule I1 maintenance charts which correspond to the<br />
maintenance performed. Also, you should retain all<br />
maintenance receipts. Your owner information portfolio is a<br />
convenient place to store them.<br />
I<br />
ODOMETER<br />
DATE MAINTENANCE READING PERFORMED SERVICED BY<br />
Maintenance Record<br />
.- .- .<br />
L .~<br />
. 270
Maintenance Record<br />
DATE<br />
ODOMETER<br />
READING<br />
SERVICED BY<br />
MAINTENANCE PERFORMED<br />
271 ...
Maintenance Schedule<br />
Maintenance Record<br />
DATE<br />
ODOMETER<br />
READING<br />
BY<br />
MAINTENANCE PERFORMED SERVICED<br />
J<br />
. .<br />
-..<br />
.-<br />
. . .272
L<br />
1 U<br />
L<br />
Part 8<br />
Customer Assistance Information<br />
Here you will find out how to contact<br />
Pontiac if you need assistance. This<br />
part also tells you how to obtain<br />
service publications and how to repori<br />
any safety defects.<br />
Part 8 includes<br />
Customer Satisfaction Procedure ...................................... 274<br />
Customer Assistance for the Hearing or Speech Impaired .................. 275<br />
BBB AUTO LINE-Alternative Dispute Resolution Program ............... 275<br />
Reporting Safety Defects ............................................ 277<br />
Pontiac Roadside Assistance Program .................................. 278<br />
Service Publications ................................................ 279<br />
273 ...
Customer Assistance Information<br />
I'<br />
t-J<br />
Customer Satisfaction<br />
Procedure<br />
Your satisfaction and goodwill are<br />
important to your dealer and Pontiac.<br />
Normally, any concern with the sales<br />
transaction or the operation of your<br />
vehicle will be resolved by your dealer's<br />
Sales or Service Departments.<br />
Sometimes, however, despite the best<br />
intentions of all concerned,<br />
misunderstandings can occur. If your<br />
concern has not been resolved to your<br />
satisfaction, the following steps should be<br />
taken:<br />
STEP ONE -- Discuss your concern with<br />
a member of dealership management.<br />
Normally, concerns can be quickly<br />
resolved at that level. If the matter has<br />
already been reviewed with the Sales,<br />
Service, or Parts Manager, contact the<br />
owner of the dealership or the General<br />
Manager.<br />
STEP TWO -- If after contacting a<br />
member of dealership management, it<br />
appears your concern cannot be resolved<br />
by the dealership without further help,<br />
contact the Pontiac Customer Assistance<br />
Center by calling 1-800-PM CARES. In<br />
Canada, contact GM of Canada Customer<br />
Assistance Center in Oshawa by calling<br />
1-800-263-3777 (English) or<br />
1-800-263-7854 (French).<br />
In Mexico, call (525) 254-3777. In Puerto<br />
Rico or U.S. Virgin Islands, call<br />
1-809-763- 13 15. In all other overseas<br />
locations, contact GM North American<br />
Export Sales in Canada by calling<br />
1-905-644-41 12.<br />
For prompt assistance, please have the<br />
following information available to give<br />
the Customer Assistance Representative:<br />
0 Your name, address, home and<br />
business telephone number<br />
Vehicle Identification Number (This is<br />
available from the vehicle registration<br />
or title, or the plate above the left top<br />
of the instrument panel and visible<br />
through the windshield.)<br />
Dealership name and location<br />
0 Vehicle delivery date and present<br />
mileage<br />
0 Nature of concern
We encourage you to call the toll free<br />
number listed previously in order to give<br />
your inquiry prompt attention. However,<br />
if you wish to write Pontiac, write to:<br />
United States<br />
Pontiac Division<br />
Customer Assistance Center<br />
One Pontiac Plaza<br />
Pontiac, MI 48340-2952<br />
Canada<br />
General Motors of Canada Limited<br />
Customer Assistance Centre<br />
1908 Colonel Sam Drive<br />
Oshawa, Ontario L 1 H 8P7<br />
When contacting Pontiac, please<br />
remember that your concern will likely be<br />
resolved in the dealership, using the<br />
dealership's facilities, equipment and<br />
personnel. That is why we suggest you<br />
follow Step One first if you have a<br />
concern.<br />
Customer Assistance<br />
for the Hearing or<br />
Speech Impaired<br />
(TDD)<br />
To assist owners who have hearing<br />
difficulties, Pontiac has installed special<br />
TDD (Telecommunication Devices for the<br />
Deaf) equipment at its Customer<br />
Assistance Center. Any hearing or speech<br />
impaired customer who has access to a<br />
TDD or a conventional teletypewriter<br />
(TTY) can communicate with Pontiac by<br />
dialing: 1-800-TDD-PONT (TDD users<br />
in Canada can dial 1-800-263-3830.)<br />
GM Participation in<br />
BBB AUTO LINE -<br />
Alternative Dispute<br />
Resolution Program"<br />
*This program may not be available in all<br />
states, depending on state law. Canadian<br />
owners refer to your Warranty and Owner<br />
Assistance information booklet. General<br />
Motors reserves the right to change<br />
eligibility limitations and/or to<br />
discontinue its participation in this<br />
program.<br />
Both Pontiac and your Pontiac dealer are<br />
committed to making sure you are<br />
completely satisfied with your new<br />
vehicle. Our experience has shown that, if<br />
a situation arises where you feel your<br />
concern has not been adequately<br />
addressed, the Customer Satisfaction<br />
Procedure described earlier in this section<br />
is very successful.<br />
275.. .
Customer Assistance Information<br />
GM Participation in<br />
BBB AUTO LINE -<br />
Alternative Dispute<br />
Resolution Program*<br />
(CONI)<br />
There may be instances where an<br />
impartial third-party can assist in arriving<br />
at a solution to a disagreement regarding<br />
vehicle repairs or interpretation of the<br />
New Vehicle Limited Warranty. To assist<br />
in resolving these disagreements Pontiac<br />
voluntarily participates in BBB AUTO<br />
LINE.<br />
BBB AUTO LINE is an out-of-court<br />
program administered by the Better<br />
Business Bureau system to settle disputes<br />
between customers and automobile<br />
manufacturers. This program is available<br />
free of charge to customers who currently<br />
own or lease a GM vehicle.<br />
If you are not satisfied after following the<br />
Customer Satisfaction Procedure, you<br />
may contact the BBB using the toll-free<br />
telephone number, or write them at the<br />
‘-llowing address:<br />
BBB AUTO LINE<br />
Council of Better Business Bureaus<br />
4200 Wilson Boulevard<br />
Suite 800<br />
Arlington, VA 22203<br />
Telephone: 1-800-955-5100<br />
To file a claim, you will be asked to<br />
provide your name and address, your<br />
vehicle identification number (VIN), and<br />
a statement of the nature of your<br />
complaint. Eligibility is limited by vehicle<br />
age and mileage, and other factors.<br />
We prefer you utilize the Customer<br />
Satisfaction Procedure before you resort<br />
to AUTO LINE, but you may contact the<br />
BBB at any time. The BBB will attempt<br />
to resolve the complaint serving as an<br />
intermediary between you and Pontiac. If<br />
this mediation is unsuccessful, an<br />
informal hearing will be scheduled where<br />
zligible customers may present their case<br />
to an impartial third-party arbitrator.<br />
The arbitrator will make a decision which<br />
you may accept or reject. If you accept<br />
the decision, GM will be bound by that<br />
decision. The entire dispute resolution<br />
procedure should ordinarily take about<br />
Forty days from the time you file a ,claim<br />
until a decision is made.<br />
Some state laws may require you to use<br />
this program before filing a claim with a<br />
state-run arbitration program or in the<br />
courts. For further information, contact<br />
the BBB at 1-800-955-5100 or the<br />
Pontiac Customer Assistance Center at<br />
1 -800-PM-CARES.<br />
.276
REPURTZNG SAFETY<br />
DEFECTS TO THE<br />
UNZTED STATES<br />
GOVERNMENT<br />
If you believe that your vehicle has a<br />
defect which could cause a crash or could<br />
cause injury or death, you should<br />
immediately inform the National<br />
Highway Traffic Safety Administration<br />
(NHTSA), in addition to notifying<br />
General Motors.<br />
If NHTSA receives similar complaints, it<br />
may open an investigation, and if it finds<br />
that a safety defect exists in a group of<br />
vehicles, it may order a recall and remedy<br />
campaign. However, NHTSA cannot<br />
become involved in individual problems<br />
between you, your dealer, or General<br />
Motors.<br />
To contact NHTSA, you may either call<br />
the Auto Safety Hotline toll-free at<br />
1-800-424-9393 (or 366-0123 in the<br />
Washington, D.C. area) or write to:<br />
NHTSA<br />
U.S. Department of Transportatior,<br />
Washington, D.C. 20590<br />
You can also obtain other information<br />
about motor vehicle safety from the<br />
Hotline.<br />
REPORTZNG SAFETY<br />
DEFECTS TO THE<br />
CANADIAN<br />
GOVERNMENT<br />
If you live in Canada, and you believe<br />
that your vehicle has a safety defect, you<br />
should immediately notify Transport<br />
Canada, in addition to notifying General<br />
Motors of Canada Limited. You may<br />
write to:<br />
Transport Canada<br />
Box 8880<br />
Ottawa, Ontario K1 G 352
Customer Assistance Information<br />
w REPORTZNG SAFETY<br />
DEFECTS TO<br />
GENERAL MOTORS<br />
In addition to notifying NHTSA (or<br />
Transport Canada) in a situation like this,<br />
we certainly hope you’ll notify us. Please<br />
call us at 1-800-PM-CARES , or write:<br />
Pontiac Division<br />
Customer Assistance Center<br />
One Pontiac Plaza<br />
Pontiac, MI 48340-2950<br />
In Canada, please call us at<br />
1-800-263-3777 (English) or<br />
1-800-263-7854 (French). Or, write:<br />
General Motors of Canada Limited<br />
Customer Assistance Center, 163-005<br />
1908 Colonel Sam Drive<br />
Oshawa, Ontario LlH 8P7<br />
Pontiac Roadside<br />
Assistance Program<br />
Security While You Travel<br />
1-800-ROADSIDE 1-800-762-3743<br />
As the proud owner of a new Pontiac<br />
vehicle, you are automatically enrolled in<br />
the Pontiac Roadside Assistance Program<br />
This value-added service is intended to<br />
provide you with peace of mind as you<br />
drive in the city or travel the open road.<br />
Pontiac’s Roadside Assistance toll-free<br />
number is staffed by a team of trained<br />
technical advisors who are available 24<br />
hours a day, 365 days a year.<br />
We take anxiety out of uncertain<br />
situations by providing minor repair<br />
information over the phone or making<br />
arrangements to tow your vehicle to the<br />
nearest Pontiac dealer.<br />
We will provide the following services for<br />
3 years/36,000 miles, at no expense to<br />
you:<br />
Vehicle out of fuel<br />
Keys locked in vehicle<br />
Tow to nearest dealer for warranty<br />
Change a flat tire<br />
Jump starts<br />
. 278
We have quick, easy access to telephone<br />
numbers of the following services<br />
depending on your needs:<br />
0 Hotels<br />
Glass replacement<br />
Rental vehicles or taxis<br />
0 Police, fire department or hospitals<br />
In many instances, mechanical failures<br />
are covered under Pontiac’s<br />
comprehensive warranty. However when<br />
other outside services are utilized, our<br />
advisors will explain any payment<br />
obligations you might incur.<br />
For prompt and efficient assistance when<br />
calling, please have the following<br />
information available to give the advisor:<br />
0 Location of vehicle<br />
Telephone number of your location<br />
0 Vehicle model, year, and color<br />
Mileage of vehicle<br />
0 Vehicle identification number<br />
Vehicle license plate number<br />
Pontiac reserves the right to limit services<br />
or reimbursement to an owner or driver<br />
when in Pontiac’s judgement the claims<br />
become obsessive in frequency or type of<br />
occurrence.<br />
While we hope that you never have the<br />
occasion to use our service, it is added<br />
security while traveling for you and your<br />
family. Remember, we’re only a phone<br />
call away. Pontiac Roadside<br />
Assistance-1 -800-ROADSIDE or<br />
1-800-762-3743.<br />
Canadian Roadside<br />
Assistance<br />
Vehicles purchased in Canada have an<br />
extensive Roadside Assistance Program<br />
accessible from anywhere in Canada or<br />
the U.S.A. Please refer to the separate<br />
brochure provided by the dealer or call<br />
1-800-268-6800 for emergency services.<br />
Pontiac Courtesy<br />
Transportation<br />
For warranty repairs during the BUMPER<br />
TO BUMPER coverage period, interim<br />
transportation may be available under the<br />
Pontiac Courtesy Transportation Program.<br />
Please consult your dealer for details. In<br />
Canada, please consult your GM Dealer<br />
for information on courtesy<br />
transportation.<br />
Service Publications<br />
Information on how to obtain Product<br />
Service Publications and Indexes as<br />
described below is applicable only in the<br />
fifty U.S. states (and the District of<br />
Columbia) and only for cars and light<br />
trucks with GVWR less than 10,OOQ<br />
pounds (4 536 kg).<br />
In Canada, information pertaining to<br />
Product Service Bulletins and Indexes can<br />
be obtained by writing to:<br />
General Motors of Canada Limited<br />
Service Publications Department<br />
1908 Colonel Sam Dr.<br />
Oshawa, Ontario L1H 8P7<br />
Pontiac regularly sends its dealers useful<br />
service bulletins about Pontiac products.<br />
Pontiac monitors product performance in<br />
the field. We then prepare bulletins for<br />
servicing our products better. Now, you<br />
can get these bulletins too.<br />
279
Customer Assistance Information<br />
Service Publications<br />
(CONT.)<br />
Bulletins cover various subjects. Some<br />
pertain to the proper use and care of your<br />
vehicle. Some describe costly repairs.<br />
Others describe inexpensive repairs<br />
which, if done on time with the ’latest<br />
parts, may avoid future costly repairs.<br />
Some bulletins tell a technician how to<br />
repair a new or unexpected condition.<br />
Others describe a quicker way to fix your<br />
tehicle. They can help a technician<br />
service your vehicle better.<br />
Most bulletins apply to conditions<br />
affecting a small number of cars or trucks.<br />
Your Pontiac dealer or a qualified<br />
technician may have to determine if a<br />
specific bulletin applies to your vehicle.<br />
Individual PSP’s<br />
If you don’t want to buy all the PSP’s<br />
issued by Pontiac for all models in the<br />
model year, you can buy individual PSP’s,<br />
such as those which may pertain to a<br />
particular model. To do this, you will first<br />
need to see our index of PSP’s. It provides<br />
a variety of information. Here’s what<br />
you’ll find in the index and how you can<br />
get one:<br />
What You’ll Find in the<br />
Index:<br />
0<br />
0<br />
0<br />
A list of all PSP’s published by<br />
Pontiac in a model year (1 990 or<br />
later). PSP’s covering all models of<br />
Pontiac vehicles are listed in the same<br />
index.<br />
Ordering information so you can buy<br />
the specific PSP’s you may want.<br />
Price information for the PSP’s you<br />
may want to buy.<br />
How You Can Get an<br />
Index:<br />
Indexes are published periodically. Most<br />
of the PSP’s which could potentially<br />
apply to the most recent Pontiac models<br />
will be listed in the most recent<br />
publication for that model year. This<br />
means you may want to wait until the end<br />
of the model year before ordering an<br />
index, if you are interested in buying<br />
PSP’s pertaining to a current model year<br />
car or truck.<br />
Some PSP’s pertaining to a particular<br />
model year vehicle may be published in<br />
later years, and these would be listed in<br />
the later year’s index. When you order an<br />
index for a model year that is not over<br />
yet, we’ll send you the most recently<br />
published issue. Check the ordering form<br />
for indexes for earlier model years.<br />
Cut out the ordering form, fill it out, and<br />
mail it in. We will then see to it that an<br />
index is mailed to you. There is no charge<br />
for indexes for the 1990- 1994 model<br />
years.<br />
Toll-Free Telephone<br />
Number<br />
If you want an additional ordering form<br />
for an index, just call toll-free and we’ll<br />
be happy to send you one. Automated<br />
recording equipment will take your name<br />
and mailing address. The number to call<br />
is 1-800-551-4123.<br />
A VERY IMPORTANT REMINDER:<br />
These PSP’s are meant for technicians.<br />
They are not meant for the<br />
“do-it-yourselfer.” Technicians have the<br />
equipment, tools, safety instructions, and<br />
know-how to do a job quickly and safely.<br />
. . .280
Pontr'ac Service<br />
Publications<br />
You can get these by using the order<br />
form: Pontiac Division Service Manuals<br />
are intended for use by professional,<br />
qualified technicians. Attempting repairs<br />
or service without the appropriate<br />
training, tools, and equipment could cause<br />
injury to you or others and damage to<br />
your vehicle that may cause it not to<br />
operate properly.
. . .282
1994 PONTIAC SERVICE PUBLICATIONS ORDERING INFORMATION<br />
The following publications cowring the operation and servicing of pur vehicle can be purchased by filling out the Service Publications Order Form<br />
in this book and mailing it with your check, money order or credit card information to Helm, Incorporated (address listed below).<br />
CURRENT PUBLICATIONS FOR 1994 PONTIAC TRANS SPORT<br />
PRODUCT SERVfCE PUBLICATIONS<br />
SERVfCE MANUALS<br />
Product Service Publications (PSP’s), are bulletins, letters and articles Service Manuals have the diagnosis, repair and overhaul information<br />
published for trained dealer service personnel. See Service Publica- on engines, transmission, axle, suspension, brakes, electrical, steertions<br />
listed previously in this section.<br />
ing, body, etc.<br />
A cumulative index is published quarterly during the current model<br />
year. The indexes list all PSP’s published by Pontiac in the model year. Model Form Number Price<br />
1994 Pontiac Trans Sport ............ S-9410-U TBA”<br />
PSP Index<br />
NOTE: Please specify special body or engine types on order form.<br />
Year Form Number Write information in the Form Price Number column. For example: Turbo,<br />
1994 pspI-94-P ............................... Free Convertible.<br />
1993 pspI-93-p ............................... Free ‘Price to be announced at a tabr date. Call 1-800-782-4356 for further information.<br />
1992 psP1-92-P ............................... Free<br />
1991 pspI-91-P ............................... Free<br />
OWNER’S INFORMATION<br />
Owner publications are written directly for Owners intended and to provide<br />
basic operational information about the vehicle. The Owner’s<br />
PSP Bound Bulletin Book (Complete Year Bulletins)<br />
Manual includes the Maintenance Schedule for all models.<br />
Year Description Form Number Price<br />
15.00<br />
1994 Pontiac Trans Sport Owner’s Manual<br />
15.00<br />
1992 All PSP’S .................... S-92-PSP-4<br />
1991 All’PSP’s. ................... S-91-PSP-4<br />
For subscription information call Helm, Incorporated.<br />
In Portfolio: Includes &rtfolio, Owner‘s Manual and Warranty Booklet.<br />
1994 Pontiac Trans Sport In-Portfolio ........lo260058 $15.00<br />
Without Portfolio: Includes Owner’s Manual.<br />
1994 Pontiac Trans Sport Without Portfolio .. .10260060 $10.00<br />
CURRENT & PAST MODEL ORDER FORMS Address all inquiries to: HELM, INCORPORATED<br />
Service Publications are available for current and past model Pontiac EO. Box 07130<br />
vehicles. To request an order form, please specify year and model Detroit, MI 48207<br />
name of vehicle. For information and inquiries call: 1-800-782-4356
PONTIAC SERVICE PUBLICATIONS ORDER FORM<br />
NOTE: Please complete form below (Print or Type) and MAIL TO:<br />
Post Office Box 07130, Detroit, Michigan 48207<br />
ORDER TOLL FREE<br />
1-800-782-4356<br />
(Monday-Friday 8:OO A.M.-6:00 P.M.<br />
EST)<br />
(CUSTOMER NAME)<br />
(ATTENTION)<br />
(STREET ADDRESS-NO P.O. BOX NUMBERS)<br />
(STATE)<br />
(ZIP CODE)<br />
*Prices are subject to change without notice and without incurring obligation.<br />
* pries to ba ann ,nccd at a wer date, cell ,-800-782-4356 for further information. payable in U.8. funds. To cwer Canadian pastage, add<br />
Orders cannot be returned without prior authorization. A restocking fee may apply.<br />
NOTE TO CANADIAN CUSTOMERS: All listed prices are quoted in US. funds. Canadian residents are to make checks<br />
$1 1.50 plus the US. Handling Charge. Requests for manuak<br />
printed in French should be directed to Canadian General Motors dealerships.<br />
Please alow adequate time for postal service.<br />
285 . . .
. . .286
PONTIAC SERVICE PUBLICATIONS ORDER FORM<br />
NOTE: Please complete form below (Print or Type) and MAIL TO:<br />
Elm<br />
Post Office Box 07130, Detroit, Michigan 48207<br />
OIDER TOLL FREE<br />
1-800-782-4356<br />
(Monday-Friday 8:OO A.M.-6:00 P.M. EST)<br />
PUBLICATION FORM NUMBER<br />
ITEM DESCRIPTION<br />
VEHICLE MODEL<br />
QTY.<br />
NAME<br />
YEAR<br />
3.<br />
S-9410-U Service Manual<br />
Pontiac Trans Sport 1994<br />
TBA* *<br />
10260058<br />
Owner's Manual In-Portfolio<br />
Sport 1994 Pontiac - Trans $15.00<br />
10260060<br />
Owner's Manual Without-Portfolio Pontiac Trans S~ort 1994<br />
$10.00<br />
TOTAL PRICE<br />
TOTAL MATERIAL<br />
NOTE: Dealers and Companies please provide dealer or company name, and -<br />
also the name of<br />
[7 Check or Money ~ i ~ purchaz h i ~ ~ ~<br />
the person to whose attention the shipment should be sent. Order payable to , add 4% sales tax,<br />
For purchases outside USA. please write to the above address for quotation. Helm, Inc. (USA<br />
Handling Charge<br />
funds only -<br />
$4.00<br />
do not<br />
send cash.) Canadian Postage<br />
(See Note Below)<br />
GRAND TOTAL<br />
(CUSTOMER NAME) (ATTENTION) 0 MasterCard<br />
Discover<br />
[7 VISA 0 Card<br />
(STREET ADDRESS-NO<br />
BOX P.O. NUMBERS) (APT. NO.)<br />
Account Number: m l ml ml<br />
Date mo/yr:<br />
(CITY (STATE) (ZIP CODE)<br />
AREA<br />
DAYTIME TELEPHONE NO. CODE (<br />
(CUSTOMER SIGNATURE)<br />
*Prices are subject to change without notice and without incurring obligation. NOTE TO CANADIAN CUSTOMERS All listed prices are quoted in U.S. funds. Canadian residents are to make checks<br />
*price to be announced at a later date. cell 1-800-782-4356 fo, further information. payable in US. funds. To cover Canadian postage, add $1 1.50 plus Ihe US., Handling Charge. Requestsfor manuals<br />
printed in French should be directed to Canadian General Motors dealershlps.<br />
Orders cannot be returned without prior authorization. A restocking fee may apply. Please allow adequate time for postal service.<br />
287. . .
288
PONTIAC SERVICE PUBLICATIONS ORDER FORM<br />
NOTE: Please complete form below (Print or Type) and MAIL TO:<br />
KEEEJ<br />
Post Office Box 07130, Detroit, Michigan 48207<br />
ORDER TOLL FREE<br />
1-800-782-4356<br />
(Monday-Friday 8:OO A.M.-6:00 P.M. EST)<br />
(CUSTOMER NAME) (ATTENTION)<br />
(STREET ADDRESS-NO P.O. BOX NUMBERS)<br />
I<br />
(STATE)<br />
(ZIP CODE)<br />
*Prices are subject to change without notice and without incurring obligation. NOTE TO CANADIAN CUSTOMERS: All listed prices are quoted in U.S. funds,Canadian are to make<br />
* *Price to be announced at a later date. Cel 1-800-782-4356 for further information. Payable in US<br />
fmds. To Canadian postage, add$ll.!X PIIS the US. Handling Charge. Requests for manuals<br />
printed in French should be directed to Canadian General Motors dealerships.<br />
Orders cannot be returned without prior aulhoriiation. A restocking fee may apply. Please allow adequate time for postal service.
.i 290
~ $15.00<br />
PONTIAC SERVICE PUBLICATIONS ORDER FORM<br />
NOTE: Please complete form below (Print or Type) and MAIL TO:<br />
elm<br />
Post Office Box 07130, Detroit, Michigan 48207<br />
ORDER TOLL FREE<br />
1-800-782-4356<br />
(Monday-Friday 8:OO A.M.-6:00 P.M. EST)<br />
VEHICLE MODEL<br />
NAME<br />
I<br />
I YEAR EACH<br />
S-9410-U Service Manual<br />
Pontiac Trans Sport 1994<br />
TBA’ *<br />
10260058<br />
10260060<br />
Owner’s Manual In-Portfolio<br />
Owner’s Manual Without-Portfolio<br />
Pontiac Trans Sport<br />
Pontiac Trans Sport<br />
1994 -<br />
1994<br />
$1 0.00<br />
I<br />
PUBLICATION FORM NUMBER ITEM DESCRIPTION<br />
}<br />
QTY. I 1 TOTAL PRICE<br />
NOTE Dealers and Companies please provide dealer or company name, and<br />
also the name of the person to whose attention the shipment should be sent.<br />
For purchases outside USA. please wriie to the above address for quotation.<br />
(CUSTOMER NAME)<br />
(STREET<br />
(ATTENTION)<br />
ADDRESS-NO P.O. BOX NUMBERS) (APT. NO.)<br />
(Cnv) (STATE) (ZIP CODE)<br />
DAYTIME TELEPHONE NO. CODE<br />
AREA (<br />
I TOTAL MATERIAL I<br />
0 Check or Money Michigan Purchasers<br />
Order payable to<br />
Helm, Inc. (USA<br />
funds - do only not m<br />
send cash.)<br />
Canadian Postage<br />
II (See Note Below)<br />
1<br />
MasterCard<br />
I I GRAND TOTAL I<br />
m l m l<br />
I<br />
Account m l<br />
Number:<br />
Expiration K I<br />
Date molyr:<br />
] M (CUSTOMER SIGNATURE)<br />
I<br />
I<br />
m]<br />
ml Check address here is different if your from billing your<br />
shipping address shown.<br />
*Prices are subject to change without notice and without incurring obligation. NOTE TO CANADIAN CUSTOMERS: All listed prices are quoted in US. funds. Canadian residents are to make checks<br />
, to be at a call ,-800-782-4356 for funher payable in U.S. funds. To cover Canadian postage, $1 add 1.50 plus the US., Handling Charge. Requests for manuals<br />
printed in French should be directed toCanadian General Motors dealershtps.<br />
Orders cannot be returned without prior authorization. A restocking fee may apply. Please allow adequatelime for postal service.<br />
291 ...
292
PONTIAC SERVICE PUBLICATIONS ORDER FORM<br />
\<br />
NOTE: Please complete form below (Print or wpe) and _MAIL TO:<br />
mm<br />
Post Office Box 07130, Detroit Michi an 48207<br />
I I I I I<br />
I<br />
NOTE: Dealers and Companies please provide dealer or company name, and<br />
also the name of the person to whose attention the shipment should be sent.<br />
For purchases outside U.S.A. please write to the above address for quotation.<br />
(CUSTOMER NAME) (ATTENTION)<br />
(STREET<br />
ADDRESS-NO P.O. BOX NUMBERS) (APT. NO.)<br />
I GRAND TOTAL I<br />
I<br />
(CITY) (STATE) (ZIP CODE)<br />
DAYTIME TELEPHONE NO. $%: (<br />
293
.,. .294
PONTIAC SERVICE PUBLICATIONS ORDER FORM<br />
NOTE: Please complete form below (Print or Type) and MAIL TO:<br />
I<br />
Post Office Box 07130, Detroit, Michigan 48207<br />
ORDER TOLL FREE<br />
1-800-782-4356<br />
(Monday-Friday 8:OO A.M.-6:00 P.M. EST)<br />
PUBLICATION FORM NUMBER ITEM DESCRIPTION VEHICLE MODEL<br />
NAME<br />
I I I YEAR<br />
QTY.<br />
*Prices are subject to change without notice and without incurring obligation. NOTE TOCANADlAN CUSTOMERS Ai listed prices a= quoted in U.S. MS. Canadian re;iidem are to<br />
* *Price to be announeed at a leter date. Call 1-800-782-4356 for further infmatim. payable in Us. funds. TO COYBr Canadian postage, add$ll.5Oplus the US. Handling Charge, Requestsfor manuals<br />
printed in French should be,direcfed to Canadmn General Motors dealerships.<br />
Orders cannot be returned without prior authorization. A restocking fee may apply. Please allow adequate time tor postal service.<br />
295.. .
ABS (Anti-Lock Brakes) ........ 151<br />
ABS Warning Light ............. 114<br />
Accessory Power Outlet ........... 94<br />
Adding<br />
Brake Fluid ............. 223. 268<br />
Electrical<br />
Equipment ...... 71.72. 130. 243<br />
Engine Cqolant . . 189. 219. 249. 268<br />
Engine Oil .............. 211. 268<br />
Power Steering Fluid . 221. 250. 269<br />
Sound Equipment ......:..... 130<br />
Transaxle Fluid.<br />
Automatic ......... 217.249. 269<br />
Windshield Washer Fluid . . 222. 269<br />
Adjusting Rear Seats ............. 15<br />
AirBag ........................ 25<br />
How It Works ................ 27<br />
Readiness Light .............. 26<br />
Servicing Your Air Bag-Equipped<br />
Pontiac .................... 29<br />
Air Cleaner Filter ........... 215. 251<br />
Air Conditioner ................ 123<br />
Air Inflator System ........... 95. 193<br />
Alcohol. Driving Under the<br />
Influence of .................. 148<br />
Alcohol in Gasoline ............. 207<br />
Alignment. Wheel .............. 234<br />
Aluminum Wheels<br />
Cleaning ................... 240<br />
Removing .................. 196<br />
Antenna ...................... 146<br />
Antifreeze ......... 189.219.249. 268<br />
Anti-Lock Brake System ......... 151<br />
Junction Block Fuse .......... 247<br />
Warning Light ............... 114<br />
Anti-Theft Tips ................. 61<br />
Appearance Care ............... 235<br />
Chart ...................... 242<br />
Ashtrays & Lighter ........... 96. 99<br />
Audio Systems ................. 129<br />
AM/FM Stereo Radio ......... 131<br />
AM/FM Stereo Radio with<br />
Cassette Player ............. 133<br />
AM/FM Stereo Radio with<br />
Cassette Player and Graphic<br />
Equalizer ................. 136<br />
AM/FM Stereo Radio with<br />
Compact Disc Player ........ 139<br />
Care of Audio Systems ........ 145<br />
Delco-LOC Anti-Theft Feature 141<br />
Radio Reception. For the Best . . 144<br />
Setting the Clock ............. 130<br />
Steering Wheel Touch <strong>Controls</strong> .... 143<br />
Automatic Door Locks ............ 57<br />
Automatic Transaxle<br />
Adding Fluid ........ 217. 249. 269<br />
Checking Fluid .............. 217<br />
Shifting ..................... 73<br />
Starting Your Engine ........ 70. 71<br />
BBB Auto Line ............... 275<br />
Batteries. Remote Lock Control ..... 60<br />
Battery .................... 225. 304<br />
Acid Warning ........... 179. 226<br />
Jump Starting ............... 177<br />
Voltmeter ................... 112<br />
Blizzard ...................... 167<br />
Block Heater. Engine ......... 72. 215<br />
Blowout. Tire .................. 193<br />
Brakes<br />
ABS ....................... 151<br />
ABS Warning Light .......... 114<br />
Adjustment ................. 225<br />
Fluid .................. 223. 268<br />
Master Cylinder ............. 223<br />
Parking ..................... 77<br />
Pedal Travel ................ 225<br />
Replace .................... 225<br />
Warning Lights ....... 11 3. 114. 152<br />
Wear Indicators .............. 224<br />
Brake System Warning Light ...... 113<br />
Brakes. Anti-Lock ............... 151<br />
Warning Light ............... 114<br />
Braking ....................... 151<br />
Braking in Emergencies .......... 154<br />
“Break-In. .. New Vehicle .......... 69<br />
Brightness Intensity Control ....... 89<br />
Buckling Up .................... 18<br />
Bulb Replacement<br />
Chart ...................... 252<br />
Headlight ............... 226. 252<br />
Taillight ................ 227. 252<br />
Front Side Marker .............. 252<br />
Front Turn Signal ............ 252<br />
Headlight ................... 252<br />
Rear Light Bar .............. 252<br />
Taillight .................... 252<br />
CD Player Anti-Theft Feature .... 141<br />
Capacities and Specifications ...... 249<br />
Carbon Monoxide in Exhaust ... 68. 80<br />
Cassette Tape Player .... 133. 136. 145<br />
297 a
Center Lap Belts ................ 33<br />
Certificationnire Label .......... 228<br />
Chains<br />
Tire ................... 202. 235<br />
Trailer Safety ............... 17 1<br />
Changing a Flat Tire ............. 193<br />
Checking<br />
Air Cleaner ................. 2 15<br />
Brake Fluid ................. 223<br />
Engine Coolant .......... 189. 2 19<br />
Engine Oil .................. 2 11<br />
Power Steering Fluid ......... 221<br />
Safety Belt Systems ........... 51<br />
Things Under the Hood ....... 209<br />
Your Restraint Systems ......... 5 1<br />
Transaxle Fluid<br />
Automatic .................. 2 17<br />
Chemical Paint Spotting .......... 241<br />
Child Restraints ................. 37<br />
Child Security Lock .............. 66<br />
Cigarette Lighter ................ 99<br />
Circuit Breakermelay Panel ....... 247<br />
Circuit Breakers & Fuses ......... 244<br />
City Driving ................... 161<br />
Cleaner. Air ............... 2 15. 251<br />
Cleaning<br />
Aluminum Wheels ........... 240<br />
Cassette Player and Tapes ...... 145<br />
Compact Discs .............. 145<br />
Fabric ..................... 236<br />
Finish Care .................. 239<br />
Foreign Material ............. 240<br />
Glass ...................... 238<br />
Inside of Your Pontiac ........ 236<br />
Leather or Vinyl ............. 237<br />
Outside of Your Pontiac ....... 239<br />
Safety Belts ................. 238<br />
Special Problems ............ 237<br />
Top of Instrument Panel ....... 238<br />
Underbody Maintenance ....... 24 1<br />
Vinyl or Leather ............. 237<br />
Warnings ........... 236.238. 239<br />
Weatherstrips ............... 240<br />
White Sidewall Tires .......... 240<br />
Windshield and Wiper Blades ... 239<br />
Climate Control ................ 120<br />
Clock. Setting the ............... 130<br />
Clusters. Instrument Panel ........ 108<br />
Collision Repair ................ 24 1<br />
Comfort <strong>Controls</strong> ............... 120<br />
Climate Control System ....... 123<br />
Quick Reference Guide ........ 120<br />
Ventilation .............. 121. 128<br />
Compact Disc Player ............ 138<br />
Compact Spare Tire ..... 195. 202. 304<br />
Compartment. Storage ............ 98<br />
Control. Loss of ................ 157<br />
Control of a Vehicle ............. 150<br />
Convenience Net ................ 98<br />
Convex Outside Mirror ........... 96<br />
Coolant ................... 249. 268<br />
Checking & Adding ...... 189. 219<br />
Proper Mixture to Use .... 189. 22C<br />
Safety Warnings<br />
About ............ 189.220. 22 1<br />
Temperature Gage ............ 1 13<br />
Coolant Heater. Engine ....... 72. 215<br />
Cooling System .... 189. 219. 249. 304<br />
:overs. Wheel ................. 196<br />
hise Control .................. 84<br />
:up Holder ..................... 99<br />
Zustomer Assistance Information . . 274<br />
Daytime Running Lights ......... 88<br />
Dead Battery: What to Do ........ 177<br />
Defects. Reporting Safety ........ 277<br />
Defensive Driving .............. 148<br />
Defogger. Rear Window ......... 128<br />
Defogging Your Windows ........ 127<br />
Dome Lights ................. 89. 93<br />
Door Locks ..................... 55<br />
Downshifting ........... 75. 164. 173<br />
Driver Position .................. 21<br />
Driving<br />
At Night ................... 158<br />
City ....................... 161<br />
Controlling a Skid ............ 158<br />
Defensively ................. 148<br />
Drunken ................... 148<br />
Freeway .................... 162<br />
Hill and Mountain ............ 164<br />
In a Foreign Country .......... 208<br />
In the Rain .................. 159<br />
Long Distance ............... 162<br />
Loss of Control .............. 157<br />
On Snow or Ice .............. 166<br />
Passing .................... 156<br />
Through Deep Standing Water ... 72<br />
Winter Driving .............. 165<br />
With a Trailer ............... 168<br />
Drunken Driving ............... 148
I<br />
Electrical Equipment.<br />
Adding .......... 71.72. 130. 243<br />
Electric Outside Mirror Control ..... 97<br />
Electronic Level Control ..... 104. 229<br />
Emergencies. Braking in ......... 154<br />
Emergencies on the Road ......... 175<br />
Emergencies. Steering in ......... 155<br />
Emergency Starting ............. 177<br />
Emergency Towing ............. I8 1<br />
Engine Block Heater ......... 72. 215<br />
Engine Coolant ......... 189. 219. 249<br />
1 Engine Coolant Heater ........ 72. 215<br />
Engine Coolant Temperature Gage . 113<br />
Engine Exhaust ................. 79<br />
Engine Identification ............ 243<br />
Engine Oil ................ 21 1. 268<br />
Additives ................... 2 14<br />
Capacity ................... 249<br />
Checking & Adding .......... 21 1<br />
Disposing of Used Oil ........ 2 15<br />
Energy Conserving ....... 2 12. 213<br />
Exhaust .................. 68. 90<br />
Filter ...................... 251<br />
Oil Pressure Gage ............ 1 12<br />
When to Change ..... 2 15.258. 260<br />
Engine Overheating ............. 186<br />
Engine Specifications ............ 25 1<br />
Engine.Starting .......... 70. 71. 175<br />
ERT AM/FM Stereo Radio with<br />
Cassette Player and Graphic<br />
Equalizer .................... 13f<br />
Ethanol in Gasoline ............. 207<br />
Exhaust<br />
Dangerous Gas in .......... 68. 8C<br />
Parking with the Engine<br />
Running ................ 79. 80<br />
Zxpectant Mothers. Use of<br />
Safety . Belts ................... 30<br />
3xpressway Driving ............. 162<br />
Zxtender. Safety Belt ............. 51<br />
Zxterior Appearance ............ 235<br />
Fabric Cleaning ............... 236<br />
;an Warnings ...... 178. 179. 187. 210<br />
Zilling the Fuel Tank ............ 208<br />
zilter-<br />
Air ............ 215.251.259. 261<br />
Oil ........ ........ 251.258. 260<br />
Finish Damage ................. 240<br />
?lashers. Hazard Warning ........ 176<br />
Flat Tire ...................... 193<br />
Flooded Engine .............. 71. 72<br />
Fluid<br />
Brake .................. 223. 268<br />
Capacities .................. 249<br />
Power Steering .......... 221. 269<br />
Transaxle ....... 2 17.249.269. 304<br />
Windshield Washer ....... 222. 269<br />
Fluids & Lubricants ............. 268<br />
Freeway Driving ............... 162<br />
Fuel ..................... 207. 304<br />
Alcohol in Fuel .......... 207. 208<br />
Capacity ................... 207<br />
Exhaust Warnings .......... 68. 8C<br />
Filling Your Tank ............ 208<br />
Fuels with Alcohol ........... 20i<br />
Gage ....................... 111<br />
In Foreign Countries .......... 201;<br />
Low Fuel Warning Light ........ 111<br />
Parked with the Engine<br />
Running ................ 79. 80<br />
Fuses & Circuit Breakers ......... 244<br />
Gages<br />
Coolant Temperature ......... 113<br />
Fuel ........................ 111<br />
Voltmeter ................... 112<br />
Gasoline ...................... 207<br />
Gasoline Tank, Filling Your ....... 208<br />
Gas Station Information .......... 304<br />
3ear Positions .................. 73<br />
3earshift Lever ................. 73<br />
3love Box ..................... 98<br />
3raphic Equalizer .............. 136<br />
Halogen Bulbs ............ 226. 252<br />
Hazard Warning Flashers ......... 176<br />
Headlight & Taillight.<br />
Removing and Replacing ... 226. 227<br />
Headlights .................... 226<br />
High-Low Beam Changer ...... 88<br />
“On” Reminder ............... 88<br />
Replacement ................ 226<br />
Replacement Bulbs ....... 226. 252<br />
Head Restraint .................. 10<br />
Hearing or Speech Impaired ...... 275<br />
Heater ........................ 121<br />
Heater. Engine Block ......... 72. 215<br />
Heater. Engine Coolant ....... 72. 215<br />
High Beams ................ 88. 159<br />
Highway Hypnosis .............. 163<br />
Hilland Mountain Roads ......... 164<br />
299.
Hood Release .............. 209. 304<br />
Safety Warning .............. 2 10<br />
Warning. Overheated Engine ... 186<br />
Horn .......................... 81<br />
Hot Engine. Safety<br />
Warnings ......... 1 13 186. 188. 189<br />
Hydroplaning .............. 160. 22 1<br />
Identification<br />
Engine ..................... 243<br />
Label. Service Parts .......... 243<br />
Number. Vehicle (VIN Code) ... 243<br />
Idling Your Engine ............ 74. 79<br />
If You’re Stuck: In Sand. Mud.<br />
Ice. or Snow .................. 202<br />
Ignition<br />
Key ........................ 54<br />
Illuminated Entry System ....... 61<br />
Positions .................... 69<br />
Indicator Lights ................ 110<br />
Infant Restraint .................. 37<br />
Inflation. Tires ................. 230<br />
Inside Rearview Mirror ........... 96<br />
Instrument Panel ............... 105<br />
Instrument Panel Cluster ......... 108<br />
Instrument Panel Intensity Control . . 89<br />
Instrument Panel Warning Lights ... 110<br />
Interior Lights ......... ; ........ 93<br />
Control ..................... 89<br />
Front Reading ................ 93<br />
Override Switch ............... 92<br />
Rear Reading Lights ........... 93<br />
Jack. Tire .................... 194<br />
... 300<br />
lump Starting .................. 177<br />
Junction Block Fuse ABS ........ 247<br />
Keyless Entry. Remote .......... 58<br />
Key in Ignition .................. 61<br />
Keyless Entry System ............ 58<br />
Battery Replacement ........... 60<br />
Transmitter ................... 60<br />
Keys .......................... 54<br />
Lane Change Indicator ........... 82<br />
Lap-Shoulder Belt<br />
Front .................... 22. 30<br />
Rear ........................ 31<br />
Use by Children .............. 35<br />
Leather. Cleaning ............... 237<br />
Level Control. Electronic ......... 104<br />
Liftgate ........................ 67<br />
Ajar Warning Light ........... 116<br />
Lighter ........................ 99<br />
Lights<br />
Courtesy ................. 89. 93<br />
Daytime Running Lights ........ 88<br />
Dome ...................... 93<br />
Low Traction ................ 114<br />
Low Traction Warning ........ 115<br />
“On” Reminder ............... 88<br />
Reading ..................... 93<br />
Replacement Bulbs ........... 253<br />
Safety Belt Reminder .......... 21<br />
Taillights .................... 227<br />
Turn Signal .................. 82<br />
Under Hood ................ 2 1 1<br />
Warning Lights .............. 110<br />
2oading Your Vehicle ....... 104. 228<br />
Electronic Level Control ....... 229<br />
Locks<br />
Automatic ................... 57<br />
Door ....................... 55<br />
Power Door .................. 56<br />
Remote ..................... 58<br />
Long Distance Driving ........... 162<br />
Low Battery ................... 177<br />
Low Fuel Warning ............... 111<br />
Low Traction .................. 114<br />
Low Traction Light ............. 114<br />
Lubricants and Fluids ............ 268<br />
Luggage Carrier ................ 102<br />
Maintenance<br />
Fluids & Lubricants .......... 268<br />
Materials Chart .............. 242<br />
Record ..................... 270<br />
Replacement Parts ....... 251. 252<br />
Schedule ............... 257. 262<br />
Services. Scheduled .......... 257<br />
When Trailer Towing ......... 257<br />
Malfunction Indicator Lamp ...... 116<br />
Manual Front Seat ................ 8<br />
Master Cylinder. Brake .......... 223<br />
Methanol in Gasoline ............ 209<br />
Mileage Indicator ............... 109<br />
Mirrors<br />
Convex Outside .............. 96<br />
InsideManual Daymight ....... 96<br />
Manual Remote Control ........ 97<br />
Power Remote Control ......... 97<br />
Visor Vanity ................. 98
’ Mountain Driving ............... 164<br />
Net. Convenience ............... 98<br />
New Vehicle “Break-In”<br />
Requirements .................. 69<br />
Night Driving .................. 159<br />
Octane Requirements .......... 207<br />
Odometer ..................... 109<br />
Off-Road Recovery ............. 156<br />
Oil. Engine ........ 21 1.262.268. 304<br />
Capacity ................... 249<br />
Quality .................... 2 12<br />
Thickness .................. 2 12<br />
Used Oil ................... 2 15<br />
When to Change ............. 2 15<br />
Oil Pressure Gage .............. 1 12<br />
Oil Pressure Indicator ............ 1 12<br />
Operation of Lights .............. 88<br />
Outside Rearview Mirrors ......... 96<br />
Overdrive. Automatic ............ 75<br />
Overheated Engine .......... 186. 188<br />
Overheated Engine Coolant<br />
Gage ....................... 113<br />
Paint ...........................<br />
Chemical Spotting ........... 241<br />
Finish Care ................. 239<br />
Finish Damage .............. 240<br />
Parking<br />
At Night .................... 62<br />
On Hills .................... 174<br />
Over Things That Burn ......... 80<br />
With the Engine Running .... 79. 80<br />
Parking Brake ................... 77<br />
Park. Shifting Into ............... 74<br />
Passenger Belts .............. 30. 31<br />
Passing ....................... 156<br />
Polishing and Waxing ........... 239<br />
Power Accessory Outlet ........... 94<br />
Power Door Locks ............... 56<br />
Power Mirrors .................. 97<br />
Power Outlet. Accessory .......... 94<br />
Power Seat <strong>Controls</strong> ............... 9<br />
Power Sliding Door .............. 63<br />
Power Steering ................. 154<br />
Power Steering Fluid ........ 221.269<br />
Power Windows ............. 82. 248<br />
Pregnancy. Use of Safety<br />
Belts During .................. 30<br />
Problems on the Road ........... 175<br />
Publications ................... 279<br />
Pulse Windshield Wipers .......... 90<br />
Radiator Overheating ........... 190<br />
Radiator Pressure Cap ....... 190. 22 1<br />
Radio ........................ 131<br />
Rain.Drivinginthe ............. 159<br />
Reading Lights .................. 93<br />
Rear Air Vents ................. 126<br />
Rear Climate Control ............ 125<br />
Rear Fan .................. 122. 126<br />
Rear Seats<br />
Adjusting .................... 15<br />
Dump and Stow Feature ........ 16<br />
Removing ............. 1 1. 12. 14<br />
Replacing ................... 11<br />
Third Row Entry .............. 13<br />
Rear Storage Compartment ....... 100<br />
Rear Window Defogger .......... 128<br />
Rear Window Wiper and Washer .... 90<br />
Rearview Mirror ................. 96<br />
Reclining Seatbacks ............... 9<br />
Recommended Fluids<br />
and Lubricants ................ 268<br />
Reminder Lights. Safety Belt ....... 21<br />
Remote Control Mirrors ........... 97<br />
Remote Keyless Entry ............ 58<br />
Remote Positive Battery Terminal . . 179<br />
Removable Rear Bucket Seats ...... 16<br />
Replacement Bulbs ............. 252<br />
Replacement Fuses .............. 244<br />
Replacement Parts .............. 251<br />
Replacing Brakes ............... 225<br />
Replacing Safety Belts ............ 51<br />
Replacing Seat and Restraint System<br />
Parts After a Crash .......... 51.<br />
5 2<br />
Replacing Tires ................ 232<br />
Replacing Wheels .............. 234<br />
Replacing Windshield Wiper<br />
Blades ...................... 228<br />
Reporting Safety Defects ......... 277<br />
Restraints. Child ................. 37<br />
Restraint. Head .................. 10<br />
Roads. Hill and Mountain ........ 164<br />
Roadside Assistance ............. 278<br />
Rocking Your Vehicle ........... 203<br />
Stuck. If You Are ............ 203<br />
Rotation. Tire .................. 231<br />
Running Lights. Daytime .......... 88<br />
Saddlebags ................... 101<br />
Safety Belts .................... 17<br />
301
Adults ...................... 21<br />
Built-In Child Restraint ........ 37<br />
Center Lap .................. 51<br />
Checking .................... 33<br />
Children .................... 35<br />
Child Restraints .............. 43<br />
Child Restraints. Where to Put ... 43<br />
Cleaning ................... 238<br />
Driver Position ............... 21<br />
Extender .................... 5 1<br />
How to Wear ................. 21<br />
Larger Children ............... 49<br />
Passenger Belts ............... 30<br />
Pregnancy. Use During ......... 30<br />
Questions & Answers ... 20. 23.24. 25<br />
Rear Safety Belts ............. 30<br />
Reminder Lights .............. 21<br />
Replacement ................. 5 1<br />
Right Front. Adult Passenger .... 30<br />
Smaller Children and Babies .... 36<br />
Top Strap .................... 44<br />
Torn ............;........... 51<br />
Twisted ..................... 25<br />
Vehicles First Sold in Canada ..... 2<br />
Warning Light ............. 17. 21<br />
Why You Should Wear Safety<br />
Belts ................... 17. 20<br />
Safety Chains (Trailer) ........... 171<br />
Safety Defects. Reporting ........ 277<br />
Scheduled Maintenance Services ... 257<br />
Seat Belts ...................... 17<br />
Seat <strong>Controls</strong> .................... 8<br />
Head Restraint ............... 10<br />
Manual Front Seat .............. 8<br />
. 302<br />
Manual Reclining Seatback ...... 9<br />
Power Seat. Six-Way ........... 9<br />
Reclining Seatback ............. 9<br />
Rear Seats<br />
Adjusting .................. 15<br />
Folding Seatback ........... 11<br />
Removing ........... 11. 12. 14<br />
Replacing .................. 11<br />
Third Row Entry ........... 13<br />
Seats ........................... 8<br />
"Service Engine Soon" Light ...... 116<br />
Service Information ............. 206<br />
Service Parts Identification Label . . 243<br />
Service Publications ............. 279<br />
Service Publications Order Form ... 285<br />
Service Station Information ....... 304<br />
Servicing Your Air Bag-Equipped<br />
Pontiac ....................... 29<br />
Setting the Clock ............... 130<br />
Setting the Trip Odometer ........ 110<br />
Shifting Into P (Park) ............. 73<br />
Shifting the Transaxle ............ 73<br />
Signaling Turns ................. 82<br />
Skidding ...................... 158<br />
Sliding Door .................... 62<br />
Sliding Door Ajar Warning Light . . 117<br />
Sliding Door Child Security Lock ... 66<br />
Snowstorm. If You're Caught in a . . 167<br />
Sound Equipment. Adding ........ 130<br />
Sound Systems ................. 129<br />
Spare Tire. Compact ..... 195. 202. 304<br />
Spark Plugs ................... 251<br />
Specifications and Capacities ...... 249<br />
Speed Control ................... 84<br />
Speedometer ................... 109<br />
Stains. Removing ............... 237<br />
Starting Your Engine ............. 70<br />
Starting Your Vehicle if the Battery<br />
is Dead ....................... 177<br />
Steering<br />
In Emergencies .............. 155<br />
Off-Road Recovery .......... 156<br />
Tips ....................... 154<br />
Steering Wheel Audio Touch<br />
<strong>Controls</strong> ..................... 143<br />
Steering Wheel, Tilt .............. 81<br />
Stereo Sound Systems ........... 131<br />
Storage<br />
Convenience Net ............. 101<br />
Front Seat Console ........... 107<br />
Glove Box ................... 98<br />
Rear Storage Compartment ..... 100<br />
Storing Your Vehicle ............ 226<br />
Stuck. If You Are ............... 202<br />
Sunroof ....................... 104<br />
Sun Visors ..................... 98<br />
Tachometer .................. 109<br />
Taillight " ................... 87. 227<br />
Tape .................... Player<br />
Technical Facts & Specifications<br />
Bulbs ....................... 252<br />
Electrical Equipment.<br />
Add-on ............... 71. 243<br />
Engine Specifications ......... 251<br />
Fluid Capacities & Types ...... 249<br />
Fuses & Circuit Breakers ...... 244<br />
Replacement Parts ........... 251
Service Parts Identification<br />
Label ..................... 243<br />
Vehicle Identification Number<br />
(VIN) ..................... 243<br />
Temperature Gage .............. 1 13<br />
Theft .......................... 61<br />
Thermostat .................... 22 1<br />
Tilt Steering Wheel .............. 8 1<br />
Time. Setting the ............... 130<br />
Tires ......................... 230<br />
Buying New ................ 232<br />
CertificationEire Label ....... 228<br />
Chains ................. 202. 235<br />
Flat. Changing ............... 193<br />
Inflation ................ 193. 230<br />
Inspection & Rotation ......... 231<br />
Loading ..................... 228<br />
Pressure .................... 230<br />
Quality Grading ............. 233<br />
Spare. Compact .......... 195.202<br />
Wear Indicators .............. 232<br />
Wheel Alignment & Tire<br />
Balance ................... 234<br />
Wheel Replacement .......... 234<br />
When to Replace Wheels ...... 234<br />
Top Strap ...................... 44<br />
Torque Lock .................... 79<br />
Towing a Trailer ................ 168<br />
Towing Your Pontiac ............ 181<br />
Traction Control ............ 115. 153<br />
TractionControlWarningLights ... 115<br />
Trailer Towing ................. 168<br />
Driving with a Trailer ......... 172<br />
Hitches .................... 171<br />
Maintenance ................ 174<br />
Parking on Hills ............. 174<br />
Safety Chains ............... 17 1<br />
Trailer Brakes ............... 172<br />
Turn Signals ................ 173<br />
Transaxle. Automatic ............. 73<br />
Trip Odometer ................. 1 10<br />
Turn Signal Indicator ............. 82<br />
Turn Signal/Multifunction Lever .... 82<br />
Cruise Control ................ 84<br />
High-Low Beam Changer ...... 88<br />
Pulse Windshield Wipers ....... 90<br />
Turn & Lane Change Indicator ... 82<br />
Windshield Washer ............ 91<br />
Windshield Wipers ............ 90<br />
Underhood Light .............. 2 11<br />
Unleaded Gasoline .............. 207<br />
Upholstery Care ................ 236<br />
Vehicle Identification Number<br />
(VIN) ....................... 243<br />
Vehicle Loading ................ 228<br />
Vehicle Storage ................ 226<br />
Ventilation ................ 121. 128<br />
VIN ......................... 243<br />
Visor Vanity Mirror .............. 98<br />
Voltmeter ..................... 1 12<br />
Warning Flashers. Hazard ....... 176<br />
Warning Lights<br />
Anti-Lock Brake System ...... 114<br />
Brake ...................... 113<br />
Liftgate Ajar ................ 116<br />
Low Fuel .................... 1 11<br />
Low Traction ................ 114<br />
Malfunction Indicator Lamp .... 116<br />
Oil Pressure Gage ............ 112<br />
Service Engine Soon .......... 116<br />
Sliding Door Ajar ............ 117<br />
Traction Control .... i ........ 115<br />
Voltmeter ................... 112<br />
Washer. Windshield .............. 91<br />
Weatherstrips .................. 240<br />
Weight<br />
Gross Axle Weight Rating<br />
(GAWR) .................. 228<br />
Gross Vehicle Weight Rating<br />
(GVWR) .................... 228<br />
Wheel Alignment & Tire Balance . . 234<br />
Wheel Covers. How to Remove .... 196<br />
WheelNuts ................ 199. 200<br />
Wheel Nut Torque .............. 200<br />
Wheel Replacement ............. 234<br />
Windows<br />
Power ...................... 82<br />
Standard .................... 81<br />
Windshield Washer .............. 91<br />
Fluid ............... 92.222. 269<br />
Windshield Wiper Blade<br />
Replacement ................. 228<br />
Windshield Wipers ............... 90<br />
Cleaning ................... 239<br />
Winter Driving ................. 165<br />
If You’re Caught in a Blizzard . . 167<br />
If Your Vehicle is Stuck in<br />
Deep Snow ................ 202<br />
Wrecker Towing ................ 181<br />
303 . .
Service Station Information<br />
Battery<br />
The Delco Freedom@ battery<br />
needs no water. See Page 225<br />
Windshield Washer Fluid<br />
See Page 222<br />
Transaxle Fluid<br />
See Page 217<br />
Y<br />
Hood Release<br />
See Page 209<br />
Cooling System<br />
Check and add coolant only at the<br />
coolant recovery tank. The fluid<br />
should be at the FULL HOT<br />
mark when the engine is warm.<br />
See Page 220<br />
Engine Oil<br />
See Page 211<br />
Cold Tire Pressure \ 111 I I<br />
See Certificationnire Label on<br />
inside edge of driver’s door.<br />
See Page 228<br />
Fuel<br />
Capacity 20 U.S. Gal. (76 L)<br />
Use unleaded gas only,<br />
87 Octane or higher.<br />
See Page 207<br />
Spare Tire Pressure<br />
Compact Spare: 60 psi (420 kPa)<br />
See Page 202