MBA 200 Rotating Paddle - SMB Group
MBA 200 Rotating Paddle - SMB Group
MBA 200 Rotating Paddle - SMB Group

You also want an ePaper? Increase the reach of your titles
YUMPU automatically turns print PDFs into web optimized ePapers that Google loves.
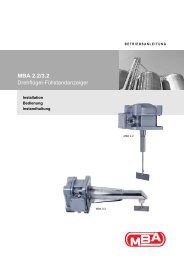
Bin-level Indicator <strong>MBA</strong> <strong>200</strong><br />
3.3 Installation<br />
3.3.1 Operational conditions<br />
Observe temperature specifications on the nameplate<br />
(example → page 11, § 7.1, explanations → page 4, § 2.4).<br />
Keep the following pressure limits:<br />
Standard configuration<br />
Version D10 (equipped<br />
with burst membrane in the<br />
unit head)<br />
In explosion-hazardous<br />
locations<br />
3.3.2 Installation position<br />
Units without additional shaft bearing in the extension<br />
arm: Use only with a vertically suspended shaft (±5°).<br />
Exception: If the shaft is rigid (not flexible) and not longer<br />
than <strong>200</strong> mm and the bulk material is light-weighted, an<br />
angle of inclination of max. 90° is permissible (allows sidemounting<br />
with horizontal shaft).<br />
<br />
–50 … +300 kPa<br />
(–0.5 … +3.0 bar)<br />
max. 1.0 MPa (10 bar)<br />
80 … 110 kPa<br />
(0.8 … +1.1 bar)<br />
<br />
3.3.3 Attachment<br />
Standard versions<br />
Attach the <strong>MBA</strong> process connection to the container.<br />
(dimensions → page 12, § 7.5).<br />
If protection class IP 65 is required (European standard<br />
EN 60529): Provide a suitable water/dust sealing<br />
between device and container.<br />
If the paddle does not go through the container opening:<br />
Detach the paddle before mounting and re-install after<br />
mounting.<br />
Height adjustment (option)<br />
The height adjustment device is a clamp-ring fitting which<br />
allows to fix the protective tube at variable insertion depth.<br />
1. Install the threaded base part of the fitting in the container<br />
wall.<br />
2. Put the clamping nut and the clamping ring over the<br />
protective tube.<br />
3. Guide the protective tube through the base part of the<br />
fitting (caution: do not damage the sealing rings inside<br />
the fitting) and bring it into the desired position.<br />
4. Guide the clamping ring into the fitting. Screw-up and<br />
tighten the clamping nut.<br />
5. Install the paddle.<br />
<br />
In case of lateral installation (horizontal shaft): Install the<br />
unit in such a way that the cable glands are on the<br />
underside of the housing.<br />
The unit head can be turned (2) after the clamping screw (1)<br />
on the underside has been released.<br />
1<br />
2<br />
The clamping screw must be fixed to achieve operational<br />
condition.<br />
Temperature protection by height adjustment<br />
The height adjustment device can also be used to keep the<br />
unit head away from high container temperatures.<br />
● Important: This feature applies only to units equipped<br />
with »DTR« type bearings.<br />
Mounting instructions:<br />
Adjust the height to a level where the distance between<br />
unit head and container is at least <strong>200</strong> mm (7.9").<br />
If the container is equipped with a thermal insulation:<br />
Remove the thermal insulation around the protective tube<br />
(instructions → page 7, § 3.3.4).<br />
When these conditions are kept, the unit can be used with<br />
container temperatures up to <strong>200</strong> °C (392 °F).<br />
6<br />
<strong>MBA</strong> <strong>200</strong> · Operating Instructions 8011417 V 2.2 · © <strong>MBA</strong> Instruments GmbH Germany