

Surgical Manual - Implant Supply
Surgical Manual - Implant Supply
Surgical Manual - Implant Supply

You also want an ePaper? Increase the reach of your titles
YUMPU automatically turns print PDFs into web optimized ePapers that Google loves.
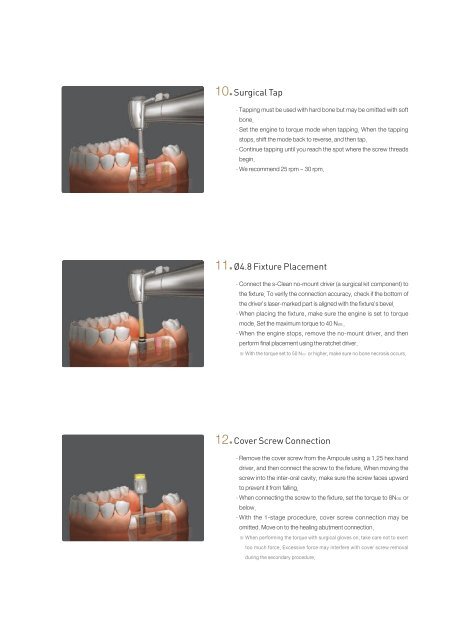
10● <strong>Surgical</strong> Tap<br />
- Tapping must be used with hard bone but may be omitted with soft<br />
bone.<br />
- Set the engine to torque mode when tapping. When the tapping<br />
stops, shift the mode back to reverse, and then tap.<br />
- Continue tapping until you reach the spot where the screw threads<br />
begin.<br />
- We recommend 25 rpm ~ 30 rpm.<br />
11● Ø4.8 Fixture Placement<br />
- Connect the s-Clean no-mount driver (a surgical kit component) to<br />
the fixture. To verify the connection accuracy, check if the bottom of<br />
the driver’s laser-marked part is aligned with the fixture’s bevel.<br />
- When placing the fixture, make sure the engine is set to torque<br />
mode. Set the maximum torque to 40 Ncm.<br />
- When the engine stops, remove the no-mount driver, and then<br />
perform final placement using the ratchet driver.<br />
※ With the torque set to 50 Ncm or higher, make sure no bone necrosis occurs.<br />
12● Cover Screw Connection<br />
- Remove the cover screw from the Ampoule using a 1.25 hex hand<br />
driver, and then connect the screw to the fixture. When moving the<br />
screw into the inter-oral cavity, make sure the screw faces upward<br />
to prevent it from falling.<br />
- When connecting the screw to the fixture, set the torque to 8Ncm or<br />
below.<br />
- With the 1-stage procedure, cover screw connection may be<br />
omitted. Move on to the healing abutment connection.<br />
※ When performing the torque with surgical gloves on, take care not to exert<br />
too much force. Excessive force may interfere with cover screw removal<br />
during the secondary procedure.