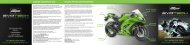
Kawasaki ZX636 2003/4 Z750 Z1000 2003-06 Tail Tidy Installation ...
Kawasaki ZX636 2003/4 Z750 Z1000 2003-06 Tail Tidy Installation ...
Kawasaki ZX636 2003/4 Z750 Z1000 2003-06 Tail Tidy Installation ...
- No tags were found...

Create successful ePaper yourself
Turn your PDF publications into a flip-book with our unique Google optimized e-Paper software.
Kit contents<br />
1 x Reflector Bracket 2 x Number Plate Screws & Nuts<br />
1 x Reflector 2 x M6 ‘bighead’ studs<br />
2 x Male Bullet Connectors 4 x M6 S/S Washer<br />
2 x Female Bullet Connectors 5 x M6 Flange Nuts<br />
2 x Large 6mm Washers 6 x Cable Ties<br />
1. Remove rear seat cover and seat.<br />
Fitting Instructions<br />
2. Remove the two screws at back of bike, on top surface of tail unit.<br />
3. Remove the six push-stop lugs which hold rear seat cowl to under-tray<br />
(located underneath tail unit flanks). To remove these, press the centre<br />
and remove the entire fastener.<br />
4. Remove rear seat cowl.<br />
5. Remove black tool tray (only one screw to remove). Remove wires to<br />
the right of the rear seat and disconnect all four connectors.<br />
7. Remove the four screws holding the under-tray to the centre of the subframe,<br />
this will allow complete removal of the tail unit; go ahead and<br />
remove it.<br />
10. Thread led wire through bracket and secure led using M6 flange nut.<br />
Crimp the two terminals to the number plate light wires.<br />
11. Take the wires from the bracket number plate light and feed up<br />
through the central hole in the under-tray and connect them to the<br />
number plate light wires.<br />
12. Replace the two black nipples which were removed along with the<br />
bungee hooks.<br />
13. Fit the indicators to the new bracket.<br />
14. Route the cables as they were and fix them in place.<br />
15. Test unit for correct operation of indicators and number plate light (if<br />
you find that the number plate light doesn’t work, reverse the wires).<br />
16. Re-assemble tail unit of bike by reversing the dismantling procedure<br />
described above.<br />
8. Remove the two bungee hooks (keep the two black nipples for use in a<br />
moment).<br />
9. Place the two large 6mm washers on the bracket studs and locate the<br />
new bracket using the two rear holes through the under-tray and fasten<br />
using the nuts supplied - the two big head studs locate in the front two<br />
holes, these are purely blanking plugs.<br />
Please visit: www.evotech-performance.com<br />
to view our full product range