
Create successful ePaper yourself
Turn your PDF publications into a flip-book with our unique Google optimized e-Paper software.
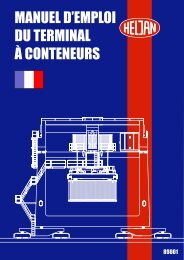
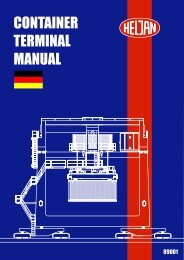
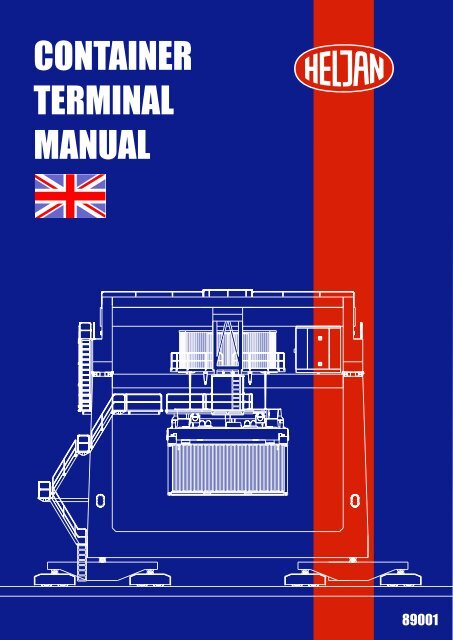
<strong>CONTAINER</strong><br />
<strong>TERMINAL</strong><br />
<strong>MANUAL</strong><br />
89001
IMPORTANT!<br />
Please read this manual carefully before unpacking the crane and using<br />
it for the first time. You will see the crane has many features, but there<br />
are a few things you should be aware of in order to obtain correct<br />
operation of the crane and to avoid damage.<br />
FOLLOWING THE INSTRUCTIONS WILL ENSURE YOU GET<br />
MAXIMUM ENJOYMENT FROM YOUR PURCHASE!<br />
THE <strong>CONTAINER</strong> <strong>TERMINAL</strong> CONTAINS:<br />
1 x Gantry with trolley and hoist<br />
1 x Control unit<br />
2 x Containers<br />
1 x Base element (33 x 57 cm) with fitted crane rails<br />
2 x OO scale tracks (22.6 cm)<br />
8 x rail connectors, 16 screws for mounting the base element to a plate, 4 fittings<br />
2
INTRODUCTION<br />
Thank you for purchasing the HELJAN Container Terminal. The crane is digitally controlled, but<br />
don’t be frightened as the operation is simple and no specific experience with digital systems is<br />
needed to achieve full enjoyment of the crane. The basic model consists of the complete crane,<br />
control unit and two containers. One control unit can control up to three cranes. The basic model<br />
measures 33 x 57 cm, but it can be extended with further base elements limited only by power loss<br />
and your space! Additional containers can be purchased seperately.<br />
BEFORE YOU START!<br />
Please be careful when unpacking. Start with the base elements that are placed in the special<br />
packaging at the bottom of the box. Do not unpack the crane until you have assembled the base<br />
element and installed the tracks where you want to place them.<br />
ASSEMBLING THE BASE ELEMENT<br />
The base element consists of eight parts, 2 x 2 end sections and 2 x 2 central sections. The lower<br />
parts are assembled with the supplied fittings. Mount the base element on to your baseboard. Use a<br />
1.5 mm drill to make the holes in your baseboard, the holes have been drilled in the lower parts and<br />
screws are supplied. This is shown on photo 1 where you can also see how to connect the railway<br />
track to your layout.<br />
INSTALLING THE TRACKS<br />
Two OO scale tracks are included but you can install up to five tracks, four beneath the crane and<br />
one next to it (additional tracks can be purchased as accessories). When you have decided where<br />
you wish to place the tracks offer them to the two central lower parts. Take the upper part to one of<br />
the lower parts where you want to install the track, and turn it over. On this side there are grooves<br />
that enable you to cut out the piece that fits the track (see Photo 2). Don’t forget to connect the rails<br />
with the rail connectors as supplied, which can also be used to connect the tracks with lines to the<br />
power pack. Having done this the upper parts can be fitted to the lower parts of the base. You can<br />
also install wires for the FALLER Car-system, please refer to FALLER’s instructions.<br />
FITTING THE GANTRY AND TROLLEY<br />
Carefully remove the trolley and the gantry from the packaging. Place the gantry on its base rails<br />
and the trolley on the gantry rails. All that remains prior to commencing container terminal<br />
operation is to connect it to the control unit and the power supply.<br />
Photo 1 Photo 2<br />
Cut here<br />
3
4<br />
ASSEMBLING THE BASE ELEMENT
INSTALLING THE TRACKS<br />
5
POWER SUPPLY<br />
You can use either AC or DC power packs. The voltage should be 14-16 V, 2,5 A. Connect the control<br />
unit to your power pack and the crane tracks (see below). Do not turn on the power until you have<br />
read the next paragraph!<br />
THE CONTROL UNIT<br />
Trafo 0° 180° Crane<br />
The control unit is the core or the brain of the container terminal. Apart from controlling all<br />
functions of the crane, you can also adjust the speed with this unit. There are four connections: one<br />
for the power pack, one to the crane, one to a joystick and one for a PC. In the next section the use of<br />
the crane with the control unit will be explained. For use of Joystick and PC-connection please see<br />
our home page (www.heljan.dk). Prior to turning on the power please note these important points:<br />
� All connections must be made before turning on the power.<br />
� If operating with a joystick do not move the joystick during the start up phase, as this may cause a<br />
malfunction.<br />
� If you unplug the joystick while still in use it will cause interruption to the signal.<br />
As soon as the power is turned on and the display shows ‘HELJAN’ the control unit is ready for use.<br />
If you connect a joystick it will be identified and calibrated during the start up phase.The joystick<br />
cannot be identified in the display during use.<br />
YOU ARE NOW READY FOR OPERATION!<br />
6<br />
F<br />
W<br />
Trafo 0° 180° Crane<br />
N<br />
S<br />
Power pack Crane<br />
�<br />
�<br />
F<br />
W<br />
N<br />
PC �<br />
�Joystick<br />
E<br />
S<br />
G<br />
M<br />
Containerterminal<br />
S<br />
E<br />
S<br />
G<br />
M<br />
Containerterminal<br />
OPERATING THE GANTRY<br />
� Press button ‘E’ (East) to drive right or ‘W’ (West)<br />
to drive left.
F<br />
F<br />
F<br />
W<br />
W<br />
W<br />
Trafo 0° 180° Crane<br />
N<br />
S<br />
Trafo 0° 180° Crane<br />
N<br />
S<br />
Trafo 0° 180° Crane<br />
N<br />
S<br />
E<br />
S<br />
G<br />
M<br />
Containerterminal<br />
E<br />
S<br />
G<br />
M<br />
Containerterminal<br />
E<br />
S<br />
G<br />
M<br />
Containerterminal<br />
IMPORTANT!<br />
To prevent the strings that connect the hoist with the trolley from<br />
getting tangled avoid obstructions when you lower the hoist.<br />
If the hoist comes to rest at an angle raise it until it reaches the<br />
trolley and hold the buttons for a short while. When you lower the<br />
hoist after having done so it will then be in a horizontal position.<br />
DRIVING THE TROLLEY<br />
� Press button ‘N’ (North) to drive forwards or ‘S’<br />
(South) to drive backwards.<br />
DRIVING THE GANTRY AND<br />
THE TROLLEY AT THE SAME<br />
TIME<br />
� Press buttons ‘N’ and ‘E’ or ‘N’ and ‘W’ ‘S’ and ‘E’<br />
or ‘S’ and ‘W’.<br />
RAISING OR LOWERING THE<br />
HOIST<br />
� Hold button ‘F’ (Function) and then press button<br />
‘N’ (to raise the trolley) or ‘S’ (to lower the trolley).<br />
7
8<br />
F<br />
F<br />
F<br />
F<br />
W<br />
W<br />
W<br />
W<br />
Trafo 0° 180° Crane<br />
N<br />
S<br />
Trafo 0° 180° Crane<br />
N<br />
S<br />
Trafo 0° 180° Crane<br />
N<br />
S<br />
Trafo 0° 180° Crane<br />
N<br />
S<br />
E<br />
S<br />
G<br />
M<br />
Containerterminal<br />
E<br />
S<br />
G<br />
M<br />
Containerterminal<br />
E<br />
S<br />
G<br />
M<br />
Containerterminal<br />
E<br />
S<br />
G<br />
M<br />
Containerterminal<br />
TURNING THE HOIST<br />
AROUND<br />
� Hold button ‘F’ and then press button ‘E’ or ‘W’.<br />
TURNING ON THE MAGNET<br />
� Press button ‘M’ (Magnet).<br />
TURNING OFF THE MAGNET<br />
� Press button ‘M’.<br />
TURNING THE SPOTLIGHT<br />
ON AND OFF<br />
� Press the grey button ‘S’ (Searchlight).
F<br />
F<br />
F<br />
W<br />
W<br />
W<br />
�<br />
F<br />
W<br />
Trafo 0° 180° Crane<br />
N<br />
S<br />
Trafo 0° 180° Crane<br />
N<br />
S<br />
�<br />
Trafo 0° 180° Crane<br />
N<br />
S<br />
Trafo 0° 180° Crane<br />
N<br />
S<br />
E<br />
S<br />
G<br />
M<br />
Containerterminal<br />
E<br />
S<br />
G<br />
M<br />
Containerterminal<br />
E<br />
S<br />
G<br />
M<br />
Containerterminal<br />
E<br />
S<br />
G<br />
M<br />
Containerterminal<br />
TURNING THE GANTRY<br />
LIGHT ON AND OFF<br />
� Press button ‘G’ (Gantry Light).<br />
CHANGING FROM CRANE 1<br />
�CRANE 2 �CRANE 3<br />
� Hold button ‘F’ and then press button ‘M’.<br />
This function is not possible when using a joystick<br />
or PC.�<br />
CHANGING DRIVING<br />
DIRECTION<br />
Depending on how the control unit is placed in<br />
relation to the Container Terminal the driving<br />
direction of the gantry and the trolley can be<br />
changed by switching the switch. This influences<br />
both the control unit, the joystick and the PCsystem.<br />
SHORT CIRCUIT<br />
In the case of a short circuit a flashing “OFF”<br />
appears in the display and the power supply to the<br />
crane will be turned off. When the reason for the<br />
short circuit has been determined and cleared<br />
press button ‘F’.<br />
9
Containerterminal<br />
SETTING THE SPEED<br />
Choose the address of the crane whose speed you want to change.<br />
Hold ‘F’.<br />
Press ‘S’ or ‘G’.<br />
‘SP:Gt’ appears in the display.<br />
By pressing ‘S’ or ‘G’ you can choose the speed to be changed.<br />
These are the meanings of the specifications shown in the display:<br />
SP:Gt = Gantry decoder<br />
SP:to = Trolley decoder<br />
SP:Hu = Hoist decoder Up<br />
SP:Hd = Hoist decoder Down<br />
SP:tr = Turn right<br />
SP:tl = Turn left<br />
When the desired speed has been reached press the button ‘M’.<br />
‘SP:4’ appears in the display.<br />
‘4’ means the speed and may be varied after setting.<br />
With the buttons ‘S’and ‘G’ the speed can be increased or reduced.<br />
When the ‘F’ button is released the ‘new’ speed has been fixed.<br />
With the exception of the Gantry and Trolley decoders ‘Pro’ appears shortly in the display.<br />
REPROGRAMMING THE CRANE ADDRESSES<br />
The Gantry and trolley decoders can be reprogrammed as follows:<br />
A) Choose a new crane address as described ‘CHANGE FROM CRANE 1 � CRANE 2<br />
� CRANE 3’. Hold the buttons.<br />
B) Then press ‘S’.<br />
C) ‘Pro’ appears in the display.<br />
D) The Crane now reacts to its new address.<br />
Note: The Cv1 of the Crane decoder is programmed according to the Configuration Variables.<br />
10
CONFIGURATION VARIABLES:<br />
Trolley / Hoist Decoder<br />
Config. Variables Function Range Default Setting Value<br />
CV1 Local address, Crane 1 1-99 4 4<br />
CV1 Local address, Crane 2 1-99 6 6<br />
CV1 Local address, Crane 3 1-99 8 8<br />
CV5 Trolley Motor, maximum speed 1-255 255 255<br />
CV2 Trolley Motor, start voltage 1-255 48 48<br />
CV3 Trolley Motor, acceleration time 1-255 0 0<br />
CV4 Trolley Motor, deceleration time 1-255 0 0<br />
CV55 Hoisting machine, Down Speed 1-255 100 8.0 V<br />
CV56 Hoisting machine, Up Speed 1-255 100 8.0 V<br />
CV57 Turn Mechanism, Turn right speed 1-255 80 6.5 V<br />
CV58 Turn Mechanism, Turn left speed 1-255 80 6.5 V<br />
CV61 Magnet on 1-255 255 16.0 V<br />
CV60 Magnet function mapping 1-255 1 1<br />
CV59 Search Light function mapping 1-255 2 2<br />
CV120 Address Change CV (write only) 1-3 - -<br />
Gantry Decoder<br />
Config. Values Function Range Defaut Setting Value<br />
CV1 Local address, Crane 1 1-99 5 5<br />
CV1 Local address, Crane 2 1-99 7 7<br />
CV1 Local address, Crane 3 1-99 9 9<br />
CV5 Gantry Motor, maximum speed 1-255 255 255<br />
CV2 Gantry Motor, start voltage 1-255 48 48<br />
CV3 Gantry Motor, acceleration time 1-255 0 0<br />
CV4 Gantry Motor, deceleration time 1-255 0 0<br />
CV58 Gantry Light function mapping 1-255 4 4 (F2)<br />
CV60 Flash Light config 0-44 33 33<br />
CV120 Address Change CV (write only) 1-3 - -<br />
11
12<br />
FEATURES<br />
� Each movement can be adjusted by the user in 9 individual speedsteps.<br />
� Gantry floodlight for the whole working area under the crane.<br />
� Operator crane spotlights.<br />
� 1 control unit can control up to 3 container cranes.<br />
� 3 containers can be stacked.<br />
� Extra add-on base elements for longer movements.<br />
(No practical track length limitation, except power loss)<br />
� The crane base is extremely flexible to allow endless combinations of railway<br />
tracks, roadbeds and storage.<br />
� Additional containers can be purchased.<br />
� You can use all your favourite containers by adding a metal adapter<br />
(available as optional accessory) inside.<br />
� The crane can be controlled by an existing DCC-system.<br />
� Unique control system makes it possible to move the gantry and the trolley<br />
at the same time.<br />
� Change of digital address: treat the crane as an ordinary locomotive.<br />
� The crane is designed with asymmetrical gantry boom to allow harbour<br />
operation with container ships.<br />
� The crane may be powered and controlled via the nearest available powered<br />
track (which means less wiring) if you operate via DCC.<br />
� This system offers true ‘turn key’ operation: no wiring between track and<br />
gantry as well as between gantry and trolley.<br />
� User friendly operation also with several cranes on the layout: just twin-key<br />
toggle on the control unit.<br />
KEEP TRACKS AND WHEELS CLEAN!
ACCESSORIES<br />
Containerterminal<br />
BASE ELEMENT EXTENSI ON SET<br />
#19858904<br />
Base Element Extension Set<br />
2 central sections (33 x 22,6 cm)<br />
4 rail connectors, 16 screws, 4 fittings<br />
This set will extend your basic Container Terminal<br />
Set.<br />
#19858905<br />
Track Extension Set<br />
2 OO Scale tracks (each 22.6 cm long)<br />
8 rail connectors<br />
For the installation of additional tracks in your<br />
Container Terminal.<br />
�<br />
#19858903<br />
HELJAN Containers<br />
4 Containers with metal adapter installed<br />
#19858906<br />
Metal adapters for containers<br />
5 metal adapters<br />
After installing a metal adapter in an existing<br />
container, this can be used in the Container<br />
Terminal<br />
13
ELECTRONIC TURNTABLE OO<br />
�<br />
�<br />
�<br />
�<br />
�<br />
�Detailed bridge with arch<br />
Weathered one-piece pit<br />
�Motorized gear drive<br />
Holds engines up to 315 mm long<br />
Programmable indexing for 60 positions<br />
#89011 (DC)<br />
#89012 (AC)<br />
ACCESSORIES<br />
#858902<br />
4 connecting tracks for<br />
Märklin C-tracks<br />
#858901<br />
4 connecting tracks for<br />
Märklin K-tracks<br />
15
The container revolutionized global transportation. It is<br />
efficient and flexible: once the cargo is placed in the container it<br />
can be carried by train, by truck or on a ship. Whenever the<br />
container is to be moved from a train onto a truck or a ship this is<br />
done by the container crane which is the key to the whole<br />
operation.<br />
The HELJAN digital Container Terminal opens up an exiting<br />
new world of entertainment and model reality.<br />
REBSLAGERVEJ 6<br />
DK-5472 SØNDERSØ<br />
TLF. + 45 64 89 11 88<br />
HELJAN@HELJAN.DK