

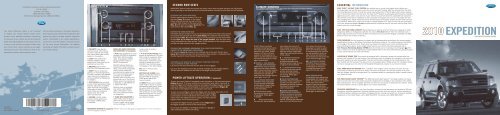
Ford Expedition 2010 - Quick Reference Guide Printing 1 (pdf)
Ford Expedition 2010 - Quick Reference Guide Printing 1 (pdf)
Ford Expedition 2010 - Quick Reference Guide Printing 1 (pdf)

Create successful ePaper yourself
Turn your PDF publications into a flip-book with our unique Google optimized e-Paper software.
This <strong>Quick</strong> <strong>Reference</strong> <strong>Guide</strong> is not intended<br />
to replace your vehicle Owner’s <strong>Guide</strong> which<br />
contains more detailed information concerning<br />
the features of your vehicle, as well as important<br />
safety warnings designed to help reduce the risk<br />
of injury to you and your occupants. Please read<br />
your entire Owner’s <strong>Guide</strong> carefully as you begin<br />
learning about your new vehicle and refer to the<br />
appropriate chapters when questions arise.<br />
May 2009<br />
First <strong>Printing</strong><br />
<strong>Quick</strong> <strong>Reference</strong> <strong>Guide</strong><br />
<strong>Ford</strong> Motor Company Customer Relationship Center<br />
P.O. Box 6248<br />
Dearborn, MI 48121<br />
1-800-392-3673 (FORD)<br />
(TDD for the hearing impaired: 1-800-232-5952)<br />
AL1J 19G217 AA<br />
All information contained in this <strong>Quick</strong> <strong>Reference</strong><br />
<strong>Guide</strong> was accurate at the time of duplication. We<br />
reserve the right to change features, operation<br />
and/or functionality of any vehicle specification<br />
at any time. Your <strong>Ford</strong> dealer is the best source<br />
for the most current information. For detailed<br />
operating and safety information, please consult<br />
your Owner’s <strong>Guide</strong>.<br />
<strong>Expedition</strong><br />
Litho in U.S.A.<br />
AUDIO SYSTEM<br />
Premium AM/FM Stereo In-Dash Six CD/MP3 SATELLITE COMPATIBLE Sound System (if equipped)<br />
1 2 3 4 5 6 4 7 8 9 10<br />
1 CD EJECT Press and a<br />
memory preset 1-6 to eject a<br />
CD from a specific slot. Press<br />
and hold to auto eject all CDs<br />
present in the system.<br />
2 LOAD Press LOAD and a<br />
memory preset to load a<br />
specific slot. Press and hold to<br />
autoload up to six CDs.<br />
3 AM/FM Press to select<br />
AM/FM1/FM2 frequency band.<br />
4 SEEK Press to access the<br />
previous or next strong station,<br />
CD track, previous/next satellite<br />
radio channel (if equipped), or<br />
previous/additional display text<br />
or category.<br />
5 TEXT/SCAN Press and hold<br />
to hear a brief sampling of radio<br />
stations, CD tracks or satellite<br />
radio channels (if equipped).<br />
Press again to stop. In CD/MP3<br />
mode, press and release to<br />
display track title, artist<br />
name and disc title.<br />
6 FOLDER In folder mode,<br />
press to access previous or<br />
next folder on MP3 discs,<br />
if available.<br />
SATELLITE RADIO FEATURES<br />
AND CONTROLS (if equipped)<br />
7 AUX Press repeatedly to cycle<br />
through FES/DVD (if equipped),<br />
SAT1, SAT2, SAT3 (satellite<br />
radio, if equipped), LINE IN<br />
(auxiliary audio mode) or<br />
SYNC ® (if equipped).<br />
SIRIUS ® Satellite Radio is a<br />
subscription based satellite<br />
radio service that broadcasts<br />
music, sports, news and<br />
entertainment programming.<br />
For more information and a<br />
complete list of SIRIUS ®<br />
satellite radio channels, visit<br />
www.sirius.com in the United<br />
States, www.sirius-canada.ca<br />
in Canada, or call SIRIUS ® at<br />
1–888–539–7474.<br />
Satellite radio is available<br />
only with a valid SIRIUS ®<br />
radio subscription. Check<br />
with your authorized dealer<br />
for availability.<br />
8 TUNE/DISC SELECTOR In<br />
radio mode, press to go up/<br />
down the frequency band.<br />
In menu mode, use to select<br />
various settings. In CD/MP3<br />
mode, press to select a<br />
desired disc.<br />
9 u/II OK (Play/pause) This<br />
control is operational in CD and<br />
DVD mode (if equipped). When<br />
a CD or DVD is playing in the<br />
FES system, press this control<br />
to play or pause the current<br />
CD/DVD. The CD/DVD status<br />
will display in the radio display.<br />
OK: Use in various menu<br />
selections.<br />
SETTING THE CLOCK Press<br />
MENU until SELECT HOUR or<br />
SELECT MINS is displayed.<br />
Press / to adjust the<br />
hours/minutes.<br />
10 MENU Press when satellite<br />
radio mode is active to access<br />
the satellite radio menu. Press<br />
OK when satellite radio<br />
menu appears in the display,<br />
then press / to cycle through<br />
additional features. For more<br />
information, please consult<br />
your Owner’s <strong>Guide</strong>.<br />
navigation system (if equipped): Please refer to the Navigation Supplement for more information<br />
on the navigation system.<br />
SECOND ROW SEATS<br />
Important: Before folding the second row seats, ensure that the head restraints are fully flipped<br />
down by pulling on the strap and that all items have been removed from the floor and off the seats.<br />
Entering the Third Row Seat<br />
Fold the head restraint forward. Pull up on<br />
the lever (Lever 1) located on the side of<br />
either outboard second row seat until the<br />
seatback folds forward to the seat cushion<br />
(Pos. 2). Pull lever fully upward (Lever 1). The<br />
seat will then flip forward (Pos. 3).<br />
Exiting the Third Row Seat<br />
Fold head restraint forward. Pull up on the strap located at the back of the second<br />
row seat by the outboard side shield (Pull Strap). The seatback will fold forward<br />
to the cushion (Pos. 2). Continue pulling up on the pull strap and the seat will flip<br />
forward (Pos. 3). To return the seat to the upright position, push the seat down<br />
until it is latched to the floor strikers. Then, lift the seatback to the upright position<br />
and flip the head restraint to the upright position.<br />
Folding the Outboard Seatbacks to a Load Floor Position –<br />
(Refer to the important note above)<br />
Lift the lever (Lever 1) located on the outboard side of the seat. Pull the lever<br />
(Lever 2) to release the seat into the kneel-down floor position. A moderate force<br />
may be required to move the seat forward and down.<br />
Returning the Seats to the Upright Position From the<br />
Fully-Lowered Floor Position<br />
Lift and pull the seat rearward until the latch is fully engaged.<br />
Lift up on the seatback until a click is heard, locking it into the upright position.<br />
This will allow the seatback to be lifted to the upright locked position.<br />
POWER LIFTGATE OPERATION (if equipped)<br />
Lever 1 Pos. 2 Pos. 3<br />
To open the power liftgate (if equipped), push the button on the instrument panel<br />
(Figure A), press on your remote entry transmitter twice within 3 seconds, or<br />
press the liftgate control button located on the inside of the liftgate handle. To close,<br />
press and release the control located in the left rear quarter panel (Figure B).<br />
Keep clear of the liftgate when operating the rear switch.<br />
To open a manual liftgate, unlock the liftgate (with the power door locks or the<br />
remote entry transmitter button) and push the outside liftgate<br />
control button on the handle below the license plate. To close,<br />
make certain the liftgate window is closed, and then push the<br />
liftgate closed until it latches securely.<br />
To unlatch the liftgate window, push the button (Figure C) on<br />
the liftgate located to the left of the license plate.<br />
Figure B<br />
Do not open the liftgate or the liftgate window in a garage or<br />
other enclosed area with a low ceiling.<br />
Pull Strap<br />
Lever 2<br />
Figure A<br />
Figure C<br />
CLIMATE CONTROL<br />
Dual automatic temperature control with heated and cooled seats and rear passenger<br />
compartment climate control (if equipped)<br />
9 1 2 3 4 5 6 2 7 8 9 10<br />
1 AUTO Press to activate<br />
automatic temperature control.<br />
The system will automatically<br />
determine fan speed, airflow<br />
location, A/C (on or off) and<br />
outside or recirculated air, to<br />
heat or cool the vehicle to reach<br />
the desired temperature. Press<br />
again to deactivate.<br />
2 Heated and cooled<br />
Driver and passenger<br />
seats Press once to activate<br />
high heat/cool (three indicator<br />
lights), twice to activate medium<br />
heat/cool (two indicator lights),<br />
three times to activate low<br />
heat/cool (one indicator light) or<br />
press again to turn off.<br />
3 Airflow direction<br />
control Press repeatedly<br />
to cycle through all possible<br />
air distribution modes. Refer<br />
to your Owner’s <strong>Guide</strong> for<br />
more information.<br />
4 REAR Press to enable<br />
the auxiliary climate system<br />
(if equipped). Press again<br />
to disable.<br />
5 Press to recirculate<br />
the cabin air. Recirculated air<br />
may reduce the amount of<br />
time needed to cool down the<br />
interior of the vehicle and may<br />
also help reduce undesirable<br />
odors from reaching the interior<br />
of the vehicle.<br />
6 defrost Distributes<br />
outside air through the<br />
windshield defroster and<br />
demister vents to clear thin ice<br />
or fog from the windshield.<br />
7 rear defrost Press<br />
to activate and clear the rear<br />
window and side heated<br />
mirrors (if equipped) of thin<br />
ice and fog. Press again<br />
to deactivate.<br />
8 Rear temperature<br />
control Press to enable the<br />
auxiliary climate system (if<br />
equipped) as well as increase/<br />
decrease the desired rear<br />
cabin temperature.<br />
9 DRIVER/Passenger<br />
Temperature controlS<br />
Press to increase or decrease<br />
the temperature on the driver<br />
or passenger side of the<br />
vehicle. Pressing the passenger<br />
side control will activate dual<br />
zone where the driver and<br />
passenger are able to select<br />
their own individual settings.<br />
If the passenger side controls<br />
are not activated, the driver<br />
side controls will determine<br />
the temperature setting for the<br />
entire vehicle (single zone).<br />
10 Rear fan speed<br />
control Press to enable<br />
the auxiliary climate system<br />
(if equipped) as well as to<br />
increase/decrease the fan<br />
speed for the rear cabin.<br />
rear heated seats<br />
(if equipped) Your vehicle may<br />
be equipped with heated rear<br />
seats. The controls are located<br />
on the rear of the center<br />
console. Push the top portion<br />
of the control for maximum<br />
heat and the bottom portion of<br />
the control for minimum heat.<br />
Press again to deactivate.<br />
Essential Information<br />
Easy Fuel ‘no cap’ fuel system Your vehicle has a ‘no cap’ fuel system which allows you<br />
to simply open the fuel filler door, insert the nozzle and start fueling. Wait five seconds from the time<br />
the refueling nozzle is shut off until the nozzle is pulled back out of the fill pipe tube to allow residual<br />
fuel in the nozzle to drain into the tank. The Easy Fuel System is self-sealing and therefore protected<br />
against dust, dirt, water, snow and ice. If you need to fill your fuel tank with a portable fuel container,<br />
use the fuel funnel which is attached to the underside of the spare tire cover or is included with the<br />
tire changing tools. Slowly insert the funnel into the Easy Fuel system and fill the tank with fuel from<br />
the container. When done, clean the funnel or properly dispose of it. Extra funnels can be purchased<br />
from your authorized dealer. Do not use aftermarket funnels as they will not work with the Easy Fuel<br />
system and may cause damage.<br />
Fuel type and tank Capacity Depending on your vehicle, your fuel tank has a capacity of either<br />
28 gallons (106L) or 33.5 gallons (126.8L). You have a Flex Fuel Vehicle. Flex Fuel vehicles have a<br />
yellow ring around the top of the fuel filler inlet (tube) and can use either Regular unleaded fuel, E85<br />
Ethanol Fuel or any mixture of the two.<br />
Tire Pressure Your tire pressure is properly set at the dealership according to the recommended<br />
specifications found on the Safety Compliance Certification Label or Tire Label located on the B-Pillar<br />
or the edge of the driver’s door. Check your tire pressure at least once a month and before long<br />
trips (including the spare). As an added safety feature, your vehicle has been equipped with a<br />
Tire Pressure Monitoring System (TPMS) that illuminates a low tire pressure warning light when<br />
one or more of your tires is significantly under-inflated. Refer to the Tires, Wheels and Loading chapter<br />
in your Owner’s <strong>Guide</strong> for more information.<br />
location of spare tire Your vehicle is equipped with a temporary spare tire located under the<br />
vehicle, just forward of the rear bumper. The temporary spare is designed for emergency use only and<br />
should be replaced as soon as possible. The jack and tools are located in the access panel on the<br />
floor behind the 3rd row seat. The spare tire is not equipped with a TPMS sensor. For complete details<br />
on how to change your tire, refer to the Roadside Emergencies chapter in your Owner’s <strong>Guide</strong>.<br />
Fuel Pump Shut-Off Switch After a collision, if the engine cranks but does not start, the fuel<br />
pump shut-off switch may have to be reset. The switch is located in the left rear quarter trim panel,<br />
near the liftgate, behind an access panel. For complete details on resetting the switch, please consult<br />
your Owner’s <strong>Guide</strong>.<br />
SOS Post-Crash Alert System TM The SOS Post-Crash Alert System TM provides audible and visual<br />
alarms in the event of a crash which causes the deployment of airbags or the activation of the safety<br />
belt pretensioners. The turn signals will flash and the horn will sound. To deactivate the system, press<br />
the hazard flasher control, or press on your remote transmitter.<br />
Roadside Assistance Your new <strong>Ford</strong> <strong>Expedition</strong> comes with the assurance and support of 24-hour<br />
emergency roadside assistance. Roadside assistance includes such services as: lockout assistance,<br />
limited fuel delivery, battery jump starts, changing a flat tire, towing, and winch out. To receive roadside<br />
assistance in the United States, call 1 (800) 241-3673. In Canada, call 1 (800) 665-2006.<br />
<strong>2010</strong><br />
QUICK<br />
EXPEDITION<br />
REFERENCE GUIDE
1 Headlamp<br />
COntrols<br />
Turns the<br />
headlamps off.<br />
Turns on the<br />
parking lamps.<br />
Turns on<br />
the headlamps.<br />
Autolamps:<br />
Automatically turns<br />
the exterior lamps<br />
on/off based on<br />
available daylight.<br />
Turns on fog lamps<br />
(if equipped) by<br />
pulling the control<br />
towards you.<br />
2 multi-function<br />
lever Rotate the<br />
end of the control<br />
up/down to increase/<br />
decrease the speed of<br />
the wipers. Push the<br />
end of the stalk:<br />
• quickly for a single<br />
swipe without fluid.<br />
• and hold briefly<br />
for three swipes with<br />
washer fluid.<br />
• and hold for a<br />
longer wash cycle.<br />
Rain sensing wipers<br />
(if equipped): These<br />
wipers automatically<br />
activate when<br />
moisture is present<br />
on the windshield<br />
and the control is set<br />
to any setting except<br />
OFF. The wiper speed<br />
will vary based on the<br />
amount of moisture<br />
detected on the<br />
windshield as well as<br />
the current interval<br />
setting. Ensure<br />
that the control is<br />
turned to OFF prior to<br />
entering a car wash.<br />
To operate your rear<br />
window wiper, turn<br />
the rear wiper control<br />
to 1 (intermittent<br />
speed), 2 (normal<br />
speed) or O (off). For<br />
a rear wash cycle,<br />
rotate and hold the<br />
rear wiper control to<br />
either position.<br />
Note: For optimal<br />
wiper performance,<br />
clean your blades and<br />
glass regularly. Refer<br />
to your Owner’s <strong>Guide</strong><br />
for more information.<br />
3 ABS Warning<br />
light The ABS light<br />
illuminates briefly<br />
when the ignition is<br />
turned on. If the ABS<br />
light remains on or<br />
continues to flash, a<br />
malfunction has been<br />
detected. Contact<br />
your authorized dealer<br />
as soon as possible.<br />
Normal braking (less<br />
ABS) is still functional<br />
unless the brake<br />
warning light is<br />
also illuminated.<br />
4 Service Engine<br />
Soon light The<br />
service engine soon<br />
light illuminates<br />
briefly when the<br />
ignition is turned on.<br />
If it remains on or<br />
is blinking after the<br />
engine is started, the<br />
On Board Diagnostics<br />
System (OBD-II)<br />
has detected a<br />
malfunction. Drive in<br />
a moderate fashion<br />
and contact your<br />
authorized dealer as<br />
soon as possible.<br />
5 Message Center<br />
(if equipped) The<br />
message center<br />
displays important<br />
vehicle information<br />
through a constant<br />
monitoring of vehicle<br />
systems. The system<br />
will notify you of<br />
potential vehicle<br />
problems with a<br />
display of system<br />
warnings followed<br />
by a long indicator<br />
chime. Refer to your<br />
Owner’s <strong>Guide</strong> for<br />
more information.<br />
6 AdvanceTrac ® ®<br />
with Roll Stability<br />
Control (RSC ® )<br />
Stability<br />
Enhancement<br />
system (if equipped)<br />
The AdvanceTrac® ®<br />
stability system<br />
helps you to<br />
maintain stability<br />
and steerability of<br />
your vehicle during<br />
a variety of road<br />
conditions. If your<br />
vehicle becomes<br />
stuck in the snow,<br />
mud or sand, try<br />
turning off the<br />
AdvanceTrac ® system<br />
to allow wheel spin<br />
and help increase<br />
momentum to dig<br />
the vehicle out. The<br />
control will illuminate<br />
when turned off.<br />
Refer to your<br />
Owner’s <strong>Guide</strong> for<br />
more information.<br />
Trailer<br />
Sway Control<br />
(if equipped)<br />
Your vehicle may<br />
be equipped with<br />
trailer sway control.<br />
This control uses<br />
the vehicle’s<br />
AdvanceTrac ® system<br />
to detect and help<br />
reduce trailer sway<br />
by applying brake<br />
force at individual<br />
wheels and, if<br />
necessary, reducing<br />
engine power. If this<br />
happens, TRAILER<br />
SWAY REDUCE SPEED<br />
will display in the<br />
instrument cluster<br />
with the AdvanceTrac ®<br />
icon . For more<br />
information, please<br />
refer to your<br />
Owner’s <strong>Guide</strong>.<br />
7 audio SYSTEM<br />
Please see reverse<br />
side for more details.<br />
8 Hazard FLASHER<br />
ControL<br />
9 Rear Window<br />
Defroster Press<br />
to clear the rear<br />
window of fog and<br />
thin ice. Press<br />
again to deactivate.<br />
The rear window<br />
defroster will<br />
automatically turn off<br />
after 15 minutes<br />
of operation.<br />
10 Overdrive<br />
control with<br />
Tow Haul feature<br />
The Tow Haul<br />
feature improves<br />
transmission<br />
operation when<br />
towing a trailer or<br />
a heavy load. To<br />
activate Tow Haul,<br />
press the button on<br />
the gearshift lever.<br />
The TOW HAUL<br />
indicator light will<br />
illuminate in the<br />
Instrument Panel<br />
1 2 3 4 5<br />
14<br />
13<br />
Use extreme caution with any device or feature that may take your attention<br />
off the road. Your primary concern is the safe operation of the vehicle. Only<br />
use non-essential features and devices when it is safe to do so.<br />
12<br />
10<br />
11<br />
10<br />
7<br />
6<br />
8<br />
9<br />
instrument cluster. To<br />
deactivate, press the<br />
button again. Drive<br />
with the vehicle in<br />
Overdrive (D) with Tow<br />
Haul off for the best<br />
fuel economy. Refer to<br />
your Owner’s <strong>Guide</strong> for<br />
more information.<br />
11 Control Trac®®<br />
4x4 system<br />
(if equipped) The<br />
Control Trac® ® system<br />
allows you to choose<br />
between 2H (2WD<br />
High), 4A (4x4 Auto),<br />
4H (4x4), or 4L (4x4<br />
Low) modes.<br />
• Choose 2H (2WD<br />
High) to provide<br />
power to the rear<br />
wheels only – used<br />
mainly for driving on<br />
dry pavement.<br />
• Choose 4A (4x4<br />
Auto) for all on-road<br />
driving conditions,<br />
such as dry road<br />
surfaces, wet<br />
pavement, snow or<br />
gravel. Choose 4H<br />
(4x4) for severe winter<br />
or off-road conditions,<br />
such as deep snow,<br />
ice or shallow sand.<br />
(Not intended for dry<br />
pavement use.)<br />
• Choose 4L (4x4<br />
low) only when you<br />
need extra gearing<br />
to provide maximum<br />
power when climbing<br />
steep grades, going<br />
through deep sand<br />
or pulling a boat out<br />
of the water. For<br />
complete information<br />
on shifting between<br />
modes as well as<br />
basic operating<br />
principals, please<br />
refer to your<br />
Owner’s <strong>Guide</strong>.<br />
12 Steering<br />
Wheel Controls<br />
(if equipped)<br />
VOL +/- : Press to<br />
increase/decrease<br />
volume levels.<br />
SEEK : Press to<br />
access the previous/<br />
next radio station,<br />
CD track or preset<br />
satellite radio channel.<br />
MEDIA: Press<br />
repeatedly to<br />
access all possible<br />
media sources.<br />
VOICE: Press to access<br />
voice recognition,<br />
if equipped.<br />
: Press to access<br />
SYNC ® ® phone<br />
features, if equipped.<br />
13 Speed Control<br />
To set the speed:<br />
1. Press ON.<br />
2. Accelerate to the<br />
desired speed.<br />
3. Press SET + and<br />
take your foot off<br />
the accelerator.<br />
• To set a higher<br />
speed, press and<br />
hold SET + or press<br />
SET + repeatedly<br />
until the desired<br />
speed is reached.<br />
• To set a lower<br />
speed, press and<br />
hold SET – or press<br />
SET – repeatedly<br />
until the desired<br />
speed is reached.<br />
• To return to a<br />
previously set speed,<br />
press RES.<br />
• To turn off, press<br />
the brake pedal or<br />
press OFF.<br />
14 Power<br />
Adjustable<br />
Foot Pedals<br />
(if equipped)<br />
Press the top of the<br />
control p to move the<br />
pedals closer to you<br />
or the bottom of the<br />
control q to move<br />
the pedals further<br />
away from you. The<br />
pedals should only<br />
be adjusted when the<br />
vehicle is stopped and<br />
in Park (P).<br />
POWERFOLD<br />
MIRRORS<br />
(if equipped) Rotate<br />
the adjustment<br />
switch located on<br />
the driver’s door, to<br />
the center position.<br />
Press the switch<br />
down to fold in the<br />
mirrors. Press again<br />
to fold them back to<br />
the original position.<br />
Fold the side mirrors<br />
in carefully before<br />
driving through a<br />
narrow space, like an<br />
automatic car wash.<br />
If you fold in a mirror<br />
manually, the power<br />
fold mirrors will need<br />
to be reset. To reset,<br />
move the adjustment<br />
switch to the center<br />
position. Press the<br />
switch down to fold<br />
the mirrors in, and<br />
wait for approximately<br />
eight seconds. You<br />
should hear a click<br />
indicating the mirrors<br />
have been reset.<br />
If you do not hear a<br />
click, press the switch<br />
to fold the mirrors<br />
back out, and repeat<br />
the reset procedure.<br />
USB port<br />
(if equipped)<br />
The USB port is<br />
located inside the<br />
center console and<br />
allows you to plug<br />
in media playing<br />
devices, memory<br />
sticks, and also to<br />
charge devices if they<br />
support this feature.<br />
For more information,<br />
please refer to the<br />
SYNC ® ®® supplement<br />
or the Navigation<br />
System supplement.<br />
Auxiliary<br />
input jack<br />
The auxiliary input<br />
jack is located in the<br />
center console and<br />
allows you to play<br />
audio from a portable<br />
music player through<br />
the vehicle speakers<br />
with high fidelity. Refer<br />
to your Owner’s <strong>Guide</strong><br />
for more information.<br />
ADDITIONAL FEATURES<br />
SecuriCode Keyless<br />
Entry System (if equipped)<br />
The keyless entry keypad<br />
allows you to lock or unlock all<br />
doors and the liftgate without<br />
using a key. Simply enter your<br />
five digit program code and the<br />
press 3•4 within five seconds<br />
to unlock all doors and the<br />
liftgate. Press 5•6 to open<br />
the liftgate glass. To lock all<br />
doors and the liftgate, press<br />
7•8 and 9•0 at the same time.<br />
Note: You do not have to enter<br />
your five digit code first.<br />
Reverse sensing<br />
(if equipped) The sensing<br />
system may warn you if there<br />
is an object behind the vehicle.<br />
The system will sound a<br />
warning tone that increases<br />
in frequency as the object<br />
gets closer and will sound<br />
continuously when the object is<br />
less than 10 inches away. The<br />
system is not effective when the<br />
vehicle is traveling above 3 mph<br />
(5 km/h) and may not detect<br />
angular or moving objects.<br />
Note: Visibility aids do not<br />
replace the need to watch<br />
where the vehicle is moving.<br />
Refer to your Owner’s <strong>Guide</strong><br />
for safety information, more<br />
detail and limitations.<br />
Rearview Camera<br />
(if equipped) The rearview<br />
camera is located on the liftgate<br />
which provides a visual display<br />
of the area behind the vehicle.<br />
The display will automatically<br />
appear on the navigation<br />
system screen (if equipped) or<br />
in the rearview mirror whenever<br />
the vehicle is in Reverse (R)<br />
and uses colors (green, yellow<br />
and red) to alert you of your<br />
proximity to objects.<br />
Note: Visibility aids do not<br />
replace the need to watch<br />
where the vehicle is moving.<br />
Refer to your Owner’s <strong>Guide</strong> for<br />
safety information, more detail<br />
and limitations.<br />
SYNC ® (if<br />
equipped)<br />
SYNC ® is<br />
a hands-free communications<br />
and entertainment system<br />
with special phone and media<br />
features. For more information,<br />
please refer to the SYNC ®<br />
Supplement or to the SYNC ®<br />
section in the Navigation<br />
Supplement. Please feel free<br />
to visit www.SyncMyRide.com.<br />
integrated Keyhead<br />
Transmitter (IKT) and<br />
Remote Entry System<br />
Features<br />
• Press once to lock all<br />
doors. Press again to confirm<br />
all doors are closed.<br />
• Press once to unlock the<br />
driver’s door. Press again within<br />
three seconds to unlock all doors.<br />
• Press to activate the panic<br />
alarm. Press again or turn on<br />
the ignition to deactivate.<br />
• Press twice within three<br />
seconds to open the liftgate.<br />
• Car finder: Press twice<br />
within three seconds to locate<br />
your vehicle. The horn will chirp<br />
and the turn lamps will flash.<br />
MyKey Allows you to program<br />
certain driving restrictions on<br />
any standard key in order to<br />
promote good driving habits.<br />
When MyKey is programmed:<br />
• Belt-Minder ® ® cannot be<br />
disabled and the audio system<br />
will be muted until the safety<br />
belt is buckled.<br />
• early low fuel warnings<br />
are displayed.<br />
• audio volume can be limited.<br />
• vehicle speed can be limited.<br />
• audible and visual speed<br />
warnings can be configured at<br />
preselected speeds.<br />
• AdvanceTrac® ®®<br />
cannot be<br />
programmed off.<br />
For complete information, refer<br />
to MyKey in the Locks and<br />
Security chapter in your<br />
Owner’s <strong>Guide</strong>.<br />
Improved fuel economy<br />
while coasting or<br />
decelerating Your vehicle<br />
has been designed to improve<br />
fuel economy by reducing<br />
fuel usage while coasting or<br />
decelerating. This may be<br />
perceived as a light to medium<br />
braking sensation when<br />
removing your foot from the<br />
accelerator pedal.


