

Ford F-550 2013 - Quick Reference Guide Printing 2 (pdf)
Ford F-550 2013 - Quick Reference Guide Printing 2 (pdf)
Ford F-550 2013 - Quick Reference Guide Printing 2 (pdf)

You also want an ePaper? Increase the reach of your titles
YUMPU automatically turns print PDFs into web optimized ePapers that Google loves.
This <strong>Quick</strong> <strong>Reference</strong> <strong>Guide</strong> is not intended to<br />
replace your vehicle Owner’s Manual which contains<br />
more detailed information concerning the features<br />
of your vehicle, as well as important safety warnings<br />
designed to help reduce the risk of injury to you and<br />
your passengers. Please read your entire Owner’s<br />
Manual carefully as you begin learning about your<br />
new vehicle and refer to the appropriate chapters<br />
when questions arise. All information contained in<br />
this <strong>Quick</strong> <strong>Reference</strong> <strong>Guide</strong> was accurate at the<br />
time of duplication. We reserve the right to change<br />
features, operation and/or functionality of any<br />
vehicle specification at any time. Your <strong>Ford</strong> dealer<br />
is the best source for the most current information.<br />
For detailed operating and safety information,<br />
please consult your Owner’s Manual.<br />
<strong>Ford</strong> Motor Company Customer<br />
Relationship Center<br />
U.S. • 1-800-392-3673 (FORD)<br />
(TDD for the hearing impaired: 1-800-232-5952)<br />
fordowner.com<br />
<strong>Ford</strong> of Canada’s Customer Relationship Centre<br />
Canada • 1-800-565-3673 (FORD)<br />
ford.ca<br />
fordowner.com (U.S.)<br />
ford.ca (Canada)<br />
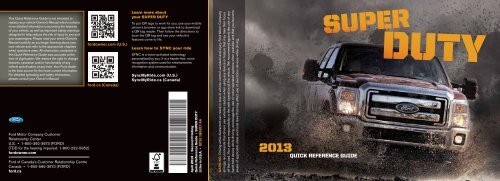
Learn more about<br />
your SUPER DUTY<br />
To put QR tags to work for you, use your mobile<br />
phone’s browser or app store link to download<br />
a QR tag reader. Then follow the directions to<br />
scan the QR tag and see your vehicle’s<br />
features come to life.<br />
Learn how to SYNC your ride<br />
SYNC is a voice-activated technology<br />
personalized by you. It is a hands-free, voice<br />
recognition system used for entertainment,<br />
information and communication.<br />
SyncMyRide.com (U.S.)<br />
SyncMyRide.ca (Canada)<br />
April <strong>2013</strong> • Second <strong>Printing</strong><br />
<strong>Quick</strong> <strong>Reference</strong> <strong>Guide</strong> • Super Duty<br />
Litho in U.S.A. • DC3J 19G217 AA<br />
Warning: Driving while distracted can result in loss of vehicle control, accident and injury. <strong>Ford</strong> Motor Company<br />
strongly recommends that drivers use extreme caution when using any device or feature that may take their focus<br />
off the road. Your primary responsibility is the safe operation of the vehicle. We recommend against the use of any<br />
hand-held device while driving, encourage the use of voice-operated systems when possible and that you become<br />
aware of applicable state and local laws that may affect use of electronic devices while driving.<br />
<strong>2013</strong><br />
<strong>Quick</strong> reference guide
COMMONLY used voice commands<br />
SYNC. ® Say the Word. Touch the<br />
button on the right-hand side of your steering wheel, and then say:<br />
Basic Commands<br />
• What can I say?<br />
• List of commands<br />
• Main menu<br />
• Previous<br />
• Next<br />
• Go back<br />
• Exit<br />
• Help<br />
• Vehicle health<br />
• Pair my phone<br />
Entertainment<br />
• Audio list of commands<br />
— You can also get detailed lists of<br />
commands for radio, USB, Bluetooth ®<br />
audio, Sirius and SD Card<br />
• Audio <br />
• Radio<br />
— FM <br />
— FM preset <br />
• CD<br />
—Play track <br />
— Shuffle <br />
• USB<br />
— Play song <br />
— Play album <br />
• SiriusXM<br />
— <br />
— Preset <br />
Phone<br />
• Phone list of commands<br />
• Dial<br />
• Call on cell/at home/at work<br />
• Call voicemail<br />
• Do not disturb<br />
• Listen to text messages<br />
(phone-dependent feature)<br />
Climate *<br />
• Climate control list of commands<br />
• Climate <br />
• Climate my temperature<br />
• Climate temperature degrees<br />
SYNC Services<br />
If equipped, say “Services” first, and then,<br />
“What can I say?”<br />
• Traffic<br />
• Directions<br />
• Business search<br />
• Operator (for direction or business search)<br />
• Favorites<br />
• News, sports, weather, horoscopes,<br />
stock quotes, movies or travel<br />
• Help<br />
Navigation *<br />
• Navigation list of commands (if equipped)<br />
— Destination street address<br />
<br />
— Destination home<br />
— Navigation voice <br />
— Navigation volume <br />
— Repeat instruction<br />
— Show <br />
• Travel Link list of commands<br />
— Traffic<br />
— Weather<br />
— Movie listings<br />
— Fuel prices<br />
— Sports <br />
*<br />
Available only with My<strong>Ford</strong> Touch<br />
Table of Contents<br />
4–5 Instrument panel<br />
6–7 SYNC<br />
8–13 SYNC with My<strong>Ford</strong> Touch<br />
14–15 COMFORT & Convenience<br />
16–17 Essential information<br />
18–19 function<br />
Some services may not be available in your area.<br />
Refer to your Owner’s Manual, visit the website<br />
or call the toll-free number for more information.<br />
For U.S. customers: visit SyncMyRide.com<br />
or call 1-800-392-3673 (select Option 1<br />
or 2 for language, then Option 3).<br />
For Canadian customers: visit SyncMyRide.ca<br />
or call 1-800-565-3673 (select Option 1<br />
or 2 for language, then Option 3).
Instrument<br />
1<br />
2<br />
3<br />
4<br />
1<br />
5<br />
6<br />
8 9<br />
10<br />
Panel<br />
7<br />
11<br />
1 STEERING WHEEL CONTROLS *<br />
Use the controls to adjust frequently accessed features.<br />
Press Set + or Set -, RSM and OFF to set and adjust<br />
the cruise control speed * .<br />
Use the left-hand controls to scroll through and make<br />
selections from within your information display. Use<br />
the right-hand controls to adjust audio volume and<br />
media selection, and to activate voice controls * .<br />
2 POWER-ADJUSTABLE PEDALS *<br />
Located on the left side of the steering column, press<br />
the arrow to move the accelerator and brake pedals<br />
farther away from you; press the arrow to move the<br />
pedals closer.<br />
Note: Adjust the pedals only when the vehicle<br />
is in P (Park).<br />
3 INFORMATION DISPLAY *<br />
Monitor vehicle systems, receive alerts, and program<br />
and configure certain vehicle features. Use your<br />
steering wheel controls to scroll, make selections and<br />
adjustments that will appear in the message center<br />
within the instrument cluster.<br />
The LCD productivity screen displays features<br />
such as Gauge Mode with diesel-specific engine oil<br />
temperature and exhaust filter information along with<br />
transmission temperature and compass data.<br />
A and B trip odometers also include trip time, fuel<br />
used and average fuel economy.<br />
Instant fuel economy also provides fuel history in<br />
select increments and saves your last five resets.<br />
Truck apps * include details about trailers and<br />
off-road features.<br />
The Settings menu delivers Driver Assist features such<br />
as rear park aid, rear camera, and more. Refer to your<br />
Owner’s Manual for more information.<br />
4 SELECTSHIFT AUTOMATIC ® TRANSMISSION<br />
Change gears without a clutch. Put the gearshift into<br />
M (manual) and press + to upshift and – to downshift.<br />
To lock gears, put the gearshift lever into D (Overdrive)<br />
and press – to lock out the gears. Only the available<br />
gears will be displayed. Press + to unlock the gears.<br />
5 TOW/HAUL Mode<br />
Activate the Tow/Haul<br />
mode to eliminate excessive<br />
transmission shifting when<br />
traveling on a grade. When<br />
equipped with exhaust<br />
braking (diesel only), this<br />
feature also helps slow the<br />
vehicle and assist the driver while descending a grade.<br />
6 ELECTRONIC SHIFT-ON-THE-FLY<br />
4X4 SYSTEM *<br />
Rotate the knob and shift from 2WD to 4x4 High or Low:<br />
2H (2WD) provides power to the rear wheels only.<br />
This is appropriate for normal, on-road driving on dry<br />
pavement, providing optimal smoothness and fuel<br />
economy at high speeds.<br />
4H (4WD HIGH) delivers extra gearing for maximum<br />
power to all four wheels at reduced speeds. This is<br />
intended for use in situations such as deep sand, steep<br />
grades or pulling heavy objects.<br />
4L (4WD LOW) mechanically locks into four-wheel<br />
drive when extra power at reduced speeds is required.<br />
Use this setting for off-road, low-speed operation<br />
such as climbing steep grades, going through deep<br />
sand or pulling a boat out of the water.<br />
Note: Do not use 4H or 4L on dry, hard-surfaced roads.<br />
Doing so can produce extra noise and increase tire wear.<br />
For more complete details, refer to the Four-Wheel Drive<br />
chapter of your Owner’s Manual.<br />
7 MEDIA HUB<br />
8 HILL DESCENT CONTROL *<br />
While traveling at low speeds (between 2 mph<br />
[3 km/h] and 12 mph [20 km/h]), activate to help<br />
maintain vehicle speed while descending steep<br />
grades in a variety of road conditions. To enable,<br />
press the hill descent button. A light in the cluster<br />
will illuminate and a chime will sound.<br />
To increase descent speed, press the accelerator<br />
pedal until the desired speed is reached.<br />
To decrease speed, press the brake pedal until the<br />
desired speed is reached.<br />
Note: Hill descent control requires a cooling down interval<br />
after sustained use. The amount of time that the feature<br />
can remain active before cooling varies with conditions.<br />
The system will provide a warning in the information<br />
display and a chime will sound when the system is about<br />
to disengage for cooling. At this time, manually apply<br />
the brakes as needed to maintain descent speed.<br />
9 TRAILER BRAKE CONTROLLER *<br />
The fully integrated trailer brake controller (TBC)<br />
synchronizes vehicle and trailer brakes for seamless<br />
braking (even with the heaviest loads) to provide<br />
added driving control and confidence. Use the GAIN<br />
adjustment buttons to increase or decrease the<br />
braking feature’s power output to the trailer.<br />
Refer to the Towing section of your Owner’s Manual<br />
for more details.<br />
10 LARGE CONTROLS FOR EASY HANDLING<br />
Even when you are wearing gloves, the audio, climate<br />
and other system controls are easy to adjust.<br />
11 UPFITTER SWITCHES *<br />
The four switches can be<br />
customized to control<br />
additional functions, with<br />
8, 12 or 20 amps of electrical<br />
battery power.<br />
4 *IF EQUIPPED 5
SYNC ®<br />
Getting Started with Your SYNC System<br />
SYNC is a hands-free, voice recognition system used for entertainment,<br />
information and communication. SYNC. Say the Word.<br />
Before You Get Started<br />
1. Set up your owner account at SyncMyRide.com (U.S.) or SyncMyRide.ca<br />
(Canada). Register by following the on-screen instructions, and then learn<br />
about the complimentary services that are available to you.<br />
2. SYNC uses a wireless connection called Bluetooth ® to communicate with<br />
your phone. Turn Bluetooth mode on in your phone’s menu options. This lets<br />
your phone find SYNC. For more details on setting up your phone with SYNC,<br />
visit SyncMyRide.com (U.S.) or SyncMyRide.ca (Canada), or your phone<br />
manufacturer’s website.<br />
Pairing your Phone with SYNC<br />
Pair your phone to use the many of the<br />
features of SYNC:<br />
1. Make sure that your vehicle is in P (Park)<br />
and both your ignition and radio are<br />
turned on.<br />
2. Press the phone button .<br />
When the display indicates no phone is paired, press OK.<br />
3. When Find SYNC appears in the display, press OK.<br />
4. Put your phone into Bluetooth discovery mode. Refer to your phone’s user<br />
guide if necessary.<br />
5. When prompted on your phone’s display, enter the six-digit PIN provided by<br />
SYNC in the radio display.<br />
6. The display indicates when the pairing is successful.<br />
Note: The system may prompt you to:<br />
• Set your phone as the primary/favorite (the primary phone will receive<br />
messages and voice mails).<br />
• Download your phone book (this is required to use the full set of<br />
voice commands).<br />
• Turn on 911 Assist ® .<br />
6 *IF EQUIPPED<br />
Why Do I Need a SYNC Owner Account?<br />
A SYNC owner account is required for Vehicle Health Report activation and the<br />
ability to view your reports online. You’ll also be able to take advantage of all<br />
of SYNC’s Services and personalization features, such as saving your Favorites<br />
and Points of Interest (POI). You’ll receive the latest software updates that add<br />
new places, directions and information; and if you have questions, you’ll get free<br />
customer support. Visit the website or call the toll-free number to set up your<br />
account. See the inside front cover of this guide for more information.<br />
COMMONLY USED VOICE COMMANDS<br />
SYNC. SAY THE WORD.<br />
Every time you want to give SYNC a voice command, you must first press the<br />
voice button and when prompted, speak your voice command. For a list of<br />
voice commands, say “What can I say?”<br />
USING MY PHONE WITH SYNC<br />
Note: You can download your phone book to make phone calls with voice<br />
commands by name. Contacts listed in all caps will require you to spell them (i.e.<br />
JAKE will be J-A-K-E).<br />
Making a phone call: Use SYNC to make<br />
a phone call to anyone in your phone book<br />
by pressing the voice button . When<br />
prompted, give a voice command.<br />
For example, you could say, “Call Jake<br />
Smith at home”. When the system confirms<br />
the number, say “Dial” to initiate the call<br />
automatically or say the phone number.<br />
Answering incoming calls: Whenever you have an incoming call, you will be<br />
able to see the name and number of the person calling in your display. Press<br />
the phone button to answer an incoming call. You can hang up at any time by<br />
pressing and holding the phone button .<br />
Media hub<br />
USING SYNC TO ACCESS<br />
DIGITAL MEDIA<br />
Your vehicle includes a concealed SYNC<br />
media hub. The multiple inputs allow you<br />
to plug in your USB media devices such as<br />
phones and MP3 players, and use SYNC to play all of your favorite music. In<br />
vehicles equipped with SYNC, the media hub is located in the center console. In<br />
vehicles equipped with My<strong>Ford</strong> Touch ® , the media hub is located on top of the<br />
instrument panel (as shown above).<br />
Note: SYNC indexes all of your music. The more music that is stored on your<br />
device, the longer it takes SYNC to index.<br />
USING VOICE COMMANDS TO PLAY MUSIC<br />
1. Plug your media player into your USB port.<br />
2. Press the voice button . When prompted, say “USB” and then follow<br />
up by saying a voice command.<br />
3. You will hear the command repeated back to you and the selected<br />
item will play.<br />
Applink<br />
SYNC AppLink allows you voice access to<br />
select mobile applications that you<br />
already have or can download to your<br />
Android , BlackBerry ® or iPhone ® . Current<br />
apps available include Pandora Internet<br />
Radio ® , Stitcher Smart Radio , Open Beak<br />
(BlackBerry exclusive), iHeartRadio, Slacker,<br />
NPR News, SYNC Destinations and more.<br />
Note: AppLink is not available with<br />
My<strong>Ford</strong> Touch systems.<br />
–Using SYNC AppLink<br />
1. Create your app account and personalize your app settings, if required.<br />
2. Download the latest mobile app through your Smartphone’s marketplace.<br />
3. Turn on your ignition.<br />
4. Pair the phone to a SYNC AppLink vehicle. If your phone is already paired to<br />
the vehicle, it connects automatically when you enter.<br />
5. If you’re an iPhone owner, you must also connect the Apple ® -provided USB<br />
cable and start the application you want to use on your iPhone to access the<br />
apps through SYNC. Android and BlackBerry connect wirelessly using<br />
SYNC AppLink.<br />
6. Now you’re ready to voice-access the app by pressing the voice button and<br />
saying “mobile apps” and then the name of the app you want.<br />
For more information on SYNC, please visit the website or use the toll-free<br />
number. See the inside front cover of this guide for details.<br />
*IF EQUIPPED<br />
7
SYNC ® with My<strong>Ford</strong> Touch ®<br />
A revolutionary way to connect with your vehicle.<br />
Getting Started, Understanding SYNC<br />
with My<strong>Ford</strong> Touch<br />
Use the four-corner, four-color touchscreen to explore and interact with your vehicle. The<br />
touchscreen works the same way as traditional controls, knobs and buttons do. Press the<br />
various corners on your touchscreen to personalize the many features and settings of your<br />
vehicle all in one place. The system provides easy interaction with your cellular phone,<br />
multimedia entertainment, climate controls and navigation system.<br />
Get in touch using your<br />
four-corner touchscreen<br />
General tips<br />
• Press the home icon at any time to return to your<br />
home screen. You can also use SYNC to go back by<br />
saying the voice command “Go back”.<br />
• For additional support, refer to your Owner’s Manual,<br />
visit the website or call the toll-free number. See the<br />
inside front cover of this guide for more information.<br />
• The touchscreen is sensitive, so make sure you press<br />
the desired icon accurately and firmly.<br />
Getting Started with Your SYNC System<br />
SYNC is a hands-free, voice recognition system used for entertainment,<br />
information and communication. SYNC. Say the Word.<br />
Before You Get Started<br />
1. Set up your owner account at SyncMyRide.com (U.S.) or SyncMyRide.ca<br />
(Canada). Register by following the on-screen instructions, and then learn<br />
about the complimentary services that are available to you.<br />
2. SYNC uses a wireless connection called Bluetooth ® to communicate with<br />
your phone. Turn Bluetooth mode on in your phone’s menu options. This lets<br />
your phone find SYNC. For more details on setting up your phone with SYNC,<br />
visit SyncMyRide.com (U.S.) or SyncMyRide.ca (Canada), or your phone<br />
manufacturer’s website.<br />
Pairing your Phone with SYNC<br />
Pair your phone to<br />
use the many of the<br />
features of SYNC:<br />
1. Make sure that<br />
your vehicle is in<br />
P (Park) and both<br />
your ignition and<br />
radio are turned on.<br />
2. Press the phone<br />
button . When the display indicates no phone is paired, press OK.<br />
3. When Find SYNC appears in the display, press OK.<br />
4. Put your phone into Bluetooth discovery mode. Refer to your phone’s user<br />
guide if necessary.<br />
5. When prompted on your phone’s display, enter the six-digit PIN provided by<br />
SYNC in the radio display.<br />
6. The display indicates when the pairing is successful.<br />
Note: The system may prompt you to:<br />
• Set your phone as the primary/favorite<br />
(the primary phone will receive messages and voice mails).<br />
• Download your phone book<br />
(this is required to use the full set of voice commands).<br />
• Turn on 911 Assist ® .<br />
TIPS<br />
• Make sure you accept SYNC’s request to access your phone.<br />
• To pair subsequent phones, please refer to Pairing Subsequent Phones<br />
in the SYNC chapter of your Owner’s Manual.<br />
• If you are experiencing pairing problems, refer to your Owner’s Manual.<br />
8 *IF EQUIPPED<br />
*IF EQUIPPED 9
SYNC ® with My<strong>Ford</strong> Touch ®<br />
Phone<br />
Voice-control your phone for hands-free calling<br />
with your phone securely put away. With SYNC,<br />
you won’t even need to know the phone number.<br />
Just say the name of the person you want from<br />
your contacts.<br />
Your phone connects you with many other<br />
features and SYNC Services:<br />
• Connect to SYNC Services for traffic,<br />
directions, business searches and<br />
information favorites.<br />
• Connect to Operator Assist to help locate a<br />
listing or destination.<br />
• Call for a Vehicle Health Report.<br />
• Automatically connects with a 911 Operator<br />
in the event of an accident (system must be<br />
turned on prior to event).<br />
• Transfer calls seamlessly from SYNC to your<br />
phone as you get in or out of your vehicle.<br />
SET UP YOUR IN-CASE-OF-EMERGENCY CONTACTS<br />
You can add contacts from your phone book for simple one-touch<br />
access on the touchscreen after a 911 Assist ® event. You can save<br />
up to two contacts on the 911 Assist screen by scrolling through<br />
your menu choices and selecting the following information:<br />
• Touch Settings, then Phone and 911 Assist.<br />
• Touch Edit to add contacts from your phone book.<br />
WIRELESS AND INTERNET<br />
Your SYNC with My<strong>Ford</strong> Touch system has a Wi-Fi feature<br />
that creates a wireless network within your vehicle to use<br />
with a computer or other Internet-compatible device. From<br />
the Settings menu, select Wireless & Internet, and then Wi-Fi<br />
Settings. From there:<br />
• Turn the Wi-Fi network feature on.<br />
• Choose a wireless network.<br />
• Turn the Gateway Mode on to make SYNC an access point<br />
for a phone or computer. View and select or change your<br />
Gateway settings. Press for more information.<br />
Navigation *<br />
Get started with your navigation system by<br />
pressing the upper-right, green corner. The available,<br />
voice-activated navigation system includes:<br />
• SiriusXM Traffic<br />
• SiriusXM Travel Link<br />
• GPS (Global Positioning System) technology<br />
• 3-D mapping<br />
• Turn-by-turn navigation<br />
Refer to the My<strong>Ford</strong> Touch ® chapter of your Owner’s<br />
Manual for complete details.<br />
Set a Destination<br />
Set a destination through your touchscreen by using<br />
a street address, a city center, a place on the map or<br />
a Point of Interest (POI). The easiest way, however,<br />
is by voice.<br />
1. Push the voice button , then when prompted<br />
say “Destination street address”.<br />
2. The system will ask you to say the full address<br />
and will display an example on-screen.<br />
3. You can then speak the address naturally, such as:<br />
“One two three Main Street, Anytown.”<br />
You can also use the touchscreen to enter a<br />
destination and narrow your choices by city or<br />
street as you type.<br />
You can choose from up to three different types<br />
of routes:<br />
• Fastest: Uses the fastest moving<br />
roads possible.<br />
• Shortest: Uses the shortest distance possible.<br />
• Eco (EcoRoute): Uses the most<br />
fuel-efficient route.<br />
SAVE A FAVORITE<br />
When you find a specific address or a Point of<br />
Interest (POI) that you’d like to store within<br />
the system, you can save it to your Favorites.<br />
Using the touchscreen, press Save to Favorites. When<br />
you want to view that destination again, you can<br />
press Favorites to retrieve your stored locations.<br />
Note: Some features, such as Point of Interest (POI)<br />
ratings and the ability to type in a destination, are<br />
not available while the vehicle is moving. For more<br />
complete information, see the SYNC chapter in your<br />
Owner’s Manual.<br />
TIPS<br />
• Save your favorite locations by<br />
touching “Save to Favorites”.<br />
• Change your map views from<br />
Direction Headed, North Up or 3D.<br />
Once the system is active, the local area network within the<br />
vehicle lets all passengers connect to the Internet. Refer to<br />
the My<strong>Ford</strong> Touch chapter of your Owner’s Manual for<br />
10 *IF EQUIPPED<br />
complete details.<br />
*IF EQUIPPED 11
SYNC ® with My<strong>Ford</strong> Touch ®<br />
Climate<br />
SYNC with My<strong>Ford</strong> Touch controls the temperature, airflow direction, fan speed, and activates other<br />
climate features like heated front seats for you and your passenger. To use voice commands to operate<br />
climate, say a voice command like “Climate temperature 72 degrees” and My<strong>Ford</strong> Touch will make<br />
that adjustment.<br />
Set your MYTemp<br />
• Touch the lower-right, blue Climate corner<br />
on the touchscreen.<br />
• Set your exact, desired temperature using<br />
the red or blue arrows.<br />
• Press and hold the MyTemp button until<br />
the background goes solid.<br />
Set your Passenger’s<br />
TEMPERATURE<br />
• Touch DUAL to turn on the passenger side<br />
temperature control.<br />
• Touch + or - to adjust the temperature.<br />
Adjust Heated or Cooled<br />
Front Seats *<br />
• Touch the heated<br />
or cooled seat icon<br />
to control the seat<br />
temperature.<br />
• More light bars indicate a higher setting.<br />
To operate the heated feature, press to<br />
cycle through the various heat settings and off.<br />
To operate the cooled feature, press to<br />
cycle through the various cooling settings<br />
and off.<br />
Entertainment<br />
No matter how you store your music, SYNC makes<br />
it yours to enjoy when you’re behind the wheel. Just<br />
press the lower-left, red corner of the touchscreen.<br />
From here, you can easily go between AM/FM, Sirius,<br />
and other media sources.<br />
SET YOUR RADIO PRESETS<br />
• Touch the Entertainment corner on<br />
the touchscreen.<br />
• Touch FM.<br />
• Touch Direct Tune.<br />
• Enter the desired station and touch Enter.<br />
• Touch Presets and then touch and hold one of<br />
the memory preset buttons to save it. You will<br />
hear a brief mute and the sound will return when<br />
the station is saved.<br />
BRING IN YOUR OWN MUSIC<br />
Gain access to any audio source by voice and<br />
even control how each operates, like changing<br />
radio stations, CD tracks or music on one of the<br />
following devices:<br />
• CD<br />
• USB<br />
• Bluetooth ® Streaming<br />
• SD Card<br />
• A/V In<br />
Refer to your Owner’s Manual, visit the website or<br />
call the toll-free number. See the inside front cover<br />
of this guide for more information.<br />
12 *IF EQUIPPED<br />
*IF EQUIPPED 13
Comfort & Convenience<br />
MYKEY ®<br />
MyKey allows you to program certain driving restrictions in order to promote good<br />
driving habits. You can program things such as speed restrictions, limited volume<br />
levels. For complete information, refer to the MyKey chapter in your Owner’s Manual.<br />
MEMORY FEATURE *<br />
The memory function allows a “one touch” recall of personalized memory features<br />
(i.e., the positions of the driver seat, power mirrors and power-adjustable foot<br />
pedals). Use the memory controls, located on the driver’s door , to program<br />
and then recall memory positions.<br />
To program position 1, press and hold the 1 button until you hear a chime. Use<br />
this same procedure to set the second position using the 2 button . You can now<br />
use these controls to recall the set memory positions.<br />
REMOTE ENTRY SYSTEM with remote start *<br />
Press once<br />
to unlock the driver’s door.<br />
Press twice<br />
to unlock the passenger<br />
and rear doors.<br />
Press once<br />
to lock all the doors.<br />
Press twice<br />
to confirm all the doors are<br />
closed and locked.<br />
Press<br />
to activate the panic alarm.<br />
Press again or<br />
turn the ignition on to<br />
deactivate the panic alarm.<br />
Car finder:<br />
Press twice within three seconds. The horn will chirp and the turn lamps will<br />
flash. It is recommended to use this method to locate your vehicle, rather than using<br />
the panic alarm.<br />
REMOTE Start:<br />
Press to lock all the doors.<br />
Press twice. The exterior lamps will flash twice. The horn will chirp if the<br />
system fails to start.<br />
MOONROOF *<br />
Your moonroof is equipped<br />
with a one-touch, express<br />
opening and closing<br />
feature. To open, press<br />
and release the SLIDE<br />
control, the sunscreen and<br />
moonroof will open. The<br />
moonroof will stop short of<br />
the fully opened position.<br />
To fully open the moonroof,<br />
press and release the SLIDE<br />
control again. To close,<br />
pull and release the SLIDE<br />
control. Press and release<br />
the TILT control to vent the<br />
moonroof. Pull and hold<br />
the TILT control to close<br />
the moonroof. The sliding<br />
shade can be manually opened or closed when the moonroof is closed. Pull the<br />
shade toward the front of the vehicle to close it.<br />
HEATED rear SEATS *<br />
The rear seat heat controls are located on the rear<br />
door armrest. To operate the heated seats, push<br />
the indicated side of the control for maximum or<br />
minimum heat. Push again to deactivate.<br />
ADJUSTABLE HEAD RESTRAINTS<br />
The front head restraints<br />
can be adjusted to suit<br />
your needs. Simply pull<br />
up to raise the head<br />
restraint. To lower, press<br />
the head restraint down<br />
while pressing and holding<br />
the guide sleeve adjust/<br />
release button. You may<br />
also be able to tilt the<br />
head restraint forward or<br />
backward for additional<br />
comfort. Pivot the head<br />
restraint forward to the<br />
desired location. After the<br />
head restraint reaches the<br />
forward-most tilt position,<br />
pivot it forward again to<br />
return it to the standard position.<br />
Center Console *<br />
Your vehicle may be equipped with a variety of console features.<br />
These include:<br />
• Locking storage compartment with hanging file folder supports and room for<br />
a laptop computer, binder or book; removable false bottom tray for accessing<br />
hidden storage compartment; and storage on the passenger side of the<br />
console bin.<br />
• One 12-volt power point inside the storage compartment and one on the rear<br />
of the console; and a 110-volt AC power point outlet on the rear of the console.<br />
14 *IF EQUIPPED *IF EQUIPPED<br />
15
Essential Information<br />
DIESEL fuel recommendations<br />
<strong>Ford</strong> recommends that you use only the diesel fuels that meet either the<br />
ASTM D975 diesel or the ASTM D7467 B6-B20 biodiesel industry specifications.<br />
Outside of North America, use fuels meeting EN590 or equivalent local<br />
market standard.<br />
Diesel fuel is adjusted seasonally for colder temperatures. For best results at<br />
temperatures below 20°F (-7°C), it is recommended to use a diesel fuel that has<br />
been seasonally adjusted for the weather.<br />
DIESEL EXHAUST SYSTEM<br />
The Diesel Particulate Filter (DPF) system helps reduce carbon emissions. This<br />
system requires completion of a periodic drive to clean or operator commanded<br />
regeneration procedure that is prompted through your information display.<br />
Failure to comply with the required cleaning procedure maintenance can result<br />
in damage to the DPF system that may not be covered under warranty. See your<br />
Diesel Supplement for more information.<br />
Diesel Exhaust Fluid (DEF) Level<br />
To help reduce emission levels from the exhaust of the diesel engine, your<br />
vehicle is equipped with a selective catalytic reduction (SCR) system that relies<br />
upon diesel exhaust fluid (DEF) to operate properly. The SCR automatically<br />
injects DEF into the exhaust system to enable proper SCR function. Make sure<br />
that you check your vehicle’s DEF level during the oil change service interval,<br />
but certain conditions or driving styles, such as trailer towing or fast rates<br />
of acceleration, will require the refilling of the DEF tank more often. See the<br />
scheduled maintenance information in your Diesel Supplement for<br />
more information.<br />
Fuel Type/Tank Capacity/Flex Fuel *<br />
Depending on your vehicle, your fuel tank size varies based on body style and/or<br />
engine configuration. Refer to the Capacities and Specifications section in your<br />
Owner’s Manual for more details.<br />
Flex fuel vehicles have a yellow ring around the top of the fuel filler inlet (tube)<br />
and can use either regular unleaded fuel or E85 ethanol fuel.<br />
It is best not to alternate repeatedly between gasoline and E85. If you do switch<br />
fuels, it is recommended that you add as much fuel as possible—at least half a<br />
tank. Do not add less than five gallons (18.9 liters) when refueling. You should<br />
drive the vehicle immediately after refueling for at least 5 miles (8 km) to allow<br />
the vehicle to adapt to the change in ethanol concentration. If you exclusively<br />
use E85 fuel, it is recommended to fill the fuel tank with regular unleaded<br />
gasoline at each scheduled oil change.<br />
Fuel-efficient Transmission *<br />
Your vehicle has been designed to improve fuel economy by reducing fuel usage<br />
while coasting or decelerating. This may be perceived as a light to medium<br />
braking sensation when removing your foot from the accelerator pedal.<br />
SOS Post-Crash Alert System <br />
The SOS Post-Crash Alert System provides audible and visual alarms in the<br />
event of a crash which causes the deployment of airbags or the activation of the<br />
safety belt pretensioners. The turn signals will flash and the horn will sound. To<br />
deactivate the system, press the hazard flasher control, or you can press on your<br />
remote transmitter.<br />
BRAKE OVER ACCELERATOR (BOA) FEATURE<br />
In the event that the accelerator pedal becomes stuck or entrapped, BOA will<br />
reduce engine power when the brake pedal is applied. Drivers who rest a foot on<br />
the brake pedal while pressing the accelerator pedal may activate BOA. See your<br />
Owner’s Manual for complete details.<br />
Tire Pressure Monitoring System *<br />
Your vehicle has been equipped with a tire pressure monitoring system<br />
(TPMS) that illuminates a low tire pressure warning light when one or more<br />
of your tires is significantly under-inflated. If this happens, stop and check<br />
your tires as soon as possible. Inflate them to the proper pressure. Refer to the<br />
Wheels and Tires chapter in your Owner’s Manual for more information.<br />
Location of Spare Tire and Tools *<br />
If your vehicle is equipped with a spare tire, jack and associated tools, refer to the<br />
following table for their locations:<br />
If you do not have a flex fuel vehicle, then only use “Regular” unleaded gasoline<br />
with an octane rating of 87. Do not use E85 fuels, because your vehicle was not<br />
16 *IF EQUIPPED<br />
designed to run on fuels with more than 15% ethanol.<br />
*IF EQUIPPED<br />
Tool<br />
Spare tire (pick-up trucks only)<br />
Jack<br />
Jack handle, lug wrench, lug wrench<br />
extension (only available on Dual Rear<br />
Wheel [DRW] vehicles) and wheel<br />
chock (only available on Single Rear<br />
Wheel [SRW] vehicles equipped with<br />
a diesel engine)<br />
Location<br />
Under the vehicle, just forward of the<br />
rear bumper.<br />
Regular cab and Crew Cab:<br />
fastened to the floor pan behind<br />
rear-most seat on passenger side;<br />
SuperCab: under the rear bench seat<br />
on the passenger side.<br />
Regular cab: fastened to the floor<br />
behind the driver seat;<br />
SuperCab: under the passenger side<br />
rear bench seat;<br />
Crew Cab: fastened to the floor behind<br />
the driver’s side rear seat.<br />
For complete details on how to change your tire, refer to the Roadside Emergencies<br />
chapter in your Owner’s Manual.<br />
Roadside Assistance<br />
Your new <strong>Ford</strong> Super Duty ® comes with the assurance and support of 24-hour<br />
emergency roadside assistance. To receive roadside assistance in the United States,<br />
call 1-800-241-3673. In Canada, call 1-800-665-2006.<br />
17
Function<br />
ADVANCETRAC ®<br />
WITH ROLL<br />
STABILITY<br />
CONTROL (RSC ® )<br />
STABILITY<br />
ENHANCEMENT<br />
SYSTEM *<br />
The AdvanceTrac stability<br />
system helps you to maintain<br />
stability and steer-ability of<br />
your vehicle during a variety<br />
of road conditions. If your<br />
vehicle becomes stuck in<br />
the snow, mud or sand,<br />
try turning off the AdvanceTrac system to allow wheel spin and help increase<br />
momentum to dig the vehicle out. Press the control to turn the system off. Refer<br />
to your Stability Control chapter in your Owner’s Manual for more details.<br />
ELECTRONIC LOCKING DIFFERENTIAL (ELD) *<br />
With the ELD engaged, the rear axle temporarily locks, allowing both rear<br />
wheels to turn at the same speed. The function helps to provide additional<br />
traction as needed.<br />
To activate:<br />
• In 4x4 vehicles, pull the 4WD control knob toward you.<br />
• In 4x2 vehicles and vehicles equipped with a manual shift 4WD system,<br />
turn the ELD control knob from OFF to ON.<br />
• The indicator light will be continuously displayed in the cluster when<br />
the ELD is active.<br />
Note: ELD should not be used on dry surfaces.<br />
Rear view<br />
Camera System *<br />
Located under the <strong>Ford</strong> oval badge on<br />
the tailgate, this camera provides a<br />
visual display of the area behind the<br />
vehicle. The display will automatically<br />
appear in the navigation system screen *<br />
or in the auto dimming rearview mirror<br />
whenever the vehicle is in R (Reverse)<br />
and uses colors (green, yellow and red)<br />
to alert you of your proximity to objects.<br />
If equipped with the navigation system,<br />
you can also press Zoom to zoom in<br />
or out.<br />
Note: Visibility aids do not replace<br />
the need to watch where the vehicle is<br />
moving. Refer to your Owner’s Manual<br />
for safety information, more detail and limitations.<br />
One-Touch Up or Down (Front Windows)<br />
This feature automatically opens or closes the window. Press or lift the switch<br />
completely and release. The window will fully open or close. Press or lift it again<br />
to stop the window.<br />
Note: The window may be disabled for up to five minutes if it is cycled up and down<br />
repeatedly. This helps prevent damage to the motor. Normal operation will resume<br />
once the motor cools.<br />
Reverse Sensing System *<br />
The sensing system, only active when the transmission is in<br />
R (Reverse), warns the driver of obstacles within a certain range of<br />
the rear bumper area. It sounds a warning tone if there is an object<br />
behind the vehicle. The tone will sound continuously when the<br />
object is less than 12 inches (30 centimeters) away. The system is<br />
not effective when the vehicle is traveling above 3 mph (5 km/h)<br />
and may not detect angular or moving objects.<br />
Note: Visibility aids do not replace the need to watch where<br />
the vehicle is moving. Refer to your Owner’s Manual for safety<br />
information, more detail and limitations.<br />
18<br />
*IF equipped<br />
*IF EQUIPPED<br />
19


