Disc Brake Inspections - Commercial Vehicle Safety Alliance
Disc Brake Inspections - Commercial Vehicle Safety Alliance
Disc Brake Inspections - Commercial Vehicle Safety Alliance

You also want an ePaper? Increase the reach of your titles
YUMPU automatically turns print PDFs into web optimized ePapers that Google loves.
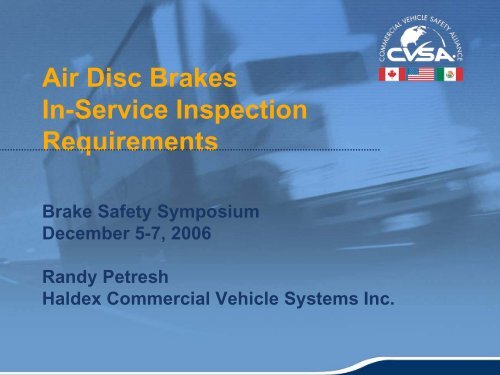
Air <strong>Disc</strong> <strong>Brake</strong>s<br />
In-Service Inspection<br />
Requirements<br />
<strong>Brake</strong> <strong>Safety</strong> Symposium<br />
December 5-7, 2006<br />
Randy Petresh<br />
Haldex <strong>Commercial</strong> <strong>Vehicle</strong> Systems Inc.<br />
1
<strong>Disc</strong> <strong>Brake</strong> Models<br />
• Currently, five <strong>Disc</strong> <strong>Brake</strong> models in service today:<br />
• Bendix/ Dana<br />
• Bendix SB/ SN Series<br />
• Haldex ModulX<br />
• Meritor WABCO EX225<br />
• Meritor WABCO PAN22<br />
Refer to the following illustrations for additional details<br />
associated with each specific <strong>Disc</strong> <strong>Brake</strong> configuration.<br />
2
<strong>Disc</strong> <strong>Brake</strong>s Configuration<br />
Although there are specific differences between the<br />
various <strong>Disc</strong> <strong>Brake</strong> models, All of them conform to<br />
this basic configuration.<br />
Common components include:<br />
–Caliper<br />
–Rotor<br />
–Pads<br />
–Carrier<br />
–Chamber/ Spring <strong>Brake</strong>s<br />
9
<strong>Disc</strong> vs. Drum Inspection “Challenges”<br />
• Obviously, <strong>Disc</strong> <strong>Brake</strong>s will require completely<br />
different inspection procedures and requirements<br />
than currently practiced for Drum <strong>Brake</strong>s. The<br />
challenges will be:<br />
– Cannot view/ inspect braking surfaces.<br />
– Cannot view/ inspect disc pads.<br />
– Cannot view/ inspect brake actuation.<br />
– Cannot view/ measure push rod stroke/ brake adjustment.<br />
10
Actuation/ Adjuster<br />
mechanism totally<br />
enclosed in Caliper<br />
housing<br />
Chamber/ Spring <strong>Brake</strong><br />
mounted directly to the<br />
back of the caliper<br />
Caliper Assembly<br />
permanently lubricated<br />
and sealed<br />
11
<strong>Disc</strong> <strong>Brake</strong> <strong>Inspections</strong><br />
• <strong>Disc</strong> <strong>Brake</strong> <strong>Inspections</strong> which can be performed:<br />
– Loose, damaged, missing components.<br />
– Cracked, damaged brake hoses.<br />
– Oil, grease, dirt buildup contamination.<br />
– Chamber/ Spring <strong>Brake</strong> breather holes are clear and not<br />
obstructed by contamination.<br />
– All of these inspection points are similar to current Drum<br />
<strong>Brake</strong>s.<br />
– Can be performed with “wheels on”.<br />
– Reference Out-of-Service- Appendix A/ Part II<br />
12
<strong>Disc</strong> <strong>Brake</strong> <strong>Inspections</strong><br />
• Additional <strong>Disc</strong> <strong>Brake</strong> inspection points:<br />
– Presence of manual adjuster access plug, and slide pin<br />
boots and caps (back of caliper).<br />
– Rotor inboard plate and outer circumference, if no dust<br />
shields are present.<br />
– And finally, Visual Pad Wear Indicators, if the <strong>Disc</strong> <strong>Brake</strong> is<br />
so equipped.<br />
• Unique indicator for each <strong>Disc</strong> <strong>Brake</strong> model.<br />
13
Visual Wear Inspection- Bendix<br />
• Slide pin relative to rubber bushing is in<br />
direct relationship to pad and rotor wear.<br />
• New pads/ new rotor- pin exposed.<br />
• Pads worn- pin below edge of rubber<br />
bushing.<br />
• Length of rolling boot is in direct<br />
relationship to pad and rotor wear.<br />
• New pads/ new rotor- rolling boot<br />
extended.<br />
• Pads worn- rolling boot extension<br />
significantly reduced.<br />
14
Visual Wear Inspection- Meritor WABCO EX225<br />
• Indicator is located on the inboard side of<br />
caliper next to short or long slide pin<br />
• Spring loaded pin is an indicator of total<br />
pad and rotor wear.<br />
• New pads/ new rotor- pin exposed.<br />
• Pads / rotor worn- pin flush with or below<br />
caliper casting.<br />
• Pin position is an approximate indicator of<br />
pad and rotor conditions and does not<br />
account for all tolerances.<br />
• Automatically resets when pads / rotor are<br />
replaced.<br />
Indicator<br />
Visual Wear<br />
Indicator<br />
15
Visual Wear Inspection- Meritor WABCO<br />
PAN22<br />
• Indication based on Caliper (edge A)<br />
to Carrier (edge B) relationship.<br />
• Edge A and edge B visible through<br />
wheel rim.<br />
• New pads<br />
– Edge A in front of edge B.<br />
– Edge B not visible.<br />
• Worn pads<br />
– Edge A position moves until same position<br />
as edge B.<br />
16
Visual Wear Inspection- Haldex<br />
• Indications based on Caliper projection<br />
to carrier indicator pin relationship.<br />
• New pads<br />
– Indicator pin extended past projection.<br />
• Worn pads<br />
– Indicator pin flush to Caliper projection.<br />
• Without carrier indicator pin:<br />
– Measure distance from Caliper projection<br />
to carrier mounting face.<br />
17
Additional <strong>Disc</strong> <strong>Brake</strong> inspections may be possible<br />
depending on installation/ orientation of the <strong>Disc</strong><br />
<strong>Brake</strong>.<br />
• Oil soaked/ contaminated pads.<br />
• Missing or loose/ detached friction material (pads) from<br />
backing plate.<br />
• <strong>Brake</strong> Caliper movement.<br />
• Caliper should move freely on slide pins in the axial (inboard/<br />
outboard) direction..<br />
• No movement indicative of non-sliding Caliper.<br />
• Rotor cracking/ heat checking.<br />
18
Rotor Cracking/ Heat Checking<br />
• Heat Checks: Short, thin radial<br />
indications on the rotor braking<br />
surfaces. Heat checks will wear<br />
away and reform. May develop into<br />
braking surface cracks.<br />
• Cracks: Heat checks similar in<br />
appearance to cracks. Cracking is<br />
defined as a “surface split” radiating<br />
into or from an edge of the rotor or<br />
over 75% in length.<br />
Light Heat Checking<br />
Heavy Cracking<br />
19
Rotor Inspection Guide<br />
20
<strong>Brake</strong> Adjustment Inspection<br />
• Check adjustment by sliding Caliper back and forth.<br />
– If Caliper slides more than .080 in., <strong>Disc</strong> <strong>Brake</strong> is out of<br />
adjustment.<br />
• Or, measure running clearance between pad and<br />
braking surface; normal operating clearance should<br />
be between .020 in. and .040 in.<br />
• Or, perform an adjuster functional check.<br />
21
Adjuster Functional Check<br />
• Remove rubber access plug.<br />
• Attach box end wrench to adjuster shaft.<br />
• Deadjust brake.<br />
• Actuate brake several times.<br />
• If wrench rotates when brake is<br />
actuated, adjuster mechanism is<br />
working properly.<br />
• If wrench does not rotate, adjuster<br />
mechanism is not working, and caliper<br />
may need to be replaced.<br />
22
Service Chambers/ Spring <strong>Brake</strong>s<br />
• Identical size on both wheelends/<br />
each axle.<br />
• <strong>Disc</strong> <strong>Brake</strong> compatible chambers.<br />
– NOT the same as Drum <strong>Brake</strong>s.<br />
– External Seal to Caliper housing.<br />
– Internal Boot.<br />
External Seal<br />
Internal Boot<br />
23
Additional Information and Inspection Details<br />
• Refer to TMC RP-652<br />
• Manufactures Maintenance Manuals<br />
24
Thank You<br />
25