InLine
Create successful ePaper yourself
Turn your PDF publications into a flip-book with our unique Google optimized e-Paper software.
IPS<br />
<strong>InLine</strong><br />
®<br />
E D I T I O N<br />
Dieter Grübel
IPS<br />
<strong>InLine</strong><br />
®<br />
Dieter Grübel<br />
Ivoclar Vivadent Trainer, Liechtenstein
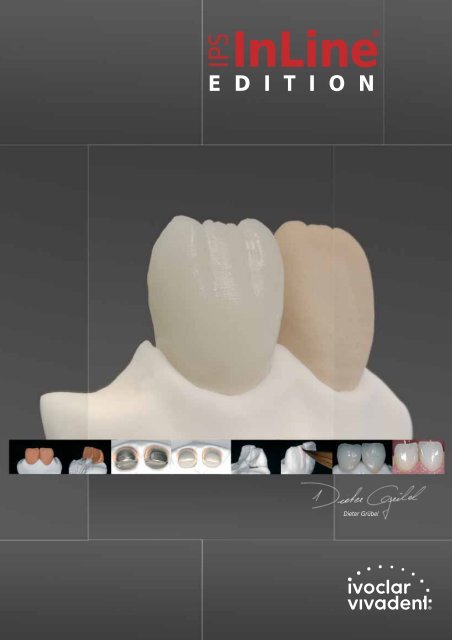
IMPRESSIVELY ”IN” –<br />
THE NEW LEUCITE METAL-CERAMIC<br />
There are innumerable ceramic assortments available on the market. New materials are consistently<br />
being offered. If you are satisfied with a veneering ceramic, you might ask yourself: why something<br />
new again?<br />
Every dental technician gains experience with different ceramic assortments during his professional<br />
life – either by interest or related to the material. However, already at the first attempt to try the<br />
new material, you realize that the result does not resemble that which is usually achieved with the<br />
familiar ceramic. The logical consequence: You have to adjust your processing technique to the new<br />
ceramic. But you don’t really have time for that!<br />
Often, it is advisable to have a closer look at the new product. In this IPS <strong>InLine</strong> Edition I try to<br />
show you what is important before you start with a new veneering ceramic and how you can<br />
efficiently and economically achieve a reproducible result.<br />
My experience:<br />
ACCURATE, FAST AND BEAUTIFUL<br />
THE NEW<br />
IPS<br />
<strong>InLine</strong><br />
®<br />
LEUCITE METAL-CERAMIC<br />
Most dental technicians will find the same factors as being important when veneering metal-ceramic restorations.<br />
For me, these factors are primarily shade stability – even after several firing cycles – optimized shrinkage<br />
behaviour, as well as fast processing and outstanding aesthetic properties. Exactly these aspects were<br />
considered in the development of IPS <strong>InLine</strong>.<br />
Shade<br />
The new shading of the ceramic enables the easy reproduction of the desired shade without shade loss, even<br />
at high firing temperatures and after multiple firing cycles.<br />
Shrinkage<br />
Due to the optimized sintering behaviour of the ceramic, every restoration, no matter if small or large, can<br />
be efficiently fabricated without complex add-on firings.<br />
Processing<br />
Thanks to the manifold improvements, such as the paste opaquer, which is available in ready-to-use jars or<br />
syringes, or the fluorescence opaquer, restorations can be fabricated faster and in a more controlled fashion.<br />
3
THE METAL FRAMEWORK – the foundation of eve<br />
Compatibility of alloys<br />
In order to meet the expectations of customers, it is<br />
important to me to process a ceramic that is insensitive and<br />
that can be processed and used on many different alloys.<br />
According to my experience, IPS <strong>InLine</strong> can be used on highgold,<br />
palladium-based or even base metal alloys without any<br />
problems – also with multiple firing cycles!<br />
Framework design<br />
The metal framework forms the basis for efficient working. The framework determines the<br />
success or failure of the metal-ceramic. Clinical long-term success requires good accuracy of<br />
fit, which in turn provides stability.<br />
IPS <strong>InLine</strong> is coordinated with a variety of Ivoclar Vivadent alloys in the CTE range of<br />
13.8–15.0 10 -6 K -1 25–500 °C.<br />
“The framework should be designed as small as possible in order to have as much<br />
space as possible available for the highly aesthetic veneer ..."<br />
That’s where the problems start with which we have to deal in the daily working routine:<br />
– Tension cracks<br />
– Strength<br />
– Shrinkage<br />
– Aesthetics<br />
Sources of error which have to be compensated by the veneering ceramic are very timeconsuming<br />
and have a big influence on the quality of the completed restoration.<br />
My experiences/rule of thumb:<br />
High-gold alloy min. 0.5 mm<br />
Base metal alloy min. 0.3 mm<br />
2.0 mm<br />
1.7 mm<br />
1.2 mm<br />
1.5 mm 1.5 mm<br />
0.9 mm<br />
>_ 1.2 mm<br />
>_ 1.2 mm<br />
Preparation guidelines Layering diagram Framework design Completed metal framework<br />
TIP:<br />
Independent of the size of the tooth:<br />
Always try to achieve a consistent layer thickness of the framework to be veneered.<br />
4
y metal-ceramic restoration<br />
Surface finishing<br />
When the criteria for framework design and framework thickness have been<br />
considered, the alloy surface is finished. It should be a matter of course to<br />
observe certain basic rules for finishing. In addition to the type of finishers<br />
used, the appropriate application is of utmost importance.<br />
TIP:<br />
Always use the same set of grinding instruments for the<br />
respective alloy. If different instruments are used, foreign<br />
objects will be included into the alloy surface, which may<br />
result in bubbles or cracks in the ceramic.<br />
An impeccable surface is achieved by using a white oxide stone for grinding.<br />
5
HOW DO I PROPERLY HANDLE MY ALLOY?<br />
Oxide firing – quality control of the metal framework<br />
The last important working step before the opaquer is applied is the thermal treatment<br />
(oxide firing), which has to be done in different ways depending on the alloy.<br />
Different manufacturing methods<br />
When it comes to oxide firing, there is a great confusion/uncertainty. Is oxide firing required<br />
at all? If yes, which parameters have to be applied? This confusion can certainly be related to<br />
the fact that there are different recommendations for the various types of alloys.<br />
Below are some examples as provided from dental technicians to dental technicians, without<br />
any reference to a specific alloy or manufacturer.<br />
• Sandblast – apply opaquer<br />
• Sandblast – oxidize – apply opaquer<br />
• Sandblast – oxidize – sandblast – apply opaquer<br />
• Oxidize – with/without vacuum<br />
• Oxidize – with/without holding time<br />
• No oxide firing required<br />
• Sandblast – oxidize – pickle – apply opaquer • Oxidize at 925 °C, 950 °C, 1010 °C<br />
TIP:<br />
Since there are no universal working procedures and oxide firing temperatures,<br />
please observe the respective Instructions for Use of the manufacturer. If no<br />
Instructions for Use are enclosed, you should keep your hands off this alloy.<br />
Bond between alloy and veneering<br />
material<br />
The oxide layer forms the most important component of the<br />
bond between metal and ceramic. Therefore, particular<br />
attention should be paid to this working step.<br />
~70 % bond by diffusion (OXIDE LAYER)<br />
~15 % bond by compression<br />
Metal<br />
Oxygen<br />
Silica<br />
~15 % mechanical bond<br />
6<br />
Graphic representation of the chemical bond. The alloy and ceramic “share”<br />
oxygen atoms, which generate the adhesive bond.<br />
[Schnettger A., Fachhochschule Osnabrück 2004]
Cleanness of the surface<br />
The oxide firing provides information on the cleanness of the surface and thus offers a<br />
control whether the metal framework is free of gases or contamination. The oxide must be<br />
even and clean. If the colour is not consistent, the procedure has to be repeated.<br />
Presoldering<br />
With presoldering in particular, it is important<br />
to check the cleanness of the metal framework<br />
with oxide firing.<br />
After oxide firing<br />
Pickling<br />
with PCT AScid<br />
Cleaning<br />
with steam<br />
IPS d.SIGN 98<br />
high-gold alloy<br />
IPS d.SIGN 96<br />
gold-reduced alloy<br />
Pickling<br />
Pickling of the oxide layer with PCT AScid is recommended for high-gold alloys with a zinc or<br />
copper content to ensure a sound metal-ceramic bond.<br />
– Processing<br />
Place the alloy into the PCT AScid solution for 5–10 minutes. Rinse pickled<br />
objects with water and clean with steam. PCT AScid will reliably remove oxides<br />
and flux residue.<br />
(Contraindicated for base metal alloys)<br />
7
ADVANTAGES OF THE IPS INLINE OPAQUER<br />
The IPS <strong>InLine</strong> Opaquer is characterized by its optimum consistency. Therefore, the opaquer is<br />
ready to use without the need to mix it. This will considerably facilitate your daily working<br />
routine. Due to the ideal consistency of the opaquer, you will always achieve the same<br />
masking effect.<br />
Ideal consistency, no individual mixing required.<br />
1 st wash firing (930 °C) 2 nd opaquer firing (930 °C)<br />
Apply a very thin layer of opaquer to ensure a sound bond<br />
between ceramics and metal. Gases that have not escaped<br />
during oxide firing can be eliminated during wash firing.<br />
The second opaquer layer is used to mask the metal framework<br />
and reproduce the shade of the natural tooth.<br />
Optimum masking effect<br />
Enhanced fluorescence with in-depth<br />
effect – Opaquer F<br />
Either apply the Opaquer F as a thin, third opaquer layer and<br />
fire or mix up to 20% of Opaquer F with the conventional<br />
IPS <strong>InLine</strong> Opaquers before the second layer is applied.<br />
8
WHAT ARE THE PROPERTIES OF DENTIN?<br />
The brightness value of the dentin is decisive for the final result of the restoration. In virtually<br />
all the shade ranges, the dentin has to feature a high brightness value. The opaquer supports<br />
the dentin, which is, however, not always sufficient.<br />
Depending on the ceramic type and properties, the dental technician has to process the<br />
Dentin material in different ways to achieve his goal. Based on this example, I like to show<br />
how different ceramic systems can be.<br />
IPS Classic IPS <strong>InLine</strong> IPS d.SIGN IPS Classic IPS <strong>InLine</strong> IPS d.SIGN<br />
Feldspar ceramics<br />
Low colour saturation<br />
High brightness value<br />
IPS Classic – high translucency, low colour saturation, high brightness value<br />
You have to focus on the dentin shade in particular. The ceramic has a very low colour saturation and may lose a lot of colour with multiple firing<br />
cycles. This is particularly the case with high-fusing ceramic materials, such as feldspar and leucite. The colour and chroma have to be compensated<br />
by Intensive Dentin or Deep Dentin materials.<br />
IPS Classic IPS <strong>InLine</strong> IPS d.SIGN IPS Classic IPS <strong>InLine</strong> IPS d.SIGN<br />
Leucite metal-ceramics<br />
High colour saturation<br />
Mean brightness value<br />
IPS <strong>InLine</strong> – high translucency, high colour saturation, mean brightness value<br />
The brightness value has to be mastered, as high translucency and high colour saturation result in a low brightness value. This is easily achieved<br />
using Deep Dentin materials.<br />
Fluorapatite leucite glass-ceramic<br />
IPS Classic IPS <strong>InLine</strong> IPS d.SIGN IPS Classic IPS <strong>InLine</strong> IPS d.SIGN<br />
High colour saturation<br />
IPS d.SIGN – mean translucency, high colour saturation, high brightness value<br />
The fluorapatite crystals have a very lifelike light scattering/light reflection. Hence, highly aesthetic results can be easily achieved.<br />
High brightness value<br />
9
THE DENTIN CORE<br />
The most important and thus most difficult thing for me was to always have control over the<br />
dentin. Factors, such as shade, chroma, brightness and translucency have to be contained<br />
already in the dentin core. With the first dentin firing, these properties become visible.<br />
The dimensions of the dentin core<br />
All these properties (shade, chroma, brightness and translucency) have to be ideally adjusted<br />
in size and volume to the natural tooth.<br />
• If the dentin core is too SMALL, I automatically apply too much Impulse and Incisal materials<br />
and the tooth shade, brightness etc. will be lost.<br />
• If the dentin core is too LARGE, there is no space for the Impulse and Incisal materials<br />
and the tooth will lose its aesthetic properties.<br />
TIP:<br />
The biggest advantage of firing the dentin core is that we can efficiently and<br />
elegantly control the dimensions of the dentin core by individual grinding.<br />
A lifelike surface texture is created by individual grinding.<br />
TPP: The incisal edge has to be reduced wafer-thin to achieve a harmonious tapering of the dentin core.<br />
Predictable results<br />
If required, small adjustments of shade, chroma and brightness can be made using Impulse<br />
and Incisal materials in the second firing cycle.<br />
10
Design of the dentin core<br />
Fully anatomical build-up of Deep Dentin and Dentin<br />
The two ceramic materials are always used to fabricate a fully anatomical build-up. Thus, we<br />
can achieve consistent shade, chroma, brightness and translucency in the tooth.<br />
TIP:<br />
This recommendation may also be applied to other<br />
ceramics. Depending on the properties of the ceramic,<br />
the dimensions will differ.<br />
The translucency of the incisal edge can be ideally controlled by individual grinding of the dentin core. The incisal edge is tapered until the desired translucency is<br />
achieved.<br />
Big advantage: predictable results. I can see the result even before I start to cover the dentin core with Impulse and Incisal materials.<br />
Young tooth / Translucent<br />
Young tooth / Opaque<br />
Incisal<br />
Dentin<br />
Incisal<br />
Dentin<br />
Deep Dentin<br />
Deep Dentin<br />
With high brightness and high translucency, 1 /3 of the tooth volume<br />
is built up with Deep Dentin.<br />
With high brightness and low translucency, 2 /3 of the tooth volume is<br />
built up with Deep Dentin.<br />
11
VENEERING<br />
1 st firing<br />
1. Line the dentin with two thirds Deep Dentin to control the translucency and entirely cover<br />
the opaquer.<br />
2. Subsequently, complete the tooth with Dentin materials to the natural size of the adjacent<br />
tooth.<br />
2 nd firing<br />
Cover the entire tooth using the respective Incisal materials. In the present case, I mixed<br />
Transpa Incisal TI1 with 40% Opal Effect 2 in order to increase the opacity and brightness.<br />
My goal was to create a very young tooth with low translucency, high opacity, and a high<br />
brightness value.<br />
The incisal edge is covered with Opal Effect 1 to achieve a nice opal effect.<br />
Mix Transpa Incisal TI1 with 40% Opal Effect 2 and apply.<br />
TIP:<br />
Always place the ceramic in the same moist condition<br />
into the ceramic furnace. This will optimize the<br />
firing quality and shade of the ceramic compared to<br />
a ceramic that is placed in a dry condition into the<br />
furnace.<br />
Completed restoration<br />
12
AESTHETIC RESULTS<br />
Young tooth with<br />
high translucency<br />
Young tooth with<br />
high translucency<br />
and mamelon structure<br />
Deep Dentin and Dentin firing<br />
If an individual design is established by grinding, the translucency in the incisal edge can<br />
be controlled. If required, a slight mamelon structure can be designed.<br />
The dentin core is reduced and ends about 0.5 mm before the incisal edge.<br />
The dentin core is reduced to a mamelon structure and ends about 0.5 mm before the incisal edge.<br />
The incisal edge is built up to full contour with Opal Effect E1 material. Dentin material is applied to the mamelon structure. Subsequently, the area is covered with Incisal TI1.<br />
13
THOROUGH PREPARATION<br />
If you want to achieve your working goal quickly and efficiently, you have to invest a lot of<br />
time in thorough planning. In implantology in particular or with large restorations, it may<br />
have severe consequences for the final result if the preparation is not well thought-out. If<br />
errors occur during the working process, this will considerably influence the quality of and<br />
the time required for the fabrication of the restoration.<br />
• Study model<br />
A study model is of utmost<br />
importance in order to<br />
adjust the work individually<br />
to the case and situation.<br />
• Guidelines provided by the silicone matrix<br />
The silicone matrix helps to control the shape of the metal framework.<br />
• Study model / fully anatomical wax-up<br />
The anatomy (marginal ridge) can be controlled with the help of the fully<br />
anatomical study model. This will support the layering process and<br />
subsequent grinding procedure.<br />
• Guidelines provided by the silicone matrix<br />
The size of the restoration may be ideally adjusted with the silicone matrix.<br />
Consequently, the tooth can be ideally copied.<br />
14
THE CERAMIC SHOULDER …<br />
... has become the standard in many<br />
laboratories<br />
The ceramic shoulder should be a standard if predominantly<br />
base metals are used. Hence, problems such as gingival<br />
recession or visible black margins can be prevented.<br />
Margin A2<br />
Intensive Margin<br />
Opaque<br />
If limited space is available, it is recommended to cover the translucency of the Margin materials with a<br />
thin layer of Intensive Margin Opaque to completely mask the metal framework.<br />
Impressive results with the IPS <strong>InLine</strong> materials regarding accuracy of fit and shade brilliance.<br />
Firing Brennen parameters im Programat Ofen: T B<br />
Brennparameter 1. + 2. Margin °C Brand °C<br />
S<br />
Min.<br />
➚<br />
t<br />
°C/Min.<br />
H<br />
Min.<br />
V1<br />
°C<br />
V2<br />
°C<br />
1 st and 2 nd T Margin B firing S<br />
➚<br />
930 t<br />
H403<br />
V 1<br />
4<br />
V 2<br />
60<br />
1<br />
450<br />
929<br />
930°C 403°C<br />
Margin Add-On firing<br />
4 Min.<br />
60°C<br />
900<br />
1 Min.<br />
403<br />
450°C<br />
929°C<br />
4<br />
60<br />
1<br />
450<br />
899<br />
15
FIRST DENTIN FIRING<br />
For the first dentin firing, the dentin is built up to its original size. The shrinkage of the first<br />
firing provides the space required for the Impulse and Incisal materials.<br />
Fully anatomical build-up with Deep Dentin up to about 60% of the<br />
entire volume of the natural tooth.<br />
Subsequently, the Deep Dentin areas are covered with Dentin<br />
material and built up to full size.<br />
Fully anatomical build-up with Dentin material. Cut-back in the incisal third down to the opaquer. Deep Dentin material is thinly tapered towards the incisal edge and<br />
subsequently covered with Dentin material.<br />
Firing parameters<br />
T<br />
°C<br />
B<br />
°C<br />
S<br />
Min.<br />
➚<br />
t<br />
°C/Min.<br />
H<br />
Min.<br />
V1<br />
°C<br />
V2<br />
°C<br />
1 st Dentin/Incisal firing<br />
910<br />
403<br />
4<br />
60<br />
1<br />
450<br />
909<br />
16
SECOND IMPULSE AND INCISAL FIRING<br />
First, the palatal area is built up to full contour with Incisal material. Advantage: definition of the incisal edge. Dentin and Impulse materials can be selectively applied.<br />
Applied Impulse materials (E1, E3, Transpa blue, Occlusal Dentin<br />
brown).<br />
Finally, the tooth is completed using Incisal materials.<br />
Firing parameters<br />
T<br />
°C<br />
B<br />
°C<br />
S<br />
Min.<br />
➚<br />
t<br />
°C/Min.<br />
H<br />
Min.<br />
V1<br />
°C<br />
V2<br />
°C<br />
2 nd Dentin/Incisal firing<br />
900<br />
403<br />
4<br />
60<br />
1<br />
450<br />
899<br />
17
AESTHETICS AND EXCELLENCE<br />
Shape and texture<br />
If you try to achieve aesthetic restorations by using a lot of Impulse materials and special<br />
layering techniques, you will often be disappointed by the result. I have come to realize that<br />
the search for impeccable shade matching and the attempt to ideally copy every internal<br />
effect or defect, can only be an approximation. However, this imitation becomes more and<br />
more easy with continuously improving ceramic assortments.<br />
The shape and tooth surface form the basis for success. Those who succeed in establishing<br />
the basis will also achieve what is known as the chameleon effect and thus impeccable<br />
integration of the restoration into the natural surroundings.<br />
Silver powder is used to analyze and control the shape and surface structure. I apply silver<br />
powder both on the natural tooth and the restoration. This will show possible errors, which<br />
can be selectively adjusted.<br />
Even the smallest errors become apparent with silver powder.<br />
18
NATURAL ENAMEL CRACK<br />
I use the conventional Dentin materials to achieve a natural enamel crack. The Stains are very<br />
intensive and difficult to control. To achieve a better contrast during application, I colour the<br />
Dentin material.<br />
Incisal material is applied up to the area where an<br />
enamel crack is desired.<br />
The Incisal material is carefully covered with the coloured Dentin<br />
material.<br />
Important: The ceramic material should be equally moist to<br />
ensure proper application (mixing with glaze liquid).<br />
Completed IPS <strong>InLine</strong> restoration<br />
Conclusion<br />
IPS <strong>InLine</strong> offers me the flexibility in processing which I need for my daily work. The<br />
easy handling properties and the lifelike aesthetics have convinced me to integrate<br />
IPS <strong>InLine</strong> into my daily working routine in the laboratory.<br />
Enjoy working with IPS <strong>InLine</strong>.<br />
Dieter Grübel<br />
Ivoclar Vivadent Trainer | Bendererstrasse 2 | FL-9494 Schaan | Principality of Liechtenstein<br />
19
603427/0906/e/RDV


