Installation Instructions - B-Band, Inc.
Installation Instructions - B-Band, Inc.
Installation Instructions - B-Band, Inc.

Create successful ePaper yourself
Turn your PDF publications into a flip-book with our unique Google optimized e-Paper software.
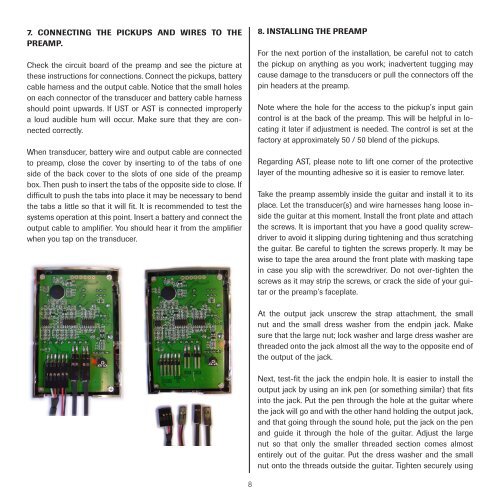
7. Connecting the PICKUPs and wires to thepreamp.Check the circuit board of the preamp and see the picture atthese instructions for connections. Connect the pickups, batterycable harness and the output cable. Notice that the small holeson each connector of the transducer and battery cable harnessshould point upwards. If UST or AST is connected improperlya loud audible hum will occur. Make sure that they are connectedcorrectly.When transducer, battery wire and output cable are connectedto preamp, close the cover by inserting to of the tabs of oneside of the back cover to the slots of one side of the preampbox. Then push to insert the tabs of the opposite side to close. Ifdifficult to push the tabs into place it may be necessary to bendthe tabs a little so that it will fit. It is recommended to test thesystems operation at this point. Insert a battery and connect theoutput cable to amplifier. You should hear it from the amplifierwhen you tap on the transducer.8. Installing the preampFor the next portion of the installation, be careful not to catchthe pickup on anything as you work; inadvertent tugging maycause damage to the transducers or pull the connectors off thepin headers at the preamp.Note where the hole for the access to the pickup’s input gaincontrol is at the back of the preamp. This will be helpful in locatingit later if adjustment is needed. The control is set at thefactory at approximately 50 / 50 blend of the pickups.Regarding AST, please note to lift one corner of the protectivelayer of the mounting adhesive so it is easier to remove later.Take the preamp assembly inside the guitar and install it to itsplace. Let the transducer(s) and wire harnesses hang loose insidethe guitar at this moment. Install the front plate and attachthe screws. It is important that you have a good quality screwdriverto avoid it slipping during tightening and thus scratchingthe guitar. Be careful to tighten the screws properly. It may bewise to tape the area around the front plate with masking tapein case you slip with the screwdriver. Do not over-tighten thescrews as it may strip the screws, or crack the side of your guitaror the preamp’s faceplate.At the output jack unscrew the strap attachment, the smallnut and the small dress washer from the endpin jack. Makesure that the large nut; lock washer and large dress washer arethreaded onto the jack almost all the way to the opposite end ofthe output of the jack.Next, test-fit the jack the endpin hole. It is easier to install theoutput jack by using an ink pen (or something similar) that fitsinto the jack. Put the pen through the hole at the guitar wherethe jack will go and with the other hand holding the output jack,and that going through the sound hole, put the jack on the penand guide it through the hole of the guitar. Adjust the largenut so that only the smaller threaded section comes almostentirely out of the guitar. Put the dress washer and the smallnut onto the threads outside the guitar. Tighten securely using