- Page 2:
The NewDra
- Page 6:
The NewDra
- Page 10:
To the memory of my father,who shar
- Page 14:
8. Relationships in a New</
- Page 18:
tests, but at the time they provide
- Page 22:
California State University, Long B
- Page 26:
of the problem (how the parts fit
- Page 30:
IntroductionThe subject of how peop
- Page 34:
I am aware, of course, that additio
- Page 38:
Color in drawingChapter Eleven, "<s
- Page 42:
ain-function study has become forma
- Page 46:
corpus callosum, indicate that the
- Page 50:
DRAWING is A CURIOUS PROCESS, so in
- Page 54:
Gertrude Stein asked the Frencharti
- Page 58:
My students often report thatlearni
- Page 62:
"When the artist is alive in any pe
- Page 66:
2The DrawingExerci
- Page 70:
Drawing materialsT
- Page 74:
What you'll need:• Paper to draw
- Page 78:
out any instruction? On the other h
- Page 82:
Frank FernandezAngie HinckelJohn Da
- Page 86:
ability from the first lesson (befo
- Page 90:
You were seeing and responding to t
- Page 94:
Fig. 2-2. Rembrandt Van Rijn(1606-1
- Page 98:
"Few people realize what an astonis
- Page 102:
essentially alike, or symmetrical,
- Page 106:
As journalist Maya Pines stated inh
- Page 110:
spoon from a group of objects that
- Page 114:
is strongly linked with concepts of
- Page 118:
Dr.J. William Bergquist, a mathemat
- Page 122:
"Approaching forty, I had a singula
- Page 126:
Mirror writing reverses the shapeof
- Page 130:
A comparison of left-mode and right
- Page 134:
Psychologist Charles T. Tart,discus
- Page 138:
Crossing Over:Experiencing the Shif
- Page 142:
your own version of the profile if
- Page 146:
ain-mode that is specialized for th
- Page 150:
al mode. There are other examples.
- Page 154:
know who the person is, the upside-
- Page 158:
3. I recommend that you not try to
- Page 162:
is so far superior to the drawing d
- Page 166:
consciousness in these terms, and t
- Page 170:
symbol system seems to override per
- Page 174:
"When I was a child, I spake as ach
- Page 178:
Art in schoolEven sympathetic art t
- Page 182:
Children's repeated imagesbecome kn
- Page 186:
Fig. 5-7. Landscape drawing by asix
- Page 190:
divers. They are fascinated by bloc
- Page 194:
The stage of realismBy around age t
- Page 198:
"The painter who strives to represe
- Page 202:
"I must begin, not with hypothesis,
- Page 206:
"Art is a form of supremely delicat
- Page 210:
Getting AroundYour Symbol System:Me
- Page 214:
felt that the reason the contour me
- Page 218:
you see each point on the contour.
- Page 222:
The paradox of the Pure Contour <st
- Page 226:
In drawing, an edge is where two th
- Page 230:
What you'll do:1. Rest your hand on
- Page 234:
est) drawing for the next exercise.
- Page 238:
ships. Early on in my classes, I us
- Page 242:
Fig. 6-12. The artist using his dev
- Page 246:
Students often become very frustrat
- Page 250:
Fig. 6-15. Fig. 6-16. Fig. 6-17.pap
- Page 254:
over your hand, with its helpful cr
- Page 258:
GETTING AROUND YOUR SYMBOL SYSTEM:
- Page 262:
The next step: Tricking L-mode with
- Page 266:
IN THIS CHAPTER, we'll take up the
- Page 270:
emember and they are, after all, co
- Page 274:
Unity: A most important principleof
- Page 278:
on the negative spaces, the forms w
- Page 282:
cate how a trained artist does this
- Page 286:
Unit or your "One"—or whatever yo
- Page 290:
As in any field, the "rules" of art
- Page 294:
Note that:•The toned format on yo
- Page 298:
Fig. 7-14.Fig. 7-15."How far does t
- Page 302:
Demonstration drawing byinstructor
- Page 306:
Relationshipsin a New</stro
- Page 310:
It is the same with drawing. Once y
- Page 314:
Sighting can be used to determineth
- Page 318:
Traditional Renaissance perspective
- Page 322:
wonder how the draughtsman was able
- Page 326:
What happens? The "measurement" has
- Page 330:
As a clever student of mine put it:
- Page 334:
zontal position on the plane to com
- Page 338:
Set yourself up to draw at your cho
- Page 342:
To complete your perspective drawin
- Page 346:
Fig. 8-26. Edgar Degas (1834-1917),
- Page 350:
Instructor Dana Crowe.RELATIONSHIPS
- Page 354:
HUMAN FACES HAVE ALWAYS FASCINATED
- Page 358:
Fig. 9-1. The four figures are theT
- Page 362:
Fig. 9-5.inches. You'll find it's a
- Page 366:
isn't that true?" "No," they said,
- Page 370:
Fig. 9-12.When you finally believe
- Page 374:
Fig. 9-14. Vincent Van Gogh(1853-18
- Page 378:
Fig. 9-16. Albrecht Dürer, FourHea
- Page 382:
Fig. 9-22. Locate also the pointwhe
- Page 386:
If, as occasionally happens, yourL-
- Page 390: "People have many illusions whichbl
- Page 394: 4. Your drawing pencils and eraser5
- Page 398: Fig. 9-29.she was "just drawing." S
- Page 402: Fig. 9-35.19. In drawing your model
- Page 406: Fig. 9-38.Fig. 9-39.Fig. 9-40.Fig.
- Page 410: Another example of two styles of dr
- Page 414: The Valueof Logical Lightsand Shado
- Page 418: Fig. 10-2. Henry Fuseli (1741—182
- Page 422: These special perceptions, like all
- Page 426: of the model's face fully visible t
- Page 430: the first "blocking in" of the ligh
- Page 434: Fig. 10-10. A copy in pencil ofCour
- Page 438: Fig. 10-12. Charles Sheelcr(1883-19
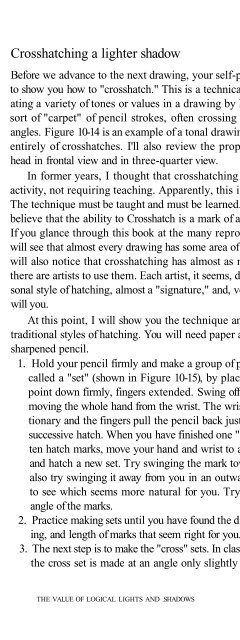
- Page 444: Fig. 10-15. Fig. 10-16.Fig. 10-18.
- Page 448: shapes, relationships of angles and
- Page 452: Fig. 10-24. The full-face view diag
- Page 456: Fig. 10-25. A sketch by the authorf
- Page 460: Fig. 10-28. Fig. 10-29.A three-quar
- Page 464: 12. The ear. The mnemonic for placi
- Page 468: suggested procedure. Later on, you'
- Page 472: Fig. 10-35. A diagram of the threeq
- Page 476: "One of life's most fulfillingmomen
- Page 480: Two additional self-portraits byins
- Page 484: Drawingon the Beau
- Page 488: Fig 11-3. Color Wheel. Complements
- Page 492:
Fig. 11-7. Kathe Kollwitz, Self-Por
- Page 496:
Fig, 11-11. Elizabeth Layton, Self-
- Page 500:
Fig. 11-15. Odilon Redon (1840-1916
- Page 504:
Fig. 11-17. Student Laura Wright, U
- Page 508:
Fig. 11-20. David Hockney, Celia in
- Page 512:
mostly indiscriminate? Or is purpos
- Page 516:
like, and we feel that's sufficient
- Page 520:
physicist and mathematician Isaac <
- Page 524:
hues are complements. This knowledg
- Page 528:
light logic. Use the grid as a boun
- Page 532:
another instance of the transformat
- Page 536:
Because pastels come in a wide rang
- Page 540:
Start your drawing now. You will ne
- Page 544:
"In oneself lies the whole world an
- Page 548:
Through practice, your mind will sh
- Page 552:
"It is not to be despised, in my op
- Page 556:
The Palmer method drill.entries on
- Page 560:
Have soft eyes and a gentle manner.
- Page 564:
Student example of "pure" or "blind
- Page 568:
Decide on a slant, then use sightin
- Page 572:
In drawing, different styles of lin
- Page 576:
Handwriting can stand considerable
- Page 580:
PostscriptFor teachers and parentsA
- Page 584:
David Galin, among other researcher
- Page 588:
inventing a pictorial language with
- Page 592:
For art studentsMany successful con
- Page 596:
GlossaryAbstract Art. A translation
- Page 600:
Nonobjective Art. Art that makes no
- Page 604:
Connolly, C. The Unquiet Grave: A W
- Page 608:
Rodin, A. Quoted in The Joy of Drai
- Page 612:
Bomeisler, Brian, 23-24,24, up, 190
- Page 616:
Fabric of Mind, The (Bergland), XXf
- Page 620:
Miro.Joan, 121, aimirror handwritin
- Page 624:
R-mode, cognitive shifts to, xx, 3,
- Page 628:
Portfolio and Video Ordering<strong