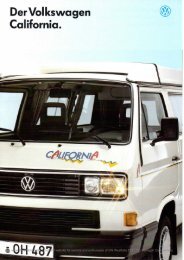
Download 1980 Volkswagen VW Transporter / Caravelle Instruction ...
Download 1980 Volkswagen VW Transporter / Caravelle Instruction ...
Download 1980 Volkswagen VW Transporter / Caravelle Instruction ...

Create successful ePaper yourself
Turn your PDF publications into a flip-book with our unique Google optimized e-Paper software.
<strong>Instruction</strong> Manualfor the<strong>Volkswagen</strong> <strong>Transporter</strong>.www.WestfaliaT3.info - a useful website for owners and enthusiasts of <strong>VW</strong> Westfalia T25 / T3 / Vanagon Campervans
The fuel consumption depends to a large extenton the style of drivingTo use as little fuel as possible, always drive smoothly and steadily.Avoid• Full throttle accelerationand• Maximum speedsPlease read the "Driving tips" section.You will then use less fuel.Road safety and vehicle safety belong togetherBefore moving off, check• the fuel level• the lights and turn signals• the brakes• the windscreen washerand, at regular intervals• the engine oil level• the brake fluid level• the tyre pressureYou will then have less to worry about.www.WestfaliaT3.info - a useful website for owners and enthusiasts of <strong>VW</strong> Westfalia T25 / T3 / Vanagon Campervans
<strong>Instruction</strong> Manualfor the<strong>Volkswagen</strong> <strong>Transporter</strong>.January <strong>1980</strong> Edition<strong>Volkswagen</strong>werk A k t i c n g cs ells ch a ft • Wolfs burgwww.WestfaliaT3.info - a useful website for owners and enthusiasts of <strong>VW</strong> Westfalia T25 / T3 / Vanagon Campervans
www.WestfaliaT3.info - a useful website for owners and enthusiasts of <strong>VW</strong> Westfalia T25 / T3 / Vanagon Campervans
IntroductionAmong the publications supplied with your new vehicle are the:<strong>Instruction</strong> Manual and theService ScheduleBoth are to be found in the vehicle wallet.The <strong>Instruction</strong> Manual contains important information on the use and treatment ofyour vehicle. You should read this booklet before using the vehicle so that you get toknow your car quickly and can start the first trip with complete confidence. Afterreading the booklet you will know exactly how to drive and look after your vehicleproperly.Please note that some of the items of equipment described are fitted to certain modelsonly or are optional extras.The Service Schedule contains details of what has to be done at regular intervals tomaintain the roadworthiness and value of the vehicle. When the servicing has beencarried out, your V.A.G dealer confirms this by stamping the schedule.You should always have the Service Schedule handy when you take your car to adealer - it is the key to efficient service.A word about the warranty conditions: Proper treatment and complete proof that allthe specified Standard Services have been carried out by a V.A.G dealer are stipulationsfor the upholding of any warranty claims for damage to parts which are coveredby the Standard Service system.It is therefore in your interests to take your car in regularly for aStandard Service.<strong>Volkswagen</strong>werk Aktiengesellschaft3www.WestfaliaT3.info - a useful website for owners and enthusiasts of <strong>VW</strong> Westfalia T25 / T3 / Vanagon Campervans
ContentsPageInstrument panel 6OperationKeys 8DoorsCab doors 8Sliding door 9Windows (vent wings,sliding windows) 10Rear flap 11SeatsCab seats 12Passenger compartment seats 13Head restraints 14Seat belts 15Luggage compartment 18Gear lever 19Reversing lights 19Handbrake 20Brake warning lamp 20PageWarning lamps forEngine oil pressure 22Generator . . 22Brake system 23Speedometer 24Trip recorder 24Fuel gauge 25Clock 25Lighting switch 26Emergency light switch 27Fog/rear fog lights/Heatedrearwindow 27Turn signal and dipswitch 28Headlight flasher 28Parking lights 28Windscreen wipers 29Windscreen washer 29Headlight washer 29Intermittent wiper facility 29Heating and ventilation 30Fresh air blower 30Ventilation 31Auxiliary heater 32Steering lock/ignition switch 20Sliding roof 35 Trailer towing 424 Starting engine 21www.WestfaliaT3.info - a useful website for owners and enthusiasts of <strong>VW</strong> Westfalia T25 / T3 / Vanagon CampervansPageSun visors 35Ashtrays, glove box 35Socket/cigarrette lighter 35Interior light, interior mirror 36Loading limit 36Cover (Pick-up) 36Driving tipsThe first 600 miles (1000 km)and afterwards 37Driving safelyTyres 38Brakes 38Driving economically 39Winter drivingAir cleaner/intake airpreheating, fuel 40Winter tyres, snow chains 40Engine, gearbox oil, battery 41Spark plugs, handbrake,windscreen and headlight washers .. 41Door locks, frosted-up windows .... 41
ContentsOperating instructionsPage.e 44- ngtank -.- 45=-gine compartment cover 46I-ecking engine oil level 47Topping up engine oil 47,',\ndscreen washer container 48Adjusting windscreen washer jets 493rakefluid reservoir 503 rake servo 50Wheels 51Care and maintenance 54Care of car 55Cavity preservation 57Undercoating 57Battery 58LubricantsEngine oil, gearbox oil 59Lubrication 60Changingengineoil 61PageChanging oil filter 62Additional points to be lubricated ... 62Changing gearbox oil 62Air cleaner 63Lifting vehicle 65Do-it-yourselfWheel changing 66Spare wheel, tools, jack 66Fuses 69Relays 69Bulb changing 70Adjusting headlights 70Headlight,sidelight 71Rear lights, front turnsignals, interior light 72Number plate light,masking headlightswhen going abroad 73Emergency starting 74Towing 75Service installationof seat belts 76PageFaultfinding 77Automatic gearbox 79Technical descriptionBody 84Front axle 84Steering 84Rear axle 84Brakes 84Transmission 85Engine 85Technical dataEngine 86Fuel consumption 87Performance 88Electrical system 88Capacities 89Wheels 89Weights 90Trailer weights 91Dimensions 92Identification plate,chassis and enginenumbers 93Index 94Vehicle data quiz 98www.WestfaliaT3.info - a useful website for owners and enthusiasts of <strong>VW</strong> Westfalia T25 / T3 / Vanagon Campervans
www.WestfaliaT3.info - a useful website for owners and enthusiasts of <strong>VW</strong> Westfalia T25 / T3 / Vanagon Campervans
Instrument panelPage1 - Vents for side windows and windscreen 302 - Fresh air vents 303 - Lighting switch and instrument lighting rheostat 264 - Brake warning lamp 235 - Speedometer with trip recorder 246 - Warning lamps 227 - Clock or instruments 258 - Heated rear window switch 279 - Emergency light switch 270 - Fog and rear fog light switch 27Page11 - Vents for windscreen 3012 - Ashtray 3513 - Loudspeaker grille14 - Fuse box 6915 - Turn signal and dip switch 2816 - Steering lock/starter switch 2017 - Windscreen wiper and washer lever 2918 - Heating and ventilating leversand blower switch 3019 - Footwell vents 30The horn is operated by pressing the button in centre of steering wheel.20 - Cover plate for radio aperture21 - Glove box 35www.WestfaliaT3.info - a useful website for owners and enthusiasts of <strong>VW</strong> Westfalia T25 / T3 / Vanagon Campervans
OperationKeysThe door and ignition key is a reversible keyand cannot be put in the lock the wrong wayround. This key is also used for the rear flap.Vehicles with a lockable glove box or tankcap have additional keys.The key number is on a plastic tag on the keyring. With this number you can order replacementkeys from your V.A.G dealer.When you have noted the number, the tagshould be removed so that no unauthorizedperson can order a key.DoorsCab doorsBoth cab doors can only be locked fromoutside with the key. Keyless locking bypressing knobs is not possible.The locking knobs must go down when doorsare locked.From inside the doors can be locked afterclosing by pressing the locking knobs down.When the locking knobs are down the doorscannot be opened from outside.When vehicle is in motion, the knobs shouldnot be pressed down as otherwise the doorscannot be opened from outside in anemergency.8www.WestfaliaT3.info - a useful website for owners and enthusiasts of <strong>VW</strong> Westfalia T25 / T3 / Vanagon Campervans
OperationThe sliding door can only be locked with thekey from the outside.When fully open, the door is held by a hook.To close from the outsidePress the door handle down to release thehook and slide the door forwards withmomentum.To unlock and lock from the insidePush locking catch up or down when the dooris properly closed.As long as the catch is in the lower positionthe door cannot be opened from inside or out.When the vehicle is in motion, the door mustalways be properly closed but when carryingpassengers the locking catch should be leftin the upper position so that the door can beopened from outside in an emergency.www.WestfaliaT3.info - a useful website for owners and enthusiasts of <strong>VW</strong> Westfalia T25 / T3 / Vanagon Campervans
OperationVehicles with vent wingsTo open - Press button in fastener and pivotfastener forwards.To close - Press vent wing against seal atfront then pivot fastener to the rear.Vehicles with sliding windowsThe windows are locked when they areclosed. To open them, press the fastenerdown and slide window along.www.WestfaliaT3.info - a useful website for owners and enthusiasts of <strong>VW</strong> Westfalia T25 / T3 / Vanagon Campervans
OperationRear flapTo openUnlock with ignition key, press lock cylinderin and lift flap.To closeSlam flap down.Do not drive with the rear flap open as exhaustgases are then able to enter thevehicle interior.Before going through an automatic carwash, lock the rear flap otherwise thebrushes may press the lock cylinder inand open the flap.After closing the flap always pull up briefly onflap to ensure that it is properly closed. If thecatch is not engaged correctly the flap canopen suddenly when vehicle is moving -even when the lock has been turned.B25-01311www.WestfaliaT3.info - a useful website for owners and enthusiasts of <strong>VW</strong> Westfalia T25 / T3 / Vanagon Campervans
Cab seatsTo move driver's or front passenger's seatfore and aft (only on vehicles with singleseats)The seat can be moved when lever (1) on leftof left seat (right of right seat) is pulled.• Move seat as required and release lever.• Move seat further until catch engages innearest slot.For safety reasons the seat position shouldonly be adjusted when vehicle is stationary.To adjust backrest rakeTake weight off backrest, press lever (2) onright side of seat frame down and movebackrest to desired position by movingupper part of body then release lever.To take seat out• Slide seat forward into 1st latch position.• Lift hook (3) against spring-loading, at thesame time pull lever (1), hold it and slideseat past stop.• Release hook and lever and push seatforward out of runners.• The hook need not be lifted when puttingseat back as the seat, with the lever lifted,can just be pushed past the stop.Vehicles with two seater benchThe seat is moved fore and aft in same wayas the single seats. The lever is at the front ofseat.When seat is moved, the backrest rake isalso altered.To removeRemove in same way as the single seats.Bolts on right and left of backrest must beremoved.Swivelling seatsOn vehicles with swivelling seats the passenger'sseat can be turned 180° to the rightand the driver's seat 90° to the left. To turnseats, push them forward slightly or opendoor. The handbrake must be released beforeturning driver's seat. (Engage a gear toprevent vehicle from rolling away).www.WestfaliaT3.info - a useful website for owners and enthusiasts of <strong>VW</strong> Westfalia T25 / T3 / Vanagon Campervans
OperationSeats in passenger compartmentReleasing the centre seat backrestPull the release knob upwards and push thebackrest forwards.When the backrest is pushed backwards itwill automatically lock into position.Removing centre bench seatRemove four wing bolts under seat (the twofront bolts are shown in illustration).The runners must be kept clean, andgreased lightly from time to time.Removing rear bench seatThe rear seat cushion is bolted to the sidepanels on each side with one bolt under theupholstery. Remove bolts and take lowerpart of seat out.The seat backrest is secured at each sidewith two bolts. The lower bolt also serves asthe seat belt anchorage.When refitting the backrest, ensure thatthe seat belt is also correctly installed.www.WestfaliaT3.info - a useful website for owners and enthusiasts of <strong>VW</strong> Westfalia T25 / T3 / Vanagon Campervans
OperationHead restraintsThe setting is correct when the upper edge ofthe head restraint is roughly at eye level.To adjust head restraintGrip at sides with both hands and pull up orpush down.To remove and install head restraintsPull spring clips out of slotted rings in backrestwith a small screwdriver and lift head restraintout.To install, insert head restraint first and thenpress clips in with straight part at the rear.www.WestfaliaT3.info - a useful website for owners and enthusiasts of <strong>VW</strong> Westfalia T25 / T3 / Vanagon Campervans
OperationSeat belts*Vehicles with three-point static beltsPutting belt onTake buckle off hook on door pillar and passit across chest and hips. Push buckle into thelock part fitted on the seat inner side until itengages audibly.The belt must fit tightly and not betwisted.Adjusting beltLengthening belt before putting it onWith one hand holding the belt below the adjuster,push the adjuster upwards with theother hand.Slackening belt when onPush the adjuster upwards.Shortening beltTilt the adjuster and push it downwards.After being adjusted, the belt must be pulledtight again.Taking belt offRelease belt by pressing the orange buttonmarked "PRESS" in the lock. The buckle willthen spring out.Hang the buckle up straightaway on the hookon the door pillar.* In some export countries the belts used may differ slightly fromthose described here. 15www.WestfaliaT3.info - a useful website for owners and enthusiasts of <strong>VW</strong> Westfalia T25 / T3 / Vanagon Campervans
OperationVehicles with three-point inertiareel beltsThe inertia reel belt adapts automatically tobody size and seat position and gives completefreedom of movement when pulledslowly.Sudden braking will cause the belt tolock. The locking mechanism will also lockthe belt when driving down steep gradients orcornering hard.Putting belt onPull the buckle slowly and smoothly acrossyour chest and hips and push it into the lockpart belonging to the seat until buckle engagesaudibly.The belt must not be twistedTaking belt offTo release belt, press the orange buttonmarked "PRESS" in the lock. The buckle willthen spring out.Pass the buckle towards the relay fitting onthe door pillar so that the retractor can roll thebelt up properly. A plastic slide is fitted to holdthe buckle in a convenient position. Adjustthe slide to suit yourself.Vehicles with lap beltsThe buckle is used in the same way as on thethree-point inertia reel belts.The length of the belt is very important: itmust always fit tightly.To adjust the belt, hold the tongue at rightangles to the belt itself and pull the appropriatepart of the belt in the required direction.Adjustment is easier if the lock tongue andcap are pressed together.The surplus length of belt can be taken up bymoving the plastic slide.16www.WestfaliaT3.info - a useful website for owners and enthusiasts of <strong>VW</strong> Westfalia T25 / T3 / Vanagon Campervans
Operationotes:eat belts are only beneficial if they areorn at all times - particularly in townaffic.ersons less than 4 ft. 10 in. tall should notear normal three-point belts - this would ineasethe danger of injury in an accident.hildren under 12 years of age should alaysbe carried on the rear seat (Combi andJS): Small children in a special seat, olderlildren should have a childs belt. Childrenlex 6 years of age can use a lap belt andlildren over 4 ft. 10 in. tall can use a normalree-point belt.nly one person is to be secured with eachsit. Never secure two people (even Chilton)with one belt.Bulky, loose clothing such as an overcoator jacket impair the belt fitting and thereforeits function1 The belt should never pass over hard orbreakable objects such as spectacles,ball pens, keys, pipe etc., as this couldlead to personal injury.• Ensure that the belt buckle engagesproperly and that the belt is not twisted.• The correct adjustment of the static beltlength is very important.The lap belt must always fit tightly. This isalso valid for inertia reel belts.The shoulder part must be adjusted sothat the hand can just be pushed betweenbelt and chest.Inertia reel belts adjust automatically.• When the seat position is altered, the adjustmentof the belt must be checked and,rectified as necessary.• Belts which are not in use should alwaysbe hung up on the hooks provided. Thiswill prevent the buckles from swingingabout when the brakes are applied suddenly.• Ensure that the belt does not get jammedbetween seat and backrest or rub on anysharp edges.• Do not let the centre seat belts slip downbetween seat cushion and backrest becausebelts which cannot be seen readilywill not be used by the occupants.• Seat belts which have been stressed inan accident and stretched must be replacedand the belt anchorages shouldbe checked by a workshop.• Keep the belts clean because they maynot retract properly if very dirty (see alsosection on "Care of car").www.WestfaliaT3.info - a useful website for owners and enthusiasts of <strong>VW</strong> Westfalia T25 / T3 / Vanagon Campervans
B25-020 JLuggage compartmentThe luggage compartment is accessiblethrough the rear flap. See section "Rear flap"on page 11.Vehicles with hinged rear seat backrestTo enlarge luggage space:• Release backrest by pulling loop• Fold backrest down to seatThe backrest locks automatically whenhinged to the rear.When making full use of the load capacity oyour vehicle the following should be noted• Secure the luggage to prevent it from sliding forward when braking suddenly, an• Make sure that the heating element of threar window will not be damaged bcases rubbing against it.If head restraints are fitted they must bpushed right down before folding the backrest forwards.On vehicles with three point inertia reel beltfor the rear seat bench, ensure that the beltare not jammed when folding the backresback. It is advisable for this reason to put thbelt tongue in the buckle before folding backrest down.www.WestfaliaT3.info - a useful website for owners and enthusiasts of <strong>VW</strong> Westfalia T25 / T3 / Vanagon Campervans
OperationGear leverManual gearboxSelect reverse gear only when the vehicle isstanding still.Move lever to the left, press it down andfurther to the left and then forward.As the reverse gear is on a separate shaft,grating noises may occur if the gear is engagedtoo quickly with engine running - particularlywhen the gearbox is warm.It is advisable therefore to wait a few secondswith clutch pedal fully depressed, before engagingreverse.Automatic gearboxSee page 79Do not make a habit of resting your hand onthe lever when driving.The pressure of your hand is transmitted tothe shift forks in the gearbox and can causepremature wear on the forks.So don't forget - after changing gear takeyour hand off the lever.Vehicles with reversing lightsThe lights come on when reverse is engagedwith ignition on.19www.WestfaliaT3.info - a useful website for owners and enthusiasts of <strong>VW</strong> Westfalia T25 / T3 / Vanagon Campervans
OperationHandbrakeAlways apply handbrake firmly so that youcannot drive off with the handbrake on slightly.To release handbrake - pull lever up slightly,press in the locking knob and push lever rightdown.On vehicles with a brake warning lamp thelamp should go out when the handbrake isreleased, with the engine running (see"Warning Lamps").Steering lock/starter switchKey positions:1 - Ignition offTo lock the steering withdraw key andturn wheel until you hear the pin engage.Do not withdraw key until vehicle isstationary.2 - Ignition onlamps" and "Instru(see "Warningments")If the key is difficult to turn to this positionor cannot be turned at all, move thesteering wheel to and fro slightly to releasethe locking pin.Starting (see page 21)In this position the current to the headlights, windscreen wipers, blower andheated rear window is interrupted.www.WestfaliaT3.info - a useful website for owners and enthusiasts of <strong>VW</strong> Westfalia T25 / T3 / Vanagon Campervans
Operation:arting the engine• careful when running the engine in anfined space. Danger of poisoning.Check that gear lever is in neutral. (Onvehicles with automatic gearbox: Selectorlever at "P" or "N") and apply handbrakebefore starting.Depress the clutch pedal when startingso that the starter only has to turn the engine.As soon as the engine starts, release theignition key so that the starter can disengage.Before the starter can be operated againthe key must be turned back to position 1.The non-repeat lock in the ignition switchprevents the starter from being operatedwhen the engine is running as this coulddamage the starter.Do not try to warm engine up by running itwith vehicle stationary. Drive off straightaway.• Only when it is very cold is it advisable tolet the engine run for about 30 seconds ata fast idle before moving off. This givesthe lubrication system time to circulatethe oil properly.• On vehicles with an automatic gearbox,run engine at a fast idle for about 1 minutebefore selecting a gear.The increase in the idling speed whichtakes place as the engine starts to warmup can be reduced by just tapping the acceleratorpedal briefly.• On vehicles with the 37 kW engine, theengine may rattle briefly after being started.This is caused by the hydraulic tappetswhich have to build up to a certain oilpressure first. The noise is harmless andno cause for alarm.• At temperatures above freezing pointDepress accelerator pedal slowly whileoperating the starter.• At temperatures below freezing pointBefore operating starter, depress acceleratorpedal fully once and let it returnslowly - this actuates the automatic choke.• When engine is very warmDepress accelerator pedal fully while operatingstarter but do not "pump" the pedal.www.WestfaliaT3.info - a useful website for owners and enthusiasts of <strong>VW</strong> Westfalia T25 / T3 / Vanagon Campervans
OperationWarning lamps
Operation(©) Brake systemOn vehicles with a brake warning lampthe lamp should come on when the ignition isswitched on and go out after the engine hasbeen started and the handbrake released. Ifthe light does not come on when the ignitionis switched on the cause of the trouble mustbe found and rectified as soon as possible sothat the light can fulfil its warning function.If the light comes on when the brakes areapplied, it could mean that one of the twobrake circuits has failed.You can drive on to the nearest V.A.G workshopbut allow for reduced braking efficiency,higher pedal pressures and longer brakingdistances on the way.www.WestfaliaT3.info - a useful website for owners and enthusiasts of <strong>VW</strong> Westfalia T25 / T3 / Vanagon Campervans23
Operation^40~1 1001 120 \I0II0I |0| S0| |0| 100 0~yWIOI 10110!rQ -i»O160^y180 y•"JB25-027InstrumentsSpeedometerPermissible speed ranges for the variousgears in km/h:37 kW 51 kW1st gear 0-20 0-252nd gear 15-40 15-203rd gear 25-70 25-854th gear 40-to top speed 40-to top speedThe white roll with red figures records 100mor 1/10 mile.Vehicles with trip recorderThe trip recorder is zeroed by pressing theknob below the speedometer.Gear shift points on speedo dial:• The marks apply only when the engine iswarm.• The arrangement of these marks is determinedby the type of engine fitted.• The next higher gear should beselected, at the latest, when the needlehas reached the mark.Changing up early helps to save fueland keeps the noise down.• The next lowest gear should only beselected at the earliest, when the vehiclespeed has dropped below the marking.24www.WestfaliaT3.info - a useful website for owners and enthusiasts of <strong>VW</strong> Westfalia T25 / T3 / Vanagon Campervans
OperationFuel gaugeThe tank holds about 60 litres (13 gallons).When the needle reaches the start of the reservemark there are about 2 gallons (1,0litres) of fuel left in the tank.The fuel gauge starts to work when the ignitionis switched on but it takes a few secondsfor the needle to reach its final position.Vehicles with a clockThe clock is electrically operated. The handscan be moved by pressing in and turning theknob in the dial centre.25www.WestfaliaT3.info - a useful website for owners and enthusiasts of <strong>VW</strong> Westfalia T25 / T3 / Vanagon Campervans
OperationLighting switchParking lights - 1st detentDriving lights - 2nd detentThe headlights only work when the ignition ison (key in Drive position). When the starter isbeing used, the headlights are switched offautomatically.When the lights are switched on the brightnessof the instrument panel lights can beregulated by turning the switch on vehicleswith variable instrument panel light.Dipping headlights - see page 28.www.WestfaliaT3.info - a useful website for owners and enthusiasts of <strong>VW</strong> Westfalia T25 / T3 / Vanagon Campervans
OperationC- Emergency light switch*When the emergency lights are on, a warninglamp in the switch flashes as well.B - Rear window switchThe heater element only works when theignition is on. (Ignition key in drive position.)When heater element is on a warning lamp inthe switch lights up.D - Switch forfoglightsVrearfoglight*Foglights - first detentFog and rear foglights - second detentIn both positions a warning lamp in theswitch lights up.On vehicles without foglights the rearfoglight comes on at the first switch position.As soon as window is clear switch elementoff to reduce current consumption.The foglights come on with the side or drivinglights when ignition is on.The rear foglight comes on only when thefoglights or driving lights are on.Please note the local regulations on the use of these lights inyour country.www.WestfaliaT3.info - a useful website for owners and enthusiasts of <strong>VW</strong> Westfalia T25 / T3 / Vanagon Campervans
OperationTurn signal and dipper leverThe turn signals only work when the ignitionis on.Centre positionLever upLever down- off- Right turn signals- Left turn signalsThe turn signals are self-cancellingWhen a turn signal fails, the warning lampflasher faster.To signal a lane changeMove lever up or down until resistance is feltand hold it in this position - the warning lampmust be flashing.When released, the lever springs back to thecentre position.JWhen vehicle lights are on pull lever past
Operation"he windscreen wipers and washer onlyvork when ignition is switched on.loten the winter please ensure that the wiper)lades are not frozen to the glass as othervisethey will be damaged when the wipersire switched on.Windscreen wiper andwasher leverWipers and washer off:Lever at position OBrief wipe:Move lever up to pressure point of 1st stop.The wipers work as long as lever is held inthis position.Wipers slow:Lever at 1 st stop.Wipers fast:Lever at 2nd stop.Windscreen washer:Lever at position 4.Washer works as long as lever is held in position.On vehicles with automatic wash/wiperand intermittent wipe facility:Automatic wash/wipe:Move lever to position 4 - washer and wipersworkRelease lever - Washer stops and wiperscontinue for about 4 seconds.Intermittent wipe:Lever at position 3.Wipers work about every 6 seconds.Vehicles with headlightwasherWhen the headlights are on, the lenses arewashed every time the windscreen iswashed.At regular intervals, such as when filling tankwith fuel, caked-on dirt (insects etc) shouldbe removed from the lenses.Filling the washer container is described onpage 48.29www.WestfaliaT3.info - a useful website for owners and enthusiasts of <strong>VW</strong> Westfalia T25 / T3 / Vanagon Campervans
OperationA B C D EHeating and ventilationHeatingA - Warm air distribution leverLever to right- Warm air from windscreen vents and sidevents F.Lever in centre- Warm air from cab footwell vents and sidevents F.Lever to left- Warm air from footwell vents in cab andpassenger compartment and side vents F.B - Heat control lever*Lever to right - increases heatLever to left - reduces heatDefrosting windscreen• All levers fully to right.VentilationC - Fresh air leverFresh air from windscreen defroster ventsand footwell vents.Lever to right -Reduces amount of airLever to left -Increases amount of airOn vehicles with 3 levers for heating andventilation and roof vents in the passengercompartment the roof vents are also suppliedwith fresh air.D - Lever for roof vents in passengercompartment (only on model with 4 levers)Lever to right -Reduces amount of airLever to left - Increases amount of airE - Rotary switch for three-speed blower(Optional equipment)When driving slowly, the blower should beused to increase the flow of air.30' As the heat depends on engine temperature the full heat output isonly available when engine is properly warmwww.WestfaliaT3.info - a useful website for owners and enthusiasts of <strong>VW</strong> Westfalia T25 / T3 / Vanagon Campervans
OperationF - Warm air vents for side windowsG - Fresh air ventsLever down - Vent openLever up - Vent closedThe air flow can be directed up or down (c) byswinging the complete grille.Moving the lever in the grille to or fro changesair flow sideways (d).VentilationStale air can escape through grilles in the cabdoors. The flow can be regulated with slidesSlide forward - Grille openSlide to rear - Grille closed825- 03531www.WestfaliaT3.info - a useful website for owners and enthusiasts of <strong>VW</strong> Westfalia T25 / T3 / Vanagon Campervans
OperationVehicles with Auxiliary Heater BA 6The heating system consists of the engineheating and a gasoline heater booster.In this system the fresh air is prewarmed inthe engine heat exchangers and then heatedup in the heater.The heater is supplied with fuel from the vehicletank. It can use up to one liter per houraccording to operating conditions.The temperature of the warm air can be regulatedand is kept constant electronically. Thismeans that the heater produces a varyingamount of additional heat according to theengine temperature. The heater cuts out altogethertemporarily when the engine is capableof supplying the desired amount ofheat on its own, for example, when drivingfast on a motorway. When the engine is notrunning the heater works alone.Heating control lever - BLever to left - Heating system offLever halfway to right - Engine heating onLever fully to right - Gasoline heater alsoready to be switched onB25-07B32www.WestfaliaT3.info - a useful website for owners and enthusiasts of <strong>VW</strong> Westfalia T25 / T3 / Vanagon Campervans
Operation0Temperature regulating switchThis switch is used to switch heater on andregulate amount of heat.Heating when drivingTo switch on:Push lever B fully to right.Turn temperature regulating switch clockwiseto position 1 (lamp lights up) and setamount of heat required between 1 and 2.To switch off:Turn temperature regulating switch anticlockwiseto 0 (lamp goes out) and move leverB to left.Heating with engine not runningTo switch on:Push lever B fully to right.Press temperature regulating switch in at 0and turn clockwise as far as it will go (lamplights up). The knob springs out again whenreleased. Set heat required between 1 and 2.To switch off:The clockwork in the temperature regulatingswitch switches the heater off automaticallyafter about 10 minutes and the lamp goesout.To switch heater off before clockworkhas run down:Turn temperature regulating switch anticlockwiseto 0. The lamp goes out andclockwork runs down.When the heater is running on the clockworktime switch, it must be switched off by handbefore attempting to start the engine at lowtemperatures so that the full battery capacityis available to turn the engine. When theclockwork has run down, the heater isswitched off automatically when the starter isbeing operated.Every time the heater is switched off, thewarm air and combustion air blowers continuerunning briefly to cool the heater downquicker.To avoid draining the battery, do not run theheater repeatedly when the engine is notrunning.In enclosed spaces and when filling the fueltank, the heater must be switched off.33www.WestfaliaT3.info - a useful website for owners and enthusiasts of <strong>VW</strong> Westfalia T25 / T3 / Vanagon Campervans
OperationHeater safety switchThe heater has a safety switch which is locatedunder the dash on the left near thesteering column. If the heater does not startsome time or starts and then goes out again,wait 3 minutes and then operate the red leveron the safety switch.If the heater still does not work or if the safetyswitch stops it again, there is a defect in theheater which can only be repaired by a V.A.Gworkshop.MaintenanceWhen driving through mud and snow, theexhaust pipe may tend to get blocked. Have alook at it occasionally to see that it is clear.According to official regulations:The heat exchanger in the heater is only to beused for 10 years. After this period the heatexchanger must be replaced in a V.A.Gworkshop. The year in which the heater isfirst put into operation is marked on the nameplateon the heater. The V.A.G workshopmust fit a plate showing the date of the repairand bearing the words "Genuine servicepart".FusesThere are 3 fuses for the heater system: A 16Amp. fuse in the fuse box (Nr. 10) for the control.An 8 Amp. overheating protection fuse in aseparate holder on the right of the main fusebox.A 16 Amp. fuse for the blower under dash (inwire). See illustration.For instructions on changing fuses, see "Fuses"in the "Do-it-yourself" section.www.WestfaliaT3.info - a useful website for owners and enthusiasts of <strong>VW</strong> Westfalia T25 / T3 / Vanagon Campervans
OperationVehicles with sliding roofTo open sliding roof-old crank down and turn anti-clockwise.To close sliding roofITum the crank clockwise until it comes to astop, then turn it back slightly until it can befolded into the recess.For saftey reasons the crank should alwaysbe folded into the recess.Sun visorsBoth sun visors can be lifted out of theirbrackets and swung round towards thedoors.On vehicles with a make-up mirror the mirroris fitted in the passenger's sun visor.AshtraysAshtray in dashTo take out:Grip the strip on opened lid and lift at one sideto take out.To insert:Press ashtray into opening with lid closed.Ashtray in passenger compartmentTo take out:Open ashtray, press down and take out.To insert:Insert at top first then push in fully.Glove boxVehicles with a lockable glove box have anadditional key.Vehicles with socket/cigarettelighterThe socket can be used for other electricalaccessories with a capacity of up to 100Watts. Please bear in mind however that thebattery will soon be discharged when engineis not running.Push in lighter knob. The lighter springsback automatically when the coil is hot.Then use the lighter immediately becausethe coil cools down quickly.www.WestfaliaT3.info - a useful website for owners and enthusiasts of <strong>VW</strong> Westfalia T25 / T3 / Vanagon Campervans
OperationFront interior lightSwitch positions:Front - Door contacts, light comes onwhen driver's door* is opened.Centre - OffRear - Light on all the time.* Passenger door as well on some models.Rear interior lightSwitch positions:UpCentreDown- Door contacts, light comes onwhen the sliding door or on somemodels the front doors, areopened.-Off- Light on all the time.Interior mirrorOn vehicles with an anti-dazzle mirror thereis a small lever on the mirror:Normal position - Lever forwardAnti-dazzle position - Lever to rearFor safety reasons the mirror springs out onimpact.It can be installed again by pressing it in firmiy.36B2-658Cover (Pick-up)Ensure that the cover is secured properlybehind the cab.The cover is correctly secured when the rodincorporated in the cover engages in the rainchannel at the rear of the cab and the left andright hand ends are bolted to the canopyframe.Loading limitWhen stowing cargo, ensure that door/flapis not obstructed.www.WestfaliaT3.info - a useful website for owners and enthusiasts of <strong>VW</strong> Westfalia T25 / T3 / Vanagon Campervans
Driving tipsThe first 1000 km - and afterwardsCareful choice of materials, quality workmanship and modern proructionmethods guarantee the high precision and smooth operationM all the engine components. Nevertheless, during the first few-.ours of its working life the engine will be more subject to the effectsof internal friction than later on when all the moving parts have beddeddown. How well the parts bed down depends primarily on theway you drive during the first 1000 km or so.Do not drive at full throttle during the first 1000 km.Varying the engine speed and the load on the transmission will help10 produce a well run-in vehicle.The following points apply to new and run-in vehicles:• Never over-rev a cold engine - either in neutral or in the gears.• Letting the engine labour is just as bad as thrashing it at full revs.• Never let vehicle labour up a gradient with the accelerator pedalpressed right down; change down a gear or two in good time.During the running-in period you should make especially gooduse of the gearbox.• Changing up in good time helps to save fuel and keeps the noisedown.• The permissible speeds in 1 st, 2nd and 3rd gears when vehicle isrun in are marked on the speedometer dial. The gears should bechanged at the latest by the time these speeds are reached so thatthe permissible engine speeds are not exceeded.www.WestfaliaT3.info - a useful website for owners and enthusiasts of <strong>VW</strong> Westfalia T25 / T3 / Vanagon Campervans37
Driving tipsDriving safely~-e following points are of particular importance to safe operation oftie vehicle.Tyres• New tyres do not give maximum grip straightaway and shouldtherefore be run in at moderate speeds for about the first 60 miles(100 kilometers). This will help to make the tyres last longer.Brakes• Brake linings must bed themselves in and do not have the maximumfrictional properties at first. To compensate for the slightlyreduced braking effect, be prepared to use more pressure on thepedal during the first 300 miles (500 km). This also applies whennew linings have been fitted.• Use engine braking when going down steep hills: Change downbefore starting to go down the hill and use brakes as a reserve.When brakes are applied, do not keep them on continuously, applyand release alternately.• After driving through water, driving in heavy rain or washing thecar, the braking effect can be retarded slightly: The linings mustbe dried out first by applying the brakes.• Brake lining wear depends to a large extent on the operatingconditions and style of driving. On vehicles which are used .mainly in town traffic under stop/start conditions or are drivenhard it may be necessary to have the thickness of the brake liningschecked in a V. A.G workshop in between the normal visits tothe workshop.• The movement of the pedals, particularly the brake pedal,must not be restricted in any way.If trouble occurs in the brake system, the full range of pedalmovement may be required. For this reason, floor mats etc.should not be placed in the footwell if they are likely to interferewith pedal travel.Do not put articles in the footwell which could roll or slide underthe pedals when the brakes are applied.• If the pedal travel increases suddenly, it may be that one of thetwo brake circuits has failed. On vehicles which are fitted with abrake warning lamp, the failure of a brake circuit will also beshown by the lighting up of the warning lamp when brakes areapplied. You can still drive on to get to the next V.A.G workshopbut be prepared to use more pressure on the pedal and allow forlonger braking distances on the way.On vehicles with a brake warning lamp (see also page 23), thefailure of a brake circuit is also shown by the lighting up of thelamp.38www.WestfaliaT3.info - a useful website for owners and enthusiasts of <strong>VW</strong> Westfalia T25 / T3 / Vanagon Campervans
Driving tipsDriving economically_- e technical conditions for low fuel consumption and economy are: _ : into your vehicle at the factory. It is now up to you to maintain"~e-=e properties:• Have your vehicle serviced in a V.A.G workshop at the intervalslaid down in the Service Schedule. You will then obtain optimaleconomy plus constant reliability and long service life.• Check the tyre pressures at regular intervals. Low tyre pressuresare not only detrimental to handling, the higher rolling resistanceincreases the fuel consumption.• Do not drive about unnecessarily with a roof rack or ski bracketson the vehicle. Particularly at high speeds the increased air resistancemakes itself felt.• Do not carry a lot of unnecessary ballast about in the luggagecompartment. Particularly in town traffic when vehicle is beingfrequently accelerated the vehicle weight has a considerable influenceon fuel consumption.Economy depends also on the personal style of driving:If you wish to drive economically, that is to keep fuel consumptionand brake lining and tyre wear to a minimum, avoid high speeds andfull throttle acceleration and drive smoothly and carefully.The individual conditions in which the vehicle is used also have aninfluence on fuel consumption and the driver can do little to alterthese factors. The fol lowing factors for instance are not favourable tofuel consumption:• Traffic density, particularly large towns where there are numeroustraffic lights.• Stop-start driving, such as driving from house to house so thatthe engine is never properly warm.• Condition of road surface, particularly loose sand and snow.• Driving in columns of vehicles in low gear so that the enginespeed is relatively high (in relation to the distance covered).Good consumption figures can be obtained when driving for longdistances at medium speeds and medium engine speeds with fewstops.Engine oil consumption is also largely dependent on the way youdrive, i. e. on engine load and engine speed. Depending on the wayyou drive, oil consumption can be up to 4 pints per 1000 miles(1.41/1000 km).It is well know that a new engine does not give its most favourable oilconsumption until after a certain period of operation. Because ofthis, oil consumption cannot be judged accurately until after about3000 miles (5000 km). Up to then the consumption may be somewhathigher than indicated in the previous paragraph.The fuel consumption and engine performance can also not be correctlyassessed until this distance has been covered.39www.WestfaliaT3.info - a useful website for owners and enthusiasts of <strong>VW</strong> Westfalia T25 / T3 / Vanagon Campervans
Driving tipsWinter drivingThe vehicle will always be ready for use in snow and ice if a few simplemeasures are taken to "winterproof" it before.the cold weatherstarts.Air cleaner / intake air preheatingThe intake air preheating is controlled automatically and no "wintermeasures" are necessary on the air cleaner.FuelAt ambient temperatures between 0° C and 15° C, carburetor icingcan occur when the air humidity is high even though the intake airpreheating system is working properly. The result is that the enginetends to stall at idling speed during the warming-up phase.Even the anti-icing additives contained in some fuels in the cold seasoncannot entirely prevent carburetor icing.When a properly tuned engine stalls repeatedly in the conditions describedabove it is advisable to mix <strong>Volkswagen</strong> Audi Petrol Additivewith the fuel. This additive is obtainable from V.A.G workshopsin Germany and in many export countries under the Part No. AOS150 000 03.Winter tyresonly have advantages when road conditions are really wintry. Vehiclesfitted with radial ply tyres can often manage without winter tyresif conditions are not too severe.If vehicles fitted with radial ply tyres at the factory are equipped withwinter tyres only radial ply winter tyres should be used.When fitting normal winter tyres (cross ply), note the PR figures onthe tyre walls. The specified carcass strength (PR number) must beadhered to.Winter tyres must always be fitted on all four wheels.Due to the specific characteristics of winter tyres, it is necessary toinflate them to 0.2 bar (3 psi) above the pressure for normal tyres.Winter tyres are no longer fully effective when the tread has worndown to a depth of 4 mm.Snow chainsThin chains which do not stand clear of the tread more than 15 mm,including tensioner, can be used on the driving wheels. (Rearwheels)When driving over long streches of road which are free of snow, thechains should be removed. On dry roads the chains wear veryquickly and can damage the tyres as well.www.WestfaliaT3.info - a useful website for owners and enthusiasts of <strong>VW</strong> Westfalia T25 / T3 / Vanagon Campervans
Driving tipsEngine oiltends to thicken at low temperatures and may cause starting difficulties.As soon as winter temperatures are expected, change over ingood time to a thinner grade of oil. If you use multigrade oil youshould not need to change to a different grade.The various viscosity grades are described under "Lubricants".Hypoid gear oil (Manual gearbox)The SAE 80 or SAE 80 W-90 hypoid gear oil to Mil-L-2105 API/GL 4specifications is used all the year round.Lubrication of the automatic gearbox is described in the sectionAutomatic gearbox", paragraph "Lubrication".BatteryA really cold battery has only a fraction of its normal capacity, particularlyif it is not fully charged to start with. In order to ensure that theengine starts readily in all conditions have battery checked at aV.A.G workshop frequently and charged if necessary.The spark plugsshould not have excessively large gaps, particularly in the winter.The correct gap is 0.6-0.7 mm.HandbrakeIf there is a danger of frost, do not apply the handbrake but engage1st (automatic gearbox: range "P") or reverse gear instead. Brakelinings which have become wet due to splashing or condensationcan freeze on to the drums in the winter when the handbrake is lefton. When parking on steep hills, turn the front wheels in towards thekerb as well.The windscreen and headlight washercan be frostproofed and kept working by the addition to the water of alarge dose of window cleaner solution with an anti-freeze agent.Door lockscan freeze up if water gets into the cylinder when the vehicle iswashed, for instance, so do not aim the water jet directly at the locks.It is a good idea to cover up the keyholes beforehand. A frozen doorlock can be thawed out easily, even when it is very cold, with the helpof a lock defreezing agent.Frozen windowscan be cleared with defroster spray. After the spray has worked for ashort period, the ice can be wiped off.It is a good idea to carry a shovel or a short-handled spade in the cardu ring the winter so that you can clear away snow if you get stuck. Asmall hand-brush for sweeping snow off the vehicle and a plasticscraper for the windscreen are also useful.41www.WestfaliaT3.info - a useful website for owners and enthusiasts of <strong>VW</strong> Westfalia T25 / T3 / Vanagon Campervans
Driving tipsTrailer towing*If you are going to tow a trailer with your vehicle, it must be speciallyequipped for this purpose.When a new vehicle is ordered with a towing bracket, the followingis taken into account:• The towing bracket and the electrical connections for the trailerare installed correctly.• In Germany the vehicle documents are endorsed.When a towing bracket is service installed, the following should benoted:• The towing bracket is a safety part. Only a bracket which hasbeen developed foryour vehicle is to be used and it must be fittedin accordance with our instructions. Details are usually given inthe fitting instructions supplied with the bracket.• A special warning lamp must be fitted within the driver's range ofvision to show that the trailer turn signals are working.The service installation should preferably be carried out by a V.A.GDealer.Please note the following points:• One pin in the 7 pin trailer socket on the vehicle is usually left free(terminal 54 g). This can be used to connect additional electricalcomponents in the trailer to the vehicles electrical system.• If traffic conditions behind the trailer cannot be seen properly withthe normal mirrors, outside mirrors mounted on folding extendablearms should be fitted.• Ensure that the tyres have good treads and that the inflationpressures are correct. If the vehicle is fitted with winter tyres,trailers with brakes should also be equipped with winter tyres.• The fitting of a towing bracket increases the weight slightly so thatthe payload must be reduced correspondingly.I42 * <strong>Instruction</strong>s tor towtng with vehicles which have an automatic gearbox are given in section "Automatic gearbox"www.WestfaliaT3.info - a useful website for owners and enthusiasts of <strong>VW</strong> Westfalia T25 / T3 / Vanagon Campervans
Driving tips"owing a trailer places a considerable strain on the body,ansmission, clutch and brakes of the towing vehicle." order to avoid damage to the towing vehicle, please note the fol-• :wing instructions and driving rules.• Do not exceed the maximum trailer weight specified for the vehicle(see Technical Data).• The weight of the trailer draw bar on the ball of the towing barmust not exceed 50 kg (110 lbs). The permissible rear axle loadmust not be exceeded.The minimum nose weight must not be less than 4 % of the actualtrailer weight but it need not be more than 25 kg.• Use the clutch carefully when towing. Do not accelerate morethan necessary when moving off and never slip the clutch longerthan necessary.• Always drive at a moderate speed. In many countries there arespeed restrictions for vehicles towing trailers.• Use brakes in good time and as gently as possible. Practise brakingproperly with a trailer with over-run brakes: Apply brakesgently at first then increase pressure quickly. In this way you canavoid the jerking which is caused by locked trailer wheels.• Change down in good time before going downhill.• Trailer towing always puts the fuel consumption up. This is due tothe extra weight and the higher rolling and air resistance.The following points should be noted when towing a trailer in mountainousregions:• The trailer weights given in the "Technical Data" section in conjunctionwith the 16% gradient are only applicable up to an altitudeof 1000 m above sea level.When driving above 1000 m, the engine output and thus theclimbing ability decreases due to the lower air density. The maximumcombined weight (vehicle and trailer loaded to permissibletotal weight) given for altitudes up to 1000 m must therefore bereduces by 10 % for each further 1000 m if the gradients mentionedabove are to be climbed.If the combined vehicle and trailer weight is below the permissiblemaximum a correspondingly steeper gradient can beclimbed.43www.WestfaliaT3.info - a useful website for owners and enthusiasts of <strong>VW</strong> Westfalia T25 / T3 / Vanagon Campervans
Operating instructionsThe condition of a car is closelybound up with road safety.So before driving off check the following:the fuel levelthe lights and turn signalsthe brakesthe windscreen washerand at regular intervalsthe engine oil levelthe brake fluid levelthe tyre pressuresYou will have less to worry about whiledriving!Type of fuelThe 37 and 51 kW engines: Regular petrol;RON* not lower than 91.If regular petrol with adequate anti-knockproperties is not available, use premium petrolor an appropriate mixture.Additivesshould not normally be put in the petrol.Only if the engine tends to stall repeatedlywhen warming up in the cold season due tocarburetor icing, do we recommend that<strong>Volkswagen</strong> AUDI Petrol Additive is mixedwith the petrol.Further details are given in the section on"Driving in winter", page 40." RON - indicates anti-knock properties of the petrol.44www.WestfaliaT3.info - a useful website for owners and enthusiasts of <strong>VW</strong> Westfalia T25 / T3 / Vanagon Campervans
Operating instructionsFilling tankThe filler neck is at the front on the right handside of the vehicle.Vehicles with a lockable tank cap have aspecial key.Trouble-free refueling calls for correct use offiller pistol.• Insert nozzle fully into tank neck and donot tilt it.• Do not try to fill tank too quickly, otherwisethe fuel will foam and this may causepistol to switch off too soon.The fuel tank capacity is approx. 60 litres, ofwhich approx. 10 litres are reserve."Fuel gauge", see section "Operation".[B5-391•"•5www.WestfaliaT3.info - a useful website for owners and enthusiasts of <strong>VW</strong> Westfalia T25 / T3 / Vanagon Campervans
Operating instructions«IBwww.WestfaliaT3.info - a useful website for owners and enthusiasts of <strong>VW</strong> Westfalia T25 / T3 / Vanagon Campervans
Operating instructionsEngine oil levelThe engine oil level should always be betweenthe two marks - max/min - on the dipstickand must never be below the min mark.Checking oil levelThe dipstick and filler pipe can be reachedthrough a flap behind the rear number plate.The vehicle must be on a level surface whenthe oil level is checked. Do not check the oilimmediately after stopping the engine, as theoil in circulation takes a few minutes to draindown into the sump.Pull the dipstick out and wipe it with a cleancloth. Push the dipstick in fully, pull it outagain and check the level.The difference in quantity between the min.and max. marks is:37 kW engine - 1.0 I (1.75 pints)51 kW engine-0.6 I (1.0 pint)If the level is down to the MIN mark, it is notnecessary to top up right up to the MAX mark.Add sufficient oil to ensure that the vehiclewill run to the next oil level check without thelevel falling below the min. mark.Permissible oil consumption, see "TechnicalData".Topping upUnscrew the cap from the oil filler and pull extensionpipe out fully.Add oil.Check the level with the dipstick - the oilshould not be above the max. mark.Push extension pipe in again and screw thecap back on tightly.Notes on the use of oils of different types andviscosity grades are given under "Lubricants".When engine is working hard, the oil levelshould be kept near to the max. mark.www.WestfaliaT3.info - a useful website for owners and enthusiasts of <strong>VW</strong> Westfalia T25 / T3 / Vanagon Campervans
Operating instructionsB25-!34flWindscreen washer containerThe filler opening of the container is underthe carpet on left hand side of front footwell.The container holds about 3.5 litres. On vehicleswith a headlight washer the capacity is6.5 litres.To fill containerLift carpet, open flap and unscrew cap. Fillcontainer to top with water and screw cap onagain. Switch ignition on and check thatwasher is working.We recommend that you always add a windowcleaner fluid to the water since water onits own is not usually sufficient to get thewindscreen and headlight lenses really cleanin a short time.See "Winter driving", page 41.48www.WestfaliaT3.info - a useful website for owners and enthusiasts of <strong>VW</strong> Westfalia T25 / T3 / Vanagon Campervans
Operating instructionswww.WestfaliaT3.info - a useful website for owners and enthusiasts of <strong>VW</strong> Westfalia T25 / T3 / Vanagon Campervans
Brake fluidBrake fluid is hygroscopic. As too high awater content in the brake fluid becomes detrimentalto the entire system after a period oftime, the brake fluid must be renewed everytwo years. The brake system must be bledafterwards.Use only fresh (unused <strong>Volkswagen</strong>/Audibrake fluid which complies with US FMVSS116 DOT 3 specifications to fill the system.This brake fluid is available in all V.A.G workshops.Caution:Brake fluid will damage paintwork and theplastic material of which the dash is made.Take great care not to spill any fluid whentopping up the reservoir. Cover area roundreservoir if necessary.Vehicles with brake servoThe servo is operated by vacuum which isonly available when engine is running.When vehicle is rolling or being towed withthe engine not running, the brake pedal mustbe pressed harder.Brake fluid reservoirThe brake fluid reservoir has two chambers,one for each of the brake circuits.The screw cap for the common filler openinghas a vent hole. This hole must always bekept clear.The reservoir is made of transparent materialso that the level of the brake fluid can bechecked easily. The level should always bebetween the maximum and minimum marks.The level of the fluid tends to sink slightlywhen the vehicle is used due to the automaticadjustment of lining wear which takes place.This is quite normal.However, if the level sinks noticeably in ashort time this indicates that fluid is being lostsomewhere in the system due to leakage.You should then take the vehicle to a V.A.Gworkshop at once and have the brake systemchecked.The fluid reservoir is in the dash under thedash cover panel. The panel can be lifted tofill the reservoir. To do this grip in the recessat the back of the cover. When installing insertthe lower front edge first.www.WestfaliaT3.info - a useful website for owners and enthusiasts of <strong>VW</strong> Westfalia T25 / T3 / Vanagon Campervans
Operating instructionsWheelsWheels and tyres are important design features.The wheels and tyres approved by usare specially matched to the model concernedand contribute largely to the excellentroadholding and safe driving characteristics.Before fitting any non-standard wheels ortyres to your car, have a word with yourV.A.G dealer.Using types of wheel and/or tyre whichhave not been approved by us can affectthe vehicle under the Construction andUse regulations.See "Wheel changing".Here are a few general notes on tyresNew tyres• New tyres can be "run in". (See section"Safe driving")Tyre pressuresThe tyres must always be inflated to the correctpressures. Low pressures are detrimentalto handling and increase fuel consumption.• The tyre pressures are given under"Technical data" page 89.The inflation pressures are also given ona sticker on the end of the dash on thedriver's side.• The pressures are for cold tyres. Thepressures must not be reduced if tyresare checked when hot and pressure ishigher than specified.Tyre care• Check tyres occasionally for damage andremove foreign bodies.• Keep petrol and oil off the tyres.• Try to avoid exposing the tyres to strongsunlight for weeks on end.• Replace missing valve caps as soon aspossible.Tubeless tyres• All factory fitted tyres are tubeless.• Tubeless tyres must only be fitted tosafety (hump) rims.• Tubes should only be used in tubelesstyres in emergencies. When this is done,ensure that air trapped between tube andtyre can escape at the valve.51www.WestfaliaT3.info - a useful website for owners and enthusiasts of <strong>VW</strong> Westfalia T25 / T3 / Vanagon Campervans
Operating instructionsTyre wearTyre life depends considerably on the followingfactors:• Inflation pressuresPressures which are too high or too lowshorten tyre life and also have a detrimentalinfluence on vehicle handling.Low pressure can also cause a tyre to failsuddenly. At high speeds such tyres flexmuch more and this in turn creates excessiveheat. This can cause tread separationand tyre blow-out. The pressuresshould therefore be checked at regularintervals, preferably when filling the fueltank, and rectified as necessary.• Style of drivingFast cornering, violent acceleration andhard braking all increase tyre wear.• Season of year and weatherThe tyre treads wear more at high ambienttemperatures on dry roads than atlower temperatures on wet roads. Therubber is less resistant to friction whenwarm than, when cold.• Wheel alignment errorsIncorrect adjustment of wheel alignmentcauses increased, usually one-sidedwear and also detracts from vehiclessafety.Wear indicators.At the bottom of the tread grooves of the originaltyres on your vehicle there are a numberof 12 mm wide and 1.6 mm high bars runningacross the tyre.When these bars appear in two or more adjacentgrooves so that there is no longer anytread at these points the tyres concernedshould be replaced as soon as possible.When the tread has worn down to a depth of1 mm* measured at any point on the tread,the tyre has reached the limit for safe usage.We advise you however not to let the tyreswear down to this extent as tyres with treadsin this condition cannot grip the road surfaceproperly when driving at high speeds on wetroads.* In other countries this figure may differ.52www.WestfaliaT3.info - a useful website for owners and enthusiasts of <strong>VW</strong> Westfalia T25 / T3 / Vanagon Campervans
Operating instructionsChanging wheels roundIn order to avoid having to replace tyres earlierthan necessary in case of uneven tyrewear it is advisable to change the tyres roundas shown below - without altering the directionof rotation.Replacing tyres• For safety reasons it is advisable to renewtyres on all four wheels at the sametime or to renew them at least in pairs onthe axles.• Vehicles which are fitted in productionwith radial ply tyres must be fitted with thesame type of tyre when replacements aremade.• Only tyres of the same type and tread patternmay be combined.• A combination of radial ply and normaltyres (cross ply) is not permitted.• For safety reasons a new valve shouldalways be fitted when a new tubeless tyreis being installed.Wheel balancing• The front wheels are balanced on newvehicles. As the wheels can get out ofbalance due to various influences whenthe vehicle is in use, the front wheelsshould be balanced again when steeringvibration is felt.• The wheels should also be balanced a-gain when a tyre has been repaired. Thisalso applies to balanced wheels when atyre has lost all its pressure due to a faultyvalve.Winter tyres see "Winter driving".53www.WestfaliaT3.info - a useful website for owners and enthusiasts of <strong>VW</strong> Westfalia T25 / T3 / Vanagon Campervans
Care and maintenanceCar care can be done by every car owner. All that is required is interestand pride in one's own car, a supply of suitable car care materialsand a quick glance at our instructions which must be followedexactly.Maintenance is more than car care. It requires specialist knowledge,workshop appliances and special tools. Even oil changingand lubricating require specialist knowledge and cannot be doneproperly without the equipment available in a lubricating plant*. Thiswork must be done in accordance with our instructions.Present day safety regulations and environmental protection placevery strict limits on the amount of repairs and adjustments whicheven a technically skilled and experienced handyman can undertakeon the engine and running gear.Tinkering with the vital parts of a motor vehicle can endanger the lifeand health of all roads users. Alteration of the factory settings of carburetor,ignition or valves invariably changes the emission valuesand increases fuel consumption and such alterations are forbiddenin most countries today.If you have your vehicle serviced at a V.A.G dealership you can restassured that everything possible will be done to maintain the roadworthiness,economy and reliability of the vehicle.The Service Schedule issued with your vehicle tells you in detailwhat has to be checked and when and what advantages this bringsyou.* In most countries there are environmental protection laws governing the disposal of old oli.www.WestfaliaT3.info - a useful website for owners and enthusiasts of <strong>VW</strong> Westfalia T25 / T3 / Vanagon Campervans
Care and maintenanceCare of carRegular and careful care helps to maintainthe value of the vehicle. Every V.A.Gworkshop carries stocks of suitable car carematerials. The instructions for use on thecontainer should be followed.WashingThe best protection against environmentalnfluences is frequent washing and waxing.The longer salt, road dust, industrial grime,insects and bird droppings etc. are left on thepaintwork, the more damage they are liableto do to the finish.All inside folds, flanges and joints on doorsand flaps are particularly endangered bysalt.These areas must therefore be carefullycleaned with a sponge and the rinsed andleathered off every time the vehicle iswashed - even when it has been through anautomatic washing plant.If the vehicle is washed by hand it should bewashed from top to bottom with plenty ofclear water and using a sponge or a softbrush. Do not wash car in direct sunshine.Rinse out the sponge thoroughly at frequentintervals in order to avoid scratching thepaint.If clear water does not suffice to remove dirt,add a shampoo to the water. After washingrinse thoroughly with water and dry with aleather. Pay particular attention to folds,flanges and joints on doors and flaps.WaxingWax as often as possible. This will preventdirt from sticking to the paint and industrialgrime from penetrating into the paint.Either apply wax to the vehicle after washingand then polish it or simply add a wash waxsolution regularly to the second lot of washingwater. Rinse the vehicle with this solutionand dry with a leather. Pay particular attentionto folds, flanges and joints on doors andflaps.PolishingShould only be done if paint has lost its shineand gloss cannot be brought back with wax.If the polish used does not contain preservativecompounds, the paint must be waxed afterwards.Matt painted surfaces should not betreated with wax or polish because thiswill spoil the matt finish. This also appliesto trim strips of plastic with a matt finish.Touching up paint damageSmall marks in the paint such as scratches orstone damage should be touched up immediatelywith paint. (<strong>Volkswagen</strong> touchupbrushes or spray-cans) before the metalstarts to rust.However, should rust be found at any time itmust be removed thoroughly and then thearea treated first with an anti-corrosionprimer (brush or spray-can) and then the correctpaint applied.A sticker under the driver's seat on the rightside of seat box gives the paint designationand the number of the original vehicle finish.Removing industrial grimeTreat the paint surface with an industrialgrime remover as soon as possible. Do notuse in sunlight or on warm surfaces. Do notapply directly to black plastic parts. The solutionshould be allowed to work for a few minutesand then rinsed off very thoroughly.Pay particular attention to all seams andjoints.Removing tar spotsTreat the paint surface with a tar remover assoon as possible. After treatment rinse awayall traces of the tar remover with a detergentsolution (water and shampoo).55www.WestfaliaT3.info - a useful website for owners and enthusiasts of <strong>VW</strong> Westfalia T25 / T3 / Vanagon Campervans
Care and maintenanceRemoving insectsDried-on-insects should be removed assoon as possible with insect remover. Washthe paint surface afterwards. Clean dirtywindscreens with an insect sponge.Care of chromed partsBefore applying any chrome cleaner, washthe chrome plated parts thoroughly and drythem. Remove spots and marks with a suitablechrome polish. These materials usuallycontain a preservative which protects theparts from the weather.A chrome protective compound can besprayed to give long-term protection.Car of plastic partsPlastic parts and adhesive strips which areexposed to the weather should be cleaned asexplained in the section "Washing".If normal washing is not sufficient, theseparts may only be cleaned with special plasticcleaners. The cleaner manufacturers instructionsfor use should be followed closely.No other cleaning compounds or paint polishshould be used because these may attackthe plastic parts and strips.Cleaning and anti-corrosiontreatment of engine compartmentThe. engine compartment and the outsidesurface of the power unit are given anti-corrosiontreatment at the factory. If the enginecompartment is cleaned at any time withgrease removing solutions or if one has theengine washed, the anti-corrosion compoundis nearly always removed as well. It istherefore essential to ask for durable preservationof all surfaces, seams, joints andcomponents in the engine compartment tobe carried out.Good anti-corrosion treatment is very importantparticularly in the winter. If vehicle is frequentlydriven on salted roads, the entire enginecompartment should be thoroughlycleaned at the end of the salting period atleast and then preserved so that the salt cannothave a damaging effect. At the same timethe underside of the vehicle should bewashed as well.Your V.A.G dealer has stocks of the highqualitypreservation compound recommendedby the factory and has the equipmentnecessary to apply it.Cleaning and preservingleatheretteApply plastic cleaner and rub dry with a softcloth.Door, flap and window weatherstripsThe weatherstrips will remain flexible andlast longer if they are rubbed lightly with arubber protective compound from time totime. This will also stop the weatherstripsfrom freezing on in the winter.Cleaning windowsWindows can normally be cleaned with asponge and lukewarm water and then driedwith a leather.Do not use the same leather for the paintworksince traces of paint cleaner and polishcause streaks to appear on the windscreen.Insects can be removed with an insectsponge.Traces of rubber, oil, grease or silicone canbe removed with window cleaner or a siliconeremover, depending on how dirty the glass is.Both solutions can be put into the water in thewindscreen washer. In the winter a windowcleaner with an anti-freeze agent should beused in the water.Windscreen wiper bladesBlades which are clogged with insects or oildeposits should be removed and cleanedwith a hard brush and a detergent solution.New blades should be installed once or twicea year according to condition.56www.WestfaliaT3.info - a useful website for owners and enthusiasts of <strong>VW</strong> Westfalia T25 / T3 / Vanagon Campervans
Care and maintenanceAiring the interiorf the vehicle is left in a closed garage for aong time, the garage and car doors shouldoe opened occasionally to prevent the formationof mould and damp stains.Cleaning cloth upholsteryClean with a vacuum cleaner or a mediumnard brush. Spots or very dirty patches canbe removed with a suitable cleaner.Moisten a clean, non-coloured cloth with thecleaner and rub the spot with a circular motion,working inwards.Cleaning seat beltsInertia reel belts may not retract properly ifvery dirty. Dirty belts can be cleaned bywashing with a mild soap solution withouttaking the belts out of the vehicle. Do nothave the belts cleaned chemically becausethe cleaning compounds damage the webbingmaterial. Ensure that the belts do notcome into contact with corrosive fluids. Inertiareel belts should be completely dry beforethey are allowed to roll up. Check occasionallyto see that the belt locks and the retractors(inertia reel belts) are working properly.Inspect the belt webbing and the fittings fordamage.Seat belts which have been stressed in anaccident and streched must be replaced andthe anchorages should be checked by aworkshop.Cab seatsIf the seats become hard to move, clean therunners with a cloth and grease lightly at topand bottom.Removing seats, see section "Operation",paragraph "Seats".Cavity preservationVarious cavities in the body are also protectedagainst corrosion and this protectioncan be intensified by repetition of the preservation.The best results are obtained when the firstsubsequent treatment is done about oneyear after the vehicle is put on the road.All V.A.G workshops know how and wherethis treatment has to be carried out and havethe factory approved compound and theequipment required.UndercoatingThe underside of the vehicle is coated with aspecial compound to protect it from chemicaland mechanical influences.However, as this protective layer gets damagedwhen the vehicle is in use, the undercoatingshould be examined at certain intervals- preferably before and after the winterseason - and any damage made good.Not all the materials available are suitable forthis purpose so we advise you to have patchingup or additional coating done by a V.A.Gworkshop.Every V.A.G workshop has stocks of the correctcompound, has the necessary equipmentand is familiar with the applicationprocedure. They know, in particular, whatprecautions have to be taken in respect of thebraking system and the exhaust system toensure that additional undercoating is appliedproperly.www.WestfaliaT3.info - a useful website for owners and enthusiasts of <strong>VW</strong> Westfalia T25 / T3 / Vanagon Campervans
Care and maintenanceBatteryThe battery is under the righthand seat. It canbe reached when seat is pushed fully forward.The 2nd battery (optional) is under the lefthandseat.On vehicles with swivelling seat on the rightthe seat must be turned 180° and pushed fullyforward to get at the battery. See page 12.On vehicles with swivelling seat on the leftand a 2nd battery the seat must be removedto get at the battery. The seat frame mustthen be turned 180°. See page 12.As the starting ability of the engine and thefunctioning of the entire electrical systemdepend to a great extent on the condition ofthe battery, it is essential to check and servicethe battery regularly.Checking the acid levelThe acid level should always be between thetwo marks on the side of the battery. If it islow, remove the plugs and add distilled water.Do not fill above the max. mark becausethe acid will overflow when the battery isbeing charged and cause damage.How often the battery has to be checked dependson the operating conditions and thetime of year.If a vehicle is often used for long runs in thedaytime when next to no current is beingused, the battery will need topping up withdistilled water much more often than in thecase of a vehicle operating under differentconditions. As a general rule the battery acidlevel should be checked more often in thesummer than in the winter.When driving in hot countries it is advisableto check the battery at least once a week.If you do not intend to use your vehicle for along period, the battery should be taken outand, if necessary, charged about every 4weeks, otherwise it will discharge itself intime and this can cause permanent damageto the plates.RemovingLoosen terminals. Remove earth strap firstthen the positive cable. Detach battery securingbracket. Pull battery forward a little andlift it out.InstallingWhen installing the battery, first fix the positivecable, then the earth strap. Keep theterminals clean and coat them with terminalgrease after fitting the clamps.Some more points:• Never short the battery terminals as thiscauses the battery to heat up very quicklyand it may burst. Furthermore, the sparkscan ignite the gas generated during thecharging process. Never use a nakedflame near the battery.• Battery acid is corrosive and must notget into the eyes or onto skin and clothing.• Never run the engine with the batterydisconnected as this will damage theelectronic components in the electricalsystem.• To avoid short circuits, disconnect thebattery earth strap before starting workon the electrical system. When changinga bulb it is sufficient to switch the lamp off.• On the other hand, both terminals mustbe taken off before the battery is given aquick charge while in the vehicle.Starting with a second battery is described inDIY section, page 74.58www.WestfaliaT3.info - a useful website for owners and enthusiasts of <strong>VW</strong> Westfalia T25 / T3 / Vanagon Campervans
Care and maintenanceClimateTropicalTemperate0AO-SinglegradeoilMulti-grade oil8310 inUJ UJmiiUJ UJ<
Care and maintenanceLubricationEngineThe engine oil must be changed at leasttwice each yearEngine oil not only deteriorates when it is inuse, the lubricating properties are also impairedby ageing. The oil should, therefore,be changed every 6 months or not later thanat the mileages specified in the ServiceSchedule.If the vehicle is used in arduous conditionssuch as very dusty areas, the engine oilshould be changed at shorter intervals.Oil changing in winter conditions is describedunder "Winter driving".If you are not sure whether your engine oilshould be changed at shorter intervals or not,ask your V.A.G dealer.Due to the cleansing properties of the HDoils, the fresh oil tends to look dirty after beingin use only a short time. This has nothing todo with its lubricating properties and need notworry you.60www.WestfaliaT3.info - a useful website for owners and enthusiasts of <strong>VW</strong> Westfalia T25 / T3 / Vanagon Campervans
Care and maintenance37 kW engine• The old oil should only be drained whenwarm.• Clean oil strainer at every oil change.Loosen all six cap nuts but only remove five.Detach strainer plate on one side with ascrewdriver and let oil drain out. Removestrainer and clean thoroughly. Use new gasketsand washers when installing.Oil quantity: With filter change 3.0 litreswithout filter change 2.5 litres51 kW engine• The old oil should only be drained whenwarm.• Remove oil drain plug "A".• Remove central bolt "B" and take outstrainer at the intervals specified in theService Schedule.Use new gaskets and washers.Tighten bolt "B" to 13 Nm (9 lb ft) with a torquewrench.Oil quantity: with filter change - 3.5 Iwithout filter change - 3.0 ISee "Lubricants" page 59 for engine oil specifications.Always check level with dipstick after changingoil: The oil must be near the maximummark but not above it on any account. See"Checking oil level".Putting engine oil in - see page 47.B25-048 ,61www.WestfaliaT3.info - a useful website for owners and enthusiasts of <strong>VW</strong> Westfalia T25 / T3 / Vanagon Campervans
Care and maintenanceChanging the oil filterThe filter is changed at the intervalsspecified in the Service Schedule.Loosen and tighten the filter by hand or withthe special wrench.Oil sealing ring on new filter element beforeinstalling it.Only the filter Part No. 070 115 561 is to beused for the 37 kW engine.37 kVV engineAdditional points to be lubricatedThe sliding door link and the rear flap hingesshould be oiled at the mileages specified inthe Service Schedule or at least once a year,prior to the winter. The double cab doorhinges and other flap hinges should be oiledat shorter intervals depending on conditionsof use.Lubricant: SAE 30 engine oil.Catch surplus oil drops and wipe off carefully.The battery terminals and posts are coatedwith terminal grease.The lock cylinders in the doors should belubricated as required with graphite. The keycan be dipped in graphite and then turned toand fro in the lock a few times.Gearbox oilThe gearbox oil is not changed.51 kW enginewww.WestfaliaT3.info - a useful website for owners and enthusiasts of <strong>VW</strong> Westfalia T25 / T3 / Vanagon Campervans
Care and maintenanceAir cleanerThe element should normally be renewed asdetailed in the Service Schedule.In very dusty conditions the element must becleaned (by beating out carefully with thedirty side downwards) or renewed at shorterintervals.Cleaner housing must be wiped clean eachtime. Cover air intake opening so that dirtdoes not fall into engine.Ensure that element is installed properly.Do not clean element in petrol or moistenwith oil.37 kW engineCleaning or renewing the element• Pull vacuum hose A off at cleaner.• Release clip B.• Lift cleaner and detach it from the mountings.• Release 4 clips and take housing apart.• Take element out and clean or replace.Insert paper element again carefully and ensurethat seal is located properly.When installing cleaner, insert housing in therubber grommets on mounting.Close clip and connect vacuum hose.www.WestfaliaT3.info - a useful website for owners and enthusiasts of <strong>VW</strong> Westfalia T25 / T3 / Vanagon Campervans
Care and maintenance51 kW engineCleaning or renewing the element• Open clips A.• Detach all hose connections on top partof cleaner.• Remove screws B on both carburetors,pull side parts of cleaner off carburetorconnections and take cleaner top part off.• Take element out of bottom part andclean or renew it.When installing, ensure that the seals are locatedproperly on both carburetors. Connectall hoses again.In order to ensure satisfactory operation ofthe temperature and load sensitive intake airpreheating it is essential that the two vacuumhoses at front of cleaner are connected correctly.64www.WestfaliaT3.info - a useful website for owners and enthusiasts of <strong>VW</strong> Westfalia T25 / T3 / Vanagon Campervans
Care and maintenanceLifting vehicleWith a vehicle liftBefore driving over a vehicle lift ensurethat there is sufficient clearance betweenlift and vehicle.The vehicle may only be lifted at the pointsshown here.FrontAt the front jacking point (see Fig.)With a trolley jackThe vehicle should also only be lifted with atrolley jack at the points shown here.On no account should the vehicle be liftedunder the engine gearbox or the front axleas this can cause serious damage.With vehicle jackUsing the jack is described in the D-l-Y section,under "Wheel changing".RearAt rear cross member (see Fig.www.WestfaliaT3.info - a useful website for owners and enthusiasts of <strong>VW</strong> Westfalia T25 / T3 / Vanagon Campervans
Do-it-yourselfChanging wheelsThe spare wheelis located under the body on a hinged pan.To take wheel out remove bolt with wheel nutspanner.Caution: Keep clear as the pan falls down.Danger of injury. Then pull wheel forward offthe pan.To stow spare wheel, place it on the pan withoffset downwards and swing pan up untilhook engages. Then insert bolt and tighten it.For safety reasons the pan must alwaysbe bolted in position so that it cannot releaseaccidentally.Jack and toolsare under the drivers seat.www.WestfaliaT3.info - a useful website for owners and enthusiasts of <strong>VW</strong> Westfalia T25 / T3 / Vanagon Campervans
Do-it-yourselfChanging a wheelPreparationApply handbrake, engage a gear and scotcha wheel at front and rear on opposite side tothat on which wheel is to be removed (use awedge or stone), to prevent vehicle from rollingaway.Place spare wheel, jack and tools ready foruse.Remove wheel cap by placing hook in holeson edge of cap and levering on edge of rimwith wheel spanner.Loosen all wheel nuts/bolts one turn withwheel spanner.If you wish to fit non-standard tyres orwheels to your car at any time we adviseyou to see your V.A.G dealer first becausethe use of wheels and/or tyres not approvedby us may affect the registrationof the vehicle under the Construction andUse regulations.67www.WestfaliaT3.info - a useful website for owners and enthusiasts of <strong>VW</strong> Westfalia T25 / T3 / Vanagon Campervans
Do-it-yourselfInsert jack arm into jacking pointnearest to wheel with flat.If the ground is so soft that the jack can sinkinto it, place a large strong support under thebaseplate.Lift the vehicle until the appropriate wheel isoff the ground.Remove wheel nuts/bolts and take wheel off.Fit new wheel and tighten nuts hand tight withwheel spanner.Lower vehicle.Tighten nuts/bolts uniformly and diagonally.The wheel nuts can be tightened adequatelyby any normal healthy adult using the toolsprovided in the proper way. In case of doubthave the tightening torque checked with atorque wrench at the first opportunity.Tightening torque: 170 Nm (122 ft. lbs).Install wheel cap.Stow jack, wheel and tools away again.The jack is only designed to lift the vehiclefor wheel changing. When workingunder the vehicle, ensure that it is supportedon blocks or trestles.Check inflation pressure of wheel fitted at thenext opportunity and rectify if necessary.Have the damaged tyre repaired as soon aspossible.www.WestfaliaT3.info - a useful website for owners and enthusiasts of <strong>VW</strong> Westfalia T25 / T3 / Vanagon Campervans
Do-it-yourselfFusesTo prevent damage to the electrical systemdue to short-circuiting or overloading, eachindividual current circuit is provided with afuse.The fuses are housed in a box with a plasticlid on the left under the dash*.Changing a fuse• Switch component concerned off.• Remove the lid of the fuse box.• Take defective fuse out of the clips carefully.• Insert new fuse of same capacity so thatthe metal strip is visible, but do not gripthe metal strip or bend the retaining clips.The fuse must fit tightly between the clips.Fuse layoutAs numbered on the plastic lid:No. Component Ampere1 Tail light left, parking light left 82 Tail light right, parkinglight right, number plate light,rear fog light 83 Low beam left 84 Low beam right 85 High beam left,high beam warning lamp 86 High beam right 87 Vacant 88 Interior light, socket/cigarette lighter,brake light 89 Emergency light system 1610 Windscreen wiper/washersystem, heated rear window 1611 Turn signals 812 Horn, reversing lights 8Additional fuses in separate holders on rightnear fuse box.Fresh air blowerFog lightsFuses for auxiliary heatersee page 34.1616Note:• A blown fuse can be recognized by thebreak in the metal strip.• If the newly inserted fuse blows again aftera short time, the electrical systemmust be checked by a V.A.G workshop tofind the cause of the short circuit andrectify it.• On no account should fuses be patchedup because this can cause serious damageelsewhere in the electrical system.• Always carry a few spare fuses on thevehicle.RelaysRelays for various electrical components arelocated above the fuse box.Checking and replacing relays should bedone by a V.A.G workshop.* On RHD vehicles the glove box must first be tipped forward or removed.69www.WestfaliaT3.info - a useful website for owners and enthusiasts of <strong>VW</strong> Westfalia T25 / T3 / Vanagon Campervans
Do-it-yourselfChanging bulbsBefore fitting a new bulb, switch off thelamp concerned. Do not touch the glasspart of the new bulb with the bare fingers becausethe finger marks left on the glassevaporate when the bulb gets hot, the vapoursettles on the reflector and dims it.A bulb must only be replaced by a bulb of thesame type. The designation is marked on thebase of the bulb. It is advisable to alwayscarry a small box of spare bulbs on the vehicle.These can be obtained from any V.A.GDealer.Screw A = Lateral aimScrew B = Vertical aimScrews C = Secure headlightCorrect headlight adjustment isvery important for vehicle safety.The adjustment should thereforeonly be done with a special appliance.HeadlightTo change a headlight bulb the headlightmust be taken out.:Remove air intake grille.Turn 5 quick-release clips 90° with a screwdriver.Pull grille forward slightly at the top and lift itout.Remove 3 screws -C- and take headlight out.Do not turn adjusting screws A and B.www.WestfaliaT3.info - a useful website for owners and enthusiasts of <strong>VW</strong> Westfalia T25 / T3 / Vanagon Campervans
Do-it-yourselfHeadlights (Normal) A - upper Fig.The bulb is held in the reflector by a retainingring.• Pull connector and cap 1 off headlight.• Turn ring 2 to the left to take it off.• Take bulb 3 out of reflector.• Place new bulb in reflector so that thelocating lug on the bulb plate engages therecess at the bottom of the reflector.The centre terminal of the three on thebulb is then at the top.• Install ring, press it against reflector andturn it to the right.• Press cap on carefully so that it contactsthe reflector properly and attach connector.• Have headlight alignment checked.Headlights (Halogen H 4) B - lowerFig-• Pull connector and cap 1 off.• Squeeze retaining clip 4 together andhinge away.• Replace bulb 5. Install new bulb so thatthe centre tab is upwards.• Hinge clip over bulb base, squeeze it togetherand engage in retaining lugs.• Install cap and connector.• Have headlight alignment checked.Side light(Normal and Halogen H4 headlights.)• Turn bulb holder 6 slightly to the left andpull it out of the reflector.• Turn bulb to left slightly and take it out.• Press new bulb into holder and turn it tothe right.• Press holder into reflector and turn to theright.5 4 671www.WestfaliaT3.info - a useful website for owners and enthusiasts of <strong>VW</strong> Westfalia T25 / T3 / Vanagon Campervans
Do-it-yourselfRear lightsRemove screws and take out lens and insert.Press the two side lugs together in directionof arrow and take out insert with bulbs.Press bulb in lightly and turn it to the left to replaceit.Front turn signals• Remove screws.• Take lamp off.• Pull rubber cap off.• Press tab inwards and take insert out ofhousing.• Turn bulb to the left and renew it.Interior lightThe light is held in position by a lug at theswitch end and a spring at the opposite end.• Press spring carefully in towards the lightwith a screwdriver and lift light out.• Take bulb out of contacts• Insert new bulb.Insert housing at switch end first thenpress other end in until spring engages.www.WestfaliaT3.info - a useful website for owners and enthusiasts of <strong>VW</strong> Westfalia T25 / T3 / Vanagon Campervans
Do-it-yourselfNumber plate lightThe number plate lights are pushed into thecross panel from the rear. To replace a bulb,pull complete housing out, take tens off,press bulb into holder, turn it to left and take itout. Insert new bulb and attach lens. Wheninstalling housing, ensure that it engagesthe metal tab at the top and fits in the openingin the cross panel at the front.Masking headlights when goingabroadWhen the vehicle is used in a country whichdrives on the opposite side of the road to thehome country, the asymmetric headlights willdazzle oncoming traffic.To prevent this, the wedge-shaped sector onthe headlight lens must be covered up withan opaque adhesive strip. The illustrationshows the strip installed for the change fromrighthand to lefthand traffic.73www.WestfaliaT3.info - a useful website for owners and enthusiasts of <strong>VW</strong> Westfalia T25 / T3 / Vanagon Campervans
Do-it-yourselfA - Flat batteryB - Boosting batteryThe battery is under the righthand seat in thecab.(see "Battery" page 56).Emergency startingIf the engine will be not start because the batteryhas insufficient power in the winter or isflat because the vehicle has not been usedfor some time, jumper cables can be connectedto the battery of another vehicle tostart the engine. The following points shouldbe noted:• Both batteries must be 12 Volt types. Thecapacity (Ah) at the boosting battery mustnot be a lot lower than that of the flat one.• The jumper cables must be heavyenough to carry the load. Note cablemanufacturer's data.• A flat battery can freeze at -10° C and if abattery is frozen it must be thawed out beforeconnecting a jumper cable.• There must be no contact between thevehicles as otherwise current can flow assoon as the plus terminals are connected.• The flat battery must be properly connectedto the electrical system.• Remove all cell plugs and lay themloosely on the holes.• The engine of the boosting vehicle mustbe running.• Connect jumper cables as follows:1. One end of (+) cable (usually red) tothe (+) terminal of flat battery.2. Other end of red cable to (+) terminalof boosting battery.3. One end of (-) cable (usually black) to(-) terminal of boosting battery.4. Other end of black cable to (-) terminalof flat battery.Take great care to ensure that the jumpercable clips do not touch one another and thatthe plus cable does not touch current conductingvehicle parts - short circuit danger.• Do not stand with your face over the battery- danger of acid burns.• Start the engine in the normal way.• When engine is running, disconnect cablesin reverse sequence.• Screw cell plugs in again.74www.WestfaliaT3.info - a useful website for owners and enthusiasts of <strong>VW</strong> Westfalia T25 / T3 / Vanagon Campervans
Do-it-yourselfTowingSo that you can assist other vehicles, andalso in case your car ever needs to be towed,towing eyes are provided on the left at thefront and the right at the year. Towropesshould only be attached to these eyes.Avoid excessive towing effort and do not jerk.During towing operations on other than surfacedroads there is always the danger thatthe attachment point on the body will be overloadedand damaged.The driver of the towing vehicle must engagethe clutch very smoothly when moving off orchanging gear. The driver of the vehicle beingtowed must keep the towrope taut.The towrope should be slightly elastic to reducethe risk of damage to both vehicles. It isadvisable to use only ropes of synthetic materialsor with elastic links.If your vehicle has to be towed at any timenote the following points.• Switch the ignition on so that the steeringwheel is free and the turn signals,horn, and, if necessary the windscreenwiper and washer can be used.• As the brake servo only works when theengine is running, more pressure is requiredon the brake pedal when the engineis not running.• If the vehicle has an automatic gearbox,see the instructions in the "Automaticgearbox" section on page 82.Check whether there are any local trafficregulations concerning the towing of vehicles.www.WestfaliaT3.info - a useful website for owners and enthusiasts of <strong>VW</strong> Westfalia T25 / T3 / Vanagon Campervans
Do-it-yourselfService installation of beltsSeat belts can be service installed for allseats in vehicles which are not fitted withbelts in the factory.FrontThe front anchorages are marked with ringsin the illustration. On vehicles with a twoseaterbench the anchorages for the centreplace are on the inside of the seat boxes.RearAnchorages are provided for all seats in thepassenger compartment. Depending onmodel they are either in the seat frames orthe side panels.The holes for the belt bolts are covered by theinterior trim and the holes in the carpet are fittedwith plastic plugs or covered with adhesivetape.These plastic plugs must not be used toattach the belts.Anchorages which are not being used shouldbe fitted with plugs.V.A.G. workshops have all the necessary informationon the fitting of belts.The installation of seat belts should thereforepreferably be done by a V.A.G workshop.www.WestfaliaT3.info - a useful website for owners and enthusiasts of <strong>VW</strong> Westfalia T25 / T3 / Vanagon Campervans
Do-it-yourselfHints on fault findingSome hints on fault finding are given in various parts of this manual.These hints are summarized again here.Fault Possible cause RemedyEngine is hard to start orwill not start at allEngine tends tostall when warming upOil pressure warning lampcomes on or flickers whenengine is runningGenerator warning lamp comeson when engine is runningIncorrect starting procedureBattery flat (starter notturning)Carburetor icingOil pressure too lowV belt slack or brokenIf belt is in order thegenerator may be defectiveUse correct procedure (page 21)• Start with booster battery (page 74)• Have battery charged (page 58)• Push or tow start vehicle(not possible with automatic gearbox)Mix <strong>Volkswagen</strong>-Audi Petrol Additivewith the fuel (page 44)Stop engine immediately and checkoil level. Further notes on page 47Adjust tension or fit new belt.Without belt, drive slowly (max. 50 km/h)to nearest V.A.G Dealer.Further notes on page 22Drive to next V.A.G Dealer. Batterywith discharge continuously.77www.WestfaliaT3.info - a useful website for owners and enthusiasts of <strong>VW</strong> Westfalia T25 / T3 / Vanagon Campervans
Do-it-yourselfFault Possible cause RemedyBrake pedal travel suddenlyincreases considerably.Warning lamp comes onwhile driving.Turn signal warning lamp flashesquickerFailure of a brake circuitOne signal bulb hasfailedDrive carefully to next V.A.G DealerCaution! More pedal pressurewill be required and stoppingdistances will be longer (page 50)Renew bulb (page 72)Electrical component failed Fuse blown Renew fuse (page 69)If lights are involved:Bulb defective Renew bulb (page 70-72)Vehicle pulls to one sideTyre pressures differconsiderablyCheck pressures, inflate ifnecessary (page 89)www.WestfaliaT3.info - a useful website for owners and enthusiasts of <strong>VW</strong> Westfalia T25 / T3 / Vanagon Campervans
Do-it-yourselfThe Automatic Gearboxconsists of an automatic three-speedplanetary gearbox and a hydro-dynamic torqueconverter. In the normal driving range -D - all the forward gears are shifted automaticallyaccording to engine load and vehiclespeed.The selector has 6 positions:P - Parking lockR - ReverseN - NeutralD 12 j Forward ranges|87-099|A safety catch is provided for selector leverpositions P, R and 1.The catch is released by pressing the buttonon the side of the selector lever.DescriptionBasic driving rules• When moving off, always apply footbrakeor handbrake before selecting adriving range.Reason: The torque converter, whichalso serves as a moving off "clutch", alwaystransmits a certain amount of powereven when the engine is only idling. Thismeans that the vehicle tends to moveslowly or "creep" as soon as a drivingrange is selected. The higher the enginespeed is, the stronger is the tendency tocreep.• When selecting a driving range beforemoving off, do not depress the acceleratorpedal. If the lever has beenaccidentally moved into "N" from adriving range when vehicle is moving,release accelerator pedal and let enginespeed drop to idling before movinglever back into a driving range.Reason: When engaged at high enginespeeds, the shift clutches in the gearboxare subjected to an excessive amount ofstrain.When ignition is on the symbol for the selectedgear is illuminated in the lever console. 79www.WestfaliaT3.info - a useful website for owners and enthusiasts of <strong>VW</strong> Westfalia T25 / T3 / Vanagon Campervans
Automatic GearboxSelector lever positions"D" The three forward driving ranges areshifted up and down automatically accordingto the throttle opening (engineload) and the vehicle speed. "D" istherefore the position for normal driving."2" The vehicle moves off in 1st gear andchanges into 2nd gear automatically butdoes not change into 3rd gear. Themaximum speed in "2" is 90 km/h (56mph).When vehicle is in motion, the lever canbe moved from "D" into "2", with acceleratorpedal depressed if necessary.However, as the shift into 2nd geartakes place immediately, this must onlybe done at speeds below 85 km/h (63mph).This is the correct gear for hillystretches."1" The vehicle moves off in 1st gear andremains in this gear. It does not shift into2nd or 3rd gear.This is the gear for steep gradients.This range can also be selected whenvehicle is in motion, but this must notbe done at speeds above 45 km/h (28mph) (Press button on lever). If thisinstruction is not noted, the enginemay be damaged by excessivespeed.The maximum speed in 1 st gear is 50km/h (30 mph)."R" The reverse range must only beselected with the vehicle stationary andthe engine idling. Press button on selectorlever to engage reverse."N" This corresponds to neutral in a normalmanual gearbox. Nothing happens inthe automatic gearbox."P" In "P" the driving wheels are locked =Parking lock. The parking lock mayonly be engaged when vehicle isstanding still. To move the lever into orout of "P", the safety catch must be depressed.Kick down:Pressing the accelerator pedal right downpast the full throttle operates the kickdownswitch. The kickdown switch alters the pointsat which the automatic gearbox works. Thereare two variations:• Maximum acceleration by delaying upshiftuntil engine is at full throttle (forcedthrottle).• Bringing about an immediate downshift atspeeds below 90 km/h (56 mph) for fastovertaking and when on hills, that is tosay, in those situations where a downshiftwould appear necessary with a manualgearbox.If the vehicle is driven with the acceleratorpedal fully depressed in this way and with theselector lever at "D", the gearbox shifts intothe next gear at the following speeds:from 1 to 2 approx 50 km/h (30 mph)from 2 to D approx 90 km/h (56 mph)www.WestfaliaT3.info - a useful website for owners and enthusiasts of <strong>VW</strong> Westfalia T25 / T3 / Vanagon Campervans
Automatic GearboxDriving tipsStartingThe engine can only be started in "N" or "P".(Other points on starting are as given in section"Operation", paragraph "Starting theengine".)Moving offWhen the lever is moved from "P" to "N" withengine running or into a driving range whenmoving off, the brakes must be applied at "P"because the reverse gear is engaged briefly(see "Basic driving rules").StoppingTo stop vehicle temporarily such as at trafficlights, all that is necessary is to apply thebrakes. It is not necessary to move the leverto "N" while stationary. The engine shouldonly run at idling speed and the vehicle isheld with the brakes.ParkingIn general, applying the handbrake will besufficient to prevent the vehicle from rollingaway. This is of course, assuming that thehandbrake is working properly.However, when additional security is calledfor, such as when parking on a gradient, theparking lock should be engaged as well.Basic rules:• Engage the parking lock after applyingthe handbrake.• Release the parking lock before releasingthe handbrake.When it is freezing, it is advisable to use onlythe parking lock to secure the vehicle becausethe brake shoes can freeze on to thedrums if the handbrake is applied.Note:When a vehicle has been parked on a gradient,using only the parking lock, it may befound that a fair amount of force is requiredon the lever to release the parking lock. Thisis caused by the load on the parking lockmechanism and is quite normal.81www.WestfaliaT3.info - a useful website for owners and enthusiasts of <strong>VW</strong> Westfalia T25 / T3 / Vanagon Campervans
Automatic GearboxDriving in mountainsOn hilly stretches and particularly in mountainousareas the driver of a vehicle with automaticgearbox should be prepared to usethe selector lever.On steep roads with lots of sharp corners it is,however, advisable to select driving range"2". This prevents the gearbox from shiftingup and down unnecessarily. On downhillstretches the selection of a lower range iseven more important: Safety can be improvedand the stain on the brakes relievedby the increased engine braking available in2nd gear.On very steep downgrades, select range "1"in good time so that the maximum enginebraking force is available.Emergency startingOn vehicles with an automatic gearbox theengine cannot be started by towing or pushingthe vehicle.If the engine will not start because the batteryis flat, it is possible to start it by connectingjumper cables to the battery of another vehicle.See further detail under "Emergency startingin D-l-Y" section.Towing• Selector lever at "N"• Do not tow faster than 30 mph (50km/h).• Do not tow further than 30 miles (50kilometers).• If the vehicle has to be towed long distancesit must be lifted at the rear or thedrive shafts must be removed.Reason: When the engine is not running,the gearbox oil pump is not working andthe gearbox is not adequately lubricatedfor high speeds or long distances.Trailer towingWhen towing a trailer in flat country, it is onlynecessary to note what has already beensaid about driving a vehicle with automaticgearbox. The general instructions under"Trailer towing" also apply in this case.In the interests of safety, however, and takinginto account the additional load placed on theautomatic gearbox and the brakes whendriving in hilly districts, the following pointsshould be given special attention:On steep hills and in traffic situationswhere it is obvious that only low speedsare possible, it is better to select drivingrange "2". In range "2" the driver cancontrol the vehicle and trailer better.• For long downhill stretches it is essentialto select range "1" in order to get maximumbenefit from engine braking and relievestrain on the brakes. If the gradientis only slight, sufficient braking effort maypossibly be obtained in range "2".82www.WestfaliaT3.info - a useful website for owners and enthusiasts of <strong>VW</strong> Westfalia T25 / T3 / Vanagon Campervans
Automatic GearboxLubricationThe torque converter and the automaticgearbox are both lubricated by a commonsupply of ATF.The final drive housing is filled with hypoidgearbox oil.See "Care and maintenance" section, para."Lubricants" for specifications.Checking ATF levelThe correct ATF level is essential to the servicelife and operation of the gearbox. Thelevel should therefore be checked at frequentintervals, for instance, when the engine oilhas been checked.In the engine compartment is a dipstickwhich is attached to the filler tube cap.Note the following points when checking:• The ATF must be lukewarm. Do notcheck level when oil is hot or cold.• The vehicle must be on a level surface.• The selector lever must be at "N" and thehandbrake applied.• During the check the engine must be runningat idling speed.• Use only clean lint-free rag to wipe thedipstick.The level must be between the two markson the dipstick.If level is too high or too low do not just add ordrain oil. Consult a V.A.G Dealer as soon aspossible so that the cause of the deviatinglevel can be ascertained.Changing the ATFThe ATF is changed regularly at long intervalsas detailed in the Service Schedule. Thisrequires specialist knowledge and shouldpreferably be done by a V.A.G Dealer.Please note that in arduous operating conditions(trailer towing, stop/go and city traffic,continuous mountain driving, high ambienttemperatures) the ATF is changed more frequently.Details of these intervals are also given in theService Schedule.When there is no ATF in the converter andgearbox, the engine must not be startednor should the vehicle be towed.The oil in the final drive does not needchanging.83www.WestfaliaT3.info - a useful website for owners and enthusiasts of <strong>VW</strong> Westfalia T25 / T3 / Vanagon Campervans
Technical DescriptionBodyIntegral body/chassis design • Floor plates reinforced by side and cross members.Front axleIndependent suspension with wishbones/track control arms, coil springs, telescopic dampers • Anti-roll barSteeringRack and pinion steering with relay idler • Safety steering column.Rear axleIndependent suspension with diagonal trailing links, coil springs and telescopic dampers • Double jointed drive shafts.BrakesHydraulic dual circuit system • Discs at front • Self-adjusting drums with retardation-sensitive pressure regulator at rear • Brake servo(51 kW engine) • Handbrake effective on rear wheels.Power transmissionSingle plate dry clutch • Baulk synchronized four-speed gearbox and differential in one housing or hydro-dynamic torque converter and 3-speed automatic gearbox (51 kW engine), flange fitted final drive • Rear wheel drive.84www.WestfaliaT3.info - a useful website for owners and enthusiasts of <strong>VW</strong> Westfalia T25 / T3 / Vanagon Campervans
Technical DescriptionEngineLocated at rear, rear wheel drive37 kW 51 kWType4 cylinder, 4 stroke, horizontally opposedCylindersCast ironCylinder headsLight alloyCrankcaseLight alloyCrankshaft4 bearingsValve gearvia push rod and rocker arms, hydraulic tappetsEngine coolingAir with fanLubricationPressure feed system with gear type pump, oil filter and coolerFuel system 1 down draft carburetor 2 down draft carburetorswith automatic chokewith automatic chokeand accelerator pumpand accelerator pumpAir cleanerDry type with paper elementwww.WestfaliaT3.info - a useful website for owners and enthusiasts of <strong>VW</strong> Westfalia T25 / T3 / Vanagon Campervans
Technical DataNumerous European countries are starting to use the new international units for technical measurements.Examples of these units are as follows:Old unit New unit RemarksOutputbhp kW (Kilowatt) 1 bhp = 0.736 kW;1 kW = 1.36 bhpTorque lb ft Nm (Newtonmeter) 11b ft = 1.36 NmRevolutions rpm 1/min1) new way of writingPressures psibar pressure 1 psi =0.07 kg/cm2 = 0.07 bar') For example 2700/minEngine data 37 kW engine 51 kW engineBore (mm)Stroke (mm)Capacity (cm3)Compression ratioMaximum output in kW (bhp) DIN 70 020Maximum torque in Nm (lb ft) DINFuel rating (RON)*Oil consumption in litre/1000 km85.56915847.437 (50) at 4000 rpm103 (74) at 2400 rpm911.4947119707.451 (70) at 4200 rpm137 (99) at 3000 rpm911.486 * For further detail see "Filling tank" in operating instructions.www.WestfaliaT3.info - a useful website for owners and enthusiasts of <strong>VW</strong> Westfalia T25 / T3 / Vanagon Campervans
Technical DataFuel consumption*37 kW enginemanual gearbox51 kW enginemanual gearbox51 kW engineautomatic gearboxUrban mpg 17.9 16.8 19.6litres/100 km 15.8 16.8 14.490km/h(56mph) mpg 23.7 25.0 23.1litres/100 km 11.9 11.3 12.2120km/h(75mph)**mpglitres/100 km- - -• The consumption figures given are based on recommendation Depending on driving style, road and traffic conditions, environmen-A 70 of the ECE. In order to obtain true-to-life consumption figu- tal influences and vehicle condition, the values obtained in actualres the tests are carried out in three different conditions:practice differ from those given in the standards.• For the urban measurement, normal town traffic driving is simulated.• The measurements for 90 km/h and• 120 km/h are carried out at a constant test speed." Applies only to vehicles with a maximum speed of more than 130 km/h (80 mph) 87www.WestfaliaT3.info - a useful website for owners and enthusiasts of <strong>VW</strong> Westfalia T25 / T3 / Vanagon Campervans
Technical DataPerformance37 kW enginemanual gearbox51 kW enginemanual gearbox51 kW engineautomatic gearboxMaximum and cruising speed* in km/h:Manual gearbox:Bus, CombiPick-up, double cab pick-up without coverHigh-roofed delivery van, high-roofed combiPick-up, double cab pick-up with coverPick-up with large platformHill climbing ability with full load on good roadsdriving non-stop in 1st gear110 km/h117 km/h105 km/h105 km/h105 km/h26%127 km/h123 km/h115 km/h115 km/h122 km/h29%122 km/h120 km/h117 km/h115 km/h113 km/h33%Electrical system 37 kW engine Part No. 51 kW engine Part No.Voltage (V)Battery (Ah)Starter (kW/hp)Alternator with voltage regulator (W)V belt (mm)1245/54763*0.8 (1.1)630/910*9.5 x 1165 070.903.1371245/54763*0.8 (1.1)630/910*9.5 x 1165 070.903.137Belt tension:Deflection (mm)**Deflection (mm)**Spark plugsPlug thread (mm)Electrode gap (mm)newused9-1111-14Bosch W7A (W175T1)Beru 14-7A (175/14)140.6-0.7N 17 801.1N 17 802.19-1111-14Bosch W8C (W145T2)Beru 14-8C (145/14/3)Champion N7For heavy duty operationat above 25° CBosch W7C (W175T2)Beru 14-7C (175/14/3)140.6-0.7N 17 811.26N 17 812.24N 17 813.1488 * Optional " Measured with a firm thumb pressure {7.5 kg) in the centre between the pulleys.www.WestfaliaT3.info - a useful website for owners and enthusiasts of <strong>VW</strong> Westfalia T25 / T3 / Vanagon Campervans
Technical DataCapacities 37 kW engine 51 kW engineFuel tank about 60 I (13 galls) about 60 I (13 galls)(10 of wtiich are reserve) (10 of which are reserve)Engine oil 3.0 I (5.2 pints) with oil filter change* (4.3 pints) 3.5 I (6.1 pints) with oil filter change*2.5 I (4.4 pints) without filter change* 3.0 I (5.2 pints) without filter change*Windscreen washer about 3.5 I (6.125 pints) about 3.5 IWith headlight washer about 6.5 I (11.2 pints) about 6.5 I* HD oil. Further details are given in "Lubricants" section.Wheels 37 kW engine 51 kW engineWheelsTyresStandardOptional7.00 14 8 PR 93 P185 SR 14 Reinforcedor185 R 14 C 6 PRPerforated steel disc wheelswith hump drop centre5V2 J x 14185 SR 14 Reinforced185 R 14 C 6 PRIf you wish to fit non-standard tyres orwheels to your car at any time we adviseyou to see your <strong>VW</strong>-AUDI Dealer first becausethe use of wheels and/or tyres notapproved by the factory may affect theregistration of the vehicle under the Constructionand Use regulations.Tyre pressures* (bar/psi) front rear7.00 14 8 PR 2.3 (33) 3.3 (47)185 R14 C 2.6 (37) 3.8 (54)185 SR 14 Reinforced 2.3 (33)2.9 (41)Ambulance with185 SR 14 Reinforced 2.3 (33) 2.6 (37)The pressures are also given on a sticker on the left door pillar between the hinges. 89www.WestfaliaT3.info - a useful website for owners and enthusiasts of <strong>VW</strong> Westfalia T25 / T3 / Vanagon Campervans
Technical DataWeights (kg)Vehicles with 37 kW engineBus Van High roofedVanCombiwith seatsHigh roofed .Combi withseatsPick-upPick-upwith largeplatformDouble cabPick-upAmbulanceTotal permissible weight 2310 2360 2360 2360 2360 2360 2360 2360 2300Permissible front axle load 1100 1100 1100 1100 1100 1100 1100 1100 1100Permissible rear axle load 1300 1300 1300 1300 1300 1300 1300 1300 1200Unladen weight (with driver)*** 1410** 1365 1415 1365** 1415** 1365 1460 1450 1650Payload 900 995 945 995 945 995 900 910 650Roof load* 100 100 - 100---75 100Vehicles with 51 kW engineTotal permissible weight 2310 2360 2360 2360 2360 2360 2360 2360 2300Permissible front axle load 1100 1100 1100 1100 1100 1100 1100 1100 1100Permissible rear axle load 1300 1300 1300 1300 1300 1300 1300 1300 1200Unladen weight (with driver)*** 1440** 1395 1445 1395** 1445** 1395 1490 1480 1680Payload 870 965 915 965 915 965 870 880 620Roof load* 100 100 - 100- — 75 100-90* Only use racks supported in rain channel. Load evenly. Total weight must not be exceeded." Without driver" The addition of optional extras and accessories could alter the unladen weight, resulting in an appropriate reduction in the payload permitted.www.WestfaliaT3.info - a useful website for owners and enthusiasts of <strong>VW</strong> Westfalia T25 / T3 / Vanagon Campervans
Technical DataWeightsVehicles with automatic gearboxBus Van High roofedVanCombiwith seatsHigh roofedCombi withseatsPck-upPtek-upwith largeplatformDouble cabPick-upAmbulanceTotal permissible weight 2310 2360 2360 2360 2360 2360 2360 2360 2300Permissible front axle load 1100 1100 1100 1100 1100 1100 1100 1100 1100Permissible rear axle load 1300 1300 1300 1300 1300 1300 1300 1300 1200Unladen weight (with driver)*** 1480** 1435 1485 1435** 1485** 1435 1530 1520 1720Payload 830 925 875 925 875 925 830 840 580Roof load* 100 100100—75 100' Use only racks supported in rain channel. Load evenly. Total weight must not be exceeded.•' Without driver*** The addition of optional extras and accessories could alter the unladen weight, resulting in an appropriate reduction in the payloud permitted.---Trailer weights (kg)37 kWengineManual.gearbox51 kWengineManualgearbox51 kWengineAutomaticgearboxThese figures are valid inWest Germany only. In othercountries they may vary.Permissible weights*Trailer with brakes,gradients up to 12 %Trailer without brakesPermissible nose weight max.100060050**120060050**80060050**' See "Trailer towing" pages 42/43." Minimum nose weight at least 4 % of actual trailer weight but need not be more than 25 kg. 91www.WestfaliaT3.info - a useful website for owners and enthusiasts of <strong>VW</strong> Westfalia T25 / T3 / Vanagon Campervans
Technical DataDimensions (mm)Bus Van High roofedVanCombiwith seatsHigh roofedCombi withseatsPick-upPick-upwith largeplatformDouble cabPick-upAmbulanceLength* 4570 4570 4570 4570 4570 4570 4570 4570 4570Width 1845 1845 1845 1845 1845 1870 2000 1870 1845Height 1950 1965 2365 1960 2360 1930 1930 1925 1940with cover-— —2235 2235 2230 _Ground clearance - -at max. weight 190 190 190 190 190 190 190 190Overhangfront 1 1 60 1160 1160 1160 1160 1160 1160 1160 1160rear 950 950 950 950 950 950 950 950 950Wheelbase 2460 2460 2460 2460 2460 2460 2460 2460 2460 •Track 1570 1570 1570 1570 1570 1570 1570 1570 1570Turning circle (m) 10.7 10.7 10.7 10.7 10.7 10.7 10.7 10.7 10.792 " Vehicles with rubber strips on bumpers are 30 mm longer.www.WestfaliaT3.info - a useful website for owners and enthusiasts of <strong>VW</strong> Westfalia T25 / T3 / Vanagon Campervans
Identification Plate, Chassis Number, Engine Number_ _ /ITmlChassis numberUnder vehicle on front cross memberEngine numberThe engine number on both engines is on therighthand side directly in front of the fan.| H 825-069 JChassis numberIdentification plate*On righthand door pillar between the hinges.Identification plateVehicles for export to certain countries have no identificationpiate. Engine number 51 kW engine. 93www.WestfaliaT3.info - a useful website for owners and enthusiasts of <strong>VW</strong> Westfalia T25 / T3 / Vanagon Campervans
Alphabetical IndexAdditional fuses 69Additional lubricants 59Additional points to be lubricated 62Adjusting jets 49Air cleaner 63,64Ashtray 35ATF 59,83Automatic gearbox 79Auxiliary heater 34Backrest adjusting 12Balanced wheels 53Battery 41,58Blower switch 30Brake flu id 50Brake fluid reservoir 50Brake linings 38Brake servo 50Brake system 23,38,50,84Brake warning light 23Braking distance 23,28Bulb changing 70Cab doors 8Canopy 36Capacities 89Care and maintenance 54Care of car 55-57Care of chrome 56Care of weatherstrips 56Cavity preservation 57Changing bulbs 70Changing wheels 66Chassis number 93Cigarette lighter/socket 35Cleaning and preservingengine compartment 56Cleaning cloth upholstery 57Cleaning leatherette 56Clock 25Contents 45Defrosting windows 30Difficult starting 77Dimensions 92Dip switch 28Do-it-yourself 66-78Doors 8,9Door windows 8,9Driving economically 39Driving in winter 40Driving lights 26Driving safety 38Driving tips 37-43Electrical system 88Emergency light system 27Emergency starting 74Engine 85-data 86-number 93-oil 59-oilfilter 62-oil capacity 47,61-oil changing 61-oil consumption 39,86-oil level 47-oil pressure 22-oilstrainercleaning 61-starting 21Engine compartment cover 46Faultfinding 77,78Filling tank 45Fog lights 27Foot brake 23,84Front seat 12Frozen windows 41Fuel-additives 44-consumption 87-fillingtank 45-gauge 2594www.WestfaliaT3.info - a useful website for owners and enthusiasts of <strong>VW</strong> Westfalia T25 / T3 / Vanagon Campervans
Alphabetical Index-tank capacity 45,89-type 44Fuses 69Gear lever 19Gearshift marks 24Gear oil 41,62Generator 22,88Generator warning lamp 22Glove box 35Handbrake 20,41Headlights-adjusting 70-masking when going abroad 73-washer 29Headlightflasher 28Head restraints 14Heated rear window 27Heating 30High beam 22,28Horn 7Identification plate 93Increasing size of luggage area 18Industrial grime 55Insects 56Instrument lighting 26Instrument panel 6Instrument panel lighting 26Instruments 24,25Intake air preheating 40Interior light 36,72Interior mirror 36Jack 66,68Jacking points 55-57Jets adjusting 49Keys 8Kick-down 80Lap belts 16Lifting vehicle 65,68Lighting 26Lighting switch 26,70-73Loading limit 36Lubricants 59Lubrication 60Luggage compartment 18Maintenance flap 47Mirror 36Number plate lighting 73Octane number 44-oil pressure 22oil pressure warning lamp 22oils 59oil filter 62oil capacities 47-61oil dipstick 47oil consumption 39,86oil changing 61oil additives 59Operating instructions 44-53Operation 8-36Out of balance wheels 53Outside mirror 3695www.WestfaliaT3.info - a useful website for owners and enthusiasts of <strong>VW</strong> Westfalia T25 / T3 / Vanagon Campervans
Alphabetical IndexiPaint damage 55Payload 90,91Performance 88Polishing 55Preservation 55Radio 6Rear fog light 27Rear lights 72Rear seat 13Rear view mirror 36Rear window heated 27Relays 69Removing industrial grime 55Removing insects 56Removing tar spots 55Reserve fuel in tank 45Reverse gear 19Reversing lights 19Roof load 90,91Roof rack 90,91Roof vent 30Running in 37Safety switch 34Seat belts-cleaning,using 15-service installation 76Seats 12,13Selector lever (automatic gearbox) .... 80Shift pattern 19,79Sidelights 28,71Sliding roof 35Sliding window 10Sliding door 9Snow chains 40Socket/cigarette lighter 35Spare keys 8Spare wheel 66Sparkplugs 41,88Speedometer 24Speed ranges 18Starting engine 21Swivelling seats 12Steering lock/ignition switch 20Sun visors 35Tailgate 11Taillights 72Tank capacity 45,89Tar spots 55Technical data 86-92Technical description 84,85Temperature switch 33Tools 66Towing 75,82Trailertowing 42Trailer weights 91Trip recorder 24Trouble 66-68Turn signals 72Turn signal lever 28Tyres-inflation pressures 89,99-running in 38Undercoating 57Vee belts 22,88Vehicle care 55-57Vehicle data quiz 98,99Ventilation 30,31Vent wings 10Viscosity grades 59Warning lamps 22,23Washing 5596www.WestfaliaT3.info - a useful website for owners and enthusiasts of <strong>VW</strong> Westfalia T25 / T3 / Vanagon Campervans
Alphabetical IndexWaxing 56Weights 90,91Wheelsbalancing 53changing 66technical data 89Windowscleaning 56defrosting 30Windscreen washer container 48Windscreen washer system 29Windscreen wiper blades 56Windscreen wipers 29Winter operation 40,41Winter tyres 4097www.WestfaliaT3.info - a useful website for owners and enthusiasts of <strong>VW</strong> Westfalia T25 / T3 / Vanagon Campervans
<strong>Volkswagen</strong> <strong>Transporter</strong> englisch1.80www.WestfaliaT3.info - a useful website for owners and enthusiasts of <strong>VW</strong> Westfalia T25 / T3 / Vanagon Campervans