Italeri 1/35 ELCO 80' Torpedo Boat PT-596 - IPMS Santa Rosa
Italeri 1/35 ELCO 80' Torpedo Boat PT-596 - IPMS Santa Rosa
Italeri 1/35 ELCO 80' Torpedo Boat PT-596 - IPMS Santa Rosa
- No tags were found...

Create successful ePaper yourself
Turn your PDF publications into a flip-book with our unique Google optimized e-Paper software.
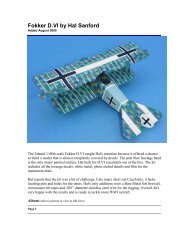
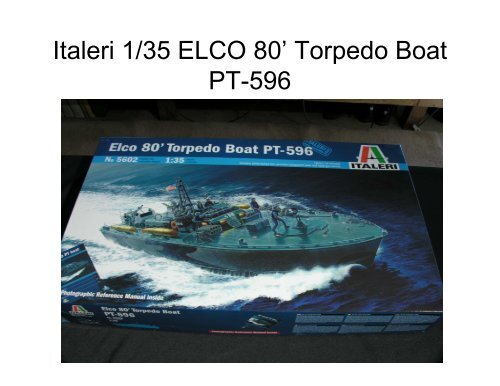
<strong>Italeri</strong> 1/<strong>35</strong> <strong>ELCO</strong> 80’ <strong>Torpedo</strong> <strong>Boat</strong><strong>PT</strong>-<strong>596</strong>
The entire kit 322 parts on 6 trees.Thekit comes with PE and 2 aluminumgun barrels
The hull is a beautiful one piece mold
Armed with an array of referencematerial, I am ready to go to work
Eduard aftermarket PE
Aftermarket Archer Dry Transfers
True Details U.S. Flags
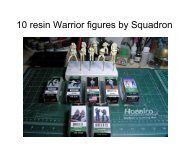
10 Warriors (Squadron) <strong>PT</strong> <strong>Boat</strong>Figures
Aftermarket Hornet Heads were usedon all figures
Kit included photographic reference
Reference includes B&W WWII photos
Full color painting directions
A sturdy basswood cradle was madeto build the boat on
Assembly Manual
Kit parts inventory
Parts inventory
Step 1: Deck assembly, open allindicated holes
Step1: Holes drilled
Step 2: Place PE deck window framesand bridge deck
Step 2: Frames and bridge deckinstalled
Step 2: Bridge deck required a bit ofshimming with some strip styrene to fitproperly
Step 2: Deck painted with first coat.Note, I have installed all of the deckfittings that I felt I could, and still nothinder the build. Most of these partswould have been installed on futuresteps.
Step 2: Interior of hull was painted FlatBlack so nothing can be seen thrudeck cabin windows
Step 3: Bridge and turret assembly
Step 3: Basic Cockpit assembled
Step 3: Basic turret
Step3: Cabin front
Step 3: Super detailing the cockpit
Step 3: Painting begins
Step 3: Camouflage starts here
Step 3: Cockpit painted with first coat
Step 3: WWII photo of actual <strong>PT</strong> boatcockpit
Step 3: My cockpit representation
Step 4: Air inlets and 40mm Boforsready ammo box assembly
Step 4: Assembly and basic paintingcomplete
Step 4: Engine air intake with as PEscreen
Step 4: Vents and 40mm ready useammo locker complete
Step 5: Main cabin and .50 caliberturret assembly
Step 5: Cabin assembly completed. Ihad to use a piece of sheet styrene tofill in a large gap.
Step 5: Cabin camo painted.
Step 5: Acetate windows installed
Step 6: Install cockpit, main cabin andaft ventilation section all built inprevious steps.
Step 6: Three main sections nowassembled, painted and installed ondeck.
Step 7: Starboard side panel with lifepreserver installed. Archer Dry Transfer
Step 7: Rear cockpit wall with woodseats
Step 7: Port side panel with lifepreserver. Archer Dry Transfer
Step 8: Assemble and install antenna,searchlight and deck vents
Step 8: Antenna, searchlight withwiring, deck vent and other misc items
Step 9: Assembly of life raft and lightpanel
Step 9: Life raft assembled andpainted
Step 9: Port side light panel complete
Step 10: Assemble 40mm safety barand smoke canister
Step 10: Safety bar installed
Step 10: Smoke canister painted andinstalled on deck. Note PE tie downs
Step 11: Install bow reinforced towingplate and port and starboard stringers
Step 11: PE plate was installed withTap Plastics Epoxy Tape.
Step 11: The basic green color of thehull has been painted at this point
Step 11: It is now time to paint thecamouflage on the hull. Tamiya tapewas used for the masks
Step 11: Pieces of tape were laid outto make a larger piece of tape and thecamo pattern was drawn on it and cutout.
Step 11: Port side camouflagesprayed
Step 11: With both sides camouflagedthe red bottom was applied with a mixof Tamiya Red and Red Brown
Step 12: Install mufflers and decals
Step 12: Dry Transfers have beeninstalled along with the mufflers andcamoflage pattern