Guitar Technique - NORDISC Music & Text
Guitar Technique - NORDISC Music & Text
Guitar Technique - NORDISC Music & Text

You also want an ePaper? Increase the reach of your titles
YUMPU automatically turns print PDFs into web optimized ePapers that Google loves.
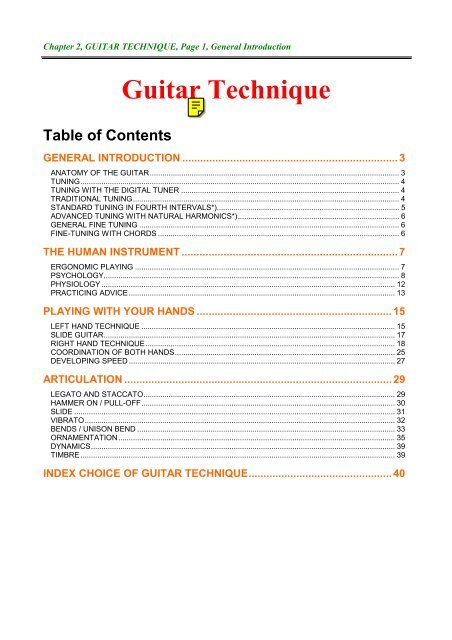
Chapter 2, GUITAR TECHNIQUE, Page 1, General IntroductionTable of Contents<strong>Guitar</strong> <strong>Technique</strong>GENERAL INTRODUCTION ........................................................................ 3ANATOMY OF THE GUITAR....................................................................................................................... 3TUNING........................................................................................................................................................ 4TUNING WITH THE DIGITAL TUNER ........................................................................................................ 4TRADITIONAL TUNING............................................................................................................................... 4STANDARD TUNING IN FOURTH INTERVALS*)....................................................................................... 5ADVANCED TUNING WITH NATURAL HARMONICS*)............................................................................. 6GENERAL FINE TUNING ............................................................................................................................ 6FINE-TUNING WITH CHORDS ................................................................................................................... 6THE HUMAN INSTRUMENT ........................................................................ 7ERGONOMIC PLAYING .............................................................................................................................. 7PSYCHOLOGY............................................................................................................................................. 8PHYSIOLOGY ............................................................................................................................................ 12PRACTICING ADVICE ............................................................................................................................... 13PLAYING WITH YOUR HANDS ................................................................. 15LEFT HAND TECHNIQUE ......................................................................................................................... 15SLIDE GUITAR........................................................................................................................................... 17RIGHT HAND TECHNIQUE....................................................................................................................... 18COORDINATION OF BOTH HANDS......................................................................................................... 25DEVELOPING SPEED ............................................................................................................................... 27ARTICULATION ......................................................................................... 29LEGATO AND STACCATO........................................................................................................................ 29HAMMER ON / PULL-OFF......................................................................................................................... 30SLIDE ......................................................................................................................................................... 31VIBRATO.................................................................................................................................................... 32BENDS / UNISON BEND ........................................................................................................................... 33ORNAMENTATION.................................................................................................................................... 35DYNAMICS................................................................................................................................................. 39TIMBRE ...................................................................................................................................................... 39INDEX CHOICE OF GUITAR TECHNIQUE................................................ 40
Chapter 2, GUITAR TECHNIQUE, Page 2, General IntroductionAll Aspects of ROCK & JAZZVolume 3 – The Electric <strong>Guitar</strong><strong>Guitar</strong> <strong>Technique</strong> 2 of 7 DocumentsISBN 87-88619-68-01st Edition, 1st IssueSummer 2000 Produced in DenmarkDigital Books is a trademark of<strong>NORDISC</strong> <strong>Music</strong> & <strong>Text</strong>, DK-2700 Broenshoej, DenmarkWEBEmailhttp://home7.inet.tele.dk/nordiscnordisc@post7.tele.dk<strong>Text</strong>, notes and musical examples:© Copyright Sebastian Kalamajski 2000Editor, Illustrations, layout and concept, additional textOrchestra arrangements, rock musical examples:© Copyright H.W. Gade 1981-84/2000All rights reserved. Copying or reproduction in full/in extension not allowed. No public hire of the materialallowed without the written permission of the publishing house.
Chapter 2, GUITAR TECHNIQUE, Page 3, General IntroductionGeneral IntroductionAll electric guitars, whatever they may look like, have one thing in common – thepickup. This device is allowing us guitarists to get more volume out of ourinstrument by ”picking up” vibrations from the string, transform them to electriccurrent and send it to the amplifier. Besides the pickup, a typical electric guitar, inthis case a Fender Telecaster could have the following parts.ANATOMY OF THE GUITAR1 Head2 Tuning pegs3 Neck*)4 Frets*)5 Position marks6 Knob for strap (the other knob is placed atthe bottom of the guitar)7 Fingerplate8 Pickup9 Controls for volume etc.10 Chair with fastening clamps for strings andfine-tuning screws11 Vibrato arm12 Outlet for chord to amplifier*) When guitarists say that they go ”up the neck”, it means that the fretting hand moves towards the guitarbody, and the pitch goes up; ”down the neck” means going towards the head and that the pitch goes down.
Chapter 2, GUITAR TECHNIQUE, Page 4, General IntroductionTUNINGYou tune your guitar by using tuning pegs and your ears (or an electric tuner). The standardtuning of a guitar is.Fig. 1 <strong>Guitar</strong> String GaugesE 1 st stringB* 2 nd stringG 3 rd stringD 4 th stringA 5 th stringE 6 th string*) The B string is called H in Germany and the Scandinavian countries,see All Aspects of ROCK & JAZZ 1/ <strong>Music</strong> TheoryRemember that we count the strings from bottom to top (from the thinnest to the thickest string), sothe thinnest string is the E 1 st string, and the thickest string is the E 6 th string. The easiest way totune the strings – but not always the best - is to use a digital tuner.TUNING WITH THE DIGITAL TUNERSet the switch to the deep E. Keep picking the E 6 th string while turning the tuning peg until thetuning graph / arrow stops moving. Set the switch to the next note (A) and repeat the processwith the A, D, G, B and high E strings.TRADITIONAL TUNINGIf you do not have or do not want to use a digital tuner, you must learn to use your ears to tuneyour instrument. If you are completely new to music you will find it difficult at the beginning,but as time goes by you will get better at it. Let us look at four different ways to tune guitar.Choose the one you like or use them all for best tuning results. Before you start tuning, tuneyour E 6 th string to the low E. You can use a piano or keyboard to “catch” the pitch of the note.Fig. 2 Tuning the <strong>Guitar</strong> Strings after the Piano
Chapter 2, GUITAR TECHNIQUE, Page 5, General IntroductionTuning Fork You may alternatively use a “tuning fork”, but as the tuning fork is tuned in A,you must start with tuning the A 5 th string instead of the E 6 th string. In this case, start tuningthe D 4 th string etc. and finish by tuning the E 6 th string. Historical note: Before the arrival ofdigital tuners, it was most common to start tuning the A 5 th string.STANDARD TUNING IN FOURTH INTERVALS*)A Pick the deep E 6 th string with your left-hand finger on the 5 th fret (the A note), and pick theopen A 5 th string shortly after. Keep picking both the E 6 th string and A 5 th string whileadjusting the E 6 th string with its tuning peg until you can hear that the two pitches soundexactly the same.D Pick the A 5 th string on the 5 th fret (the D note) and tune the open D 4 th string with its tuningpeg while you keep picking both the A 5 th string and the D 4 th string until the two pitches are intune with each other.G Pick the D 4 th string on the 5 th fret (the G note) and tune the open G 3 rd string with its tuningpeg while you keep picking both the D 4 th string and the G 3 rd string until the two pitches are intune with each other.B Pick the G 3 rd string on the 4 th fret (the B note) and tune the open B 2 nd string with its tuningpeg while you keep picking both the G 3 rd string and the B 2 nd string until the two pitches are intune with each other. Please note that the interval between the G 3 rd string and the B 2 nd stringis a major third, not a fourth!E Pick the B 2 nd string on the 5 th fret (the E note) and tune the open E 1 st string with its tuningpeg while you keep picking both the B 2 nd string and the E 1 st string until the two pitches are intune with each other. Now fine tune the deep E 6 th string with the high E 1 st string to makesure that the tuning has not moved away from the original E. This is often the case because thenew strings easily get out of tune while tuning the next strings (!). Strum all the strings andlisten if it sounds OK.*) See All Aspects of ROCK & JAZZ 1/ <strong>Music</strong> Theory, chapters Scales and Harmony
Chapter 2, GUITAR TECHNIQUE, Page 6, General IntroductionADVANCED TUNING WITH NATURAL HARMONICS*)A Play a natural harmonic by lightly touching the deep E 6 th string with a left-hand fingerprecisely above the 5 th fret (without pressing the string!), and do the same on the 7 th fret on theA 5 th string. Adjust the tuning peg for the E 6 th string until you hear the same pitches withoutany ”waving” effect (the note trembles due to interferences between two notes out of tuneWhen the notes are in tune, the wavering stops and they become one note).D Repeat the procedure with a natural harmonic on the A 5 th string’s 5 th fret and a naturalharmonic on the D 4 th string’s 7 th fret. Adjust the tuning peg for the D 4 th string until the notesbecome one without any wavering.G Repeat the procedure with a natural harmonic on the D 4 th string’s 5 th fret and a naturalharmonic on the G 3 rd string’s 7 th fret. Adjust the tuning peg for the G 3 rd string until the notesbecome one without any wavering.B As the interval between the G 3 rd string and B 2 nd string is difficult to produce on the thin G 3 rdstring you should use the Interval tuning here. Pick the G 3 rd string on the 4 th fret (the B note)and tune the open B 2nd string with its tuning peg, while you keep picking both the G 3 rd stringand the B 2 nd string until the two pitches are in tune with each other. When you learn to use allthe natural harmonics, you may want to use the 4 th fret on the G 3 rd string (the note B twooctaves up) to tune the B 2 nd string.5 Use the natural harmonics tuning again with a natural harmonic on the B 2 nd string’s 5 th fret anda natural harmonic on the E 1 st string’s 7 th fret. Adjust the tuning peg for the E 1 st string untilthe notes become one without any wavering.*) See All Aspects of ROCK & JAZZ 1/ <strong>Music</strong> Theory, chapters Scales and HarmonyGENERAL FINE TUNINGWhen you have tuned your guitar using the above methods, it may still sound a little out oftune. What you can do is use the octave fingerings (see rhythm guitar section) for everypossible string pair and fine-tune the strings, so the two pitches (the root tone and the higheroctave) are in tune. The instrument may be hard to tune if the strings are relatively new as thestrings tend to ”loosen up” and lower the pitches. In this case you’ll just have to tune yourguitar very often, and maybe stretch the strings by pulling them up, away from the fret board,several times, directly after you have put them on the guitar and tried to tune it.FINE-TUNING WITH CHORDSHaving tuned all the strings, prepare yourself for a chock: The guitar is not in tune yet! Mostguitar frets are placed a little imprecisely so to ensure that the guitar is ready for the next song,check the chords on the “tuned” guitar. If you are going to play with “loose string” chords (openchords), you should try a G-chord, a D-chord, an E-chord and an A-chord. Likewise, if you playwith chords on the 5 th fret or higher, you need to check these chords and fine-tune the stringsaccordingly. Normally it is almost impossible to achieve a tuning that fits both open chord andchords placed on the higher frets.
Chapter 2, GUITAR TECHNIQUE, Page 7, The Human InstrumentThe Human InstrumentERGONOMIC PLAYINGErgonomic playing is letting your body relax as much as possible and avoid getting hurt. Generally,when you hold the guitar you should hold it in such way that you feel as little strain in your body aspossible. So simple is it! If you feel insecure how to do it right, read on and find out more!How to sit down with the <strong>Guitar</strong> This is really a matter of personal taste, but the main rule forsitting properly with your instrument is, as mentioned before, not to feel any strain or pain in yourbody. Personally, I recommend sitting down with both your feet on the floor, and placing the guitaron the right leg (or the left leg – if you are left-handed). Your back should not be crooked, but youmay still slightly bend your upper part of the body using your lower back, if you need to see whatyou are playing. Be careful not to bend your neck, as it may cause you many painful experiences.How to hold your guitar with your left hand is discussed in the left-hand technique section in thischapter.Fig. 3 The author sits down, relaxes - and plays!How to stand up with the <strong>Guitar</strong> When you stand up, your left hand seems to have a limitedrange of movement. It is caused by a more bended wrist, which creates a more partial contraction inarm and finger muscles, in contrast with less contraction when you are sitting down. To minimizethis effect, you need to experiment with adjusting your guitar strap till you come to the point whereyou hold your guitar with just a little bending in the wrist – it should help you a lot. You will getmore used to this position if you practice playing guitar this way. You do not have to stand upthroughout the whole practice routine, just a smaller amount of time should do.
Chapter 2, GUITAR TECHNIQUE, Page 8, The Human InstrumentPSYCHOLOGYA Visit inside your Brain First of all, it will be useful to learn some of the basic functions ofyour mind; it will give you a better understanding of the psychological aspect of guitar playing.The classic division of mind is:The Conscious Mind being responsible for observing and analysing your environment.The Unconscious (Subconscious) mind storing the information you are absorbing, thisis your memory bank.The Supraconscious mind: your intuition, tendencies; stays apart from the ordinary flow ofthoughts.Consciousness is something you can learn to control better than you are doing now. By doingthis you will get more out of your practice time, you will learn everything faster than before,and the improvement in your guitar playing will be more remarkable in less time. This will alsoaffect other parts of your life, e.g. improving your reading ability, learning new languages andyour typing speed on the computer!The other two mind functions – unconsciousness and supraconsciousness – are alwaysactivated, no matter what you are doing. You can, however, get a better use of your memorybank – unconsciousness – by gaining a better control of your conscious mind. Simply: yourmemory of scales, chords, or whatever you are learning will improve, and learning new musicpieces on guitar will take you less time than ever before. Here is how it works:Concentration When you are trying to learn something, get used to being focused on whatyour hands are doing. Do not get distracted by other events, because your consciousness getsunorganised and you simply waste your practice time. The following factors can strengthenyour attention on practicing guitar:Before practicing: make a sketch of what you are going to practice – and follow it! Write downhow much time you want to spend on different topics, plus: do not forget to take 5 minutes restsevery 25-40 minutes.By focusing on your playing, many nerve impulses going to your brain will be unleashed due toevent of practicing. Your brain will not have to deal with lots of different impulses, caused byany distractions (like sneaking on TV), and you will simply learn faster.It is easier to stay focused easier if you are motivated! Unfortunately, many students aremotivated only if they know they will get rewarded for their work, or when there is a fear-oflossfactor lurking at the corner. You should, however, try to get inspired every time you
Chapter 2, GUITAR TECHNIQUE, Page 9, The Human Instrumentpractice. How? For example, listen to your favourite guitarist and think how lovely it will beplaying like he/she does; think about how great it will be when you are the one walking thestage in front of an audience that loves your playing; think of the great future life when you arethe one that plays guitar like no one else etc. Try to invent your own inspiration-givingtechniques, write them down, and use them when you happen to get uninspired. If none of thesetechniques works, the one thing that can help is simply picking up the instrument and starting toplay! Remember though, this technique will not work if you will not give it a try!Second Nature Playing If you ever tried to learn a classical guitar piece, you probably knowhow time-consuming it may be. The same also applies for learning a scale throughout thefretboard, and many other aspects of guitar playing. This section is about learning somethinguntil it becomes, as I call it, automatic – it means, being able to play something withoutthinking about where to place your fingers on the fretboard, how to move your hands, etc. Youwill soon get equipped with techniques that will shorten the time you usually spend when youwant to learn something. Use these techniques along with the others presented above and inprevious sections.When you successfully learn something, and you can play it up without thinking so much whatyour fingers are doing, a new aspect of music will automatically open for you: theinterpretation. Playing something right is one thing, but playing it so it sounds nice is an art,which requires your full concentration. And that can only be done when you have learned toplay something technically perfect and can also play it second nature.You will know when you can play a piece this way when you do not have to use yourconsciousness to think where your hands shall move, where your fingers shall go etc. Yourunconscious mind is doing the entire job! What happens in your body when you play it thisway?As already mentioned: you do not have to concentrate on what you play, it just happens.However, during the learning stage your concentration must be fully focused on what yourhands and fingers are doing – this will speed up the process of learning something secondnature. Sometimes it can be hard to do this, especially when you are almost finished withlearning a piece of music, and your fingers have a tendency to loose your attention – yourconsciousness begins to ”think” about something else. Beware when that happens, stay focusedon your playing all the time throughout the whole learning process! Do not let your mindwander even when you are almost, but yet not completely, comfortable with the piece you try tolearn.Your finger muscles are getting more used to all the movements that are necessary to play themusic piece. They are also getting used to all the energy losses that happens when you playguitar. When you learn something second nature, you are often able to play it faster and moreprecise than you did before. At this stage you have got something that people call musclememory,although it is not only muscles that are doing the job. Because all your fingermovements becomes automatic, you probably have discovered how important it is to learnsomething right from the very beginning: placing the fingers in right positions, playing relaxed,avoiding dampening strings that should not be damped, and many, many other factors. If you donot pay attention, and learn something the wrong way, it will become a habit, which will be
Chapter 2, GUITAR TECHNIQUE, Page 10, The Human Instrumenthard to get rid of. So, remember: before you start to learn something on your guitar, take yourtime and go through all the technical problems you might have when playing the piece; writedown how you shall play different parts of the composition, what fingerings you shall use etc. Itis very important!!!Repetition is the main technique you will use when trying to learn something new. Your innerbody gets adapted to what you are doing and, as time goes by, the difficulty of playing thecomposition will pass away.Motivation This is a hard, if possible at all, task to teach. Nevertheless, some advice can begiven to you. How can one stay motivated all the time? One way that really works nice formany successful students is a conscious search for the evidences that shows the progresscreated by continuous practicing. As you work on your guitar technique you notice that slowlybut surely you simply play better and better. By regular focus on the progress – the evidence ofdevelopment as a guitarist – you automatically stay motivated to continue practicing over andover. A good way to start using this simple and effective inspiration-giving technique is to writedown what you expect to notice in your progress as you practice a particular aspect of guitarplaying. Let us clarify this with an example: assume that one day I start working on major scaleshapes and want to learn them all over the entire fretboard. Now, what advances do I expectfrom learning this material? Maybe it will be easier for me to create my own solos, and gain abetter understanding of the guitar neck. Now I know what I can look forward to, once I learn allthe major scale shapes. Some day, after a couple of hard practicing weeks I realize that Iactually can create my own solos with more ease and I have gained a better understanding ofthe fretboard. Did I possess these abilities before? No! Do I have it now? Yes!!! I found outthat my practice showed results; I found the evidence for my progress! I am so #%&%# glad,and this feeling of happiness heightens my motivation so I cannot wait till I start practicingagain – this time on some other aspect of music.Before you start to use this technique make sure that you never set any unrealistic expectationsto yourself! Something like “I have never played guitar before but I will start to develop myspeed now, and I am expecting to become another Yngwie Malmsteen in two weeks” is really avery optimistic goal. Instead, try to not make any “deadlines” for your progress, and divide yourlong-term goals into smaller, short-term goals you can work on. This should really keep youmotivated, as you notice how you continuously progress from one level to another.Habits Practicing should be preferably developed into a habit to ensure your path of musicalprogress. Creating a new time-consuming habit often means that you must forget about otherevents you normally would spend time on. If you like to sit for hours and click through everysingle channel on your TV instead of working on your guitar technique… well, you will not getfar, so simple is it! Throw out the TV through the window, and develop the habit of practicingyour guitar instead. Look at all activities that normally “stops” you from playing your guitar andsee if it is possible to substitute some, or all, of these activities with diligent practicing time.However, do not just forget about your family, friends and other people!!! Live your social lifetoo!!!More about Memory Memory is often defined differently by various groups of scientists.Most of these believe that memory has its place in the brain, while others mean that it issituated somewhere outside the brain. Some believe that if you forget something ”for good” you
Chapter 2, GUITAR TECHNIQUE, Page 11, The Human Instrumentwill not be able to recall it again, but there are people who can let you discover your ”longforgotten”memories from your childhood by using hypnosis. Discussion about how memoryreally works and where it is situated is not over yet. This section is not about teaching you whatis wrong or right, if you want to dig deeper into the subject, there are many books you can getyour hands on and study. What is presented here, are just some more thoughts about usingmemory for improving your guitar playing faster, by using only PROVEN techniques that havealready worked for many students.Learning something new can be often made easier by associating it to something you alreadyknow. A new chord form, for example, may look similar to some other chord form you know; itwill be easier to remember it by associating it to the chord you know before-hand. As you playthis new chord form for some time, it becomes second nature, and you never have to associate itto something else anymore. Your learning rate has improved, and you may go on and learn newmaterial.Playing something you already know involves using your unconsciousness. If you can play itsecond nature, but start to think about what you are playing (by using your consciousness) youmay experience some doubt about where or how your fingers shall move. On the other hand,when you do not think what you are playing at all, your playing is becoming mechanical and”cold”. What you must do when performing something is to create a balance betweencontrolling your playing and letting your fingers play by themselves. It is not good to think whatyour fingers are doing and where to move them, but if you want to be a good performer youmust think how you play the music. Listen to how you sound: if you play a nice classical guitarpiece, play it beautifully, if you play acid jazz solo, play it ”acid”, playing a distorted rock riffrequires a ”cool” sound, and so on. Create the feeling that the particular music style needs.Your memory can be strengthened by several other factors, along with those mentioned in theprevious sections. It is easy to remember a composition that makes sense to you and is notcomplicated. However, if you want to learn some advanced aspects of music, you will get faceto-facewith stuff that requires lots of study time. Keep that in mind, and do not get discouragedwhen learning that a difficult jazz scale takes more time than learning a pentatonic scale (just anexample). It is just the nature of your body that causes this difficulty phenomenon, and youcannot beat Mother Nature. Other factors that will help you are repetitions, motivation, hardstudy periods varied with rests and, if you are young, your age. (By the way, you can try to useall the techniques mentioned in the psychology section in your other activities, for examplestudying in school!)
Chapter 2, GUITAR TECHNIQUE, Page 12, The Human InstrumentPHYSIOLOGYRests Playing the guitar is possible due to contractions in your finger muscles. Thesecontractions demand that your muscle cells are sufficiently equipped with the necessary fuel.This fuel comes with blood, which, in case you have played intensively for some period of time,cannot reach the muscles to a sufficient degree. When lots of muscle contractions occur, morefuel burns, and if there is no blood with enough oxygen to burn this fuel, a substance calledlactic acid is created. Lactic acid makes your muscle feel tired and makes your playing morepainful. When this happens you should stop for a while and let the fresh blood run into themuscles and transport the lactic acid awayBecoming a great musician requires not only working on your technique, but also studyingmusic theory, composition etc. A good practice schedule idea is to practice guitar playing for anhour or two, and then rest your finger muscles, and go over to studying books instead. After thatyou may take a longer rest from all music study, and then begin to practice your guitar playingonce again (if you have enough time, of course). Your muscles should be refreshed at that timeand it will feel good to begin to pick up the instrument once more.Breathing Another topic that needs some discussion is your breathing technique. Manystudents have a tendency to hold their breath when some difficult passage must be played. Yousee, you should never do that! Your breathing should be regular and natural, without anyunusual stops and breaks. When you hold your breath your muscles gets more strained andmore tensioned, and that will actually harm rather than help your playing. So, take control ofyour breathing!Solving Technical Problems Another tendency, evident for many students, is the inabilityto solve technical problems efficiently. Often, you try to get rid of a technical problem byrepeating the same passage of notes over and over until it is nailed. It may actually work, butthe negative side effect is that it takes a great amount of time. Beside that, the practiced passagemay be learned the wrong way, unnatural for a human body. You can avoid this habit by alwaysanalysing the problem you might have. Look for a reason why you are not able to make thisparticular finger movement, and see what you can do about it. Often, a simple change offingering might help, but there can even be other factors, for example how you hold your handor pick the strings. Always do a good analysis of what you are about to play, and how you canplay it the most easier and natural way.Results? Thanks to your hard practice, the muscles that are responsible for controlling yourfingers are getting stronger, coordination between your brain and muscles is improving, andmore substances involved in burning muscle fuel during your workout are created. Your fingermovements are getting more and more precise and perfect, which in turn leads to moreeconomical fuel use and therefore a better condition of your muscles.
Chapter 2, GUITAR TECHNIQUE, Page 13, The Human InstrumentPRACTICING ADVICEStudy Plan The first step you should do before you practice is to organize and write down apractice schedule showing what and for how long you will practice a particular aspect of music.When you do it look at the topics you would like to learn first and decide if it will be easier tolearn something step by step or if it will be better to learn everything at once. Often, it is a goodidea to break down a particular aspect of music into small parts, and practice each part of thattopic individually. For example, if you want to learn the melodic minor scale on the entirefretboard, it would be better if you practice playing the scale in one position first, and thenmove on and learn the next scale shape in next position, and so on. Sometimes though, it iseasier to learn everything at once, for example an easy melody.Warm-up! Before you start an intensive practice period, make sure that your finger musclesare sufficiently filled with blood – do a warm-up! A warm-up exercise can be created byyourself just make sure that it is not a finger-flutter exercise! Instead, play a scale or arpeggio ata slow speed, and do it for a couple of minutes. After that - begin your practicing routine.Once again, take Rests! Do not forget to take rests during your practicing time. A fiveminute rest every 25-40 minutes will let your muscles and brain recover from the intensivelearning period (I assume that you practice with full concentration and engagement, asmentioned before). Believe it or not, but taking rests will speed up your learning rate, and youwill give your brain a well deserved time-out during which it is going to digest all theinformation it was given when you practiced intensively. Shorter rests can also be taken whenyou practice a very physically related material and your finger muscles gets tired so you cannotmove them anymore. These rests should be incorporated within the ordinary practicing timeperiod, but, of course, they should not last longer than approximately one minute.Variations are More Fun To make your practice time more interesting and fun, you can tryto practice various aspects of guitar playing in a row. For example, diminished scale for a halfan hour, followed by chord exercises, followed by technique development, all finished off byimprovisation. This kind of practice schedule will be more exciting to accomplish thanpracticing just one scale for two hours in row. In the first section of this book, Read This First,you will find suggestions on how to use this book in progressive and efficient way.Have Patience! During your guitar practicing periods, you may experience that you aregetting nowhere with something you practiced for a long period of time. Do not get discouragedwhen that happens, because this phenomenon is not remarkable at all. We all sometimes
Chapter 2, GUITAR TECHNIQUE, Page 14, The Human Instrumentexperience some kind of stagnation in our playing. How frustrating it may be, there is not somuch we can do about it, apart from keeping up with practicing and wait for the breakthroughto come, because it will come one day! You just have to be patient enough and do not worryabout it too much. You can also take a break from your playing for a day or even longer. Duringthis break your motivation should rise high enough to get you back to your guitar again.Another thing you can do is changing the old practice schedule and get involved in somethingnew. This will refresh your mind and you will have more fun while practicing.When You are about to Learn Something Completely New Practicing a new aspect ofmusic should be done with a step-by-step method: begin by taking a good look at what you areabout to learn. Try to foresee what may cause you trouble and what you should spend more timeon. Especially, when you learn some new techniques of playing, or a new solo, there is almostalways just one single small passage of notes and/or finger movement that makes the wholetechnique difficult. Instead of practicing the whole line of notes, practice only that little passagethat causes you trouble – this way your practicing time will be far more efficient.Try to associate the new material to something you already know to accelerate your learningrate. When you do this, your brain will digest all information much faster and easier since itattaches the new information to other familiar things.
Chapter 2, GUITAR TECHNIQUE, Page 15, Playing with your handsPlaying with your handsLEFT HAND TECHNIQUEBefore we do anything, let me make a clear statement: It is important to learn proper left andright hand technique before trying to develop speed and more advanced fingering techniques. Itis crucial for your further development as a guitarist that you have a good knowledge of how tohold and play your guitar the easiest and most efficient way possible. If you learn it the wrongway, it will be hard to get rid of the bad habit afterwards, so make sure you pay a great attentionto how your hands are working when you practice, and let the proper hand technique sink in tillthe day you use it without thinking about it.Here are the points you should think about when using your fretting left hand.1 Hold the guitar neck as if you were holding a book: place the thumb in the middle of the backof the neck, and straighten out your other fingers across the fretboard.2 Make sure your wrist is not bended too much. If it is you will greatly limit your playing ability.3 Place your fingers on one fret each, on the E 6 th string. For example index finger 1 st fret, longfinger 2 nd fret, ring finger 3 rd fret and little finger 4 th fret. Make sure the fingertips - and not anyother part of you - touch the strings. Also, place each finger just behind the right fret (closer tothe guitar body). Press down the strings with just enough force to make them touch thefretboard and sound clean; do not press too hard!4 The palm of your hand should have no contact with the neck. Leave a little space between thehand and the fretboards. JAZZ Do not damp the strings with your fingers. ROCK Damping isallowed.Well, this is it! The Main Idea here is to play naturally and not strain the hand. Of course, there aresome exceptions for this rule, when other ”special” techniques are involved, but for now you shouldconcentrate on relaxed playing, which you will do if you follow the rules listed above.Just some few more words about your thumb: as listed in point 1. You should hold your thumbbehind the neck of the guitar, but for some techniques, e.g. bends or slides (see the Articulationsection), it might feel better to hold it over the neck instead. Many guitarists feel they get abetter control of these techniques when they use their thumb this way. Try both thumb positionsand see which of these suits you better when you are bending strings or use the slidingtechnique. Personally, I do not use thumb-over-neck-position as it slows down my playing, dueto the need of switching thumb positions. If you play slower solos however, you might feelbetter using this thumb positioning anyway.
Chapter 2, GUITAR TECHNIQUE, Page 16, Playing with your handsThere is also something to say about your little finger (pinkie). Generally most peoples pinkiesare much weaker than other fingers, and some of the guitarists never use this finger just becauseof that. You should, however, if you not already do it, develop its strength and use it all thetime! It is very helpful when playing scales, chords, solos and many, many other things. Even ifit feels hopeless to play with your pinkie in the beginning, you will gain more control andpower with the finger as you use it. Just have patience with it!Here is an exercise for the left hand technique development. Be sure to use all the rules statedabove when you perform it! Do not care about the right hand here, just move the left handfingers from one fret(s) to the next as written. At first, do it slowly. Have fun!Fig. 4Left Hand ExerciseTablature2lefthand.PDFTablature Formats To show the reader different versions of the TAB notation system, we havechosen to use both a very simple TAB system without noteheads and a sophisticated system withnoteheads, slurs etc. The system type depends on the complexity of the music.ZOOM FUNCTION To zoom in on the notes and TABs, which often appear blurred on thescreen, click the hyperlink of the notes or TAB to see the illustration in max resolution.When you need to print the notes/TABs, always print the ZOOM view for best results.
Chapter 2, GUITAR TECHNIQUE, Page 17, Playing with your handsStretching Fingers By developing a good finger stretching ability in your left hand you willbe able to play more advanced chords and solo techniques. The trick here is not hurry with it,because the tendons in your hand are definitely harder to stretch than muscles, and so it takes agreat deal of time to adapt them to longer finger stretches than before. You must also be carefulnot overdoing the stretching exercises otherwise you will hurt yourself! Do one set of theexercise presented below every day, and that will be enough!Fig. 5Stretching ExerciseNotes2stretch.pdfTablature2stretch-tab.PDFSLIDE GUITARA very special technique developed in the 1920’ies classic blues styles uses a bottleneck or asteel tube on your left hand 1 st finger. Slide guitar can be played with the steel tube only or incombination with the other fingers on the left hand. The guitar is often tuned to a chord. A fineexample of a slide guitar genius is Johnny Winter, who has produced the most stunning solos,partly with standard tunings, partly tuning the guitar to, for example, an E or A chord. Anexample of slide guitar playing can be found in Chapter 6, Exercises, Rock exercise No 5.
Chapter 2, GUITAR TECHNIQUE, Page 18, Playing with your handsRIGHT HAND TECHNIQUEYour right hand is responsible for picking the strings with the plectrum or the fingers and thusmakes the strings vibrate and create sound waves. In this section, you will learn how to use yourright hand the natural way and picking techniques enabling you to progress faster as a guitarist.There are also a few words about string dampening – one aspect of guitar playing oftenneglected by novice guitarists, reducing their ability to play clean and clear.Pick (Plectrum) What kind of pick should you use? Although the choice is free for everyone,most professional guitarists use a pick that is stiff, hard, and easy to hold. That kind of plectrumwill give you a better control over the strings. The pick should not be too large because it willmove itself up and down in your hand all the time you play, and it will cause less control overyour playing.Fig. 6 Picking <strong>Technique</strong>You hold the pick between your thumb and index finger. The edge of the pick should be heldparallel to the strings. Hold the pick slightly angled with respect to the strings, so you not justplay using the flat side of the pick but use its edge instead. Make sure that you do not hold thepick too hard or too loose – hold it by your fingers with medium strength; and remember not tohold it too close to the edges, but rather in the midpoint – otherwise your playing will get moreuncontrolled and eventually it will be hard to play faster.Right Hand Finger Position Holding the right hand fingers straight or bent is also a matterof taste for many of us. There are many great guitar players and each of them uses his/her ownright hand position. However, the style used and recommended by many pros is to bend yourfingers inside your hand so your fingertips almost touch the palm of the hand. Benefits gainedfrom this style are following: it allows you to pluck the strings with your fingers (which is goodwhen you want to play a bass line with your pick and chords with your fingers), and it givesyour hand a free range of movement over the strings. This style is also the one recommended inthis book.
Chapter 2, GUITAR TECHNIQUE, Page 19, Playing with your handsPicking The Strings There are different ways to pick the strings:1 Circular movement of your thumb and index finger. You can do it by rotating the pick usingonly these two fingers. Your wrist and forearm should be almost completely straight.2 Picking from the wrist. You move your hand up and down by bending your wrist.3 Picking by using the forearm muscles This technique is often used for playing fast lines. Youshould feel that your forearm muscles are contracted, and your arm is kind of ”shaking”. Yourfingers and wrist is held straight.4 Picking from the elbow You can use this technique when you play chords, especially in openpositions (more about that in the Rhythm <strong>Guitar</strong> section). Your wrist is held straight, and yourhand does not touch the guitar body. Move your forearm up and down pivoting from the elbow.Many guitar players are using different picking techniques for playing fast lines. The onerecommended in this book is a combination of techniques 2 and 3. You may nevertheless wantto experiment with other techniques as well. I saw the circular picking technique in action whenEric Johnson played some fast stuff on his guitar. Other pros use their forearm muscles toshred. The choice is absolutely personal, and the choice is thus up to you. No matter whattechnique you might choose to play fast, please notice that picking from the elbow will notwork so well, but it is good to have it nailed when you need to strum through some open chordssometimes.Dampening Strings When you play your guitar you do not want to hear a bunch ofunnecessary and unwanted tones ringing through the music. Therefore, you must learn to dampthe strings you do not use. There are two possibilities of dampening strings, either with yourright or left hand. Although this section is about right hand technique only, let us make anexception and talk about both hands possible action when the strings shall be damped.Damping a string (or several strings) with the palm of your right hand should in my opinion bedone only when you switch from picking the higher (thinner) to a lower (thicker) string. Whatyou should do here is to simply bend your hand a little in the wrist, so the palm of the handcomes in contact with the string/strings you want to damp. By doing it you will mute the stringyou do not want to hear, and get rid of all unwanted noises. This technique should be practicedeach time you play something – by thinking about damping the strings whenever you practice,you will learn the muting technique very fast. You can even practice this little exercise forfaster results:
Chapter 2, GUITAR TECHNIQUE, Page 20, Playing with your handsFig. 7Dampening Strings, Example 1Notes2damp_1.pdfTablature2damp_2_tab.PDFAs mentioned above, you may also use your left hand to damp the strings you do not want toring out. This muting technique can be used when you move your pick from lower (thicker) tohigher (thinner) strings, or even the other way (upwards). The idea here is to use one or more ofyour left hand fingers to touch the string/strings that should be muted. An exception with thismuting technique is when you play on the higher strings, and cannot use your left hand fingersto mute the bass strings. In this case you should use your right hand palm for muting theunwanted noises. One more time: the fast way to learn this damping technique is to incorporateit in everything you play or practice. You can practice this exercise too, if you feel you need it:Fig. 8Dampening Strings Example 2Notes2damp_2.pdf
Chapter 2, GUITAR TECHNIQUE, Page 21, Playing with your handsTablature2damp_2_tab.PDF
Chapter 2, GUITAR TECHNIQUE, Page 22, Playing with your handsAlternate Picking Learning alternate picking is recommendable. This picking technique canbe used in almost any kind of guitar playing. If you get it nailed you will be able to play”anything” you want, without any need to ”work-out” some specific solo with metronome.There are people who say that economy picking is a better alternative, but it will surely notallow you to play spontaneous, fast solo lines without working them out beforehand. So,alternate picking is the one you should master! What is alternate picking? It is a simple downand up picking movement in your right hand. No matter what tone you play or what string youshift to, this down and up motion should never be interrupted. It causes most troubles when youmust do a shift from one string to another, so it is logical to create an exercise that will help youout of this problem:Fig. 9Alternate PickingNotes2altpick.pdfTablature2altpick_tab.PDF
Chapter 2, GUITAR TECHNIQUE, Page 23, Playing with your handsSweep picking is used when you literally sweep across the strings. It is mostly used whenplaying arpeggios with one note on each string, but can even be used for rhythm guitar figures.More about this technique can be found in Lead <strong>Guitar</strong> section – sweep picking. If you cancombine this technique with the alternate picking you will truly be able to play ”anything” youwant. Practice the following exercise often to learn how to change between these twotechniques spontaneously. You may move it in other positions, or apply it to other scale shapesas well.Economy picking is playing the notes by picking strings by the shortest (and therefore themost economical) right hand movement possible. It allows you to play fast lines with less spentpractice time, but as said before: it is a technique you can use in the licks you have worked outbeforehand. If you want to be able to do a spontaneous ”economy picking” when youimprovise, you must learn to combine the alternate and the sweep picking instead.Fig. 10Economy pickingNotes2economy.pdfTablature2economy_tab.jpg
Chapter 2, GUITAR TECHNIQUE, Page 24, Playing with your handsHybrid technique is used most for chord-melody playing style. You pick the bass stringswith the plectrum, and pluck the other strings with your long, ring and little fingers. It is a veryuseful playing technique, and it can be used in many ways. See the chord melody section inchapter 4 to see what it can do for your playing.Fig. 11 Hybrid PickingPick Patterns What picking pattern should you use when you play in other meters, forexample in a 3/4 groove, instead of 4/4? When you have an odd number of notes to pick, it maybe hard to decide if you should use a double down- or upstroke, or alternate picking when youswitch from the last note in the group to the first note in the next group. Should you do it like inexample 1 or 2?Fig. 12Pick Patterns2pickpat.pdfIt depends on the circumstances! Alternate picking throughout the whole figure (last example)is the only way to go if you play fast. Your hand will not be capable of making a fast doubledown stroke, as in the first example (unless you are a genetic miracle). However, the firstmethod works fine at slower speeds, as well as alternate picking. In this case, the choice is up toyou. Remember though, whatever method you decide to use, to always know which note is thefirst note in a group and emphasize it (hit the string little harder than for other notes).
Chapter 2, GUITAR TECHNIQUE, Page 25, Playing with your handsCOORDINATION OF BOTH HANDSPlaying the guitar requires, in most cases, activity in both right and left hand. To make sure thatyour hands are doing what you want them to do, you must develop the perfect timing betweenthem. You must be able to pick the string with your right hand at the same time you place yourlet hand finger on the fretboard. Of course, there are exceptions from this rule, but most oftenyour hands must be coordinated, particularly when you want to play fast.NOTE Before you begin to work on any coordination exercise, make sure that you have learned allthe other rules about using your left and right hand. These rules are listed in previous sections, andyou simply must learn and master them before you start here.You can actually develop your coordination by working on almost any aspect of guitar playingunder the sun, as long as both hands are involved. In this section you will find one example of auseful exercise that you may include in your practice routine. When you practice coordinationmake sure you follow these suggestions:Play the exercises with virtually no rests between the notes. Remember that the previous noteshould be ringing clear until you pick the next one. Do not let any empty spaces come inbetween two notes.Your left hand fingers should be lifted only slightly above the strings when you do not usethem, or when you just played a note. The less travel route your fingers have, the faster you willplay.Practice with a metronome! Start with a speed you feel very comfortable with when performingthe exercise. Do not turn up the speed until you have nailed the exercise and can play it clearand without any trouble.
Chapter 2, GUITAR TECHNIQUE, Page 26, Playing with your handsFig. 13 XCoordination of HandsNotes2coord.PDFTablature2coordinate_tab.PDF
Chapter 2, GUITAR TECHNIQUE, Page 27, Playing with your handsDEVELOPING SPEEDIf you learned all the techniques and rules listed so far in chapter 2, you are already on your wayto developing a good playing speed. Keep in mind though, that you cannot develop fast fingersin a couple of weeks. This process can take you years to accomplish. This is just because yourfinger muscles and coordination between your brain and hands takes quite a lot of time todevelop. You must remember to have patience and continue to practice until you get where youwant.There are few considerations you might think about during your speed development practice:Do some warm-up exercises for about five minutes before you start ripping off! Your musclesmust be warm and filled with enough amounts of blood if you desire the best performancepossible.Practice with a metronome! Begin with a slow, very comfortable speed and practice theexercise till you can perform it very clear and without strain. This is very important! Do notturn up the speed of the metronome until you feel very comfortable with the previous speed. Ifyou do, you will soon discover that you have to go back to the slower speed again! And this canfeel very frustrating.Always play with a good coordination in your hands. Do not forget the rules for each handeither!As you climb up to the higher speeds, you might feel that your wrist gets more locked up andyour forearm muscles are working more. Your picking technique is changing, and this is perfectbecause the impact from the strings gets higher the higher speed you are playing at. It happensbecause you pick so many notes in so little time, and your forearm muscles gets more and moreinvolved in coping with the intensity coming from the resistance of the strings.Remember that the higher speed you play at, the less movement your fretting fingers and righthand must do. This is a common problem for guitarists who wants to play fast – fingers andright hand are travelling too long distances in and off from the strings which automaticallyreduces playing speed. Get rid of this problem if you have it!!! Higher and higher speeds areonly possible by lesser and lesser movements of fingers and hands!What exercises should you use to develop speed? It depends on which playing technique youwant to master of course, but practicing the exercises given in this chapter will be veryeffective. Concentrate on developing your alternate picking technique by performing exercisesin this section and also by practicing scales in lead guitar section. It is also good to practicesweep picking with arpeggios (see Lead <strong>Guitar</strong> chapter), and trying to combine the sweeppicking with alternate picking (see exercise in the Right Hand <strong>Technique</strong> section).You can also create your own exercises if you want to learn some particular aspect of guitartechnique. When you do it, make sure that you cover as many aspects of this technique aspossible – look at the most efficient movements of fingers and hands, separate main problemsyou can have with this technique and practice them; see what possibilities this technique cangive you etc.
Chapter 2, GUITAR TECHNIQUE, Page 28, Playing with your handsHave Patience…!It might have been pointed out several times before, but I must say it again: have patience! It isimpossible to develop a great and relaxed guitar technique in ”no time”. Every finger muscleinvolved in playing guitar must be strengthened and developed. Even coordination betweenyour both hands, and your brain-hands connection must get more efficient. All these processestake time and you just have to be patient!
Chapter 2, GUITAR TECHNIQUE, Page 29, ArticulationArticulationArticulation describes how you play a specific note. For example you can play a noteshort, long, or vibrate it. There are several articulation techniques applicable forguitar and the ones presented in this section include:LEGATO AND STACCATOLegato (-) means playing notes, one after the other, without any “empty spaces” betweenthem. This technique can be executed on guitar by means of hammer-on’s, pull-offs and slide.The basic procedure goes as follows: the first note is (usually) struck by the right hand, but thenext ones are created exclusively by the left hand.Staccato (‘) means playing the note very shortly/abruptly. The note will therefore soundshorter than the actual rhythmic value they are given on the music sheet. If you try to sound thenote as shortly as possible, it becomes a staccatissimo ( . ) note. You execute these techniqueby damping the strings either by your left or right hand, immediately after you have picked thestring (staccato) or faster than immediately (staccatissimo).Fig. 14Legato and StaccatoNotes2legstac.PDF
Chapter 2, GUITAR TECHNIQUE, Page 30, ArticulationHAMMER ON / PULL-OFFHammer-on Allows you to go from a lower to a higher note. You pick the first notewith your right hand and follow it by pressing (hammering-on) another left-hand finger on thenext fret so the following note will sound. When pressing down the string, be sure not to adapttoo much pressure on it; the speed and timing of your finger movement is the main idea here!Hammering on should be done quick, relaxed, and with perfect timing – it is hard at first, but ifyou practice it diligently you will surely master the move.Pull-off Allows you to go from a higher to a lower note. You place a left-hand finger onone fret and the other finger on another fret lower on the neck. Play the first note with the pick,and drag the fretting finger down towards the floor and off of the string, so the next note frettedby the other finger will sound. Pulling off the finger should be done so the string is actuallyplucked and set in vibration. Be sure to practice this move so both the first and second notesounds equally high!Here is an exercise that will help you develop both hammer-ons and pull-offs. Try to get allnotes ringing equally loud:Fig. 15Hammers and PullsNotes2hampull.PDF
Chapter 2, GUITAR TECHNIQUE, Page 31, ArticulationSLIDESlide You play a note by fretting a note with a left hand finger and picking it with yourright hand. Move/slide your left-hand finger to the next fret on the fretboard. You can go inboth directions on the neck. Here comes an exercise for sliding. Be sure to hit all notesaccurately!Fig. 16SlideNotes2slide.PDFTablature2slide_tab.PDF
Chapter 2, GUITAR TECHNIQUE, Page 32, ArticulationVIBRATOVibrato (vib) This technique can be used in many different ways and the way every guitaristuse it is quite personal. Vibrato is giving the note more expression and makes it last longer. Itcan be produced by the following means:- Pull the string up and down with your left hand. You can do it in various speeds.- Slightly move the left-hand finger up and down within the fret. Classical string players oftenuse this technique.- A combination these two techniques.If you have a tremolo arm, you can use it to equally vibrate all strings.Fig. 17VibratoNotes2vibrato.PDF
Chapter 2, GUITAR TECHNIQUE, Page 33, ArticulationBENDS / UNISON BENDFig. 18BendsBends. When you bend a string with your left hand finger, you can rise the pitch by aninterval of a semi-note or a whole note, and sometimes even higher. Usually, guitarists use tobend the string from one note to another belonging to the same key and scale. Generallybending on the thinnest strings requires more strength in your muscles, and you must developthe right feeling in your fingers (and ears!) to bend the strings accurately to the exact pitch. Abend should sound like it is supposed to sound, that is: when you bend a string you should feelhow hard you must bend it to go up to desired note. Hear this note in your head and then bendthe string to it. It demands quite a lot of work to get this nailed; remember that every stringmust be bent with different strength even if you want to bend it by the same interval as you dofor the other strings. Do not forget that when you bend the string with your pinkie, ring or longfinger, you can use other fingers along with the first one to help it bend the string (it is calledreinforcement).The following exercise incorporates half and whole step bends, and should be practiced notonly in 10 th position on E 1 st string, but also in other positions on other strings!!!Notes2bends.PDFObserve that the thinner E 1 st , 2 nd and G 3 rd strings should be bended upwards, while the bassstrings are preferably bended downwards, towards the floor.Tablature2bends_tab.PDFNOTE The simple tablature employed in this example (ASCII tablature) does not include the graphic arrowsof the note example, but uses b = bend, r = return from bend and ^ = high bend.
Chapter 2, GUITAR TECHNIQUE, Page 34, ArticulationROCK The unison bend is very common in rock. You pick two strings at the sametime, and bend the thicker one to the same pitch as the thinner string.Fig. 19Unison BendsNotes2ubends.PDFBended notes can be made even more expressive by vibrating the string. This technique mighttake you some time to develop, since you must hold the same pitch and shake the stringsimultaneously. On the other hand, it is a great articulation technique, worth working on.
Chapter 2, GUITAR TECHNIQUE, Page 35, ArticulationORNAMENTATIONFig. 20TrillsTrill played by a quick hammer-on and pull-off movement of one of the left-hand fingers,up to a duration several seconds if desired.Notes2trill.PDF
Chapter 2, GUITAR TECHNIQUE, Page 36, ArticulationMordent or Reverse Mordent is a target note followed by a quick hammer-on orpull-off, followed by another quick pull-off respectively hammer-on which returns to the targetnote. The standard Mordent uses the pull-off and the Reverse Mordent uses the hammer-on.Fig. 21TrillsNotes2mordent.pdf
Chapter 2, GUITAR TECHNIQUE, Page 37, ArticulationGrace notes or appoggiatura is a very short note that precedes the main note. It can beplayed with a quick pull-off, hammer-on, or with a slide into the target note.Fig. 22Grace Notes or AppoggiaturaNotes2grace.pdf
Chapter 2, GUITAR TECHNIQUE, Page 38, ArticulationTurn are a quick upward or downward legato consisting of three notes (middle note=samepitch as the target note), followed by a quick pull-off respectively hammer-on to the target note.Fig. 23TurnsNotes2turns.PDF
Chapter 2, GUITAR TECHNIQUE, Page 39, ArticulationDYNAMICSAnother way of articulating a note is picking the string softer or harder, thus decreasing orincreasing the volume of the note. When you play your guitar keep in mind that the musicshould sound equally high throughout the time (if there is nothing else stated of course).The main dynamic terms in music are piano ( ) soft and forte ( ) strong, but there areseveral others you should be familiar with. Look in the All Aspects of ROCK & JAZZ/1 <strong>Music</strong>Theory for more information about this articulation method.TIMBREFig. 24 Choose Timbre by Picking Position1 Very soft timbre (rhythm guitar, typical)2 Neutral timbre3 Hard timbre, lots of overtones (solo playing, especially in rock)Timbre means note colour and is created by a characteristic pattern of overtones. You can varyit by picking the strings while holding the pick in different angles in respect to the stringsor/and picking strings closer to the bridge or closer to the neck. In the first case you will get acolder sound, in second case a warmer sound. You can also change your controls on your guitaror/and change the microphone switch. Another way to change timbre is to experiment with aneffect pedal in many various ways, let your fantasy flow!Home
Chapter 2, GUITAR TECHNIQUE, Page 40, Index Choice of <strong>Guitar</strong> <strong>Technique</strong>Index Choice of <strong>Guitar</strong> <strong>Technique</strong>11st, 2, 4, 5, 6, 15, 17, 3322nd, 4, 5, 6, 15, 3333rd, 4, 5, 6, 15, 3344th, 4, 5, 6, 1555th, 4, 5, 677th, 6AAlternate, 22, 24Anatomy, 3Appoggiatura, 37Articulation, 15, 29BBend, 34Bends, 33, 34Brain, 8CCircular, 19Concentration, 8Consciousness, 8Controls, 3Coordination, 25, 26DDamping, 15, 19EExercise, 16, 17FFender, 3Finger, 18Fingerplate, 3Frets, 3Fun, 13HHammer-on, 30Hand, 15, 16, 18, 27Hybrid, 24IInterval, 6LLegato, 29MMalmsteen, 10Mordent, 36OOrchestra, 2PPhysiology, 12Piano, 4Picking, 18, 19, 22, 24, 39Pickup, 3Plectrum, 18Position, 3, 18, 39Practicing, 10, 13, 14Pull, 30, 32Pull-off, 30RRhythm, 19SSecond, 9Slide, 17, 31Speed, 27Staccato, 29Strum, 5Sweep, 23TTAB, 16Tablature, 16, 17, 20, 21, 22,23, 26, 31, 33Timbre, 39Tuning, 3, 4, 5VVariations, 13Vibrato, 3, 32Volume, 2WWarm-up, 13