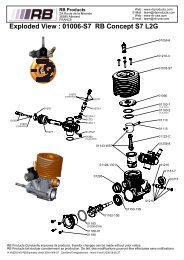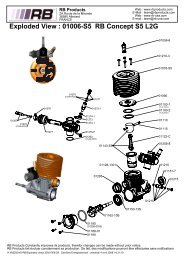

Create successful ePaper yourself
Turn your PDF publications into a flip-book with our unique Google optimized e-Paper software.
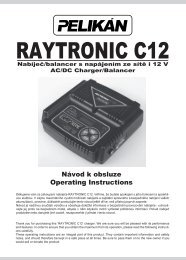
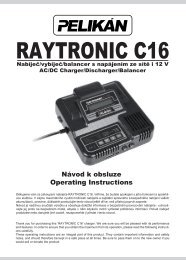
Instruction ManualIMPORTANT PRECAUTIONS• Do not charge battery types other than nickel-cadmium (NiCd) or nickel-metal hydride(NiMH) rechargeable batteries. Damage may occur from other types of batteries.• Do not connect AC and DC power sources to the charger simultaneously.• Do not attempt to charge batteries at excessive fast charge currents.• Do not use automotive type battery chargers to power the charger.• Do not leave the charger unattended while charging. Disconnect the battery and removeinput power from charger immediately if the charger becomes hot. Allow the charger orbattery to cool down before reconnecting.• Do not allow water, moisture or foreign objects into the charger.• Do not place the battery or charger on or near a flammable object while in use. Keep awayfrom carpets, cluttered workbenches, etc.• Do not cover the air intake holes on the charger as this could cause the charger to overheat.• Always disconnect charger from power source when not in use.• Adult supervision required when used by a child.IMPORTANT CARE AND HANDLING INSTRUCTIONS FOR NIMH BATTERIESWhile similar in appearance to sub-C NiCd batteries, NiMH batteries have a different internalchemistry and require a different charging method. It is important not to allow NiMH batteriesto overheat while being charged. Heat can adversely affect the performance of NiMH batteries. .If overheating is observed, disconnect the battery from the charger immediately. Do not deepcycle NiMH batteries. Permanent damage could result. Store NiMH packs with some voltageremaining on the cells. Use a NiMH battery pack no more than three cycles per day, with a twoto three hour break in-between for cooling. More frequent use is likely to overheat the pack.INPUT POWERTo use a 12V DC battery or power supply for input power, attach the charger’s red alligator clipto the positive (+) terminal on the battery or power supply, and the black alligator clip to thenegative (-) terminal. It’s best to use a “clean” DC power source whose output is filtered toremove unwanted electrical noise. To achieve the maximum potential with this charger, thesource battery must be capable of delivering at least 6 amps of current while maintaining 12VDC.To use 230V AC for input power, connect the black AC plug to a regular 230V wall outlet.When input power is applied, the charger will automatically detect the input voltage level todetermine if it is adequate for operation. The error message “Input V Error” will be displayed ifthe AC or DC input voltage is too high or too low. Double-check the power source at this timeto determine what problem might exist.CAUTION: Never connect the DC input leads to any power source simultaneouslywith AC input, as permanent damage to your charger may result!OUTPUT CONNECTIONThe output connections for this charger consists of two spring-loaded terminals. The redterminal is positive polarity (+), and the black terminal is negative polarity (-). These terminalsoffer the optimum in convenience for using any charge connector of your choice. A preassembledstandard battery connector is included with this charger.CAUTION: Always make sure to follow proper polarities when connecting thecharge leads to the charger! Failure to do so could result in permanent damage toyour battery and the charger. Match the positive battery lead to the charger’s red (+)terminal, and the negative (-) battery lead to the charger’s black terminal. Do not allow2