Materials & Prep List - RaNae Merrill Quilt Design
Materials & Prep List - RaNae Merrill Quilt Design
Materials & Prep List - RaNae Merrill Quilt Design

Create successful ePaper yourself
Turn your PDF publications into a flip-book with our unique Google optimized e-Paper software.
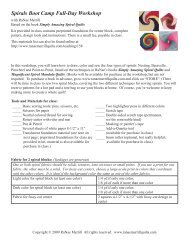
About Radiant Collection fabrics for this patternThe blue, red & yellow quilt shown above is made with fabrics from the Radiant Collection I created for Blank<strong>Quilt</strong>ing in 2005. The starburst fabric and Navy panels are still available at www.ranaemerrillquilts.com. Youcan use Navy panels for the background, then make the compass part of the pattern from regular fabrics.BTR-3761 StarburstsThere are dark, medium andlight starbursts with radii ofup to 5”. Parts of the patternask you to choose light,medium or dark circles.BTR-3760: Panels, Navy blueonly. These panels are 24” x 44.”The point where all the radiatinglines meet is the “center point.”This design goes through light,medium and dark as it graduatesfrom one color to another.To order Simply Amazing Spiral <strong>Quilt</strong>s and other supplies: www.ranaemerrillquilts.comThe Spiromaniacs Blog: http://spiromaniacs.wordpress.com7-20-09Receive the Spiromaniacs newsletter: www.ranaemerrillquilts.com/mailinglist.htmlSpiral <strong>Quilt</strong> workshops and lectures: www.ranaemerrillquilts.com/teaching or 212-316-2063<strong>Design</strong>s, patterns & instructions (C) 2009 <strong>RaNae</strong> <strong>Merrill</strong> All rights reserved.These materials are solely for the personal use of participants in this workshop. They may not be used by any other person or organizationfor any purpose (whether or not for profit) unless specifically authorized to do so in writing by <strong>RaNae</strong> <strong>Merrill</strong>.InstructionsAll seam allowances are 1/4”.Cut edgeCut Background, Borders & BindingCut Background & Border 2: (Pre-cut before class if possible)If using Radiant panels for background,refer to cutting instructions on Page 7Fold and press fabric as shown at right.Cut as shown in diagrams below:____ 2 strips 5” x WOF (Border 2) (Fig. 1)____ 2 strips 5” x 35” (Border 2) (Fig. 2)____ 1 rectangle 28” x 30” (Center background) (Fig. 3)Folded edge of fabricLength of fabricCut edgeSelvagesDouble folded edge of fabricCut edges (square up)Single folded edge of fabricSelvages (remove)Fig. 1Fig. 2Fig. 3Double folded edge of fabricCut edges (square up)Cut 5” x WOF from this sideSingle folded edge of fabricSelvages (remove)Double folded edge of fabricCut 5” x 35” stripfrom this sideSingle folded edge of fabricDouble folded edge of fabric15” highBorder 2 (2 pieces)30” x 28”whenunfolded14” wideSingle folded edge of fabricBorder 2 (2 pieces)Cut Border 1 & Binding: (Pre-cut before class if possible)____ 4 strips 1-1/2” x WOF (Border 1)____ 4 strips 2-1/2” x WOF (Border/Binding)(C) 2005 <strong>RaNae</strong> <strong>Merrill</strong> All rights reserved www.ranaemerrillquilts.comThis pattern is for personal use only and may not be used to make items for sale or to teach classes.