Exhaust System Installation Ford Mustang V6 & Mustang GT ... - Borla
Exhaust System Installation Ford Mustang V6 & Mustang GT ... - Borla
Exhaust System Installation Ford Mustang V6 & Mustang GT ... - Borla
You also want an ePaper? Increase the reach of your titles
YUMPU automatically turns print PDFs into web optimized ePapers that Google loves.
TITLE: <strong>Ford</strong> <strong>Mustang</strong><strong>GT</strong> & <strong>Mustang</strong><strong>V6</strong><br />
<strong>Installation</strong> Instructions<br />
PART NO. A-35593 Rev. F Page 3 of 4<br />
BORLA PERFORMANCE INDUSTRIES<br />
701 Arcturus Ave.<br />
Oxnard, CA. 93033<br />
805-986-8600<br />
Caution!!! Never work on a hot exhaust system. Serious injury in the form of burns can result If the vehicle has been in use and the exhaust<br />
system is hot, allow vehicle to cool for at least 1 hour. Always wear eye protection when working under any vehicle.<br />
Note: It is our recommendation that you use a hoist or hydraulic lift to facilitate the installation of your new <strong>Borla</strong> Performance <strong>Exhaust</strong> <strong>System</strong>.<br />
Taking all under car safety precautions, lift the vehicle using a hoist or hydraulic lift. Once this has been done, you may begin the removal of<br />
your old exhaust system from your vehicle.<br />
Note: Before removing the original exhaust system from your vehicle, please compare the parts you have received with the bill of materials<br />
provided on the previous page to assure that you have all the parts necessary for the installation of your new <strong>Borla</strong> Performance <strong>Exhaust</strong><br />
<strong>System</strong>.<br />
Original <strong>Exhaust</strong><br />
<strong>System</strong> Removal<br />
Note: With a used vehicle, we suggest a penetrating<br />
spray lubricant to be applied liberally to all exhaust fasteners<br />
and allowing a significant period of time for the<br />
chemical to lubricate the threads before attempting to<br />
disassemble.<br />
1. Lubricate hangers and rubber isolators on the rear<br />
mufflers.<br />
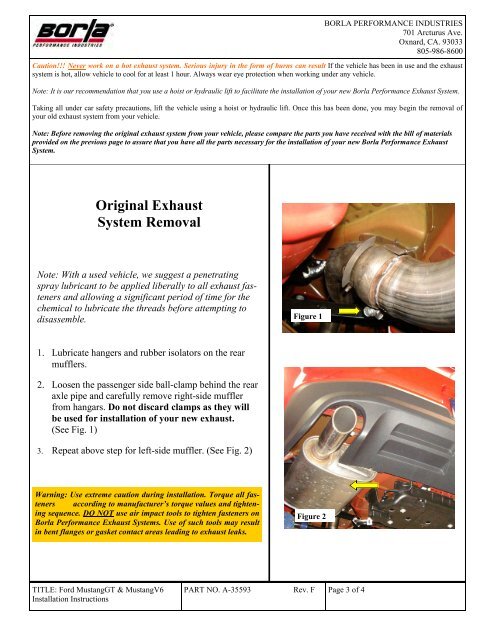
2. Loosen the passenger side ball-clamp behind the rear<br />
axle pipe and carefully remove right-side muffler<br />
from hangars. Do not discard clamps as they will<br />
be used for installation of your new exhaust.<br />
(See Fig. 1)<br />
3. Repeat above step for left-side muffler. (See Fig. 2)<br />
Warning: Use extreme caution during installation. Torque all fasteners<br />
according to manufacturer’s torque values and tightening<br />
sequence. DO NOT use air impact tools to tighten fasteners on<br />
<strong>Borla</strong> Performance <strong>Exhaust</strong> <strong>System</strong>s. Use of such tools may result<br />
in bent flanges or gasket contact areas leading to exhaust leaks.<br />
Figure 1<br />
Figure 2


