

Assembly instructions
rainline_installationinstructions
rainline_installationinstructions
- No tags were found...

You also want an ePaper? Increase the reach of your titles
YUMPU automatically turns print PDFs into web optimized ePapers that Google loves.
Lindab Rainline | Roof Drainage System<br />
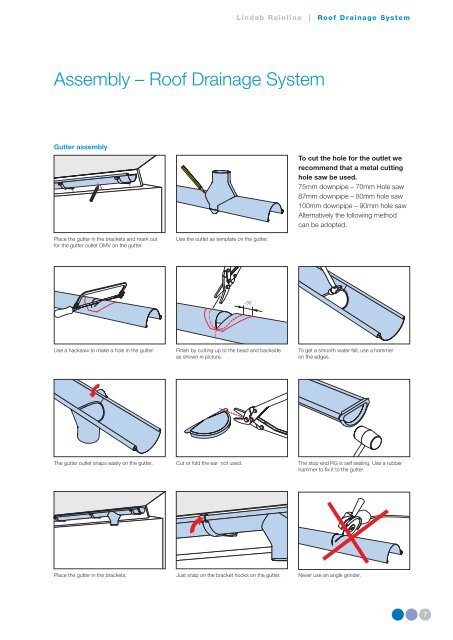
<strong>Assembly</strong> – Roof Drainage System<br />
Gutter assembly<br />
To cut the hole for the outlet we<br />
recommend that a metal cutting<br />
hole saw be used.<br />
75mm downpipe – 70mm Hole saw<br />
87mm downpipe – 80mm hole saw<br />
100mm downpipe – 90mm hole saw<br />
Alternatively the following method<br />
can be adopted.<br />
Place the gutter in the brackets and mark out<br />
for the gutter outlet OMV on the gutter.<br />
Use the outlet as template on the gutter.<br />
Use a hacksaw to make a hole in the gutter.<br />
Finish by cutting up to the bead and backside<br />
as shown in picture.<br />
To get a smooth water fall, use a hammer<br />
on the edges.<br />
The gutter outlet snaps easily on the gutter.<br />
Cut or fold the ear not used.<br />
The stop end RG is self sealing. Use a rubber<br />
hammer to fix it to the gutter.<br />
Place the gutter in the brackets. Just snap on the bracket hooks on the gutter. Never use an angle grinder.<br />
7