

position
Dodge RAM MODEL 116 11-2010 - Pop Up Hitch
Dodge RAM MODEL 116 11-2010 - Pop Up Hitch
- No tags were found...

You also want an ePaper? Increase the reach of your titles
YUMPU automatically turns print PDFs into web optimized ePapers that Google loves.
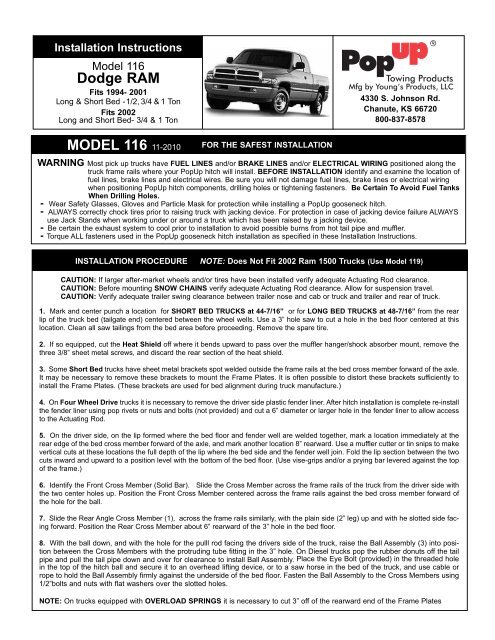
Installation Instructions<br />
Model 116<br />
Dodge RAM<br />
Fits 1994- 2001<br />
Long & Short Bed -1/2, 3/4&1 Ton<br />
Fits 2002<br />
Long and Short Bed- 3/4 & 1 Ton<br />
Towing Products<br />
Mfg by Young’s Products, LLC<br />
4330 S. Johnson Rd.<br />
Chanute, KS 66720<br />
800-837-8578<br />
MODEL 116 11-2010<br />
FOR THE SAFEST INSTALLATION<br />
WARNING Most pick up trucks have FUEL LINES and/or BRAKE LINES and/or ELECTRICAL WIRING <strong>position</strong>ed along the<br />
truck frame rails where your PopUp hitch will install. BEFORE INSTALLATION identify and examine the location of<br />
fuel lines, brake lines and electrical wires. Be sure you will not damage fuel lines, brake lines or electrical wiring<br />
when <strong>position</strong>ing PopUp hitch components, drilling holes or tightening fasteners. Be Certain To Avoid Fuel Tanks<br />
When Drilling Holes.<br />
- Wear Safety Glasses, Gloves and Particle Mask for protection while installing a PopUp gooseneck hitch.<br />
- ALWAYS correctly chock tires prior to raising truck with jacking device. For protection in case of jacking device failure ALWAYS<br />
use Jack Stands when working under or around a truck which has been raised by a jacking device.<br />
- Be certain the exhaust system to cool prior to installation to avoid possible burns from hot tail pipe and muffler.<br />
- Torque ALL fasteners used in the PopUp gooseneck hitch installation as specified in these Installation Instructions.<br />
INSTALLATION PROCEDURE NOTE: Does Not Fit 2002 Ram 1500 Trucks (Use Model 119)<br />
CAUTION: If larger after-market wheels and/or tires have been installed verify adequate Actuating Rod clearance.<br />
CAUTION: Before mounting SNOW CHAINS verify adequate Actuating Rod clearance. Allow for suspension travel.<br />
CAUTION: Verify adequate trailer swing clearance between trailer nose and cab or truck and trailer and rear of truck.<br />
1. Mark and center punch a location for SHORT BED TRUCKS at 44-7/16” or for LONG BED TRUCKS at 48-7/16” from the rear<br />
lip of the truck bed (tailgate end) centered between the wheel wells. Use a 3” hole saw to cut a hole in the bed floor centered at this<br />
location. Clean all saw tailings from the bed area before proceeding. Remove the spare tire.<br />
2. If so equipped, cut the Heat Shield off where it bends upward to pass over the muffler hanger/shock absorber mount, remove the<br />
three 3/8” sheet metal screws, and discard the rear section of the heat shield.<br />
3. Some Short Bed trucks have sheet metal brackets spot welded outside the frame rails at the bed cross member forward of the axle.<br />
It may be necessary to remove these brackets to mount the Frame Plates. It is often possible to distort these brackets sufficiently to<br />
install the Frame Plates. (These brackets are used for bed alignment during truck manufacture.)<br />
4. On Four Wheel Drive trucks it is necessary to remove the driver side plastic fender liner. After hitch installation is complete re-install<br />
the fender liner using pop rivets or nuts and bolts (not provided) and cut a 6” diameter or larger hole in the fender liner to allow access<br />
to the Actuating Rod.<br />
5. On the driver side, on the lip formed where the bed floor and fender well are welded together, mark a location immediately at the<br />
rear edge of the bed cross member forward of the axle, and mark another location 8” rearward. Use a muffler cutter or tin snips to make<br />
vertical cuts at these locations the full depth of the lip where the bed side and the fender well join. Fold the lip section between the two<br />
cuts inward and upward to a <strong>position</strong> level with the bottom of the bed floor. (Use vise-grips and/or a prying bar levered against the top<br />
of the frame.)<br />
6. Identify the Front Cross Member (Solid Bar). Slide the Cross Member across the frame rails of the truck from the driver side with<br />
the two center holes up. Position the Front Cross Member centered across the frame rails against the bed cross member forward of<br />
the hole for the ball.<br />
7. Slide the Rear Angle Cross Member (1), across the frame rails similarly, with the plain side (2” leg) up and with he slotted side facing<br />
forward. Position the Rear Cross Member about 6” rearward of the 3” hole in the bed floor.<br />
8. With the ball down, and with the hole for the pulll rod facing the drivers side of the truck, raise the Ball Assembly (3) into <strong>position</strong><br />
between the Cross Members with the protruding tube fitting in the 3” hole. On Diesel trucks pop the rubber donuts off the tail<br />
pipe and pull the tail pipe down and over for clearance to install Ball Assembly. Place the Eye Bolt (provided) in the threaded hole<br />
in the top of the hitch ball and secure it to an overhead lifting device, or to a saw horse in the bed of the truck, and use cable or<br />
rope to hold the Ball Assembly firmly against the underside of the bed floor. Fasten the Ball Assembly to the Cross Members using<br />
1/2”bolts and nuts with flat washers over the slotted holes.<br />
NOTE: On trucks equipped with OVERLOAD SPRINGS it is necessary to cut 3” off of the rearward end of the Frame Plates
.<br />
INSTALLATION PROCEDURE - CONTINUED<br />
9. Square the assembled Cross Members and Ball Assembly across the frame. Identify the driver side (4, with labels) and passenger<br />
side (5) Frame Plates. Position the Frame Plate extensions between the Cross Members. Fasten to the Front Cross Member<br />
using a flat washer and a 1/2” nut. Fasten to the Rear Cross Member by passing a 1-1/4” bolt with a flat washer from the Frame<br />
Plate and securing with a 1/2” nut. Snug these fittings at this time.<br />
10. Fasten the Frame Plates to the frame by aligning two of the the slots in the Frame Plate with existing holes in the truck frame.<br />
Pass 1-1/2” bolts with flat washers from inside the frame and secure with 1/2” flat washers and nuts.<br />
11. Torque 1/2” fasteners to 65 foot pounds in the following sequence: First the Cross Members to Ball Assembly, then to the<br />
Frame Plates to the Cross Members, and finally the Frame Plates to the truck frame.<br />
12. Drill four 1/2”” holes for the Safety Chain Brackets from under the truck bed. Drill through the four holes in the Ball Assembly<br />
through the truck bed floor. Place a U-bolt in each pair of holes from the top side of the bed. From under the bed place a spring and<br />
1/2” lock nut on each U-bolt leg. Tighten each nut until thread extends through the nut.<br />
13. Pass the Actuating Rod (6) through the slotted hole between the Frame Plate extensions and into the hole in the slide. Align<br />
the Actuating Rod and secure using the 1/4” bolt. Seat the bolt in the hole in the rod, and tighten to 7 foot pounds. Ascertain that<br />
the rod is free in the frameplate and doesn’t drag.<br />
IMPORTANT!<br />
The final step is to raise the ball and check the <strong>position</strong> of<br />
the slide from under the truck.<br />
When the ball is fully raised, the Roll Pin Stop should be<br />
against the ball tube. This allows the Detent Ball to lock the<br />
slide in place and <strong>position</strong>s the ball over the flat surface at<br />
top of the slide.<br />
In this <strong>position</strong> it is impossible for the ball to retract without<br />
manually pushing in the handle.<br />
Read the SAFE TOWING INSTRUCTIONS<br />
on the PopUp Warranty Sheet<br />
Roll Pin Stop<br />
Spring Loaded<br />
Detent Ball<br />
HARDWARE PROVIDED<br />
16 - 1/2” X 1-1/4” Grd. 8 Bolts<br />
14 - 1/2” Lock Nuts<br />
14 - 1/2” Flat Washers<br />
2 - U-Bolts & 4 Springs<br />
1 - 3/8” Eyebolt<br />
1 - Plastic Cap<br />
Passenger Side Frame Plate<br />
(5)<br />
Front Cross Member<br />
(2)<br />
Ball Assembly<br />
(3)<br />
Rear Cross Member<br />
(1)<br />
www.popuphitch.com<br />
Does Not Fit 2002 Ram 1500 Trucks (Use Model 119)<br />
(4)<br />
Driver Side Frame Plate<br />
Model Number 116<br />
Gross Trailer Weight: 30M lbs.<br />
Gross Trailer Tongue Weight: 7.5M lbs.<br />
(6)<br />
Actuating Rod<br />
Copyright 2010 Young’s Products, LLC. All Rights Reserved<br />
Patent no. US 7,775,545
IMPORTANT!<br />
Before installing the actuating rod place the indicator / lock collar on the rod<br />
toward the bend for the handle.<br />
As a last step firmly pull the handle to raise the ball, verify that the Roll Pin Stop<br />
is against the ball tube. Then slide the indicator / lock collar against the outside<br />
of the frame plate and secure it in this <strong>position</strong> using a 1/8” allen wrench.<br />
With the indicator / lock collar in place raise the actuator rod slightly and push<br />
in to lower the ball. To raise the ball raise the handle and pull the actuator rod<br />
out till the indicator / lock collar clears the frame plate. This gives a positive<br />
indication that the ball is fully raised and is ready for towing.<br />
Roll Pin<br />
Stop<br />
Frame<br />
Plate<br />
Indicator /<br />
Lock Collar