

Aroma Digital Turbo Pressure CookerAPC-804SB (APC-804SB) - APC-804SB Instruction Manual - Digital Turbo Pressure Cooker
Aroma Digital Turbo Pressure CookerAPC-804SB (APC-804SB) - APC-804SB Instruction Manual - Digital Turbo Pressure Cooker
Aroma Digital Turbo Pressure CookerAPC-804SB (APC-804SB) - APC-804SB Instruction Manual - Digital Turbo Pressure Cooker

You also want an ePaper? Increase the reach of your titles
YUMPU automatically turns print PDFs into web optimized ePapers that Google loves.
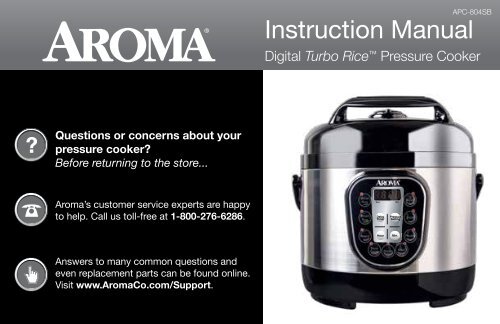
<strong>APC</strong>-<strong>804SB</strong><br />
<strong>Instruction</strong> <strong>Manual</strong><br />
<strong>Digital</strong> <strong>Turbo</strong> Rice <strong>Pressure</strong> <strong>Cooker</strong><br />
Questions or concerns about your<br />
pressure cooker?<br />
Before returning to the store...<br />
<strong>Aroma</strong>’s customer service experts are happy<br />
to help. Call us toll-free at 1-800-276-6286.<br />
Hour<br />
Delay<br />
Timer<br />
Min.<br />
Pressue<br />
Setting<br />
Hour<br />
Min.<br />
Answers to many common questions and<br />
even replacement parts can be found online.<br />
Visit www.<strong>Aroma</strong>Co.com/Support.
Congratulations on your purchase of the <strong>Aroma</strong> ® 8-cup <strong>Turbo</strong> Rice <strong>Digital</strong> <strong>Pressure</strong> <strong>Cooker</strong>!<br />
Your new <strong>Aroma</strong> ® <strong>Turbo</strong> Rice <strong>Digital</strong> <strong>Pressure</strong> <strong>Cooker</strong> is the perfect way to have delicious home-cooked meals in a fraction of the time! <strong>Pressure</strong> cooking produces<br />
tender, delicious cooked results astonishingly fast. Your new digital pressure cooker is perfect for a wide variety of pressure cooking recipes. <strong>Pressure</strong> safety systems allow<br />
you to rest easy while your pressure cooker handles the cooking.<br />
It’s not just a pressure cooker! Your new <strong>Aroma</strong> ® <strong>Turbo</strong> Rice <strong>Digital</strong> <strong>Pressure</strong> <strong>Cooker</strong> also includes easy-to-use programmed functions to cook white rice, brown rice,<br />
beans, slow cook, steam, meat, poultry, soup, and keep warm. These additional functions, make meal options nearly endless!<br />
This manual contains instructions for using your <strong>Aroma</strong> ® <strong>Turbo</strong> Rice <strong>Digital</strong> <strong>Pressure</strong> <strong>Cooker</strong> and its convenient pre-programmed digital settings, as well as the<br />
accessories included.<br />
For more information on your <strong>Aroma</strong> ® <strong>Turbo</strong> Rice <strong>Digital</strong> <strong>Pressure</strong> <strong>Cooker</strong> or for replacement parts, product service, recipes and other home appliance solutions, please<br />
visit us online at www.<strong>Aroma</strong>Co.com.<br />
See what’s cooking with <strong>Aroma</strong> online!<br />
www.<strong>Aroma</strong>TestKitchen.com www.facebook.com/<strong>Aroma</strong>Housewares www.twitter.com/<strong>Aroma</strong>Housewares www.pinterest.com/<strong>Aroma</strong>Housewares<br />
Published By:<br />
<strong>Aroma</strong> Housewares Co.<br />
6469 Flanders Drive<br />
San Diego, CA 92121<br />
U.S.A.<br />
1-800-276-6286<br />
www.<strong>Aroma</strong>Co.com<br />
©2016 <strong>Aroma</strong> Housewares Company<br />
All rights reserved.<br />
IMPORTANT SAFEGUARDS<br />
Basic safety precautions should always be followed when using electrical appliances, including the following:<br />
1. Important: Read all instructions carefully before first use.<br />
2. Do not touch hot surfaces. Use the handles or knobs.<br />
3. Use only on a level, dry and heat-resistant surface.<br />
4. To protect against fire, electric shock and injury to persons, do not<br />
immerse cord, plug or the appliance in water or any other liquid. See<br />
instructions for cleaning.<br />
5. Close supervision is necessary when the appliance is used by or near<br />
children.<br />
6. Unplug from outlet when not in use and before cleaning. Allow unit<br />
to cool before removing or replacing parts and before cleaning the<br />
appliance.<br />
7. Do not operate any appliance with a damaged cord or plug or after<br />
the appliance malfunctions or has been damaged in any manner.<br />
Contact <strong>Aroma</strong> ® customer service for examination, repair or<br />
adjustment.<br />
8. The use of accessory attachments not recommended by <strong>Aroma</strong> ®<br />
Housewares may result in fire, electrical shock or injury.<br />
9. Do not use outdoors.<br />
10. Do not let cord touch hot surfaces or hang over the edge of a counter<br />
or table.<br />
11. NEVER ATTEMPT TO OPEN LID WHILE THE UNIT IS<br />
PRESSURE COOKING. Do not open the pressure cooker until the<br />
unit has cooled and all internal pressure has been released. If lid is<br />
difficult to turn, this indicates that the cooker is still pressurized. Do<br />
not force it to open. Any pressure in the cooker can be hazardous.<br />
12. Do not place on or near a hot gas or electric burner or in<br />
a heated oven.<br />
13. Do not use the appliance for other than its intended use.<br />
14. Always check the pressure release devices for clogging before use.<br />
15. Do not touch, cover or obstruct the steam vent on the top of the<br />
pressure cooker as it is extremely hot and may cause scalding.<br />
16. Use only with a 120V AC power outlet.<br />
17. Always unplug from the base of the wall outlet. Never pull on the cord.<br />
18. The pressure cooker should be operated on a separate electrical circuit<br />
from other operating appliances. If the electrical circuit is overloaded with<br />
other appliances, the pressure cooker may not operate properly.<br />
19. Always make sure the outside of the inner cooking pot is dry prior to use. If<br />
the inner pot is returned to the cooker when wet, it may damage or cause<br />
the product to malfunction.<br />
20. Food should not be left in the inner cooking pot with the “Keep-Warm”<br />
function on for more than 12 hours.<br />
21. To disconnect, turn control to “OFF,” then remove the plug from the wall<br />
outlet.<br />
22. To reduce the risk of electrical shock, cook only in the removable inner<br />
cooking pot provided.<br />
23. Extreme caution must be used when moving a pressure cooker containing<br />
hot food or liquids.<br />
24. For household use only.<br />
25. This appliance cooks under pressure. Improper use may result in scalding<br />
injury. Make certain unit is properly closed before operating. Follow the<br />
instructions in “Using the Start/Keep Warm” on page 7.<br />
26. Do not fill the unit over 4/5 full. When cooking foods that expand during<br />
cooking such as rice or dried vegetables, do not fill the unit over 3/5 full.<br />
Over filling may cause a risk of clogging the vent pipe and developing<br />
excess pressure. Follow the instructions in “To <strong>Pressure</strong> Cook” on page 7.<br />
27. Be aware that certain foods, such as applesauce, cranberries, pearl barley,<br />
oatmeal or other cereals, split peas, noodles, macaroni, rhubarb, or<br />
spaghetti can foam, froth, and sputter, and clog the pressure release<br />
device (steam vent). These foods should not be cooked in<br />
the pressure cooker.<br />
28. Do not use this pressure cooker for pressure frying with oil.<br />
SAVE THESE INSTRUCTIONS<br />
1
Exhaust Airtight Exhaust<br />
IMPORTANT SAFEGUARDS<br />
Short Cord<br />
<strong>Instruction</strong>s<br />
1. A short power-supply cord is<br />
provided to reduce the risks<br />
resulting from becoming<br />
entangled in or tripping over<br />
a longer cord.<br />
2. Longer extension cords are<br />
available and may be used if<br />
care is exercised in their use.<br />
3. If a longer extension cord is<br />
used:<br />
a. The marked electrical<br />
rating of the extension<br />
DO NOT DRAPE CORD!<br />
KEEP AWAY<br />
FROM CHILDREN!<br />
cord should be at least as great as the electrical rating of the<br />
appliance.<br />
b. The longer cord should be arranged so that it will not drape over the<br />
countertop or tabletop where it can be pulled by children or tripped<br />
over unintentionally.<br />
c. The extension cord should be a grounding-type 3-wire cord.<br />
Grounding <strong>Instruction</strong>s<br />
This appliance must be grounded while in use to protect the operator from<br />
electrical shock. The appliance is equipped with a 3-conductor cord and a<br />
3-prong grounding-type plug to fit the proper grounding-type receptacle. The<br />
appliance has a plug that looks like sketch A. An adapter, sketch B, should be<br />
used for connecting sketch-A plugs to two-prong receptacles. The grounding<br />
tab, which extends from the adapter, must be connected to a permanent<br />
ground such as a properly grounded outlet box as shown in sketch C using a<br />
metal screw.<br />
PARTS IDENTIFICATION<br />
Lid Handle<br />
Locking Lid<br />
Non-stick Inner Cooking Pot<br />
<strong>Pressure</strong> <strong>Cooker</strong> Handle<br />
<strong>Digital</strong> Display<br />
<strong>Pressure</strong> <strong>Cooker</strong> Body<br />
<strong>Digital</strong> Control Panel<br />
To Open <strong>Pressure</strong> <strong>Cooker</strong><br />
To Close <strong>Pressure</strong> <strong>Cooker</strong><br />
Floating<br />
Safety<br />
Valve<br />
Steam Vent<br />
2<br />
THIS APPLIANCE IS FOR HOUSEHOLD USE ONLY.<br />
Steam Rack<br />
Measuring Cup Serving Spatula Soup Ladle<br />
3
PARTS IDENTIFICATION (CONT.)<br />
SAFETY SYSTEMS<br />
The <strong>Aroma</strong> ® <strong>Digital</strong> <strong>Pressure</strong> <strong>Cooker</strong> was built with safety in mind. Along with its convenient digital features, this pressure cooker<br />
also includes seven advanced safety systems.<br />
Safety System #1: Vent automatically releases<br />
pressure if it becomes too high.<br />
Power: The POWER button turns the<br />
pressure cooker on and off.<br />
Keep-Warm: The KEEP-WARM button keeps<br />
food warm and ready to serve. The pressure<br />
cooker will automatically switch to this mode after<br />
the selected function has finished cooking.<br />
<strong>Pressure</strong> Setting: The PRESSURE SETTING button<br />
allows you to determine what level of pressure you<br />
want: low (1P), medium (2P), high (3P).<br />
Cooking Timer (HOUR/MINUTE): The HOUR<br />
and MINUTE buttons allow you to personalize the<br />
amount of time on the timer. These buttons allow<br />
for adding and removing cooking time.<br />
Delay Timer: The DELAY TIMER button allows you to<br />
delay the time the pressure cooker will begin to cook.<br />
MENU FUNCTIONS<br />
White Rice: The White Rice function cooks delicious,<br />
quality rice automatically.<br />
Brown Rice: The Brown Rice function is ideal for<br />
cooking brown rice and other tough-to-cook whole<br />
grains.<br />
Beans: The Beans function allows optimal results for<br />
tough to cook beans at the touch of a button.<br />
Slow Cook: The Slow Cook function allows the<br />
pressure cooker to double as a programmable slow<br />
cooker with time settings that range from 1 to 10<br />
hours.<br />
Steam: The Steam function allows the pressure<br />
cooker to quickly steam delicious meats and<br />
vegetables.<br />
Meat: The Meat function is preset to a high pressure<br />
setting for quickly cooking meats to tender perfection.<br />
Poultry: The Poultry function is preset for perfectly<br />
cooked poultry at high pressure.<br />
Soup: The Soup function is perfect for flavorful soups<br />
and stews. Add all of the ingredients and set the time<br />
from 1 minute to 5 hours depending on your recipe.<br />
2<br />
1<br />
4<br />
5<br />
6<br />
Exhaust Airtight Exhaust<br />
3<br />
Safety System #2: The pressure cooker will<br />
not cook with pressure if the lid is not securely<br />
closed and locked.<br />
Safety System #3: Flexible gasket releases<br />
pressure if it becomes too high.<br />
Safety System #4: Built to withstand pressure<br />
higher than the cooker is intended to reach.<br />
Safety System #5: Accurately measures<br />
pressure to ensure it stays within intended<br />
ranges.<br />
Safety System #6: <strong>Digital</strong> thermostat cuts<br />
heating off to prevent dry boiling.<br />
Safety System #7: To prevent overheating, the<br />
power fuse will trip if the temperature rises too<br />
high.<br />
4 5<br />
7
BEFORE FIRST USE<br />
Using the START/KEEP WARM function<br />
1 2<br />
3<br />
4<br />
NOTE<br />
1. Read all instructions and important safeguards.<br />
2. Remove all packaging materials and check that all items have been received in good condition.<br />
3. Tear up all plastic bags and dispose of properly as they can pose a risk to children.<br />
4. Wash lid and all accessories in warm, soapy water. Rinse and dry thoroughly.<br />
5. Remove the inner cooking pot from pressure cooker and clean with warm, soapy water. Rinse and dry thoroughly before returning to cooker.<br />
6. Wipe body clean with a damp cloth.<br />
• Do not use abrasive cleaners or scouring pads.<br />
• Do not immerse the pressure cooker base, cord or plug in water at any time.<br />
Add food to be pressure cooked to<br />
the inner cooking pot.<br />
Place the inner cooking pot into the<br />
pressure cooker.<br />
Close the lid securely onto the<br />
pressure cooker, turning it clockwise<br />
so that it locks into place. There will<br />
be an audible “click” when the lid<br />
locks closed.<br />
Move the steam vent on the top of<br />
the lid to the “AIRTIGHT” position.<br />
NOTE<br />
• Do not fill above the 4/5 line<br />
in the inner cooking pot.<br />
• The amount of water and<br />
food should not exceed 4/5<br />
of the height of the inner<br />
cooking pot. For food that<br />
will expand in water, the level<br />
should not exceed 3/5 of<br />
the inner cooking pot. The<br />
minimun allowable level is<br />
1/5 of the inner cooking pot.<br />
Plug the power cord into an available Press the POWER/KEEP WARM Press the START/KEEP WARM<br />
120V AC wall outlet.<br />
button to turn on the pressure button again, the cooker will remain<br />
cooker. The LED display will light up. in KEEP WARM. Press it a third time<br />
6 and it will cancel the process.<br />
7<br />
5<br />
6<br />
7
TO PRESSURE COOK<br />
Using the PRESSURE SETTING function<br />
Begin PRESSURE SETTING cooking by following steps 1 to 4 on page 7.<br />
TO PRESSURE COOK<br />
Using the PRESSURE SETTING function (CONT.)<br />
5<br />
6<br />
7<br />
8<br />
10<br />
11<br />
12 13<br />
Plug the power cord into an available<br />
120V AC wall outlet.<br />
9<br />
Press POWER/KEEP WARM button<br />
to turn pressure cooker on. Press<br />
the PRESSURE SETTING button. To<br />
select desired pressure setting, see<br />
page 10 for PRESSURE SETTING<br />
pressure levels.<br />
Select Cooking time by pressing MIN<br />
button. Maximum cooking time is 90<br />
minutes. Press the POWER/KEEP<br />
WARM button. The cooker will begin<br />
to operate.<br />
When optimun pressure is achieved<br />
the cooker will beep once. The<br />
programmed time will count down<br />
until reaching zero “0”.<br />
Allow the pressure cooker to cool<br />
and release all excess pressure<br />
before attempting to open the lid.<br />
To speed up this process, manually<br />
move the steam vent to the open<br />
position. *CAUTION!<br />
Open the lid by turning it<br />
counterclockwise to unlock it.<br />
Remove the lid.<br />
Check food for doneness. If cooking<br />
is complete, remove food for<br />
serving.<br />
Once serving is complete, press the<br />
POWER button to turn the pressure<br />
cooker off. Unplug from the power<br />
outlet when not in use.<br />
Once the selected time has elapsed<br />
the pressure cooker will “beep” 3<br />
times and automatically switch to<br />
the KEEP-WARM mode.<br />
NOTE<br />
• The programmed cook time can be set up to 90min and it is with High/Medium/Low<br />
pressure level selections. Press the <strong>Pressure</strong> Setting button, the LED screen shows<br />
3P01, then press Min to select the cooking time from 1-90 min (After 90 min, the timer<br />
will start a new cycle.). After setting cooking time, you can press <strong>Pressure</strong> Setting again<br />
to change the pressure levels. By pressing <strong>Pressure</strong> Setting button, it will start a cycle<br />
of “3P”-“2P”-“1P”. After setting, press Start button, the cooker will begin to operate<br />
• 3P is high pressure, 2P is medium pressure, 1P is low pressure.<br />
8 9<br />
HELPFUL<br />
HINTS<br />
CAUTION<br />
• The “Keep-Warm” setting is great for keeping food warm and delicious while serving. However, do not leave food on “Keep-Warm” for longer than<br />
12 hours.<br />
• *Exercise caution when moving the steam vent to the “EXHAUST” position. A large amount of hot steam will quickly escape once the vent is<br />
opened.
PRESSURE LEVELS<br />
The <strong>Aroma</strong> ® <strong>Turbo</strong> Rice <strong>Digital</strong> <strong>Pressure</strong> <strong>Cooker</strong> includes three pressure settings for a variety of cooking options. The<br />
table below gives an approximate pressure level that each pressure setting will reach.<br />
5<br />
TO COOK USING THE DELAY TIMER FUNCTION<br />
Begin DELAY TIMER cooking by following steps 1 to 4 on page 7.<br />
6<br />
7 8<br />
PRESSURE SETTING<br />
APPROXIMATE<br />
PRESSURE LEVEL<br />
(pounds per square inch)<br />
High (3P)<br />
10 psi<br />
Plug the power cord into an available<br />
120V AC wall outlet.<br />
Press the POWER/KEEP WARM to<br />
turn on the pressure cooker. The<br />
LED display will light up.<br />
Press the DELAY TIMER to begin the<br />
delay timer process. Press HOUR to<br />
select the desired time in 30-minute<br />
increments.<br />
Select desired function. The cooker<br />
will start to build pressure and<br />
begin the cooking process when the<br />
delayed time has expired.<br />
9<br />
10<br />
11 12<br />
Medium (2P)<br />
5 psi<br />
Low (1P)<br />
2.5 psi<br />
Allow the pressure cooker to cool<br />
and release all excess pressure<br />
before attempting to open the lid.<br />
To speed up this process, manually<br />
move the steam vent to the open<br />
position. *CAUTION!<br />
Open the lid by turning it<br />
counterclockwise to unlock it.<br />
Remove the lid.<br />
Check food for doneness. If cooking<br />
is complete, remove food for<br />
serving.<br />
Once serving is complete, press the<br />
POWER button to turn the pressure<br />
cooker off. Unplug from the power<br />
outlet when not in use.<br />
• You can delay the pressure cooker to delay cooking up to 15 hours.<br />
• DELAY TIMER is not recommended for use on SLOW COOK, MEAT, and POULTRY.<br />
HELPFUL<br />
10 HINTS<br />
11
TO COOK WHITE RICE, BROWN RICE, BEANS<br />
The steam vent should be closed when cooking Rice or Beans.<br />
1 2<br />
3<br />
4<br />
5<br />
TO COOK WHITE/BROWN RICE, BEANS (CONT.)<br />
6<br />
7<br />
8<br />
Using the provided measuring<br />
cup, add rice or beans to the inner<br />
cooking pot.<br />
NOTE: When cooking beans or<br />
legumes add 3 cups of water to each<br />
cup of beans or legumes.<br />
Rinse rice or beans to remove<br />
excess starch if desired. Drain.<br />
For white rice, fill the inner pot with<br />
water to the line that matches the<br />
number of uncooked cups. For<br />
example, for two cups of uncooked<br />
rice you will fill to line labeled with a<br />
2 or follow package directions.<br />
Place the inner cooking pot into the<br />
pressure cooker.<br />
Close the lid securely onto the<br />
pressure cooker, turning it clockwise<br />
so that it locks into place. There will<br />
be an audible “click” when the lid<br />
locks closed. Turn the steam vent to<br />
the “CLOSED POSITION”.<br />
Press POWER/KEEP WARM button.<br />
Press either WHITE RICE, BROWN<br />
RICE, or BEANS function button.<br />
The LED light will indicate the power<br />
level and the cooking minutes.<br />
After the function has been selected,<br />
the cooker will start automatically.<br />
The pressure cooker will<br />
automatically start building pressure.<br />
Once pressure is achieved, the<br />
programmed time will begin to count<br />
down to zero.<br />
• Before placing the inner cooking pot into the<br />
• If you misplace the measuring cup, a ¾ standard US<br />
pressure cooker, check that it is dry and free of<br />
cup is an exact replacement.<br />
3/4<br />
US cups<br />
debris. Adding the inner cooking pot when wet<br />
• To add more flavor to rice, try substituting a favorite<br />
NOTE<br />
may damage the pressure cooker.<br />
HELPFUL meat or vegetable broth or stock. The ratio of broth/<br />
• If you wish to delay cooking for Rice or Beans, press DELAY TIMER button, the LED screen shows 0000 (the 2 green digits 00 will flash). Press HOUR<br />
HINTS<br />
• The amount of water and food shall not exceed<br />
stock to rice will be the same as water to rice.<br />
The provided rice cooker<br />
button to set the Pre-set time (30 min-15 hours). After 15 hours, the timer will start a new cycle. If you wish to choose the cooking time, press MIN button<br />
cup is the equivalent to<br />
4/5 of the height of the inner cooking pot. For<br />
• 3P is high pressure, 2P is medium pressure, 1P is low<br />
to select the time from 5-15min (After 15min, the timer will start a new cycle). If you wish to change the pressure level, press the PRESSURE SETTING<br />
a ¾ standard US cup.<br />
NOTE<br />
food that will expand in water, the level should<br />
pressure.<br />
button to choose 3P (high pressure)/ 2P medium pressure/ 1P low pressure. After setting, press START button, the cooker will begin to operate.<br />
not exceed 3/5 of the inner cooking pot. The<br />
• The amount of water and food should not exceed 4/5 of the height of the inner cooking pot. For food that will expand in water, the level should not<br />
minimun allowable level is 1/5 of the inner<br />
exceed 3/5 of the inner cooking pot. The minimun allowable level is 1/5 of the inner cooking pot.<br />
cooking pot.<br />
12 13
9<br />
TO COOK WHITE/BROWN RICE, BEANS (CONT.)<br />
10<br />
11 12<br />
TO COOK MEAT, POULTRY, SOUP<br />
Begin cooking MEAT, POULTRY, SOUP by following steps 1 to 4 of “<strong>Pressure</strong> Cook” on page 7.<br />
5<br />
6<br />
7<br />
8<br />
When cooking is complete, the<br />
pressure cooker will beep 3 times and<br />
automatically switch to KEEP WARM.<br />
Screen will read “00H0”.<br />
Turn the steam vent to the<br />
“EXHAUST” position to release<br />
pressure. Open the lid by turning it<br />
counterclockwise and remove the<br />
lid. CAUTION: Hot steam will release<br />
when vent is opened.<br />
Check food for doneness. If cooking<br />
is complete, remove food for serving.<br />
Once serving is complete, press the<br />
POWER button to turn the pressure<br />
cooker off. Unplug from power<br />
outlet when not in use.<br />
Plug the power cord into an available<br />
120V AC wall outlet.<br />
Press POWER/KEEP WARM button.<br />
Press MEAT, POULTRY, or SOUP<br />
button. The LED display will light up<br />
with each function’s pressure level<br />
respective time.<br />
After the function has been selected,<br />
the cooker will start automatically.<br />
The pressure cooker will<br />
automatically start building pressure.<br />
Once pressure is achieved, the<br />
programmed time will begin to count<br />
down to zero.<br />
CAUTION<br />
• Only use utensils safe for use on nonstick coatings. Metal<br />
utensils will damage the inner cooking pot’s nonstick coating.<br />
• To keep food warm in pressure cooker switch function to “KEEP-WARM”.<br />
NOTE<br />
• You can press MIN to set the cooking time from 25-40min (After 40 min, the timer will start a new cycle), and press PRESSURE SETTING for<br />
pressure levels: 3P is high pressure, 2P is medium pressure and 1P is low pressure. After setting, press START/KEEP WARM button, the cooker will<br />
begin to operate.<br />
14 15
9<br />
TO COOK MEAT, POULTRY, SOUP (CONT.)<br />
10 11<br />
TO SLOW COOK<br />
The steam vent should be in “EXHAUST” when slow cooking<br />
Begin slow cooking by following steps 1 to 3 of “<strong>Pressure</strong> Cook” on page 7.<br />
4 5<br />
6 7<br />
When cooking is complete, the<br />
pressure cooker will beep 3 times<br />
and automatically switch to<br />
KEEP WARM. Screen will read<br />
“00H0”<br />
Check food for doneness. If cooking<br />
is complete, remove food for serving.<br />
Once serving is complete, press the<br />
POWER button to turn the pressure<br />
cooker off. Unplug from power<br />
outlet when not in use.<br />
Turn the steam vent to the<br />
“EXHAUST” position.<br />
Plug the power cord into an available<br />
120V AC wall outlet.<br />
Press POWER button. Press SLOW<br />
COOK button. The LED display will<br />
light up.<br />
Adjust slow cook time to desired<br />
cooking time. Press the POWER/<br />
KEEP WARM button to begin the<br />
cooking process.<br />
NOTE: cooking time can be adjusted<br />
from 2 hours to 9.5 hours.<br />
HELPFUL<br />
HINTS<br />
• The “Keep-Warm” setting is great for keeping food warm and<br />
delicious while serving. However, do not leave food on “Keep-Warm”<br />
for longer than 12 hours.<br />
16 17
8<br />
TO SLOW COOK (CONT.)<br />
The steam vent should be in “EXHAUST” when slow cooking<br />
9<br />
10 12<br />
TO STEAM<br />
The steam vent should be in “EXHAUST” when slow cooking<br />
Begin slow cooking by following steps 1 to 3 of “<strong>Pressure</strong> Cook” on page 7.<br />
4<br />
5<br />
6<br />
7<br />
The pressure cooker will<br />
automatically start adjusting cooking<br />
temperature. Once temperature is<br />
achieved, the programmed time will<br />
begin to count down to zero.<br />
When cooking is complete, the<br />
pressure cooker will beep 3 times and<br />
automatically switch to KEEP WARM.<br />
Screen will read “00H0”.<br />
Check food for doneness. If cooking<br />
is complete, remove food for serving.<br />
Once serving is complete, press the<br />
POWER button to turn the pressure<br />
cooker off. Unplug from power<br />
outlet when not in use.<br />
Turn the steam vent to the<br />
“EXHAUST” position.<br />
Plug the power cord into an available<br />
120V AC wall outlet.<br />
Place the steam rack into the center<br />
of the inner cooking pot.<br />
Place food to be steamed on top<br />
of the steam rack. Place food in a<br />
heatsafe bowl or dish then on rack<br />
that is included. You may also place<br />
certain foods on rack.<br />
NOTE<br />
• If you wish to choose the cooking time, press HOUR to set the timer<br />
from 2 hours-9.5 hours. After 9.5 hours, the timer will start a new<br />
cycle. After setting, press START/KEEP WARM button.<br />
• The steam vent should be in EXHAUST position when slow cooking.<br />
NOTE<br />
• The steam vent should be in EXHAUST when steaming.<br />
HELPFUL<br />
HINTS<br />
• For smaller foods, or to increase steaming space, a heat-safe dish may<br />
be placed on top of the steam rack. The dish should be small enough<br />
that space remains between the edges of the dish and the inner cooking<br />
pot to allow steam to reach food.<br />
18 19
TO STEAM (CONT.)<br />
MEASURING TABLES<br />
8<br />
9 10 11<br />
Meat Pressurizing Table<br />
Rice Water Measurement Chart<br />
MEAT<br />
COOKING TIME<br />
SAFE INTERNAL<br />
TEMPERATURE<br />
UNCOOKED<br />
RICE<br />
RICE WATER LINE<br />
INSIDE POT<br />
APPROXIMATE<br />
COOKED<br />
RICE YIELD<br />
WHITE RICE<br />
COOKING TIMES<br />
BROWN RICE<br />
Fish 8-10 Min. 140°<br />
1 Rice <strong>Cooker</strong> Cups*<br />
Line 1<br />
2 Cups<br />
12-15 Min.<br />
26-30 Min.<br />
2 Rice <strong>Cooker</strong> Cups*<br />
Line 2<br />
4 Cups<br />
13-17 Min.<br />
28-32 Min.<br />
Chicken 15-20 Min. 165°<br />
3 Rice <strong>Cooker</strong> Cups*<br />
Line 3<br />
6 Cups<br />
16-19 Min.<br />
34-38 Min.<br />
Plug the power cord into an available<br />
120V AC wall outlet.<br />
12<br />
Press POWER button. Press STEAM<br />
button. The LED display will light up.<br />
13<br />
After the function has been selected,<br />
the cooker will start automatically.<br />
14<br />
When the water inside begins to<br />
boil, the cooker will beep once. The<br />
pressure cooker will automatically<br />
start and the programmed time will<br />
begin to count down to zero.<br />
HELPFUL<br />
HINTS<br />
Pork 20-25 Min. 160°<br />
Beef 20-25 MIn. 160°<br />
• Since most vegetables only absorb a small amount of water, there is<br />
no need to increase the amount of water with a larger serving<br />
of vegetables.<br />
• Steaming times may vary depending upon the cut of meat being<br />
used.<br />
• To ensure meat tastes its best, and to prevent possible illness, check<br />
that meat is completely cooked prior to serving. If it is not, simply<br />
place more water in the inner cooking pot and repeat the cooking<br />
process until the meat is adequately cooked.<br />
4 Rice <strong>Cooker</strong> Cups* Line 4<br />
8 Cups<br />
19-21 Min. 36-39 Min.<br />
*1 Rice <strong>Cooker</strong> Cup = ¾ US Cups<br />
Minimum Cooking Capacity: 2 Cups Uncooked/4 Cups Cooked<br />
When cooking is complete, the<br />
pressure cooker will beep 3 times and<br />
automatically switch to KEEP WARM.<br />
Screen will read “00H0”.<br />
Check food for doneness. If cooking<br />
is complete, remove food for serving.<br />
Once serving is complete, press the<br />
POWER button to turn the pressure<br />
cooker off. Unplug from power<br />
outlet when not in use.<br />
NOTE<br />
• Altitude, humidity and outside temperature will affect cooking times.<br />
• These steaming charts are for reference only. Actual cooking times<br />
may vary.<br />
20 21
TO CLEAN<br />
Always unplug the pressure cooker and allow it to cool completely before cleaning.<br />
RECIPES<br />
1<br />
2<br />
3<br />
4<br />
Chunky Beef Goulash with Sweet Hungarian Paprika<br />
Remove the lid. Wash the lid top and<br />
underside in warm, soapy water<br />
using a sponge or dishcloth.<br />
5 6<br />
Condensation will build up on<br />
condensation collection area on the<br />
rear of the unit where the lid locks into<br />
place. Wash with warm soapy water<br />
and dry thoroughly after each use.<br />
Remove the inner cooking pot. Wash<br />
in warm, soapy water using a<br />
sponge or dishcloth.<br />
Wipe the body of the pressure<br />
cooker clean with a damp cloth.<br />
Rinse and dry thoroughly.<br />
NOTE<br />
Repeat process with steam rack, if<br />
used.<br />
• Remove Exhaust Valve and clean to prevent malfunction due to<br />
clogging.<br />
• Remove valve cover located on the inside of lid to prevent<br />
malfunction due to clogging.<br />
• Do not use harsh abrasive cleaners, scouring pads or products<br />
that are not considered safe to use on nonstick coatings.<br />
• Always make sure the outside of the inner pot is dry prior to use. If<br />
the inner cooking pot is returned to the pressure cooker when wet,<br />
it may damage this product, causing it to malfunction.<br />
• Any other servicing should be performed by <strong>Aroma</strong> ® Housewares<br />
Company. Contact <strong>Aroma</strong> ® customer service at 1-800-276-6286,<br />
Monday to Friday 8:30AM-4:30PM PST.<br />
2 tablespoons olive oil<br />
3 tablespoons flour<br />
1½ teaspoons salt<br />
1 teaspoon black pepper<br />
1½ lbs.<br />
boneless beef chuck roast, cut into 1-inch pieces<br />
2 tablespoons sweet Hungarian paprika<br />
1 bay leaf<br />
14½ oz.<br />
can whole tomatoes, with juice<br />
2 cloves garlic, peeled, minced<br />
1 large yellow onion, peeled, chopped<br />
14½ oz.<br />
can beef broth<br />
14½ oz.<br />
can yellow corn, drained<br />
6 oz. wide egg noodles, drained<br />
Place the oil in the inner cooking pot and heat with the MEAT setting until hot. In a plastic bag,<br />
combine the flour, salt and pepper. Add several pieces of beef to the bag and seal, tossing the flour<br />
mixture and beef. Remove and, using tongs, place the beef in the inner cooking pot to sauté. Repeat<br />
with the remaining beef pieces. Brown the beef on all sides.<br />
Add the paprika, bay leaf, tomatoes with juice, garlic, onion and beef broth. Close the lid securely and<br />
set the steam vent to “Closed.” Set to High <strong>Pressure</strong> and cook for 30 minutes. Release the pressure,<br />
remove the lid and add the corn and noodles, stirring to mix. Remove the bay leaf before serving.<br />
Serves 4 to 6.<br />
CAUTION: Do not exceed 4/5 capacity of cooking pot when adding all ingredients.<br />
• For even faster cleanup, the inner cooking pot and steam<br />
CAUTION: Do not exceed 4/5 capacity of cooking pot when adding all ingredients.<br />
HELPFUL rack can be washed in the top rack of the dishwasher!<br />
HINTS<br />
22 For additional pressure cooker recipes, or even to submit your own, visit our website at www.<strong>Aroma</strong>Co.com!<br />
23<br />
Ingredients<br />
Ingredients<br />
½ cup<br />
sweet red wine<br />
½ cup<br />
white vinegar<br />
1 cup red currant preserves<br />
2 tablespoons soy sauce<br />
2 tablespoons honey<br />
1 tablespoon Dijon mustard<br />
2 lbs. fryer chicken, skinless, cut into pieces<br />
Glazed Honey & Red Currant Chicken<br />
In a self-sealing plastic bag, combine the wine, vinegar, preserves, soy sauce, honey and mustard.<br />
Add the chicken pieces and mix well. Marinate in the refrigerator for 4 to 6 hours. Place the chicken<br />
and marinade in the inner cooking pot. Close the lid securely and set the steam vent to “AIRTIGHT”.<br />
Use POULTRY setting. Release the pressure and remove the lid. Serve while warm, spooning the<br />
sauce over the chicken. Serves 4.
RECIPES<br />
RECIPES<br />
Crimini Mushroom & White Wine Risotto<br />
Ingredients<br />
2 tablespoons olive oil<br />
3 tablespoons shallots, peeled, chopped<br />
8 oz. crimini mushrooms, wiped clean, sliced<br />
2 cups Arborio rice, uncooked<br />
3 cups chicken broth<br />
1 cup dry white wine<br />
½ cup<br />
Parmesan cheese, freshly grated<br />
Place the oil in the inner cooking pot and heat with MEAT or POULTRY. Add the shallots and sauté<br />
until tender. Add the mushrooms and rice and cook, stirring often, for 2 minutes. Add the broth and<br />
wine and stir again. Close the lid securely and set the steam vent to “AIRTIGHT.” Set to high pressure<br />
(3P) and cook for 20 to 25 minutes. Release the pressure and remove the lid. If the rice has not<br />
completely cooked through, continue to cook on High <strong>Pressure</strong> another 5 to 10 minutes. Stir the rice<br />
before serving, adding the cheese to blend and melt. Serve right away. Serves 4 to 6.<br />
Fresh Brussels Sprouts with White Wine Vinaigrette<br />
Ingredients<br />
4 slices smoked bacon<br />
1¼ lbs.<br />
fresh Brussels sprouts, cleaned, trimmed<br />
¼ cup<br />
olive oil<br />
3 tablespoons white wine vinegar<br />
1 teaspoon salt<br />
½ teaspoon<br />
black pepper<br />
½ cup<br />
water chestnuts, thinly sliced<br />
2 tablespoons green onions, minced<br />
Slice bacon into thin strips and place in the inner cooking pot. Press MEAT or POULTRY until crisp.<br />
Remove to a paper towel and crumble when cool. Set aside.<br />
Add the sprouts to the bacon drippings and set to Sauté for 4 minutes, turning often. Discard any<br />
excess drippings and add 1 cup water. Close the lid securely and set the steam vent to “AIRTIGHT.”<br />
Set to high pressure (3P) and cook for 3 to 4 minutes. Release the pressure.<br />
Spoon the sprouts into a serving bowl. In a small bowl, whisk together the oil, vinegar, salt and<br />
pepper. Add the water chestnuts and green onions and pour over the sprouts. Top with bacon and<br />
serve while warm or cover and chill for 4 hours. Serves 8 to 10.<br />
Ingredients<br />
1 tablespoons butter<br />
1 medium yellow onions, peeled, thinly sliced<br />
¼ cup<br />
sherry<br />
4 cups beef broth<br />
1 bay leaf<br />
¼ teaspoon<br />
salt<br />
¼ teaspoon<br />
black pepper<br />
¾ cups<br />
Gruyere cheese, shredded (or use Swiss cheese)<br />
Golden Caramelized Onion Soup with Gruyere Cheese<br />
Place the butter in the inner cooking pot and heat with MEAT or POULTRY setting to melt. Add the<br />
onions and sauté until golden brown and caramelized. Add the sherry, broth, bay leaf, salt and pepper.<br />
Close the lid securely and set the steam vent to the “AIRTIGHT” position. Set to High <strong>Pressure</strong> and<br />
cook for 4 minutes. Release the pressure and ladle the soup into bowls. Top each with a generous<br />
portion of cheese before serving. Serves 4.<br />
Ingredients<br />
2 tablespoons olive oil<br />
¼ teaspoon<br />
black pepper<br />
1½ lbs.<br />
boneless lamb loin<br />
1 cup chicken broth<br />
½ teaspoon<br />
dried thyme<br />
½ teaspoon<br />
ground marjoram<br />
½ teaspoon<br />
ground sage<br />
2 teaspoons fresh mint, chopped, divided<br />
1 green pepper, cored and roughly chopped<br />
2 cups instant couscous, uncooked<br />
Mediterranean Lamb Medallions with Couscous<br />
Place the oil in the inner cooking pot and heat with MEAT or POULTRY until hot. Rub the pepper over<br />
the lamb and place the meat in the cooker, browning on all sides in the oil. Add the chicken broth,<br />
herbs and green pepper. Turn the pressure cooker off. Close the lid securely and set the steam vent<br />
to “AIRTIGHT.” Set to high pressure (3P) and cook for 35 to 40 minutes, or until the meat’s internal<br />
temperature registers 150°F. Release the pressure. Remove the lid, remove lamb and let stand for 10<br />
minutes. Slice.<br />
Add water, if needed, to equal 2 cups of liquid in the inner cooking pot. Bring to a boil on Steam. Add<br />
the couscous. Cover and turn off. Let stand about 5 minutes until the liquid has been absorbed. Serve<br />
the lamb slices over the couscous. Serves 6 to 8.<br />
24 For additional pressure cooker recipes, or even to submit your own, visit our website at www.<strong>Aroma</strong>Co.com!<br />
For additional pressure cooker recipes, or even to submit your own, visit our website at www.<strong>Aroma</strong>Co.com!<br />
25
WARRANTY<br />
LIMITED WARRANTY<br />
<strong>Aroma</strong> Housewares Company warrants this product free from defects in<br />
material and workmanship for two years from provable date of purchase in<br />
the United States.<br />
Within this warranty period, <strong>Aroma</strong> Housewares Company will repair or<br />
replace, at its option, defective parts at no charge, provided the product<br />
is returned, freight prepaid with proof of purchase and U.S. $15.00 for<br />
shipping and handling charges payable to <strong>Aroma</strong> Housewares Company.<br />
Before returning an item, please call the toll free number below for a return<br />
authorization number. Allow 2-4 weeks for return shipping.<br />
This warranty does not cover improper installation, misuse, abuse or<br />
neglect on the part of the owner. Warranty is also invalid in any case that<br />
the product is taken apart or serviced by an unauthorized service station.<br />
This warranty gives you specific legal rights, which may vary from state to<br />
state, and does not cover areas outside the United States.<br />
SERVICE & SUPPORT<br />
In the event of a warranty claim, or if service is required for this product, please<br />
contact <strong>Aroma</strong> ® customer service toll-free at:<br />
1-800-276-6286<br />
M-F, 8:30AM-4:30PM, Pacific Time<br />
Or we can be reached online at CustomerService@<strong>Aroma</strong>Co.com.<br />
For your records, we recommend stapling your sales receipt to this page along with<br />
a written record of the following:<br />
Date of Purchase:<br />
Place of Purchase:<br />
AROMA HOUSEWARES COMPANY<br />
6469 Flanders Drive<br />
San Diego, California 92121<br />
1-800-276-6286<br />
M-F, 8:30 AM - 4:30 PM, Pacific Time<br />
Website: www.<strong>Aroma</strong>Co.com<br />
• Proof of purchase is required for all warranty claims.<br />
NOTE<br />
26


