

Avanti Avanti - BD6000 - BD6000 - Manual
Avanti Avanti - BD6000 - BD6000 - Manual
Avanti Avanti - BD6000 - BD6000 - Manual

You also want an ePaper? Increase the reach of your titles
YUMPU automatically turns print PDFs into web optimized ePapers that Google loves.
INSTRUCTION MANUAL<br />
MANUAL DE INSTRUCCIONES<br />
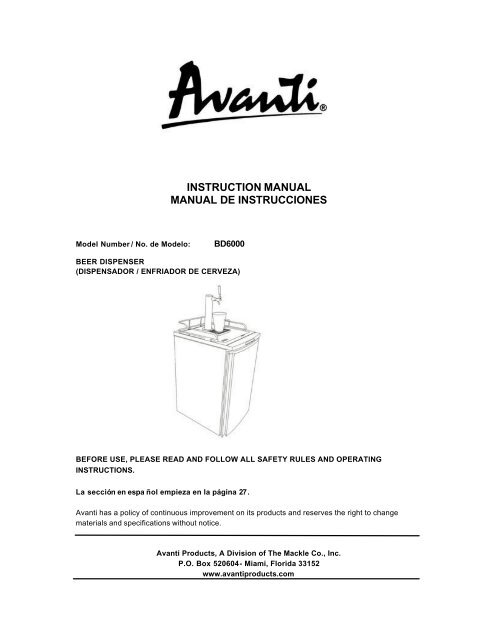
Model Number / No. de Modelo:<br />
<strong>BD6000</strong><br />
BEER DISPENSER<br />
(DISPENSADOR / ENFRIADOR DE CERVEZA)<br />
BEFORE USE, PLEASE READ AND FOLLOW ALL SAFETY RULES AND OPERATING<br />
INSTRUCTIONS.<br />
La sección en espa ñol empieza en la página 27.<br />
<strong>Avanti</strong> has a policy of continuous improvement on its products and reserves the right to change<br />
materials and specifications without notice.<br />
<strong>Avanti</strong> Products, A Division of The Mackle Co., Inc.<br />
P.O. Box 520604 - Miami, Florida 33152<br />
www.avantiproducts.com
BEER DISPENSER SAFETY<br />
Your safety and the safety of others are very important.<br />
We have provided many important safety messages in this manual for your appliance. Always read<br />
and obey all safety messages.<br />
This is the Safety Alert Symbol. This symbol alerts you to potential hazards that<br />
can kill or injure you and others. All safety messages will follow the Safety<br />
Alert Symbol and either the words” DANGER”, “WARNING” or “CAUTION”.<br />
Danger means that failure to heed this<br />
safety statement may result in severe<br />
personal injury or death.<br />
Warning means that failure to heed this<br />
safety statement may result in extensive<br />
product damage, serious personal injury, or<br />
death.<br />
Caution means that failure to heed this<br />
safety statement may result in minor or<br />
moderate personal injury, property or<br />
equipment damage.<br />
All safety messages will alert to know what potential hazard is, tell you how to reduce the chance of<br />
injury, and let you know what can happen if the instructions are not followed.<br />
2
IMPORTANT SAFEGUIDES<br />
Before the appliance is used, it must be properly positioned and installed as<br />
described in this manual,so read the manual carefully. To reduce the risk of fire,<br />
electrical shock or injury when using the appliance, follow basic precaution,<br />
including the following:<br />
? Plug into a grounded 3 -prong outlet, do not remove grounding prong, do not use a n adapter, and<br />
do not use an extension cord.<br />
? Replace all panels before operating.<br />
? It is recommended that a separate circuit, serving only your appliance be provided. Use<br />
receptacles that cannot be turned off by a switch or pull chain.<br />
? Never clean appliance parts with flammable fluids. These fumes can create a fire hazard or<br />
explosion. And do not store or use gasoline or other flammable vapors and liquids in the vicinity of<br />
this or any other appliance. The fumes can create a fire hazard or explosion.<br />
? Before proceeding with cleaning and maintenance operations, make sure the power line of the<br />
unit is disconnected.<br />
? Do not connect or disconnect the electric plug when your hands are wet.<br />
? Unplug the appliance or disconnect power before cleaning or servicing. Failure to do so can result<br />
in electrical shock or death.<br />
? Do not attempt to repair or replace any part of your appliance unless it is specifically<br />
recommended in this manual. All other servicing should be referred to a qualified technician.<br />
FOLLOW WARNING CALL OUTS BELOW ONLY WHEN APPLICABLE TO YOUR MODEL<br />
? Use two or more people to move and install appliance. Failure to do so can result in back or other<br />
injury.<br />
? To ensure proper ventilation for your appliance, the front of the unit must be completely<br />
unobstructed. Choose a well-ventilated area with temperatures above 60°F (16°C) and below<br />
90°F (32°C). This unit must be installed in an area protected from the element, such as wind, rain,<br />
water spray or drips.<br />
? The appliance should not be located next to ovens, g rills or other sources of high heat.<br />
? The appliance must be installed with all electrical, water and drain connections in accordance with<br />
state and local codes. A standard electrical supply (115 V AC only, 60 Hz), properly grounded in<br />
accordance with the Na tional Electrical Code and local codes and ordinances is required.<br />
? Do not kink or pinch the power supply cord of appliance.<br />
? The fuse (or circuit breaker) size should be 15 amperes.<br />
? It is important for the appliance to be leveled in order to work properly. You may need to make<br />
several adjustments to level it.<br />
? All installation must be in accordance with local plumbing code requirements.<br />
? Make certain that the pipes are not pinched or kinked or damaged during installations .<br />
? Check for leaks after connection.<br />
? Never allow children to operate, play with or crawl inside the appliance.<br />
? If you use the drainage container , you must set the drain select switch to OFF or the water can<br />
overflow from the drainage container<br />
? Although the unit has been tested at the factory, due to long-term transit and storage, the first<br />
batch of cubes must be discarded.<br />
? Do not use solvent-based cleaning agents of abrasives on the interior. These cleaners may<br />
damage or discolor the interior.<br />
? Do not use this apparatus for other than its intended purpose.<br />
3
REGISTRATION INFORMATION<br />
Thank you for purchasing this fine <strong>Avanti</strong> product. Please fill out this form and return it within 100<br />
days of purchase and receive these important benefits to the following address:<br />
<strong>Avanti</strong> Products, A Division of The Mackle Co., Inc.<br />
P.O.Box 520604 – Miami, Florida 33152<br />
? Protect your product:<br />
We will keep the model number and date of purchase of your new <strong>Avanti</strong> product on file to<br />
help you refer to this information in the event of an insurance claim such as fire or theft.<br />
? Promote better products:<br />
We value your input. Your responses will help us develop products designed to best meet<br />
your future needs.<br />
-------------------------------------------------(detach here)----------------------------------------------------------<br />
<strong>Avanti</strong> Registration Form<br />
__________________________________ _____________________________________<br />
Name Model # Serial #<br />
__________________________________ _____________________________________<br />
Address Date Purchased Store/Dealer Name<br />
__________________________________ ______________________________________<br />
City State Zip Occupation<br />
__________________________________ As Your Primary Residence, Do You:<br />
Area Code Phone Number ?Own ?Rent<br />
Did You Purchase An Additional Warranty: Your Age:<br />
?Extended ?Food Loss ?None ?under 18 ?18-25 ?26-30<br />
Reason For Choosing This <strong>Avanti</strong> Product: ?31-35 ?36-50 ?over 50<br />
Please indicate the most important factors Marital Status:<br />
that influenced your decision to purchase ?Married ?Single<br />
this product.<br />
Is This Product Used In The:<br />
?Price ?Home ?Business<br />
?Product Features<br />
How Did You Learn About This Product:<br />
?<strong>Avanti</strong> Reputation<br />
?Advertising<br />
?Product Quality ?In Store Demo ?Personal Demo<br />
?Salesperson Recommendation<br />
?Other_______________________________<br />
?Friend/Relative Recommendation<br />
Comments____________________________<br />
?Warranty<br />
_____________________________________<br />
?Other_______________________<br />
_____________________________________<br />
4
5
HELP US HELP YOU...<br />
Read this guide carefully.<br />
It is intended to help you operate and maintain<br />
your new Beer Dispenser properly.<br />
Keep it handy to answer your questions.<br />
If you don't understand something or you need<br />
more assistance, please call:<br />
<strong>Avanti</strong> Customer Service<br />
800-220-5570<br />
Keep proof of original purchase date (such as<br />
your sales slip) with this guide to establish the<br />
warranty period.<br />
CAUTION:<br />
THIS BEER DISPENSER IS NOT<br />
DESIGNED FOR THE STORAGE<br />
OF MEDICINE OR OTHER<br />
MEDICAL PRODUCTS.<br />
Write down the model and serial numbers.<br />
You'll find them on a pla te located on the rear<br />
wall of the Beer Dispenser.<br />
Please write these numbers here:<br />
____________________________________<br />
Date of Purchase<br />
____________________________________<br />
Model Number<br />
____________________________________<br />
Serial Number<br />
Use these numbers in any correspondence or<br />
service calls concerning your Beer Dispenser.<br />
If you received a damaged Beer Dispenser,<br />
immediately contact the dealer (or builder) that<br />
sold you the Beer Dispenser.<br />
Save time and money. Before you call for<br />
service, check the Troubleshooting Guide. It<br />
lists causes of minor operating problems that<br />
you can correct yourself.<br />
IF YOU NEED SERVICE<br />
We're proud of our service and want you to be<br />
pleased. If for some reason you are not happy<br />
with the service you receive, here are some<br />
steps to follow for further assistance.<br />
FIRST, contact the people who serviced your<br />
Beer Dispenser. Explain why you are not<br />
pleased. In most cases, this will solve the<br />
problem.<br />
NEXT, if you are still not pleased, write all the<br />
details, including your telephone number, and<br />
send to:<br />
Customer Service<br />
<strong>Avanti</strong> Products<br />
10880 NW 30 Street<br />
Miami, FL 33172 USA<br />
6
TABLE OF CONTENTS<br />
Beer Dispenser Safety 2<br />
Important Safeguides 3<br />
Registration Information ______________________________________________________ 4<br />
Help Us Help You … __________________________________________________________ 6<br />
Parts and Features ___________________________________________________________ 8<br />
Important Safety Instructions __________________________________________________ 9<br />
Installation Instructions _______________________________________________________ 9<br />
Before Using Your Beer Dispenser 9<br />
Installation of Your Beer Dispenser_____________________________________________ 9<br />
Electrical Connection ________________________________________________________ 10<br />
Extension Cord 10<br />
Reversing The Door Swing of Your Appliance 10<br />
Installation Instruction For Beer Dispenser __________________________________ 11-15<br />
Spanner Faucet Wrentch 15<br />
Plastic Faucet Lever 15<br />
Dispensing Beer ____________________________________________________________ 15<br />
Converting Your Beer Dispenser To An All Refrigerator __________________________ 16<br />
Operating Your Beer Dispenser _______________________________________________ 16<br />
Setting the Temperature ______________________________________________________ 16<br />
Automatic Defrosting ________________________________________________________ 16<br />
Care and Maintenance _______________________________________________________ 16<br />
Cleaning Your Beer Dispenser ________________________________________________ 16<br />
Vacation Time_______________________________________________________________ 17<br />
Moving Your Beer Dispenser _________________________________________________ 17<br />
Draught Beer Trouble Guide 17-22<br />
Troubleshooting Guide ______________________________________________________ 23<br />
Service For Your Beer Dispenser ______________________________________________ 24<br />
Your <strong>Avanti</strong> Products Warranty _______________________________________________ 25<br />
Wiring Diagram 26<br />
INSTRUCCIONES EN ESPAÑOL 27~36<br />
7
PARTS AND FEATURES<br />
1. Beer Tower<br />
2. Mylar Washer<br />
3. Safety Guard Rail<br />
4. Drip Tray<br />
5. Adjustable Thermostat<br />
6. CO 2 Regulator<br />
7. CO 2 Gas Cylinder<br />
8. CO 2 Gas Cylinder Holder<br />
9. Evaporator<br />
10. Reversible Door<br />
11. Beer Keg (Not Included)<br />
12. Metal Plate<br />
13. Metal Bracket (2)<br />
14. Castors with Loc k (4)<br />
8
IMPORTANT SAFETY INSTRUCTIONS<br />
?WARNING?<br />
To reduce the risk of fire, electrical shock, or<br />
injury when using your Beer Dispenser, follow<br />
these basic precautions:<br />
? Read all instructions before using the unit.<br />
? DANGER or WARNING: Risk of child entrapment.<br />
Child entrapment and suffocation are not problems of the past. Junked or abandoned<br />
appliances are still dangerous . . . even if they will “just sit in the garage a few days”.<br />
? Before you throw away your old unit: Take off the door. Leave the shelves in place<br />
so that children may not easily climb inside.<br />
? Never allow children to operate, play with, or crawl inside the unit.<br />
? Never clean unit parts with flammable fluids. The fumes can create a fire hazard or<br />
explosion.<br />
? Do not store or use gasoline or any other flammable vapors and liquids in the vicinity of<br />
this or any other unit. The fumes can create a fire hazard or explosion.<br />
-Save these instructions-<br />
INSTALLATION INSTRUCTIONS<br />
? Before Using Your Beer Dispenser<br />
? Remove the exterior and interior packing.<br />
? Check to be sure you have all of the following parts:<br />
? 1 Instruction manual<br />
? 1 Safety Guard Rail<br />
? 1 Drip Tray (2 Pieces)<br />
? 1 CO 2 Cylinder Holder<br />
? 1 CO 2 Regulator (Box)<br />
? 1 CO 2 Empty Cylinder(Box)<br />
? 1 CO 2 Air Line Hose (Red)<br />
? 2 CO2 Hose Connectors<br />
? 1 Beer Keg Coupler (Box)<br />
? 1 Beer Tower Assembly<br />
? 1 Pull Handle (Beer Tower Faucet)<br />
? 1 Metal Wrench<br />
? 4 Plugs (For Guard Rail Holes )<br />
? 1 Metal Plate for Cabinet Bottom<br />
? 2 Steel Wire Shelves<br />
? 1 Steel Clamp for Red Hose<br />
? 1 Beer Tower Top Plastic Cover<br />
? 1 DVD Instruction<br />
? 4 Castors with Lock<br />
? Before connecting the Beer Dispenser to the power source, let it stand upright for<br />
approximately 2 hours. This will reduce the possibility of a malfunction in the cooling system<br />
from handling during transportation.<br />
? Clean the interior surface with lukewarm water using a soft cloth.<br />
? Installation of Your Beer Dispenser<br />
? This appliance is designed to be free standing only, and should not be recessed or built-in.<br />
? Place your Beer Dispenser on a floor that is strong enough to support the Beer Dispenser<br />
when it is fully loaded.<br />
? Allow 3 inches of space between the back and sides of the Beer Dispenser, which allows the<br />
proper air circulation to cool the compressor and condenser.<br />
? Locate the Beer Dispenser away from direct sunlight and sources of heat (stove, heater,<br />
radiator, etc.). Direct sunlight may affect the acrylic coating and heat sources may increase<br />
electrical consumption. Extreme cold ambient temperatures may also cause the Beer<br />
Dispenser not to perform properly.<br />
? Avoid locating the Beer Dispenser in moist areas.<br />
? Plug the Beer Dispenser into an exclusive, properly installed-grounded wall outlet. Do not<br />
9
under any circumstances cut or remove the third (ground) prong from the power cord. Any<br />
questions concerning power and or grounding should be directed toward a certified electrician<br />
or an authorized <strong>Avanti</strong> Products service center.<br />
? After plugging the appliance into a wall outlet, allow the unit to cool down for 2-3 hours before<br />
placing any contents in the Beer Dispenser compartment.<br />
? Electrical Connection<br />
?Warning?<br />
Improper use of the grounded plug can result in the risk of electrical shock. If the power cord is<br />
damaged, have it replaced by an authorized <strong>Avanti</strong> Products service center.<br />
This unit should be properly grounded for your safety. The power cord of this unit is equipped with a<br />
three-prong plug which mates with standard three prong wall outlets to minimize the possibility of<br />
electrical shock.<br />
Do not under any circumstances cut or remove the third ground prong from the power cord supplied.<br />
For personal safety, this appliance must be properly grounded.<br />
This unit requires a standard 115/120 Volt AC ~/60Hz electrical outlet with three-prong ground. Have<br />
the wall outlet and circuit checked by a qualified electrician to make sure the outlet is properly<br />
grounded. When a standard 2-prong wall outlet is encountered, it is your responsibility and obligation<br />
to have it replaced with a properly grounded 3-prong wall outlet.<br />
The cord should be secured behind the unit and not left exposed or dangling to prevent accidental<br />
injury.<br />
The unit should always be plugged into its own individual electrical outlet which has a voltage rating<br />
that matches the rating label on the appliance. This provides the best performance and also prevent<br />
overloading house wiring circuits that could cause a fire hazard from overheated. Never unplug the<br />
unit by pulling the power cord. Always grip the plug firmly and pull straight out from the receptacle.<br />
Repair or replace immediately all power cords that have become frayed or otherwise damaged. Do<br />
not use a cord that shows cracks or abrasion damage along its length or at either end. When moving<br />
the unit, be careful not to damage the power cord.<br />
? Extension Cord<br />
Because of potential safety hazards under certain conditions, it is strongly recommended that you do<br />
not use an extension cord with this unit. However, if you must use an extension cord it is absolutely<br />
necessary that it be a UL/CUL-Listed, 3-wire grounding type appliance extension cord having a<br />
grounding type plug and outlet and that the electrical rating of the cord be 115 volts and at least 10<br />
amperes.<br />
? Reversing the Door Swing of Your Appliance<br />
This appliance has the capability of the door opening from either the left or right side. The unit is<br />
delivered to you with the door opening from the left side. Should you desire to reverse the opening<br />
direction, please call service for reversal instructions.<br />
10
? Installation Instructions for Beer Dispenser<br />
WARNING<br />
CO 2 GAS CAN BE DANGEROUS<br />
WARNING: CO 2 cylinders contain high-pressure compressed gas which can be hazardous if not<br />
handled properly. Make sure you READ and UNDERSTAND the following procedures for CO2<br />
cylinders BEFORE INSTALLATION.<br />
1. ALWAYS connect the CO 2 cylinder to a regulator. Failure to do so could result in explosion<br />
with possible death or injury when the cylinder valve is opened.<br />
2. NEVER connect the CO 2 cylinder directly to the product container.<br />
3. ALWAYS follow correct procedures when cylinders are changed.<br />
4. ALWAYS secure the cylinder in an upright position.<br />
5. NEVER drop or throw a CO 2 cylinder.<br />
6. ALWAYS keep a CO 2 cylinder away from heat. Store extra cylinders in a cool place<br />
(preferably 70°F). Securely fasten with a chain in an upright position when storing.<br />
7. ALWAYS ventilate and leave the area immediately if CO2 leakage has occurred.<br />
8. ALWAYS check the D.O.T. test date on the cylinder neck before installation. If over five (5)<br />
years, do not use, return cylinder to gas supplier.<br />
9. NEVER connect a product container unless there are two (2) safety’s in the pressure system:<br />
a. One at or on the CO 2 regulator<br />
b. One at or on the product coupler or in the pressure gas line.<br />
Beer Keg Installation Sketch<br />
11
Castors with Lock Installation Sketch<br />
? Remove the 4 castors from one of the boxes inside the unit. Install the two castors with metal<br />
bracket at the front designated positions of the cabinet base and the rest two castors at the rear<br />
designated positions (Four screw holes pre-supplied).<br />
Metal<br />
Bracket<br />
? In order to release or lock the brake, follow the below guide.<br />
Installation of CO2 Cylinder Holder<br />
? Install the metal holder provided onto the 4 studs located on the<br />
exterior back wall. Align the holes in the holder with the studs and<br />
push down firmly. (See Figure 1)<br />
Installation of CO 2 Cylinder<br />
? Install your fully charged cylinder into the holder stand.<br />
Figure 1<br />
Installation of CO 2 Regulator<br />
? Attach the CO 2 regulator to the cylinder by turning the regulator nut<br />
onto cylinder valve, making sure washer is securely inserted into<br />
connecting nut. Tighten snug using an adjustable wrench (not<br />
supplied) and assure there are no leaks. (See Figure 2)<br />
Figure 2<br />
12
Installation Of t he Keg Coupler<br />
? Insert the keg coupler provided into the locking neck of the beer<br />
keg and turn it clockwise to lock into position, making sure the<br />
keg coupler is in the closed position. (See Figure 3)<br />
Figure 3<br />
Installation of the CO 2 Air Line Hose<br />
? Attach the end o f the red hose to the hose connection on the keg coupler. Secure hose by using<br />
the connector and make sure there are no leaks.<br />
Installation of Protective Metal Plate<br />
? This plate should always be installed when the keg is in place to protect against unnecessary<br />
damage to the floor of the cabinet liner.<br />
Installation of the Beer Keg<br />
? Position the beer keg directly in front of the open door. Using keg handles only, carefully lift the<br />
beer keg. (See Figure 4 )<br />
? To place the beer keg inside the cabinet, brace your knees behind the beer keg. Lift the front of<br />
the keg just enough so the front edge of the keg is resting on the front edge of the Beer Dispenser<br />
bottom cabinet. (See Figure 5)<br />
? Grasp the keg handles and slide it all the way into the cabinet.<br />
Figure 4 Figure 5<br />
Installation of CO 2 Air Line Hose through the Cabinet Wall<br />
? Remove plug located at the exterior back (top left hand corner).<br />
? Save it for later use if you decide to convert unit to an all<br />
refrigerator.<br />
? Insert the open end of the air line (red) from the cabinet through<br />
the uncovered hole.<br />
(See Figure 6)<br />
Figure 6<br />
13
Installation of CO 2 Air Line Hose t o Re gulator<br />
? Attach the open end of the red hose provided to the hose barb<br />
connection on the regulator.<br />
? Secure hose by using the steel clamp provided. Use<br />
Pliers/screwdriver to tighten clamp and assure no leaks.<br />
(See Figure 7 )<br />
Figure 7<br />
Installation Of The Beer Tower<br />
? Remove the top plug by twisting and pulling out, saving it for later use if you decide to convert unit<br />
to an all refrigerator.<br />
? Unravel the beer line (clear hose) from the tower and insert the beer line and wing nut through the<br />
uncovered hole on top.<br />
? Lock the beer tower assembly to the top and make sure to position the beer faucet so it is aligned<br />
with the cabinet front (6 o’clock position). You accomplish this by aligning the bottom of the beer<br />
tower to the 3 grooves on the top cabinet and tighten by hand clockwise to properly lock.<br />
WARNING<br />
THE BEER TOWER ASSEMBLY OF YOUR UNIT COMES WITH A FLAT MYLAR WAS HER.<br />
YOUR UNIT MAY NOT REQUIRE THE USE OF THIS WASHER AS TOWER IS DESIGNED FOR A<br />
TIGHT AND SECURE FIT.<br />
HOWEVER, WHILE INSTALLING THE TOWER TO THE UNIT THIS WASHER CAN BE USED FOR<br />
A TIGHTER FIT IF NECESSARY.<br />
Connecting the Beer Tower to Coupler<br />
? Make sure the washer is properly inserted into the wing nut.<br />
? Place wing nut into the top of the coupler turning until tight.<br />
How to Tap a Keg of Beer<br />
? Make sure the beer tower faucet is in the closed position.<br />
? Pull tapping handle out and press downward until it locks into<br />
position. (See Figure 8) The keg is now tapped.<br />
Figure 8<br />
Opening the CO 2 Cylinder Main Valve<br />
? Before doing that, make sure the secondary shut-off valve is<br />
closed, as shown in figure 9. To open the main CO 2 cylinder valve,<br />
slowly turn the main valve counter-clockwise until fully open.<br />
? Notice the needle on the gauge start to climb.<br />
Figure 9<br />
14
Adjusting the CO 2 Regulator<br />
? The gauge monitors low internal keg pressure and should be<br />
adjusted to read 10-12 PSI. (See Figure 10)<br />
? In order to do that:<br />
1. Release adjustment lock nut marked 2.<br />
2. Using a flat screwdriver, turn regulator screw marked 3. If<br />
increased low pressure is sought, rotate screw clockwise. By<br />
rotating it counter clockwise, low pressure will be decreased.<br />
When the required operati ng pressure is attained, retighten<br />
lock nut 2.<br />
3. Open secondary shut off valve to let CO2 flow into the keg.<br />
Figure 10<br />
? Spanner Faucet Wrench<br />
? Spanner faucet wrench provided for either removing or tightening<br />
connection. (See Figure 11)<br />
Figure 11<br />
? Plastic Faucet Lever<br />
? Attach the black plastic lever (pull handle) provided on the top of<br />
the faucet tightening it by hand clockwise until the end, holding in<br />
the silver snug underneath so it does not move.<br />
? If there is still a small drip from the faucet, you may have tightened<br />
the plastic lever too much and may need to unscrew silver snug<br />
counter-clockwise (as shown in Figure 12) one turn. That should<br />
correct the problem if exists.<br />
Figure 12<br />
? Dispensing Beer<br />
? Keep beer keg refrigerated at all times.<br />
? Never allow beer lines to dry out.<br />
? Use clean beer glassware before pouring.<br />
? Hold glass at a 45° angle when 2/3 full, start to straighten glass and tap it off.<br />
? Always make sure the faucet handle is pushed all the way back.<br />
NOTE: Keg sizes that can be used in your beer dispenser.<br />
1/2 barrel 59 Liters 15.5 gals. 1984 oz. 164 / 12-oz. Glass<br />
1/4 barrel 30 Liters 7.8 gals. 992 oz. 82 / 12-oz. Glass<br />
1/6 barrel 20 Liters 5.2 gals. 661 oz. 55 / 12-oz. Glass<br />
1/8 barrel 15 Liters 4.0 gals. 496 oz. 41 / 12-oz. Glass<br />
NOTE: Our Beer dispenser accepts almost all Brand Name ½ kegs. However Coors’ kegs do not fit in<br />
our unit.<br />
15
? Converting Your Beer Dispenser To An “All Refrigerator”<br />
1. Turn the control knob to the “OFF” position.<br />
2. Close the main valve on the CO 2 cylinder.<br />
3. Close the secondary shut-off valve on the regulator pipe.<br />
4. Close the connection between the beer keg and the keg coupler.<br />
5. Drain any remaining beer from the lines.<br />
6. Disconnect the beer line and CO 2 air line from the keg coupler.<br />
7. Remove the beer keg and bottom metal plate.<br />
8. Remove the keg coupler.<br />
9. Disconnect the air line from the CO 2 cylinder.<br />
10. Remove the CO 2 air line from cabinet plug<br />
11. Replace the air line rear cabinet plug<br />
12. Remove the beer tower. Also pull the beer line thru the top of the cabinet.<br />
13. Replace the top cabinet plug.<br />
14. Remove the guard rail and cover the guard rail installation holes by the provided plugs.<br />
15. Install the two wire shelves to the desinaged positions.<br />
16. Adjust temperature as desired.<br />
OPERATING YOUR BEER DISPENSER<br />
? Setting The Temperature<br />
To start, turn the temperature control knob to the maximum setting (6) to<br />
achieve coldest position quickly. Allow the unit to run for 3 hours.<br />
Temperature range of the thermostat goes from 36°F to 45°F (2.2ºC to<br />
7.2ºC).<br />
Optimum temperature for serving draught beer is between 34°F – 38°F<br />
(1.1ºC – 3.3ºC) and that is a key factor to consider in storing and dispensing<br />
draught beer.<br />
To turn off the Beer Dispenser, turn the control knob to the “OFF” position.<br />
NOTE: Keep an accurate thermometer handy and adjust temperature control setting as necessary or<br />
according to your needs.<br />
? Automatic Defrosting<br />
There is no need to defrost the Beer Dispenser. Defros t water collects and passes through the drain<br />
outlet in the rear wall into a tray located above the compressor, where it evaporates.<br />
NOTE:<br />
? IF THE UNIT IS UNPLUGGED, POWER LOST, OR TURNED OFF, YOU MUST WAIT 3 TO 5<br />
MINUTES BEFORE RESTARTING THE UNIT. IF YOU ATTEMPT TO RESTART BEFORE THIS<br />
TIME DELAY, THE BEER DISPENSER WILL NOT START.<br />
? TURNING THE TEMPERATURE CONTROL TO “OFF” POSITION STOPS THE COOLING<br />
CYCLE BUT DOES NOT SHUT OFF THE POWER TO THE UNIT.<br />
CARE AND MAINTENANCE<br />
? Cleaning Your Beer Dispenser<br />
? Turn the temperature control to "OFF", unplug the Beer Dispenser, and remove the contents.<br />
? Wash the inside surfaces with a warm water and baking soda solution. The solution should be<br />
about 2 tablespoons of baking soda to a quart of water.<br />
? Wash the shelves and metal plate with a mild detergent solution.<br />
? Wring excess water out of the sponge or cloth when cleaning area of the controls, or any<br />
electrical parts.<br />
16
? Wash the outside cabinet with warm water and mild liquid detergent. Rinse well and wipe dry with<br />
a clean soft cloth.<br />
? Vacation Time<br />
? Short vacations: Leave the Beer Dispenser operating during vacations of less than three weeks.<br />
? Long vacations: If the appliance will not be used for several months, remove all contents and<br />
unplug the power cord. Clean and dry the interior thoroughly. To prevent odor and mold growth,<br />
leave the door open slightly: blocking it open if necessary.<br />
? Moving Your Beer Dispenser<br />
? Remove all the contents.<br />
? Securely tape down all loose items inside your Beer Dispenser.<br />
? Tape the door shut.<br />
? Be sure the Beer Dispenser stays secure in the upright position during transportation. Also<br />
protect outside of Beer Dispenser with a blanket, or similar item.<br />
DRAUGHT BEER TROUBLE GUIDE<br />
CLOUDY BEER<br />
When beer in glass appears hazy, and not clear.<br />
Causes<br />
1)<br />
? Over chilling beverage cooler and/or<br />
beverage lines.<br />
2)<br />
? Cracking, or when partially opening<br />
beer faucet.<br />
3)<br />
? Contaminated air source. If possible<br />
change to CO2 gas as a pressure<br />
source.<br />
? Defective Thomas or tongue vents.<br />
4)<br />
? General conditions causing cloudy<br />
beer.<br />
5)<br />
? Unrefrigerated food placed on barrel<br />
on cold beer.<br />
Corrections<br />
1)<br />
? Excessive low temperatures may cause hazy,<br />
cloudy beer, particularly when beer lies in cold coil<br />
for long periods of time. Make certain that lines are<br />
thoroughly cleaned, and then raise temperature<br />
slightly.<br />
2)<br />
? Open faucet quickly and completely.<br />
? Replace worn washers and parts in faucet when<br />
necessary to permit full opening of faucet.<br />
3)<br />
? See flat beer, co rrection #7<br />
? Always draw fresh air from an outside source to<br />
compressor. Attach hair felt filter to the outside<br />
intake, in addition to filter in line.<br />
? Bacteria growth may result from beer backing up<br />
through defective vents in air line, air pressure will<br />
then carry this into beer barrel.<br />
? Check and replace defective vents frequently, and<br />
thoroughly clean air line.<br />
4)<br />
? See wild beer corrections #2, #5, #6, and #7, and<br />
flat beer corrections #5, #7, and #8.<br />
5)<br />
? When unrefrigerated products, such as meats<br />
vegetables, fish, or fruits, are placed on barrel of<br />
cold beer, the beer becomes warm long before<br />
these products chill down to the cold temperature.<br />
This change in temperature will cause Cloudy Beer.<br />
17
FLAT BEER<br />
Foamy head disappears quickly: beer lacks usual zestful brewery fresh flavor.<br />
Causes<br />
Corrections<br />
1)<br />
? Greasy glass<br />
1)<br />
? Do not wash beer glasses together with glasses<br />
that have contained milk or any other fatty<br />
substance. Lipstick is a fatty substance.. Make<br />
sure it is removed from glass.<br />
? Excess amount of germicides build up and leave<br />
a fatty film on glass, which may cause flat beer.<br />
? It is preferable to steam and sterilize glasses<br />
where health laws permit.<br />
? Wash glasses thoroughly with a good detergent.<br />
? Do not use soap.<br />
? Do not dry-wipe glasses. Permit glasses to airdry<br />
by placing them on wire or corrugated metal.<br />
? Rinse in fresh cold water just before serving<br />
2)<br />
? Improper drawing of beer into glass.<br />
3)<br />
? Not enough pressure.<br />
4)<br />
? Defective Thomas and Tongue Vents.<br />
? Pressure is shut off.<br />
5)<br />
? Pre-color, or beer system, too cold.<br />
6)<br />
? Sluggish pressure regulators.<br />
beer. It is best to serve beer in a wet glass.<br />
2)<br />
? Open faucet quickly and completely.<br />
? Check and find the correct distance to hold<br />
glass from faucet when drawing. Proper foam<br />
should be a tight creamy head, and the collar on<br />
the average glass should be ¾” to 1” high.<br />
? Beer drawn without head has appearance of<br />
being flat.<br />
3)<br />
? Increase pressure if beer runs too slowly.<br />
Correct flow is to fill<br />
4)<br />
? Check all washers frequently, particularly the air<br />
vents. A clogged vent will obstruct the flow of air<br />
or Co2.<br />
? Check source of pressure. Check power source<br />
when air compressor is used. Air compressor<br />
should never be connected to light switch. Make<br />
certain to have a separate electric plug outlet for<br />
the compressor.<br />
? Check CO2 tank, if empty, replace (See inside<br />
cover for proper procedure).<br />
? When barrel is tapped, and proper pressure<br />
applied, pressure must always remain on until<br />
barrel is empty.<br />
? If beer is started without first applying pressure<br />
beer will be wild at the start, and flat towards the<br />
end.<br />
5)<br />
? With an accurate thermometer, check<br />
temperature in pre-cooler or box.<br />
? Temperature at the faucet should always be<br />
colder by at least two degrees than at the<br />
precooler or box.<br />
6)<br />
? A regular seat, or the regulator diaphragm, may<br />
require replacing.<br />
? Also, check the same as you would for<br />
Corrections 3 & 4.<br />
18
7)<br />
? Contaminated air source.<br />
? Oil or grease fumes.<br />
8)<br />
? Moisture in Air system.<br />
9)<br />
? Rapid movement of air.<br />
7)<br />
? Filter all air after it leaves compressor.<br />
? Oil fume from compressor, of kitchen grease<br />
fumes, pumped into beer, will cause Flat Beer.<br />
? If possible CO 2 gas should be used as a<br />
pressure source.<br />
8)<br />
? With the use of an air compressor, it is<br />
imperative to have a moisture trap installed in<br />
the Pre-cooler, and drained daily. This is in<br />
addition to an activated charcoal filter,<br />
necessary to purify the air just before it enters<br />
the barrel.<br />
? With tank type compressors, drain the tank<br />
weekly.<br />
? Moisture traps should be drained daily.<br />
9)<br />
? An air fan, or exhaust blower drawing air, or<br />
blowing air, across the bar where beer is drawn,<br />
may cause the dead of foam to fall quickly. Fans<br />
or blowers should be located so that air<br />
movement is not directly across from where<br />
beer is drawn.<br />
LOOSE FOAM<br />
Causes<br />
? Large soap-like bubbles (sometimes<br />
called fish eyes). Foam settles quickly.<br />
Corrections<br />
? This is generally a Flat Beer condition: the<br />
Causes and corrections for Flat Beer should be<br />
followed.<br />
OFF-TASTE BEER<br />
Often bitter and bitey, sometimes completely odor, carrying an unpleasant taste.<br />
Beer lines should be flushed after each barrel is empty. Maintain fresh, Clean, sanitary<br />
conditions at bar. Smoke, kitchen odors, fly sprays, and disinfectants will harm the tast and<br />
flavor of beer, making it unpalatable. These conditions, as described, may come from an air<br />
source, or from actual contact with the glass at bar.<br />
Causes<br />
1)<br />
? Improper, or no cleaning of coils, hose,<br />
leads, and direct draw system.<br />
2)<br />
? Contaminated Air Line. Defective Thomas<br />
or Tongue Bents.<br />
Corrections<br />
1)<br />
? Coils should be thoroughly cleaned at least once<br />
a week.<br />
? Brush and clean faucet. (see Wild Beer,<br />
Correction #2)<br />
? Taps, rods, and tap-Seal fitting should all be<br />
scoured, using a detergent, then rinsed clean.<br />
? Direct draw Systems must be cleaned the same<br />
as coil systems: 4 feet of direct draw line<br />
accumulates as much per foot as any other<br />
system.<br />
2)<br />
? Air hoses, air lines and vents, should be<br />
examined, and if contaminated, replaced.<br />
19
3)<br />
? Rubber hose will absorb and retain odors.<br />
4)<br />
? Unfiltered air, Air is moisture ridden or<br />
oily.<br />
? Dirty air lines should be washed with a good<br />
cleaning compound, normally used for cleaning<br />
coils, and then rinsed clean.<br />
3)<br />
? Rubber hose will absorb and retain odors. An<br />
approved Vinyl tubing is best for air since it does<br />
not absorb moisture, and is not affected by oily<br />
substances.<br />
? A fresh, outdoor, air line is imperative when air is<br />
the source of pressure.<br />
4)<br />
? Air must always be filtered.<br />
? See Flat Beer, Correction #8 for moisture ridden<br />
air.<br />
May taste and smell extremely yeasty, or moldy.<br />
SOUR BEER<br />
Cause<br />
1)<br />
? Contaminated Air Line.<br />
2)<br />
? Improper transportation of barrels of beer,<br />
Beer delivered on open truck, during high<br />
summer temperatures, may be the cause<br />
for starting secondary fermentation.<br />
3)<br />
? No refrigeration, and improper rotation.<br />
Corrections<br />
1)<br />
? See Cloudy Beer, Correction #3<br />
? See Off-Taste Beer, Correction #2<br />
? See Flat Beer, Correction #7<br />
2)<br />
? If at all possible, deliver beer barrels in closed<br />
body, refrigerated truck. If open staked body<br />
truck is used, cover barrels with a tarpaulin for<br />
protection against summer heat, and circulating<br />
warm air.<br />
? Truck should never be loaded the night before<br />
morning delivery, unless beer is refrigerated in<br />
truck.<br />
3)<br />
? The rule is first barrel in, first tapped.<br />
? Refrigeration must be left on winter or summer.<br />
? Sour beer is generated as a result of secondary<br />
fermentation, above 45 degrees. Retail outlets<br />
that do not have refrigeration should ice up<br />
barrels, or at least cover barrels with tarpaulin or<br />
burlap bags.<br />
? Best temperature for barrels is 38° to 40°.<br />
WILD BEER<br />
Beer, when drawn, is all foam, or too much foam, and not enough liquid beer.<br />
Cause<br />
1)<br />
? Improper drawing beer into glass.<br />
Corrections<br />
1)<br />
? Open faucet quickly and completely.<br />
? Check and find the correct distance to hold glass<br />
from faucet when drawing. Proper foam should<br />
be a tight, creamy head, and the collar on the<br />
average glass should be ¾ “ to 1” high.<br />
20
2)<br />
? Yeast growth, or other obstructions in<br />
faucet.<br />
? Worn faucet parts and worn faucet<br />
washers.<br />
3)<br />
? Kinks, dents, or twists in coils, or direct<br />
draw lines: obstructions in line, near, or<br />
behind faucet.<br />
4)<br />
? Sag, or trap in line.<br />
5)<br />
? Beer too warm at faucet;<br />
? Beer too warm in Coil System.<br />
? Beer too warm in Air Shaft System.<br />
6)<br />
? Hot spots in line.<br />
7)<br />
? Pre-Cooler, or Direct Draw Dispenser, too<br />
warm.<br />
8)<br />
? No cold storage space for delivered beer;<br />
beer becomes warm in barrel.<br />
9)<br />
? Too much air pressure.<br />
10)<br />
? Excess CO 2 .<br />
2)<br />
? Clean faucet spout with a good brush daily.<br />
Scour all internal faucet parts at least once a<br />
week.<br />
? Replace worn washers as required. If faucet<br />
does not open wide, worn parts or entire faucet<br />
must be replaced.<br />
3)<br />
? Check for, and replace kinked, dented, or<br />
twisted line from barrel to faucet.<br />
? Examine for frayed coupling washer behind<br />
faucet that may cause obstruction.<br />
4)<br />
? Keep all metal beer lines straight from barrel to<br />
faucet; never permit lines to sag, as this creates<br />
traps that may cause wild beer.<br />
5)<br />
? Temperature at faucet must always be at least 2<br />
degrees colder than at barrel.<br />
? In sweet-water refrigerated, or ice-water system,<br />
faucet shank must always be submerged.<br />
? In Cold Air System, the coldest air from the<br />
blower must first be directed to the faucet, and<br />
then circulated back to pre-cooler.<br />
6)<br />
? Insulate all beer lines; a long beer run must be<br />
constantly refrigerated. Insulation helps. But<br />
insulation is not refrigeration.<br />
? Keep all beer lines away from hot water pipes,<br />
hot air ducts, and steam lines. A cold steam<br />
pipe in the summer is a hot steam pipe in the<br />
winter.<br />
7)<br />
? It is always summer indoors and in the<br />
basement, therefore, maintain pre-cooler, and<br />
direct draw dispenser temperature at 40° all year<br />
round. If direct draw temperature cannot be<br />
lowered, increase applied pressure; however,<br />
balance the system by changing to smaller<br />
diameter length of vinyl tubing or install a foam<br />
control faucet.<br />
? Never shut off refrigeration – day or night.<br />
8)<br />
? Coil systems, and direct draw systems, must be<br />
properly balanced in order to apply pressure<br />
required for warmest temperature to which<br />
barrels of beer will be exposed. A control beer<br />
faucet can be used in place of a restricted coil to<br />
balance system.<br />
9)<br />
? Check source of pressure. Adjust pressure to<br />
suit properly balanced system. For correct beer<br />
flow, fill a 10 oz. Glass in 4 seconds at proper<br />
tempe rature.<br />
? Check and replace a creeping regulator and<br />
gauge.<br />
10)<br />
? Adjust pressure when using CO 2 as low as<br />
possible, however, remembering that the applied<br />
21
11)<br />
? Not enough pressure.<br />
? No pressure.<br />
pressure must be slightly higher than the internal<br />
pressure of the beer (no more than 18 lbs.<br />
should be applied.)<br />
? The colder the beer and the higher the applied<br />
CO 2 pressure, the more rapid the absorption of<br />
CO2 by the beer. This over-carbonates the beer,<br />
causing Wild Beer.<br />
11)<br />
? Check for defective air vents. (see Flat Beer,<br />
Corrections #3 and 4.)<br />
? Always turn pressure on before drawing beer.<br />
12)<br />
? Old Beer.<br />
12)<br />
? Rotate stock. The oldest beer should be tapped<br />
first; if beer has been allowed to stand in warm<br />
temperature beyond 45° for any excessive<br />
length of time, it may begin secondary<br />
fermentation.<br />
? Store beer at 40° all year round.<br />
TAIL END BEER<br />
Beer draws well at the beginning of the barrel. Towards the end of the barrel the beer is flat.<br />
This is more likely to occur when beer turnover is slow.<br />
Causes<br />
? Where air is used as a pressure source,<br />
air replaced the CO 2 in beer causing flat<br />
beer. Where beer is being drawn rapidly<br />
this problem is not so evident.<br />
Corrections<br />
? Wherever possible CO 2 Gas should be used as<br />
pressure source.<br />
? In high pressure system s where CO 2 gas cannot<br />
be sued a banner air-gas Blender should be<br />
installed. This introduces a small amount of CO 2<br />
back into the beer, thus maintaining normal CO 2<br />
content in beer.<br />
22
PROBLEMS WITH YOUR BEER DISPENSER?<br />
You can solve many common Beer Dispenser problems easily, saving you the cost of a possible<br />
service call. Try the suggestions below to see if you can solve the problem before calling the servicer.<br />
TROUBLESHOOTING GUIDE<br />
PROBLEM<br />
Beer Dispenser does not operate.<br />
Turns on and off frequently.<br />
Vibrations.<br />
The Beer Dispenser seems to make too much<br />
noise.<br />
The door will not close properly.<br />
POSSIBLE CAUSE<br />
Not plugged in.<br />
The circuit breaker tripped or blown fuse.<br />
The temperature control knob is set in “OFF”<br />
position.<br />
The room temperature is hotter than normal.<br />
The door is open too often.<br />
The door is not closed completely.<br />
The temperature control is not set correctly.<br />
The door gasket does not seal properly.<br />
The Beer Dispenser does not have the correct<br />
clearances.<br />
Check to assure that the Beer Dispenser is<br />
leveled.<br />
The rattling noise may come from the flow of the<br />
refrigerant, which is normal.<br />
As each cycle ends, you may hear gurgling<br />
sounds caused by the flow of refrigerant in your<br />
Beer Dispenser.<br />
Contraction and expansion of the inside walls<br />
may cause popping and cr ackling noises.<br />
The Beer Dispenser is not leveled.<br />
The Beer Dispenser is not leveled.<br />
The door was reversed and not properly installed.<br />
The gasket is dirty.<br />
The shelves or metal plate or beer keg are out of<br />
position.<br />
23
SERVICE FOR YOUR BEER DISPENSER<br />
We are proud of our customer service organization and the network of professional service<br />
technicians that provide service on your <strong>Avanti</strong> Beer Dispenser. With the purchase of your <strong>Avanti</strong><br />
Beer Dispenser, you can have the confidence that if you ever need additional information or<br />
assistance, the <strong>Avanti</strong> Products Customer Service team will be here for you. Just call us toll-free.<br />
Product Information<br />
800-323-5029<br />
Part Orders<br />
800-220-5570<br />
In-Home Repair Service<br />
800-220-5570<br />
AVANTI PRODUCTS CUSTOMER SERVICES<br />
Whatever your questions are about our products,<br />
help is available.<br />
You may order parts and accessories that will be<br />
delivered directly to your home.<br />
You may order these items by personal check,<br />
money order, Master Card, or Visa.<br />
An <strong>Avanti</strong> Products authorized service center will<br />
provide expert repair service, scheduled at a time<br />
that is convenient for you. Our trained servicers<br />
know your Beer Dispenser inside and out.<br />
24
YOUR <strong>Avanti</strong> Products WARRANTY<br />
WHAT IS COVERED<br />
LIMITED ONE-YEAR<br />
WARRANTY<br />
For one year from the date of<br />
purchase by the original owner, <strong>Avanti</strong><br />
Products will, at its option, repair or<br />
replace any part of the Beer Dispenser<br />
which proves to be defective in<br />
material or workmanship under normal<br />
use. During this period <strong>Avanti</strong><br />
Products will provide all parts and<br />
labor necessary to correct such<br />
defects free of charge , so long as the<br />
Beer Dispenser has been installed<br />
and operated in accordance with the<br />
written instructions in this manual. In<br />
rental or commercial use, the warranty<br />
period is 90 days. All <strong>Avanti</strong><br />
Appliances of 3.5 cubic feet capacity<br />
or less must be brought/sent to the<br />
appliance service shop for repair.<br />
Staple your sales receipt here. Proof of<br />
original purchase date is needed to obtain<br />
service under warranty.<br />
LIMITED SECOND THROUGH<br />
FIFTH YEAR WARRANTY<br />
For the second through the fifth year from date<br />
of original purchase, <strong>Avanti</strong> Products will<br />
provide a replacement compressor free of<br />
charge due to a failure. You are responsible<br />
for the service labor and freight charges . In<br />
rental or commercial use, the limited<br />
compressor warranty is one year and nine<br />
months. Cost to move the Beer Dispenser to<br />
the servicers’ shop and back to the user's<br />
home, as may be required, are the user's<br />
responsibility.<br />
WHAT IS NOT COVERED<br />
? Content losses of food due to spoilage.<br />
? Incidental or consequential damages.<br />
? Parts and labor costs for the following will<br />
not be considered as warranty:<br />
? Evaporator doors, door springs, and/or<br />
frames.<br />
? Inner door panels, door shelves, door<br />
rails, and/or door supports.<br />
? Chest unitlid liners.<br />
? Vegetable crispers.<br />
? Light bulbs and/or plastic housing.<br />
? Plastic cabinet liners.<br />
? Punctured evaporator that voids the<br />
warranty on the complete sealed system.<br />
? Repairs performed by unauthorized<br />
servicers.<br />
? Service calls that do not involve defects in<br />
material or workmanship such as<br />
customer education, door reversal, or<br />
proper installation.<br />
? Service calls that are related to external<br />
problems, such as abuse, misuse,<br />
inadequate electrical power, accidents,<br />
fire, floods, or acts of God.<br />
? Replacement of house fuses or resetting<br />
circuit breakers.<br />
? Failure of the product if it is used for other<br />
than its intended purpose.<br />
? This warranty does not apply outside the<br />
Continental U.S.A.<br />
25
WIRING DIAGRAM<br />
26
INSTRUCCIONES EN ESPAÑOL<br />
PRECAUCIÓN<br />
Para reducir el riesgo de incendio,<br />
descarga eléctrica, o daño cuando use su<br />
electrodoméstico, siga las siguientes<br />
precauciones.<br />
? Lea todas las instrucciones antes de usar su electrodoméstico.<br />
? Peligro o Precaución: Existe el riesgo que los niños queden atrapados.<br />
? Antes de desechar su dispensador de cerveza usado: Retire la puerta. Deje las<br />
repisas en su lugar para evitar que los niños queden atrapados dentro.<br />
? No permita que los niños jueguen o entren dentro del dispensador.<br />
? No limpie su dispensador. con líquidos inflamables. Los gases pueden<br />
ocasionar fuego o una explosión.<br />
? No guarde ni use gasolina u otros líquidos inflamables cerca de éste o de<br />
cualquier otro electrodoméstico. Los vapores pueden ocasionar fuego o<br />
explosión.<br />
- Guarde estas instrucciones -<br />
INSTRUCCIONES PARA LA INSTALACION<br />
? Antes de Usar su Electrodoméstico<br />
? Retire la envoltura interna y externa<br />
? Verifique que tenga las siguientes partes:<br />
o <strong>Manual</strong> de instrucciones<br />
o Carril de la parte superior<br />
o Bandeja de goteo (2 piezas)<br />
o Soporte de cilindro<br />
o Regulador del CO2 (GAS CARBONICO) (en una caja)<br />
o Cilindro CO2 (GAS CARBONICO) vacío (en una caja)<br />
o Manguera de la línea de aire CO2 (GAS CARBONICO) roja<br />
o Conectores de la manguera CO2 (GAS CARBONICO) (2 piezas)<br />
o Acoplador del barril de cerveza (en una caja)<br />
o Dispensador de cerveza con grifo<br />
o Manija del dispensador (grifo de la torre de cerveza)<br />
o 4 Tapas para la bandeja de goteo<br />
o Soporte para el barril de cerveza<br />
o Plato de metal para la parte inferior del gabinete<br />
o Llave de metal<br />
o Tapas para el gabinete superior<br />
? Antes de que conecte su Dispensador de Cerveza a la corriente eléctrica,<br />
manténgalo ubicado en una superficie plana y vertical por lo menos por 2 horas.<br />
Esto reducirá la posibilidad de malfuncionamiento en el sistema de enfriamiento por<br />
el manipuleo durante el transporte.<br />
? Limpie la superficie interior con agua tibia utilizando un trapo suave.<br />
? Instalación de su Dispensador de Cerveza<br />
? Ubique su Dispensador de Cerveza en un piso que sea lo suficientemente fuerte<br />
para soportar el peso de la unidad cuando esté totalmente lleno.<br />
? Deje más o menos 3 pulgadas de espacio entre la pared, la parte posterior y los<br />
lados del electrodoméstico, lo cual permitirá la circulación de aire apropiado para<br />
enfriar el compresor.<br />
? Aleje su Dispensador de Cerveza de la luz solar y de fuentes directas de calor<br />
27
(estufa, calentador, radiador, etc.). Los rayos solares directos pueden malograr la<br />
capa acrílica, y las fuentes de calor pueden ocasionar un aumento en el consumo<br />
eléctrico. Los ambientes extremadamente fríos pueden afectar la eficiencia del<br />
enfriamiento de su dispensador.<br />
? Evite ubicar el dispensador en áreas húmedas.<br />
? Conecte el dispensador a un enchufe de pared exclusivo e instale el cable de tierra.<br />
Bajo ninguna razón se debe retirar la tercera punta del enchufe. Cualquier consulta<br />
con respecto a la energía y/o cable de tierra debe ser dirigida a un electricista<br />
certificado o autorizado por el Servicio Técnico de <strong>Avanti</strong> Products.<br />
? Después de enchufar el dispensador, deje que la unidad se enfríe de 2 a 3 horas<br />
antes de poner cualquier contenido en el compartimiento del dispensador.<br />
? Conexión eléctrica<br />
ADVERTENCIA<br />
El uso inapropiado del enchufe a tierra puede desencadenar un choque eléctrico. Si el<br />
cordón del enchufe del electrodoméstico se encuentra dañado, debe ser reemplazado<br />
por el Servicio Técnico de <strong>Avanti</strong> Products.<br />
? El cordón del enchufe está equipado con tres puntas que encajan perfectamente en un<br />
enchufe de pared standard para reducir el riesgo de un choque eléctrico.<br />
? Bajo ninguna circunstancia corte o saque la tercera punta del enchufe que le<br />
proveemos, ya que esta es para que vaya conectada a tierra.<br />
? No use una extensión.<br />
? La corriente de este electrodoméstico es de 115/120 voltios, tiene una salida eléctrica de<br />
60 hz. y consta de un enchufe de tres puntas que va conectado al enchufe de pared.<br />
? El cordón del enchufe debe ser asegurado atrás del electrodoméstico y no dejarlo<br />
expuesto para evitar accidentes.<br />
? Nunca desenchufe el Dispensador de Cerveza tirando del cordón de corriente eléctrica.<br />
Siempre tome firmemente el mango del enchufe y hale hacia usted.<br />
ADVERTENCIA<br />
GAS CO2 (GAS CARBONICO) PUEDE SER PELIGROSO<br />
ADVERTENCIA: Los cilindros de CO2 (GAS CARBONICO) contienen un gas comprimido<br />
de alta presión que puede ser peligroso si no es manejado correctamente. Cerciórese de<br />
leer y entender las siguientes instrucciones relacionadas a los cilindros de CO2 (GAS<br />
CARBONICO) antes de su instalación.<br />
1. SIEMPRE conecte el cilindro de CO2 (GAS CARBONICO) a un regulador. Una falla al<br />
momento de abrir la válvula podría dar lugar a una explosión, existiendo peligro de<br />
muerte o lesión.<br />
2. NUNCA conecte el cilindro de CO2 (GAS CARBONICO) directamente al recipiente del<br />
producto.<br />
3. SIEMPRE siga correctamente los procedimientos cuando los cilindros sean cambiados.<br />
4. SIEMPRE esté seguro de que los cilindros estén en posición vertical.<br />
5. NUNCA arroje o deje caer el cilindro de CO2 (GAS CARBONICO).<br />
6. SIEMPRE mantenga el cilindro de CO2 (GAS CARBONICO) alejado del calor.<br />
Almacene los cilindros extras en un lugar fresco (de preferencia 70º F).<br />
7. SIEMPRE deje ventilada el área en caso ocurriese una fuga de CO2 (GAS<br />
CARBONICO).<br />
8. SIEMPRE controle la fecha de vencimiento D.O.T. en la tapa del cilindro antes de su<br />
instalación. Si pasan 5 años y usted no lo utilizó, devuélvalo al surtidor del gas.<br />
9. NUNCA conecte un recipiente del producto a menos que haya 2 seguros en el sistema<br />
de presión:<br />
28
a. Uno en el regulador de CO2 (GAS CARBONICO).<br />
b. Uno en el acoplador del producto o en la línea de presión del gas.<br />
Instalación del Soporte del Cilindro de CO2 (GAS CARBONICO)<br />
? Instale el soporte de metal sobre los 4 tornillos localizados en la parte posterior. Alinee<br />
los agujeros en el soporte con los tornillos presionando firmemente hacia abajo. (Vea la<br />
figura 1)<br />
Instalación del Cilindro de CO2 (GAS CARBONICO)<br />
? Instale el cilindro completamente cargado en el soporte de metal.<br />
Instalación del Regulador de CO2 (GAS CARBONICO)<br />
? Una el regulador de CO2 (GAS CARBONICO) al cilindro girando la tuerca del regulador<br />
sobre la válvula del cilindro, cerciórese de insertar la tuerca. Apriete con una llave<br />
ajustable y asegúrese de que no haya ningún escape de CO2 (GAS CARBONICO).<br />
(Vea la figura 2).<br />
Instalación de la Manguera de Aire de CO2 (GAS CARBONICO) al Regulador<br />
? Junte el extremo de la manguera de aire (roja) a la conexión de la manguera en el<br />
regulador.<br />
? Asegure la manguera usando una de las dos presillas de ajuste proporcionadas. Utilice<br />
los alicates para apretar la presilla de ajuste y asegúrese que no hayan fugas.<br />
Instalación de la torre al acoplador<br />
? Asegúrese que la empacadura este bién colocada en la rosca tipo mariposa.<br />
? Coloque rosca tipo mariposa en el acoplador y ajústela firmemente.<br />
Instalación de la Línea de Aire dentro del Compartimiento<br />
? Retire la tapa situada en la parte posterior (esquina superior de la mano izquierda).<br />
? Guárdela para después en caso de que decida convertir la unidad a refrigerador.<br />
? Inserte el extremo abierto de la línea de aire (roja) en el compartimiento a<br />
través del agujero descubierto.<br />
Instalación de la Torre<br />
? Retire la tapa girando y halando. Guárdela para después, en caso decida convertir su<br />
unidad de dispensador a refrigerador.<br />
? Desenrede la manguera que traslada la cerveza desde la torre e insértela junto con la<br />
tuerca tipo mariposa, a traves de la apertura.<br />
? Asegure la torre ensamblada a la parte superior y verifique que la posición del grifo<br />
surtidor de cerveza se encuentra alineado con el gabinete frontal. Logre esto alineando<br />
las tres alas en la parte inferior de la torre de cerveza a los tres agujeros destapados en<br />
la parte superior del gabinete y ajústelos con la mano de manera que quede<br />
apropiadamente cerrados.<br />
Instalación del protector de la placa de metal<br />
? Esta placa debe de ser instalada cuando el barril esté en posición vertical. (ver figura 6)<br />
? No se necesita si la unidad se convierte a refrigerador.<br />
Instalación del barril de cerveza<br />
? Coloque el soporte del barril de cerveza frente a la puerta abierta. Utilizando las asas del<br />
barril, levántelo cuidadosamente y sobre el soporte del barril de cerveza.<br />
? Para ubicar el barril de cerveza colóquelo dentro de la cabina, doble ligeramente sus<br />
rodillas y levante el barril usando las asas posteriores del soporte, solo lo suficiente, de<br />
manera que pueda colocar el frente del barril con el frente de la cabina.<br />
29
? Agarre el soporte del barril por las asas y deslícelo dentro de la cabina. (Vea figura 7)<br />
Instalación del adaptador del barril<br />
? Inserte el adaptador del barril que se provee dentro del cuello del barril de cerveza y<br />
gírelo en sentido horario para asegurarlo en posición<br />
Instalación de la manguera de aire CO2 (GAS CARBONICO)<br />
o Una el extremo de la manguera roja a la manguera de conexión en el barril acoplador,<br />
conectando la llave dispensadora de cerveza al acoplador.<br />
o<br />
Asegure la manguera usando el broche de presión de plástico que se proveé, usando<br />
alicates para ajustar con grampas. (Vea figura 4)<br />
o Cerciórese de que la arandela esté insertada correctamente en la tuerca de ala.<br />
o Coloque la tuerca de ala en la tapa del acoplador y dele la vuelta firmemente.<br />
Como servir la cerveza desde la Torre<br />
? Cerciórese que el grifo de la torre de la cerveza esté en la posición “Cerrada”.<br />
? Hale y presione hacia abajo la manija surtidora del acoplador hasta que quede<br />
asegurada.<br />
? El barril proporcionará la cerveza deseada por el usuario.<br />
Como abrir la válvula principal del CO2 (GAS CARBONICO)<br />
? Antes de hacer esto, asegúrese que la válvula secundaria de corte esté cerrada,<br />
(POSICION HORIZONTAL) como se muestra en la figura (Pagina 14). Para abrir la<br />
válvula principal del cilindro de CO2 (GAS CARBONICO), gire lentamente la válvula<br />
principal en dirección contrario al sentido horario.<br />
? Note que la aguja empieza a subir.<br />
Como ajustar el regulador del CO2 (GAS CARBONICO)<br />
? Afloje la tuerca de fijación.<br />
? Al ajustar el regulador del CO2 (GAS CARBONICO), la aguja vigila la presión interna<br />
baja del barril. Ajústelo para que lea entre 10-12 PSI.<br />
? Como ajustar:<br />
Con un destornillador plano, de vuelta al tornillo del regulador marcado “vea fig 6”. Si se<br />
necesita aumentar la presión, rote el tornillo en sentido de las agujas del reloj. El tornillo<br />
en dirección contraria a las manecillas del reloj, disminuirá la presión. Cuando se logra<br />
la presión de funcionamiento requerida, vuelva a apretar la tuerca de fijación “vea fig 2”.<br />
? Abra la válvula (posición vertical) secundaria para dejar el CO2 (GAS CARBONICO) fluir<br />
en el barril.<br />
? Dispensando Cerveza<br />
? Mantenga el barril de cerveza refrigerado todo el tiempo<br />
? Nunca permita que las vías de cerveza queden secas<br />
? Use vasos bien limpios<br />
? Sostenga el vaso en un ángulo de 45°, cuando esté 2/3 lleno empiece a enderezar el<br />
vaso y cierre el grifo<br />
? Siempre asegúrese que la manija del grifo esté cerrada.<br />
? La llave de cerradura para el grifo del Dispensador de Cerveza está disponible para que<br />
el dispensador solamente pueda ser usado por personas mayores de edad.<br />
Nota :<br />
Capacidad y medidas de los barriles que pueden ser usados para surtir cerveza<br />
59 Litros (1/2 barril) 30 Litros (1/4 barril)<br />
20 Litros (1/6 barril) 15 Litros (1/8 barril)<br />
30
? Convierta su Dispensador de Cerveza en “Todo un Refrigerador”<br />
1. Gire el control a la posición “OFF”.<br />
2. Cierre la válvula principal en el cilindro de CO2 (GAS CARBONICO).<br />
3. Cierre la válvula de desconexión secundaria en el tubo del regulador.<br />
4. Cierre la conexión entre el barril de la cerveza y el acoplador del barril.<br />
5. Drene cualquier tipo de residuo de cerveza en las vías.<br />
6. Desconecte las vías de cerveza y las vías de aire CO2 (GAS CARBONICO) del barril de<br />
cerveza.<br />
7. Retire el barril de cerveza, el soporte y el platillo de metal inferior de la cabina.<br />
8. Retire el adaptador del barril.<br />
9. Desconecte la vía de aire del cilindro de CO2 (GAS CARBONICO).<br />
10. Retire la vía de aire CO2 (GAS CARBONICO) de la tapa de la cabina.<br />
11. Reemplace la tapa de la vía de aire posterior.<br />
12. Retire la torre de cerveza. También tire de la línea de la cerveza a través del hueco de<br />
la cabina superior.<br />
13. Reemplace la tapa superior del gabinete.<br />
14. Instale las parrillas opcionales en los soportes laterales.<br />
15. Ajuste la temperatura a su gusto.<br />
? Control de temperatura<br />
USANDO SU DISPENSADOR DE CERVEZA<br />
Para empezar, gire el control de temperatura al nivel más alto (6)<br />
para enfriamiento rápido. Deje que la unidad funcione por 3 horas<br />
seguidas. La temperatura del termostato se puede ajustar desde 33<br />
°F a 45 °F (2.2ºC to 7.2ºC).<br />
La temperatura óptima para servir cerveza es entre 34° F y 38° F<br />
(1.1ºC – 3.3ºC) y ese es un factor importante que debe considerar<br />
para almacenar y surtir cerveza.<br />
Para apagar su dispensador, gire el control a la posición “OFF”.<br />
NOTA: Mantenga un termómetro adecuado a la mano y ajuste el control temperatura según<br />
sus necesidades.<br />
? Descongelamiento Automático<br />
No hay necesidad de descongelar el dispensador de la cerveza. Toda el agua<br />
descongelada pasa por la salida de drenaje por la pared posterior, a una bandeja ubicada<br />
sobre el compresor, donde se evaporará.<br />
? NOTA Si la unidad es desenchufada, pierde poder o es apagada, espere de 3 a 5<br />
minutos antes de reiniciar la unidad. Si usted intenta reiniciar antes de este tiempo, es<br />
muy posible que el dispensador no funcione.<br />
CUIDADO Y MANTENIMIENTO<br />
? Instalación de la puerta del Dispensador de Cerveza<br />
El Dispensador de Cerveza tiene la capacidad de poderse abrir no solo por la izquierda sino<br />
también por el lado derecho. La unidad viene con una puerta que se abre por la izquierda.<br />
Si usted desea puede invertir la dirección de apertura de la puerta, siga las siguientes<br />
instrucciones:<br />
? Como Cambiar la Direccion de Apertura de la Puerta<br />
En caso de que necesite cambiar el lado de apertura de la puerta, por favor consulte al<br />
31
servicio posventa de su localidad o al empleado que le vendio la unidad.<br />
? Limpieza de su Dispensador de Cerveza<br />
? Girar el control de temperatura a OFF, desenchufe el Dispensador de Cerveza y vacíe el<br />
contenido.<br />
? Lave el interior con agua tibia y un trapo suave remojado en una solución de bicarbonato<br />
de sodio. La solución consiste en 2 cucharadas de bicarbonato de sodio y un litro de<br />
agua.<br />
? Lave las repisas y cabina con un detergente suave.<br />
? Exprima el exceso de agua de la esponja o trapo cuando limpie áreas como controles o<br />
partes eléctricas.<br />
? Las partes externas de su dispensador. deben ser limpiadas con un detergente suave y<br />
agua tibia. Enjuague bien y seque el interior y exterior con un trapo suave.<br />
? Si usted sale de vacaciones<br />
? Vacaciones cortas: Deje su Dispensador de Cerveza funcionando si sus vacaciones<br />
serán de menos de 3 semanas.<br />
? Vacaciones largas: Retire el contenido interior de su dispensador. Desconecte su<br />
dispensador y límpielo. Deje la puerta de su congelador ligeramente abierta para evitar<br />
la formación de mal olor o moho. En el caso de ser un largo tiempo de almacenamiento,<br />
selle la puerta con cinta adhesiva para que no se abra o retírela.<br />
? Para mover su dispensador<br />
? Retire todo el contenido del dispensador.<br />
? Asegúrese de colocar cinta adhesiva a todo lo que se puede caer dentro de su<br />
congelador.<br />
? Retire las patas para prevenir accidentes.<br />
? Selle las puertas con cinta adhesiva.<br />
? Asegúrese que el dispensador se mantenga parado durante el traslado. También<br />
proteja el exterior del Dispensador de Cerveza con una manta o algo similar.<br />
CERVEZA TURBIA<br />
La bebida no se muestra cristalina<br />
CAUSAS<br />
? La temperatura del nivel de<br />
enfriamiento de las bebidas está muy<br />
baja<br />
? Crujidos o cuando se abre<br />
parcialmente el grifo del dispensador<br />
? Condiciones generales que ocasiona<br />
nubosidad en la cerveza.<br />
CORRECCIONES<br />
? La nubosidad en la cerveza es causada por<br />
excesiva baja temperatura, particularmente<br />
cuando la cerveza permanece recostada en<br />
el espiral por un periodo de tiempo largo.<br />
Verifique que las líneas estén perfectamente<br />
limpias, y suba ligeramente la temperatura.<br />
? Abra el grifo rápida y completamente.<br />
? Reemplace los anillos gastados y partes del<br />
grifo cuando sea necesario, ya que esto<br />
permitirá que se pueda abrir el grifo<br />
completamente.<br />
? Ver correcciones para cerveza rebelde.<br />
32
CERVEZA ACIDA<br />
La bebida tiene un olor y sabor a rancio o pasado<br />
CAUSAS<br />
CORRECCIONES<br />
? La línea de aire está contaminada ? Ver OFF-Taste Beer Corrección.<br />
? Transporte inapropiado de los barriles ? Si es posible, envíe todos los barriles de<br />
de cerveza, cuando se transporta en<br />
un camión no refrigerado durante la<br />
temporada de verano en que las<br />
temperaturas son muy altas, puede<br />
causar que se inicie una fermentación<br />
secundaria<br />
cerveza completamente cerrados en un<br />
camión refrigerado. Si se usa un camión<br />
que no está completamente cerrado y no<br />
cubre los barriles, cúbralos con tarpaulín o<br />
bolsas de yute o fardo para protegerlos del<br />
calor, clima y la circulación de aire caliente.<br />
? El camión nunca debe ser cargado la<br />
noche anterior a la mañana en que se hará<br />
el envío de barriles, a menos que la<br />
cerveza esté refrigerada en el camión.<br />
? Falta de refrigeración o rotación de<br />
barriles inapropiada<br />
? La regla es: conecte primero el barril con<br />
fecha de vencimiento más próxima.<br />
? La refrigeración debe realizarse en invierno<br />
o en verano.<br />
? La cerveza se acidifica como resultado de<br />
la fermentación secundaria, por encima de<br />
los 45 grados. Los comerciantes de<br />
barriles de cerveza que no tienen<br />
refrigeración deben mantener fresca la<br />
parte superior de los barriles o al menos<br />
cubrirlos con tarpaulín o bolsas de yute o<br />
fardo.<br />
? La temperatura perfecta para los barriles<br />
de cerveza es de 38° a 40° grados.<br />
CERVEZA SIN CUERPO<br />
La espuma desaparece rápidamente, la cerveza carece de su acostumbrado sabor<br />
fresco<br />
CAUSAS<br />
CORRECCIONES<br />
? Vasos grasosos ? No lavar los vasos cerveceros junto con<br />
vasos que hayan contenido leche, o<br />
cualquier tipo de sustancia grasosa. Las<br />
pinturas de labios contienen una sustancia<br />
grasosa, asegúrese de que se retire bien al<br />
lavar los vasos.<br />
? El exceso de gérmenes deja una película<br />
de grasa en los vasos, lo que ocasiona que<br />
la cerveza pierda cuerpo inmediatamente.<br />
? Es preferible vaporizar y esterilizar los<br />
vasos si esto es permitido.<br />
? Lave los vasos minuciosamente y con un<br />
buen detergente.<br />
? No use jabón.<br />
? No seque los vasos con secador. Déjelos<br />
secar al aire libre colocándolos en un<br />
33
? Chorro inapropiado del Dispensador<br />
de Cerveza<br />
escurridor de rejillas de metal.<br />
? Enjuague con agua helada o fresca sólo<br />
antes de servir la cerveza. Es mejor servir<br />
la cerveza en un vaso mojado.<br />
? Abra el grifo rápida y completamente.<br />
? Verifique y encuentre la distancia correcta<br />
entre el grifo y el vaso en el momento que<br />
sale la cerveza del grifo.<br />
? La espuma debe quedar arriba de la<br />
cerveza y el collar promedio del vaso de<br />
cerveza debe ser de ¾ de pulgada a 1<br />
pulgada de alto.<br />
? Cerveza servida sin espuma da la<br />
apariencia de no tener cuerpo.<br />
? No hay suficiente presión ? Aumente la presión si la cerveza sale muy<br />
lentamente.<br />
? Reguladores de presión lentos ? El regulador de diafragma pueda que<br />
requiera un cambio.<br />
CAUSAS<br />
? La espuma muestra burbujas grandes<br />
(como ojos de pescado) o se asienta<br />
rápido<br />
PERDIDA DE ESPUMA<br />
CORRECCIONES<br />
? Esto es generalmente una cerveza sin<br />
cuerpo: se deben de seguir las causas y<br />
correcciones para cerveza sin cuerpo.<br />
CERVEZA SIN SABOR<br />
A menudo amargo a veces con olor o sabor desagradable<br />
Las vías de la cerveza deben ser enjuagadas después de vaciar cada barril.<br />
Mantenga las condiciones sanitarias del bar frescas y limpias. Humo de cigarrillo,<br />
olor de cocina, vaporizadores aromáticos, y desinfectantes dañaran el sabor y el<br />
gusto de la cerveza haciéndola desagradable. Las condiciones descritas pueden<br />
venir del ambiente, o del contacto con los vasos del bar<br />
CAUSAS<br />
CORRECCIONES<br />
? Inapropiadas mangueras y sistemas<br />
que dirigen el drenaje<br />
? Cepille y limpie el grifo (Vea cerveza<br />
rebelde, Corrección).<br />
? Casquillos, varillas y barras deben ser<br />
lavadas usando detergente y<br />
enjuagándolas cuidadosamente.<br />
? El sistema de drenaje directo debe ser<br />
limpiado igual que el sistema de enrollado:<br />
4 pies del sistema de drenaje directo<br />
acumula la misma cantidad por pie que<br />
cualquier otro tipo de sistema.<br />
? Vía de aire contaminada ? Mangueras de aire, vías de aire, deben ser<br />
examinadas. Si están contaminadas,<br />
reemplácelas.<br />
? Las vías de aire contaminadas deben ser<br />
lavadas con un buen detergente, de los que<br />
34
? Mangueras de goma absorben y<br />
retienen olores<br />
se usan para limpiar de mangueras de<br />
espiral, y enjuagándolas cuidadosamente<br />
? Mangueras de goma absorben y retienen<br />
olores. Puede usar tubo de vinilo regulado<br />
y aprobado y son lo mejor para el aire ya<br />
que no absorben humedad y no pueden ser<br />
afectados por sustancias grasosas. Una<br />
línea de aire fresca es importante cuando el<br />
origen de la presión es el aire.<br />
CERVEZA REBELDE<br />
Cuando la cerveza es pura espuma, o demasiada espuma, y no hay casi nada de<br />
cerveza líquida<br />
CAUSAS<br />
CORRECCIONES<br />
? La cerveza es vertida<br />
? Abra el grifo rápida y completamente.<br />
inapropiadamente dentro del vaso ? Verifique y encuentre la distancia correcta<br />
entre el grifo y el vaso en el momento que<br />
sale la cerveza del grifo.<br />
? La espuma debe quedar arriba de la<br />
cerveza y el collar promedio del vaso de<br />
cerveza debe ser de ¾ de pulgada a 1<br />
pulgada de alto.<br />
? Acumulación de levadura u otras<br />
sustancias en el grifo<br />
? Limpie diariamente el orificio del grifo con<br />
una escobilla. Refriegue el interior del grifo<br />
con un buen cepillo una vez a la semana.<br />
? Partes gastadas de la llave y anillos<br />
de la llave desgastados<br />
? Reemplace los anillos sólo cuando sea<br />
necesario. Si cuando abre la llave sale<br />
poca cerveza, la llave debe ser cambiada.<br />
? Mangueras torcidas o rajadas:<br />
obstrucciones en línea, cerca o detrás<br />
del grifo<br />
? Verifique las vías, desde el barril hasta la<br />
llave del dispensador y remplácelas si<br />
están dobladas o golpeadas.<br />
? Examinar que es lo que causa obstrucción.<br />
? Vías hundidas y con trampas ? Mantenga todas las vías de metal derechas<br />
desde el barril hacia el grifo, jamás permita<br />
que las vías se hundan y creen trampas<br />
que podrían causar una cerveza rebelde.<br />
? Demasiada presión de aire ? Verifique la fuente de presión. Ajuste la<br />
presión a la más adecuada. Para un<br />
correcto flujo de cerveza, llene 10 oz. en un<br />
vaso por 4 segundos a la temperatura<br />
adecuada.<br />
? Verifique y reemplace el regulador.<br />
? Exceso CO2 (GAS CARBONICO) ? Ajuste la presión usando CO2 (GAS<br />
CARBONICO) al nivel más bajo posible, y<br />
al mismo tiempo recuerde que la presión<br />
aplicada debe ser ligeramente más alta que<br />
la presión interna de la cerveza (no aplique<br />
más de 18 lbs).<br />
? Mientras más fría esté la cerveza y más<br />
alta sea la presión aplicada de CO2 (GAS<br />
CARBONICO), la cerveza absorberá más<br />
35
ápidamente el CO2. Esto carbonata la<br />
cerveza en exceso, causando que la<br />
cerveza se ponga rebelde.<br />
? No hay presión o esta no es suficiente ? Verifique las salidas de aire defectuosas.<br />
Vea corrección.<br />
? Siempre encienda la presión antes de<br />
verter cerveza.<br />
PROBLEMAS CON SU DISPENSADOR DE CERVEZA<br />
Usted puede resolver muchos problemas comunes de su dispensador muy fácilmente,<br />
ahorrando el gasto de una posible visita del servicio técnico.<br />
Pruebe las siguientes sugerencias para verificar si usted puede resolver el problema antes<br />
de llamar al servicio técnico.<br />
GUIA PARA SOLUCIONAR PROBLEMAS<br />
PROBLEMA<br />
SOLUCION<br />
Su Dispensador de Cerveza no funciona No está conectado a la corriente eléctrica.<br />
El interruptor saltó o se quemó un fusible.<br />
El interruptor se enciende y se apaga La temperatura de la habitación es más<br />
frecuentemente<br />
caliente que lo normal.<br />
Abre la puerta muy frecuentemente.<br />
La puerta no está completamente cerrada.<br />
Seleccione correctamente la temperatura.<br />
El sellador de la puerta está sucio.<br />
El Dispensador de Cerveza no tiene el<br />
espacio suficiente.<br />
El aparato vibra<br />
Asegúrese que el electrodoméstico esté<br />
Ruido fuerte cuando comienza a trabajar el<br />
compresor<br />
ubicado en una superficie totalmente plana.<br />
Los refrigeradores modernos tienen más<br />
capacidad de almacenaje y temperatura más<br />
uniforme. Estos requieren compresores más<br />
eficientes. Ud. puede oír el compresor<br />
cuando no hay ruido alrededor.<br />
La puerta no cierra completamente<br />
Se enciende y se apaga frecuentemente<br />
El refrigerador no está totalmente nivelado.<br />
El sellador de la puerta está sucio.<br />
La canasta de almacenaje está fuera de su<br />
sitio obstaculizando el cierre de la puerta.<br />
La temperatura de la habitación es más<br />
caliente de lo normal.<br />
La puerta se abre demasiado seguido.<br />
La puerta no está cerrada completamente.<br />
El control de temperatura no está configurado<br />
correctamente.<br />
El sello de la puerta no es adecuado o los<br />
soportes no están en posición adecuada.<br />
El dispensador no cuenta con el espacio libre<br />
adecuado.<br />
PRINTED IN CHINA<br />
36


