

Brother DCP-120C - Quick Setup Guide
Brother DCP-120C - Quick Setup Guide
Brother DCP-120C - Quick Setup Guide

You also want an ePaper? Increase the reach of your titles
YUMPU automatically turns print PDFs into web optimized ePapers that Google loves.
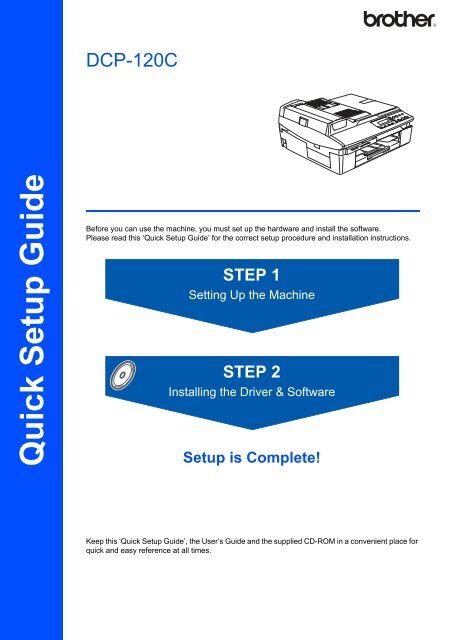
<strong>DCP</strong>-<strong>120C</strong><br />
<strong>Quick</strong> <strong>Setup</strong> <strong>Guide</strong><br />
Before you can use the machine, you must set up the hardware and install the software.<br />
Please read this ‘<strong>Quick</strong> <strong>Setup</strong> <strong>Guide</strong>’ for the correct setup procedure and installation instructions.<br />
STEP 1<br />
Setting Up the Machine<br />
STEP 2<br />
Installing the Driver & Software<br />
<strong>Setup</strong> is Complete!<br />
Keep this ‘<strong>Quick</strong> <strong>Setup</strong> <strong>Guide</strong>’, the User’s <strong>Guide</strong> and the supplied CD-ROM in a convenient place for<br />
quick and easy reference at all times.
To use the machine safely<br />
Warning Improper <strong>Setup</strong> Caution<br />
Warnings tell you what to do to prevent<br />
possible personal injury.<br />
Improper <strong>Setup</strong> icons alert you to<br />
devices and operations that are not<br />
compatible with the machine.<br />
Cautions specify procedures you must<br />
follow or avoid to prevent possible<br />
damage to the machine or other objects.<br />
Note<br />
Notes tell you how you should respond<br />
to a situation that may arise or give tips<br />
about how the current operation works<br />
with other features.<br />
User’s <strong>Guide</strong> or Software User’s <strong>Guide</strong><br />
Indicates reference to the User’s <strong>Guide</strong><br />
or Software User’s <strong>Guide</strong> which is on<br />
the CD-ROM we have supplied.
Table of Contents<br />
Getting Started<br />
Carton components...................................................................................................................................... 2<br />
Control panel................................................................................................................................................ 3<br />
Setting Up the Machine<br />
Removing the protective parts ..................................................................................................................... 4<br />
Loading paper .............................................................................................................................................. 4<br />
Installing the power cord .............................................................................................................................. 5<br />
Installing the ink cartridges........................................................................................................................... 6<br />
Print quality check ........................................................................................................................................ 8<br />
Choosing your language (Canada only)....................................................................................................... 9<br />
Setting the date and time ............................................................................................................................. 9<br />
Supplied CD-ROM ‘MFL-Pro Suite’<br />
Supplied CD-ROM ‘MFL-Pro Suite’........................................................................................................... 10<br />
Installing the Driver & Software<br />
Windows ®<br />
For USB Interface Users<br />
(For Windows ® 98/98SE/Me/2000 Professional/XP) ................................................................................ 12<br />
Macintosh ®<br />
For USB Interface Users ........................................................................................................................... 15<br />
For Mac OS ® X 10.2.4 or greater......................................................................................................... 15<br />
For Mac OS ® 9.1 to 9.2........................................................................................................................ 18<br />
Consumables<br />
Replacement consumables........................................................................................................................ 20<br />
Ink cartridge .......................................................................................................................................... 20<br />
1
Getting Started<br />
1<br />
Carton components<br />
Carton components may vary from one country to another.<br />
Save all packing materials and the carton in case for any reason you must ship your machine.<br />
<strong>Quick</strong> <strong>Setup</strong> <strong>Guide</strong><br />
CD-ROMs<br />
For Windows ®<br />
For Macintosh ® User’s <strong>Guide</strong> Accessory Order Form<br />
Black (LC41 BK) Magenta (LC41M) Yellow (LC41Y) Cyan (LC41C)<br />
Ink Cartridges<br />
If you are connecting the machine via USB:<br />
• The interface cable is not a standard accessory. Please purchase an appropriate USB 2.0 interface cable.<br />
• Please make sure you use a USB 2.0 cable that is no longer than 6 feet long (2 meters).<br />
• Your <strong>DCP</strong> has a USB interface. This interface is compatible with Hi-Speed USB 2.0; however, the maximum<br />
data transfer rate will be 12 Mbits/s. The <strong>DCP</strong> can also be connected to a computer that has a USB 1.1<br />
interface.<br />
• DO NOT connect the interface cable at this time.<br />
Connecting the interface cable is done during the software installation process.<br />
When you use a USB cable, make sure you connect it to the USB port of your computer and not to a USB port<br />
on a keyboard or a non-powered USB hub.<br />
2
Getting Started<br />
Control panel<br />
12 11 10<br />
9 8 7 6<br />
1 2 3 4 5<br />
1 Copy keys<br />
2 Set key<br />
3 Navigation keys<br />
4 Stop/Exit key<br />
5 Start keys<br />
6 On/Off key<br />
7 Ink key<br />
8 Scan key<br />
9 PhotoCapture key<br />
10 Menu key<br />
11 LCD (Liquid Crystal Display)<br />
12 Warning LED<br />
For the details of the control panel, see Control panel overview in Chapter 1 of the User’s <strong>Guide</strong>.<br />
• The screens for Windows ® in this <strong>Quick</strong> <strong>Setup</strong> <strong>Guide</strong> are based on Windows ® XP.<br />
• The screens for Mac OS ® in this <strong>Quick</strong> <strong>Setup</strong> <strong>Guide</strong> are based on Mac OS ® X 10.3.<br />
3
STEP1<br />
Setting Up the Machine<br />
1<br />
1 Removing the protective<br />
parts<br />
2 Loading paper<br />
1 Remove the protective tape and scanner glass<br />
protection sheet.<br />
Improper <strong>Setup</strong><br />
DO NOT connect the USB cable. Connecting<br />
the USB cable is done during the software<br />
installation process.<br />
You can load up to 100 sheets of 20 lb<br />
(80 g/m 2 ) paper.<br />
For details, see About paper in Chapter 1 of<br />
the User’s <strong>Guide</strong>.<br />
1 Pull the paper tray completely out of the<br />
machine and remove the output paper tray.<br />
2 Press and slide the paper guide (1) to fit the<br />
paper width.<br />
1<br />
3 Pull out the paper support (1) and unfold the<br />
paper support flap (2).<br />
1<br />
2<br />
Note<br />
Use the paper support flap for Letter, Legal and A4<br />
paper.<br />
4
Setting Up the Machine<br />
4 Fan the stack of paper well to avoid paper jams<br />
and misfeeds.<br />
3 Installing the power cord<br />
1 Connect the power cord.<br />
5 Gently put the paper into the paper tray print<br />
side down and top edge first.<br />
Check that the paper is flat in the tray and<br />
below the maximum paper mark (1).<br />
1<br />
Improper <strong>Setup</strong><br />
DO NOT connect the USB cable yet.<br />
Note<br />
The control panel warning LED will stay on until<br />
you have installed the ink cartridges.<br />
Note<br />
• Make sure the paper side guides touch the sides<br />
of the paper.<br />
• Be careful that you do not push the paper in too<br />
far; it may lift at the back of the tray and cause<br />
paper feed problems.<br />
6 Put the output paper tray back on and push the<br />
paper tray firmly back into the machine.<br />
5
STEP1<br />
Setting Up the Machine<br />
4 Installing the ink cartridges<br />
4 Take out the ink cartridge.<br />
Warning<br />
If ink gets in your eyes, wash them out with water<br />
at once, and if irritation occurs consult a doctor.<br />
1 Make sure that the power is turned on.<br />
The LCD shows:<br />
No Cartridge<br />
2 Lift the scanner cover (1) from the right-hand<br />
side of the machine until it locks securely into<br />
the open position.<br />
5 Carefully remove the protective yellow cap (1).<br />
1<br />
1<br />
Improper <strong>Setup</strong><br />
DO NOT touch the area shown in the<br />
illustration below.<br />
3 Remove the protective parts (1).<br />
1<br />
Note<br />
If the protective yellow cap comes off when you<br />
open the bag, the cartridge will not be damaged.<br />
Keep the ink cartridge in an upright position<br />
when you put it into the slot.<br />
OK<br />
Note<br />
Do not throw away the protective parts. You will<br />
need them if you transport the machine.<br />
6
Setting Up the Machine<br />
6 Press firmly down on the ink cartridge until the<br />
hook snaps over it, taking care to match the slot<br />
color (1) with the cartridge color (2), as shown<br />
in the diagram below.<br />
The machine will clean the ink tube system for<br />
use for the first time. This process will occur<br />
only once, the first time ink cartridges are<br />
installed. The cleaning process will last<br />
approximately four minutes.<br />
The LCD shows:<br />
Preparing System<br />
Approx 4 Minutes<br />
q<br />
1<br />
OK<br />
7 Lift the scanner cover to release the lock.<br />
Gently push the scanner cover support down<br />
and close the scanner cover.<br />
Note<br />
If the LCD shows Install xxxx after you install<br />
the ink cartridges, check that the ink cartridges are<br />
installed properly.<br />
2<br />
Caution<br />
• DO NOT take out ink cartridges if you do not<br />
need to replace them. If you do so, it may<br />
reduce the ink quantity and the machine will<br />
not know the quantity of ink left in the<br />
cartridge.<br />
• DO NOT shake the ink cartridges. If ink stains<br />
your skin or clothing, wash with soap or<br />
detergent at once.<br />
• DO NOT repeatedly insert and remove the<br />
cartridges. If you do so, ink may seep out of the<br />
cartridge.<br />
• If you mix the colors by installing an ink<br />
cartridge in the wrong position, clean the print<br />
head several times after correcting the<br />
cartridge installation. (See Cleaning the print<br />
head in chapter 11 of the User’s <strong>Guide</strong>.)<br />
• Once you open an ink cartridge, install it in the<br />
machine and use it up within six months of<br />
installation. Use unopened ink cartridges by<br />
the expiration date written on the cartridge<br />
package.<br />
• DO NOT dismantle or tamper with the ink<br />
cartridge, this can cause the ink to leak out of<br />
the cartridge.<br />
• <strong>Brother</strong> strongly recommends that you do not<br />
refill the ink cartridges provided with your<br />
machine. We also strongly recommend that<br />
you continue to use only Genuine <strong>Brother</strong><br />
Brand replacement ink cartridges. Using or<br />
attempting to use potentially incompatible<br />
inks and/or cartridges in your machine may<br />
cause damage to the machine itself and/or it<br />
may result in unsatisfactory print quality. Our<br />
warranty coverage does not apply to any<br />
problem that was caused by the use of<br />
unauthorized third party ink and/or cartridges.<br />
To protect your investment and guarantee<br />
your print quality please continue to replace<br />
consumed ink cartridges with only Genuine<br />
<strong>Brother</strong> Branded Supplies.<br />
7
STEP1<br />
Setting Up the Machine<br />
5 Print quality check<br />
1 After the cleaning cycle is finished, the LCD<br />
shows:<br />
Set Paper and<br />
q<br />
Press Start<br />
2 Make sure the paper is loaded in the paper<br />
tray.<br />
Press Color Start.<br />
The machine starts printing the Print Quality<br />
Check Sheet (only during initial ink cartridge<br />
installation).<br />
3 Check the quality of the four color blocks on the<br />
sheet.<br />
(black/ cyan/ yellow/ magenta)<br />
Print Quality Check<br />
1. Check the quality of the four-color blocks formed by the short lines.<br />
2. If all the short lines are clear and visible, the quality is acceptable. the quality is acceptable.<br />
Select (Yes). If you can see missing short lines, select (No) to begin the color cleaning process<br />
and follow the prompts on the LCD.<br />
4 The LCD shows:<br />
Is Quality OK?<br />
q<br />
a Yes b No<br />
5 Do one of the following:<br />
• If all lines are clear and visible, press a<br />
(Yes) to finish the quality check.<br />
• If you can see missing short lines, press b<br />
(No) and go to step 6.<br />
OK<br />
6 The LCD asks you if the print quality is OK for<br />
black and color. Press a (Yes) or b (No) .<br />
Black OK?<br />
q<br />
a Yes b No<br />
Poor<br />
After pressing a (Yes) or b (No) for both black<br />
and color, the LCD shows:<br />
Start Cleaning?<br />
q<br />
a Yes b No<br />
7 Press a (Yes), the machine will then start<br />
cleaning the colors.<br />
8 After cleaning is finished, press Color Start.<br />
The machine starts printing the Print Quality<br />
Check Sheet again and goes back to step 3.<br />
Improper <strong>Setup</strong><br />
Avoid touching the printed surface of the<br />
paper immediately after printing, the surface<br />
may not be completely dry and may stain your<br />
fingers.<br />
8
Setting Up the Machine<br />
6 Choosing your language<br />
(Canada only)<br />
1 Press Menu.<br />
2 Press a or b to choose 0.Initial <strong>Setup</strong><br />
Press Set.<br />
3 Press a or b to choose 0.Local Language<br />
Press Set.<br />
4 Press a or b to choose your language.<br />
5 Press Set.<br />
Language:English<br />
6 Press Stop/Exit.<br />
7 Setting the date and time<br />
Setting the date and time allows the machine to clean<br />
the print head regularly and maintain optimum print<br />
quality. It also allows the machine to name files<br />
created when using the Scan to Card feature.<br />
1 Press Menu.<br />
2 Press a or b to choose 0.Initial <strong>Setup</strong>,<br />
and then press Set.<br />
3 Press a or b to choose 1.Date/Time, and<br />
then press Set.<br />
4 Press a repeatedly to enter the last two digits<br />
of the year, and then press Set.<br />
Year:2005<br />
7 Press a repeatedly to enter the two digits for<br />
the hour in 24-hour format, and then press Set.<br />
Time:15:XX<br />
(e.g. Enter 1 5 for 3:00 P.M.)<br />
8 Press a repeatedly to enter the two digits for<br />
the minute, and then press Set.<br />
Time:15:25<br />
(e.g. Enter 1 5, 2 5 for 3:25 P.M.)<br />
Note<br />
You can increase or decrease the number rapidly<br />
by holding down a or b.<br />
9 Press Stop/Exit.<br />
Note<br />
If you want to start again, press Stop/Exit to go<br />
back to Step 1.<br />
To confirm the current date and time, print<br />
out the Users Settings Report. (See "Printing<br />
reports" in Appendix A of the User's <strong>Guide</strong>.)<br />
Now go to<br />
Go to Supplied CD-ROM ‘MFL-Pro Suite’ on<br />
the next page to install the drivers.<br />
(e.g. Enter 0 5 for 2005.)<br />
5 Press a repeatedly to enter the two digits for<br />
the month, and then press Set.<br />
Month:03<br />
(e.g. Enter 0 3 for March.)<br />
6 Press a repeatedly to enter the two digits for<br />
the day, and then press Set.<br />
Day:01<br />
(e.g. Enter 0 1 for the first of the month.)<br />
9
Supplied CD-ROM ‘MFL-Pro Suite’<br />
1<br />
Supplied CD-ROM ‘MFL-Pro Suite’<br />
Windows ®<br />
Macintosh ®<br />
Install MFL-Pro Suite<br />
You can install the MFL-Pro Suite software and<br />
multifunction drivers.<br />
Install Optional Applications<br />
You can install additional MFL-Pro Suite software<br />
utilities.<br />
Documentation<br />
View the User’s <strong>Guide</strong> and other documents in PDF<br />
format (Viewer included). The User’s <strong>Guide</strong> on the<br />
CD-ROM includes the Software and Network User’s<br />
<strong>Guide</strong>s for features available when connected to a<br />
computer (e.g. Printing and Scanning).<br />
On-Line Registration<br />
You will be pointed to the <strong>Brother</strong> Product<br />
Registration Web page for quick registration of your<br />
machine.<br />
<strong>Brother</strong> Support<br />
View contact information for <strong>Brother</strong> Customer Service<br />
and how to find a <strong>Brother</strong> Authorized Service Center.<br />
Repair MFL-Pro Suite (USB only)<br />
If an error occurred during the installation of the<br />
MFL-Pro Suite, use this selection to automatically<br />
repair and re-install the MFL-Pro Suite.<br />
Note<br />
MFL-Pro Suite includes Printer Driver, Scanner<br />
Driver, ScanSoft ® PaperPort ® 9.0SE, ScanSoft ®<br />
OmniPage ® and True Type ® fonts.<br />
PaperPort ® 9.0SE is a document management<br />
application for viewing scanned documents.<br />
ScanSoft ® OmniPage ® , which is integrated into<br />
PaperPort ® 9.0SE, is an OCR application that<br />
converts an image into text and puts it into your<br />
default word processor.<br />
Start Here OS 9.1-9.2<br />
You can install the printer driver, scanner driver and<br />
Presto! ® PageManager ® for Mac OS ® 9.1-9.2.<br />
Start Here OSX<br />
You can install the MFL-Pro Suite that includes the<br />
printer driver, scanner driver and the <strong>Brother</strong><br />
ControlCenter 2 for Mac OS ® 10.2.4 or greater. You<br />
can also install Presto! ® PageManager ® to add OCR<br />
capability to the <strong>Brother</strong> ControCenter2 adn easily<br />
scan, share and organize photos and documents.<br />
Readme.html<br />
You can get important information and<br />
troubleshooting tips.<br />
Documentation<br />
View the User’s <strong>Guide</strong> and other documents in PDF<br />
format. The User’s <strong>Guide</strong> on the CD-ROM includes<br />
the Software User’s <strong>Guide</strong>s for features available<br />
when connected to a computer (e.g. Printing and<br />
Scanning).<br />
<strong>Brother</strong> Solutions Center<br />
You can access the <strong>Brother</strong> Solutions Center which is<br />
a Web site offering information about your <strong>Brother</strong><br />
product including FAQs, User’s <strong>Guide</strong>s, driver<br />
updates and tips for using your machine.<br />
On-Line Registration<br />
You will be pointed to the <strong>Brother</strong> Product<br />
Registration Web Page for quick registration of your<br />
machine.<br />
10
STEP2<br />
Installing the Driver & Software<br />
Follow the instructions on this page for your operating system and interface cable.<br />
For the latest drivers and documentations and to find the best solution for your problem or question, access the <strong>Brother</strong> Solutions Center<br />
directly from the driver or visit http://solutions.brother.com<br />
Windows ®<br />
For USB Interface Users<br />
(For Windows ® 98/98SE/Me/2000 Professional/XP)..................................................... 12<br />
Macintosh ®<br />
For USB Interface Users ................................................................................................ 15<br />
• For Mac OS ® X 10.2.4 or greater......................................................................................................... 15<br />
• For Mac OS ® 9.1 to 9.2 ........................................................................................................................ 18<br />
Windows ® XP Professional x64 Edition:<br />
Visit the <strong>Brother</strong> Solution Center (http://solutions.brother.com)<br />
for driver downloads and installation steps.<br />
11
STEP2<br />
Installing the Driver & Software<br />
Windows ®<br />
1<br />
For USB Interface Users<br />
(For Windows ® 98/98SE/Me/2000 Professional/XP)<br />
Windows ®<br />
USB<br />
Important<br />
Make sure that you have finished the<br />
instructions from Step 1 Setting Up the<br />
Machine on page 4-9.<br />
4 The CD-ROM main menu will appear. Click<br />
Install MFL-Pro Suite.<br />
Note<br />
• Please close any applications running before<br />
installing MFL-Pro Suite.<br />
• Make sure there are no media cards put into the<br />
media drive of the machine.<br />
1 Unplug the machine from the AC outlet and<br />
from your computer, if you already connected<br />
an interface cable.<br />
2 Turn on your PC.<br />
(For Windows ® 2000 Professional/XP, you<br />
must be logged on with Administrator rights.)<br />
3 Put the supplied CD-ROM into your CD-ROM<br />
drive. If the model name screen appears,<br />
choose your machine. If the language screen<br />
appears, choose your language.<br />
Note<br />
• If this window does not appear, use Windows ®<br />
Explorer to run the setup.exe program from the<br />
root folder of the <strong>Brother</strong> CD-ROM.<br />
• If you are using Windows ® 2000 Professional:<br />
To access the PhotoCapture Center features<br />
from your computer you may have to install a<br />
Windows ® 2000 update first.<br />
The Windows ® 2000 update is included with the<br />
MFL-Pro Suite installer.<br />
To install the update, follow the steps below:<br />
1 Click OK to start installation of the Windows ®<br />
updates.<br />
2 When instructed, click OK to restart your<br />
computer.<br />
3 After the computer restarts, the installation of<br />
MFL-Pro Suite will automatically continue.<br />
If the installation does not continue automatically,<br />
open the main menu again by ejecting and then<br />
reinserting the CD-ROM disc or double-click the<br />
setup.exe program from the root folder, and<br />
continue from Step 4 to install the MFL-Pro Suite.<br />
5 After reading and accepting the ScanSoft ®<br />
PaperPort ® 9.0SE License Agreement, click<br />
Yes.<br />
12
Installing the Driver & Software<br />
Windows ®<br />
6 The installation of PaperPort ® 9.0SE will<br />
automatically start and is followed by the<br />
installation of MFL-Pro Suite.<br />
7 When the <strong>Brother</strong> MFL-Pro Suite Software<br />
License Agreement window appears, click Yes<br />
if you agree to the Software License<br />
Agreement.<br />
12 Carefully route the USB cable through the<br />
trench and out the back of the machine as<br />
shown below.<br />
Windows ®<br />
USB<br />
8 Choose Local Connection, and then click<br />
Next. The installation continues.<br />
Improper <strong>Setup</strong><br />
• DO NOT connect the machine to a USB port on<br />
a key board or a non-powered USB hub.<br />
<strong>Brother</strong> recommends that you connect the<br />
machine directly to your computer.<br />
• Make sure that the cable does not restrict the<br />
cover from closing, or an error may occur.<br />
13 Lift the scanner cover to release the lock.<br />
Gently push the scanner cover support down<br />
and close the scanner cover.<br />
14 Turn on the machine by plugging in the power<br />
cord.<br />
9 When this screen appears, go to the next step.<br />
10 Open the scanner cover to its open position.<br />
11 Connect the USB cable to the USB socket<br />
marked with a symbol. You will find the<br />
USB socket above and to the left of the ink<br />
cartridge slots, as shown below.<br />
It will take a few seconds for the installation<br />
screens to appear.<br />
The installation of the <strong>Brother</strong> drivers will<br />
automatically start. The installation screens<br />
appear one after another. Please wait, it will<br />
take a few seconds for all screens to<br />
appear.<br />
Improper <strong>Setup</strong><br />
DO NOT try to cancel any of the screens during<br />
this installation.<br />
13
STEP2<br />
Installing the Driver & Software<br />
Windows ®<br />
15 When the on-line Registration screen is<br />
displayed, make your selection and follow the<br />
on-screen instructions.<br />
Windows ®<br />
USB<br />
16 Click Finish to restart your computer.<br />
(After restarting the computer, for Windows ®<br />
2000 Professional/XP, you must be logged on<br />
with Administrator rights.)<br />
Note<br />
After restarting the computer, the Installation<br />
Diagnostics will run automatically. If the installation<br />
is unsuccessful, the installation results window will<br />
be shown. If the Diagnostics shows a failure,<br />
please follow the on-screen instruction or read<br />
on-line help and FAQ’s in Start/ALL Programs/<br />
<strong>Brother</strong>/MFL-Pro Suite <strong>DCP</strong>-XXXX.<br />
The MFL-Pro Suite (including <strong>Brother</strong><br />
Printer driver and Scanner driver) has<br />
been installed and the installation is now<br />
complete.<br />
14
Installing the Driver & Software<br />
Macintosh ®<br />
For USB Interface Users<br />
For Mac OS ® X 10.2.4 or greater<br />
Important<br />
Make sure that you have finished the<br />
instructions from Step 1 Setting Up the<br />
Machine on page 4-9.<br />
5 Click MFL-Pro Suite to install.<br />
Note<br />
For Mac OS ® X 10.2.0 to 10.2.3 users, upgrade to<br />
Mac OS ® X 10.2.4 or greater. (For the latest<br />
information for Mac OS ® X, visit<br />
http://solutions.brother.com)<br />
1 Unplug the machine from the AC outlet and<br />
from your computer, if you already connected<br />
an interface cable.<br />
2 Turn on your Macintosh ® .<br />
3 Put the supplied CD-ROM into your CD-ROM<br />
drive.<br />
6 Follow the on-screen instructions, and restart<br />
your Macintosh ® .<br />
7 Open the scanner cover to its open position.<br />
8 After the DeviceSelector window appears<br />
connect the USB interface cable to your<br />
Macintosh and then to the machine.<br />
The DeviceSelector window will not appear if<br />
you have connected a USB interface cable to<br />
the machine before restarting your Macintosh ®<br />
or if you are overwriting a previously installed<br />
version of the <strong>Brother</strong> Software. If you<br />
encounter this problem continue with the<br />
installation but skip step 13. After the software<br />
installation is completed you should select your<br />
<strong>Brother</strong> machine from the Model pull-down list<br />
in the main screen of ControlCenter2. For<br />
details, See the Software User's <strong>Guide</strong> on the<br />
CD-ROM.<br />
Macintosh ®<br />
USB<br />
4 Double-click the Start Here OSX icon to install<br />
the drivers and MFL-Pro Suite. If the language<br />
screen appears, choose your language.<br />
15
STEP2<br />
Installing the Driver & Software<br />
Macintosh ®<br />
9 Connect the USB cable to the USB socket<br />
marked with a symbol. You will find the<br />
USB socket above and to the left of the ink<br />
cartridge slots, as shown below.<br />
13 Choose USB and then click OK.<br />
14 Click GO, then Applications.<br />
Macintosh ®<br />
USB<br />
10 Carefully route the USB cable through the<br />
trench and out the back of the machine as<br />
shown below.<br />
15 Double-click the Utilities folder.<br />
Improper <strong>Setup</strong><br />
• DO NOT connect the machine to a USB port on<br />
a keyboard or a non-powered USB hub.<br />
<strong>Brother</strong> recommends that you connect the<br />
machine directly to your computer.<br />
• Make sure that the cable does not restrict the<br />
cover from closing, or an error may occur.<br />
16 Double-click the Printer <strong>Setup</strong> Utility icon.<br />
11 Lift the scanner cover to release the lock.<br />
Gently push the scanner cover support down<br />
and close the scanner cover.<br />
12 Turn on the machine by plugging in the power<br />
cord.<br />
Note<br />
For Mac ® OS X 10.2.x users, open Print Center<br />
icon.<br />
17 Click Add.<br />
16
Installing the Driver & Software<br />
Macintosh ®<br />
18 Choose USB. (For Mac OS ® X 10.2.4 to 10.3<br />
users)<br />
21 To install Presto! ® PageManager ® , click the<br />
Presto! PageManager icon and follow the onscreen<br />
instructions.<br />
Note<br />
For Mac OS ® X 10.4 users, go to step 19.<br />
19 Choose <strong>DCP</strong>-XXXX (where XXXX is your<br />
model name), and then click Add.<br />
Note<br />
When Presto! ® PageManager ® is installed OCR<br />
capability is added to the <strong>Brother</strong> ControlCenter2<br />
You can easily scan, share and organize photos<br />
and documents using Presto! ® PageManager ® .<br />
Macintosh ®<br />
USB<br />
Presto! ® PageManager ® has been<br />
installed and the installation is now<br />
complete.<br />
20 Click Printer <strong>Setup</strong> Utility, then<br />
Quit Printer <strong>Setup</strong> Utility.<br />
The MFL-Pro Suite, <strong>Brother</strong> printer driver,<br />
scanner driver and <strong>Brother</strong><br />
ControlCenter2 have been installed and<br />
the installation is now complete.<br />
17
STEP2<br />
Installing the Driver & Software<br />
Macintosh ®<br />
For Mac OS ® 9.1 to 9.2<br />
Important<br />
Make sure that you have finished the<br />
instructions from Step 1 Setting Up the<br />
Machine on page 4-9.<br />
1 Unplug the machine from the AC outlet and<br />
from your computer, if you already connected<br />
an interface cable.<br />
8 Connect the USB cable to the USB socket<br />
marked with a symbol. You will find the<br />
USB socket above and to the left of the ink<br />
cartridge slots, as shown below.<br />
Macintosh ®<br />
USB<br />
2 Turn on your Macintosh ® .<br />
3 Put the supplied CD-ROM into your CD-ROM<br />
drive.<br />
9 Carefully route the USB cable through the<br />
trench and out the back of the machine as<br />
shown below.<br />
Then, connect it to your Macintosh ® .<br />
4 Double-click the Start Here 9.1-9.2 icon to<br />
install the printer and scanner drivers. If the<br />
language screen appears, choose your<br />
language.<br />
5 Click MFL-Pro Suite to install.<br />
Improper <strong>Setup</strong><br />
• DO NOT connect the machine to a USB port on<br />
a keyboard or a non-powered USB hub.<br />
<strong>Brother</strong> recommends that you connect the<br />
machine directly to your computer.<br />
• Make sure that the cable does not restrict the<br />
cover from closing, or an error may occur.<br />
10 Lift the scanner cover to release the lock.<br />
Gently push the scanner cover support down<br />
and close the scanner cover.<br />
6 Follow the on-screen instructions, and restart<br />
your Macintosh ® .<br />
7 Open the scanner cover to its open position.<br />
18
Installing the Driver & Software<br />
Macintosh ®<br />
11 Turn on the machine by plugging in the power<br />
cord.<br />
14 To install Presto! ® PageManager ® , click the<br />
Presto! PageManager icon and follow the onscreen<br />
instructions.<br />
12 From the Apple ® menu, click Chooser.<br />
Note<br />
You can easily scan, share and organize photos<br />
and documents using Presto! ® PageManager ® .<br />
Presto! ® PageManager ® has been<br />
installed and the installation is now<br />
complete.<br />
Macintosh ®<br />
USB<br />
13 Click the <strong>Brother</strong> Ink icon.<br />
On the right side of the Chooser, choose the<br />
machine to which you want to print.<br />
Close the Chooser.<br />
The <strong>Brother</strong> printer driver and scanner<br />
driver have been installed.<br />
Note<br />
ControlCenter2 is not supported in Mac OS ® 9.x.<br />
19
Consumables<br />
1<br />
Replacement consumables<br />
When the time comes to replace ink cartridges, an error message will be indicated on the LCD. For more<br />
information about the ink cartridges for your machine, visit http://solutions.brother.com or contact your local<br />
<strong>Brother</strong> re-seller.<br />
Ink cartridge<br />
Black Magenta Yellow Cyan<br />
LC41BK LC41M LC41Y LC41C<br />
20
Trademarks<br />
The <strong>Brother</strong> logo is a registered trademark of <strong>Brother</strong> Industries, Ltd.<br />
<strong>Brother</strong> is a registered trademark of <strong>Brother</strong> Industries, Ltd.<br />
Multi-Function Link is a registered trademark of <strong>Brother</strong> International Corporation.<br />
Windows and Microsoft are registered trademarks of Microsoft in the U.S. and other countries.<br />
Macintosh and True Type are registered trademarks of Apple Computer, Inc.<br />
PaperPort and OmniPage OCR are registered trademarks of ScanSoft, Inc.<br />
Presto! PageManager is a registered trademark of NewSoft Technology Corporation.<br />
Each company whose software title is mentioned in this manual has a Software License Agreement specific to its proprietary<br />
programs.<br />
All other brand and product names mentioned in this manual are trademarks or registered trademarks of their<br />
respective companies.<br />
Compilation and Publication<br />
Under the supervision of <strong>Brother</strong> Industries Ltd., this manual has been compiled and published, covering the latest product<br />
descriptions and specifications.<br />
The contents of this manual and the specifications of this product are subject to change without notice.<br />
<strong>Brother</strong> reserves the right to make changes without notice in the specifications and materials contained herein and shall not be<br />
responsible for any damages (including consequential) caused by reliance on the materials presented, including but not limited<br />
to typographical and other errors relating to the publication.<br />
This product is designed for use in a Professional Environment.<br />
©2005 <strong>Brother</strong> Industries, Ltd.
USA


