

Honeywell Lyric Round™ Wi-Fi Thermostat - Second Generation (RCH9310WF) - Lyric Thermostat (Second Generation) Installation Manual (English,French,Spanish)
Honeywell Lyric Round™ Wi-Fi Thermostat - Second Generation (RCH9310WF) - Lyric Thermostat (Second Generation) Installation Manual (English,French,Spanish)
Honeywell Lyric Round™ Wi-Fi Thermostat - Second Generation (RCH9310WF) - Lyric Thermostat (Second Generation) Installation Manual (English,French,Spanish)

Create successful ePaper yourself
Turn your PDF publications into a flip-book with our unique Google optimized e-Paper software.
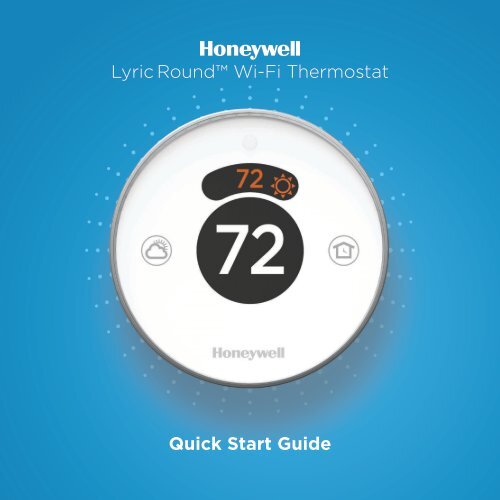
<strong>Lyric</strong> Round <strong>Wi</strong>-<strong>Fi</strong> <strong>Thermostat</strong><br />
Quick Start Guide
Compatibility<br />
Does not work with electric baseboard heat (120-240V)<br />
Compatible with most other heating, cooling and heat pump systems<br />
Optional: 24 VAC power (“C” wire)<br />
<strong>Lyric</strong>’s implementation of Apple HomeKit requires 24 VAC power (“C” wire)<br />
For help, contact:<br />
WEB lyric.honeywell.com<br />
EMAIL My<strong>Lyric</strong>@honeywell.com<br />
PHONE 1-800-633-3991<br />
SOCIAL Twitter: @<strong>Honeywell</strong>_Home, Facebook: <strong>Honeywell</strong> Home<br />
2
Included in your box:<br />
AAA<br />
AAA<br />
<strong>Thermostat</strong><br />
Wall plate<br />
Screws<br />
Anchors<br />
Optional wall cover<br />
3
Tools you will need:<br />
Phillips screwdriver<br />
Home <strong>Wi</strong>-<strong>Fi</strong> password<br />
Small flat head screwdriver<br />
Ballpoint pen<br />
<strong>Honeywell</strong> <strong>Lyric</strong> app<br />
To configure your system<br />
and connect to your smartphone<br />
Needle-nose pliers*<br />
<strong>Wi</strong>re stripper*<br />
Drill and<br />
drill bit (7/32")*<br />
*Tools you might need<br />
Smartphone<br />
To photograph your existing wiring<br />
and access the thermostat app<br />
4
BEFORE YOU BEGIN<br />
Download the <strong>Honeywell</strong> <strong>Lyric</strong> app<br />
on your smartphone.<br />
This document is not a stand-alone guide.<br />
It is best used as a reference with the app.<br />
5
1 Turn power OFF<br />
To protect yourself and your<br />
equipment, Turn off the power at the<br />
breaker box or switch that controls<br />
your heating/cooling system.<br />
OR<br />
Switch<br />
Breaker box<br />
2 Check that your system is off<br />
Change the temperature on your<br />
old thermostat. If you don’t hear the<br />
system turn on within 5 minutes, the<br />
power is off.<br />
75<br />
6
3 Remove the old thermostat’s<br />
faceplate<br />
On most thermostats, you can take<br />
off the faceplate by grasping and<br />
gently pulling or popping it off.<br />
Some thermostats may have screws,<br />
buttons, or clasps.<br />
Do not remove any wires from your<br />
thermostat<br />
4 Make sure there are no<br />
120-240V wires<br />
Do you have thick black wires with wire<br />
nuts? Is your thermostat 120V or higher?<br />
If you answered yes to either of these<br />
questions, you have a line voltage system<br />
and the <strong>Lyric</strong> thermostat will not work.<br />
If you are unsure visit<br />
lyric.honeywell.com/support<br />
R<br />
W<br />
Y<br />
G<br />
<strong>Wi</strong>re nuts<br />
Thick black wires<br />
7
5 Take a picture of the old wiring<br />
Be sure to include the letters next to the<br />
terminals where the wires are inserted.<br />
This will be a helpful reference when<br />
wiring your <strong>Lyric</strong> thermostat.<br />
6 Remove any jumpers<br />
A jumper connects one terminal to<br />
another terminal. It may look like a small<br />
staple or even a colored wire and must<br />
be removed before continuing.<br />
The <strong>Lyric</strong> thermostat does not need<br />
jumpers.<br />
Example<br />
of a jumper<br />
R<br />
RC<br />
Terminals<br />
8
7 Record if you have wires in the following terminals<br />
Do not include jumpers as part of your count.<br />
Check all that apply:<br />
Terminal Color of wire<br />
R<br />
RC<br />
RH<br />
8 Record the existing wire configuration<br />
Note the color of the wires that are plugged into your old<br />
thermostat’s terminals. You will need this information to correctly<br />
wire your <strong>Lyric</strong> thermostat.<br />
Terminal Color of wire Terminal Color of wire<br />
L<br />
C<br />
W2<br />
W<br />
U1<br />
U2<br />
K<br />
G<br />
Y2<br />
Y<br />
If the wires are in terminals that are not listed, you will need additional<br />
wiring support. Visit lyric.honeywell.com/support/installation to find out if<br />
the <strong>Lyric</strong> thermostat will work for you.<br />
9
9 Disconnect the wires and<br />
remove old wall plate<br />
Use a screwdriver or a ballpoint pen to<br />
release wires from terminals.<br />
Wrap the wires around your ballpoint pen<br />
to prevent them from falling back into<br />
the wall.<br />
10 Insert the recommended wall<br />
anchors<br />
It is recommended that you use the provided<br />
anchors when mounting your thermostat.<br />
You can use the wall plate to mark where<br />
you want to place the wall anchors.<br />
Drill bit size 7/32”<br />
10
11 Check for any paint gaps or screw<br />
holes left by the old thermostat<br />
If you choose to use the optional wall cover<br />
to hide these blemishes, snap the wall plate<br />
to the optional wall cover before screwing<br />
to the wall.<br />
AAA<br />
12 Bundle and insert wires through<br />
the clear rubber holder<br />
Guide the wires through the clear rubber<br />
holder on the back of the wall plate.<br />
Make sure at least 1/4-inch of each wire is<br />
exposed for easy insertion into the wire<br />
terminals.<br />
Exposed wire<br />
11
13 Review your answer from Step 7<br />
Set the R-switch up or down based on<br />
your answer from Step 7.<br />
R-Switch<br />
If you checked<br />
Set the R-Switch<br />
Insert <strong>Wi</strong>re(s) into Terminal(s)<br />
R (only)<br />
R wire<br />
R<br />
Rc<br />
RC (only)<br />
R<br />
R & RC<br />
Rc wire<br />
R<br />
Rc<br />
RH (only)<br />
RH wire<br />
R<br />
Rc<br />
R<br />
R wire<br />
R<br />
RC<br />
R<br />
R & RC<br />
Rc wire<br />
Rc<br />
RC<br />
RH wire<br />
R<br />
RH<br />
Rc wire<br />
Rc<br />
12
14 <strong>Fi</strong>rmly connect remaining wires from Step 8<br />
Push each remaining wire into its corresponding terminal (one wire<br />
per terminal) until it is firmly in place. If you misplace a wire, use a<br />
ballpoint pen to push down on the terminals and release the wire.<br />
Gently tug on wires to verify they are secure.<br />
15 Use the provided screws to<br />
mount the wall plate<br />
Make sure the wall plate is even by<br />
keeping the bubble in the level between<br />
the two lines.<br />
AAA<br />
13
ON<br />
16 <strong>Fi</strong>rmly snap the thermostat<br />
into place<br />
The thermostat will glow and display<br />
the <strong>Lyric</strong> screen for up to three<br />
minutes while it starts up.<br />
17 Turn your power ON<br />
Turn on the power at the breaker box<br />
or switch that controls your heating/<br />
cooling system.<br />
OR<br />
Switch<br />
Breaker box<br />
14
18 Log in to configure and connect<br />
Your <strong>Lyric</strong> thermostat is not yet configured<br />
to control your heating/cooling system.<br />
To complete your setup, download and<br />
log in to the <strong>Honeywell</strong> <strong>Lyric</strong> app.<br />
Android<br />
Search Google Play for <strong>Honeywell</strong> <strong>Lyric</strong>.<br />
Create an account and log in to configure<br />
and connect.<br />
iOS<br />
Search the App Store for <strong>Honeywell</strong> <strong>Lyric</strong>.<br />
Create an account and log in to configure<br />
and connect.<br />
15
How to use your <strong>Lyric</strong> thermostat<br />
Turn to set your<br />
desired temperature<br />
Turn on/off<br />
Cooling<br />
Turn on/off<br />
Heating<br />
Weather<br />
View 6 and<br />
12 hour<br />
forecasts<br />
Home/Away<br />
Set to Home/Away<br />
16
How to use your <strong>Lyric</strong> app<br />
Once your thermostat is configured and connected to your smartphone<br />
or tablet, take advantage of the following features:<br />
Access the<br />
menu<br />
Use shortcuts to<br />
easily activate<br />
your favorite<br />
settings<br />
Change mode -<br />
heating, cooling,<br />
or off<br />
Set away<br />
View weather<br />
forecast<br />
Set desired<br />
temperature<br />
Interested in more <strong>Lyric</strong> products? Visit lyric.honeywell.com to learn about all<br />
available products connected by the <strong>Lyric</strong> app.<br />
App is regularly enhanced and may change.<br />
17
Get the most from <strong>Lyric</strong><br />
Location Based Temperature Control<br />
<strong>Lyric</strong> thermostat uses your smartphone’s location to know when you’re<br />
away, and saves you energy. Through geofence technology, it senses<br />
your return and helps make you comfortable upon arrival. You can also<br />
manually override your current setting when you’ll be out for a few hours<br />
by using the Away button on the thermostat or in the app.<br />
Custom Shortcuts<br />
Create custom shortcuts for unique situations or save the shortcuts<br />
you really like and they’ll be available on your app any time you want.<br />
Customizable comfort has never been so simple.<br />
Comfort<br />
View and adjust the humidity levels in your home. <strong>Lyric</strong> also considers<br />
both humidity and temperature to maintain your comfort, so 72° always<br />
feels like 72°.<br />
!<br />
Smart Alerts<br />
Push notifications remind you of filter changes, notify you of high and low<br />
humidity levels, and warn you of extreme indoor temperatures.<br />
Adaptive recovery<br />
The <strong>Lyric</strong> thermostat learns your heating and cooling cycle times to<br />
deliver just the right temperature, right when you want it.<br />
Auto changeover<br />
When enabled, the thermostat automatically selects heating or cooling<br />
depending on the indoor temperature.<br />
18
Notes<br />
19
<strong>Lyric</strong> Round <strong>Wi</strong>-<strong>Fi</strong> <strong>Thermostat</strong><br />
Automation and Control Solutions<br />
<strong>Honeywell</strong> International Inc.<br />
1985 Douglas Drive North<br />
Golden Valley, MN 55422<br />
lyric.honeywell.com<br />
<strong>Wi</strong>-<strong>Fi</strong>® is a registered <strong>trade</strong>mark<br />
of <strong>Wi</strong>-<strong>Fi</strong> Alliance®<br />
® U.S. Registered Trademark<br />
© 2015 <strong>Honeywell</strong> International Inc.<br />
Rev. 11-15 Printed in U.S.A.<br />
33-00075EFS-03
<strong>Thermostat</strong> <strong>Wi</strong>-<strong>Fi</strong> <strong>Lyric</strong> Round <br />
Guide de démarrage rapide
Compatibilité<br />
Non compatible avec les chauffages de plinthes électriques (120 à 240 V)<br />
Compatible avec la plupart des systèmes de chauffage, refroidissement et<br />
thermopompes<br />
En option : Alimentation de 24 V c.a. (fil C)<br />
L’utilisation d’Apple HomeKit avec votre thermostat <strong>Lyric</strong> requiert une alimentation de<br />
24 V c.a. (fil C).<br />
Pour obtenir de l’aide, veuillez contacter :<br />
WEB lyric.honeywell.com<br />
COURRIEL My<strong>Lyric</strong>@honeywell.com<br />
TÉLÉPHONE 1-800-633-3991<br />
MÉDIAS SOCIAUX Twitter: @<strong>Honeywell</strong>_Home, Facebook: <strong>Honeywell</strong> Home<br />
22
Inclus dans cette boîte :<br />
AAA<br />
AAA<br />
<strong>Thermostat</strong><br />
Plaque murale<br />
Vis<br />
Ancres<br />
Couvercle mural facultatif<br />
23
Outils requis :<br />
Tournevis cruciforme<br />
Petit tournevis plat<br />
Mot de passe <strong>Wi</strong>-<strong>Fi</strong> de<br />
la résidence<br />
Stylo à bille<br />
Application <strong>Lyric</strong> <strong>Honeywell</strong><br />
Pour configurer le système et connecter votre<br />
téléphone intelligent<br />
Pinces à bec effilé*<br />
Dénudeur de fils*<br />
Perceuse et mèche<br />
(7/32 po)*<br />
*Outils pouvant être requis<br />
Téléphone intelligent<br />
Pour prendre une photo du câblage existant<br />
et accéder à l’application du thermostat<br />
24
AVANT DE COMMENCER<br />
Téléchargez l’application <strong>Lyric</strong> de <strong>Honeywell</strong><br />
sur votre téléphone intelligent.<br />
Ce document ne constitue pas un guide autonome.<br />
Il est destiné à être utilisé comme<br />
référence avec l’application.<br />
25
1 Coupez l’électricité<br />
Pour vous protéger ainsi que pour<br />
protéger votre équipement, coupez<br />
l’alimentation au niveau du<br />
disjoncteur ou de l’interrupteur<br />
contrôlant le système de chauffage/<br />
refroidissement.<br />
Disjoncteur<br />
OU<br />
Interrupteur<br />
2 Vérifiez que l’appareil n’est<br />
pas sous tension<br />
Modifiez la température sur l’ancien<br />
thermostat. Si le système ne se met<br />
pas en marche dans les 5 minutes qui<br />
suivent, l’alimentation vers l’appareil<br />
est coupée.<br />
75<br />
26
3 Retirez la plaque frontale de<br />
l’ancien thermostat<br />
Sur la plupart des thermostats, il<br />
est possible de retirer la plaque en<br />
la saisissant et en la tirant ou en la<br />
déboîtant délicatement. Certains<br />
thermostats peuvent avoir des vis,<br />
des boutons ou des fermoirs.<br />
Ne retirez aucun fil du thermostat<br />
4 Assurez-vous qu’il n’y a aucun fil<br />
de 120/240 V.<br />
D’épais fils noirs sont-ils présents avec des<br />
serre-fils? Votre thermostat fonctionne-t-il<br />
sur 120 V ou plus?<br />
Si vous avez répondu oui à l’une ou l’autre<br />
de ces questions, votre système fonctionne<br />
sur tension secteur et le thermostat <strong>Lyric</strong><br />
ne fonctionnera pas.<br />
En cas d’incertitude, visitez<br />
lyric.honeywell.com/support<br />
R<br />
W<br />
Y<br />
G<br />
Serre-fils<br />
Épais fils noirs<br />
27
5 Prenez une photo de l’ancien<br />
câblage<br />
Veillez à inclure les lettres près des<br />
bornes d’insertion des fils. Ceci permettra<br />
une consultation plus facile lors du<br />
câblage du thermostat <strong>Lyric</strong>.<br />
6 Retirez tous les cavaliers<br />
Un cavalier relie une borne à l’autre. Il<br />
peut ressembler à une petite agrafe ou<br />
à un fil coloré, et il doit être retiré avant<br />
de continuer<br />
Le thermostat <strong>Lyric</strong> ne fonctionne pas<br />
avec des cavaliers.<br />
Exemple<br />
de cavalier<br />
R<br />
RC<br />
Bornes<br />
28
7 Notez la présence de fils dans les bornes suivantes<br />
N’incluez pas les cavaliers dans le décompte.<br />
Cochez tous les éléments applicables :<br />
Borne Couleur du fil<br />
R<br />
RC<br />
RH<br />
8 Notez la configuration de câblage existante.<br />
Notez la couleur des fils branchés dans les bornes de l’ancien<br />
thermostat. Ces informations seront requises pour connecter le<br />
thermostat <strong>Lyric</strong> correctement.<br />
Borne Couleur du fil Borne Couleur du fil<br />
L<br />
C<br />
W2<br />
W<br />
U1<br />
U2<br />
K<br />
G<br />
Y2<br />
Y<br />
Si les fils sont dans des bornes non énumérées, une assistance<br />
supplémentaire sera requise pour le câblage.<br />
Visitez lyric.honeywell.com/support/installation pour déterminer si le<br />
thermostat <strong>Lyric</strong> fonctionnera dans votre configuration.<br />
29
9 Débranchez les fils et retirez<br />
l’ancienne plaque murale<br />
Utilisez un tournevis ou un stylo à bille<br />
pour libérer les fils des bornes.<br />
Enroulez les fils autour du stylo à bille<br />
pour éviter qu’ils ne tombent dans<br />
l’ouverture du mur.<br />
10 Insérez les ancres murales<br />
recommandées<br />
Il est recommandé d’utiliser les ancres<br />
fournies pour monter le thermostat.<br />
Vous pouvez utiliser la plaque murale<br />
pour marquer l’emplacement des ancres<br />
murales.<br />
Taille du foret 7/32 po<br />
30
11 Vérifiez qu’il n’y a pas de zones<br />
non peintes ou de trous de vis<br />
laissés par l’ancien thermostat.<br />
Si vous choisissez d’utiliser le couvercle<br />
mural optionnel pour couvrir ces marques,<br />
enclenchez la plaque murale sur le<br />
couvercle mural optionnel avant de visser<br />
sur le mur.<br />
AAA<br />
12 Regroupez et insérez les fils<br />
dans le support en caoutchouc<br />
transparent.<br />
Guidez les fils par le support en<br />
caoutchouc transparent à l’arrière de la<br />
plaque murale. Assurez-vous qu’au moins<br />
1/4 po de chaque fil est exposé pour<br />
faciliter l’insertion dans les cosses de câble.<br />
<strong>Fi</strong>l exposé<br />
31
13 Consultez la réponse de l’étape 7<br />
Réglez le contacteur R vers le haut ou vers le bas en<br />
fonction de la réponse que vous avez fournie à l’étape 7.<br />
Contacteur R<br />
Si vous avez coché Régler le contacteur R<br />
Insérez le(s) fils dans le(s) borne(s)<br />
R (uniquement)<br />
<strong>Fi</strong>l R<br />
R<br />
Rc<br />
RC (uniquement)<br />
R<br />
R et RC<br />
<strong>Fi</strong>l Rc<br />
R<br />
Rc<br />
RH (uniquement)<br />
<strong>Fi</strong>l RH<br />
R<br />
Rc<br />
R<br />
<strong>Fi</strong>l R<br />
R<br />
RC<br />
R<br />
R et RC<br />
<strong>Fi</strong>l Rc<br />
Rc<br />
RC<br />
<strong>Fi</strong>l RH<br />
R<br />
RH<br />
<strong>Fi</strong>l Rc<br />
Rc<br />
32
14 Connectez fermement les fils restants (de l’étape 8).<br />
Poussez chaque fil restant dans sa borne correspondante (un par<br />
borne) jusqu’à ce qu’il soit fermement en place. Si un fil a été mal<br />
placé, utilisez un stylo à bille pour appuyer sur la borne et libérer le fil.<br />
Tirez délicatement sur les fils pour vérifier qu’ils sont bien fixés.<br />
15 Utilisez les vis fournies pour<br />
monter la plaque murale<br />
Assurez-vous que la plaque murale est à<br />
niveau en vérifiant que la bulle du niveau<br />
est située entre les deux lignes.<br />
AAA<br />
33
16 Enclenchez fermement le<br />
thermostat en position<br />
Le thermostat s’allume et affiche<br />
l’écran <strong>Lyric</strong> pendant environ 3<br />
minutes pendant qu’il démarre.<br />
17 Rétablissez l’alimentation<br />
Rétablissez l’alimentation au niveau<br />
du disjoncteur ou de l’interrupteur<br />
contrôlant le système de chauffage/<br />
refroidissement.<br />
OU<br />
Interrupteur<br />
Disjoncteur<br />
34
18 Lonnectez-vous pour la configuration et<br />
la connexion.<br />
Le thermostat <strong>Lyric</strong> n’est pas encore configuré pour<br />
réguler le système de chauffage/refroidissement.<br />
Pour terminer la configuration, téléchargez<br />
l’application <strong>Lyric</strong> <strong>Honeywell</strong> et connectez-vous à<br />
l’application.<br />
Android<br />
Recherchez l’application <strong>Lyric</strong> <strong>Honeywell</strong> dans<br />
Google Play. Créez un compte et connectez-vous<br />
pour la configuration et la connexion.<br />
iOS<br />
Recherchez l’application <strong>Lyric</strong> <strong>Honeywell</strong> dans<br />
l’App Store. Créez un compte et connectez-vous<br />
pour la configuration et la connexion.<br />
35
Comment utiliser le thermostat <strong>Lyric</strong><br />
Tourner pour régler la<br />
température désirée.<br />
Mise en<br />
marche/arrêt<br />
Refroidissement<br />
Mise en<br />
marche/arrêt<br />
Chauffage<br />
Météo<br />
Afficher les<br />
prévisions sur<br />
6 et 12 heures<br />
À la maison/<br />
Absent<br />
Réglez sur À la<br />
maison/Absent<br />
36
Comment utiliser l’application <strong>Lyric</strong><br />
Une fois que le thermostat est configuré et connecté à votre téléphone<br />
intelligent ou à votre tablette, tirez parti des fonctions suivantes :<br />
Accéder au<br />
menu<br />
Utiliser les<br />
raccourcis pour<br />
activer facilement<br />
les réglages<br />
favoris<br />
Changer le mode –<br />
chauffage, refroidissement<br />
ou arrêt<br />
Régler sur Absent<br />
Afficher les<br />
prévisions météo<br />
Régler la température<br />
désirée<br />
Vous souhaitez découvrir d’autres produits <strong>Lyric</strong>? Visitez lyric.honeywell.com pour<br />
découvrir tous les produits disponibles connectés avec l’application <strong>Lyric</strong>.<br />
L’application est constamment améliorée et peut être modifiée.<br />
37
Obtenez tous les avantages de <strong>Lyric</strong><br />
!<br />
Contrôle de la température en fonction de l’emplacement<br />
Le thermostat <strong>Lyric</strong> vous permet de réaliser des économies d’énergie<br />
en surveillant vos allées et venues en utilisant l’emplacement de votre<br />
téléphone intelligent. Par le gardiennage virtuel, il détecte votre retour<br />
et est en mesure d’assurer votre confort lorsque vous rentrez chez vous.<br />
Vous pouvez également contourner manuellement le réglage en cours en<br />
cas d’absence pour quelques heures en utilisant le bouton Absent sur le<br />
thermostat ou dans l’application.<br />
Raccourcis personnalisés<br />
Créez des raccourcis personnalisés pour vos situations uniques, ou<br />
sauvegardez les raccourcis que vous aimez vraiment, et ils seront<br />
disponibles sur votre application à chaque fois que vous le voulez. Il n’a<br />
jamais été aussi simple de personnaliser votre confort.<br />
Confort<br />
Consultez et réglez le niveau d’humidité chez vous. <strong>Lyric</strong> prend aussi<br />
en considération l’humidité et la température pour maintenir votre<br />
confort, pour qu’une température 72° soit toujours ressentie comme une<br />
température de 72°.<br />
Alertes intelligentes<br />
Les notifications poussées vous alertent lorsqu’il est temps de remplacer<br />
le filtre, lorsque les niveaux d’humidité sont trop hauts ou trop bas et<br />
lorsque la température intérieure est extrême.<br />
Récupération adaptative<br />
Le thermostat <strong>Lyric</strong> apprend à connaître vos cycles de chauffage et de<br />
refroidissement pour obtenir la température voulue au moment souhaité.<br />
Commutation automatique<br />
Lorsque cette fonction est activée, le thermostat sélectionne<br />
automatiquement le chauffage ou la climatisation selon la température<br />
intérieure.<br />
38
Remarques<br />
39
<strong>Thermostat</strong> <strong>Wi</strong>-<strong>Fi</strong> <strong>Lyric</strong> Round <br />
Solutions de régulation et<br />
d’automatisation<br />
<strong>Honeywell</strong> International Inc.<br />
1985 Douglas Drive North<br />
Golden Valley, MN 55422<br />
lyric.honeywell.com<br />
<strong>Wi</strong>-<strong>Fi</strong>® est une marque déposée<br />
de <strong>Wi</strong>-<strong>Fi</strong> Alliance®.<br />
® Marque de commerce déposée aux É.-U.<br />
© 2015 <strong>Honeywell</strong> International Inc.<br />
Rev. 11-15 Imprimé aux États-Unis<br />
33-00075EFS-03
Termostato con conexión <strong>Wi</strong><strong>Fi</strong> <strong>Lyric</strong> Round <br />
Guía para la activación rápida
Compatibilidad<br />
No trabaja con calefacción eléctrica de zócalo (120-240V)<br />
Compatible con la mayoría de los otros sistemas de calefacción, refrigeración y bomba<br />
de calor<br />
Opcional: Alimentación de 24 V CA (cable “C”)<br />
La implementación de <strong>Lyric</strong> del kit para el hogar de Apple requiere electricidad de<br />
24 V CA (“cable C”)<br />
Para obtener ayuda comuníquese por:<br />
LA WEB lyric.honeywell.com<br />
EL CORREO ELECTRÓNICO My<strong>Lyric</strong>@honeywell.com<br />
EL TELÉFONO 1-800-633-3991<br />
LAS REDES SOCIALES Twitter: @<strong>Honeywell</strong>_Home, Facebook: <strong>Honeywell</strong> Home<br />
42
Esta caja incluye:<br />
AAA<br />
AAA<br />
Termostato<br />
Placa de pared<br />
Tornillos<br />
Tarugos<br />
Cubierta de pared opcional<br />
43
Herramientas que necesitará:<br />
Destornillador de estrella<br />
Destornillador plano pequeño<br />
Contraseña de conexión<br />
<strong>Wi</strong><strong>Fi</strong> del hogar<br />
Bolígrafo<br />
Aplicación <strong>Lyric</strong> de <strong>Honeywell</strong><br />
Para configurar su sistema y conectarlo<br />
a su teléfono inteligente<br />
Pinzas de punta fina*<br />
Pelacables*<br />
Taladro y broca<br />
(7/32”)*<br />
*Herramientas que puede necesitar<br />
Teléfono inteligente<br />
Para fotografiar su cableado actual y<br />
acceder a la aplicación del termostato<br />
44
ANTES DE COMENZAR<br />
Descargue la aplicación <strong>Lyric</strong> de <strong>Honeywell</strong><br />
en su teléfono inteligente.<br />
Este documento no es una guía independiente.<br />
Se utiliza mejor como una referencia con la aplicación.<br />
45
1 Desconecte el suministro de<br />
energía eléctrica<br />
Para protegerse a sí mismo y al<br />
equipo, desconecte el suministro<br />
de energía eléctrica en el tablero de<br />
interruptores o en el interruptor que<br />
controla el sistema de calefacción/<br />
refrigeración.<br />
Caja de interruptores<br />
O<br />
Interruptor<br />
2 Compruebe que el sistema<br />
está apagado<br />
Cambie la temperatura en el<br />
termostato existente. Si no escucha<br />
que el sistema se activa en 5 minutos,<br />
el suministro de energía eléctrica está<br />
desconectado.<br />
75<br />
46
3 Retire la placa frontal del<br />
termostato<br />
En la mayoría de los termostatos<br />
puede retirar la placa frontal<br />
halándola suavemente o<br />
desprendiéndola. Algunos<br />
termostatos pueden tener tornillos,<br />
botones o cierres.<br />
No retire ninguno de los cables de<br />
su termostato<br />
4 Compruebe que no hayan<br />
cables de 120/240 V<br />
¿Tiene su termostato cables negros<br />
gruesos con empalmes para cables?<br />
¿Es su termostato de 120 V o más?<br />
Si respondió afirmativamente a<br />
cualquiera de estas preguntas, tiene<br />
un sistema de voltaje en línea y el<br />
termostato <strong>Lyric</strong> no funcionará. Si no<br />
está seguro, visite<br />
lyric.honeywell.com/support<br />
R<br />
W<br />
Y<br />
G<br />
Empalmes para cables<br />
Cables negros gruesos<br />
47
5 Tome una foto del cableado<br />
existente<br />
Incluya las letras que se encuentran<br />
al lado de los terminales donde están<br />
insertados los cables. Esta será una<br />
referencia útil cuando cablee su<br />
termostato <strong>Lyric</strong>.<br />
6 Retire los puentes<br />
Un puente conecta un terminal a otro.<br />
Puede parecer como una pequeña grapa<br />
o incluso un cable de color y se debe<br />
retirar antes de continuar.<br />
El termostato <strong>Lyric</strong> no trabaja con<br />
puentes.<br />
Ejemplo de<br />
un puente<br />
R<br />
RC<br />
Terminales<br />
48
7 Registre si tiene cables en los siguientes terminales<br />
No incluya los puentes como parte de su conteo.<br />
Revise todos los que sean pertinentes:<br />
Terminal Color del cable<br />
R<br />
RC<br />
RH<br />
8 Registre la configuración actual de los cables<br />
Anote el color de los cables que están conectados en los terminales<br />
del termostato existente. Necesitará esta información para cablear<br />
correctamente su termostato <strong>Lyric</strong>.<br />
Terminal Color del cable Terminal Color del cable<br />
L<br />
C<br />
W2<br />
W<br />
U1<br />
U2<br />
K<br />
G<br />
Y2<br />
Y<br />
Si los cables están en terminales que no están listados, necesitará un<br />
soporte de cableado adicional.<br />
Visite lyric.honeywell.com/support/installation para averiguar si el termostato<br />
<strong>Lyric</strong> es el adecuado para su sistema.<br />
49
9 Desconecte los cables y retire<br />
la placa de pared existente<br />
Utilice un destornillador o un bolígrafo<br />
para liberar los cables de los terminales.<br />
Enrosque los cables alrededor del<br />
bolígrafo para evitar que se retraigan<br />
en la pared.<br />
10 Inserte los tarugos de pared<br />
recomendados<br />
Se recomienda que utilice los tarugos que se<br />
suministran cuando monte el termostato.<br />
Puede utilizar la placa de pared para<br />
marcar donde desea colocar los tarugos<br />
de pared.<br />
Tamaño de la broca del taladro 7/32”<br />
50
11 Revise la pared para constatar<br />
si quedaron áreas sin pintar<br />
o agujeros de tornillos del<br />
termostato existente<br />
Si elige utilizar la cubierta de pared opcional<br />
para cubrir estas imperfecciones, coloque<br />
a presión la placa de pared en la cubierta<br />
para pared opcional antes de atornillarla a<br />
la pared.<br />
AAA<br />
12 Agrupe e inserte los cables a través<br />
del soporte transparente de goma<br />
Guíe los cables a través del soporte<br />
transparente de goma en la parte posterior<br />
de la placa de pared. Compruebe que al<br />
menos 1/4 de pulgada de cada cable<br />
quede expuesto para la inserción fácil<br />
en los terminales de los cables.<br />
Cable expuesto<br />
51
13 Revise su respuesta del paso 7<br />
Configure el interruptor R hacia arriba o hacia<br />
abajo en función de su respuesta del paso 7.<br />
Interruptor R<br />
Si marcó la<br />
Configure el interruptor R<br />
Inserte el(los) cable(s)<br />
en el(los) terminal(es)<br />
R (únicamente)<br />
Cable R<br />
R<br />
Rc<br />
RC (únicamente)<br />
R<br />
R y RC<br />
Cable Rc<br />
R<br />
Rc<br />
RH (únicamente)<br />
Cable RH<br />
R<br />
Rc<br />
R<br />
Cable R<br />
RC<br />
R<br />
R y RC<br />
Cable Rc<br />
RC<br />
Cable RH<br />
R<br />
RH<br />
Cable Rc<br />
Rc<br />
52
14 Conecte firmemente los cables restantes del paso 8<br />
Inserte cada cable restante en su terminal correspondiente (un<br />
cable por terminal) hasta que esté firmemente en su lugar. Si coloca<br />
incorrectamente un cable, use el bolígrafo para presionar hacia abajo<br />
los terminales y liberar el cable.<br />
Hale suavemente los cables para verificar que estén seguros.<br />
15 Utilice los tornillos que se<br />
suministran para instalar la<br />
placa de pared<br />
Compruebe que la placa de pared esté<br />
nivelada conservando la burbuja en el<br />
nivel entre las dos líneas.<br />
AAA<br />
53
ON<br />
16 Coloque a presión el<br />
termostato firmemente en<br />
su lugar<br />
El termostato brillará y mostrará la<br />
pantalla <strong>Lyric</strong> durante tres minutos<br />
mientras se activa.<br />
17 Conecte el suministro de<br />
energía eléctrica<br />
Active el suministro de energía<br />
electricidad en el tablero de<br />
interruptores o en el interruptor que<br />
controla el sistema de calefacción/<br />
refrigeración.<br />
Caja de interruptores<br />
O<br />
Interruptor<br />
54
18 Inicie la sesión para configurar y conectar<br />
Su termostato <strong>Lyric</strong> no está aún configurado para<br />
controlar el sistema de calefacción/refrigeración.<br />
Para finalizar su configuración, descargue e inicie la<br />
sesión en la aplicación <strong>Lyric</strong> de <strong>Honeywell</strong>.<br />
Android<br />
Busque <strong>Honeywell</strong> <strong>Lyric</strong> en Google Play.<br />
Cree una cuenta e inicie la sesión para<br />
configurar y conectar.<br />
iOS<br />
Busque <strong>Honeywell</strong> <strong>Lyric</strong> en App Store.<br />
Cree una cuenta e inicie la sesión para<br />
configurar y conectar.<br />
55
Cómo utilizar el termostato <strong>Lyric</strong><br />
Gire para configurar la<br />
temperatura deseada.<br />
Encienda/Apague<br />
Refrigeración<br />
Encienda/Apague<br />
Calefacción<br />
Clima<br />
Vea la predicción<br />
del tiempo para<br />
6 y 12 horas<br />
En casa/<br />
Fuera de casa<br />
Configure para En<br />
casa/Fuera de casa<br />
56
Cómo utilizar su aplicación <strong>Lyric</strong><br />
Una vez que su termostato está configurado y conectado a su teléfono<br />
inteligente o tableta, puede hacer uso de las siguientes funciones:<br />
Tener acceso<br />
al menú<br />
Utilizar los<br />
accesos directos<br />
para activar<br />
fácilmente sus<br />
configuraciones<br />
preferidas<br />
Cambiar el<br />
modo–calefacción,<br />
refrigeración o<br />
apagado<br />
Configurar fuera de casa<br />
Ver la predicción<br />
del tiempo<br />
Configurar la<br />
temperatura deseada<br />
¿Está interesado en más productos <strong>Lyric</strong>? Visite lyric.honeywell.com para conocer<br />
sobre todos los productos disponibles conectados por la aplicación <strong>Lyric</strong>.<br />
La aplicación se mejora periódicamente y puede cambiar.<br />
57
Obtenga el máximo de <strong>Lyric</strong><br />
!<br />
Control de temperatura basado en la ubicación<br />
El termostato <strong>Lyric</strong> utiliza la ubicación de su teléfono inteligente para<br />
saber cuándo usted no está en casa y ahorrarle energía. A través de<br />
la tecnología Geofence, este detecta su regreso y le ayuda a que se<br />
sienta confortable al llegar. Usted también puede anular manualmente<br />
su configuración actual cuando esté fuera durante unas horas, hágalo<br />
utilizando el botón “Away” (Fuera de casa) del termostato o en la<br />
aplicación.<br />
Accesos directos personalizados<br />
Cree accesos directos personalizados para situaciones únicas o guarde<br />
los accesos directos que realmente le agradan y estarán disponibles en<br />
su aplicación en cualquier momento que lo desee. Nunca había sido tan<br />
simple personalizar el confort.<br />
Confort<br />
Vea y ajuste el nivel de humedad que tiene su hogar. <strong>Lyric</strong> considera tanto<br />
la humedad como la temperatura para mantener su confort, de manera<br />
que 72° se sientan siempre como 72°.<br />
Alertas inteligentes<br />
Las notificaciones “push” (de empuje) le recuerdan los cambios del filtro,<br />
le notifican si tiene niveles altos o bajos de humedad y le advierten sobre<br />
temperaturas interiores extremas.<br />
Reactivación adaptable<br />
El termostato <strong>Lyric</strong> aprende sus tiempos de ciclo de calefacción y<br />
refrigeración para brindarle la temperatura adecuada exactamente<br />
cuando usted la desea.<br />
Conversión automática<br />
Cuando está habilitado, el termostato elige automáticamente cuándo<br />
activar la calefacción o la refrigeración, según la temperatura interior.<br />
58
Notas<br />
59
Termostato con conexión <strong>Wi</strong><strong>Fi</strong> <strong>Lyric</strong> Round <br />
Automatización y control desenlace<br />
<strong>Honeywell</strong> International Inc.<br />
1985 Douglas Drive North<br />
Golden Valley, MN 55422<br />
lyric.honeywell.com<br />
<strong>Wi</strong>-<strong>Fi</strong>® es una marca comercial<br />
registrada de <strong>Wi</strong>-<strong>Fi</strong> Alliance®.<br />
® Marca Registrada en los EE. UU.<br />
© 2015 <strong>Honeywell</strong> International Inc.<br />
Rev. 11-15 Impreso en EE. UU.<br />
33-00075EFS-03


