

Singer SEQS-6700 - English - User Manual
Singer SEQS-6700 - English - User Manual
Singer SEQS-6700 - English - User Manual

You also want an ePaper? Increase the reach of your titles
YUMPU automatically turns print PDFs into web optimized ePapers that Google loves.
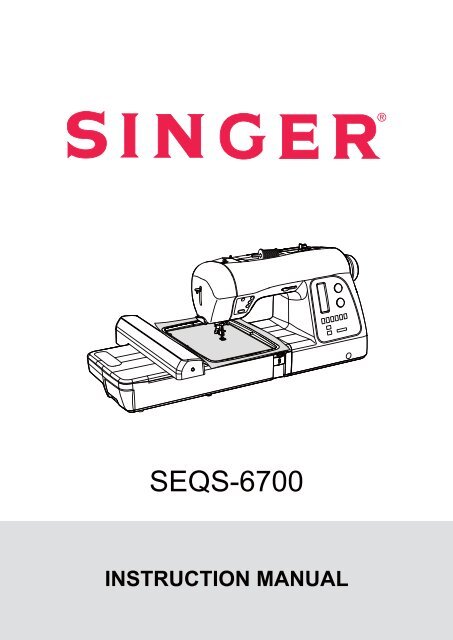
<strong>SEQS</strong>-<strong>6700</strong><br />
INSTRUCTION MANUAL<br />
67
IMPORTANT SAFETY INSTRUCTIONS<br />
When using an electrical appliance, basic safety precautions should always be followed, including the following.<br />
Read all instructions before using this sewing machine.<br />
DANGER--To reduce the risk of electric shock:<br />
1. This sewing machine should never be left unattended when plugged in. Always unplug this sewing machine from the electric<br />
outlet immediately after using and before cleaning.<br />
WARNING- <br />
1. Do not allow to be used as a toy. Close attention is necessary when this sewing machine is used by or near children.<br />
2. This appliance is not intended for use by persons (including children) with reduced physical, sensory or mental capabilities, or<br />
lack of experience and knowledge, unless they have been given supervision or instruction concerning use of the appliance by<br />
a person responsible for their safety. Children should be supervised to ensure that they do not play with the appliance.<br />
3. Use this sewing machine only for its intended use as described in this manual. Use only attachments recommended by the<br />
manufacturer as contained in this manual.<br />
4. Never operate this sewing machine if it has a damaged cord or plug, if it is not working properly, if it has been dropped<br />
or damaged, or dropped into water. Return the sewing machine to the nearest authorized dealer or service center for<br />
examination, repair, electrical or mechanical adjustment.<br />
<br />
to avoid a hazard.<br />
6. Never operate the sewing machine with any air openings blocked. Keep ventilation openings of the sewing machine and foot<br />
control free from the accumulation of lint, dust, and loose cloth.<br />
7. Never drop or insert any object into any opening.<br />
8. Indoors use only.<br />
9. Do not operate where aerosol (spray) products are being used or where oxygen is being administered.<br />
10. To disconnect, turn switch to the off („0“) position, then remove plug from outlet.<br />
11. Switch off or unplug the appliance when leaving it unattended, unplug the appliance before carrying out maintenance or<br />
replacing lamps.<br />
12. Do not unplug by pulling on cord. To unplug, grasp the plug, not the cord.<br />
<br />
14. Never sew with a damaged needle plate as this can cause needle to break.<br />
15. Do not use bent needles.<br />
<br />
17. Switch the sewing machine off (“0”) when making any adjustments in the needle area, such as threading needle, changing<br />
needle, threading bobbin, or changing presser foot, etc.<br />
18. Always unplug sewing machine from the electrical outlet when removing covers, lubricating, or when making any other user<br />
servicing adjustments mentioned in the instruction manual.<br />
19. To avoid electrical shock never put the machine nor the mains cable or mains plug into water or other liquids.<br />
20. The LED lamp maximum power is 0.3w, maximum voltage is DC 5v, if the LED lamp is damaged, you should not use the<br />
product and send it to the manufacture or service agent to repair or replace at once.<br />
21. Attention the following to avoid injury:<br />
- Unplug the foot controller of the appliance when leaving it unattended:<br />
- Unplug the foot controller of the appliance before carrying out any maintenance.<br />
CAUTION- -<br />
Moving parts-To reduce risk of injury, switch off before servicing. Close cover before operating<br />
machine.<br />
SAVE THESE INSTRUCTIONS<br />
This product is for household use, or equivalent.<br />
FOOT CONTROL (USA & Canada only)<br />
Use Model YC-485 EC or Model JF-1000 with this sewing machine.<br />
POLARIZED PLUGS CAUTION (USA & Canada only)<br />
This appliance has a polarized plug (one blade wider than the other). To reduce the risk of electric shock, this plug is intended<br />
<br />
<br />
This appliance complies with EEC Directive 2004/108/EC covering the electromagnetic compatibility.<br />
Please note that on disposal, this product must be safely recycled in accordance with relevant National legislation<br />
relating to electrical/ electronic products. If in doubt please contact your retailer for guidance.
TABLE OF CONTENTS<br />
1. GETTING TO KNOW YOUR MACHINE<br />
---------------------------------------------------2<br />
Accessories ----------------------------------------------------------------3<br />
Set up your machine ----------------------------------------------------4<br />
Spool pins ------------------------------------------------------------------4<br />
Winding bobbin -----------------------------------------------------------5<br />
Threading the bobbin thread ------------------------------------------6<br />
Threading the top thread -----------------------------------------------7<br />
Using automatic needle threader ------------------------------- 8 - 9<br />
Needle, thread and fabric chart ------------------------------------ 10<br />
Changing the needle -------------------------------------------------- 10<br />
Adjusting top thread tension ---------------------------------------- 11<br />
Changing presser foot ------------------------------------------------ 11<br />
Control panel function ------------------------------------------ 12 - 14<br />
Functions of operation switch panel ------------------------------- 15<br />
2. STARTING TO SEW<br />
Quick reference table of stitch length and width --------- 16 - 19<br />
Straight stitching ------------------------------------------------- 20 - 21<br />
Keeping seams straight, Inserting zippers and piping<br />
Hand-look quilt stitch -------------------------------------------------- 21<br />
Straight stitch with auto tie-off function --------------------------- 21<br />
Zigzag stitching --------------------------------------------------------- 22<br />
Adjusting stitch width and length, Satin stitch<br />
Placement of patterns<br />
Blind stitch --------------------------------------------------------------- 23<br />
Multi-stitch zigzag ------------------------------------------------------ 23<br />
Stretch stitches --------------------------------------------------- 24 - 27<br />
Straight stretch stitch, Overedge stitch, Ric-rac stitch,<br />
Feather stitch, Blanket stitch, Honeycomb stitch,<br />
Slant overedge stitch, Turkish stitch, Slant pin stitch,<br />
Thorn stitch, Reinforced overedge stitch, Wizard stitch,<br />
Crossed stitch, Pin stitch, Entredeux stitch,<br />
Ladder stitch, Criss-cross stitch, Fishbone stitch<br />
Sewing on a button ---------------------------------------------------- 27<br />
Buttonholes -------------------------------------------------------- 28 - 31<br />
Using buttonhole foot, Procedure, Corded buttonholes<br />
Buttonholing with hard-to-sew fabrics, <strong>Manual</strong> buttonhole<br />
Decorative sewing ----------------------------------------------------- 32<br />
Suggestions for decorative stitching ------------------------------- 32<br />
More sewing examples ----------------------------------------------- 33<br />
3. PREPARATION FOR EMBROIDERY SEWING<br />
Before attaching embroidery unit ---------------------------- 34 - 35<br />
Attaching embroidery foot, Inserting the bobbin,<br />
Threading the top thread, Extension table,<br />
Attaching embroidery unit -------------------------------------------- 36<br />
Removing embroidery unit ------------------------------------------- 36<br />
Securing fabric in embroidery hoop ------------------------------- 37<br />
Using fabric and stabilizer ------------------------------------- 38 - 39<br />
Preparing the machine before installing the hoop ------------- 40<br />
Attaching and removing embroidery hoop ----------------------- 40<br />
Installation of software ------------------------------------------ 41 - 42<br />
Function buttons when embroidering ------------------------------- 43<br />
Operation switches, Thread tension control<br />
Troubleshooting -------------------------------------------------- 44 - 47<br />
Helpful information for embroidering with FUTURA<br />
Multi hoop ---------------------------------------------------------- 48 - 51<br />
Control panel when embroidering --------------------------------- 52<br />
Helpful messages when embroidering --------------------------- 53<br />
4. OTHER THINGS YOU SHOULD KNOW<br />
Presser foot lifter ------------------------------------------------------- 54<br />
Feed dog control ------------------------------------------------------- 54<br />
Converting to free-arm sewing ------------------------------------- 54<br />
Performance checklist ------------------------------------------------ 55<br />
Cleaning hook area and feed dogs -------------------------------- 56<br />
Oiling inside the face cover ------------------------------------------ 57<br />
Special accessories --------------------------------------------- 58 - 62<br />
Satin stitch foot, Cut & hem, Straight stitch foot,<br />
Open toe foot, Invisible zipper foot, Cording foot,<br />
Darning / freehand embroidery foot, Even feed foot,<br />
Edge guide / quilting bar, Twin needle,<br />
Threading the twin needle, Wing needle<br />
Helpful messages ------------------------------------------------ 63 - 64<br />
For European version<br />
Sewing machine<br />
Dimensions: 567 mm × 240 mm × 317 mm<br />
Mass of the equipment: 10.8 kg<br />
Embroidery unit<br />
Dimensions: 504 mm × 411 mm × 141 mm<br />
Mass of the equipment: 3.0 kg<br />
Rated Voltage: 230 V ~<br />
Rated Frequency: 50 Hz<br />
Rated input: 64 W<br />
Using ambient temperature: Normal temperature<br />
Acoustic noise level: less than 70 db(A)<br />
1
1. GETTING TO KNOW YOUR MACHINE<br />
MACHINE IDENTIFICATION<br />
1. Pre-tension guide<br />
2. Bobbin winding tension disk<br />
3. Threading lever<br />
4. Face cover<br />
5. Thread cutter/holder<br />
6. Extension table (Accessory box)<br />
7. Bobbin winder spindle<br />
8. Bobbin winder latch<br />
9. Operation buttons<br />
10. Horizontal spool pin<br />
11. Handle<br />
12. Hand wheel<br />
13. Power/light switch<br />
14. Cord socket<br />
15. Buttonhole lever<br />
16. Feed dog control<br />
17. Presser foot lifter<br />
<br />
19. Thread guide<br />
20. Twin thread guide<br />
21. Presser foot screw<br />
22. Needle<br />
23. Bobbin cover plate<br />
24. Needle bar<br />
25. Alternate thread cutter<br />
26. Foot release button<br />
27. Needle clamp screw<br />
28. All purpose foot<br />
29. Feed dogs<br />
30. Needle plate<br />
31. Bobbin cover release button<br />
32. Embroidery unit<br />
33 Hoop release lever<br />
34. Carriage<br />
35. Handle<br />
36. Accessory drawer<br />
37. Hoop bracket<br />
38. Release lever<br />
39. Connector<br />
40. Large hoop<br />
41. Inner frame<br />
42. Outer frame<br />
43. Hoop adjusting screw<br />
44. Hoop mounting plate<br />
45. Small hoop<br />
46. Power line cord<br />
47. Foot control<br />
48. USB cable<br />
49. Instruction manual<br />
NOTE: Be sure the USB cable is<br />
attached to your machine when<br />
doing embroidery.<br />
2 1<br />
3<br />
4<br />
5<br />
6<br />
10<br />
11<br />
12<br />
13<br />
14<br />
32<br />
35 34 33<br />
36<br />
37<br />
40<br />
44<br />
39<br />
38<br />
41<br />
42<br />
43<br />
19<br />
20<br />
21<br />
22<br />
23<br />
44<br />
45<br />
7<br />
8<br />
9<br />
15<br />
16<br />
17<br />
18<br />
24<br />
25<br />
26<br />
27<br />
28<br />
29<br />
30<br />
31<br />
41<br />
42<br />
43<br />
46<br />
47 48<br />
49<br />
2
ACCESSORIES<br />
FOR SEWING MACHINE<br />
Sewing machine accessories are located in<br />
the storage compartments of the removable<br />
extension table, as indicated by the diagram.<br />
1. Needles<br />
2. Bobbins<br />
3. Auxiliary spool pin<br />
4. Spool pin felt disc<br />
5. Spool pin cap (mini)<br />
6. Spool pin cap (small)<br />
7. Spool pin cap (large)<br />
8. Buttonhole opener/Brush<br />
9. Screwdriver for needle plate<br />
10. Screwdriver (large)<br />
11. Screwdriver (small)<br />
12. Zipper foot<br />
13. Blind hem foot<br />
14. Satin foot<br />
15. Button sewing foot<br />
16. Buttonhole foot and underplate<br />
17. Thread spool net (long)<br />
18. Thread spool net (short)<br />
1 2 3 4 5 6<br />
7 8 9 10 11<br />
The foot that comes on your<br />
sewing machine is called the all<br />
purpose foot and will be used for<br />
the majority of your sewing.<br />
12 13 14 15<br />
The satin foot (14) is another very<br />
useful foot and should be used<br />
for most decorative sewing.<br />
When purchasing additional<br />
bobbins, be sure they are class<br />
15 J.<br />
16 17 18<br />
FOR EMBROIDERY<br />
Embroidery accessories are located in the<br />
vinyl bag, packaged with the embroidery unit.<br />
19. Vinyl bag<br />
20. Bobbins<br />
21. Scissors<br />
22. Embroidery presser foot<br />
23. Embroidery software CD<br />
19<br />
20 21 22<br />
To install the software, refer to the CD<br />
insert for more information.<br />
23<br />
3
SET UP YOUR MACHINE<br />
Be sure to wipe off any surplus oil from needle plate area<br />
<br />
POWER LINE CORD/FOOT CONTROL<br />
Connect the plug of the power line cord into the cord<br />
socket (1) and your wall outlet (2) as illustrated.<br />
Set power/light switch at<br />
“OFF”<br />
Machine socket<br />
Connect the foot control plug into the machine socket (3),<br />
when using sewing machine only.<br />
NOTE: In sewing mode, the machine can be operated either<br />
with or without the foot control (see page 15).<br />
Always disconnect the machine from power<br />
supply by removing the plug from the wall<br />
outlet.<br />
Pin<br />
4<br />
1<br />
3<br />
2<br />
POWER/LIGHT SWITCH<br />
Your machine will not operate until the power/light switch<br />
is turned on. The same switch controls both the power and<br />
the light.<br />
Foot control<br />
Power line cord<br />
When servicing the machine, or when changing needles<br />
or lights, etc., the machine must be disconnected from the<br />
power supply.<br />
Power/light switch “OFF”<br />
Power/light switch “ON”<br />
SPOOL PINS<br />
HORIZONTAL SPOOL PIN for normal<br />
thread spool<br />
Place thread spool on the pin and secure with a spool cap<br />
<br />
Spool<br />
Felt disc<br />
VERTICAL SPOOL PIN for large thread<br />
spool<br />
Attach the spool pin. Place felt disc over it. Place a thread<br />
spool on the spool pin.<br />
Vertical spool pin<br />
Thread retaining slit<br />
Spool pin cap<br />
Spool<br />
Spool pin<br />
4
WINDING BOBBIN<br />
Be sure to use Class 15 J bobbins.<br />
1. Place a spool of thread on the spool pin, and secure it with<br />
the spool pin cap. Pull the thread out from the spool and<br />
place it through thread guides as shown in illustration.<br />
1<br />
2. Put end of thread through the hole in bobbin as shown.<br />
Place bobbin onto the bobbin winder spindle as far as it<br />
can go.<br />
2<br />
3. Holding onto the end of the thread, push the bobbin winder<br />
latch against the bobbin until it clicks and bobbin starts to<br />
rotate.<br />
3<br />
4. Bobbin will disengage automatically and the winding<br />
mechanism will stop when the bobbin is full.<br />
To stop the bobbin winding at any time during the winding<br />
process, push the Start/Stop button and move the bobbin<br />
winder latch to the right. Remove the wound bobbin and<br />
cut the thread tail.<br />
4<br />
5
THREADING THE BOBBIN THREAD<br />
1. Raise the needle to its highest position by rotating the hand<br />
wheel counter clockwise (toward you).<br />
2. Remove the bobbin cover plate by pushing the release<br />
<br />
allow you to remove the cover.<br />
3. Insert the bobbin making sure the bobbin rotates counterclockwise<br />
when you pull the thread.<br />
NOTE: This is a very important step. The bobbin<br />
must rotate counterclockwise when thread is pulled.<br />
4. Pull thread through the slot (A) and then to the left.<br />
5. With a finger held gently on top of the bobbin, pull the<br />
thread until it stops in the slot (B). Then pull the thread<br />
along the groove on the needle plate until it is snipped with<br />
cutter on the top left.<br />
Cutter<br />
A<br />
NOTE: Sewing can be started without having to pull<br />
up the bobbin thread.<br />
Groove<br />
6. Replace the clear bobbin cover plate onto the needle plate.<br />
6<br />
B<br />
A
THREADING THE TOP THREAD<br />
A. Raise the presser foot lifter. Always be sure to raise the<br />
presser foot lifter before threading the top thread. (If the<br />
presser foot lifter is not raised, correct thread tension<br />
cannot be obtained.)<br />
B. Turn the hand wheel counter clockwise (toward you) until<br />
the needle is in its highest position.<br />
<br />
the thread with your right hand in the following order as<br />
illustrated.<br />
* Guide the thread through thread guides (1 & 2), and then<br />
pull it down along the groove (3).<br />
* Guide the thread into the thread guide (4).<br />
* Pass the thread through the eye of the needle (5) from<br />
front to back. (See following page for instructions on<br />
operation of the Automatic Needle Threader.)<br />
IMPORTANT:<br />
To verify that the machine is threaded properly in the<br />
tension discs, do this simple check:<br />
1.) With the presser foot raised, pull the thread towards<br />
the back of the machine. You should detect only<br />
<br />
needle.<br />
2.) Now lower the presser foot and again pull the thread<br />
towards the the back of the machine. This time you<br />
should detect a considerable amount of resistance<br />
and much more deflection of the needle. If you do<br />
not detect the resistance you have mis-threaded the<br />
machine and need to re-thread it.<br />
7
USING AUTOMATIC NEEDLE THREADER<br />
Be sure to raise the presser foot lifter and raise the needle<br />
to its highest position before threading.<br />
1. Thread the machine with your left hand while gripping the<br />
thread with your right hand. Hook thread to the thread<br />
guide on the needle bar and pull it toward you leaving<br />
about 4” (10 cm) clear.<br />
2. Hook thread into the twin thread guides (A and B).<br />
3. Pull thread gently into the thread cutter/holder to cut and<br />
hold it in place.<br />
Don’t pull thread with strong force or thread may<br />
be pulled off from needle hole after threading.<br />
4. Pull down the threading lever to its lowest position until the<br />
twin thread guide rotates and stops.<br />
Make sure that the guide doesn’t touch fabric, etc.<br />
5. Release the threading lever and needle will be threaded<br />
automatically. If it should not return to the original position,<br />
raise it gently by hand.<br />
6. Pull thread loop away from you.<br />
NOTE:<br />
For smooth threading, it is recommended that the<br />
machine be set for straight stitch (in center needle<br />
position) when using the automatic needle threader.<br />
<br />
Don’t lower the threading lever while the machine is<br />
in operation or the threading hook may be broken.<br />
IMPORTANT: If the needle cannot be threaded with the<br />
Automatic Needle Threader due to particular qualities<br />
of the thread, or if the thread is too thick for the<br />
needle being used, then manually thread the needle<br />
after hooking the thread through the thread guide on<br />
the needle bar.<br />
If the needle has not been threaded correctly, rethread<br />
from STEP 1.<br />
1<br />
2<br />
Twin thread guide<br />
3<br />
Thread guide<br />
Threading hook<br />
Thread cutter/holder<br />
B<br />
A<br />
4<br />
5 6<br />
Threading lever<br />
8
HELPFUL SUGGESTIONS:<br />
If the machine is not used frequently, put a drop of<br />
sewing machine oil onto the felt disc.<br />
Felt disc<br />
If the threading hook is deviated from needle hole,<br />
adjust the position of the hook using a small screw<br />
driver.<br />
9
NEEDLE, THREAD AND FABRIC CHART<br />
Your fabric will determine the choice of a needle and thread.<br />
The following table is a practical guide to needle and thread<br />
selection. Always refer to it before a new sewing project. For<br />
general sewing, the same size and type of thread is used in<br />
the bobbin as in the needle.<br />
IMPORTANT:<br />
Use only SINGER brand needles for best results. The<br />
use of alternative brand needles can cause tension<br />
issues or unsatisfactory results.<br />
FABRICS THREAD NEEDLES<br />
The fabrics below can be of any<br />
<br />
synthetic, rayon, blends. They<br />
are listed as examples of weight.<br />
TYPE<br />
Light-<br />
Weight<br />
Medium-<br />
Weight<br />
Medium-<br />
Heavy<br />
Knits<br />
Batiste<br />
Chiffon<br />
Crepe<br />
Corduroy<br />
Flannel<br />
Gabardine<br />
Gingham<br />
Linen<br />
Muslin<br />
Wool Crepe<br />
Bonded Wovens<br />
Canvas<br />
Coating<br />
Denim<br />
Duck<br />
Sailcloth<br />
Bonded Knits<br />
Double Knit<br />
Jersey<br />
Tricot<br />
Cotton-wrapped 2000 or 2020<br />
Polyester<br />
red<br />
100% Polyester shank<br />
* Mercerized Size 60<br />
Cotton-wrapped 2000 or 2020<br />
Polyester<br />
red<br />
100% Polyester shank<br />
* Mercerized Size 50<br />
Nylon<br />
Cotton-wrapped 2000 or 2020<br />
Polyester<br />
red<br />
100% Polyester shank<br />
* Mercerized Size 40<br />
* "Heavy Duty"<br />
Cotton-wrapped<br />
Polyester<br />
Polyester<br />
Nylon<br />
2001 or 2045<br />
yellow<br />
shank<br />
SIZE<br />
11/80<br />
orange<br />
band<br />
14/90<br />
blue<br />
band<br />
16/100<br />
purple<br />
band<br />
18/110<br />
yellow<br />
band<br />
11/80<br />
orange<br />
band<br />
14/90<br />
blue<br />
band<br />
16/100<br />
purple<br />
band<br />
Always disconnect the machine from power<br />
supply by removing the plug from the wall outlet.<br />
Changing the needle<br />
1. Raise the needle bar to its highest position by turning the<br />
hand wheel counter clockwise (toward you).<br />
Flat side<br />
Needle<br />
2. Loosen the needle clamp screw by turning it toward you.<br />
3. Remove the needle by pulling it downward.<br />
Pin<br />
4. Insert the new needle into the needle clamp with the <br />
side toward the back.<br />
Needle clamp screw<br />
5. Push the needle up as far as it can go.<br />
6. Tighten the needle clamp screw firmly with the screw<br />
driver.<br />
Flat side toward the back<br />
10
ADJUSTING TOP THREAD TENSION<br />
Helpful Hint: A slight adjustment to a higher number or a<br />
lower number may improve sewing appearance.<br />
STRAIGHT STITCHING<br />
The correct appearance of your stitching is largely determined<br />
by the balanced tension of both top and bobbin threads. The<br />
tension is well balanced when these two threads ‘lock’ in the<br />
middle of layers of the fabric you are sewing.<br />
<br />
you will need to adjust the tension control. Do this, however,<br />
only after you have determined that the machine is correctly<br />
threaded (see page 7).<br />
Make all adjustments with presser foot ‘down’.<br />
Well balanced<br />
Under side<br />
Top side<br />
A balanced tension (identical stitches both top and bottom) is<br />
usually only desirable for straight stitch sewing.<br />
Top stitch too tight<br />
Top stitch too loose<br />
ZIGZAG, SATIN STITCH, DECORATIVE and<br />
BUTTON HOLE SEWING<br />
For zigzag sewing, satin stitch and decorative stitch functions,<br />
thread tension should be less than that for straight stitch<br />
sewing.<br />
It is recommended to decrease thread tension for buttonholes.<br />
You will always obtain a nicer stitch and less puckering when<br />
the upper thread appears slightly on the bottom side of your<br />
fabric.<br />
Decrease tension<br />
Increase tension<br />
BOBBIN TENSION<br />
The bobbin tension has been correctly set at the factory,<br />
so you do not need to adjust it.<br />
CHANGING PRESSER FOOT<br />
Be sure the needle is in the highest position. Raise presser<br />
foot lifter.<br />
1. Push presser foot release button to remove the foot.<br />
2. Place the desired foot on the needle plate aligning the<br />
presser foot pin with the foot holder.<br />
3. Lower the presser foot lifter so that the foot holder snaps<br />
on the foot.<br />
2<br />
Presser foot lifter<br />
3<br />
1<br />
Foot release button<br />
Foot holder<br />
11
CONTROL PANEL FUNCTIONS<br />
4<br />
1<br />
5<br />
2<br />
3<br />
6<br />
7 8<br />
1. LCD DISPLAY<br />
When turning on the machine without the embroidery<br />
unit attached, straight stitch number 00, is selected. The<br />
information on the display changes for regular sewing,<br />
programming and embroidering. For regular sewing, the LCD<br />
display shows the number of the selected stitch, an image of<br />
the stitch, and stitch width and stitch length settings.<br />
See page 13 for information about the display when creating a<br />
stitch program, and page 52 for information about the display<br />
when embroidering.<br />
2. DIRECT SELECTION BUTTONS<br />
Frequently used stitches are available by the direct selection<br />
buttons. Simply press a button to select that stitch.<br />
3. PROGRAM MODE BUTTON<br />
Press this button to enter Program Mode. Read more about<br />
programming under 4 and 5 below.<br />
12
4. STITCH SELECTION DIAL<br />
There are two main categories of stitches:<br />
<br />
(buttonholes are also included here)<br />
<br />
programmed into longer sequences.<br />
Turn the dial to browse the available stitches one by one.<br />
Press the center of the dial to step ten stitches at a time.<br />
Example: To select stitch number 52, press the center<br />
<br />
clockwise.<br />
When the “ABC” Program Mode button has been pressed (see<br />
3 above) turning the Stitch Selection Dial will browse through<br />
letters and other programmable stitches. Selected stitch will<br />
be sewn in one repetition only. Press the center of the dial to<br />
program selected stitch.<br />
5. STITCH SETTING/SCROLL AND DELETE<br />
PROGRAM DIAL<br />
Setting Stitch Width and Stitch Length<br />
In sewing mode, stitch width (needle position for straight<br />
stitch) and stitch length are displayed. Width and length are<br />
automatically set to default for all stitches when turning on the<br />
machine. Default numbers are underlined.<br />
Press the center of the dial to toggle between stitch width<br />
and stitch length setting. A LED indicator is lit next to the<br />
selected setting. Turn the dial to adjust the selected setting.<br />
The numbers change on the display as you turn, and the<br />
underlining is removed, indicating that the new setting is not<br />
default.<br />
Note: When an arrow on either side of the stitch width/<br />
stitch length value number disappears, the machine is<br />
set at the maximum or minimum stitch width or length<br />
available for that particular stitch.<br />
The settings made for each stitch are saved until the machine<br />
is turned off.<br />
Scroll program and delete programmed stitches<br />
When the “ABC” Program Mode button has been pressed<br />
(see 3 above) turning the lower dial will scroll through the<br />
programmed letters and stitches, displaying your program as<br />
it will be stitched out.<br />
Press the center of the dial to delete the last stitch in the<br />
program. Press repeatedly or keep the center of the dial<br />
pressed to continue deleting letters and/or programmed<br />
stitches one at a time.<br />
13
6. TWIN NEEDLE BUTTON<br />
When using twin needles, press the twin needle safety button<br />
regardless of the stitch you selected. Doing so will reduce<br />
the stitch width automatically and save broken needles and<br />
possible damage to your machine.<br />
When the button is pressed, the LED indicator next to the<br />
button is lit, indicating that Twin Needle Button is activated.<br />
When turning the Stitch Selection Dial, the machine now<br />
automatically skips all stitches that are not suitable for twin<br />
needle, and a beep will sound when selecting buttonhole<br />
pattern with the direct selection button, indicating that<br />
buttonholes cannot be sewn with twin needle.<br />
6<br />
Note: Always select the Twin Needle Button prior to<br />
selecting a pattern. This will preclude any possibility<br />
of the twin needle breaking.<br />
To disengage the Twin Needle Button button and return<br />
the machine to normal sewing mode, either press the<br />
Twin Needle button again or turn the machine off. Twin<br />
Needle sewing is only active when the LED light next<br />
to the Twin Needle button is lit.<br />
It is recommended that you use SINGER Style 2025 twin<br />
needles.<br />
7. THREAD CUTTING MODE<br />
Press this button to activate Thread Cutting Mode. The<br />
machine will automatically cut the top and bobbin thread every<br />
time you stop sewing. When activated, the LED indicator next<br />
to the button is lit.<br />
7<br />
Note: Twin needle safety and Thread cutting mode<br />
cannot be enabled at the same time.<br />
8. THREAD TENSION CONTROL BUTTON<br />
Press - to decrease and + to increase thread tension. While<br />
pressing the button, thread tension adjustment mode is<br />
displayed on LCD screen.<br />
8<br />
14
FUNCTIONS OF OPERATION SWITCH<br />
PANEL<br />
1. TACKING STITCH MODE BUTTON<br />
Press Tacking Stitch Button and the sewing machine makes<br />
<br />
START/STOP to sew.<br />
Press Tacking Stitch button when the machine is stopped so<br />
tacking stitch will be activated. The position of the tacking<br />
stitches will be at the exact spot in the pattern where the<br />
Tacking Stitch button is pushed. When the function is<br />
activated, the LED indicator next to the button is lit red.<br />
2. THREAD CUTTER<br />
Press Thread Cutter to automatically cut the top and bobbin<br />
threads.<br />
3. NEEDLE STOP POSITION SELECTOR BUTTON<br />
When the machine is turned on, needle is set at its up-stop<br />
position with upper LED lamp lit. When the button is pushed,<br />
needle is set at its down-stop position with lower LED lamp<br />
lit. Push it again and it will return to its up-stop position with<br />
upper LED lamp lit.<br />
4. REVERSE STITCH BUTTON<br />
Reverse sewing is carried out by pushing the reverse stitch<br />
button. The machine will sew 4 stitches in reverse and stop.<br />
5. START/STOP BUTTON<br />
When the Start/Stop button is pushed, the machine starts<br />
slowly, and when the button is pushed once more, the<br />
machine stops.<br />
However, when foot control is plugged, the Start/Stop button<br />
will be inactive.<br />
1 2<br />
6<br />
Reverse stitch function<br />
for straight and zigzag<br />
stitches<br />
Tacking stitch function<br />
for tie-off of other<br />
stitches<br />
3<br />
4<br />
5<br />
6. LED INDICATOR<br />
Green light indicates machine is ready to start.<br />
Red light indicates machine is operating.<br />
Flashing red light indicates a problem or an error.<br />
* Flashing for 2 - 3 seconds shows that an incorrect<br />
operation was made.<br />
* Continuous flashing indicates that the machine<br />
malfunctions.<br />
7. SPEED CONTROL LEVER<br />
Sliding the lever sets desired sewing speed. When foot control<br />
is used, the lever serves as a top speed limiter.<br />
The speed control lever can be used in both the sewing mode<br />
and the embroidery mode.<br />
7<br />
15
2. STARTING TO SEW<br />
QUICK REFERENCE TABLE OF STITCH LENGTH AND WIDTH<br />
LENGTH<br />
NEEDLE POSITION<br />
STITCH<br />
No.<br />
AUTO MANUAL AUTO MANUAL<br />
00 2.5 0.5 - 4.8 CENTER LEFT - RIGHT <br />
01 2.5 1.5 - 3.0 CENTER LEFT - RIGHT <br />
02 2.5 2.0 - 4.0 CENTER -<br />
STITCH<br />
No.<br />
LENGTH<br />
WIDTH<br />
LENGTH<br />
WIDTH<br />
STITCH No.<br />
AUTO MANUAL AUTO MANUAL AUTO MANUAL AUTO MANUAL<br />
03 2.0 0.5 - 3.0 5.0 0 - 7.0 07 1.5 0.3 - 2.5 6.0 2.5 - 7.0<br />
04 2.0 0.5 - 3.0 5.0 0 - 7.0 08 2.0 1.0 - 3.0 3.0 1.0 - 6.0<br />
05 2.0 0.5 - 3.0 5.0 0 - 7.0 09 2.5 1.5 - 3.0 3.5 3.5 - 7.0<br />
06 2.0 1.0 - 3.0 3.0 2.0 - 7.0 10 2.0 1.0 - 3.0 6.0 3.0 - 6.0<br />
Adjusting needle position for straight stitch<br />
13 needle positions are available for quilting, top stitching etc.<br />
Counter<br />
clockwise<br />
Clockwise<br />
Counter clockwise<br />
Clockwise<br />
Lower scroll dial<br />
16
STITCH<br />
No.<br />
LENGTH<br />
WIDTH<br />
LENGTH<br />
WIDTH<br />
STITCH No.<br />
AUTO MANUAL AUTO MANUAL AUTO MANUAL AUTO MANUAL<br />
11 2.5 1.5 - 3.0 3.5 3.5 - 7.0 26 0.5 0.5 - 1.0 3.5 2.0 - 6.0<br />
12 2.0 1.0 - 3.0 3.0 1.0 - 6.0 27 0.5 0.5, 0.8 5.0 2.0 - 7.0<br />
13 2.5 1.5 - 3.0 - - 28 1.3 1.0 - 2.0 6.3 3.8 - 6.3<br />
14 2.0 1.0 - 2.5 5.0 3.0 - 7.0 29 2.5 1.5 - 2.5 7.0 3.5 - 7.0<br />
15 2.5 1.5 - 2.5 5.0 3.0 - 7.0 30 1.8 1.5 - 2.5 5.0 3.0 - 7.0<br />
16 2.0 2.0 - 4.0 - - 31 2.5 1.5 - 2.5 5.0 4.0 - 7.0<br />
17 - - 5.0 5.0, 6.0 32 1.8 1.0 - 4.0 7.0 3.5 - 7.0<br />
18 2.5 1.5 - 3.0 5.0 2.0 - 7.0 33 2.5 1.5 - 2.5 5.0 3.0 - 7.0<br />
19 2.0 1.5 - 2.5 7.0 3.5, 7.0 34 2.5 1.0 - 2.5 7.0 3.0 - 7.0<br />
20 1.8 0.8 - 2.5 7.0 3.5, 7.0 35 2.5 1.0 - 2.5 7.0 3.0 - 7.0<br />
21 2.5 1.3 - 2.5 5.0 3.5 - 7.0 36 2.5 1.5 - 2.5 4.5 3.0 - 6.0<br />
22 2.5 1.5 - 2.5 5.0 3.5 - 7.0 37 2.5 1.5 - 2.5 7.0 3.5 - 7.0<br />
23 - - 6.0 3.5, 6.0 38 2.5 1.5 - 2.5 4.5 3.0 - 6.0<br />
24 - - 6.0 3.5, 6.0 39 2.5 1.5 - 2.5 5.0 3.5 - 7.0<br />
25 2.5 0.8 - 2.5 5.0 1.0 - 7.0 40 1.5 0.5 - 2.0 5.0 2.0 - 7.0<br />
17
LENGTH<br />
WIDTH<br />
LENGTH<br />
WIDTH<br />
STITCH<br />
No.<br />
STITCH<br />
AUTO MANUAL AUTO MANUAL AUTO MANUAL AUTO MANUAL<br />
No.<br />
41 2.5 1.5 - 2.5 5.0 3.5 - 7.0 56 0.5 0.5 - 1.5 7.0 3.5 - 7.0<br />
42 2.5 1.3 - 3.0 6.0 3.0 - 7.0 57 0.5 0.5 - 3.0 7.0 3.0 - 7.0<br />
43 2.0 1.5 - 3.5 4.5 2.0 - 7.0 58 0.5 0.5 - 3.0 7.0 3.0 - 7.0<br />
44 0.8 0.8 - 1.5 6.0 3.5, 6.0 59 2.5 1.5 - 2.5 7.0 3.5 - 7.0<br />
45 0.5 0.5 - 1.5 7.0 3.5 - 7.0 60 2.5 1.5 - 2.5 7.0 3.5 - 7.0<br />
46 0.5 0.5 - 1.5 7.0 3.5 - 7.0 61 0.8 0.8 - 1.5 7.0 3.5 - 7.0<br />
47 0.5 0.5 - 1.5 7.0 3.5 - 7.0 62 0.8 0.8 - 1.5 7.0 3.5 - 7.0<br />
48 0.5 0.5 - 1.3 6.0 3.0 - 6.0 63 0.5 0.5 - 1.5 7.0 3.0 - 7.0<br />
49 0.5 0.5 - 2.5 7.0 3.5 - 7.0 64 0.5 0.3 - 1.5 7.0 3.0 - 7.0<br />
50 0.5 0.5 - 1.5 7.0 3.0 - 7.0 65 0.5 0.5 - 1.5 7.0 3.0 - 7.0<br />
51 0.5 0.5 - 1.5 7.0 3.0 - 7.0 66 0.5 0.5 - 1.5 5.0 3.5 - 7.0<br />
52 0.5 0.5 - 1.5 7.0 3.5 - 7.0 67 0.8 0.8 - 1.5 6.0 3.5, 6.0<br />
53 0.5 0.5 - 1.5 7.0 3.5 - 7.0 68 2.5 1.5 - 3.0 3.0 1.0 - 7.0<br />
54 0.5 0.5 - 1.5 7.0 3.5 - 7.0 69 2.5 1.5 - 3.0 3.5 1.0 - 7.0<br />
55 0.5 0.5 - 1.5 7.0 3.5 - 7.0 70 2.0 1.5 - 3.0 6.0 3.0 - 6.0<br />
18
LENGTH<br />
WIDTH<br />
LENGTH<br />
WIDTH<br />
STITCH<br />
No.<br />
STITCH<br />
No.<br />
AUTO MANUAL AUTO MANUAL AUTO MANUAL AUTO MANUAL<br />
71 2.5 1.5 - 3.0 3.0 2.0 - 7.0 86 1.5 0.5 - 1.5 7.0 3.0 - 7.0<br />
72 2.5 1.5 - 3.0 3.5 1.0 - 7.0 87 2.5 1.5 - 2.5 5.0 3.5 - 7.0<br />
73 2.0 1.5 - 3.0 6.0 3.0 - 6.0 88 2.5 1.0 - 2.5 5.0 2.0 - 7.0<br />
74 2.5 1.0 - 3.0 4.0 2.0 - 6.0 89 - - - -<br />
75 2.0 1.0 - 3.0 5.0 1.0 - 7.0 90 - - 3.0 2.0 - 4.5<br />
76 2.0 0.8 - 2.5 3.5 1.0 - 6.0 91 0.5 0.5, 0.8 - -<br />
77 2.5 1.5 - 2.5 5.0 3.0 - 7.0 92 - - - -<br />
78 2.5 1.5 - 3.0 3.0 1.0 - 7.0 93 0.5 0.5, 0.8 - -<br />
79 2.5 1.5 - 3.0 3.5 1.0 - 7.0 94 0.5 0.5, 0.8 - -<br />
80 2.5 1.5 - 2.5 5.0 3.5 - 7.0 95 0.5 0.5, 0.8 - -<br />
81 2.5 1.5 - 2.5 5.0 3.5 - 7.0 96 0.5 0.5, 0.8 - -<br />
82 2.5 1.5 - 2.5 4.5 3.0 - 6.0 97 0.5 0.5, 0.8 - -<br />
83 1.3 0.8 - 4.0 7.0 3.5 - 7.0 98 0.5 0.5, 0.8 - -<br />
84 1.3 0.8 - 4.0 7.0 3.5 - 7.0 99 0.5 0.5, 0.8 - -<br />
85 2.0 0.8 - 2.5 3.5 1.0 - 6.0<br />
19
STRAIGHT STITCHING<br />
Straight stitch is most frequently used for all types of sewing.<br />
Let’s begin by following the steps below.<br />
1. SETTINGS<br />
Presser foot - All Purpose Foot<br />
NOTE: Based upon the weight of the fabric, slight<br />
<br />
00<br />
A<br />
B<br />
C<br />
D<br />
E<br />
1<br />
H<br />
A. Thread cutter<br />
B. Tacking stitch mode button<br />
C. Needle up/down position selector button<br />
D. Reverse stitch button<br />
E. Start/stop button<br />
F. Feed dog control (at rear side)<br />
G. Presser foot lifter<br />
H. Thread tension control button<br />
I. Power/light switch<br />
NOTE: Since a straight stitch has no width, the<br />
stitch width control is used to change the needle<br />
position.<br />
F<br />
G<br />
2<br />
4<br />
I<br />
2. Pull both threads under the presser foot toward the left of<br />
the machine, leaving about 6” (15 cm) clear.<br />
3. Place the fabric under the presser foot and lower the<br />
presser foot lifter.<br />
4. Turn the hand wheel counter clockwise (towards you) until<br />
the needle enters the fabric.<br />
5. Start the machine. Guide the fabric gently with your hands.<br />
When reaching the edge of the fabric, stop the sewing<br />
machine.<br />
NOTE: The Needle Plate has both Metric and Inch<br />
Markings as an aid for guiding your fabric when<br />
sewing a seam.<br />
6. First turn the hand wheel counter clockwise (toward you)<br />
until the needle is in its highest position, then raise the<br />
presser foot. Draw the fabric to the rear and cut off excess<br />
thread with the thread cutter located on the bottom of the<br />
face cover, as shown.<br />
5<br />
6<br />
3<br />
KEEPING SEAMS STRAIGHT<br />
To keep the seam straight, use one of the numbered guide<br />
lines on the needle plate. The numbers indicate distance from<br />
the needle at its center position.<br />
The guide line on the bobbin cover plate is a ¼” (6mm) seam<br />
guide line, used for piecing quilt blocks or for sewing narrow<br />
seams.<br />
3/4" (19 mm)<br />
5/8" (16 mm)<br />
1/2" (13 mm)<br />
3/8" ( 9 mm)<br />
1/4" ( 6 mm)<br />
20
INSERTING ZIPPERS AND PIPING<br />
SETTINGS: Presser foot - Zipper Foot<br />
Use the zipper foot to sew to the right or left of the zipper. It<br />
can also be used to make or insert piping.<br />
Needle to left of foot<br />
Needle to right of foot<br />
INSERTING ZIPPERS<br />
To sew down the right side, attach left side of zipper foot to<br />
presser foot holder so that the needle passes through the<br />
opening on the left side of the foot.<br />
To sew down the left side, attach right side of foot to foot<br />
holder.<br />
PIPING<br />
<br />
Attach the right side of the zipper foot to the foot holder so that<br />
the needle passes through the right side of the zipper foot.<br />
<br />
forming seam tape for the piping.<br />
Helpful Hint: Slight adjusting of the needle position to<br />
sew closer to the piping may be accomplished with<br />
the Stitch Width Control.<br />
HAND-LOOK QUILT STITCH<br />
This stitch is designed to look like hand sewing for topstitching<br />
and quilting.<br />
1. Thread bobbin with desired top stitching color.<br />
2. Thread the needle with either invisible thread or with thread<br />
that is a color which blends in with the fabric color, so it<br />
doesn’t show.<br />
3. Increase thread tension toward 6 or higher until you<br />
achieve the desired appearance.<br />
4. Set the stitich length at 4 (maximum).<br />
5. Start to sew.<br />
02<br />
STRAIGHT STITCH WITH AUTO<br />
TIE-OFF FUNCTION<br />
16<br />
1. Press the foot control and the machine will sew 4 stitches<br />
forward and then 4 stitches in reverse and continue to sew<br />
forward until the foot control is released.<br />
2. Press the reverse button and the machine will sew 4<br />
stitches in reverse and then 4 stitches in forward and stop.<br />
21
ZIGZAG STITCHING<br />
04 05<br />
SETTINGS :Presser foot - All Purpose Foot<br />
Under side<br />
The top thread may appear on the bottom depending on the<br />
thread, fabric, type of stitch and sewing speed, but the bobbin<br />
thread must never appear on the top of the fabric.<br />
Top side<br />
ADJUSTING STITCH WIDTH AND LENGTH<br />
is values set automatically when pattern (No. 03) is set.<br />
The stitch length is 2 mm and the stitch width is about 5 mm.<br />
is the selection range when setting the value manually.<br />
SATIN STITCH<br />
SETTINGS: Presser foot - Satin Foot<br />
This is a closely spaced stitch used for appliqué, bar-tacking,<br />
etc. Slightly loosen the top thread tension for satin stitching.<br />
Set the stitch length between 0.5 and 2.0, depending on the<br />
weight of thread being used.<br />
Use a backing of stabilizer to help avoid stitches puckering the<br />
fabric.<br />
STITCH LENGTH<br />
STITCH WIDTH<br />
mm 0 0.5 1.0 1.5 2.0 2.5 3.0 3.5 4.0 4.5 5.0 5.5 6.0 6.5 7.0<br />
0<br />
0.3<br />
0.5<br />
0.8<br />
1.0<br />
1.3<br />
1.5<br />
1.8<br />
2.0<br />
2.5<br />
3.0<br />
PLACEMENT OF PATTERNS<br />
Stitch width of pattern increases from center needle position<br />
as illustrated.<br />
Center position<br />
22
BLIND STITCH<br />
SETTINGS :Presser foot - Blind Hem Foot<br />
06<br />
1 2<br />
Medium to heavyweight fabric<br />
- Regular blind stitch for normal fabrics<br />
06<br />
- Elastic blind stitch for soft, stretchable fabrics<br />
Under side<br />
Under side<br />
<br />
fabrics or overcasting it on medium to heavyweight fabrics.<br />
Then turn the hem up the required depth, press and pin in<br />
place.<br />
1 2<br />
Fine fabric<br />
2. Now fold the fabric as illustrated.<br />
Under side<br />
Under side<br />
3. Place the fabric under the foot. Turn the hand wheel counter<br />
clockwise (toward you) by hand until the needle swings fully<br />
to the left. It should just pierce the fold of the fabric. If it does<br />
not, adjust the guide (B) on the Blind hem Foot (A) so that<br />
the needle just pierces the fabric fold and the guide just rests<br />
against the fold.<br />
NOTE: For a narrower or wider blind hem, first<br />
manually adjust the length and width controls to<br />
your desired length and width. Then adjust the<br />
guide on the foot.<br />
3<br />
A<br />
B<br />
Sew slowly, guiding the fabric carefully along the edge of<br />
the guide.<br />
4. When completed, the stitching is almost invisible on the<br />
right side of the fabric.<br />
NOTE: It takes practice to sew blind hem. Always<br />
<br />
4<br />
Top side<br />
MULTI-STITCH ZIGZAG<br />
07<br />
SETTINGS :Presser foot - All Purpose Foot<br />
This is a strong stitch because as its name implies, it makes<br />
three short stitches where the normal zig-zag makes only one.<br />
For this reason, it is recommended for overcasting most types<br />
of fabrics.<br />
It is also ideal for mending tears, applying patches and<br />
inserting elastic.<br />
23
STRETCH STITCHES<br />
SETTINGS :Presser foot - All Purpose Foot<br />
Stretch stitches are mainly for use on knit or stretchable<br />
fabrics, but can also be used on woven fabrics.<br />
STRAIGHT STRETCH STITCH<br />
Straight stretch stitch is far stronger than an ordinary straight<br />
stitch because it locks three times - forwards, backwards and<br />
forwards.<br />
It is particularly suitable for reinforcing the seams of<br />
sportswear in stretch and non-stretch fabrics, and for curved<br />
seams which take a lot of strain.<br />
Use this stitch also to top-stitch lapels, collars and cuffs to give<br />
<br />
OVEREDGE STITCH<br />
This stitch is especially used for making sportswear. It sews<br />
<br />
repairing raw or worn edges as well.<br />
09<br />
RIC-RAC STITCH<br />
18<br />
The ric-rac stitch is provides a bold topstitch for decorative<br />
borders. It is ideal for edging neck-bands, armholes, sleeves<br />
and hems.<br />
FEATHER STITCH<br />
10<br />
This stitch can be used for topstitching and for attaching lace<br />
and trims.<br />
It is also ideal for quilting applications and for edge-joining.<br />
BLANKET STITCH<br />
69 79<br />
This stitch is commonly used for machine appliqué, though it<br />
can be used decoratively as well.<br />
When used for applique, adjust the length or width of the stitch<br />
according to the desired look of the project.<br />
24
HONEYCOMB STITCH<br />
1. Make several rows of gathers across the fabric that you<br />
wish to smock.<br />
2. With a narrow strip of fabric directly under the line of<br />
gathering, stitch over the gathers. The design will be a<br />
series of small diamonds.<br />
70<br />
SLANT OVEREDGE STITCH<br />
This stitch seams and overcasts in one operation to produce<br />
a narrow, supple seam, particularly suited to swimwear,<br />
sportswear, T-shirts, babywear in stretch nylon, stretch<br />
towelling, jersey and cotton jersey.<br />
75<br />
TURKISH STITCH<br />
The turkish stitch has three main uses. It is perfect for<br />
<br />
overcasting and for seaming and overcasting in one operation<br />
on slightly stretch fabrics and non-stretch ones such as linen,<br />
tweed, and medium to heavy-weight cotton.<br />
SLANT PIN STITCH<br />
Use this stitch for decorative embellishment. It can also be<br />
used for seams on stretch fabrics. Sew near the raw edge of<br />
the fabric and trim close to the outside of the stitching.<br />
76<br />
85<br />
THORN STITCH<br />
25<br />
It is a versatile stitch used for joining fabric pieces and as a<br />
decorative touch.<br />
25
REINFORCED OVEREDGE STITCH<br />
80 81<br />
<br />
They can also be used for smocking as well as for seam<br />
<br />
WIZARD STITCH<br />
15<br />
The Wizard stitch, as well as being a decorative stitch, is ideal<br />
for patching stretch fabrics such as jersey and knitwear.<br />
CROSSED STITCH<br />
74<br />
<br />
PIN STITCH<br />
68 78<br />
The Pin stitch is a traditional stitch pattern used for picot like<br />
edges and for appliqué work.<br />
ENTREDEUX STITCH<br />
Useful for decorative stitching on borders and for use in<br />
heirloom sewing. The Entredeux stitch is most often sewn with<br />
a Wing Needle (SINGER Style 2040) to create holes in the<br />
stitch pattern.<br />
71<br />
26
LADDER STITCH<br />
72<br />
The Ladder stitch is primarily used for drawn thread<br />
hemstitching. It can also be used for sewing over thin tape in<br />
an opposite or same color. Place the stitch in the center and a<br />
special effect will be obtained for decoration.<br />
Another use for the ladder stitch is couching over narrow<br />
ribbon, yarn or elastic.<br />
For drawn thread work, choose a medium to heavy weight<br />
linen-type fabric. After sewing, draw the thread out from within<br />
the ladder for an open, airy appearance.<br />
NOTE: Be sure to sew accurately along the grain line, if you<br />
wish to draw out threads.<br />
CRISS-CROSS STITCH<br />
Used to sew and finish stretch fabrics or for decoration<br />
especially of borders.<br />
73<br />
82<br />
FISHBONE STITCH<br />
Use to create decorative borders and for embroidery.<br />
77<br />
SEWING ON A BUTTON<br />
90<br />
SETTINGS :Presser foot - Button Sewing Foot<br />
:Feed dog control -<br />
Position your fabric and button under the presser foot. Lower<br />
presser foot. Turn the hand wheel counter clockwise (toward<br />
you) to make sure the needle clears both the left and right<br />
openings of the button. Adjust width if required. Sew 10<br />
stitches across.<br />
If a shank is required, place a darning needle on top of the<br />
button and sew over top of it.<br />
Helpful Hint: To secure thread, pull both threads to<br />
the backside of the fabric and tie together.<br />
27
BUTTONHOLES<br />
USING BUTTONHOLE FOOT<br />
1. Insert a button in between tab A and tab B.<br />
2. Buttonholes can be sewn to match the size of the button.<br />
Tab A<br />
Tab B<br />
It is helpful to remove the extension table when sewing a<br />
buttonhole, to keep the foot from vibrating when moving<br />
across the table.<br />
PROCEDURE<br />
* Use an interfacing in the area of the garment where<br />
buttonholes are placed. Stabilizer or regular interfacing can<br />
be used.<br />
* Make a practice buttonhole on a scrap of the fabric with the<br />
selected button.<br />
1. Select one buttonhole pattern.<br />
94 95 96 97 98 99<br />
2. Replace the presser foot with the buttonhole foot. (Refer to<br />
“Changing presser foot” on page 11.)<br />
3. Insert the button into the buttonhole foot. (Refer to “Using<br />
buttonhole foot” above.)<br />
(C)<br />
4. Set the buttonhole lever (C) so that it drops down vertically<br />
between the stoppers (A) and (B).<br />
(A)<br />
(B)<br />
Buttonhole foot<br />
(C)<br />
(C)<br />
(C)<br />
28
5. Carefully mark the position of buttonhole on your garment.<br />
6. Place the fabric under the foot. Pull out the bobbin thread<br />
underneath the fabric to a length of about 4 inches to the rear.<br />
7. Align the buttonhole mark on the fabric with the mark on<br />
the buttonhole foot, and then lower the buttonhole foot.<br />
Fabric marking<br />
Mark<br />
8. While holding the top thread, start the machine.<br />
* Sewing will be completed automatically in the following order.<br />
1 2 3 4 5 6 7 8<br />
1 2 3 4 5 6 7<br />
Buttonhole foot alignment position<br />
Fabric marking<br />
29
up the fabric in the center of the buttonhole.<br />
Be careful not to cut any of the bartack threads.<br />
CORDED BUTTONHOLES<br />
<br />
spur and pull both ends of the cord forward under the foot and<br />
tie off the cord as shown in the illustration.<br />
Sew buttonhole so that zigzag stitches cover the cord.<br />
When completed, release the cord from the foot. Using a<br />
hand sewing needle, bring the cords to the wrong side of the<br />
fabric, then tie to secure. Trim the excess cords.<br />
Spur<br />
BUTTONHOLING WITH HARD-TO-SEW<br />
FABRICS<br />
When buttonholing with hard-to-sew fabrics or along the edge<br />
of multi-layered garments, attach the underplate (A) onto the<br />
buttonhole foot as illustrated to make perfect buttonholes.<br />
Place the fabric between the underplate and buttonhole foot.<br />
(A)<br />
30
MANUAL BUTTONHOLE<br />
* Use the automatic buttonhole stitches (#94-99) and automatic<br />
buttonhole foot for buttons up to 1 3/4 ”(45mm) in length.<br />
For larger buttons use the satin foot and the manual<br />
buttonhole stitches (#91-93).<br />
* Use the satin foot to create larger buttonholes.<br />
1<br />
1. Carefully mark the buttonhole length on your garment.<br />
Place the fabric with the buttonhole marking under the<br />
satin foot so that the foot is positioned at the top of the<br />
buttonhole mark.<br />
<br />
buttonhole.<br />
2<br />
91<br />
3. Sew second bartack and stitch backward until needle<br />
reaches beginning of buttonhole.<br />
3<br />
92<br />
4. Stitch forward to the end of buttonhole mark to<br />
complete buttonhole.<br />
4<br />
93<br />
5. Stop sewing when you have completed the buttonhole<br />
and press Tacking Stitch button to tie off.<br />
5<br />
31
DECORATIVE SEWING<br />
Presser foot: Satin Foot.<br />
Different types of decorative stitches are available.<br />
The following are examples of how to use and sew these stitches.<br />
You can use other stitches in the same way.<br />
<br />
to check the stitch pattern to be used.<br />
<br />
wound onto the bobbin to make sure that the thread will not<br />
run out during sewing.<br />
<br />
<br />
particular fabric that you are working with. For example,<br />
place a piece of tear-away stabilizer underneath the<br />
stitching area when working with a cotton fabric. (See page<br />
38 for more help with stabilizer selection.)<br />
SUGGESTIONS FOR DECORATIVE STITCHING<br />
Scallop Stitch (45)<br />
This is an ideal decorative stitch for finishing the edges of<br />
fabrics, such as those used for table linens or children’s<br />
<br />
the stitch with a stabilizer underneath the fabric. Trim the edge<br />
of the fabric along the edge of the stitch, being careful not to<br />
cut into the stitching.<br />
Pyramid (46)<br />
This stitch can be used for embellishing bias binding or<br />
creating decorative borders on garments and home dec<br />
projects.<br />
Arrowhead (47)<br />
In addition to using this pattern as a decorative stitch, it can<br />
also be used as a triangular backtack stitch for reinforcing<br />
places which can easily unravel. This is particularly useful for<br />
sewing both edges of pockets..<br />
Checker Board Zigzag (48) and Checker Double (51)<br />
Use a bias tape and fold back the edge. Sew the checker<br />
stitch on top of this.<br />
Diamond (50)<br />
Fold over the edge of the fabric and use this stitch to tidy up<br />
the edge.<br />
Scallop stitches and diamond stitches can be combined to<br />
create other attractive patterns.<br />
32
MORE SEWING EXAMPLES<br />
See the sample to the right for more examples on how to use<br />
the decorative stitches.<br />
29<br />
30<br />
13<br />
20<br />
17<br />
29<br />
26<br />
19<br />
23<br />
33
3. PREPARATION FOR EMBROIDERY SEWING<br />
BEFORE ATTACHING EMBROIDERY UNIT<br />
ATTACHING EMBROIDERY FOOT<br />
Foot holder<br />
CAUTION<br />
Always be sure to turn off power to machine<br />
before changing presser foot.<br />
Screw<br />
* Raise presser foot lifter.<br />
* Turn the hand wheel counter clockwise (toward you) until<br />
the needle is in its highest position.<br />
1. Remove presser foot screw, presser foot and foot holder.<br />
Presser foot<br />
2. Attach the embroidery presser foot behind presser bar so<br />
that the drive lever is above the needle clamp. Secure it by<br />
tightening presser foot screw.<br />
3. Turn hand wheel toward you to move needle up and down,<br />
and check that the embroidery presser foot moves up and<br />
down together with the needle.<br />
Presser bar<br />
Drive lever<br />
Needle clamp<br />
CAUTION<br />
Be careful not to touch the needle when<br />
replacing presser foot.<br />
Embroidery presser foot<br />
INSERTING THE BOBBIN<br />
Refer to page 6.<br />
* A large amount of thread is required for embroidering, so<br />
be sure to use a full bobbin.<br />
NOTE: During the embroidery process, bobbin thread creates<br />
lint which gradually accumulates in the bobbin case.<br />
It is recommended that the bobbin case is cleaned<br />
periodically to keep the machine running its best.<br />
See page 56 for information on cleaning the bobbin<br />
case.<br />
34
THREADING THE TOP THREAD<br />
Refer to page 7 - 9.<br />
NOTE: It is recommended to thread the upper thread before<br />
transmitting a design to the machine for embroidery.<br />
EXTENSION TABLE<br />
1. Turn off power to machine.<br />
2. Slide the extension table to left to remove it from machine.<br />
(Refer to page 54.)<br />
35
ATTACHING EMBROIDERY UNIT<br />
CAUTION<br />
Always be sure to turn off power to machine<br />
before installing embroidery unit.<br />
1<br />
Connector cap<br />
1. Turn off the machine.<br />
Turn connector cap to the right to open.<br />
<br />
on the machine and embroidery unit. Slide the embroidery<br />
unit as far as it will go until it clicks into place.<br />
2<br />
Carriage<br />
Connector<br />
3. To make sure that the embroidery unit is fully engaged,<br />
hold the handle of the embroidery unit and pull it towards<br />
the left direction, checking that the embroidery unit does<br />
not detach.<br />
Note:<br />
If embroidery unit is not securely installed, the finished<br />
embroidery may be distorted. Make sure that the<br />
embroidery unit is pushed in as far as it will go.<br />
3<br />
CAUTION<br />
Don’t push the carriage or put strong pressure<br />
on the embroidery unit while attaching or during<br />
the embroidering process. Doing so may cause<br />
damage to the embroidery unit.<br />
Handle<br />
REMOVING EMBROIDERY UNIT<br />
* Turn off the machine.<br />
* Raise the presser foot.<br />
* Remove embroidery hoop from machine.<br />
(Refer to page 40.)<br />
1. Holding handle of embroidery unit, carefully slide toward<br />
the left while pressing release lever.<br />
Note:<br />
Do not pull carriage when removing embroidery unit.<br />
1<br />
2<br />
Release lever<br />
Handle<br />
2. Turn the connector cap to the left to close for general<br />
sewing.<br />
Release lever<br />
36
SECURING FABRIC IN EMBROIDERY<br />
HOOP<br />
NOTE: For information about using appropriate stabilizer, see<br />
page 38.<br />
1<br />
1. Loosen hoop adjusting screw and place fabric between<br />
inner and outer frame. Pull fabric edges to remove slack.<br />
NOTE: Apply stabilizer when appropriate, see page 38.<br />
<br />
side (large hoop only).<br />
<br />
2<br />
2. Slightly tighten the hoop adjusting screw and pull fabric<br />
edges to remove slack.<br />
Fit the two frames together by pressing down on the inner<br />
frame.<br />
Hoop adjusting screw<br />
a. Tighten hoop adjusting screw.<br />
b. Once fabric is properly positioned in embroidery frame<br />
with no slack, securely tighten the screw.<br />
c. Tighten the fabric in the frames so that it makes a sound<br />
like a drum when the tightened surface is tapped with a<br />
<br />
37
USING FABRIC AND STABILIZER<br />
FABRIC<br />
Use stabilizer to produce best results when embroidering on<br />
the following fabrics.<br />
Fabrics which lack firmness or stability for embroidery,<br />
such as cotton, polyester, rayon, etc.<br />
Lightweight fabrics such as this, may lack firmness or<br />
stability and when embroidered may pull in, which may<br />
result in problems such as shrinkage and puckering of the<br />
fabric around the embroidery area.<br />
Stretchy fabrics<br />
The fabric may stretch when tightening the hoop, the result<br />
may be uneven embroidery. Furthermore, when the fabric<br />
is removed from the hoop after embroidery is complete, the<br />
fabric may shrink and cause the embroidered pattern to<br />
become distorted.<br />
Embroidery can be applied to many types of fabrics, but it<br />
may be necessary to prepare the following fabrics in a special<br />
manner.<br />
* For fabrics with a loopy or napped surface, such as towels,<br />
use a water-soluble stabilizer on both the topside and<br />
underside of the fabric. Depending on the project, a tearaway<br />
or soft mesh cut-away stabilizer may be used on the<br />
underside instead.<br />
* Denim and linen are considered unstable because of the<br />
loose weave. Use a medium a medium weight cut-away<br />
stabilizer on the backside.<br />
* T-shirt type fabric usually requires at least one, sometimes<br />
two layers of soft mesh-type cut-away stabilizer on the<br />
backside.<br />
* For medium to heavyweight stable woven fabric, use a<br />
medium to heavy weight tear-away type stabilizer.<br />
* For soft or sheer fabrics, use a rinse-away type stabilizer.<br />
Stabilizer (Adhesive surface facing down)<br />
Hoop position<br />
STABILIZER<br />
Stabilizer is a non-woven substance. There is a variety of<br />
stabilizers available: tear-away, cut-away, and wash-away.<br />
There are also specialty stabilizers such as those that are<br />
removed by applying heat, adhesive stabilizers, etc. Which<br />
stabilizer you choose will depend on the nature of the fabric on<br />
which you are embroidering. Always follow the manufacturer’s<br />
instructions on how to use and apply the stabilizer correctly.<br />
The stabilizer should be larger in size than the hoop with<br />
which it is being used. Follow stabilizer manufacturer’s<br />
recommendations for use. Stabilizers can usually be obtained<br />
from a fabric store.<br />
Embroidering surface (Top side)<br />
Material (Under side)<br />
38
When embroidering onto fabric which is smaller than<br />
the hoop size, or when embroidering close to the<br />
edge of the fabric, attach the stabilizer as illustrated.<br />
Embroidery surface at fabric edge<br />
WHEN EMBROIDERING ALONG THE EDGE OF<br />
FABRIC SUCH AS A HANDKERCHIEF<br />
Stabilizer<br />
(Adhesive surface facing)<br />
Hoop inner frame<br />
Stabilizer<br />
WHEN EMBROIDERING A NARROW PIECE OF<br />
FABRIC SUCH AS RIBBON TAPE<br />
Ribbon tape<br />
Stabilizer<br />
Hoop inner frame<br />
39
PREPARING THE MACHINE BEFORE<br />
INSTALLING THE HOOP<br />
1. Turn hand wheel counter clockwise (toward you) until the<br />
needle comes to its highest position.<br />
1<br />
ATTACHING AND REMOVING<br />
EMBROIDERY HOOP<br />
1. Raise presser foot and needle, and push up lever (A) of<br />
<br />
under it.<br />
To remove, pull the hoop forward to slide it out from<br />
underneath the embroidery foot.<br />
1<br />
(A)<br />
2. Slide the hoop onto the embroidery unit from front to back<br />
until it clicks into place.<br />
To remove, press the hoop release lever and slide the hoop<br />
towards you.<br />
NOTE: Before attaching the small hoop, turn on the power<br />
switch to move the carriage to the ready position.<br />
2<br />
Carriage<br />
Hoop mounting plate<br />
Hoop release lever<br />
40
INSTALLATION OF SOFTWARE<br />
<br />
install the contents of the CD to your PC. This procedure is<br />
refered to as <br />
instructions below in order to successfully install the<br />
software for your FUTURA sewing & embroidery machine<br />
on your personal computer.<br />
The software for your FUTURA sewing & embroidery machine<br />
comes on a CD-ROM disc.<br />
In most personal computers the default drive setting for a<br />
CD-ROM drive is “D:”<br />
Please insert the installation software for your FUTURA<br />
sewing & embroidery machine into the CD-ROM disc receiver<br />
in your PC.<br />
CD-ROM<br />
After some seconds, the Installation Procedure of the software<br />
will start automatically.<br />
If after a short while, the software doesn’t automatically<br />
start the installation process, you may start the installation<br />
procedure manually by going to the “Start” option of Windows,<br />
select “Run”, type “D:\FuturaStart.exe” and click on OK.<br />
After some seconds the step-by-step installation of the<br />
software begins with the Welcome window.<br />
Click on “Next” to move on to the next screen.<br />
After reading and agreeing with terms given in the<br />
and again click<br />
on Next, and then select the directory where the software<br />
should be installed. It is highly recommended to use the<br />
selected default directory.<br />
Simply click on to continue.<br />
41
Now you are prompted to select the Program Folder where<br />
the shortcut for the software will be stored.<br />
Simply click on to continue.<br />
<br />
during the installation set-up.<br />
Pressing the "Next" button will finally start the copy and<br />
to the given directory on the<br />
hard disk.<br />
A progress bar will indicate the stage at which the installation<br />
100%.<br />
<br />
will automatically close after finish. Please wait for a short<br />
while until this happens.<br />
If the installation utility identifies a lack of available space<br />
on your hard disk, an error message will prompt you to free<br />
some hard disk space before proceeding with the installation.<br />
You can always abort the installation procedure by clicking on<br />
<br />
CORRECT START-UP PROCEDURE<br />
WHEN EMBROIDERING<br />
The following steps must be followed for proper start-up<br />
protocol. If these steps are not followed precisely, you will<br />
get a “Transmission Pending” error message.<br />
Boot up your computer, but do not open the embroidery<br />
software. Next attach the embroidery unit to your sewing<br />
machine and connect the USB cable between your<br />
computer and sewing machine.<br />
1. Turn on your sewing machine. Make sure the needle has<br />
been moved to the highest position by turning the hand<br />
wheel towards you.<br />
3. You are now ready to select and transmit a design to<br />
your machine.<br />
2. Double click on the FUTURA icon shortcut your desktop<br />
to open up the embroidery software.<br />
42
FUNCTION BUTTONS WHEN<br />
EMBROIDERING<br />
OPERATION SWITCHES<br />
THREAD CUTTER<br />
Press Thread Cutter to automatically cut the top and bobbin<br />
threads whenever the machine is stopped.<br />
If Thread Cutting Mode is active (see page 14), the machine<br />
will automatically cut the top and bobbin thread every time the<br />
machine stops at the end of a color block.<br />
Use auto thread cut only when changing thread colors.<br />
START/STOP BUTTON<br />
When start/stop button is pushed, machines starts slowly. To<br />
stop the machine, push the button again and the machine will<br />
stop sewing and the needle automatically stops at its highest<br />
position.<br />
FORWARD STITCH BUTTON<br />
After the embroidery design has been transferred to the<br />
machine, the embroidery can be advanced one stitch at a<br />
time. Note: The embroidery hoop will move as it is advancing<br />
through the design.<br />
To advance continuously, press and hold this button.<br />
LED indicator<br />
Thread Cutter<br />
Forward stitch button<br />
Reverse stitch button<br />
Start/stop button<br />
(For embroidery only)<br />
REVERSE STITCH BUTTON<br />
To back up through a design that is already in progress,<br />
press the Reverse Stitch button. Pressing the button once will<br />
reverse one stitch at a time. To reverse continuously, press<br />
and hold this button. Design may be reversed all the way back<br />
<br />
LED INDICATOR<br />
Green light indicates machine is ready to start.<br />
Red light indicates machine is operating.<br />
Flashing red light indicates a problem or an error.<br />
* Flashing for 2 - 3 seconds shows that an incorrect<br />
operation was made.<br />
* Continuous flashing indicates that the machine<br />
malfunctioned or is malfunctioning.<br />
THREAD TENSION CONTROL<br />
Thread tension is automatically set at “E” for embroidery,<br />
when the embroidery unit is attached.<br />
You may wish to re-adjust thread tension according to the type<br />
of fabric and thread being used.<br />
NOTE: When sewing designs created by the software for<br />
Photo Stitch (optional) it is recommended to decrease<br />
the thread tension toward “0” and activate the Speed<br />
Limiter, by checking the box in Machine navigator, before<br />
sending the design to the machine. This ensures the best<br />
performance of the machine.<br />
Decrease tension<br />
Increase tension<br />
43
TROUBLESHOOTING<br />
SKIPPED STITCHES AND THREAD<br />
BREAKAGES OCCUR<br />
EMBROIDERY PATTERN IS MIS-ALIGNED<br />
MACHINE SIDE<br />
HOOP SIDE<br />
Needle tip is broken.<br />
Thread path is<br />
incorrect.<br />
Embroidering is<br />
continuing when<br />
thread is tangled.<br />
No stabilizer attached<br />
when using light or<br />
stretch fabric.<br />
Replace needle.<br />
Needle is bent.<br />
Refer to page 7 - 9.<br />
Thread is tangled<br />
around spool holder.<br />
If the thread remains<br />
tangled, the fabric<br />
may pucker and<br />
<br />
embroidery. Stop<br />
embroidering, remove<br />
the hoop and untangle<br />
the thread.<br />
Attach stabilizer to<br />
the fabric.<br />
Refer to page 38 -<br />
39.<br />
Replace needle.<br />
Refer to page 4.<br />
Upper thread tension<br />
is too tight.<br />
Fabric is not tight<br />
enough in the hoop.<br />
Needle is not installed<br />
correctly.<br />
Install the needle correctly.<br />
Refer to page 10.<br />
Thread or fabric bits<br />
have collected under<br />
the needle plate.<br />
This can cause fabric<br />
to pucker and result<br />
in uneven feeding,<br />
reduce the thread<br />
tension.<br />
Refer to page 11.<br />
Tighten the fabric in<br />
the frames so that<br />
when the fabric is<br />
<br />
it makes a sound like<br />
a drum.<br />
Refer to page 37.<br />
Upper thread tension is<br />
too tight.<br />
Adjust the thread tension.<br />
Refer to page 11.<br />
Remove the thread<br />
or fabric bits. Refer to<br />
page 56.<br />
A thin needle is being<br />
used for heavy fabric.<br />
Replace with a thicker<br />
needle. Generally, at<br />
least a #14 needle<br />
should be used.<br />
Needle tip is broken<br />
or needle is too thick.<br />
Select a correct<br />
needle.<br />
Refer to page 10.<br />
Thread is tangled<br />
somewhere along the<br />
thread path.<br />
Embroidery hoop<br />
is not correctly<br />
attached.<br />
Attach the hoop<br />
securely to the hoop<br />
bracket with the hoop<br />
mounting screws.<br />
Refer to page 40.<br />
To check the elasticity<br />
of the thread, hold a<br />
length of thread of about<br />
6 inches at both ends<br />
and pull it, check the<br />
length at which it breaks.<br />
If using a highly-elastic<br />
thread, reduce the upper<br />
thread tension.<br />
If the thread is tangled<br />
on the spool pin or<br />
somewhere along the<br />
thread path, this will cause<br />
the thread to hang up and<br />
not advance through the<br />
machine. This will increase<br />
the upper thread tension<br />
and cause the fabric to<br />
pucker. Check the thread.<br />
Refer to page 7 - 9.<br />
Hoop is obstructed<br />
against free motion.<br />
Check around the<br />
hoop and remove<br />
things which cause<br />
obstruction.<br />
44
HELPFUL INFORMATION FOR<br />
EMBROIDERING WITH FUTURA<br />
1. If stitches are missing<br />
Embroidering direction<br />
Embroidered section<br />
If the embroidery machine detects that the thread has<br />
broken, it may continue to embroider up to about eight<br />
stitches without any thread (blank stitches) before it<br />
automatically stops.<br />
In such cases, use the following procedure to step back<br />
through the embroidering data to the point for continuing.<br />
1. Press the reverse switch (stitch return) to step back<br />
through the embroidery data. The hoop will move<br />
back one stitch at a time. Step back through the data<br />
until the blank area has been completely passed<br />
over.<br />
1<br />
3<br />
5<br />
7<br />
2<br />
4<br />
6<br />
8<br />
automatically stop<br />
Blank stitches resulting from thread breakage<br />
2. Restart the embroidery machine and continue<br />
embroidering.<br />
Reverse stitch button<br />
2. Computer screen says thread is broken,<br />
machine lights are flashing lights and<br />
making a beeping sound, but thread is<br />
not broken.<br />
Upper thread is not in the thread tension. Rethread upper<br />
thread, (see 7 “Threading the Top Thread”.) Placing the<br />
small net that is supplied with the accessories over the<br />
spool of thread may ensure that the thread is unwinding<br />
properly.<br />
3. After resizing a design, the density of<br />
the stitching is either too tight or not tight<br />
enough.<br />
The software will recalculate the stitch on an<br />
imported design when sizing, but only when using<br />
DESIGN>CHANGE SIZE option. It does have a limitation<br />
of re-sizing up to 149% and down sizing to 51% and<br />
while still being able to re-calculate the stitches correctly.<br />
45
4. Will the density of a design be adjusted<br />
when resizing design ?<br />
When sizing designs in the software you can resize<br />
designs from the Library in the hoop on screen and keep<br />
the design integrity. All other formats should be changed<br />
in the DESIGN/CHANGE SIZE menu in order to change<br />
the stitch count.<br />
5. Resizing individual letters<br />
You can resize individual letters after you have brought<br />
them into the hoop and exited the text window. Left<br />
click, drag a box around the desired letter, and size<br />
accordingly. Because the letters are built-in, the letter will<br />
keep the appropriate density.<br />
6. Deleting part of a design<br />
Left click and drag a box around the desired area. To<br />
select additional areas, hold down the CONTROL key<br />
and left click on next area. Once selected, touch the<br />
DELETE key on your keyboard.<br />
7. Is there a way to increase the density of<br />
the lettering?<br />
The density is set to a standard value of 4/10th of mm,<br />
which is usually the standard density used for Lettering.<br />
The value is not editable.<br />
8. Why does a design sometimes split up<br />
into very small segments? One color<br />
block can end up ‘divided’ into several<br />
blocks.<br />
The machine has a certain limit of stitches that it can<br />
accept. So what most probably happens is that these are<br />
big blocks that are cut after exceeding the limit, leaving a<br />
certain number of stitches (could possibly be only a few)<br />
as a separate block.<br />
46
9. TOP THREAD DOES NOT STAY IN<br />
THE NEEDLE EYE<br />
If embroidering several color blocks in the same color<br />
the machine might cut the top thread too short. If that<br />
happens, deactivate Thread Cutting Mode (see page 28-<br />
29) to make sure the top thread stays in the needle eye.<br />
10. AutoPunch<br />
TM <br />
Art vs. Bitmapped Art<br />
There are many different types of images or formats of<br />
<br />
using vector type images, such as .wmf. The software<br />
must be able to recognize a color (block) of information.<br />
A “. bmp” can be made of millions of colors making it<br />
impractical for use.<br />
Clipart falls into two basic categories, Vector Art and<br />
Bitmapped Art.<br />
The software is capable of vectorizing the “.bmp” image,<br />
but it may lose detail, depending on the image. It is<br />
essential to understand about the type of artwork or<br />
image used with AutoPunch.<br />
Vector Art / Vector Art (mode vectoriel) / Vector Art<br />
Vector Art is a clean “graphic” blocks of color – by simple<br />
definition. Some common formats - .wmf and .emf are<br />
two formats that the Auto Punch software can read.<br />
Bitmapped Art is the type of “format” that is typically<br />
saved when scanning. The computer sees millions of<br />
colors to create the “realistic” type of image. Even a<br />
3-color design that we see as simple has billions of<br />
pixels. Common formats recognized by the software:<br />
.bmp, .jpg, .tif, .pcx, .pcd, .tga, and .psd.<br />
Tips for AutoPunchTM<br />
* Scan art with a “high resolution” (200-300 DPI).<br />
* Scan at 3-6 times larger than the intended output.<br />
Lines that are too narrow to properly sew out are<br />
eliminated by the software when it cleans up the artwork.<br />
Bitmapped Art / Bitmapped Art (mode point) / Bitmapped Art<br />
47
Multi-Hoop<br />
Multi-Hooping is a special feature in the software that will allow<br />
embroidery data which is larger than a single embroidery hoop<br />
to be sent to the machine to stitch out, while making it easy to<br />
rehoop the fabric so that each part of the design lines up exactly.<br />
This embroidery data may be a single design that is too large for<br />
the hoop or a combination of smaller embroidery elements and/<br />
or lettering, that when combined together make a much larger<br />
<br />
Fig. 1<br />
The Multi-Hoop feature splits the design elements in up to four<br />
different parts and then sews them precisely, matching one<br />
section to the other. When re-hooping the fabric, the Multi-Hoop<br />
feature will compensate for misalignment if the fabric has been<br />
placed slightly askew in the hoop.<br />
When stitching an embroidery design that is too large for the<br />
<br />
Multi-Hoop utilizes a system where three alignment points (A, B,<br />
and C) are input on cross lines that have been marked onto the<br />
fabric. When these points are input, they inform the machine<br />
exactly as to how the fabric is positioned into the hoop and will<br />
therefore sew the design to the alignment of the cross lines. If<br />
the fabric is slightly askew, this system will compensate for it and<br />
sew accordingly. Please note: the Multi-Hoop feature will only<br />
compensate for a slight misalignment in the vertical cross line.<br />
Please try to hoop the fabric as accurately as possible.<br />
Fig. 2<br />
Fabric<br />
Cross line<br />
Preparing the Fabric<br />
Please note: The fabric must be large enough to<br />
accommodate the amount of hoops that will be required to<br />
stitch out the design.<br />
1. Using a very<br />
vertically down the center of the fabric.<br />
2. Mark a line horizontally across the center of the fabric.<br />
The vertical and horizontal lines must be at precise right<br />
angles to each other. These lines will now be referred to<br />
as the”cross lines”. These cross lines will be used to set<br />
the fabric into the hoop according to the divided design<br />
layout.<br />
Intersection of cross<br />
lines must be at perfect<br />
90 degree angles.<br />
Cross line<br />
Please Note: a thin line is very important to the<br />
<br />
In the Software<br />
1. Select Tools from the horizontal tool bar, select Hoop<br />
and then select Multiple.<br />
2. A single hoop appears on the screen marked with #1 in<br />
the upper left corner.<br />
Please note: Up to three<br />
additional hoops will<br />
appear as the design<br />
data requires.<br />
48
3. Select a large design or individual design elements<br />
and arrange them in the hoop area on the screen. The<br />
example shown uses lettering and designs from the<br />
Design Library that is built into the software. (Additional<br />
<br />
<br />
4. The design data is sent to the machine for sewing one<br />
section at a time. Click on the “Transmit to Machine” tool<br />
on the tool bar.<br />
5. The grey area (#1 Hoop) is the first of the embroidery<br />
data that is sent to the machine for sewing.<br />
Set fabric and stabilizer into the hoop, aligning cross lines<br />
of data 1 within the guide line markings of the hoop. (See<br />
<br />
There are two sets of markings on the inner hoop.<br />
On each side of the hoop there is a Center Hoop line<br />
which indicates the exact center of the hoop.<br />
In each corner of the hoop there are markings which<br />
together define the maximum sewing area for Multiple<br />
Hooping. These marks are referred to as Guide lines.<br />
Guide lines are to be set on the horizontal and vertical<br />
cross lines on the fabric as shown.<br />
Fig. 3<br />
Guide line<br />
Center point line<br />
Guide line<br />
Fig. 4<br />
Data 1<br />
A<br />
Data 2<br />
C<br />
Guide line<br />
B<br />
Guide line<br />
Data 4<br />
Data 3<br />
49
6. The next screen prompts you to input the first of three<br />
alignment points, A, B, and C. These alignment points<br />
will inform the machine exactly where the crosslines are<br />
positioned in the hoop. It is extremely important that the<br />
points are accurately input on the cross lines.<br />
The machine display shows “MH” as illustrated, and the<br />
cross lines for data 1 with input point A blinking.<br />
A<br />
7. Use the shift buttons on the machine to move the hoop,<br />
until the needle comes to point A on the cross line, and<br />
push the OK button.<br />
Note: If a mistake is made when entering the points, press the<br />
Clear button, to clear the point(s).<br />
Left Right Up Down<br />
OK<br />
Clear<br />
50
8. Once point A is entered, the PC screen and machine display<br />
will prompt you to enter in points B and C. Follow the same<br />
procedures for inputting points B and C.<br />
In a case where the three points were input wrong,<br />
and they do not form an exact right angle, the software<br />
will show the following error message and give you an<br />
opportunity to enter the alignment points again.<br />
B<br />
C<br />
9. When all three points are input, click on Send design in the<br />
Machine Navigator box to send design portion of data 1 to<br />
the machine. Embroider the design.<br />
10.After all colors of the design from hoop 1 have been<br />
embroidered, click on Exit in the Machine Navigator box<br />
and the screen will prompt you to enter the information<br />
from the data 2 area. Use the same procedure to re-hoop<br />
the fabric, send the data 2 design to the machine and input<br />
the A, B and C points.<br />
The machine display will show the “cross line” positions<br />
in the hoop for data 2 and the input points A, B and C<br />
blinking. Embroider the data 2 design.<br />
11. Follow the same procedure for data 3 and data 4.<br />
A<br />
B<br />
C<br />
51
CONTROL PANEL WHEN<br />
EMBROIDERING<br />
When embroidering, the dials on the control panel are used to<br />
step through the design color by color and within a color block.<br />
After transferring desired design(s) to your FUTURA sewing<br />
and embroidery machine, the display shows number of current<br />
color block and total number of color blocks as illustrated.<br />
The three horizontal lines indicate the beginning (bottom line),<br />
middle and end (top line) of the current color block. As the<br />
block is stitched out, a progress bar on the right side of the<br />
display will show the approximate current position in the color<br />
block.<br />
Go to stitch position<br />
Step between<br />
color blocks<br />
OK<br />
STEP BETWEEN COLOR BLOCKS<br />
To step between the transferred color blocks, press the center<br />
of the lower dial. “BL” is shown on the display. The arrows<br />
indicate which direction you can step between the color<br />
blocks.<br />
Turn the lower dial. The current color block number changes.<br />
When having reached desired color block, press OK. The<br />
<br />
block.<br />
GO TO APPROXIMATE STITCH POSITION<br />
WITHIN A COLOR BLOCK<br />
To go to a certain part of current color block, press the center<br />
of the upper dial. The horizontal line on the display indicate<br />
the approximate current position in the color block.<br />
Turn the upper dial clockwise to step forward, and counterclockwise<br />
to step backward in the design. Each step equals<br />
one tenth of the color block.<br />
Example: If a color block contains 150 stitches, each step<br />
corresponds to 15 stitches.<br />
When having reached desired position in the color block,<br />
press OK. The hoop moves to that position. Fine tune by using<br />
the Needle Stop Up/Down and Reverse buttons as described<br />
on page 43.<br />
52
HELPFUL MESSAGES WHEN EMBROIDERING<br />
Display on control panel<br />
Situation<br />
Embroidery unit is mounted, but USB cable is not connected.<br />
or<br />
USB cable is disconnected after transferring embroidery data. In this case, the image is<br />
displayed for a few seconds, and then changed back to normal display. The transferred<br />
embroidery data is still available in the machine.<br />
USB cable is connected, but embroidery data is not transferred yet.<br />
All LED lamps are turned off.<br />
Embroidery data is being transferred.<br />
All LED lamps are turned off.<br />
A<br />
B<br />
Embroidery data has been completely transferred.<br />
The number of the current color block (A) (number one directly after transferring) and total<br />
number of transferred color blocks (B) are shown on the display.<br />
A<br />
B<br />
Embroidery in progress.<br />
The number of the currently stitched out color block (A) and total number of transferred color<br />
blocks (B) are shown on the display. The status bar indicates how far in the color block the<br />
machine has embroidered.<br />
When last block or one unit of endless hoop is completed.<br />
All LED lamps are turned off.<br />
53
4. OTHER THINGS YOU SHOULD KNOW<br />
PRESSER FOOT LIFTER<br />
There are three positions for your presser foot.<br />
1. Lower the presser foot to sew.<br />
2. Raise the lifter to the middle position to insert or remove fabric.<br />
3. Lift it to its highest position to change the presser foot or to<br />
remove thick fabric.<br />
FEED DOG CONTROL<br />
The feed dogs control the movement of the fabric that is<br />
being sewn. They should be raised for all general sewing<br />
purposes and lowered for darning, freehand embroidery and<br />
monogramming so that you, not the feed dogs, are moving the<br />
fabric.<br />
You do not have to lower the feed dogs when attaching the<br />
embroidery unit, as they lower automatically.<br />
Feed dog control<br />
Down<br />
CONVERTING TO FREE-ARM SEWING<br />
<br />
arm model.<br />
With the extension table in position, it provides a large working<br />
<br />
<br />
and pull it off to the left as shown. To replace, slide the<br />
extension table back into place until it clicks.<br />
With the extension table removed the machine converts into a<br />
slim free-arm model for children’s clothes, cuffs, trouser legs,<br />
and other hard-to-reach places.<br />
54
PERFORMANCE CHECKLIST<br />
GENERAL PROBLEMS<br />
Machine does not sew.<br />
* Power switch is turned off.- Turn on the switch. (see page 4).<br />
* Buttonhole lever is not raised when sewing stitch patterns.<br />
– Raise buttonhole lever. (see page 28 - 29).<br />
* Buttonhole lever is not lowered when sewing buttonhole.<br />
– Lower buttonhole lever. (see page 28 - 29).<br />
Machine jams/knocks.<br />
* Thread is caught in hook. - Clean hook. (see page 40).<br />
* Needle is damaged. - Replace needle. (see page 10).<br />
Fabric does not move.<br />
* Presser foot is not lowered - Lower presser foot. (see page 54).<br />
* Stitch length is too short - Lengthen stitch length. (see page 12 - 13).<br />
* Feed dogs are lowered - Raise feed dogs. (see page 54).<br />
STITCHING PROBLEMS<br />
Machine skips stitches.<br />
* Needle is not all the way up into needle clamp. (see page 10).<br />
* Needle is bent or blunt. - Replace needle. (see page 10).<br />
* Machine is not threaded correctly. (see page 7 - 9).<br />
* Thread is caught in hook. - Clean hook. (see page 40).<br />
Stitches are irregular.<br />
* Needle size is not correct for thread and fabric. (see page 10).<br />
* Machine is not threaded correctly. - (see page 7 - 9).<br />
* Top thread tension is too loose. (see page 11).<br />
* Fabric is being pulled or pushed against machine feeding action. - Guide it gently.<br />
* Bobbin has not been wound evenly. - Rewind bobbin. (see page 5).<br />
Needle breaks.<br />
* Fabric is being pulled or pushed against machine feeding action. - Guide it gently.<br />
* Needle size is not correct for thread and fabric. (see page 10).<br />
* Needle is not all the way up into the needle clamp. (see page 10).<br />
THREAD PROBLEMS<br />
Needle thread breaks.<br />
* Machine is not threaded correctly. (see page 7 - 9).<br />
* Top thread tension is too tight. (see page 11).<br />
* Needle is bent. - Replace needle. (see page 10).<br />
* Needle size is not correct for thread and fabric. (see page 10).<br />
Bobbin thread breaks.<br />
* Bobbin case is not threaded correctly. (see page 6).<br />
* Lint accumulates in bobbin case or hook. - Remove lint (see page 40).<br />
Fabric puckers.<br />
* Top thread tension is too tight. - Adjust thread tension. (see page 11).<br />
* Stitch length is too long for sheer or soft fabric. - Shorten stitch length. (see page 12 - 13).<br />
55
CLEANING HOOK AREA AND FEED<br />
DOGS<br />
CAUTION<br />
Always disconnect the machine from power<br />
supply by removing the plug from the wall-outlet.<br />
1<br />
To ensure the best possible operation of your machine, it<br />
is necessary to keep the essential parts clean at all times.<br />
1. Raise the needle to its highest position.<br />
2<br />
(1)<br />
2. Remove two screws on the needle plate (1) and slide the<br />
needle plate toward you as illustrated for removal.<br />
3. Remove the bobbin case (2).<br />
3<br />
(2)<br />
4. Clean the feed dogs and hook area with the lint brush.<br />
Put one drop of sewing machine (optional) oil on the hook<br />
race as indicated by the arrows. (A, B)<br />
4<br />
NOTE: SINGER(page 57) Brand Sewing Machine Oil<br />
<br />
suited for sewing machine lubrication.<br />
(A)<br />
(B)<br />
5. Replace the bobbin case with the projection (3) positioned<br />
against the spring (4).<br />
5<br />
6. Make sure that the needle is at its highest position and put<br />
and slide the needle plate into position as illustrated.<br />
6<br />
(3) (4)<br />
Cleaning the sewing machine and footcontroller<br />
After using, keep sewing machine and foot control (page 2)<br />
clean. Use dry rags to remove dust from the sewing machine<br />
and foot control (page 2).<br />
NOTE: Use dry rags to avoid electrical shock.<br />
56
OILING INSIDE THE FACE COVER<br />
1. Remove two screws and face cover.<br />
1<br />
Screw<br />
2. Put one drop of sewing machine oil to the points indicated<br />
by arrows.<br />
Face cover<br />
Helpful Hints :<br />
For the machine used frequently : It should be oiled<br />
periodically.<br />
For the machine used after a long interval : It should be<br />
oiled before it is used.<br />
Screw<br />
CAUTION:<br />
Always remove the dust and lint before oiling.<br />
For best results always use SINGER Brand Sewing<br />
Machine Oil. Use of oil other than Sewing Machine Oil<br />
will cause damage to your machine.<br />
2<br />
57
SPECIAL ACCESSORIES<br />
SATIN FOOT<br />
The Satin stitch foot is grooved on the bottom to permit dense<br />
stitching to pass under it easily. It is most useful for sewing<br />
satin stitches. It can also be used as an alternative to the All<br />
Purpose or All Purpose Foot when sewing stretch stitches.<br />
Closely spaced zigzag (page 23) stitches are called satin<br />
stitches. This is an attractive stitch used primarily for<br />
appliqueing and bar tacking. Slightly loosen top thread tension<br />
for satin stitching. Use a backing of stabilizer or interfacing to<br />
avoid puckering.<br />
NOTE on starting to sew with satin stitch foot:<br />
Pull both threads under the foot, to the left of the footof the<br />
foot before starting to sew in order to hold threads with the<br />
foot or top thread may be entangled on the underside of fabric.<br />
CUT & HEM<br />
This foot is used to trim excess material while sewing.<br />
1. Move the plastic sleeve that covers the needle clampscrew<br />
to the right.<br />
2. Attach the cut & hem, making sure the attachment’s “arm”<br />
<br />
screw, securing the foot.<br />
<br />
<br />
<br />
the stitch width. Never use a straight stitch.<br />
4. Cut a ½” wide by 1”deep notch at the top edge of your<br />
fabric.<br />
5. Place the fabric OVER the first metal platform and then<br />
UNDER the second metal platform. If the foot is not cutting,<br />
it is usually because the material is not placed OVER the<br />
<br />
6. Sew slowly and gently guide the fabric. The cut & hem<br />
works best if no more than ½” is being trimmed.<br />
03 09 76<br />
5.0 - 7.0 2.0 - 4.5<br />
* The cut & hem is an optional accessory.<br />
1/4” FOOT<br />
This foot provides a perfect ¼” seam guideline, which is useful<br />
when piecing quilt blocks. Markings on the foot alert when to<br />
pivot the fabric.<br />
1. Select straight stitch.<br />
2. Snap on the ¼” Foot.<br />
3. Stitch the pre-cut fabric pieces together. Keep the fabric's<br />
edge even with the foot's right edge. There is no need to tie<br />
off at the seam ends.<br />
4. Iron the seams flat, ensuring precision of your work and<br />
better alignment of all corners. All seam allowances should<br />
be positioned in one direction and preferably be placed<br />
under the darker-colored material, so they cannot be seen<br />
on the right fabric side.<br />
5. Place matching strips together as desired and pin together<br />
at each corner, ensuring accurate alignment of all corners.<br />
Remember that even the smallest discrepancies will add<br />
up and distort your design. Join together the strips and iron<br />
the seams. Upon completion of your patchwork design,<br />
iron again on the right fabric side.<br />
00<br />
* The straight stitch foot is an optional accessory.<br />
58
OPEN TOE FOOT<br />
This foot provides a more visible view of the area that you will<br />
be stitching. Because of its open area at the front, you can<br />
see markings much more easily.<br />
1. Set machine to desired stitch.<br />
2. With a marking pencil or chalk, trace the outline for your<br />
design or pattern on the right side of the garment. Hint: Use<br />
a marker that can be removed easily in case the stitching<br />
does not cover it completely.<br />
3. Sew, following the outline you have traced onto your fabric.<br />
30 46 49<br />
* The open toe foot is an optional accessory.<br />
INVISIBLE ZIPPER FOOT<br />
This foot provides a hidden closing on skirts, dresses and<br />
other garments.<br />
1. Verify that the needle will line up with the opening of the<br />
foot before starting to sew.<br />
2. Before closing the seam on your project, use a fabric<br />
marker to mark the desired bottom end of the zipper on<br />
both sides of the zipper opening.<br />
3. Fold in and press the seam allowances of both opening<br />
edges and open out the pressed edges.<br />
<br />
<br />
teeth of the zipper end at the creased edge.<br />
5. Baste in place.<br />
6. Place the fabric under the presser foot, so that the teeth<br />
of the zipper are lined up with the groove of the zipper<br />
foot. Topstitch the zipper in place, ensuring that the needle<br />
penetrates the tape of the zipper close to the teeth.<br />
Continue sewing until the presser foot reaches the zipper’s<br />
slider, backstitching at the end of the seam.<br />
7. On the opposite side, close the zipper. With right sides<br />
together, make sure the two sides of the zipper are properly<br />
aligned. Pin in place, open the zipper and baste in place.<br />
8. Place the fabric under the presser foot, so that the teeth of<br />
the zipper are again lined up with the groove of the zipper<br />
foot. Topstitch the zipper in place, ensuring that the needle<br />
penetrates the tape of the zipper as close to the teeth as<br />
possible.<br />
9. Continue sewing the second seam until the presser foot<br />
reaches the zipper’s slider, backstitching at the end.<br />
00<br />
3.5 2.0 - 4.5<br />
* The invisible zipper foot is an optional accessory.<br />
59
CORDING FOOT<br />
Sew over one, two or three standards of cord to embellish<br />
<br />
used for cording.<br />
Single cording<br />
1. Mark the design on the fabric. Insert the cord in the center<br />
groove of the cording foot from the right side opening. Pull<br />
the cord about 5cm (2 inches) behind the foot.<br />
2. The grooves of the foot will hold the length of the cord in<br />
place while the stitches are being formed over the cord.<br />
3. Select the stitch and adjust the stitch width so that the<br />
stitches are just covering the cord. Lower the foot and sew<br />
slowly, guiding the cord over the design.<br />
03<br />
* The cording foot is an optional accessory.<br />
Triple cording<br />
1. Push the sewing thread to the left and insert three cords<br />
into the grooves of the foot and pull out 5cm (2 inches) of<br />
the cords behind the foot. Select the desired pattern and<br />
adjust the stitch width so that the stitches are just covering<br />
the cords. Lower the foot and sew slowly guiding the cords.<br />
07 10<br />
* The cording foot is an optional accessory.<br />
60
DARNING / FREEHAND EMBROIDERY FOOT<br />
This foot is used to create freehand embroidery, monograms<br />
and stippling when the machine is set in regular sewing mode<br />
(embroidery unit not attached).<br />
1. Drop the feed dogs. To do so, remove the free arm. On<br />
the backside of the exposed area, move the lever from the<br />
right to the left.<br />
2. Thread the needle with the machine embroidery thread. If<br />
you have chosen a rayon sheen as embroidery thread, use<br />
<br />
3. Place a stabilizer on the back layer of the fabric to create<br />
fabric stiffness and prevent distortion of the fabric during<br />
embroidering. The fabric stabilizer can be further secured<br />
by spraying it with a temporary adhesive.<br />
4. Draw your chosen design, or letter for sewing a monogram,<br />
on the fabric using a disappearing fabric-marking pen.<br />
5. Hoop the fabric. Pull it tight with an even tension.<br />
6. Place the hooped fabric under the darning/ freehand<br />
embroidery foot and lower the foot.<br />
7. Sew with a fast speed while guiding the fabric slowly.<br />
8. When the design is complete, pull the threads to the back<br />
and neaten or tie a knot. Trim away the stabilizer and press<br />
the fabric.<br />
For designs and monograms<br />
03<br />
For freehand embroidery<br />
00<br />
* The darning / freehand embroidery<br />
foot is an optional accessory.<br />
3.0 - 5.0<br />
EVEN FEED FOOT<br />
This foot has its own set of feed dogs that work in conjunction<br />
with the machine’s feeding system to improve the flow of<br />
fabric. This is particularly important when sewing several<br />
layers of fabric, such as in quilting. It is also valuable when<br />
matching plaids or stripes, and in sewing pile types of fabrics<br />
such as velour and ultra-suede.<br />
1. Secure the walking foot to the shank, while making sure<br />
the extension arm slips over the needle clamp screw.<br />
2. Tighten the thumb screw to secure the foot to the shank.<br />
3. Place two pieces of fabric right sides together.<br />
4. Sew seam from top to bottom.<br />
00<br />
3.0 - 5.0<br />
* The even feed is an optional ccessory.<br />
EDGE GUIDE / QUILTING BAR<br />
The edge guide/quilting bar is best utilized when paired with<br />
the all purpose foot or the 1/4" foot (optional accessory). The<br />
edge guide/quilting bar is used to sew perfect straight seams.<br />
It can be used to stitch parallel lines in quilting, or can be used<br />
to help guide you to sew 5/8 of an inch seam allowances.<br />
To attach the guide, simply insert it into the opening of the<br />
shank at the back of the presser foot on your machine.<br />
* The edge guide (quilting bar) is an optional accessory.<br />
61
TWIN NEEDLE<br />
A twin needle produces two rows of parallel stitches for<br />
pintucks, double top stitching and decorative sewing.<br />
When using twin needles, When using twin needles, always<br />
engage the twin needle button, regardless of the stitch you<br />
have selected. This will prevent broken needles and damage<br />
to your machine, regardless of the stitch you have selected.<br />
Use of a SINGER Brand twin needle (Style 2025) is strongly<br />
recommended.<br />
The twin needle is not included with the <strong>SEQS</strong>-<strong>6700</strong>.<br />
THREADING THE TWIN NEEDLE<br />
1. Place a spool on each spool pin. Thread the two threads<br />
as one. Draw one thread through each needle from front to<br />
back.<br />
2. Pick up bobbin thread as for single needle sewing. Pull the<br />
three threads together under the presser foot to the back of<br />
the machine, leaving about 6” (15 cm) clear.<br />
NOTE: Needle threader cannot be used to thread the<br />
twin needle.<br />
Helpful Hints:<br />
1. Always select the twin needle mode prior to<br />
selecting a pattern. This will preclude any<br />
possibility of the twin needle breaking.<br />
2. To disengage twin needle sewing mode and return<br />
the machine to normal sewing mode, either press<br />
the twin needle button again or shut the machine<br />
off. Twin needle is only active when the twin needle<br />
switch is lit red.<br />
WING NEEDLE<br />
The wing needle (sometimes known as hemstitching needle)<br />
is most commonly used in heirloom sewing. A wing needle<br />
has wings that extend from either side of the needle. This<br />
extra wide needle will create holes in the fabric to produce a<br />
decorative effect.<br />
The wing needle works best with stitches that have a repeated<br />
back and forth motion.<br />
You will obtain better results if you use the wing needle in<br />
<br />
It may be necessary to decrease the upper tension slightly<br />
for a better quality stitch, do a test sample before sewing your<br />
garment.<br />
Do not use the built-in needle threader when working with the<br />
wing needle.<br />
The wing needle is not included with the <strong>SEQS</strong>-<strong>6700</strong>.<br />
Use of a SINGER brand wing needle (Style 2040) is strongly<br />
recommended.<br />
71 72 79<br />
62
HELPFUL MESSAGES<br />
Messages are displayed with LED lamps above stitch pattern numbers on control panel and/or PC screen. When a message is<br />
<br />
On control panel Problem Correction<br />
Sewing<br />
Embroidery<br />
Machine is locked up due to thread entangled with bobbin case or rotation interrupted forcibly.<br />
Turn off power switch and eliminate the problem that caused the machine to stop.<br />
<br />
Bobbin winder is locked up due to thread entangled around spindle or rotation interrupted forcibly.<br />
Turn off power switch and eliminate the problem that caused the bobbin winder to stop.<br />
<br />
Buttonhole is selected on selection button, but buttonhole lever is raised.<br />
Lower buttonhole lever and begin sewing buttonhole.<br />
<br />
Buttonhole lever is not raised.<br />
Raise buttonhole lever when sewing stitch patterns or embroidery.<br />
<br />
Foot control is connected while operating with start/stop button or start/stop button is pushed while<br />
foot control is connected.<br />
Disconnect foot control or restart sewing by depressing foot control.<br />
<br />
Foreign particle like tip of needle, screwdriver etc. is detected on machine socket for foot control.<br />
Remove foreign particle.<br />
63
On control panel Problem Correction<br />
Sewing<br />
Embroidery<br />
Breakage of top thread is detected.<br />
supply or rethread top thread and restart.<br />
<br />
Unable to start with needle lowered.<br />
Raise needle and restart.<br />
<br />
Unable to start with presser foot lifted.<br />
Lower presser foot and restart.<br />
<br />
Hoop size is too small to move hoop to original position.<br />
Turn off power switch and attach larger hoop.<br />
<br />
Hoop size is smaller than embroidery data.<br />
Attach appropriate hoop and restart.<br />
<br />
Defect in sewing data.<br />
Transmit correct data.<br />
<br />
1-17<br />
(Error message<br />
number)<br />
System error occurs.<br />
Turn off and on power switch to eliminate the problem that caused the system error to<br />
occur. If the error number should not disappear, consult an authorized technician.<br />
<br />
64
MEMO<br />
65
© Part No. 83959 5/12


