

Garmin nuvi 350 GPS,OEM Honda Access,Canada - Owner's Manual
Garmin nuvi 350 GPS,OEM Honda Access,Canada - Owner's Manual
Garmin nuvi 350 GPS,OEM Honda Access,Canada - Owner's Manual

Create successful ePaper yourself
Turn your PDF publications into a flip-book with our unique Google optimized e-Paper software.
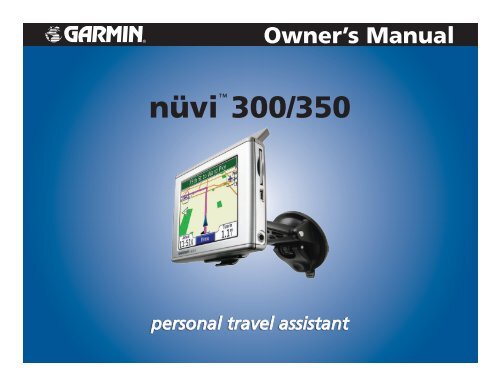
Owner’s <strong>Manual</strong><br />
nüvi 300/<strong>350</strong><br />
personal travel assistant
© 2005–2006 <strong>Garmin</strong> Ltd. or its subsidiaries<br />
<strong>Garmin</strong> International, Inc.<br />
1200 East 151st Street,<br />
Olathe, Kansas 66062, USA<br />
Tel. 913/397.8200 or 800/800.1020<br />
Fax 913/397.8282<br />
<strong>Garmin</strong> (Europe) Ltd.<br />
Unit 5, The Quadrangle,<br />
Abbey Park Industrial Estate,<br />
Romsey, SO51 9DL, UK<br />
Tel. +44 (0) 870.8501241 (outside the UK)<br />
0808.2380000 (within the UK)<br />
Fax +44 (0) 870.8501251<br />
<strong>Garmin</strong> Corporation<br />
No. 68, Jangshu 2nd Road,<br />
Shijr, Taipei County, Taiwan<br />
Tel. 886/2.2642.9199<br />
Fax 886/2.2642.9099<br />
All rights reserved. Except as expressly provided herein, no part of this manual may be reproduced, copied, transmitted,<br />
disseminated, downloaded or stored in any storage medium, for any purpose without the express prior written consent of<br />
<strong>Garmin</strong>. <strong>Garmin</strong> hereby grants permission to download a single copy of this manual onto a hard drive or other electronic<br />
storage medium to be viewed and to print one copy of this manual or of any revision hereto, provided that such electronic or<br />
printed copy of this manual must contain the complete text of this copyright notice and provided further that any unauthorized<br />
commercial distribution of this manual or any revision hereto is strictly prohibited.<br />
Information in this document is subject to change without notice. <strong>Garmin</strong> reserves the right to change or improve its products<br />
and to make changes in the content without obligation to notify any person or organization of such changes or improvements.<br />
Visit the <strong>Garmin</strong> Web site (www.garmin.com) for current updates and supplemental information concerning the use and<br />
operation of this and other <strong>Garmin</strong> products.<br />
<strong>Garmin</strong> ® and MapSource ® are registered trademarks and nüvi , My<strong>Garmin</strong> , <strong>Garmin</strong> Travel Guide , <strong>Garmin</strong> TourGuide , and<br />
<strong>Garmin</strong> Lock are trademarks of <strong>Garmin</strong> Ltd. or its subsidiaries and may not be used without the express permission of <strong>Garmin</strong>.<br />
SiRF ® , SiRFstar ® and the SiRF logo are registered trademarks of SiRF Technology, Inc. SiRFstarIII and SiRF Powered are<br />
trademarks of SiRF Technology, Inc. Audible.com ® and AudibleReady ® are registered trademarks of Audible, Inc. © Audible, Inc. 1997–2005.<br />
Windows ® is a registered trademark of Microsoft Corporation in the United States and/or other countries. Mac ® is a registered trademark of Apple<br />
Computer, Inc. RDS-TMC Traffic Information Services France © ViaMichelin 2006. Pocket Oxford Spanish Dictionary © Oxford University Press<br />
2005. Pocket Oxford Italian Dictionary © Oxford University Press 2004. Oxford Portuguese Minidictionary © Oxford University Press 2002.<br />
Multilingual Wordbank © Oxford University Press 2001. Multilingual Phrasebank © Oxford University Press 2001. Pocket Oxford-Hachette<br />
French Dictionary © Oxford University Press and Hachette Livre 2005. Pocket Oxford-Duden German Dictionary © Oxford University Press and<br />
Bibliographisches Institut & F.A. Brockhaus 2003. Other trademarks and trade names are those of their respective owners.<br />
September 2006 Software Version 4.10 Part Number 190-00627-00 Rev. B
Preface<br />
Preface<br />
Congratulations on purchasing the <strong>Garmin</strong> ® nüvi personal travel assistant. The nüvi 300 and nüvi <strong>350</strong><br />
are included in this manual. Unless otherwise specified, the information applies to both models.<br />
<strong>Manual</strong> Conventions<br />
When you are instructed to “touch” something, use your finger to touch an item on the screen.<br />
You will see small arrows (>) used in the text that indicate you should touch a series of items. For<br />
example, if you see “touch Where to > My Locations” you should touch the Where to button,<br />
and then touch My Locations.<br />
Contact <strong>Garmin</strong><br />
Contact <strong>Garmin</strong> if you have any questions while using your nüvi<br />
300/<strong>350</strong>. In the USA, contact <strong>Garmin</strong> Product Support by phone:<br />
913/397.8200 or 800/800.1020, Monday–Friday, 8 AM–5 PM<br />
Central Time; or go to www.garmin.com/support/, and click<br />
Product Support.<br />
In Europe, contact <strong>Garmin</strong> (Europe) Ltd. at +44 (0) 870.8501241<br />
(outside the UK) or 0808 2380000 (within the UK).<br />
To purchase accessories for your nüvi 300 or <strong>350</strong>, visit<br />
http://shop.garmin.com.<br />
my<strong>Garmin</strong><br />
Go to http://my.garmin.com<br />
to access the latest services for<br />
your <strong>Garmin</strong> products. From the<br />
my<strong>Garmin</strong> Web site, you can:<br />
• Register your <strong>Garmin</strong> unit.<br />
• Subscribe to online services for<br />
safety camera information (see<br />
page 63).<br />
• Unlock optional maps.<br />
Return to my<strong>Garmin</strong> often for<br />
new <strong>Garmin</strong> product services.<br />
<strong>Garmin</strong> © 2005–2006 i nüvi Owner’s <strong>Manual</strong>
Table of Contents<br />
Preface...................................................i<br />
<strong>Manual</strong> Conventions.........................................i<br />
Contact <strong>Garmin</strong>...............................................i<br />
my<strong>Garmin</strong> ..................................................i<br />
Getting Started......................................1<br />
Your nüvi......................................................1<br />
nüvi Menu Page .............................................1<br />
nüvi Tips and Shortcuts...................................2<br />
Adjust the Volume & Brightness.......................2<br />
Lock the Screen.............................................2<br />
Quick Links....................................................2<br />
Find Your Destination......................................3<br />
Follow Your Route...........................................4<br />
Add a Stop to Your Route................................5<br />
Add a Detour.................................................5<br />
Stop the Route...............................................5<br />
Take a Better Route........................................5<br />
Lock Your nüvi...............................................6<br />
Where To...............................................7<br />
Finding an Address.........................................7<br />
Finding a Place by Spelling the Name ...............8<br />
Finding a Place Using the Map..........................9<br />
Finding a Place Using Coordinates................... 10<br />
Expanding Your Search................................. 11<br />
My Locations........................................12<br />
Saving Places You Find.................................. 12<br />
Finding Saved Places (Favorites).................... 12<br />
Editing Saved Places..................................... 13<br />
Finding Recent Selections Places.................... 14<br />
My Current Location..................................... 15<br />
Custom POIs...............................................15<br />
Saving Your Current Location Using the Map.... 15<br />
Setting a Home Location............................... 16<br />
<strong>Garmin</strong> © 2005–2006 ii nüvi Owner’s <strong>Manual</strong>
Table of Contents<br />
Viewing the Map and Other Pages........17<br />
Viewing the Map Page................................... 17<br />
Trip Information Page................................... 18<br />
Current Route Page......................................19<br />
Next Turn Page............................................19<br />
Managing Files on Your nüvi................20<br />
Additional Help............................................20<br />
Supported File Types .................................... 20<br />
Step 1: Insert an SD Card (Optional).............. 21<br />
Step 2: Connect the USB Cable...................... 21<br />
Step 3: Transfer Files to Your nüvi.................. 21<br />
Step 4: Eject/UnMount and Unplug the<br />
USB Cable................................................23<br />
Information about Your nüvi Drives................. 24<br />
Using the Travel Kit.............................25<br />
Using the Language Guide............................. 25<br />
Using the Travel Guide.................................. 28<br />
SaversGuide................................................29<br />
Listening to MP3 Files................................... 30<br />
Listening to Audible Books............................. 32<br />
Viewing Pictures ..........................................37<br />
Using the World Clock................................... 38<br />
Converting Currency..................................... 39<br />
Converting Measurements............................. 41<br />
Using the Calculator.....................................42<br />
Customizing the nüvi...........................43<br />
Restoring Settings........................................43<br />
Changing the Map Settings............................ 44<br />
Changing the System Settings....................... 45<br />
Changing the Locale.....................................46<br />
Changing the Display Settings........................ 47<br />
Changing the Navigation Settings................... 48<br />
Changing the Traffic Settings......................... 49<br />
Changing the Proximity Point Settings............. 51<br />
<strong>Garmin</strong> © 2005–2006 iii nüvi Owner’s <strong>Manual</strong>
Table of Contents<br />
FM TMC Traffic Information .................52<br />
Connecting the FM TMC Traffic Receiver to Your<br />
nüvi........................................................52<br />
Viewing Traffic Events................................... 53<br />
Avoiding Traffic............................................53<br />
Traffic Symbols............................................54<br />
Color Code..................................................54<br />
Appendix..............................................55<br />
Mounting Your nüvi.......................................55<br />
Resetting Your nüvi ......................................58<br />
Clearing User Data ......................................58<br />
Caring for Your nüvi ..................................... 59<br />
Updating the nüvi Software Using<br />
WebUpdater.............................................61<br />
Purchasing Additional MapSource Maps........... 61<br />
Custom POIs (Points of Interest).................... 62<br />
Battery Information ..................................... 64<br />
About Satellite Signals.................................. 65<br />
Specifications..............................................66<br />
Software License Agreement.......................... 67<br />
USB Interface Troubleshooting....................... 68<br />
nüvi Troubleshooting.....................................69<br />
Index...................................................70<br />
WARNING: See the product information sheet in the product<br />
box for product warnings and other important information.<br />
<strong>Garmin</strong> © 2005–2006 iv nüvi Owner’s <strong>Manual</strong>
Getting Started<br />
Your nüvi<br />
Power<br />
button<br />
Getting Started<br />
MCX connector<br />
(for an optional<br />
external<br />
antenna)<br />
nüvi Menu Page<br />
A<br />
H<br />
G<br />
B<br />
C<br />
D<br />
SD card<br />
slot<br />
F<br />
E<br />
Mini-USB<br />
port<br />
Headphone<br />
plug<br />
A Satellite signal strength indicator. Touch to view<br />
satellite signal information.<br />
B Battery indicator.<br />
C Touch to adjust the settings.<br />
D Touch to adjust the volume and brightness.<br />
E Touch to view traffic incidents, if an optional<br />
FM traffic receiver is connected.<br />
F Touch to use the Travel Kit.<br />
G Touch to view the map.<br />
H Touch to find a destination.<br />
<strong>Garmin</strong> © 2005–2006 nüvi Owner’s <strong>Manual</strong>
Getting Started<br />
nüvi Tips and Shortcuts<br />
• To quickly return to the Menu page, press and hold Back.<br />
• Touch Help to learn more about the nüvi’s Travel Kit.<br />
• When you are listening to music or an audible book, quickly<br />
press the Power button twice to jump from any page back to the<br />
player page. Press Back to return to the previous page you were<br />
viewing (such as the map).<br />
• To extend the battery life, close the antenna when you do not<br />
need to receive <strong>GPS</strong> signals. If the antenna is closed, <strong>GPS</strong> is<br />
turned off.<br />
• For more tips about the battery, see page 64.<br />
Adjust the Volume & Brightness<br />
Press and quickly release the Power button or touch on the<br />
Menu page to access the Quick Settings. Move the sliders to adjust<br />
the volume and brightness. Touch Mute to turn the volume off.<br />
Lock the Screen<br />
Press and release the Power button. To prevent accidental screen<br />
taps, touch Lock. To unlock the screen, press the Power button.<br />
Quick Links<br />
• Finding an address: page 7<br />
• Viewing the Map page: page 17<br />
• Listening to MP3 files: page 30<br />
• Listening to an audible book:<br />
page 32<br />
• Converting currency: page 39<br />
• Transferring files to your nüvi:<br />
pages 20–24 and page 68<br />
• Cleaning and storing your unit:<br />
pages 59–60<br />
• Using the <strong>Garmin</strong> Lock antitheft<br />
feature: page 6.<br />
Do not leave your <strong>GPS</strong> unit<br />
exposed in an unattended vehicle<br />
on a hot day. To prevent damage,<br />
remove it from the vehicle; or<br />
store it out of direct sunlight,<br />
such as in the glove box. See the<br />
specifications on page 66.<br />
<strong>Garmin</strong> © 2005–2006 2 nüvi Owner’s <strong>Manual</strong>
Getting Started<br />
Find Your Destination<br />
Flip up the antenna on the nüvi to get satellite signals. The bars in the upper left corner represent the<br />
<strong>GPS</strong> satellite signals being received by your nüvi. When you see green bars, you have a strong signal. See<br />
page 65 for more information. After you have a satellite fix, use the <strong>Garmin</strong> nüvi to find your destination<br />
and go to it.<br />
➊<br />
➋<br />
➌<br />
Touch<br />
Where to.<br />
Select a category and<br />
sub-category, if necessary.<br />
Select a destination.<br />
➍<br />
➎<br />
Touch Go.<br />
Enjoy the route!<br />
Tip: Touch the arrows to<br />
view more choices.<br />
<strong>Garmin</strong> © 2005–2006 nüvi Owner’s <strong>Manual</strong>
Getting Started<br />
Follow Your Route<br />
Follow the route to your destination using the Map page. As you travel, your nüvi guides you to your<br />
destination with vocal prompts, turn arrows on the map, and directions at the top of the Map page. If you<br />
depart from the original route, your nüvi recalculates the route and provides new route directions. For<br />
more information about using the Map page, see pages 17–19.<br />
Read the driving<br />
instructions at the<br />
top of the page.<br />
Your route is marked<br />
with a magenta line.<br />
Follow the arrows as<br />
you make turns.<br />
A checkered flag marks<br />
your destination.<br />
Tip: If you think the nüvi is not creating the best route to your destination (for example, you are<br />
being routed on side streets), change the route preferences. Touch > Navigation > Route<br />
Preference.<br />
<strong>Garmin</strong> © 2005–2006 nüvi Owner’s <strong>Manual</strong>
Getting Started<br />
Add a Stop to Your Route<br />
You can add a stop to your route. The nüvi gives you directions<br />
to the stop and then to your final destination.<br />
1. With a route active, touch Menu on the Map page.<br />
2. Touch Where to Search for the extra stop.<br />
3. Touch Go.<br />
4. Touch Yes to add this stop before your destination.<br />
Or, touch No to make this your new final destination.<br />
Add a Detour<br />
If a road on your route is closed, you can take a detour.<br />
1. With a route active, touch Menu.<br />
2. Touch Detour.<br />
Stop the Route<br />
1. With a route active, touch Menu.<br />
2. Touch Stop.<br />
Take a Better Route<br />
As you approach your destination, the nüvi evaluates road options,<br />
which may result in a better route. When the nüvi finds a better<br />
route, or appears in the right corner of the map. Touch the<br />
icon to take the better route.<br />
Note: You can add only<br />
one stop to your route.<br />
Diamonds and<br />
Triangles: What do the<br />
different icon shapes<br />
mean?<br />
The icons used to indicate a better<br />
route and traffic are based upon<br />
the type of unit you have: North<br />
American units use diamondshaped<br />
icons ( ), European<br />
units use triangular icons ( ).<br />
<strong>Garmin</strong> © 2005–2006 5 nüvi Owner’s <strong>Manual</strong>
Getting Started<br />
Lock Your nüvi<br />
1. Flip up the antenna on the nüvi to get satellite signals.<br />
2. Touch > System > <strong>Garmin</strong> Lock.<br />
3. Touch OK, and enter a 4-digit PIN.<br />
4. Re-enter your four-digit PIN.<br />
5. Touch OK.<br />
6. Drive to a security location, and touch Set.<br />
Each time you turn on the nüvi, enter the 4-digit PIN or drive to the security location.<br />
Note: If you forget your PIN and your security location, you must send your nüvi to <strong>Garmin</strong> to<br />
get it unlocked.<br />
What is a Security Location?<br />
You can select any location, such as your home or office, for your security location. If you are at your<br />
security location, you do not need to enter a PIN. If you forget your PIN, drive to your security location to<br />
unlock the nüvi.<br />
Note: To unlock your nüvi at your security location, the nüvi must have acquired satellite signals.<br />
<strong>Garmin</strong> © 2005–2006 6 nüvi Owner’s <strong>Manual</strong>
Where To<br />
Where To<br />
The Where To menu provides several categories to help you quickly find your destination. To learn how to<br />
perform a simple search using the Where To menu, see page 3.<br />
Finding an Address<br />
From the Menu page, touch Where To > Address to enter<br />
a specific address to which you want to navigate. Your nüvi walks<br />
you through the process of finding an address with on-screen<br />
instructions.<br />
1. Touch Where To > Address.<br />
2. Select the region, and city or postal code, when prompted.<br />
3. Type the number of the address and touch Done.<br />
4. Type the street name and touch Done.<br />
5. Select the street and city, if necessary.<br />
6. Touch the address, if necessary. The Go page opens.<br />
7. Touch Go to navigate to this address.<br />
Finding an intersection is very similar to finding an address.<br />
Touch Intersection and enter the two street names.<br />
Search Tips<br />
• Do not enter the street prefix<br />
or suffix. For example, to find<br />
North Main Street enter Main,<br />
and to find Highway 7 enter 7.<br />
• Touch Spell and enter the<br />
location using the on-screen<br />
keyboard. Touch Done when<br />
you are finished.<br />
• Touch Near to narrow your<br />
search, see page 11.<br />
• You can search for a postal code.<br />
Enter the postal code instead of<br />
the city name. (Not all map data<br />
provides postal code searching.)<br />
<strong>Garmin</strong> © 2005–2006 nüvi Owner’s <strong>Manual</strong>
Where To<br />
Finding a Place by Spelling the Name<br />
If you know the name of the location you are searching for, you<br />
search only for locations by that name. If you only know part of<br />
the name, you can enter part of it to only list locations with those<br />
letter combinations in their names.<br />
1. Touch Where to > Spell Name.<br />
2. Using the on-screen keyboard, enter letters contained in<br />
the name. Touch Done.<br />
3. Select the location you want to visit. The Go page opens.<br />
Tips for Using the On-Screen Keyboard<br />
Touch Mode to enter diacritical and special characters.<br />
Touch<br />
to enter numbers.<br />
Touch to delete the last character entered; touch and hold<br />
to delete the entire entry.<br />
Tip: In any search results list, if you do not see the place<br />
you want visit or you want to narrow your search results<br />
list, touch Spell and enter the name or part of the name.<br />
Go Page Options<br />
Touch Go to create a turn-by-turn<br />
route to this location.<br />
Touch Show Map to view this<br />
location on the map.<br />
Touch Save to save this location<br />
as one of your Favorites.<br />
See pages 12–16 for more<br />
information.<br />
<strong>Garmin</strong> © 2005–2006 nüvi Owner’s <strong>Manual</strong>
Where To<br />
Finding a Place Using the Map<br />
Touch View map to open the Map page. Touch and drag<br />
anywhere on the Map page to browse the map and view different<br />
parts of the map. You can also touch Where to ><br />
Browse Map.<br />
Tips for Browsing the Map<br />
• Touch the map and drag to view different parts of the map.<br />
• Use the and icons to zoom in<br />
and out.<br />
• Touch any object on the map. An<br />
arrow appears pointing at the object<br />
you selected.<br />
• Touch Go to navigate to the selected<br />
location.<br />
• Touch Save to save the selected location to your Favorites.<br />
• If the <strong>GPS</strong> if turned off, touch Set Loc. to set your location to<br />
the selected location.<br />
• Touch Back to return to the previous screen.<br />
Viewing Places on<br />
the Map<br />
You can view a place you have<br />
found on the Map page.<br />
Touch Show Map.<br />
<strong>Garmin</strong> © 2005–2006 nüvi Owner’s <strong>Manual</strong><br />
➊<br />
➋<br />
Drag the map and<br />
zoom in or out as<br />
necessary. Touch<br />
Back when you<br />
are done.
Where To<br />
Finding a Place Using Coordinates<br />
If you know the location coordinates (latitude and longitude), you<br />
can enter them to find the location.<br />
1. Touch Where to > Coordinates.<br />
2. Touch a field (rectangle) and use the on-screen keyboard<br />
to enter the coordinates. Touch Done.<br />
3. After you have entered the coordinates, touch Next to<br />
open the Go page.<br />
Changing the Location Format<br />
Because different maps and charts use different position formats,<br />
the nüvi allows you to choose the correct coordinate format for the<br />
type of map you are using.<br />
1. Touch Where to > Coordinates.<br />
2. Touch Format.<br />
3. Select the format you would like to use.<br />
4. Touch OK.<br />
<strong>Garmin</strong> © 2005–2006 0 nüvi Owner’s <strong>Manual</strong>
Where To<br />
Expanding Your Search<br />
➊<br />
➋<br />
Touch Where to.<br />
Then touch Near.<br />
Select an option.<br />
Touch OK.<br />
• Where I Am Now—searches for places near your current<br />
location.<br />
• A Different City—searches for places near the city you enter.<br />
• My Current Route—searches for places along the route you<br />
are currently navigating.<br />
• My Destination—searches for places near your route<br />
destination.<br />
Note: Your nüvi<br />
automatically searches for<br />
places near your current<br />
location.<br />
<strong>Garmin</strong> © 2005–2006 nüvi Owner’s <strong>Manual</strong>
My Locations<br />
My Locations<br />
You can save all of your favorite places in My Locations. You can<br />
also save your home location in My Locations.<br />
Saving Places You Find<br />
➊<br />
➋<br />
➊<br />
After you have<br />
found a place,<br />
touch Save.<br />
Touch OK.<br />
➋<br />
Finding Saved Places (Favorites)<br />
1. Touch Where to > My Locations > Favorites.<br />
2. Select the place you want to visit.<br />
Note: To delete all of your Favorites and your Custom<br />
POIs from your nüvi, touch Where To ><br />
My Locations > Delete All. Touch Yes.<br />
➌<br />
<strong>Garmin</strong> © 2005–2006 2 nüvi Owner’s <strong>Manual</strong>
My Locations<br />
Editing Saved Places<br />
After you save a place, you can change the name of the place and<br />
its symbol on the map. Touch Where to ><br />
My Locations.<br />
➊<br />
➋<br />
Changing the Name<br />
To change the name, touch<br />
Change Name. Enter the<br />
new name using the on-screen<br />
keyboard. Touch Done.<br />
➌<br />
Touch Favorites.<br />
➍<br />
Select the place<br />
you want to edit.<br />
Changing the Map<br />
Symbol<br />
To change the symbol used on<br />
the map, touch Change Map<br />
Symbol and select a symbol from<br />
the list.<br />
Touch the Edit button.<br />
The Edit window opens.<br />
Touch a button to<br />
change the name or<br />
the map symbol, or<br />
to delete the item.<br />
Deleting Saved Places<br />
To delete this saved place, touch<br />
Delete. Then touch Yes.<br />
<strong>Garmin</strong> © 2005–2006 nüvi Owner’s <strong>Manual</strong>
My Locations<br />
Finding Recent Selections Places<br />
Your nüvi stores the last 50 of your recent finds in Recent<br />
Selections. The most recently viewed places appear at the top of<br />
the list. Touch Where to > My Locations to view your<br />
recently found items.<br />
➊<br />
➋<br />
Touch Recent<br />
Selections.<br />
Select an item from<br />
the list.<br />
Deleting Recently Found Places<br />
To remove all places from the Recent Selections list, touch Clear.<br />
Then touch Yes.<br />
➊<br />
➋<br />
Note: When you touch<br />
Clear, all items from the<br />
list are removed. It does<br />
not delete the actual place<br />
from your unit.<br />
<strong>Garmin</strong> © 2005–2006 nüvi Owner’s <strong>Manual</strong>
My Locations<br />
My Current Location<br />
You can view and save your current location coordinates (latitude and longitude).<br />
➊<br />
➋<br />
➌<br />
Touch Where to ><br />
My Locations.<br />
Touch My Current<br />
Location.<br />
Touch an option.<br />
Saving Your Current Location<br />
Using the Map<br />
Touch anywhere on the map. An arrow points to your<br />
current location. Touch Save. Your current location<br />
is saved in your Favorites.<br />
Custom POIs<br />
If you have loaded Custom POIs, touch Where To > My Locations > Custom POIs to view the<br />
POIs. For more information about Custom POIs, see page 62.<br />
<strong>Garmin</strong> © 2005–2006 5 nüvi Owner’s <strong>Manual</strong>
My Locations<br />
Setting a Home Location<br />
You can set a Home location for the place you return to most often. After you have set your Home, you can<br />
easily Go Home.<br />
1. Touch Where to > My Locations.<br />
2. Touch Set Home or Go Home.<br />
3. Touch an option to set your home location.<br />
Going Home<br />
Once your Home location is set, you can route to it at any time by touching Where to > My<br />
Locations > Go Home.<br />
Changing Your Home Location<br />
1. Touch Where to > My Locations.<br />
2. Touch Set Home.<br />
3. Touch an option to set your home location.<br />
<strong>Garmin</strong> © 2005–2006 6 nüvi Owner’s <strong>Manual</strong>
Viewing the Map Page and Other Pages<br />
Viewing the Map and Other Pages<br />
Viewing the Map Page<br />
From the Menu page, touch View map to open the Map page. The position icon shows your<br />
current location. Touch and drag the map to view other areas of the map. Touch areas of the page to see<br />
additional information, as described below.<br />
Touch<br />
to zoom out.<br />
Touch Menu to return to<br />
the Menu page.<br />
Touch Arrival or<br />
Speed to open the Trip<br />
Information page. See<br />
page 18.<br />
Map Page while Navigating a Route<br />
Touch the text bar to<br />
open the Current Route<br />
page. See page 19.<br />
Touch<br />
to zoom in.<br />
Touch Turn In to open<br />
the Next Turn page. See<br />
page 19.<br />
When you are following a route, your Arrival time appears in the lower left corner. The distance to the<br />
next turn (Turn In) is shown in the lower right corner.<br />
When you are simply driving while viewing the Map page (not following a route), your Speed is shown in<br />
the lower left corner. The direction you are heading (Driving) is shown in the lower right corner.<br />
<strong>Garmin</strong> © 2005–2006 nüvi Owner’s <strong>Manual</strong>
Viewing the Map Page and Other Pages<br />
Trip Information Page<br />
The Trip Information page displays your current speed and provides helpful data about your trip. To view<br />
the Trip Information page, select Speed or Arrival on the Map page.<br />
Current direction<br />
of travel<br />
Distance to your final<br />
destination<br />
Distance traveled<br />
(Odometer)<br />
Trip Information Page<br />
Resetting Trip Information<br />
If you want accurate trip information, reset the trip information before beginning a trip. If you make<br />
frequent stops, leave the nüvi turned on so it can accurately measure elapsed time during the trip.<br />
Select Reset Trip to reset the data on the Trip Information page. Select Reset Max to reset the<br />
maximum speed.<br />
<strong>Garmin</strong> © 2005–2006 nüvi Owner’s <strong>Manual</strong>
Viewing the Map Page and Other Pages<br />
Current Route Page<br />
The Current Route page displays turn-by-turn instructions for your entire route. Touch the text bar on<br />
the top of the Map page to open the Current Route page. This page displays all turns in the route and the<br />
distance between turns. Select a turn on the list to view the Next Turn page for that turn. Touch Map to<br />
view the entire route on the map.<br />
Direction of<br />
the turn<br />
Distance to<br />
the turn<br />
Upcoming turn<br />
Distance to the<br />
turn<br />
Approximate time<br />
left until this turn<br />
Current Route Page<br />
Next Turn Page<br />
Next Turn Page<br />
The Next Turn page shows the turn on the map and the distance and time left before you reach the turn.<br />
To view an upcoming turn on the map, select Turn In on the Map page, or select any turn from the<br />
Current Route page.<br />
Use the up and down arrows to view other turns in the route. When you are finished viewing the Next Turn<br />
page, select Back.<br />
<strong>Garmin</strong> © 2005–2006 nüvi Owner’s <strong>Manual</strong>
Managing Files on Your nüvi<br />
Managing Files on Your nüvi<br />
Your nüvi is able to store files, such as JPEG images and MP3<br />
music files. You can store files in the nüvi’s internal memory or on<br />
an optional SD Card.<br />
Note: The nüvi is not compatible with Windows ® 95,<br />
Windows 98, or Windows Me operating systems. This is a<br />
common limitation of most USB Mass Storage devices.<br />
Follow these steps when transferring files to your nüvi:<br />
Step 1: Insert an SD card (optional)<br />
Step 2: Connect the USB cable<br />
Step 3: Transfer files to your nüvi<br />
Step 4: Eject/unmount the drive and unplug the USB cable<br />
Additional Help<br />
For troubleshooting tips for using the nüvi with your computer to<br />
transfer files, see page 68.<br />
Supported File<br />
Types<br />
• MP3 music files<br />
• M3U playlist files<br />
• JPG image files<br />
• AA audible book files<br />
• GPI custom POI files from<br />
<strong>Garmin</strong>’s POI Loader (see page<br />
62)<br />
• GPX waypoint files from<br />
MapSource ®<br />
• Maps from MapSource<br />
Note: The nüvi does not<br />
support iTunes M4A/M4P<br />
files.<br />
<strong>Garmin</strong> © 2005–2006 20 nüvi Owner’s <strong>Manual</strong>
Managing Files on Your nüvi<br />
Step 1: Insert an SD Card (Optional)<br />
The SD card slot is located on the side of the nüvi. To insert or<br />
remove the card, press it in until it clicks.<br />
You can use an SD card that has a storage capacity of up to 2 GB.<br />
Step 2: Connect the USB Cable<br />
1. Plug the small end (the mini-USB end) of the USB cable<br />
into the mini-USB connector located on the side of your<br />
nüvi.<br />
2. Connect the larger end of the USB cable to an available<br />
USB port on your computer.<br />
Step 3: Transfer Files to Your nüvi<br />
After you connect the nüvi to your computer, one or two additional<br />
drives appear in your computer’s list of drives: “<strong>nuvi</strong>” and “<strong>nuvi</strong><br />
sd.” “<strong>nuvi</strong>” is the available storage in the nüvi’s internal memory.<br />
“<strong>nuvi</strong> sd” is the SD card inserted in your nüvi.<br />
Inserting an SD Card<br />
Connecting the USB Cable<br />
<strong>Garmin</strong> © 2005–2006 21 nüvi Owner’s <strong>Manual</strong>
Managing Files on Your nüvi<br />
Transferring Files on a Windows ® Computer<br />
1. Connect the nüvi to your computer.<br />
2. Double-click My Computer on your computer’s<br />
desktop.<br />
3. Browse your computer for the file you want to copy.<br />
4. Highlight the file, and select Edit > Copy.<br />
5. Open the “<strong>nuvi</strong>” or “<strong>nuvi</strong> sd” drive.<br />
6. Select Edit > Paste.<br />
Transferring Files on a Mac ® Computer<br />
1. Connect the nüvi to your computer. Your drive should<br />
mount onto your Mac desktop as two mounted volumes<br />
(drives); the “<strong>nuvi</strong>” and “<strong>nuvi</strong> sd” volumes.<br />
2. Browse your computer for the file you want to copy.<br />
3. Highlight the file, and select Edit > Copy.<br />
4. Double-click the volume icon to open the “<strong>nuvi</strong>” or “<strong>nuvi</strong><br />
sd” drive.<br />
5. Select Edit > Paste.<br />
Note: If the drives are<br />
not named automatically,<br />
see your operating<br />
system’s Help file or page<br />
69 of this manual to learn<br />
how to rename the drives.<br />
TIP: You can also drag<br />
and drop files to and from<br />
your drives.<br />
Tip: To help manage the<br />
files, add folders.<br />
Volume icon<br />
<strong>Garmin</strong> © 2005–2006 22 nüvi Owner’s <strong>Manual</strong>
Managing Files on Your nüvi<br />
Step 4: Eject/UnMount and Unplug the USB Cable<br />
Ejecting From a Windows ® Computer<br />
When you are finished transferring files, double-click the Unplug or Eject icon in your system tray.<br />
Select “USB Mass Storage Device” and click Stop. Select the nüvi drives and click OK. You can unplug<br />
your nüvi from your computer now.<br />
Unmounting From a Mac ® Computer<br />
When you are finished transferring files, drag the volume icon to the Trash (it turns into an Eject<br />
icon) to unmount the device. You can unplug your nüvi from your computer now.<br />
<strong>Garmin</strong> © 2005–2006 23 nüvi Owner’s <strong>Manual</strong>
Managing Files on Your nüvi<br />
Information about Your nüvi Drives<br />
Where Do I Paste the Files?<br />
For most files, like MP3 files, you can paste them anywhere in the “<strong>nuvi</strong>” and “<strong>nuvi</strong> sd” drives. You can<br />
manage the files you load on the “<strong>nuvi</strong>” and “<strong>nuvi</strong> sd” drives by adding folders. Refer to the operating<br />
system’s Help file for information on adding folders.<br />
If you have used another program, to transfer files to your nüvi or SD card, leave the files where the<br />
program placed them. For example, AudibleManager places the audible book files in the Audible folder.<br />
The POI Loader places custom POIs in the POI folder.<br />
Deleting Files from Your nüvi<br />
You can delete files from your nüvi just as you would delete files<br />
from your computer.<br />
Connect the nüvi to your computer, and open your “<strong>nuvi</strong>” or “<strong>nuvi</strong><br />
sd” drive. Highlight the file that you want to delete, and press the<br />
Delete key on your computer’s keyboard.<br />
Caution: If you are not<br />
sure about a file’s purpose,<br />
do not delete it. Your<br />
nüvi memory contains<br />
important system files that<br />
should not be deleted. Be<br />
especially cautious of files<br />
located in folders entitled<br />
“<strong>Garmin</strong>.”<br />
<strong>Garmin</strong> © 2005–2006 24 nüvi Owner’s <strong>Manual</strong>
Using the Travel Kit<br />
Using the Travel Kit<br />
The travel kit provides many features that are helpful when you<br />
are traveling across town or across the globe.<br />
Using the Language Guide<br />
The <strong>Garmin</strong> Language Guide puts data from Oxford’s multilingual<br />
resources and five bilingual dictionaries in the palm of your hand.<br />
A sample version of the <strong>Garmin</strong> Language Guide is provided.<br />
To purchase the <strong>Garmin</strong> Language Guide accessory, go to the<br />
<strong>Garmin</strong> Web site at www.garmin.com/products/<strong>nuvi</strong> and click<br />
<strong>Access</strong>ories. You can also contact your <strong>Garmin</strong> dealer to<br />
purchase nüvi accessories.<br />
Note: Only nüvi <strong>350</strong> models can verbally translate words<br />
and phrases in the Language Guide.<br />
Loading the Language Guide<br />
After you have received your <strong>Garmin</strong> Language Guide SD card,<br />
you must load the data on your nüvi. Follow the directions on the<br />
package or in the nüvi Help file to learn how to load the data into<br />
your unit.<br />
Tip: After you load the <strong>Garmin</strong> Language Guide onto your<br />
nüvi, you can use the SD card for other data, such as MP3s.<br />
➊<br />
➋<br />
Touch<br />
Kit.<br />
Travel<br />
Touch the arrows to<br />
view all items in the<br />
Travel Kit. Touch the<br />
item you want to open.<br />
All Dictionary, Word and Phrase<br />
content is © Oxford University<br />
Press. Voice files are © Scansoft.<br />
<strong>Garmin</strong> © 2005–2006 25 nüvi Owner’s <strong>Manual</strong>
Using the Travel Kit<br />
Translating Words and Phrases<br />
Touch Travel Kit > Language Guide.<br />
➊<br />
➋<br />
➌<br />
➍<br />
Touch Words and<br />
Phrases.<br />
➎<br />
Touch Language.<br />
➏<br />
Select the From and To<br />
languages and touch Back.<br />
Select a category. Search for a phrase<br />
Touch to hear the<br />
and touch it.<br />
translation.<br />
Words and Phrases Tips<br />
• Use Keywords in Phrases to find all of the<br />
phrases that contain a specific word.<br />
• Touch Search to spell the word.<br />
• Touch an underlined word to replace the word.<br />
• Touch More Variations to change words in the<br />
phrase or get a different translation.<br />
• If you cannot find what you are looking for in<br />
Words and Phrases, look in the Bilingual<br />
Dictionaries.<br />
<strong>Garmin</strong> © 2005–2006 26 nüvi Owner’s <strong>Manual</strong>
Using the Travel Kit<br />
Using the Bilingual Dictionaries<br />
The <strong>Garmin</strong> Language Guide provides five bilingual dictionaries.<br />
You can easily translate words and hear their pronunciation using<br />
the Bilingual Dictionaries.<br />
Touch Travel Kit > Language Guide.<br />
➊<br />
➋<br />
Bilingual Tips<br />
• Touch Search to spell the word<br />
or the beginning of the word.<br />
➌<br />
Touch Bilingual<br />
Dictionaries.<br />
➍<br />
Touch a translation<br />
option. If necessary<br />
touch To English.<br />
• Touch Legend to view<br />
the legend for the selected<br />
language. The Legend contains<br />
information on abbreviations,<br />
labels, and pronunciation<br />
symbols used in each dictionary.<br />
Search for the<br />
word and touch it.<br />
Touch to hear<br />
the word spoken.<br />
<strong>Garmin</strong> © 2005–2006 27 nüvi Owner’s <strong>Manual</strong>
Using the Travel Kit<br />
Using the Travel Guide<br />
Much like a paper travel guide, the <strong>Garmin</strong> Travel Guide provides detailed information about places, such<br />
as restaurants and hotels. Your nüvi comes with a few sample travel guide points; to purchase the <strong>Garmin</strong><br />
Travel Guide accessory, go to the <strong>Garmin</strong> Web site at www.garmin.com/extras or contact your <strong>Garmin</strong><br />
dealer. After you have received your <strong>Garmin</strong> Travel Guide SD card, follow the directions on the package or<br />
in the nüvi Help file to learn how to load the data into your unit.<br />
➊<br />
➋<br />
➌<br />
➍<br />
Touch Travel Kit ><br />
Travel Guide. Touch<br />
a location.<br />
➎<br />
Touch a category.<br />
Touch a sub-category,<br />
if necessary.<br />
Touch an item.<br />
Touch the arrows to<br />
view more information<br />
about the location.<br />
Touch Go to go to the location.<br />
Touch Map to display this item on a map.<br />
Touch Save to save this location to your Favorites.<br />
<strong>Garmin</strong> © 2005–2006 28 nüvi Owner’s <strong>Manual</strong>
Using the Travel Kit<br />
SaversGuide<br />
The SaversGuide ® is an optional accessory that is available only<br />
in North America. With the SaversGuide preprogrammed SD data<br />
card and membership card, your nüvi is a digital coupon book that<br />
notifies you of merchants near your current location where you are<br />
eligible for a discount, such as restaurants, hotels, movie theaters,<br />
and auto repair shops.<br />
To purchase the SaversGuide accessory, go to the <strong>Garmin</strong> Web<br />
site at www.garmin.com/extras. You can also contact your <strong>Garmin</strong><br />
dealer to purchase nüvi accessories.<br />
<strong>Garmin</strong> © 2005–2006 29 nüvi Owner’s <strong>Manual</strong>
Using the Travel Kit<br />
Listening to MP3 Files<br />
Touch Travel Kit > MP3 Player.<br />
➊<br />
➌<br />
Touch Browse.<br />
➋<br />
➍<br />
Select a category.<br />
MP3 Player Controls<br />
Touch to adjust the volume.<br />
Tap to go to the beginning<br />
of the song or play the previous<br />
song; touch and hold to skip back<br />
through the song.<br />
Tap to go to the next song;<br />
touch and hold to skip forward<br />
through the song.<br />
Touch<br />
to pause the song.<br />
To play the songs from<br />
the top of the list, touch<br />
Play All or touch the song<br />
you want to start with.<br />
Touch Back to exit the<br />
MP3 page to view other<br />
pages, such as the map.<br />
Touch<br />
Touch<br />
to repeat.<br />
to shuffle.<br />
Touch the album art to view<br />
information about the album.<br />
Note: The nüvi plays MP3 files only: it does not support<br />
iTunes M4A/M4P files.<br />
<strong>Garmin</strong> © 2005–2006 0 nüvi Owner’s <strong>Manual</strong>
Using the Travel Kit<br />
Using a Playlist<br />
Note: The playlist feature involves managing files on<br />
your nüvi. See pages 20–24 for detailed information.<br />
1. Using your computer and a playlist program, create a<br />
playlist of MP3 files.<br />
2. Save the playlist using the M3U playlist file format.<br />
3. Connect the nüvi to your computer using the USB cable.<br />
4. Open the “<strong>nuvi</strong>” drive or the “<strong>nuvi</strong> SD” drive on your<br />
computer.<br />
5. Transfer the playlist and the associated MP3 files anywhere<br />
on the selected drive. The M3U file must be in the same<br />
file location as the MP3 files.<br />
6. Disconnect the nüvi from your computer.<br />
7. On the nüvi, touch Travel Kit > MP3 Player ><br />
Browse.<br />
8. Touch Import Playlist. All available playlists appear.<br />
9. Touch a playlist to start playing the MP3 files. You cannot<br />
change the playlist order from your nüvi.<br />
MP3 Shortcuts<br />
When you are on the Map page<br />
while listening to an MP3, touch<br />
to open the MP3 player page.<br />
When you are on any other page<br />
while listening to an MP3, quickly<br />
press the Power button twice<br />
to jump back to the MP3 player<br />
page. Press Back to return to the<br />
previous page you were viewing.<br />
<strong>Garmin</strong> © 2005–2006 nüvi Owner’s <strong>Manual</strong>
Using the Travel Kit<br />
Listening to Audible Books<br />
Your nüvi provides several sample Audible books for you to listen<br />
to. These sample books are only portions of the book: to hear an<br />
entire book, purchase it from Audible.com. See pages 34—36.<br />
➊<br />
➋<br />
Touch Travel Kit ><br />
Audible Book Player.<br />
Touch Browse.<br />
➌<br />
➍<br />
Select a category, and<br />
then touch a book title<br />
Touch .<br />
<strong>Garmin</strong> © 2005–2006 2 nüvi Owner’s <strong>Manual</strong>
Using the Travel Kit<br />
Moving around the Book<br />
Touch to skip a section and to jump back.<br />
Press and hold and to move forward or backward<br />
through the book.<br />
Touch the book cover art to view more detailed information about<br />
the book.<br />
Using Bookmarks<br />
To create a bookmark, touch<br />
button.<br />
and then touch the Bookmark<br />
To view your bookmarks, touch and then touch a bookmark.<br />
Touch Play to listen to the book from the bookmark. Touch Edit<br />
to change the name or delete the bookmark.<br />
Audible Book Player<br />
Shortcuts<br />
When you are on the Map page<br />
while listening to an audible book,<br />
touch to open the audible<br />
book player page.<br />
When you are on any other page<br />
while listening to an audible book,<br />
quickly press the Power button<br />
twice to jump back to the audible<br />
book player page. Press Back to<br />
return to the previous page you<br />
were viewing.<br />
<strong>Garmin</strong> © 2005–2006 nüvi Owner’s <strong>Manual</strong>
Using the Travel Kit<br />
Loading Audible Books to Your nüvi<br />
To purchase a book, go to garmin.audible.com and create an Audible.com account. After you create an<br />
account, download AudibleManager to your personal computer. Then you can purchase a book and<br />
download it to your nüvi.<br />
Before you can listen to an audible book, you must activate your nüvi. The first time you open<br />
AudibleManager, you are led through the activation process. See page 36 for more information.<br />
After activating your nüvi, follow these two steps to load an audible book to your nüvi: download the book<br />
to your computer and transfer the book to your nüvi.<br />
Step 1: Download the book to your computer<br />
Refer to AudibleManager’s Help file for detailed instructions about downloading books to your computer<br />
and loading them on your nüvi.<br />
1. Open AudibleManager.<br />
2. Click the Go to My Library Online button on the top center of the window. Your<br />
Audible.com library opens, displaying the books you have purchased.<br />
3. Click Get it Now to download the book to your computer.<br />
4. Select a format and click Download.<br />
<strong>Garmin</strong> © 2005–2006 nüvi Owner’s <strong>Manual</strong>
Using the Travel Kit<br />
Add to <strong>Garmin</strong> - nüvi<br />
icon<br />
Go to My Library<br />
Online icon<br />
<br />
Books in your<br />
AudibleManager<br />
library<br />
Book loaded<br />
on your nüvi<br />
AudibleManager Program<br />
Step 2: Transfer the book to your nüvi<br />
Refer to AudibleManager’s Help file for detailed instructions about downloading books to your computer<br />
and loading them on your nüvi. You must first activate your nüvi before transferring books: see page 36.<br />
1. Connect your nüvi to the computer: Connect the mini-USB connector to the side of the nüvi.<br />
Connect the larger end of the cable to an available USB port on your computer. If you want to<br />
load the book on your SD card, insert the SD card in the slot in your nüvi.<br />
2. Open AudibleManager on your computer.<br />
3. Select the Internal Drive or External Drive (SD card) in the lower portion of the window.<br />
4. Select the book title. Click the Add to <strong>Garmin</strong> - nüvi button in the top left corner.<br />
<strong>Garmin</strong> © 2005–2006 5 nüvi Owner’s <strong>Manual</strong>
Using the Travel Kit<br />
5. Select how much of the book you want to load. You can load small sections at a time to save<br />
memory. Click OK. AudibleManager transfers the book to your nüvi.<br />
6. When you are finished, eject/unmount the nüvi drives and disconnect the USB cable.<br />
Activating Your nüvi with AudibleManager<br />
Before you can listen to a book you have downloaded from Audible.com, you must activate your nüvi. This<br />
is a one time process.<br />
1. Eject/unmount the nüvi from your computer. Unplug the USB cable from your nüvi.<br />
2. Open AudibleManager.<br />
3. In the “Choose your device” window, click the box next to “<strong>Garmin</strong> - nüvi” to place a check<br />
mark in the box. Click Next.<br />
4. Enter your Audible user name and password. Click Next.<br />
5. Connect your nüvi to your computer using the USB cable. Wait a few moments for<br />
AudibleManager to detect your nüvi.<br />
6. Select Activate my player(s) and click Next.<br />
7. Please wait while AudibleManager attempts to activate your nüvi. Upon completion, you will<br />
receive a message saying the process has been successful. Click Finish.<br />
Note: If you are unable to connect to the Internet or have any other problems activating your<br />
nüvi, refer to the Audible Manager Help file. Select Help from the menu and then click Help.<br />
<strong>Garmin</strong> © 2005–2006 6 nüvi Owner’s <strong>Manual</strong>
Using the Travel Kit<br />
Viewing Pictures<br />
You can view pictures that you have stored in your nüvi using the Picture Viewer.<br />
➊<br />
➋<br />
Touch<br />
Travel Kit.<br />
Touch<br />
Viewer.<br />
Picture<br />
➌<br />
➍<br />
Viewing a Slide Show<br />
Touch Slide Show to start a slide<br />
show that displays each image for<br />
a few moments and then displays<br />
the next image.<br />
Touch a picture to view<br />
a larger image of it.<br />
Touch and<br />
to scroll through<br />
the images.<br />
Touch anywhere on the screen to<br />
stop the slide show.<br />
Tip: Touch Rotate to<br />
rotate the image 90°.<br />
<strong>Garmin</strong> © 2005–2006 nüvi Owner’s <strong>Manual</strong>
Using the Travel Kit<br />
Using the World Clock<br />
➊<br />
➋<br />
➌<br />
Touch<br />
Travel Kit.<br />
Touch<br />
World Clock.<br />
To change a city listed,<br />
touch the city.<br />
➍<br />
➎<br />
➏<br />
Select a new time<br />
zone (or city). Touch<br />
OK when done.<br />
Touch World Map to<br />
view a map.<br />
Nighttime hours are<br />
shown in the shaded<br />
area. Touch World<br />
Clock to view the clocks<br />
again, or Back to exit.<br />
<strong>Garmin</strong> © 2005–2006 nüvi Owner’s <strong>Manual</strong>
Using the Travel Kit<br />
Converting Currency<br />
Touch Travel Kit > Currency Converter.<br />
➊<br />
➋<br />
➌<br />
➍<br />
Touch to change<br />
the currency.<br />
Select a currency<br />
and touch OK.<br />
Touch to change<br />
the currency.<br />
Select a currency<br />
and touch OK.<br />
➎<br />
➏<br />
➐<br />
Touch the blank<br />
rectangle under the<br />
currency rate you<br />
want to convert.<br />
Enter the number.<br />
Touch Done.<br />
Touch Clear to convert<br />
a different value.<br />
<strong>Garmin</strong> © 2005–2006 nüvi Owner’s <strong>Manual</strong>
Using the Travel Kit<br />
Updating Conversion Rates<br />
The nüvi allows you to update the currency rates manually so that<br />
you are always using the most current conversion rates. Touch<br />
Travel Kit > Currency Converter.<br />
➊<br />
➋<br />
Tip: Touch Restore<br />
to use the original<br />
conversion rate.<br />
Touch Update.<br />
Touch the rate you<br />
want to update.<br />
➌<br />
➍<br />
Touch to erase the<br />
current rate. Enter a new<br />
rate and touch Done.<br />
Touch Save to finish.<br />
Tip: Touch and hold<br />
to erase the entire entry.<br />
<strong>Garmin</strong> © 2005–2006 0 nüvi Owner’s <strong>Manual</strong>
Using the Travel Kit<br />
Converting Measurements<br />
Touch Travel Kit > Measurement Converter.<br />
➊<br />
➋<br />
➌<br />
➍<br />
Touch the button.<br />
Select a type of<br />
measurement and<br />
touch OK.<br />
Touch From or To.<br />
Select a unit of<br />
measure and touch<br />
OK.<br />
➎<br />
➏<br />
➐<br />
Touch the blank<br />
rectangle to enter a<br />
value.<br />
Enter a value and<br />
touch Done.<br />
Touch Clear to enter<br />
another measurement.<br />
<strong>Garmin</strong> © 2005–2006 nüvi Owner’s <strong>Manual</strong>
Using the Travel Kit<br />
Using the Calculator<br />
Touch Travel Kit > Calculator.<br />
➊<br />
Enter the first<br />
number of your<br />
calculation.<br />
➋<br />
Touch an operator<br />
(÷, x, -, or +).<br />
Touch . to add a decimal.<br />
Touch ± to make the number<br />
negative or positive.<br />
Touch % to make the number a<br />
percent (0.01).<br />
Touch<br />
to clear the entry.<br />
➌<br />
➍<br />
➎<br />
Enter the second<br />
number of your<br />
calculation.<br />
Touch =. Touch to make<br />
a new calculation.<br />
<strong>Garmin</strong> © 2005–2006 2 nüvi Owner’s <strong>Manual</strong>
Customizing the nüvi<br />
Customizing the nüvi<br />
To change nüvi settings, touch<br />
pages for more information.<br />
➊<br />
(settings). See the following<br />
➋<br />
Restoring Settings<br />
To restore all settings you have<br />
changed, press the Restore<br />
button, as shown below.<br />
Touch to display<br />
the Settings page.<br />
Select the setting<br />
you want to change.<br />
To restore settings for an<br />
individual category, such as Map,<br />
touch the Restore button on that<br />
particular page.<br />
<strong>Garmin</strong> © 2005–2006 nüvi Owner’s <strong>Manual</strong>
Customizing the nüvi<br />
Changing the Map Settings<br />
Map Detail—adjust the amount of detail shown on the map.<br />
Displaying more detail causes the map to redraw slowly.<br />
Map View—change the perspective of the Map page.<br />
• Track Up—display the map in 2 dimensions (2D) with your<br />
direction of travel at the top.<br />
• North Up—display the map in 2D with North at the top.<br />
• 3D View—display the map in 3 dimensions (3D), Track Up<br />
orientation. This is the default map view.<br />
Map Outlines—turn on or off the supplemental map outlines.<br />
Vehicle—touch Change to change the icon used to display your<br />
position on the map. Touch the icon you want to use, and then<br />
touch OK. Download additional vehicle icons at www.garmin<br />
.com/vehicles.<br />
Map Info—view the maps loaded on your nüvi and their version.<br />
A check mark indicates the map is enabled. Touch the check mark<br />
next to the map to disable that map.<br />
➊<br />
➋<br />
➌<br />
Restore—restore the original map settings.<br />
<strong>Garmin</strong> © 2005–2006 nüvi Owner’s <strong>Manual</strong>
Customizing the nüvi<br />
Changing the System Settings<br />
WAAS / EGNOS—turn on or off WAAS/EGNOS. For<br />
information about WAAS, go to www.garmin.com/about<strong>GPS</strong>/<br />
waas.html.<br />
Safe Mode—turn on or off Safe Mode to improve driver safety.<br />
When your vehicle is moving, Safe Mode disables all unit functions<br />
that require significant operator attention and could become a<br />
distraction while driving.<br />
<strong>Garmin</strong> Lock—turn on <strong>Garmin</strong> Lock to lock your nüvi. Enter a<br />
4-digit PIN, and set a security location. For more information, see<br />
page 6.<br />
➊<br />
➋<br />
Touch Tones—turn on or off the tone that sounds each time you<br />
touch the screen.<br />
About—display your nüvi’s software version number, unit ID<br />
number, and audio version number. This information is needed<br />
when you update the system software or purchase additional map<br />
data. See page 61.<br />
➌<br />
Restore—restore the original system settings.<br />
<strong>Garmin</strong> © 2005–2006 5 nüvi Owner’s <strong>Manual</strong>
Customizing the nüvi<br />
Changing the Locale<br />
To change a setting, touch the button next to the icon. To change<br />
all settings, touch Change All. In each screen, touch the button<br />
next to the setting you want, and then touch Next.<br />
➊<br />
Locale—select your location.<br />
Text Language—change all on-screen text to the selected<br />
language. Changing the text language does not change the<br />
language of user-entered data or map data, such as street names.<br />
Voice Language—change the language for voice prompts.<br />
(nüvi <strong>350</strong> Only) Languages noted with (TTS) are text-tospeech<br />
voices, which have an extensive vocabulary and<br />
pronounce the street names as you approach turns. The prerecorded<br />
voices (those without a person’s name) have a limited<br />
vocabulary and do not speak names of locations or streets.<br />
Time Format—choose a 12, 24, or UTC time format.<br />
➋<br />
➌<br />
Time Zone—select a time zone or nearby city from the list.<br />
Daylight Saving—set to On, Off , or Auto, if it is available.<br />
Units—change units of measure to Kilometers or Miles.<br />
<strong>Garmin</strong> © 2005–2006 6 nüvi Owner’s <strong>Manual</strong>
Customizing the nüvi<br />
Changing the Display Settings<br />
Color Mode—select Daytime for a light background,<br />
Nighttime for a dark background, or Auto to automatically<br />
switch between the two.<br />
➊<br />
Backlight Timeout—select the length of time the backlight<br />
stays on after external power is removed. Reducing the time the<br />
backlight stays on increases your battery life.<br />
Touch Screen—touch Recalibrate to recalibrate (or realign)<br />
the touch screen to respond properly.<br />
Screenshot—enables you to take a screen shot when you quickly<br />
press and release the Power button. The screen shots are saved in<br />
the “Screenshot” folder on your “<strong>nuvi</strong>” drive.<br />
Note: When Screenshot is On, the Quick Settings screen<br />
does not open when you press the Power button.<br />
Splash Screen—touch Change to select an image to be shown<br />
when you turn on the nüvi. Before you can change the splash<br />
screen, must load JPEG images. See pages 20–24.<br />
➋<br />
➌<br />
Restore Settings—restore the original display settings.<br />
<strong>Garmin</strong> © 2005–2006 nüvi Owner’s <strong>Manual</strong>
Customizing the nüvi<br />
Changing the Navigation Settings<br />
Route Preference—select a preference for calculating your<br />
route. Select Faster Time to calculate routes that are faster to<br />
drive but can be longer in distance. Select Shorter Distance<br />
to calculate routes that are shorter in distance but can take more<br />
time to drive. Select Off Road to create a direct route to the<br />
destination (the route will not follow roads).<br />
➊<br />
Vehicle—specify your vehicle type to optimize routes.<br />
Avoidances—touch the Enabled button<br />
to access the road types. Select the road<br />
types you want to avoid on your routes.<br />
The nüvi uses these road types only if<br />
alternative routes take you too far out of<br />
your way or if no other roads are available.<br />
If you have an FM TMC traffic receiver, you can also avoid traffic<br />
incidents.<br />
Attention Tone—turn on or off the attention tone.<br />
➋<br />
➌<br />
Voice Prompts—select when you want to nüvi to announce<br />
route navigation and system status.<br />
Restore Settings—restore the original navigation settings.<br />
<strong>Garmin</strong> © 2005–2006 nüvi Owner’s <strong>Manual</strong>
Customizing the nüvi<br />
Changing the Traffic Settings<br />
Note: You can only access the traffic settings if your nüvi<br />
is connected to external power and an FM TMC traffic<br />
receiver.<br />
North American Options<br />
The FM traffic services that you have<br />
subscriptions to are listed followed by the<br />
expiration date of the subscription.<br />
Touch Add to add a subscription. See the<br />
next page for more information.<br />
➊<br />
➋<br />
Non-North American Options<br />
Auto—select which provider to use. Select<br />
Auto to use the best provider for the area,<br />
or select a specific provider to use always.<br />
Search—search for additional TMC traffic<br />
providers. To increase the search time,<br />
touch Yes to clear provider table.<br />
Subscriptions—view your subscriptions.<br />
<strong>Garmin</strong> © 2005–2006 nüvi Owner’s <strong>Manual</strong>
Customizing the nüvi<br />
Adding a Subscription<br />
You can purchase additional subscriptions or a renewal if your<br />
subscription expires; go to <strong>Garmin</strong>’s FM Traffic Web site at<br />
www.garmin.com/fmtraffic.<br />
1. From the Menu page, touch > Traffic.<br />
2. For Non-North American units, touch Subscriptions ><br />
Add. For North American units, touch Add.<br />
3. Write down the FM traffic receiver’s unit ID. Go to www.<br />
garmin.com/fmtraffic to purchase a subscription and get a<br />
code.<br />
4. After you receive the 25-character code, touch Next on<br />
the nüvi, enter the code, and touch Done.<br />
You must obtain a new code each time you renew your service.<br />
If you own multiple FM traffic receivers, you must obtain a new<br />
subscription code for each receiver.<br />
➊<br />
➋<br />
<strong>Garmin</strong> © 2005–2006 50 nüvi Owner’s <strong>Manual</strong>
Customizing the nüvi<br />
Changing the Proximity Point<br />
Settings<br />
This category is only visible if you have loaded Custom POIs or a<br />
<strong>Garmin</strong> TourGuide . See pages 62–63 for more information.<br />
Alerts—touch Change to turn on or off the alerts when you<br />
approach Custom POIs. A check mark indicates the alerts are on<br />
for that type of POI. See pages 62–63 for more information about<br />
custom POIs. Touch Audio to adjust the audio notification as you<br />
approach POIs.<br />
TourGuide—if you have a third-party, <strong>GPS</strong>-guided audio<br />
tour loaded on your nüvi, you can select Auto Play to hear the<br />
complete tour as programmed, Prompted to show the speaker<br />
icon on the map when tour information is available during your<br />
route, or Off. For more information about the <strong>Garmin</strong> TourGuide<br />
feature, see page 63. For more information about loading files to<br />
your nüvi, see page 21.<br />
Restore Settings—restore the original proximity point settings.<br />
➊<br />
➋<br />
➌<br />
<strong>Garmin</strong> © 2005–2006 51 nüvi Owner’s <strong>Manual</strong>
FM TMC Traffic Information<br />
FM TMC Traffic Information<br />
Using an optional <strong>Garmin</strong> FM TMC traffic receiver, your nüvi<br />
can receive and use traffic information broadcast over the FM<br />
radio data system. When a traffic message is received, your nüvi<br />
displays the event on the map and can change your route to avoid<br />
the traffic incident. For more information about the FM traffic<br />
receiver, visit the <strong>Garmin</strong> Web site (www.garmin.com). For<br />
participating subscription providers, refer to the <strong>Garmin</strong> Web site<br />
at www.garmin.com/fmtraffic.<br />
Connecting the FM TMC Traffic<br />
Receiver to Your nüvi<br />
Place your nüvi in the auto mount and plug into the 12-volt<br />
adapter. Plug the traffic receiver’s mini-USB cable into the mini-<br />
USB connector located on the side of the nüvi.<br />
Note: You can only access the traffic information and<br />
settings if the nüvi is connected to external power and an<br />
FM traffic receiver, such as a GTM 12.<br />
Connecting the FM TMC<br />
Traffic Receiver to the nüvi<br />
<strong>Garmin</strong> © 2005–2006 52 nüvi Owner’s <strong>Manual</strong>
FM TMC Traffic Information<br />
Viewing Traffic Events<br />
➊<br />
➋<br />
➌<br />
Touch .<br />
Select an item to<br />
view details.<br />
Select an option.<br />
Avoiding Traffic<br />
When there is a traffic event on your current route or on the road you are driving, or appears on<br />
the map. As you are following a route, touch or to avoid the traffic.<br />
➊<br />
➋<br />
➌<br />
Touch .<br />
Select an item to<br />
view details.<br />
Touch Avoid.<br />
<strong>Garmin</strong> © 2005–2006 53 nüvi Owner’s <strong>Manual</strong>
FM TMC Traffic Information<br />
Traffic Symbols<br />
North American<br />
Symbols<br />
Meaning<br />
Road Condition<br />
Road Construction<br />
Congestion<br />
Accident<br />
Incident<br />
Information<br />
International<br />
Symbols<br />
Color code<br />
Traffic Symbol<br />
Color Code<br />
The bars to the left of the traffic symbols indicate the severity of<br />
the traffic incident:<br />
Traffic Events List<br />
= Low severity; traffic is still flowing.<br />
= Medium severity; traffic is a bit congested.<br />
= High severity; traffic is heavily congested or stopped.<br />
<strong>Garmin</strong> © 2005–2006 54 nüvi Owner’s <strong>Manual</strong>
Appendix<br />
Appendix<br />
Mounting Your nüvi<br />
For a tight grip, clean and dry your windshield before mounting the<br />
suction cup.<br />
To mount the suction cup mount:<br />
1. Plug the small end of the cable into the back of the mount;<br />
plug the other end into a power receptacle in your vehicle.<br />
2. Place the suction cup on the windshield.<br />
3. Flip the lever back, toward the windshield.<br />
4. Open the antenna. Fit the bottom of your nüvi into the cradle.<br />
5. Tilt your nüvi back until it snaps in place. If necessary, rotate<br />
the cradle.<br />
➋<br />
windshield<br />
Check your state and local traffic<br />
laws before mounting. Currently,<br />
state laws in California and<br />
Minnesota prohibit drivers from<br />
using suction mounts on their<br />
windshields while operating<br />
motor vehicles. Other <strong>Garmin</strong><br />
dashboard or friction mounting<br />
options should be used. See<br />
the product information sheet<br />
that came in the box for more<br />
information.<br />
➎<br />
➊<br />
➌<br />
➍<br />
Plug in the Cable Mount the Suction Cup Mount Place the nüvi in the Mount<br />
<strong>Garmin</strong> © 2005–2006 55 nüvi Owner’s <strong>Manual</strong>
Appendix<br />
NOTICE regarding windshield mounting; special notice to drivers in California and Minnesota: State<br />
law prohibits drivers in California and Minnesota from using suction mounts on their windshields while operating motor vehicles. Check your state<br />
and local laws and ordinances for similar restrictions. Other <strong>Garmin</strong> dashboard or friction mounting options should be used. <strong>Garmin</strong> does not take<br />
any responsibility for any fines, penalties, or damages that may be incurred as a result of disregarding this notice or as a result of any other state or<br />
local law or ordinance relating to use of the unit. (See California Vehicle Code Section 26708(a); Minnesota Statutes 2005, Section 169.71.)<br />
Mounting the nüvi on Your Dashboard<br />
Use the enclosed mounting disk to mount your unit to the dashboard and to comply with certain state<br />
regulations: see the product information sheet that<br />
came in the box for more information.<br />
Important: The permanent mounting adhesive is<br />
extremely difficult to remove after it is installed.<br />
To install the mounting disk:<br />
1. Clean and dry the dashboard where you will<br />
place the disk.<br />
2. Remove the backing from the permanent<br />
mounting adhesive on the bottom of the disk<br />
and place the disk on the dashboard.<br />
3. Place the suction cup mount on top of the disk<br />
4. Flip the suction lever down to secure the suction<br />
cup mount to the disk.<br />
Suction<br />
lever<br />
Suction<br />
cup mount<br />
Disk<br />
<strong>Garmin</strong> © 2005–2006 56 nüvi Owner’s <strong>Manual</strong>
Appendix<br />
Removing the Unit and the Mount<br />
1. To remove the unit from the mount, press the<br />
tab on the bottom of the cradle up.<br />
2. Lift the unit off of the mount.<br />
3. To remove the suction cup from the<br />
windshield, flip the lever toward you.<br />
4. Pull the tab on the suction cup toward you.<br />
➋<br />
➌<br />
➊<br />
➍<br />
Removing the Cradle from the Mount<br />
To remove the cradle from the mount arm, turn the cradle to one<br />
side. The cradle will snap off the ball socket.<br />
To replace the cradle, snap the cradle on the ball socket.<br />
<strong>Garmin</strong> © 2005–2006 57 nüvi Owner’s <strong>Manual</strong>
Appendix<br />
Resetting Your nüvi<br />
If your unit locks up (freezes up), press the Power button to turn<br />
off the unit, then press again to turn the unit back on. If this does<br />
not help, reset your nüvi.<br />
To reset the nüvi:<br />
1. Raise the antenna.<br />
2. Press the Reset button.<br />
➊<br />
➋<br />
Clearing User Data<br />
Hold your finger on the upper<br />
right corner of the nüvi’s screen<br />
while turning on the nüvi. Keep<br />
your finger pressed until the popup<br />
window appears. Touch Yes to<br />
clear all user data.<br />
All original settings are restored.<br />
Your Recent Selections and<br />
audible bookmarks are also<br />
deleted.<br />
<strong>Garmin</strong> © 2005–2006 58 nüvi Owner’s <strong>Manual</strong>
Appendix<br />
Caring for Your nüvi<br />
Your nüvi contains sensitive electronic components that can be permanently damaged if exposed to<br />
excessive shock or vibration. To minimize the risk of damage to your nüvi, avoid dropping your unit and<br />
operating it in high shock/vibration environments.<br />
Cleaning the Unit<br />
The nüvi is constructed of high quality materials and does not require user maintenance other than<br />
cleaning. Clean the unit’s outer casing (not the touch screen) using a cloth dampened with a mild detergent<br />
solution and then wipe dry. Avoid chemical cleaners and solvents that can damage plastic components.<br />
Cleaning the Touch Screen<br />
Clean the touch screen with a soft, clean, lint-free cloth. Use water, isopropyl alcohol, or eyeglass cleaner,<br />
if needed. Apply the liquid to the cloth and then gently wipe the touch screen.<br />
Protecting Your nüvi<br />
Follow the cautions below to protect your nüvi from damage:<br />
• Do not store the nüvi where prolonged exposure to extreme temperatures can occur (such as in the trunk<br />
of a car), as permanent damage may result.<br />
• Do not expose the nüvi to water. Contact with water can cause this unit to malfunction.<br />
• Do not leave your nüvi in plain sight when you leave your vehicle. Take your unit with you or remove it<br />
from view to avoid theft.<br />
• Though a PDA stylus can also be used to operate the touch screen, never attempt this while operating a<br />
vehicle. Never use a hard or sharp object to operate the touch screen or damage may result.<br />
<strong>Garmin</strong> © 2005–2006 59 nüvi Owner’s <strong>Manual</strong>
Appendix<br />
Using the nüvi Indoors<br />
Close the antenna to turn off <strong>GPS</strong> and use your nüvi indoors. Use this setting when you are practicing<br />
using the unit or using the Travel Kit features, such as using the MP3 player.<br />
Using a Remote Antenna<br />
You can use an optional external remote antenna (<strong>Garmin</strong> GA 27C). This is very helpful when operating<br />
the unit in a vehicle with a coated windshield or an in-screen (in the window) heating system, which can<br />
block <strong>GPS</strong> signals. Connect the antenna to the connector located on the back of the nüvi. To purchase, go<br />
to the <strong>Garmin</strong> Web site at www.garmin.com/products/<strong>nuvi</strong> and select the <strong>Access</strong>ories link.<br />
Changing the Fuse<br />
An AGC/3AG 2 Amp, high-breaking capacity, 1500 A-rated fuse is located<br />
at the tip of the vehicle adapter. If you need to change the fuse, unscrew the<br />
black end piece and replace the fuse.<br />
Unscrew<br />
Charging the nüvi<br />
You can charge the nüvi using the USB cable (see page 21) or the 12/24-Volt car adapter connected to the<br />
suction mount.<br />
<strong>Garmin</strong> © 2005–2006 60 nüvi Owner’s <strong>Manual</strong>
Appendix<br />
Updating the nüvi Software Using WebUpdater<br />
1. Go to www.garmin.com/products/webupdater/ to download the WebUpdater program.<br />
2. After downloading WebUpdater onto your computer, connect your nüvi to your computer.<br />
3. Run WebUpdater. Follow the screen prompts to update the software.<br />
You can also download software updates from the nüvi product page on the <strong>Garmin</strong> Web site at www.<br />
garmin.com/products/<strong>nuvi</strong>/. Click Software Updates. Click Download next to the nüvi software.<br />
If you register your nüvi, you will receive notification of software and map updates. To register your nüvi,<br />
go to http://my.garmin.com.<br />
Purchasing Additional MapSource Maps<br />
You can purchase additional MapSource map data from <strong>Garmin</strong> and load the maps on your nüvi’s internal<br />
memory or on an optional SD card. To enable (unlock) additional maps, you need your unit ID (see page<br />
45) and serial number (8-digit number located on the back of the unit). Follow the instructions that came<br />
with the new map data to properly install the maps to your computer.<br />
To load maps to your nüvi memory or SD card, select the name for your “<strong>nuvi</strong>” drive or SD card drive.<br />
Refer to the MapSource Help file for more information about using MapSource and loading maps on your<br />
nüvi.<br />
<strong>Garmin</strong> © 2005–2006 61 nüvi Owner’s <strong>Manual</strong>
Appendix<br />
Custom POIs Points (Points of Interest<br />
Interest)<br />
Your nüvi accepts custom points of interest (POI) databases,<br />
available from various companies on the Internet. Some custom<br />
POI databases contain alert information for points such as safety<br />
cameras and school zones. See the next page for information about<br />
safety camera databases.<br />
Your nüvi can notify you with a proximity alarm when you<br />
approach one of these points. To adjust the way your nüvi notifies<br />
you of POIs, see page 51.<br />
Caution: <strong>Garmin</strong> is<br />
not responsible for the<br />
consequences of using a<br />
custom POI database or<br />
the accuracy of the safety<br />
camera or other custom<br />
POI database.<br />
After downloading your POI database, use the <strong>Garmin</strong> POI Loader<br />
to install the POIs into your unit. The POI Loader is available at<br />
www.garmin.com/extras. Using the POI Loader program, you<br />
can store the Custom POIs on your “<strong>nuvi</strong>” drive or your SD card.<br />
You can also customize the proximity alert settings for each POI<br />
using the POI Loader. Refer to the POI Loader Help file for more<br />
information; press F1 to open the Help file.<br />
To view your Custom POIs, touch Where To > My<br />
Locations > Custom POIs. To delete the Custom POIs from<br />
your nüvi, touch Where To > My Locations > Delete<br />
All. Touch Yes to delete all of your Favorites and your Custom<br />
POIs.<br />
<strong>Garmin</strong> © 2005–2006 62 nüvi Owner’s <strong>Manual</strong>
Appendix<br />
Safety Cameras<br />
You can download safety camera information for selected<br />
locations. Check www.garmin.com/accessories/safetycamera for<br />
availability. The data is updated at least weekly, so you always<br />
have access to the most up-to-date information.<br />
To get updated safety camera information:<br />
1. Go to http://my.garmin.com.<br />
2. Sign up for a subscription.<br />
You can purchase a new region at any time, and you can extend<br />
existing subscriptions at any time. Each region that you purchase<br />
has its own expiration date.<br />
<strong>Garmin</strong> TourGuide<br />
<strong>Garmin</strong> TourGuide allows<br />
your nüvi to play third-party,<br />
<strong>GPS</strong>-guided audio tours. These<br />
audio tours, for example, can<br />
take you on a route while playing<br />
interesting facts about historical<br />
sites along the way. As you travel,<br />
the audio information is triggered<br />
by <strong>GPS</strong> signals. If you have loaded<br />
<strong>Garmin</strong> TourGuide files on your<br />
nüvi, touch Where To ><br />
My Locations > Custom POIs.<br />
<strong>Garmin</strong> © 2005–2006 63 nüvi Owner’s <strong>Manual</strong>
Appendix<br />
Battery Information<br />
Your unit contains an internal, non-removable, lithium-ion<br />
battery. Contact your local waste disposal department for<br />
information on properly disposing of the unit.<br />
Battery Tips<br />
• Your nüvi’s battery should last 4 to 8 hours depending on usage.<br />
The battery gauge indicates the status of the battery.<br />
• To extend the battery life, reduce the time the backlight stays on.<br />
Touch > Display > Backlight Timeout. See page 47.<br />
• To extend the battery life, close the antenna when you do not<br />
need to receive <strong>GPS</strong> signals.<br />
• To maximize the life of the lithium-ion battery, do not leave your<br />
nüvi direct sunlight and avoid prolonged exposure to excessive<br />
heat.<br />
• Do not leave your nüvi exposed in an unattended vehicle on a<br />
hot day. To prevent damage, remove it from the vehicle; or store<br />
it out of direct sunlight, such as in the glove box.<br />
Battery Gauge<br />
The battery icon in the<br />
upper right corner of the Menu<br />
page indicates the status of the<br />
internal battery.<br />
Battery charging<br />
or connected to<br />
external power<br />
Battery fully<br />
charged<br />
Periodically, you might notice<br />
that the battery gauge is not<br />
completely accurate. To increase<br />
the accuracy of the battery gauge,<br />
fully discharge the battery and<br />
then fully charge it without<br />
interrupting the charging. For<br />
best results, do not unplug the<br />
nüvi until it is totally charged.<br />
For information about the internal, non-removable, lithium-ion battery, see page 66, the Battery<br />
Warning section of the product information sheet that came in the box, and www.garmin.com/safety.<br />
<strong>Garmin</strong> © 2005–2006 64 nüvi Owner’s <strong>Manual</strong>
Appendix<br />
About Satellite Signals<br />
Your nüvi must acquire satellite signals to operate. If you are indoors, near tall buildings or trees, or in a<br />
parking garage, the nüvi cannot acquire satellites. Go outside to an area free from tall obstructions to use<br />
your nüvi, or close the antenna to turn off <strong>GPS</strong> and use it indoors.<br />
When the nüvi has acquired satellite signals, the signal strength bars on the Menu page are green .<br />
When it loses satellite signals, the bars turn red or disappear .<br />
Touch the signals strength bars in the upper left corner of the Menu page to view <strong>GPS</strong> information. Touch<br />
any where on the screen to return to the Menu page.<br />
Speed<br />
<strong>GPS</strong> Status<br />
Sky view<br />
Elevation<br />
Direction of travel<br />
Satellite signal strength bars<br />
The sky view shows the satellites you are receiving. The satellite signal strength bars indicate the strength<br />
of each satellite you are receiving.<br />
For more information about <strong>GPS</strong>, visit the <strong>Garmin</strong> Web site at www.garmin.com/about<strong>GPS</strong>.<br />
<strong>Garmin</strong> © 2005–2006 65 nüvi Owner’s <strong>Manual</strong>
Appendix<br />
Specifications<br />
Size: 3.87” W x 2.91” H x 0.87” D (98.3 x 73.9 x 22.1 cm)<br />
Weight: 5.1 oz. (144.6 g)<br />
Display: 3.5” (8.89 cm), 2.8” W x 2.1” H (7.2 cm x 5.4 cm);<br />
320 x 240 pixels; QVGA TFT landscape display with white<br />
backlight and anti-glare touch screen<br />
Case: Not waterproof or IPXO<br />
Temperature range: 32°F to 140°F (0°C to 60°C)<br />
Data storage: Internal memory and optional Removable SD<br />
card. Data stored indefinitely<br />
Computer interface: USB mass storage, plug-and-play<br />
Power Input: 12/24 VDC<br />
Usage: 15 W max. @ 13.8 VDC<br />
Battery life: 4 to 8 hours depending on usage<br />
Headphone jack: Standard 3.5 mm<br />
<strong>GPS</strong> Performance<br />
Specifications<br />
Receiver: WAAS enabled<br />
Acquisition times*:<br />
Warm:
Appendix<br />
Software License Agreement<br />
BY USING THE nüvi, YOU AGREE TO BE BOUND BY THE<br />
TERMS AND CONDITIONS OF THE FOLLOWING SOFTWARE<br />
LICENSE AGREEMENT. PLEASE READ THIS AGREEMENT<br />
CAREFULLY.<br />
<strong>Garmin</strong> grants you a limited license to use the software embedded<br />
in this device (the “Software”) in binary executable form in the<br />
normal operation of the product. Title, ownership rights, and<br />
intellectual property rights in and to the Software remain in<br />
<strong>Garmin</strong>.<br />
You acknowledge that the Software is the property of <strong>Garmin</strong> and<br />
is protected under the United States of America copyright laws<br />
and international copyright treaties. You further acknowledge<br />
that the structure, organization, and code of the Software are<br />
valuable trade secrets of <strong>Garmin</strong> and that the Software in source<br />
code form remains a valuable trade secret of <strong>Garmin</strong>. You agree<br />
not to decompile, disassemble, modify, reverse assemble, reverse<br />
engineer, or reduce to human readable form the Software or any<br />
part thereof or create any derivative works based on the Software.<br />
You agree not to export or re-export the Software to any country<br />
in violation of the export control laws of the United States of<br />
America.<br />
Note: The <strong>Garmin</strong> nüvi<br />
has no user-serviceable<br />
parts. Should you ever<br />
encounter a problem with<br />
your unit, take it to an<br />
authorized <strong>Garmin</strong> dealer<br />
for repairs.<br />
Note: The nüvi is<br />
fastened shut with screws.<br />
Any attempt to open the<br />
case to change or modify<br />
the unit in any way voids<br />
your warranty and may<br />
result in permanent<br />
damage to the equipment.<br />
<strong>Garmin</strong> © 2005–2006 67 nüvi Owner’s <strong>Manual</strong>
Appendix<br />
USB Interface Troubleshooting<br />
Problem/Question<br />
How do I know my nüvi<br />
is in USB Mass Storage<br />
Mode?<br />
My computer never<br />
senses that the nüvi is<br />
connected.<br />
I cannot find any drives<br />
named “<strong>nuvi</strong>” in my list<br />
of drives.<br />
I keep getting a message<br />
saying “Unsafe Removal<br />
of Device” when I unplug<br />
the USB cable.<br />
Solution/Answer<br />
When your nüvi is in USB Mass Storage Mode, a picture of a nüvi<br />
connected to a computer is shown. Also, you should see a new<br />
removable disk drive listed in My Computer (Windows) or a new<br />
volume (drive) on your desktop (Mac).<br />
1. Unplug the USB cable from your computer.<br />
2. Turn the nüvi off and then back on again.<br />
3. Plug the USB cable into your computer. The nüvi automatically<br />
turns on and goes into USB Mass Storage Mode.<br />
Try the solution listed above.<br />
If you have several network drives mapped on your computer,<br />
Windows may have trouble assigning drive letters to your nüvi drives.<br />
Follow the steps on the following page to assign your drive letters.<br />
Verify that your computer has the latest updates installed. If not,<br />
update your computer, and then connect the nüvi.<br />
Windows users, double-click the Unplug or Eject icon in your<br />
system tray. Select “USB Mass Storage Device” and click Stop. Select<br />
the nüvi drives and click OK. You can unplug your nüvi from your<br />
computer now.<br />
Mac users, drag the volume icon to the Trash. The Trash icon<br />
changes to an Eject icon.<br />
<strong>Garmin</strong> © 2005–2006 68 nüvi Owner’s <strong>Manual</strong>
Appendix<br />
How can I rename my<br />
nüvi drives in Windows?<br />
How do I map (assign)<br />
my nüvi drives in<br />
Windows?<br />
1. Open My Computer.<br />
2. Select the drive you want to rename.<br />
3. Right-click your mouse, and select Rename.<br />
4. Type the new name, and press the Return key.<br />
1. Turn off your nüvi.<br />
2. Plug in the USB cable to the nüvi and your computer. Your nüvi will<br />
automatically turn on.<br />
3. Click Start > Settings > Control Panel > Administrative Tools<br />
> Computer Management > Storage > Disk Management.<br />
4. Right-click a nüvi removable disk drive (either the internal memory<br />
or your SD card drive). Select Change Drive Letter and Path.<br />
5. Select Edit, select a drive letter, and click OK.<br />
nüvi Troubleshooting<br />
Problem/Question<br />
The suction cup will not<br />
stay on my windshield.<br />
My battery gauge does<br />
not seem accurate.<br />
The touch screen is not<br />
responding to my taps<br />
properly.<br />
Solution/Answer<br />
Clean the suction cup and windshield with rubbing alcohol. Dry with a<br />
clean, dry cloth. Mount the suction cup as described on page 55.<br />
Allow the unit to fully discharge and then fully charge it (without<br />
interrupting the charge cycle). See page 64.<br />
You need to calibrate the screen. Touch > Display. Touch the<br />
Recalibrate button and follow the on-screen instructions.<br />
<strong>Garmin</strong> © 2005–2006 69 nüvi Owner’s <strong>Manual</strong>
Index<br />
Index<br />
Symbols<br />
2 Dimensional 44<br />
3 Dimensional 44<br />
A<br />
about your nüvi 45<br />
add a stop to your route 5<br />
alerts 51<br />
anti-theft feature 2, 45<br />
attention tone 48<br />
audible books 32<br />
bookmarks 33<br />
playing 32<br />
transferring 35<br />
audio version 45<br />
avoid road types 48<br />
avoid traffic 48, 53<br />
B<br />
backlight<br />
brightness 2<br />
timeout 47<br />
battery 64<br />
better route 5<br />
bilingual dictionaries 27<br />
bookmarks 33<br />
brightness 2<br />
browse the map 9<br />
C<br />
calculator 42<br />
care instructions 59<br />
change the nüvi’s settings 43<br />
change vehicle icon 44<br />
clear user data 58<br />
color mode 47<br />
computer connection 21<br />
connect the USB cable 21<br />
convert currency 39<br />
updating conversion rates 40<br />
convert measurements 41<br />
coordinates 10<br />
finding a place using 10<br />
format 10<br />
copy and paste files 21<br />
currency 39<br />
current location, save 15<br />
current route page 19<br />
customize your nüvi 43<br />
color mode 47<br />
map 44<br />
navigation 48<br />
system setup 45<br />
time 46<br />
vehicle icon on map 44<br />
Custom POIs (Points of<br />
Interest) 62<br />
D<br />
dashboard disk 56<br />
daylight saving 46<br />
delete<br />
character 8<br />
custom POIs 12, 62<br />
files from the nüvi 24<br />
recent finds list 14<br />
saved places 13<br />
user data 58<br />
detour 5<br />
diacritical characters 8<br />
driving directions 19<br />
E<br />
edit saved places (My<br />
Locations) 13<br />
EGNOS 45<br />
eject USB 23<br />
enable maps 44<br />
erase user data 58<br />
expand your search 11<br />
F<br />
Favorites 13<br />
files<br />
copy and paste 21<br />
delete 24<br />
manage 20<br />
supported types 24<br />
transfer 21<br />
find a place near another<br />
place 11<br />
find places<br />
by name 7<br />
by postal code 7<br />
intersection 7<br />
item on the map 9<br />
near a different area 11<br />
recent selection 14<br />
saved item 12<br />
using coordinates 10<br />
FM TMC Traffic Receiver 52–<br />
54<br />
follow the route 4<br />
format, for coordinates 10<br />
fuse, change 60<br />
G<br />
<strong>Garmin</strong> Lock 2, 45<br />
<strong>Garmin</strong> Travel Guide 28<br />
Go Home 16<br />
Go page options 8<br />
<strong>GPS</strong> 2, 3, 64<br />
information 65<br />
green bars 3<br />
<strong>Garmin</strong> © 2005–2006 0 nüvi Owner’s <strong>Manual</strong>
Index<br />
H<br />
headphones 1, 66<br />
help 2<br />
home location 16<br />
I<br />
importing a playlist 31<br />
K<br />
keyboard 8<br />
kilometers 46<br />
L<br />
Language Guide 25, 26, 27<br />
latitude 10, 15<br />
legend, bilingual dictionary 27<br />
license agreement 67<br />
listen to music 30<br />
location coordinates 10, 15<br />
location format 10<br />
lock the screen 2<br />
lock your nüvi 2<br />
longitude 10, 15<br />
M<br />
M3U playlist format 31<br />
M4A/M4P 30<br />
Mac® Computer 22–24<br />
map 9, 17<br />
browse 9<br />
customize 44<br />
information 44<br />
outlines 44<br />
settings 44<br />
software<br />
update 61<br />
version 44<br />
symbol 13<br />
view 44<br />
zoom 9, 17<br />
MapSource 61<br />
MCX 1<br />
measurements 41<br />
miles 46<br />
mini-USB 21<br />
connector location 1<br />
mounting disk 56<br />
mount your nüvi 55–57<br />
MP3 30<br />
mute 2<br />
My Current Location 15<br />
my<strong>Garmin</strong> 63<br />
My Locations 12, 13, 14, 15, 16<br />
Favorites 12<br />
Go Home 16<br />
Recent Selections 14<br />
N<br />
“nüvi” drive 21, 22<br />
“nüvi sd” 21, 22<br />
narrow your results list<br />
spell the name 8<br />
navigation settings 48<br />
Near button 11<br />
Next Turn page 19<br />
north up 44<br />
O<br />
on-screen keyboard 8<br />
P<br />
pictures<br />
splash screen 47<br />
taking screen shots 47<br />
viewing 37<br />
PIN, <strong>Garmin</strong> Lock 6<br />
playlist 31<br />
POI 62<br />
position icon 17, 44<br />
postal code 7<br />
present location, save 15<br />
proximity alarms 51<br />
Q<br />
quick settings 2, 47<br />
R<br />
realign touch screen 47<br />
recalibrate touch screen 47<br />
recent selections<br />
delete 14<br />
find 14<br />
register your nüvi 61<br />
reset max speed 18<br />
reset trip 18<br />
reset your nüvi 58<br />
restore settings 43, 51<br />
route list 19<br />
route preferences 48<br />
S<br />
safety camera database 62<br />
safe mode 45<br />
safety cameras 63<br />
satellite signals 3, 65<br />
save<br />
current location 15<br />
places you find 8, 12<br />
saved places<br />
delete 13<br />
edit 13<br />
SaversGuide 29<br />
school zone database 62<br />
screen shots 47<br />
SD card 21, 66<br />
disk drive 21, 22<br />
slot location 1<br />
search different areas 11<br />
<strong>Garmin</strong> © 2005–2006 nüvi Owner’s <strong>Manual</strong>
Index<br />
search the map 2<br />
security location 6<br />
set your location 9<br />
shortcuts 2, 30, 31<br />
show map 8, 9<br />
software license agreement 67<br />
software version 45<br />
specifications 66<br />
spell the name 8<br />
stop the Route 5<br />
stop USB 23<br />
store your nüvi 59<br />
supported file types 20<br />
system setup 45<br />
T<br />
take screen shots 47<br />
text language 46<br />
time 46<br />
time zone 46<br />
touch screen 47<br />
cleaning 59<br />
recalibrating 47<br />
touch tones 45<br />
TourGuide 51, 63<br />
track up 44<br />
traffic 52<br />
adding traffic<br />
subscriptions 49<br />
avoid 48, 53<br />
events 53<br />
symbols 54<br />
transferring files 21<br />
translating words and<br />
phrases 26<br />
Travel Kit 25–42<br />
trip information page 18<br />
troubleshooting 69<br />
USB 68<br />
turn-by-turn directions 19<br />
turn list 19<br />
turn off the beeping 51<br />
U<br />
unit ID 45<br />
USB 1, 23<br />
troubleshooting 68<br />
user data 58<br />
user data, delete 58<br />
use the nüvi indoors 60<br />
V<br />
vehicle icon 44<br />
vehicle type 48<br />
view found location on the<br />
map 9<br />
view the map 17<br />
voice language 46<br />
voice prompts 48<br />
volume 2<br />
W<br />
WAAS 45–51<br />
WebUpdater 61<br />
Windows® Computer 22–24<br />
words and phrases 26, 27<br />
world clock 38<br />
Z<br />
zoom 9, 17<br />
Declaration of<br />
Conformity (DoC)<br />
Hereby, <strong>Garmin</strong>, declares<br />
that this nüvi 300/<strong>350</strong> is in<br />
compliance with the essential<br />
requirements and other relevant<br />
provisions of Directive 1999/5/<br />
EC.<br />
To view the full Declaration of<br />
Conformity, see the <strong>Garmin</strong> Web<br />
site for your <strong>Garmin</strong> product:<br />
http://www.garmin.com/<br />
products/<strong>nuvi</strong>/. Click <strong>Manual</strong>s,<br />
and then click the Declaration<br />
of Conformity link.<br />
<strong>Garmin</strong> © 2005–2006 2 nüvi Owner’s <strong>Manual</strong>
Tell us how you like this manual. Fill out the Product Documentation Survey. Go<br />
to www.garmin.com/contactUs/ and click Product Documentation Survey.<br />
For the latest free software updates (excluding map data) throughout the life<br />
of your <strong>Garmin</strong> products, visit the <strong>Garmin</strong> Web site at www.garmin.com.<br />
© Copyright 2005–2006 <strong>Garmin</strong> Ltd. or its subsidiaries<br />
<strong>Garmin</strong> International, Inc.<br />
1200 East 151 st Street, Olathe, Kansas 66062, USA<br />
<strong>Garmin</strong> (Europe) Ltd.<br />
Unit 5, The Quadrangle, Abbey Park Industrial Estate, Romsey, SO51 9DL, U.K.<br />
<strong>Garmin</strong> Corporation<br />
No. 68, Jangshu 2 nd Road, Shijr, Taipei County, Taiwan<br />
www.garmin.com<br />
Part Number 190-00627-00 Rev. B


