

Gourmia 9Qt.Sous Vide Oven -
Gourmia 9Qt.Sous Vide Oven -
Gourmia 9Qt.Sous Vide Oven -

You also want an ePaper? Increase the reach of your titles
YUMPU automatically turns print PDFs into web optimized ePapers that Google loves.
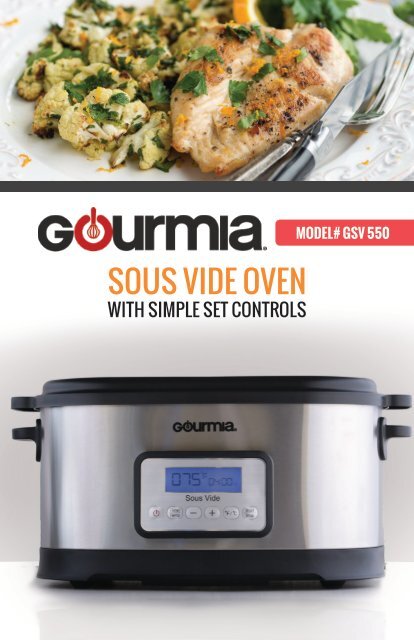
SOUS VIDE OVEN<br />
WITH SIMPLE SET CONTROLS<br />
MODEL# GSV 550
© 2016 <strong>Gourmia</strong><br />
www.<strong>Gourmia</strong>.com<br />
The Steelstone Group<br />
Brooklyn, NY<br />
All rights reserved. No portion of this manual may be reproduced by any means whatsoever<br />
without written permission from The Steelstone Group, except for the inclusion of quotations in a<br />
media review.<br />
Although every precaution has been taken in the preparation of this manual, The Steelstone<br />
Group assumes no responsibility for errors or omissions. Nor is any liability assumed for damages<br />
resulting from the use of the information contained herein. Although every effort has been made<br />
to ensure that the information contained in this manual is complete and accurate, The Steelstone<br />
Group is not engaged in rendering professional advice or services to the individual consumer;<br />
further, The Steelstone Group shall not be held responsible for any loss or damage allegedly<br />
arising from any information or suggestion in this manual.<br />
10 9 8 7 6 5 4 3 2 1<br />
Welcome to Tender, Moist & Delicious<br />
Meals from <strong>Gourmia</strong>!<br />
With the purchase of the <strong>Sous</strong> <strong>Vide</strong> <strong>Oven</strong> with Simple Set Controls, you’ve opened<br />
the door to the easiest sous vide cooking ever! Many sous vide ovens come with<br />
complicated sets of buttons, switches and control panels, but with <strong>Gourmia</strong>’s newest<br />
<strong>Sous</strong> <strong>Vide</strong> <strong>Oven</strong>, cooking is as quick and easy as pressing the Start/Stop Button. Use<br />
our Simple Set <strong>Sous</strong> <strong>Vide</strong> Cooking preset time and temperature to start cooking right<br />
away!<br />
<strong>Sous</strong> vide cooking results in wonderfully tender and delicious meals, prepared in<br />
the easiest way. The ancient art of sous vide is one of simplicity: a heated water bath<br />
cooks food to perfection using leisurely cook times and low cooking temperatures. The<br />
results? Perfectly tender, mouth-watering cuts of meat, crisp-tender vegetables that<br />
retain all their nutrients and ripe sweetness, fruit that offers natural sweetness from the<br />
tree and soups, sauces, combination meals and much, much more!<br />
One of the best features of your <strong>Sous</strong> <strong>Vide</strong> <strong>Oven</strong> is the easy operating control<br />
panel that offers clear and easy selections to cook your foods in the oven. The<br />
following pages of this manual give you full and complete instructions for all the<br />
functions and features of your <strong>Sous</strong> <strong>Vide</strong> <strong>Oven</strong>. Inside, you’ll find helpful cooking<br />
guides, information on cooking methods and complete step-by-step instructions for<br />
assembling, operating, cleaning and maintaining your <strong>Sous</strong> <strong>Vide</strong>o <strong>Oven</strong>. Please read all<br />
safety instructions and complete directions carefully for safe usage at all times.<br />
Printed in China<br />
Thank you for your purchase! We hope you will enjoy all the innovative products<br />
brought to you by our family at <strong>Gourmia</strong>.
SAFETY FIRST p. 6<br />
FEATURES & FUNCTIONS p. 9<br />
SIMPLE SET CONTROL PANEL p. 15<br />
Simple Set <strong>Sous</strong> <strong>Vide</strong> Cooking p. 14<br />
Variable Times & Temperatures p. 15<br />
TABLE OF CONTENTS<br />
STEP-BY-STEP OPERATING INSTRUCTIONS p. 17<br />
FOOD PREP & COOKING GUIDE p. 19<br />
<strong>Sous</strong> <strong>Vide</strong> Cooking Chart p. 19-20<br />
Hints & Tips for <strong>Sous</strong> <strong>Vide</strong> Cooking p. 20<br />
Water Displacement Method p. 21<br />
BEFORE FIRST USE & MAINTENANCE p. 23<br />
GOURMIA IN YOUR KITCHEN! p. 24-25<br />
WARRANTY & SERVICE p. 27
IMPORTANT SAFEGUARDS<br />
When operating this electric appliance, basic safety instructions should<br />
always be followed. Refer to the following for these instructions.<br />
1. READ ALL SAFETY & USAGE INSTRUCTIONS BEFORE USING<br />
SOUS VIDE OVEN.<br />
12. DO NOT add unauthorized accessory attachments. Such use may result in<br />
electric shock, injury or fire.<br />
13. Use only factory cord supplied; NEVER add extension cords. When done<br />
using, press Start/Stop to turn OFF, then pull plug from outlet.Do not use the<br />
Immersion <strong>Sous</strong> <strong>Vide</strong> <strong>Oven</strong> for any use other than intended.<br />
SAFETY FIRST<br />
2. EXERCISE EXTREME CAUTION: AVOID ELECTRICAL SHOCK. DO NOT<br />
immerse cord, plugs or the <strong>Sous</strong> <strong>Vide</strong> <strong>Oven</strong> Base in water or other liquid.<br />
3. Do not touch the <strong>Sous</strong> <strong>Vide</strong>o <strong>Oven</strong> Base or the water content inside while the<br />
oven is working. Use potholders or tongs to remove food bags and avoid hot<br />
water spills.<br />
14. Do not use the <strong>Sous</strong> <strong>Vide</strong> <strong>Oven</strong> for any use other than intended. Do not use<br />
on a stovetop.<br />
SAVE THESE INSTRUCTIONS<br />
SAFETY FIRST<br />
4. Do not overfill the Water Tank in the <strong>Sous</strong> <strong>Vide</strong> <strong>Oven</strong> as there is a risk of<br />
electrical shock. Visually check the Minimum line and Maximum line to ensure<br />
the water is in-between those lines before use. Do not allow the water to fall<br />
below the Minimum line.<br />
5. Do not open the EasyVue Transparent Lid during cooking. Opening the Lid<br />
causes the cooking temperature to drop and also increases the cooking time<br />
as a result. Use pot holders if the Lid must be opened and stand well away from<br />
any escaping steam.<br />
6. Do not place metal plates, trays or other metal objects in the <strong>Sous</strong> <strong>Vide</strong> <strong>Oven</strong>,<br />
as it may cause fire and/or short circuit damage.<br />
FOR HOUSEHOLD USE ONLY<br />
Electrical Polarized Plug: This <strong>Sous</strong> <strong>Vide</strong> <strong>Oven</strong> has a<br />
polarized plug (one blade is wider than the other). To<br />
reduce the risk of electrical shock, the plug is intended<br />
to be used by inserting it into the electrical outlet only<br />
one way. If the plug does not fit securely into the outlet,<br />
turn the plug and re-insert. Do not modify this plug. If<br />
the plug does not fit the outlet securely, call a qualified<br />
electrician for assistance. DO NOT use this plug with<br />
extension cords of any kind.<br />
7. UNPLUG the <strong>Sous</strong> <strong>Vide</strong> <strong>Oven</strong> from outlet when not in use or before cleaning.<br />
Allow the <strong>Oven</strong> to cool before cleaning. Do not let cord hang over edge of<br />
table or counter or touch hot surfaces.<br />
8. Children should never use the <strong>Sous</strong> <strong>Vide</strong> <strong>Oven</strong>; close supervision is required<br />
when appliance is used near children.<br />
9. Operate the <strong>Sous</strong> <strong>Vide</strong> <strong>Oven</strong> on a level surface well away from any hot gas or<br />
electrical burner, heat source, combustible spray cans or pressurized items.<br />
The <strong>Sous</strong> <strong>Vide</strong> <strong>Oven</strong> must be level for optimal performance.<br />
10. Do not operate the <strong>Sous</strong> <strong>Vide</strong> <strong>Oven</strong> outdoors.<br />
11. Never operate the <strong>Sous</strong> <strong>Vide</strong> <strong>Oven</strong> with a damaged cord or plug or one<br />
that has malfunctioned or been damaged in any way. Immediately contact<br />
Customer Service for analysis.<br />
6<br />
7
A. <strong>Sous</strong> <strong>Vide</strong> <strong>Oven</strong> Base: The <strong>Sous</strong> <strong>Vide</strong> <strong>Oven</strong> Base has a stainless<br />
steel exterior with EasyLift Handles and houses the heating unit and<br />
C<br />
A<br />
temperature probe. The Base holds the <strong>Sous</strong> <strong>Vide</strong> <strong>Oven</strong> Water Tank<br />
with the EasyVue Transparent Lid, as well as the <strong>Sous</strong> <strong>Vide</strong> Stainless<br />
Steel Cooking Rack. The Simple Set Control Panel is housed on the<br />
front side panel of the Base.<br />
B. EasyVue Transparent Lid: An important feature of the <strong>Sous</strong> <strong>Vide</strong><br />
<strong>Oven</strong> is the EasyVue Transparent Lid. Designed with a full viewing<br />
window, the Lid allows observation of the cooking process without<br />
opening the Lid. Opening the Lid while cooking is not recommended,<br />
as it reduces the oven temperature and causes a subsequent increase<br />
in cooking times.<br />
To open the Lid after cooking, use the handles to lift up and away<br />
from your face. Care should be taken when opening the Lid, as the<br />
collected steam may be hot. Use pot holders, if needed, to open the<br />
FEATURES & FUNCTIONS<br />
Lid and stand well away from any escaping steam. Place the Lid on a<br />
heat-resistant surface. Remove the hot food bags with tongs.<br />
B<br />
F<br />
C. EasyLift Handles: The engineered EasyLift Handles on the <strong>Sous</strong><br />
<strong>Vide</strong> <strong>Oven</strong> Base allow for the safe movement of the Base, particularly<br />
when removing the water after usage. The <strong>Sous</strong> <strong>Vide</strong> <strong>Oven</strong> Base<br />
should only be moved while it is unplugged and cool to the touch.<br />
The EasyLift Handles allow the user to safely grasp both handles and<br />
pour the water into a sink or large basin.<br />
(cont’d)<br />
8<br />
9
D. <strong>Sous</strong> <strong>Vide</strong> <strong>Oven</strong> Water Tank: The <strong>Sous</strong> <strong>Vide</strong> <strong>Oven</strong> Water Tank holds the<br />
<strong>Sous</strong> <strong>Vide</strong> Stainless Steel Cooking Rack and is non-removable. Food should<br />
always be placed on the Rack in the Water Tank. Food should not be placed in<br />
the Water Tank without a prepared bag for cooking.<br />
FEATURES & FUNCTIONS<br />
The Temperature Probe is the small pin in the bottom of the Water Tank that<br />
monitors the oven temperature and maintains it. Do not block access to the<br />
Probe with the Rack or filled food bags.<br />
E. <strong>Sous</strong> <strong>Vide</strong> <strong>Oven</strong> Water Fill Levels: Note that the Water Tank wall indicates a<br />
Minimum Fill Line and the Maximum Fill Line. While cooking, the water levels<br />
must ALWAYS remain between the two lines.<br />
FEATURES & FUNCTIONS<br />
F. <strong>Sous</strong> <strong>Vide</strong> Stainless Steel Cooking Rack: The Stainless Steel Cooking Rack<br />
is specifically made to be used in the <strong>Sous</strong> <strong>Vide</strong> <strong>Oven</strong> Water Tank. Other racks<br />
should not be substituted. Pack filled food bags onto the Rack either vertically<br />
or horizontally. Do not place bags in the Water Tank without using the Rack<br />
and do not place food on the Rack in the Water Tank without using prepared<br />
bags.<br />
E<br />
F<br />
D<br />
10<br />
11
ASSEMBLY BEFORE USE:<br />
fig.1<br />
fig.2<br />
1. Place the <strong>Sous</strong> <strong>Vide</strong> <strong>Oven</strong> Base on a sturdy, level surface (see Fig 1).<br />
fig.3<br />
fig.4<br />
2. Remove the Lid, using the Handles on each side, lifting straight up.<br />
Place on the counter (see Fig 2).<br />
3. Place the Rack in the <strong>Sous</strong> <strong>Vide</strong> <strong>Oven</strong> Water Tank.<br />
4. Fill the Tank with warm water (below the cooking temperature) inbetween<br />
the Minimum Fill Line and the Maximum Fill Line (see Fig 3).<br />
5. Replace the Lid and insert the plug into the outlet (see Fig 4).<br />
6. Press the Power Button and follow directions for either Simple Set<br />
<strong>Sous</strong> <strong>Vide</strong> Cooking or use the Simple Set Control Panel following to<br />
set Time and Temperature.<br />
7. When the Timer beeps indicating the water is at the correct temperature,<br />
add the filled food bags onto the rack. (see Fig 5).<br />
ASSMBLY BEFORE USE<br />
fig.5<br />
8. When the Timer beeps to indicate the cooking time is done, use tongs to<br />
remove the cooked food bags (see Fig 6).<br />
fig.6<br />
12<br />
13
1 2 3 4 5 6<br />
7<br />
THE SIMPLE SET CONTROL PANEL houses the electronic platform<br />
for the operation controls of the <strong>Sous</strong> <strong>Vide</strong> <strong>Oven</strong>. You can choose to<br />
follow the easy Simple Set <strong>Sous</strong> <strong>Vide</strong> Cooking steps for preset times<br />
and temperatures, or adjust the settings to suit your own preference.<br />
1. POWER BUTTON<br />
Easy On/Off button.<br />
2. TIMER/TEMP BUTTON<br />
Press to select times and<br />
temperatures as desired.<br />
3. — BUTTON<br />
decrease time and/or<br />
temperature<br />
4. + BUTTON<br />
increase time and/or<br />
temperature<br />
5. °F/°C BUTTON<br />
Press the Button to<br />
choose between<br />
Celsius and Fahrenheit<br />
displays.<br />
6. START/STOP BUTTON<br />
Starts and/or Stops the<br />
action of the <strong>Oven</strong><br />
7. DISPLAY CLOCK<br />
Indicates Time and<br />
Temperature readings<br />
VARIABLE TIMES & TEMPERATURES<br />
1. Press the Power Button to turn ON. The Display will flash a preset<br />
temperature of 140°F and a preset cooking time of four (4:00) hours.<br />
SIMPLE SET CONTROL PANEL<br />
Simple Set <strong>Sous</strong> <strong>Vide</strong> Cooking:<br />
1: Follow the Assembly<br />
instructions to prepare the<br />
<strong>Oven</strong> for cooking.<br />
2: Press the Power Button to<br />
turn ON. The Display will flash<br />
a preset temperature of 140°F<br />
and a preset cooking time of<br />
four (4:00) hours.<br />
2. Adjust the desired temperature. Press the + and — Buttons to set the desired<br />
temperature (minimum temperature setting allowed is 100°F/maximum<br />
temperature setting allowed is 200°F).<br />
3. Adjust the desired cooking time. Press the Time/Temp Button. The Timer<br />
display will flash. Press the + and — Buttons to set the desired time in fifteen<br />
(15) minute increments. (minimum time setting allowed is 00:30 minutes/<br />
maximum time setting allowed is 72:00 hours).<br />
3: Follow the Step-by-Step<br />
Operating Instructions to<br />
complete the cooking process.<br />
14<br />
4: Enjoy!<br />
15
STEP-BY-STEP OPERATING INSTRUCTIONS<br />
STEP-BY-STEP INSTRUCTIONS<br />
1<br />
After assembly and setting the time and temperature, press the Start/<br />
Stop Button. The <strong>Oven</strong> will preheat the water to the Set Temperature.<br />
(The display will show the increasing water temperature.)<br />
2<br />
When the water reaches the Set Temperature, the <strong>Oven</strong> will beep three<br />
(3) times. Remove the Lid up and away from your face. Use tongs to<br />
place the filled food bags onto the Rack. Replace the Lid.<br />
3<br />
Press the Start/Stop Button. The cooking time will begin to countdown.<br />
4<br />
When the cooking time has elapsed, the <strong>Oven</strong> will beep three (3) times.<br />
<strong>Oven</strong> will automatically turn OFF.<br />
5<br />
To remove the cooked food bags, lift the Lid up and away from your<br />
face. Be aware that warm steam may escape. Use tongs to remove<br />
cooked food bags. Allow the Water Tank and Base to cool completely<br />
before cleaning (see “Maintenance” for instructions).<br />
STEP-BY-STEP OPERATING INSTRUCTIONS<br />
STEP-BY-STEP INSTRUCTIONS<br />
NOTE: In the event of a temporary power outage during cooking, the<br />
<strong>Oven</strong> will resume the cooking process if it is powered ON again within<br />
thirty (30) minutes.<br />
16<br />
17
FOOD PREP & COOKING GUIDE<br />
FOOD PREP & COOKING GUIDE<br />
The art of sous vide cooking is truly an art! It is simple in nature, yet this<br />
cooking method is often used by gourmet chefs to prepare the most complex,<br />
rich entrées and vegetables. Because the foods are cooked at low temperatures for<br />
longer times, the texture and flavors are authentically and naturally good-for-you<br />
and flavorful. Beef, poultry, fish and pork are fork-tender when done, with rich and<br />
inviting textures. Vegetables retain all their nutrients when cooked sous vide, so<br />
many of the natural sugars are retained, offering delightfully sweet and nutritious<br />
side dishes. In fact, everything about sous vide says, “naturally good-for you!”<br />
The following Cooking Chart, along with our favorite Hints & Tips, will help<br />
determine how you’ll prep food and how long and at what temperature you’ll<br />
want to cook your foods for safety and flavor. Because temperatures are low and<br />
the cooking times are extended, be sure to follow all safety precautions. Enjoy!<br />
<strong>Sous</strong> <strong>Vide</strong> <strong>Oven</strong> Cooking Chart<br />
BEEF Cook Temp Cook Time Chef’s Finish<br />
Filet or Steak<br />
rare 120° - 135°F 1 hour Sear in hot skillet/top with butter<br />
medium 140°F 1 hour Sear in hot skillet/top with butter<br />
well-done 160°F 1 hour Sear in hot skillet/top with butter<br />
Tri tip Roast 140°F 6-8 hours Sear all sides when done. Slice thinly.<br />
Prime rib roast 140°F 6-14 hours Sear all sides when done. Slice thickly.<br />
FOOD PREP & COOKING GUIDE<br />
FOOD PREP & COOKING GUIDE<br />
PORK Cook Temp Cook Time Chef’s Finish<br />
Boneless or Chop<br />
medium 144°F 1-1.5 hours<br />
well-done 160°F 1-1.5 hours<br />
Sear in hot skillet/top with<br />
butter & herbs<br />
Sear in hot skillet/top with<br />
butter & herbs<br />
POULTRY Cook Temp Cook Time Chef’s Finish<br />
Chicken breast 150°F 1-1.5 hours Splash olive oil in skillet/sear all sides<br />
Chicken dark<br />
meat<br />
167°F 1-3 hours Splash olive oil in skillet/sear all sides<br />
18<br />
19
FISH Cook Temp Cook Time Chef’s Finish<br />
Filet or steak 122°F 45 -1 hour Sear in hot butter for 30 seconds<br />
* To prep meat, poultry and fish before cooking, add seasonings or rubs before<br />
bagging. Vacuum seal or use the Water Displacement Method to remove the<br />
water from the bag before cooking (see following).<br />
FOOD PREP & COOKING GUIDE<br />
EGGS Cook Temp Cook Time Chef’s Finish<br />
Poached 150°F 1-2 hours Semi-soft to hard-cooked<br />
VEGETABLES Cook Temp Cook Time Chef’s Finish<br />
Green Vegetables 180°F 5 - 20 min<br />
Root Vegetables 180°F 1.5-3 hours<br />
Toss w/ olive oil, kosher salt<br />
& toasted nuts<br />
Quarter/toss in mustard butter<br />
& herbs<br />
* To avoid the cooked protein that surfaces in sous vide chicken and fish, called<br />
“albumin,” brine the chicken or fish for one hour in lightly salted water, drain and<br />
pat dry.<br />
* ALWAYS use a BPA-free vacuum-sealed bag when cooking foods more than 8<br />
hours.<br />
* Use a vacuum-sealed bag or use the “Water Displacement Method” for foods<br />
cooked fewer than 8 hours.<br />
FOOD PREP & COOKING GUIDE<br />
Hints & Tips for <strong>Sous</strong> <strong>Vide</strong> Cooking<br />
* The thickness of meat, poultry and fish will determine the length of cooking<br />
time. Use an instant-read thermometer after removing from the cooking bag to<br />
guarantee that a safe-food temperature is indicated.<br />
Water Displacement Method<br />
1. Fill a large plastic container with cool water.<br />
* Food safety in handling and cooking is always a priority. When unsure of<br />
doneness, add 30 minutes to the cook time to pasteurize eggs and/or poultry.<br />
* Searing after cooking gives foods a crispy texture and an appealing visual<br />
picture. When meat is done, toss butter into a smoking-hot skillet and quickly<br />
sear the cooked meat for 30 seconds on each side. This gives the meat a caramel<br />
color and an appetizing outer appearance.<br />
* Some tough cuts of beef and pork can be cooked sous vide to tender<br />
perfection in 4 to 24 hours. Sear quickly when done and serve with root<br />
vegetables.<br />
2. Prep your food to be cooked and place food in a BPA-free<br />
plastic freezer bag. Do not seal.<br />
3. Slowly immerse the food-filled bag into the water. This<br />
will force the air out as the bag is immersed.<br />
4. Continue immersing the bag until just before the water<br />
reaches the top of the bag.<br />
5. With the bag still immersed as much as possible, close<br />
or zip to seal, forcing out all remaining air as much as<br />
possible.<br />
* Vegetables will cook faster if they are thinly sliced or cut in small pieces; or if<br />
left whole, they will take more time to become tender. Either way, the natural<br />
sweetness and full nutrient value adds to the delight in sous vide vegetables.<br />
* Fruit can be cooked sous vide to make toppings, purees, syrups and such. Cook<br />
for 2-2½ hours at 160°F and cool in the bag before using.<br />
20<br />
21
BEFORE FIRST USE<br />
1. Remove all packaging and discard plastic bags.<br />
2. Wipe the stainless steel <strong>Sous</strong> <strong>Vide</strong> <strong>Oven</strong> Base with<br />
stainless steel cleaner.<br />
3. Using a warm, damp cloth, thoroughly wipe the interior<br />
of the Water Tank. Dry well.<br />
4. Using a warm, damp cloth, wipe the <strong>Sous</strong> <strong>Vide</strong> Rack and Lid.<br />
Dry well.<br />
5. Follow the step-by-step instructions and enjoy!<br />
MAINTENANCE<br />
1. Do not leave the water in the Water Tank after use. When cool, drain<br />
the Tank and dry with a clean cloth.<br />
2. If food particles or minerals are released into water, carefully remove.<br />
Clean the area around the probe with a soft cloth to ensure it is<br />
wiped free of food.<br />
BEFORE USE & MAINTENANCE<br />
3. To descale the Water Tank, fill with 1 gallon water. Add 1 cup vinegar.<br />
Set to 100°F for 1 hour. Empty the Water Tank when cool and repeat<br />
the process using clean water only to rinse the unit. Wipe with a soft<br />
cloth to dry.<br />
4. If the <strong>Sous</strong> <strong>Vide</strong> <strong>Oven</strong> will not work, ensure that it is plugged in. Press<br />
the Start/Stop button and, if it doesn’t start, re-position your finger<br />
and press again.<br />
22<br />
23
Did you know? Although <strong>Gourmia</strong> is the new kid on the block, we’ve<br />
already established ourselves as one of the leading manufacturers of creative and<br />
innovative kitchen products.<br />
GOURMIA IN YOUR KITCHEN!<br />
Check out these new kitchen appliances and check our website often for new<br />
product release information @ www.gourmia.com<br />
Why not Add these Best-selling<br />
Appliances to your Kitchen!<br />
<strong>Gourmia</strong> 2.2 Quart Automatic<br />
Ice Cream, Gelato, Sorbet<br />
& Frozen Yogurt Maker<br />
GSI400<br />
<strong>Gourmia</strong> Wide Mouth Fruit<br />
and Vegetable Juice Extractor<br />
GJ750<br />
GOURMIA IN YOUR KITCHEN!<br />
<strong>Gourmia</strong> 8 Quart Smart Pot<br />
Electric Pressure Cooker<br />
GCP800<br />
<strong>Gourmia</strong> Stainless Steel<br />
Deep Fryer with<br />
3 Frying Baskets<br />
<strong>Gourmia</strong> 9 Quart <strong>Sous</strong> <strong>Vide</strong><br />
Water <strong>Oven</strong> Cooker<br />
GSV550<br />
GDF500<br />
24<br />
25
WARRANTY & SERVICE<br />
This Limited Warranty is for one full year from the date of purchase. It is<br />
applicable to the original purchaser only and is not transferable to a third party<br />
user. Repair or replacement of defective parts is solely at the seller’s discretion.<br />
In the event that repair isn’t possible, the seller will replace the product/part. If<br />
product repair/replacement won’t suffice, the seller has the option of refunding<br />
the cash value of the product or component returned.<br />
Product defects not covered under the Warranty provisions include normal wear<br />
and damage incurred from use or accidental negligence, misuse of instruction<br />
specifications or repair by unauthorized parties. The manufacturing company<br />
is not liable for any incidental or consequential damages incurred by such<br />
circumstances.<br />
For Customer Service or Questions, Please call: 888-552-0033<br />
WARRANTY & SERVICE<br />
WARRANTY & SERVICES<br />
www.gourmia.com<br />
26<br />
27
www.gourmia.com


